
How to Plan an Incredible Olympic National Park Itinerary
After visiting all of the national parks in the western United States over the past five years, we feel like we can make the declaration that Olympic National Park is the most diverse of all of those national parks.
A lot of parks are relatively small and contained, with perfect boundaries that encapsulate one specific ecosystem or landscape (like Arches National Park in Utah, or Mount Rainier National Park).
Within Olympic’s sprawling 1,400 square miles, you’ve got high alpine environments, rugged beaches on the Pacific Ocean, some of the world’s best examples of the coastal temperate rainforest, and plenty more.
We’ve been to Olympic National park multiple times now, and each time we discover something new, which is a testament to the vastness and sprawling nature of the park.
That size and sprawl has important implications for planning your trip (where to stay to minimize driving, for example), and we’re going to use our experiences in the park over the past few years to give you the information you need to plan an incredible trip.
In this guide, we’re going to talk about everything you need to know to plan an incredible Olympic National Park itinerary.
Here’s what we’re going to cover:
- A few important logistics to keep in mind as you’re planning, like how to organize your trip to minimize unnecessary driving and seasonal considerations to know before you go.
- Our favorite things to do in the park and how to put it all together to form an itinerary to make the most of your time (in this case, three days).
- Ideas on what to do with more or less time in Olympic National Park.
Throughout the guide, we’ll share our favorite hikes, viewpoints, waterfalls, and more based on our trips to help you plan your Olympic National Park adventure.
Sound good to you? Let’s get into it.
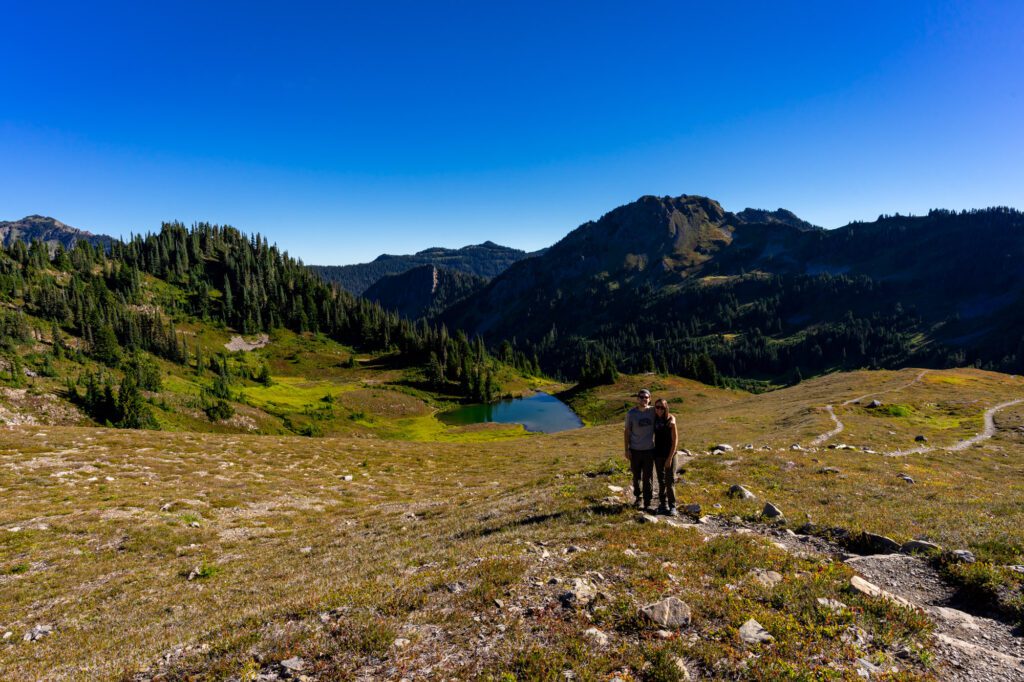
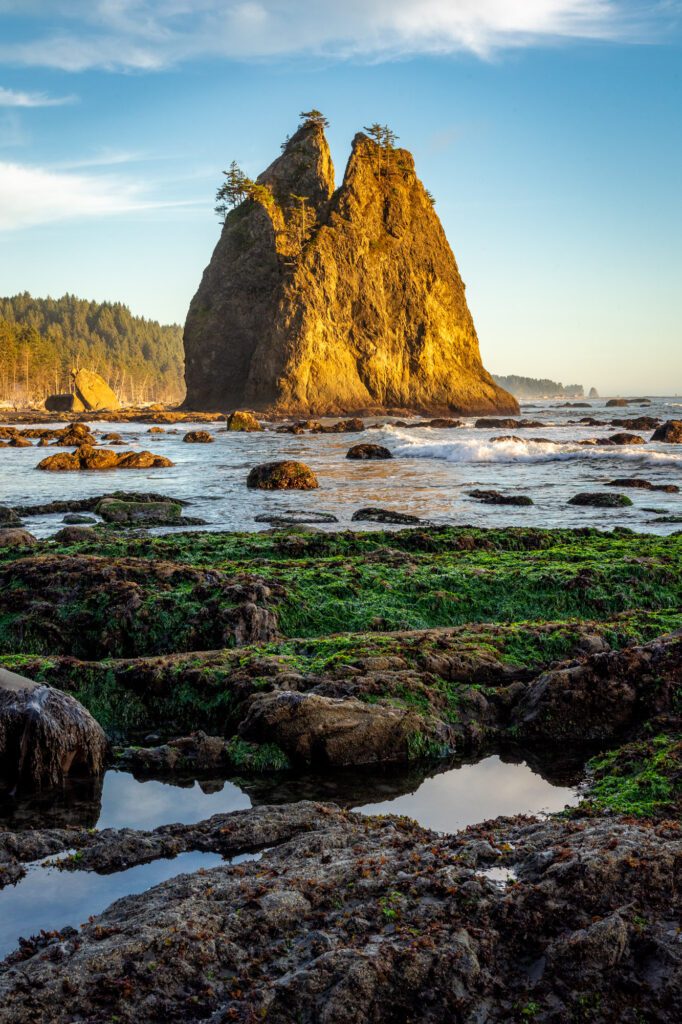
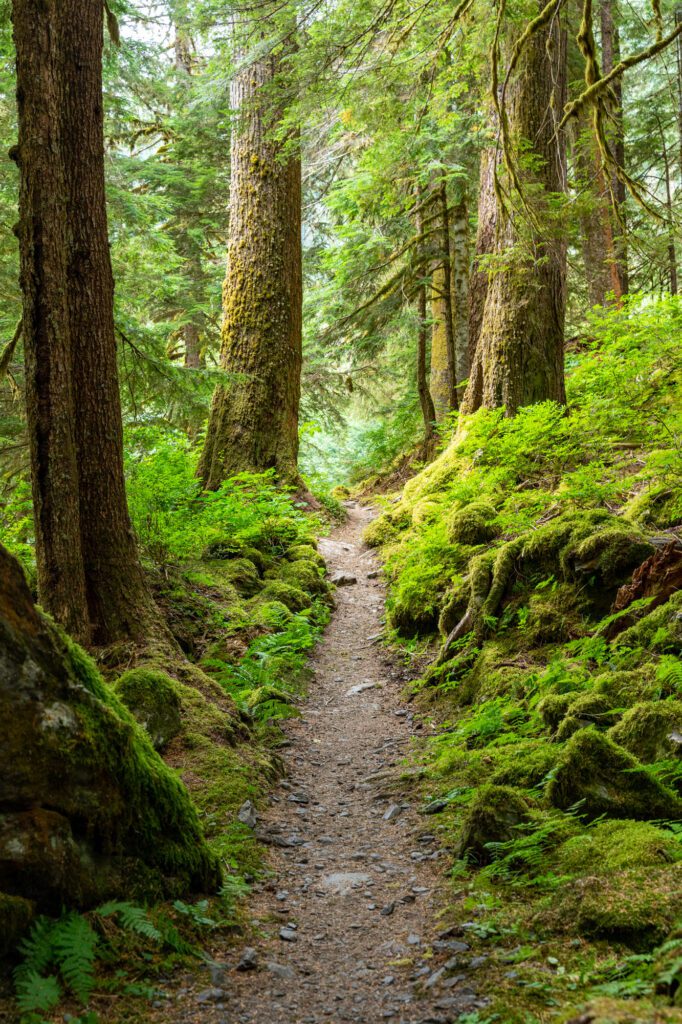
Disclaimer: Some of the links in this post, like hotel links, are affiliate links, meaning at no additional cost to you, we make a little bit of money if you click through and book. That being said, we would never recommend something to you that we don’t stand behind 100%.
A Quick Geography Overview of Olympic National Park
Before we can get into the meat (or plant-based meat, if you prefer) of this itinerary, we’re going to need to talk about the park’s geography, because it DEFINITELY matters.
Remember how we said that the park spans roughly 1,400 square miles AND that those miles aren’t always connected to each other?
Usually when you imagine a national park, you think about a section of land with a clear boundary that delineates the park from the surrounding areas.
With Olympic, it’s a little different.
The park is both big and fragmented, with non-park land cutting in and out of the park’s boundaries to form confusing borders and chunks of the park that are seemingly cut off from the other parts.
For example, there’s an entire city – Forks – that is both technically outside the park boundaries, but right smack dab in the middle of where the park should be just based on location.
At a high level, the entire park makes a “V” shape wrapping around the Olympic Peninsula, roughly following Highway 101 as it tracks the northern coast of Washington State and then turns south down the Pacific Coast.
To make it a little more digestible and easy to wrap your head around, I’d break the park up into five distinct regions.
They are:
- Hurricane Ridge
- The Sol Duc Valley (which includes Lake Crescent)
- The Northern Pacific Coast (up towards Neah Bay)
- The Central Pacific Coast
- The Rainforests (Hoh and Quinault).
Here’s a map to help you visualize what we’re talking about.
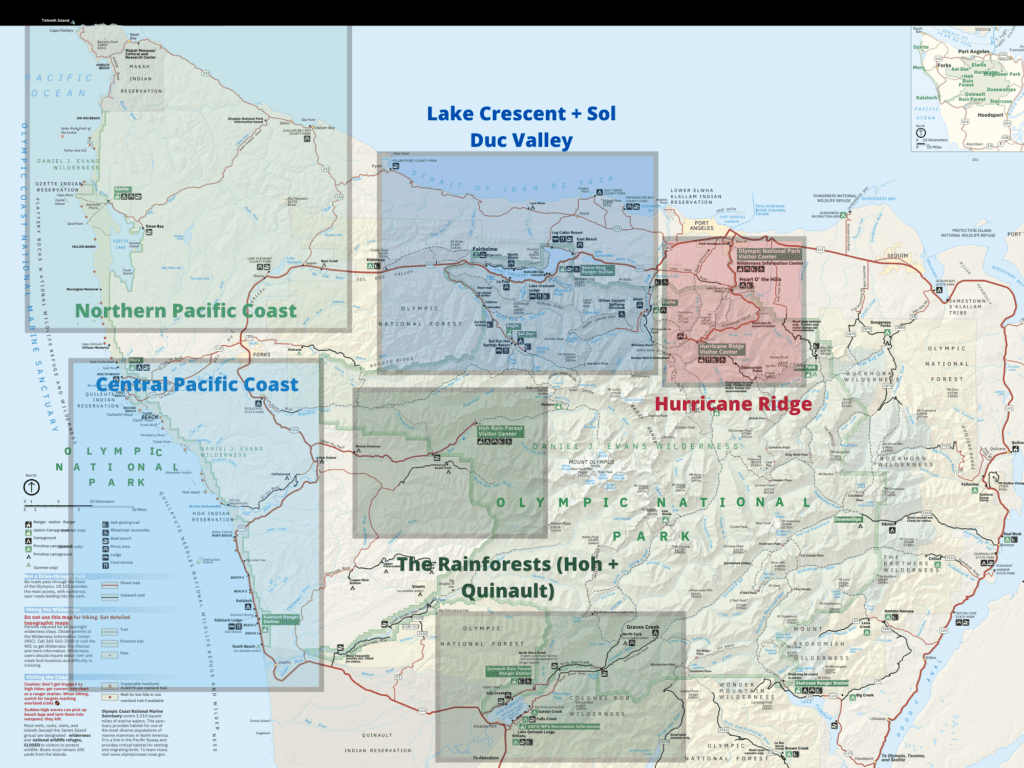
You can see that Highway 101, the main road through the park, runs from the northeastern corner in Port Angeles, out to the coast, and then south through Forks to Kalaloch.
For reference, here are the drive times and distances between different popular destinations in the park:
- Port Angeles to Hurricane Ridge: 45 minutes / 20 miles
- Port Angeles to Lake Crescent: 30 minutes / 22 miles
- Lake Crescent to Forks: 45 minutes / 35 miles
- Forks to the Hoh Rainforest: 50 minutes / 31 miles
- Hoh Rainforest to Lake Quinault: 1 hour 40 minutes / 72 miles
As you can see, if you’re not careful, you can rack up hours and hours spent in the car driving between different sections of the park.
We’ve seen itineraries pairing the Hoh Rainforest and Hurricane Ridge on the same day, which is, frankly, insane. That’s almost three hours of driving, one way!
And we didn’t even include the northwest corner of the Olympic Peninsula near Neah Bay, where you’ll find places like Cape Flattery and Shi Shi Beach.
That’s roughly 90 minutes (one way) from either Forks or Port Angeles!
We’re here to help you make sense of all the different things to do and places to see inside this sprawling (but magnificent!) slice of the Pacific Northwest, and piece together an itinerary that covers a lot of ground while minimizing the number of hours spent in the car.
How Much Time Do You Need for This Itinerary?
Another implication of the sheer size and layout of the park is that, unlike some of the smaller national parks (like Bryce Canyon or Arches in Utah, for example), we think you need a minimum of three days to cover it all.
That recommendation is based on our experiences both exploring Olympic National Park over the past few years (we’ve been multiple times), but also our broader experiences we had over two years when we lived in a Honda Odyssey on a never ending road trip that hit all of the national parks in the western U.S.
Even with three full days, we’d recommend skipping the northern Pacific Coast.
While it’s beautiful, it does require a ton of driving to get up there and we think your limited time is better spent exploring other parts of the park.
One other note: We would absolutely not recommend doing Olympic National Park as a day trip from Seattle.
Because of the layout, the only realistic piece of the park you could see with a day is the Sol Duc Valley and Hurricane Ridge.
Anything else is going to require around four hours of driving in one direction. Which is too much for a day.
Where to Stay in Olympic National Park
Let’s quickly cover where to stay in the park to set yourself up for a great trip.
Once again, the geography comes into play here, and we have a strategy that we have used (multiple times) to minimize the amount of time spent in the car.
We have an entire guide dedicated to deciding where to stay in Olympic National Park, which covers our recommended strategy, different regions, and specific places to stay for a variety of styles and budgets.
You should read that for far more detail than we’re going to cover in this high level summary.
In order to minimize drive time, our recommendation is to split your stay in half, spending half of your nights near Forks and the other half near Port Angeles.
Forks (yes, that Forks, Twilight fans) because it gives you great access to the beaches and rainforests, and Port Angeles because it’s equidistant to Lake Crescent and Hurricane Ridge.
Yes, we recognize that packing up your stuff is the worst, and usually we don’t recommend staying in multiple places like this, but we really do believe that it’s the best way to handle the fragmented nature of Olympic.
In Port Angeles, you have a choice to make.
If you want to be right in town with the amenities of a big city (like restaurants, grocery stores, and gas stations), look at the Olympic Lodge, which is clearly the best hotel in Port Angeles (we think).
We’ve had our eye on this amazing treehouse just outside Port Angeles for years now. It’s not the best location, but it is one of the most special places to stay we’ve ever come across.
On our recent trip up to the Olympic Peninsula, we stayed at this cozy cabin in the Elwha Valley (halfway between Port Angeles and Lake Crescent) and LOVED it. Can’t recommend it highly enough.
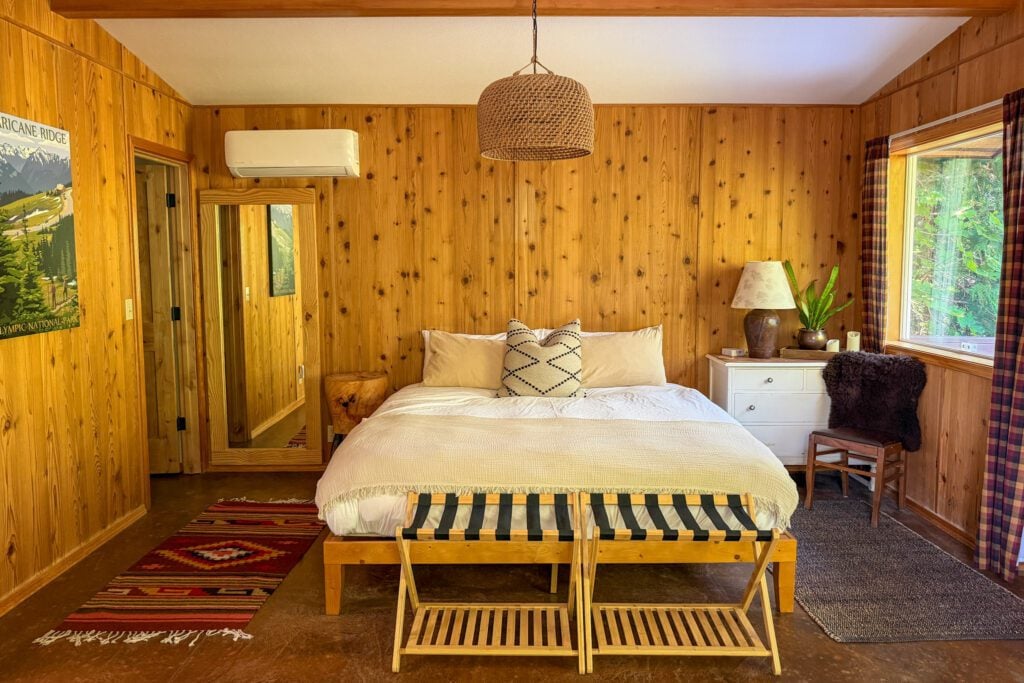
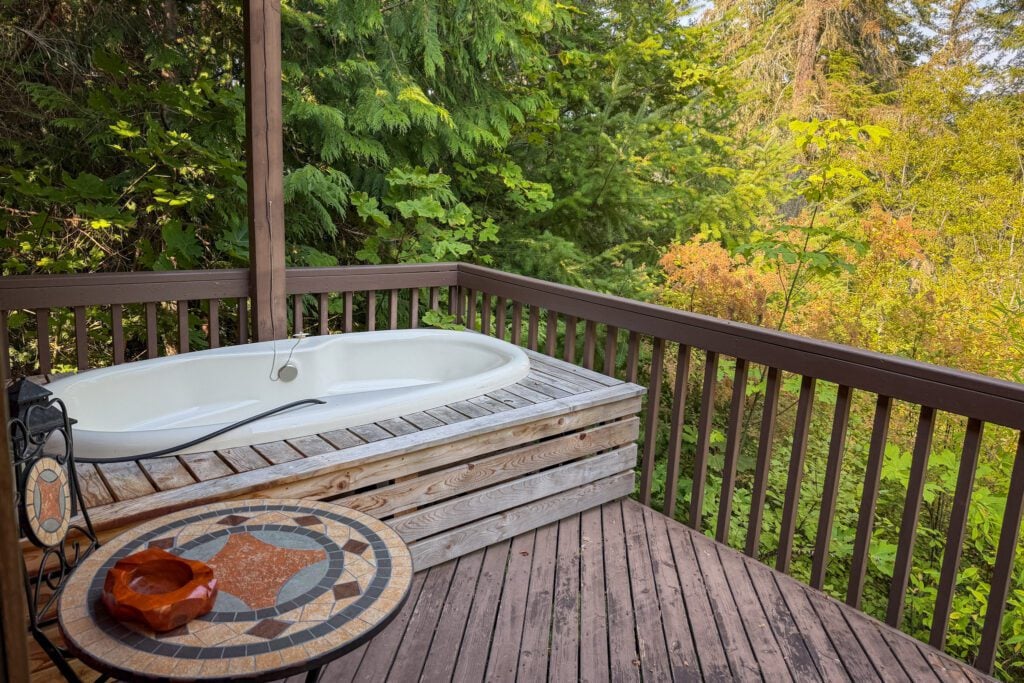
For a more rustic experience, stay at one of the cabins between Port Angeles and Lake Crescent (we like this cozy studio for couples, or this house right on the edge of the park for bigger groups), or one of the houses on the shore of Lake Sutherland.
If you’re camping, you have two options. Heart o’ the Hills Campground is at the base of the road that takes you up to Hurricane Ridge, though it’s first-come, first-served which makes planning a bit hard.
Fairholme Campground on the western edge of Lake Crescent is another good choice, and you should reserve in advance (in the late spring and summer).
In Forks, you have a couple of options right in town (the best is the cabins at the Woodland Inns), along with some nice cabins along the road out to La Push, which will give you a more rustic experience.
For what it’s worth, we stayed at this cozy tiny home with a hot tub on our last trip up to the Olympic Peninsula and it was a really nice home base for the coast and rainforests.
They also have a second unit on the same property that is basically the same if that one is sold out.
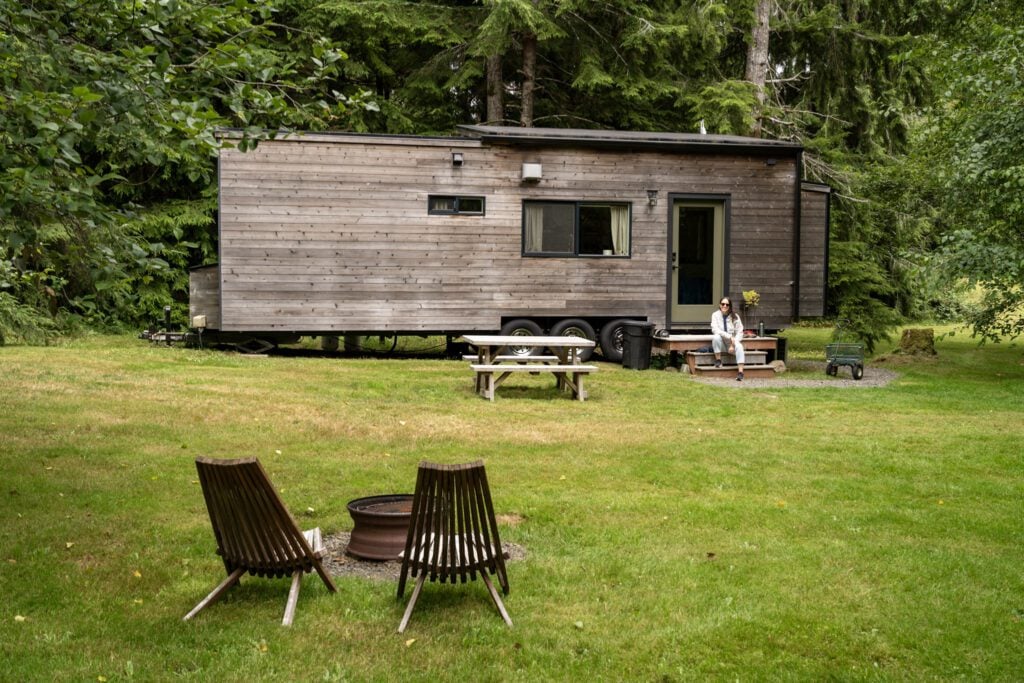
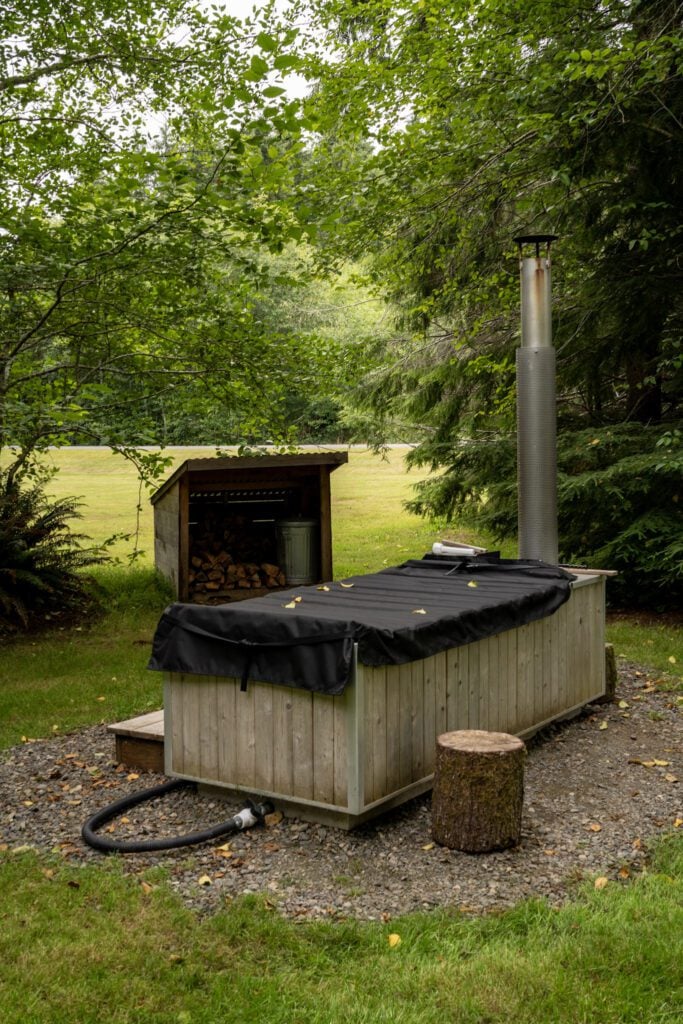
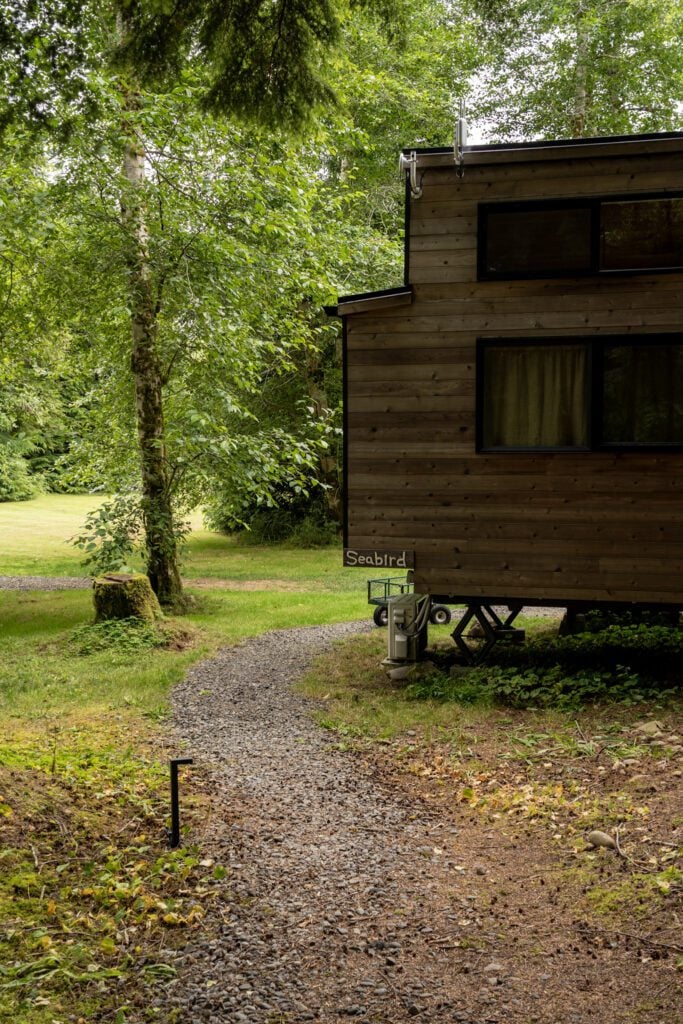
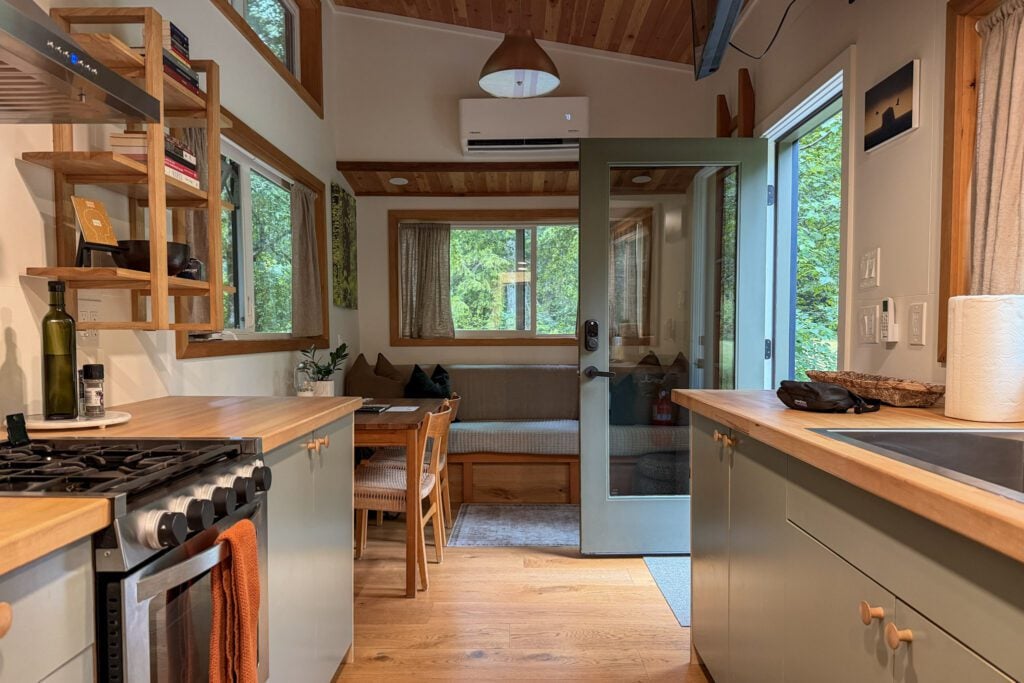
There’s also this beautiful craftsman in Forks and this charming three bedroom cottage for bigger groups.
If you’re camping, Mora Campground is our top pick near Forks, and we’ve camped there multiple times at this point. Reserve in advance during the summer, it’s popular.
A Perfect 3 Day Olympic National Park Itinerary for First Timers
Now that we’ve got the logistics out of the way, let’s get into the fun stuff!
We’ve structured this itinerary to make a big counterclockwise loop around the Olympic Peninsula, following Highway 101 from Port Angeles at the northeastern corner of the park west to the coast, and then driving south along the coast to Lake Quinault.
You can easily do this in the opposite direction, starting in Lake Quinault and moving north and east. Just reverse the days in the itinerary below.
Obviously, there’s no one-size-fits-all itinerary that will work for every single group’s interests, timing, and style, so you’ll need to do a little bit of massaging to make it fit (although we’d argue it’s close!).
Alright, now that we’ve got all the important logistics out of the way, it’s time to get into the specifics on what to do with your time in the park.
For the purposes of this itinerary, we’re going to make a few assumptions.
First, we’re assuming you’re starting at the northeastern corner in Port Angeles (which is the closest access point to Seattle and is where most people are coming from), and making your way counter-clockwise around the Olympic Peninsula to Forks.
Second, we’re assuming that you’re spending your first night in Port Angeles and the next two nights in Forks (which is what we recommended above).
If that’s not the case, you’re going to have to make some slight changes (you can essentially reverse this itinerary if you’re starting in Forks).
You might be spending the night before your first real day in Port Angeles, which will allow you to get a nice and early start at Hurricane Ridge the next morning (which we’d recommend either way).
In that case, you can either spend your first and second nights in Port Angeles and your third night in Forks, or keep it the way we’ve written above (Port Angeles for one night, Forks for two).
Day 1: Hurricane Ridge, Lake Crescent, and Waterfalls
On your first day, make the climb up to Hurricane Ridge, the highest point in the park that you can drive to, and then descend back into the Sol Duc Valley to explore around Lake Crescent and see our favorite waterfall in the park.
An Early Morning Hike at Hurricane Ridge
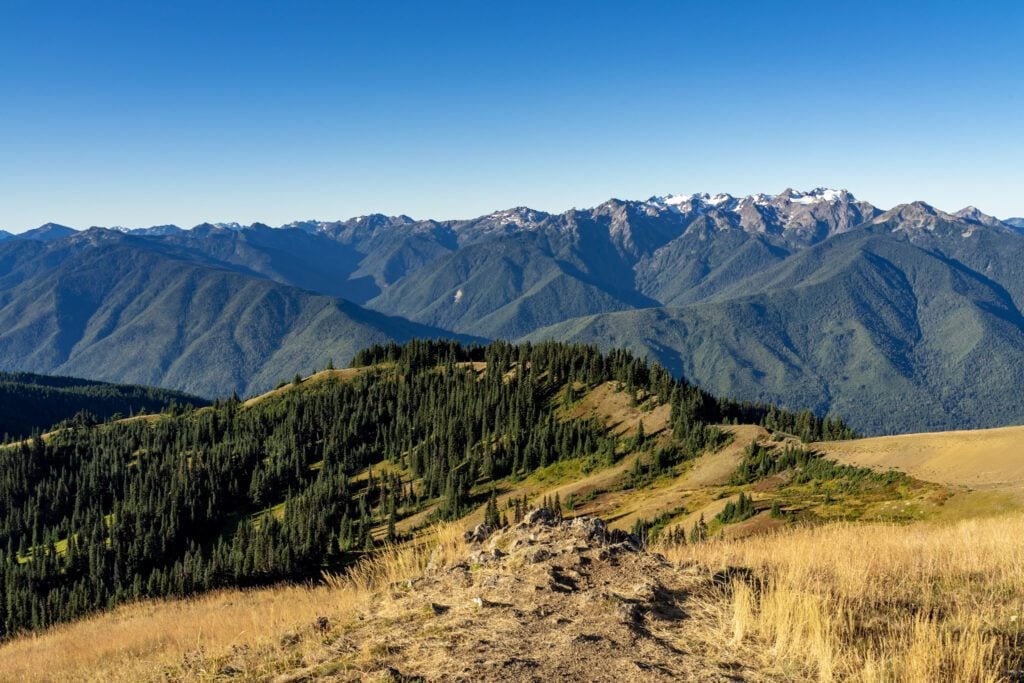
This first day is a great example of the park’s diversity because you’ll start at sea level near Port Angeles, climb 5,000 feet up to Hurricane Ridge to experience the alpine section of the park, and then return back to sea level over the course of a day.
That drive up to Hurricane Ridge is pretty intense.
It takes about 45 minutes to get up to the visitor center (the original visitor center burned down a few years ago, RIP), and over the course of that drive you climb 5,000 vertical feet.
There are two reasons why we strongly recommend that you should plan on getting an early start on your way up to Hurricane Ridge.
First, you’ll reduce the chances of getting stuck behind a car going half the speed limit, which has happened to us.
Second, you’ll avoid the long lineup at the entrance station at the base of the road, which we were shocked to see on our way out (I guess we’ve only ever been up here before 8am).
Plan on arriving before 9am, at the latest. That way, you’ll have no trouble finding parking, and you’ll be able to do one of the hikes with just a handful of people on the trail.
On our first trip out here a few years ago, we arrived at 7am, and were the only people on the trail up to Hurricane Hill. It was magical.
If you’re not stoked about driving the road up to Hurricane Ridge, there’s a handy shuttle during the summer from Port Angeles that runs up to Hurricane Ridge that is “almost never” full (I asked a ranger how many people use the shuttle).
It stops at the Lake Angeles Trailhead (aka the Entrance Station) and the main parking lot. More information here.
However, you should know that it DOES NOT stop at the Hurricane Hill trailhead, which means you’d have to walk an extra 1.5 miles each way to get there.
There are four different hikes we’d recommend up at Hurricane Ridge, and which you choose is going to depend on your appetite for hiking. We’ve done all three of the main hikes that leave from the main parking lot.
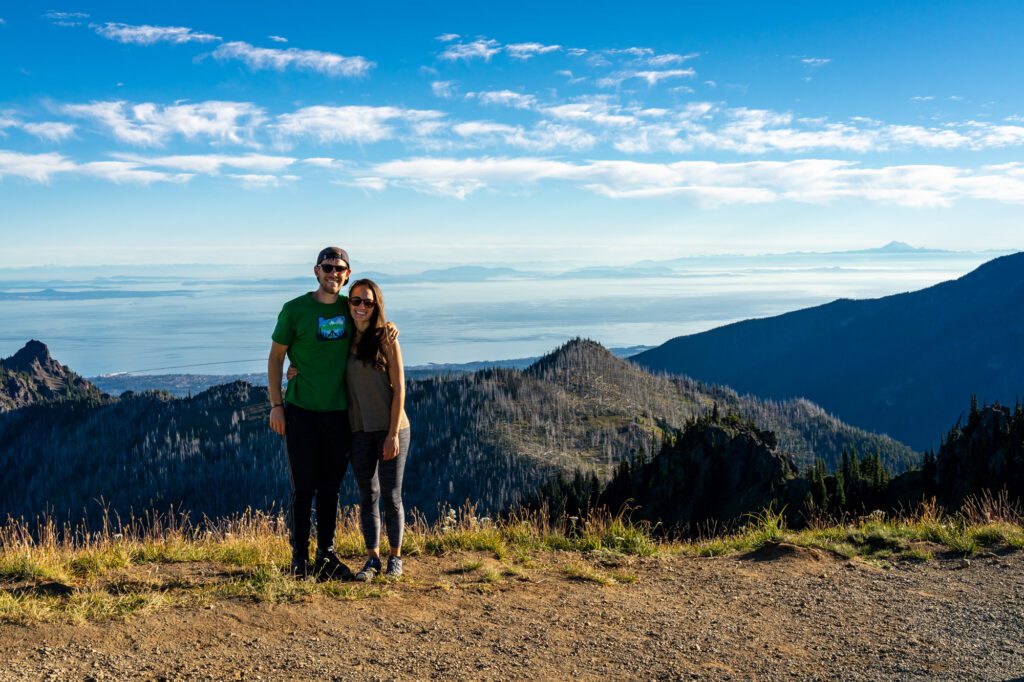
First is Hurricane Hill (3.5 miles, 800 feet elevation gain), which is clearly the most popular hike up at Hurricane Ridge.
Which makes total sense because it’s the most accessible from a difficulty standpoint, and it’s the best bang-for-your-buck in terms of views.
On a clear day, you have a panoramic view from the top of this trail featuring the Olympic Range and Mount Olympus to the south, the Strait of Juan de Fuca and Vancouver Island to the north, and Mount Baker way to the northeast.
Second is Klahhane Ridge via Sunrise Ridge (8.3 miles / 2,600 feet elevation gain), which is a longer, better version of Hurricane Hill that traverses the ridgeline out to the north with excellent views throughout the hike.
There are a couple of ways to do this hike, including a shorter, more direct version from the Switchback Trailhead on the road up, but the hike along the two ridges is the way to do it because the views are spectacular.
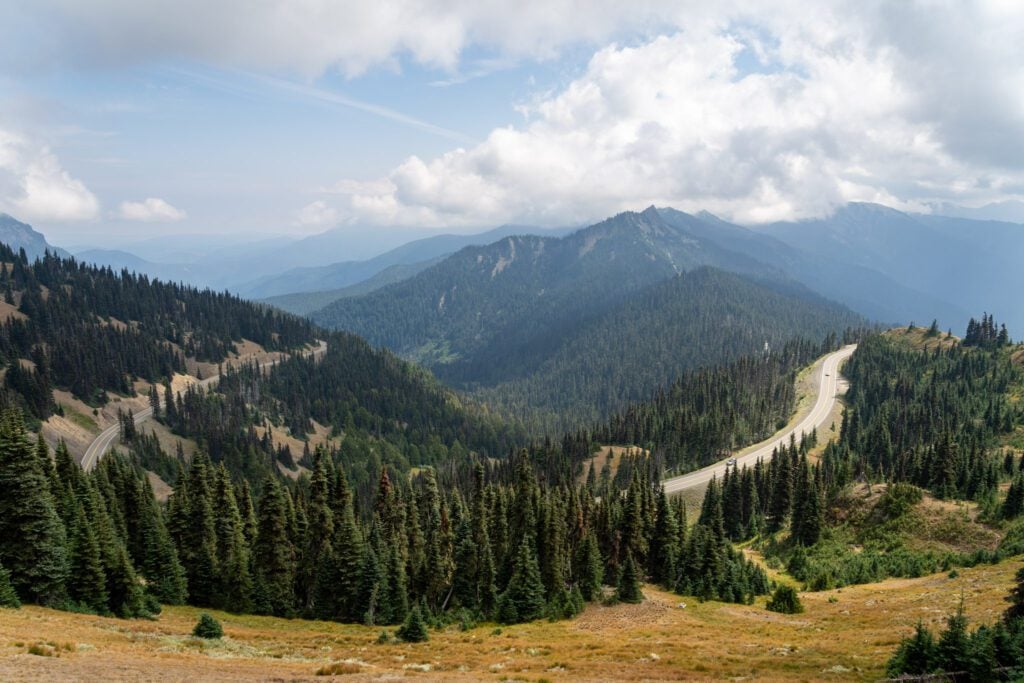
Pro-tip that we only realized as we were on the trail: You can do this hike as a one way hike that cuts the climbing in half by starting from the parking lot at Hurricane Ridge, doing the hike up to Klahhane Ridge, and then descending down to the Switchback Trailhead to catch the shuttle back up to the top to collect your car.
We have an entire guide to hiking to Klahhane Ridge that covers the best route option and everything else you need to know to hit the trail.
Third is Lake Angeles (7.5 miles / 2,500 feet elevation gain), which actually leaves from a parking lot next to the entrance station at the base of the road and climbs to a beautiful lake.
It’s a grueling, unrelenting climb, but the lake at the end is gorgeous and is well worth the effort to get there.
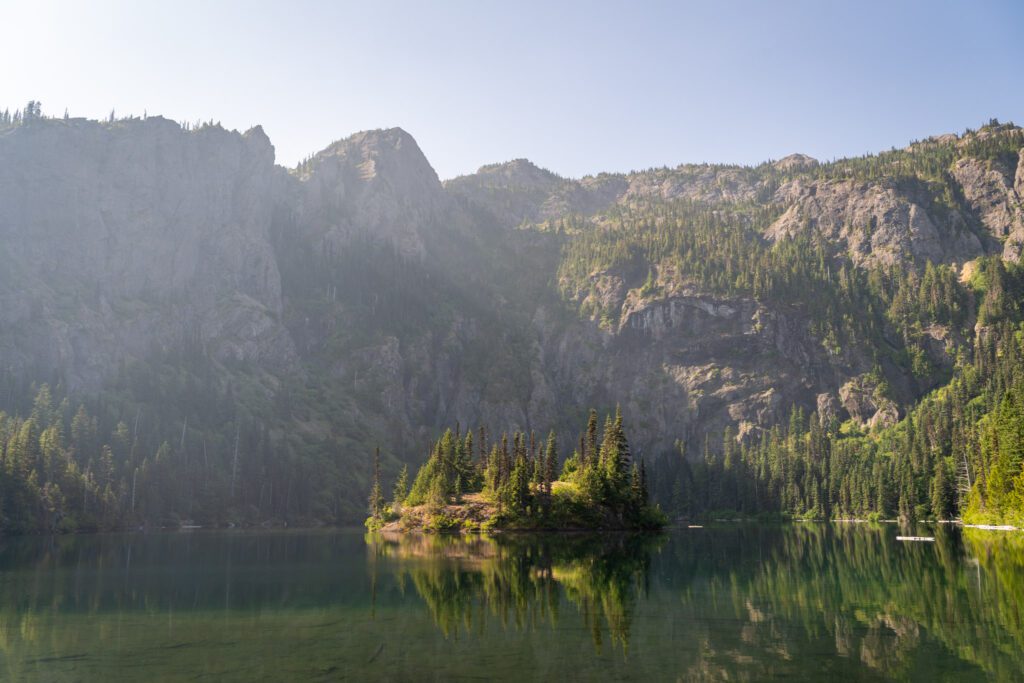
Plus, the parking lot is relatively small and everyone is heading up to Hurricane Ridge, so this hike sees fewer people on the trail than, say, Klahhane Ridge.
We have an entire guide to hiking to Lake Angeles that covers the best route option and everything else you need to know to hit the trail.
Last, but certainly not least, is the Badger Valley / Grand Valley Loop (8.5 miles / 2,600 feet elevation gain), which leaves from the Obstruction Point Trailhead, which is at the end of Obstruction Point Road, a narrow 8 mile dirt road with steep drop offs and poor visibility.
This hike is HIGH on our list because it has everything we love about hiking in the mountains (lakes, flowers, views), but we’re apprehensive about driving that road, and have only been up to Hurricane Ridge with a suitable vehicle once (our minivan wasn’t making that drive, RIP).
If you’re willing to brave the drive, you’ll also have far fewer people on the trail with you because the road scares most people off.
A note on the time of year: If you’re visiting in the off-season (winter and spring) Hurricane Ridge and the road up there may or may not be closed.
It’s 5,000 feet higher than the rest of the park, and it definitely gets snow in the winter, which means trails and roads can close or be inaccessible.
Usually, Hurricane Ridge Road is only open on Friday, Saturday, and Sunday (as conditions allow). Check conditions and restrictions here.
Chasing Waterfalls near Lake Crescent
After your morning up in the clouds, descend down into the valley below Hurricane Ridge (really, a series of valleys), which is where you’ll find three of our favorite waterfalls in the park.
We’re going to cover Marymere Falls, which you can hike to from Lake Crescent, in the next section, but there are two other waterfalls nearby that we think are worth the slight detour to reach.
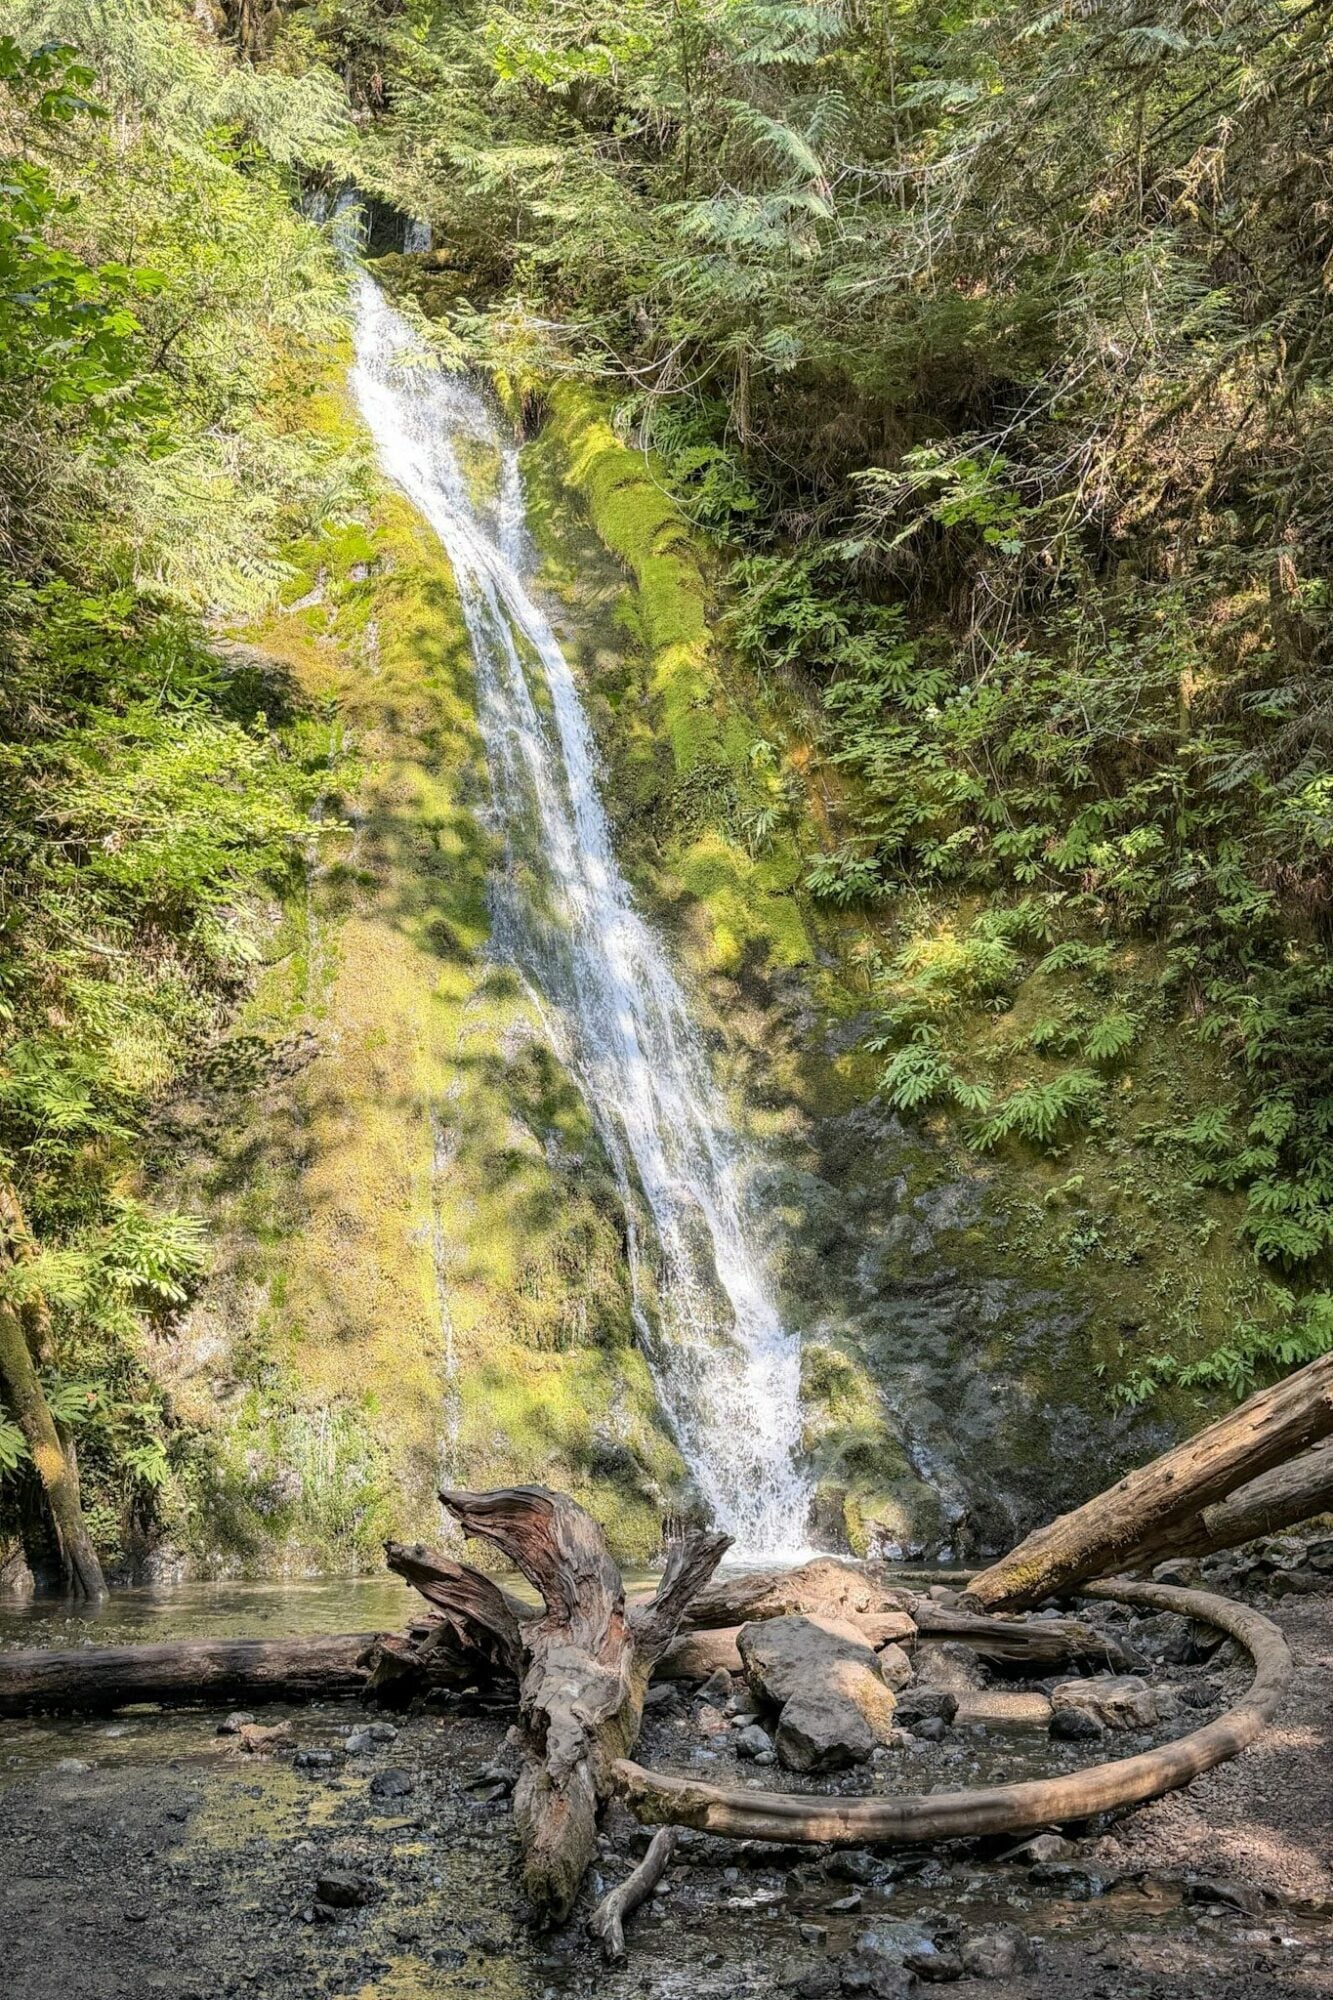
First is Madison Falls, which is in the Elwha Valley along Highway 101 between Port Angeles and Lake Crescent (here on Google Maps).
We stumbled upon this waterfall as we were looking for something to do to kill some time, and we were very glad we stopped by.
Now, this is BARELY a hike. It’s really a short walk from the parking lot on a paved trail with a little bit of climbing. It’s fairly accessible for most people, including kids.
It’s also worth noting that the road up into the Elwha Valley, Olympic Hot Springs Road, is closed to vehicles now after a series of bad washouts.
Without cars, it’s a really nice walk or bike ride along a paved road up into the valley, which is beautiful. More information from the NPS here.
The next waterfall, Sol Duc Falls, is a bit more of a detour, but it is our favorite waterfall of the three.
It’s a little over an hour of driving in total to get to and from the Sol Duc Trailhead (which you can find here on Google Maps).
It’s a long-ish drive out to the trailhead, where you’ll pass Sol Duc Hot Springs Resort (yes there are hot springs to soak in if you’re into that, but it’s a little gross to us because it’s packed with people) and continue to the end of the road.
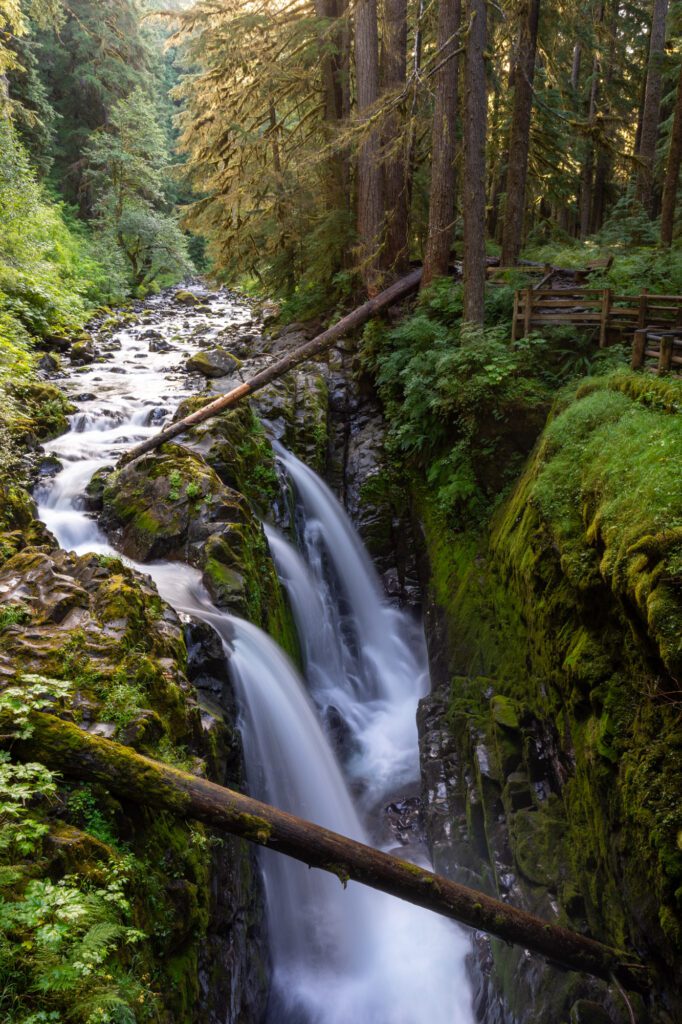
From the trailhead, it’s a short, mostly flat walk to get out to Sol Duc Falls, our favorite waterfall in the park.
The hike through the forest will be 1.6 miles and have an elevation gain of just 200 feet, so just about everyone can do it.
You end up on a wooden footbridge standing over the falls looking up the gorge where the Sol Duc River flows.
It’s a nice walk through the forest that is every bit as charming and beautiful as the much more visited rainforests in the park.
If you want to make it a little bit of a longer hike, you can extend it by starting from the Sol Doc Hot Springs Resort (here on Google Maps) and follow the Lovers Lane Trail, which makes it a relatively easy six mile hike through the rainforest en route to the falls.
This is also the trailhead for the High Divide / Seven Lakes Basin trail, which we backpacked a few summers ago and is one of our favorite hikes in Washington State (though it’s best as an overnight trip with 2-3 nights spent along the trail).
A note on Sol Duc Hot Springs Resort: A lot of people like the hot springs, but we’ve heard from friends who have visited that they’re kind of run down and gross (checks out based on the fact that most national park facilities are constantly in use). It might be a good stop for kids, though! More information here.
An Evening at Lake Crescent
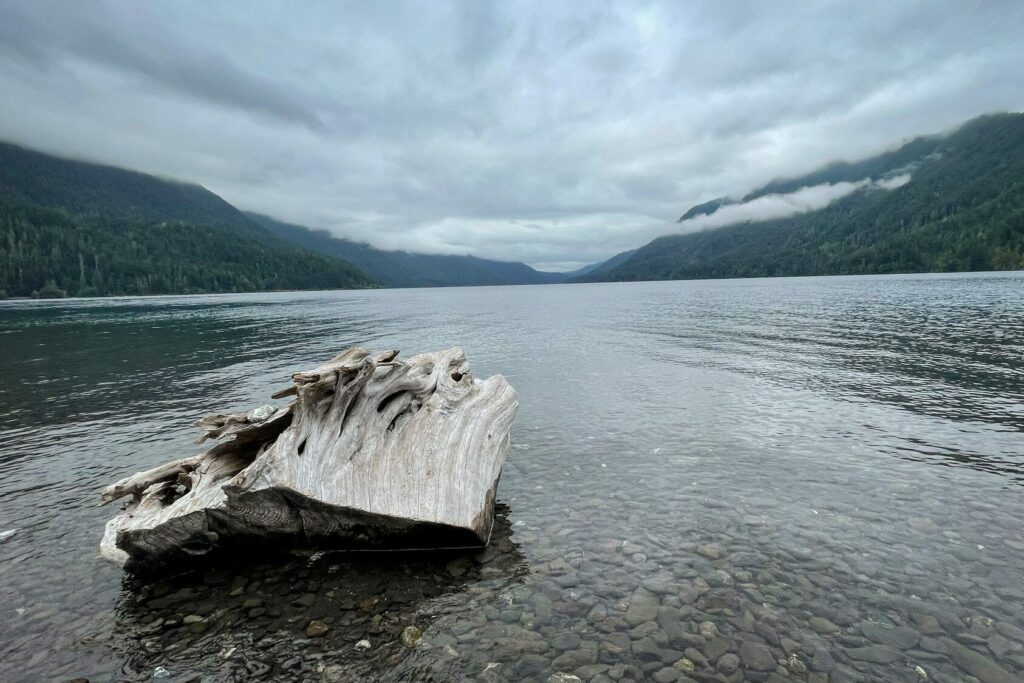
Finish your first day by heading to Lake Crescent, the big lake along Highway 101 (about 20 miles west of Port Angeles).
If you park in the main parking lot (here on Google Maps), you can access all three places we’re going to cover in this section.
This is also where you’ll find the historic and photogenic Storm King Ranger Station.
The first of the stops we like here is the relatively short and easy hike to Marymere Falls, which we’re reminded is a really nice forest walk every time we do it.
It’s a lovely stroll through the forest, which is ferny and wet, and leads you to a 90 foot waterfall with multiple viewpoints accessible by climbing relatively steep wooden stairs.
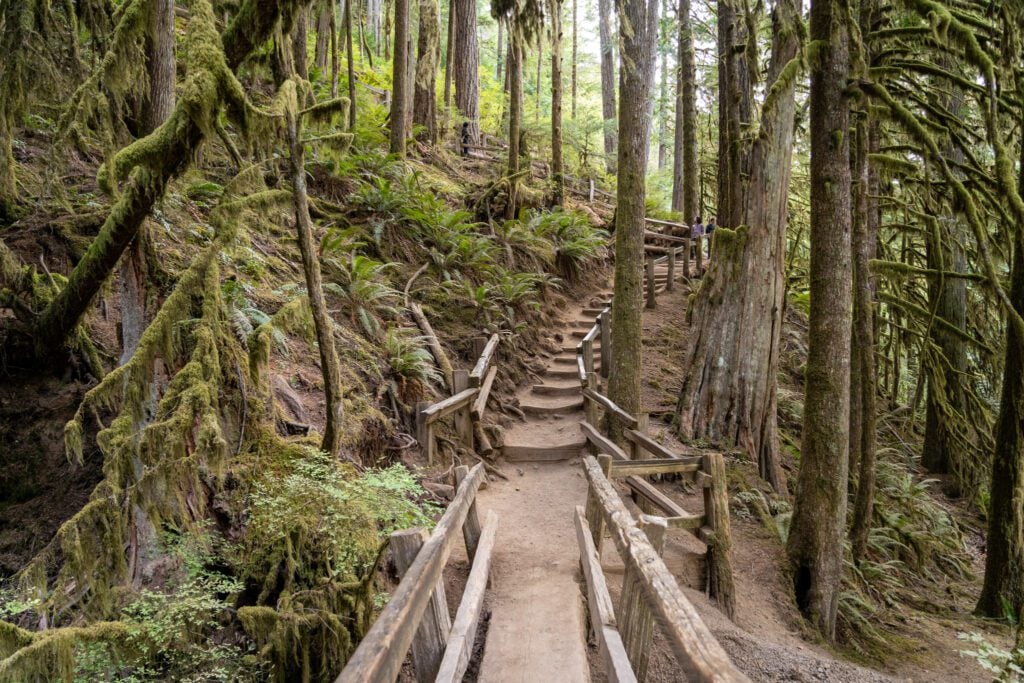
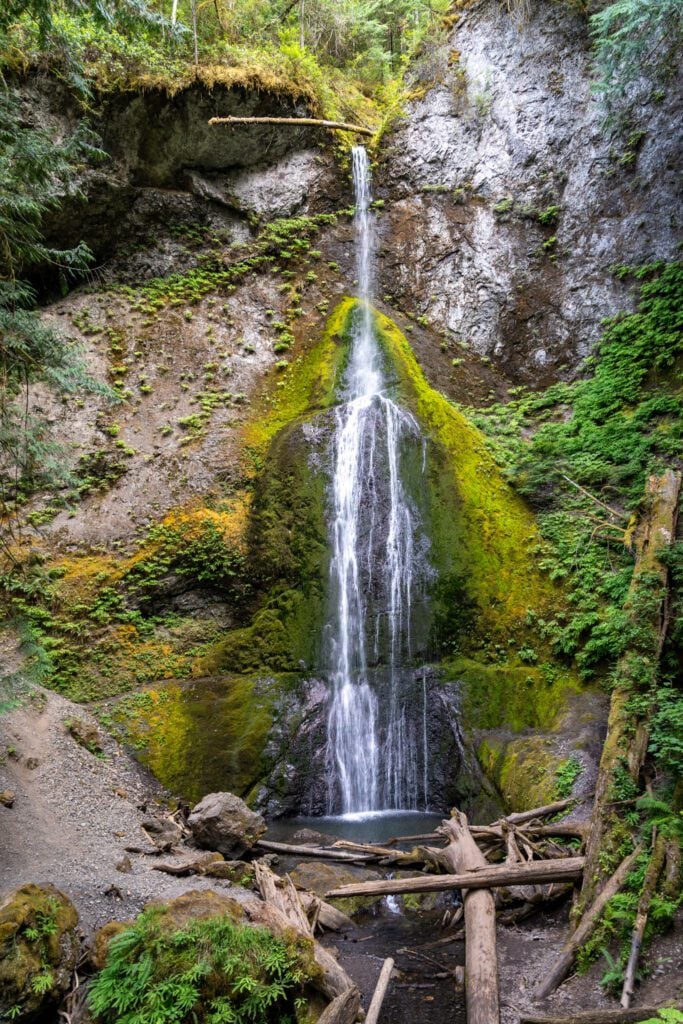
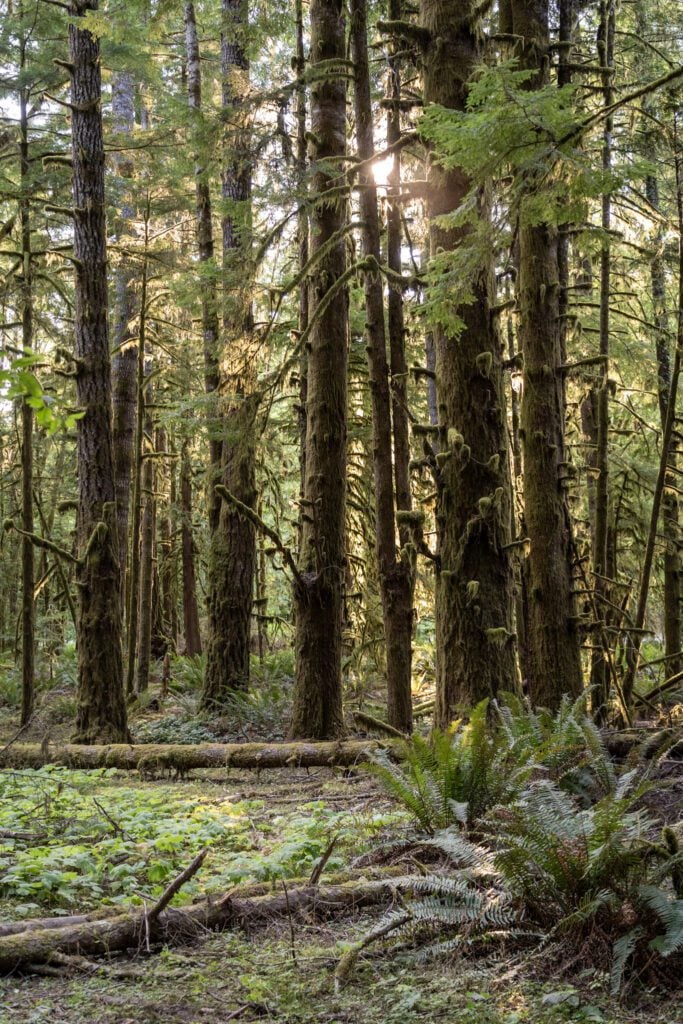
All-in, it’s a 1.8 mile hike round trip, with 500 feet of elevation gain. The end of the hike that takes you to the two viewpoints is the only piece of the hike that has any significant elevation changes.
Some people like to do the hike up to Mount Storm King, which we have done, but we actually wouldn’t recommend it.
To be honest, though, the hike itself really isn’t that cool. Or scenic. Or particularly fun.
The views at the top are nice, but the journey to get there is decidedly “meh.”
We discovered it because every PNW influencer has done an amazing sunrise or sunset photoshoot at the top, and the hike fell short of our expectations. We’d opt for one of the longer hikes near Hurricane Ridge before this one (and it’s not close).
It’s a relatively short and steep climb, and to get to the summit you’ll have to ascend some cables and do some scrambling that might be a little much for people afraid of heights.
I suggest only doing this one if the weather is good because it can get pretty ugly up there when it’s not. This hike is 4 miles roundtrip with an elevation gain of 2,065 feet, and leaves from the same trailhead as Marymere Falls.
It’s a slog, and there are many better hiking options in the park (here’s our guide to the best hikes in Olympic National Park).
The second place we like here is the Lake Crescent Lodge. While we wouldn’t necessarily recommend staying here (high prices, rooms that need some TLC, though the location is excellent), it’s a nice place to visit right on Lake Crescent.
The historic lodge was built way back in 1915, and is one of the oldest national park lodges in the country.
You can grab a drink or a meal at the bar/restaurant onsite, rent a canoe or kayak and do some exploring on the water, or just grab one of the adirondack chairs on the rocky lakefront beach and relax.
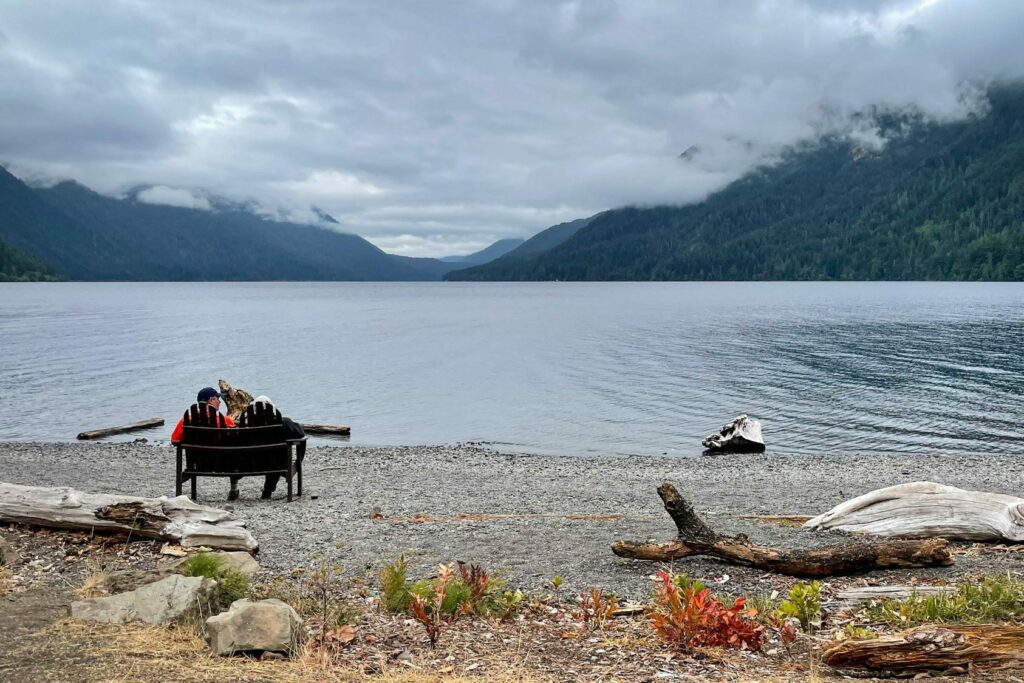
After Lake Crescent, you’re already halfway to Forks, so we’d head that direction and establish your home base there, depending on your timing, which will set you up for a nice easy drive to the Hoh Rainforest on the next day.
Day 2: The Hoh Rainforest + La Push Beaches
On your second day, spend your time exploring the Pacific Coast. Start at the world-famous Hoh Rainforest and then spend the rest of the day on the beaches near La Push, just west of Forks.
The Hoh Rainforest
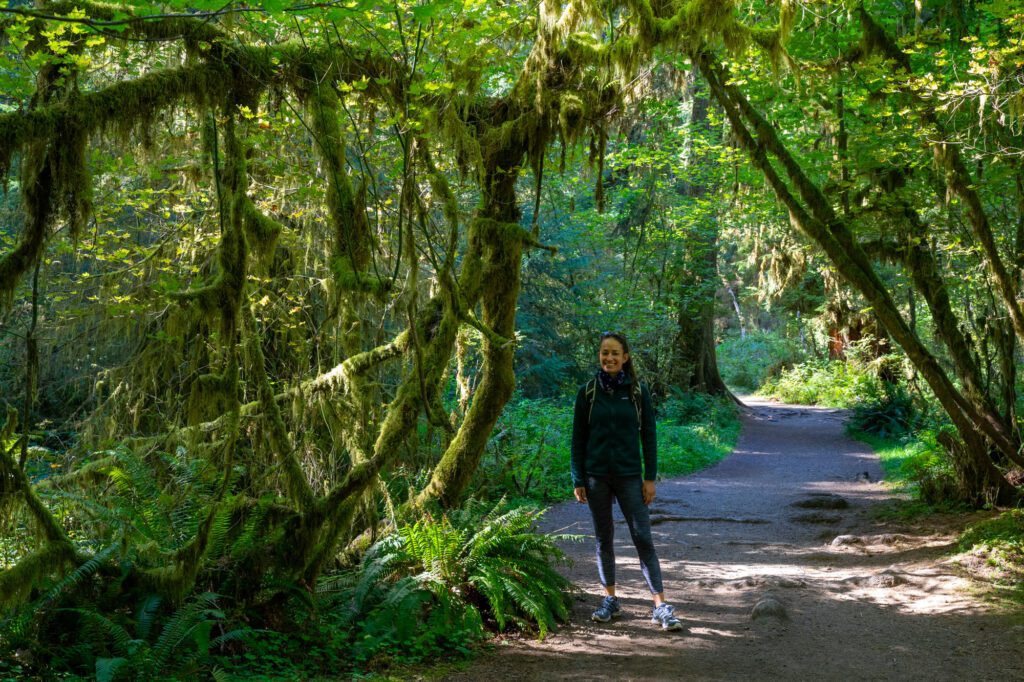
The Hoh Rainforest is the most famous example of the coastal temperate rainforest that calls the Pacific Northwest’s coastline home.
According to the park’s brochure on weather, the Hoh Rainforest gets 12 feet (144 inches) of rain per year.
For context, compare that to Seattle, a city that is universally known as rainy, which gets just over three feet (around 40 inches) of rain per year.
The sheer amount of rain that the Hoh Rainforest gets on an annual basis means that the rainforest is full of ferns, moss-covered trees, and babbling creeks that is straight out of Rivendell (that’s a reference for the Lord of the Rings nerds).
There’s an important reason we have this as the first stop on your second day in the park: it’s the most crowded area in the park, and the parking lot is relatively small for the amount of demand.
The parking situation at the Hoh Rainforest is extremely limited, which means they’ve started limiting capacity at the entrance station during peak times with a one car in, one car out policy. Between 9am and 5pm, there will be a line in the summer.
We know, because we accidentally got a late start last time and got caught in an hour wait to park.
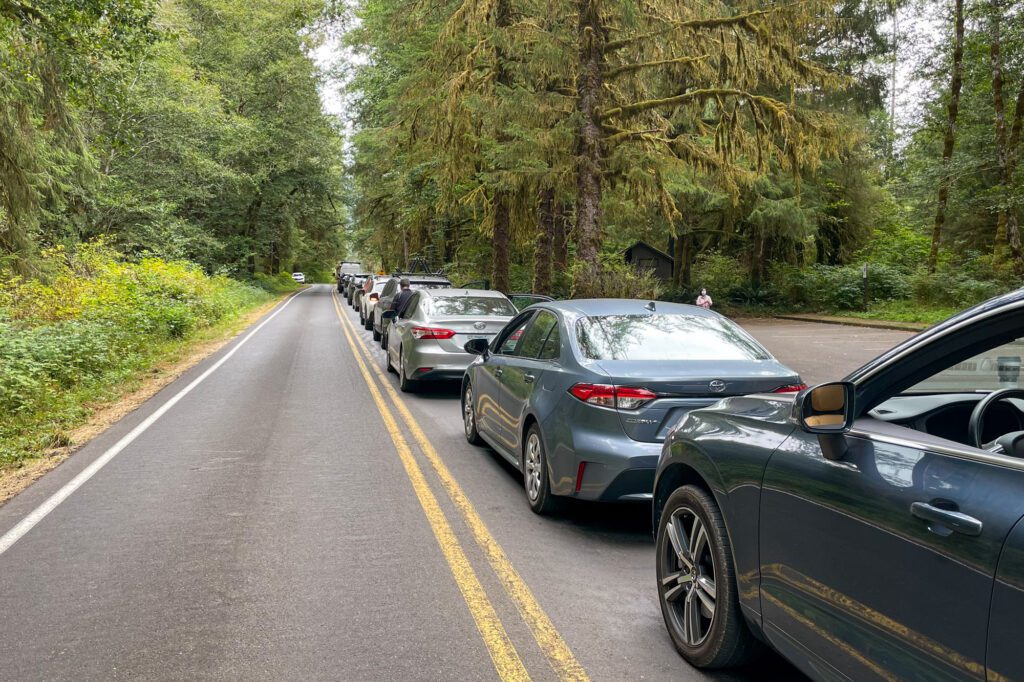
Do yourself a favor and get there by 8am at the latest, both for the best experience in the rainforest, and so that you don’t have to wait for parking.
Also, the early morning is the best time to visit because there won’t be that many people around, making it more of a solitary experience with the rainforest.
The ambiance is much more pleasant without hundreds of people talking and kids screaming. Believe us.
Can we be completely honest with you for a second?
As we’ve spent more time in Olympic National Park, we’ve come to realize that you’ll find incredibly beautiful examples of the coastal temperate rainforest in every corner of the peninsula, many of which rival the Hoh in beauty and breadth.
At one point on our latest trip up to the Olympic Peninsula, I turned to Alysha in the Quinault Rainforest and said “is this actually better than the Hoh?”
It’s not that the Hoh Rainforest isn’t beautiful, because it certainly is.
It’s more the fact that it’s the most popular section of the park, and we’ve seen long lines at the entrance station that take two to three hours.
Is it worth it? Only you can answer that question (and you should probably see it at least once in your life).
So, with all that in mind, let’s talk about how to make the most of a visit to the Hoh Rainforest.
At a high level, there are basically two things to do here, and both of them involve some level of hiking.
There are a couple of short trails to tackle that serve as a great introduction to the rainforest – The Hall of Mosses and the Spruce Nature Trail.
Both are worth doing, and are accessible for hikers of all ages and experience levels.
The problem is that those two trails are by far the most popular, and they are consistently packed with people all day long, which isn’t quite the ideal rainforest experience, we think.
Our biggest tip for you – and this is something we tell everyone we talk to in real life who’s heading to the Olympic Peninsula – is to hike the first few miles of the Hoh River Trail, which is a flat trail through the exact same rainforest as the shorter trails, but sees a tiny fraction of the visitors.
The Hoh River Trail actually follows the river all the way out to the base of Mount Olympus, which would be a fun multi-day backpacking trip, but you can do the shorter section of the trail out to Mineral Creek Falls.
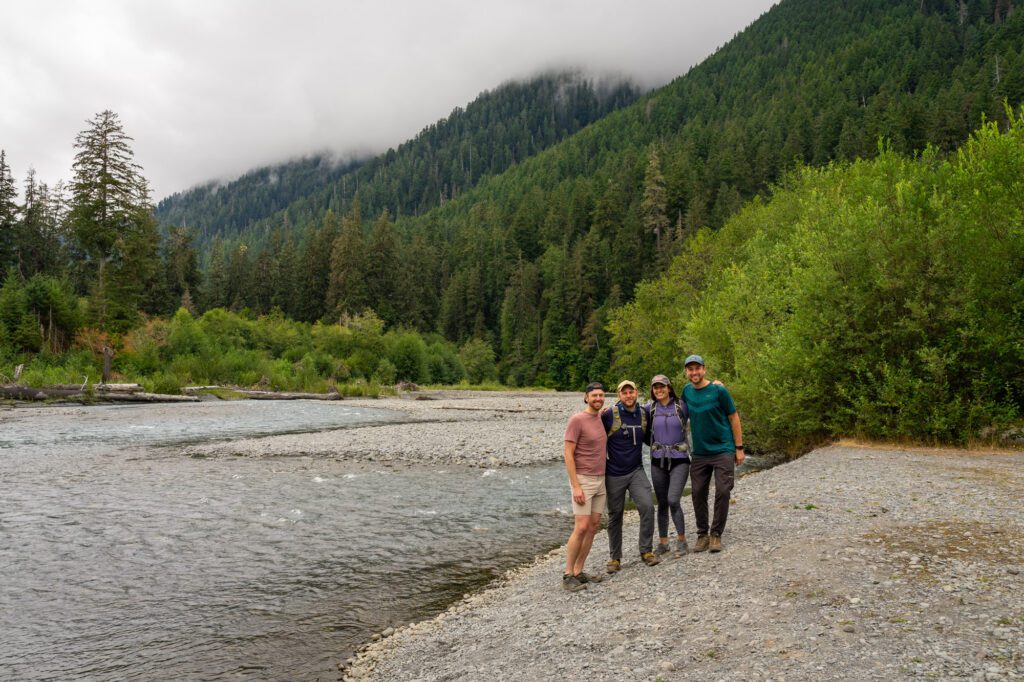
It’s a flat 2.5 miles or so, and you end at a spot with access to the Hoh River (and you pass the “quietest place in the world” on the way).
We did this a few years ago with friends on that trip where we got stuck at the entrance station, and the only other people we saw on the trail were backpackers coming in or out from their overnight trip, a big contrast to the crowds on the shorter trails.
First, Second, and Third Beach
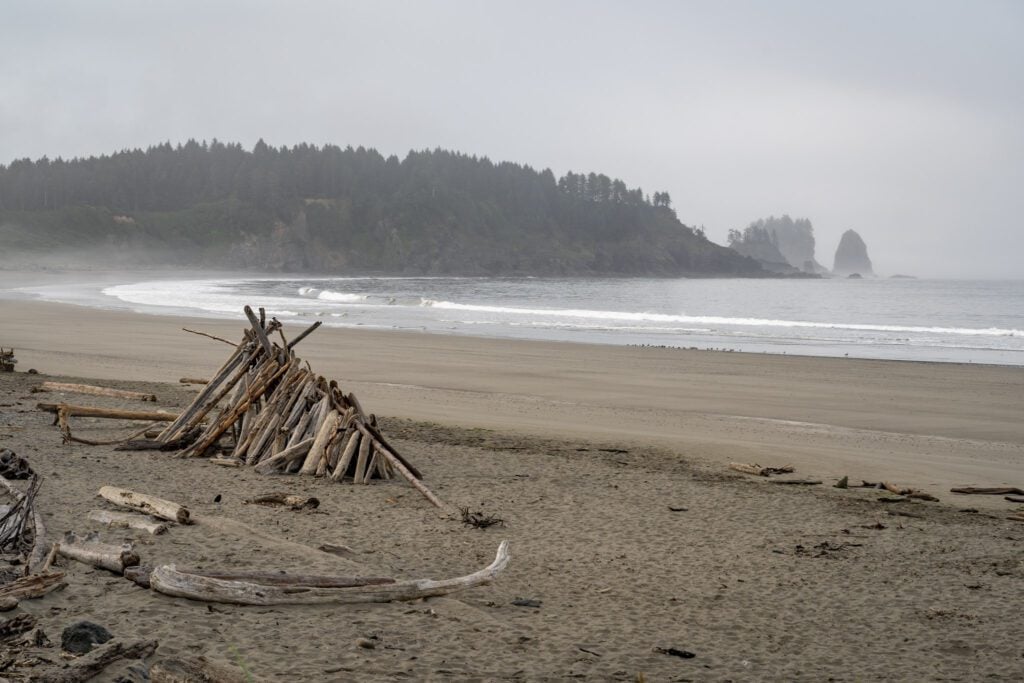
After the rainforest, head back towards the city of Forks and spend the afternoon exploring the series of wild beaches near the town of La Push.
They are creatively named First, Second, and Third Beach, and all three are worth visiting if you have the time.
Until our most recent trip up to the Olympic Peninsula, we had never actually been to any of these beaches because they had been closed every time we’d been here. We were missing out!
This is another good example of a rainforest that rivals the Hoh in terms of beauty.
Second and Third Beach require a short hike through the rainforest to reach, and we were equally impressed with the beauty along the trail as we were in the Quinault Rainforest.
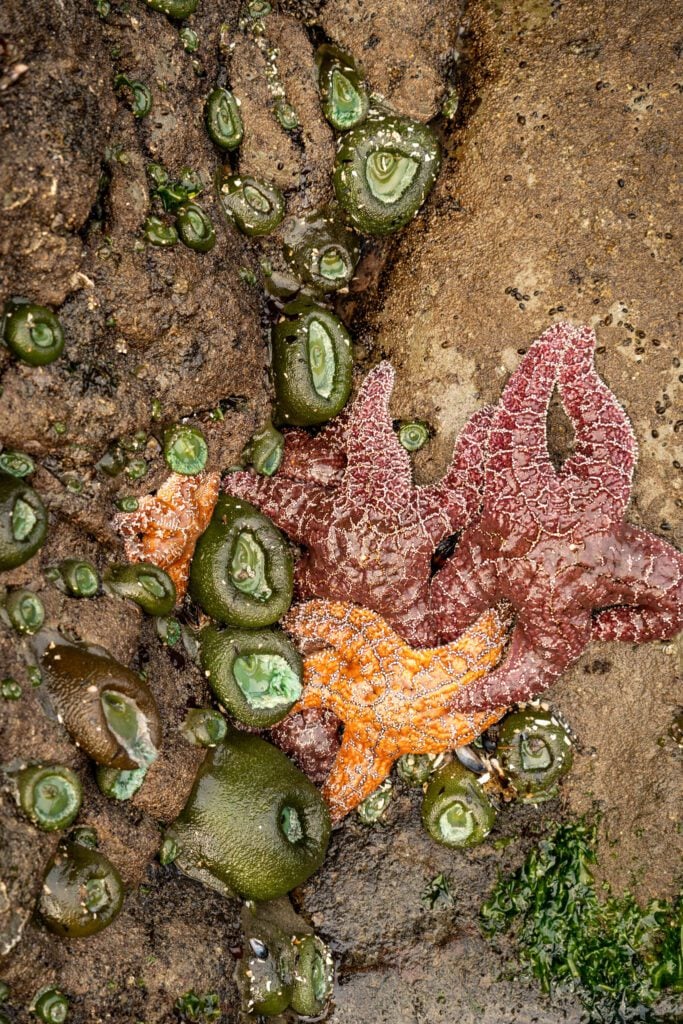
Our biggest tip for visiting these beaches is to time it so that you’re arriving around low tide, which is when the tide pools and abundance of sea life (sea stars, anemones, snails, and more) are visible.
Our favorite part of Second Beach in particular, which we visited at super low tide, was the fact that you could literally hear the sea life crackling as you were exploring the tidepools and rocks.
Check the tide charts here, and plan your visit around the low tide times for your dates if you can.
First Beach is a drive-up situation, where you drive out to the coast through the town of La Push and find yourself on a wide, sandy beach.
There are some nice sea stacks just off the coast, and you’ll find some nice driftwood on the beach.
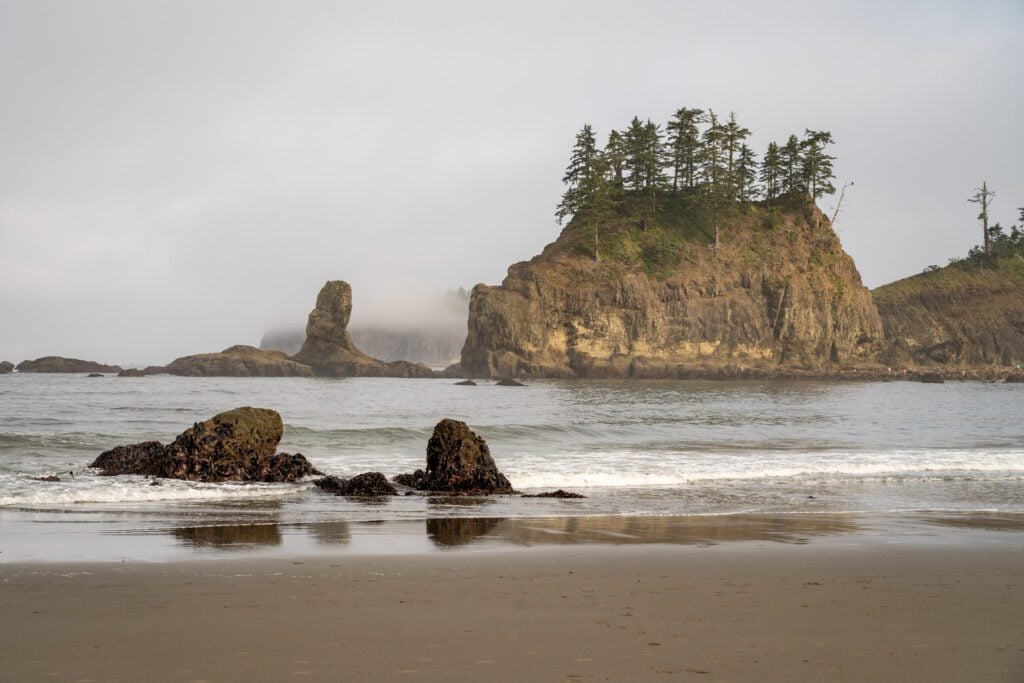
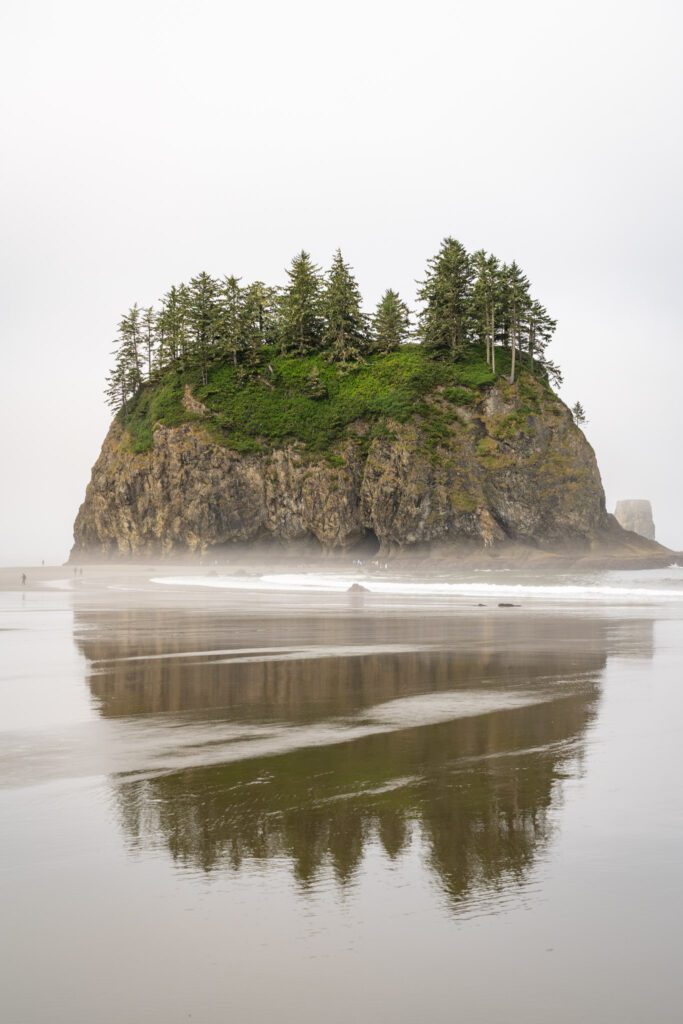
Second Beach is our favorite of the three, particularly at low tide.
It’s a short hike through the rainforest out to the beach, and you’ll emerge onto a wide, sandy beach with excellent sea stacks in both directions (which means plenty of tidepooling to do at low tide).
Third Beach is another good beach with a slightly longer hike in (it’s just under three miles round trip), which means fewer people make it out there.
It’s a wide sandy beach, but it doesn’t have the sea stacks that you find on Second Beach, and the tidepooling isn’t nearly as good.
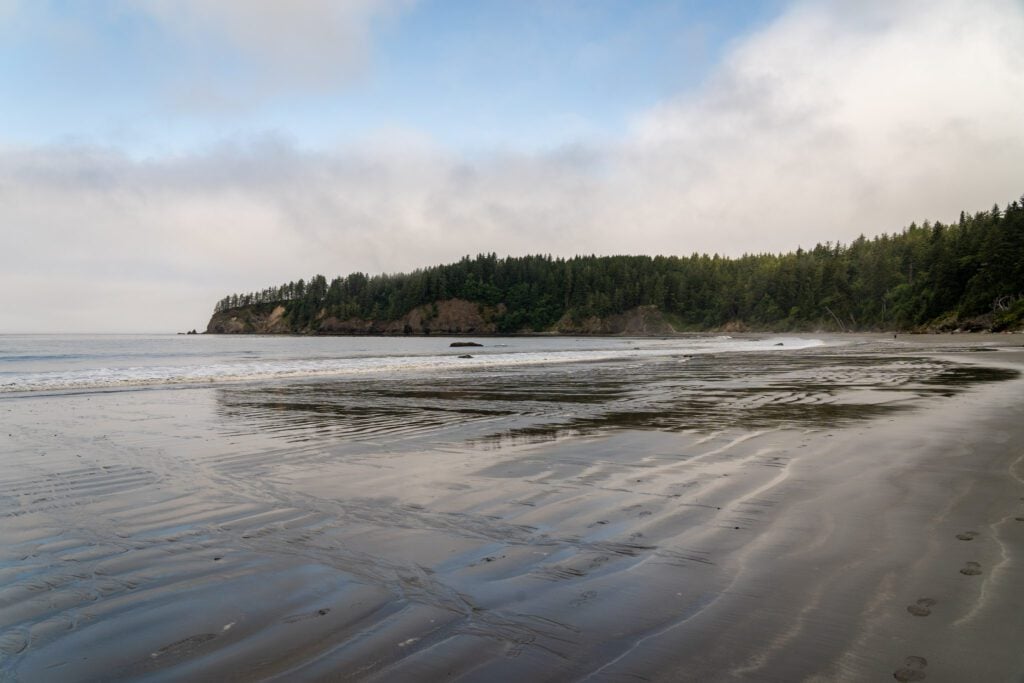
The other thing about Third Beach is that the parking lot is small, and it’s partially filled with overnight hikers, which is a nice limiting factor for the number of people out on the trail.
We saw just a few people on the way in and out, so the slightly longer hike does mean you’re going to see fewer people on the trail and beach.
An important note: As of 2026, parking at First and Second Beach requires a parking permit that allows parking on Quileute Tribal Lands.
There are handy signs at the lots with QR codes to pay, but there is zero cell coverage out in La Push, which makes those QR codes completely useless.
Instead, you’ll have to stop by the Lonesome Creek Store (here on Google Maps) to grab a physical parking permit in person.
As we were standing at the trailhead, we saw three different groups try to pull up the website on the QR code, fail because they had no service, and head on down the trail.
Rialto Beach at Sunset
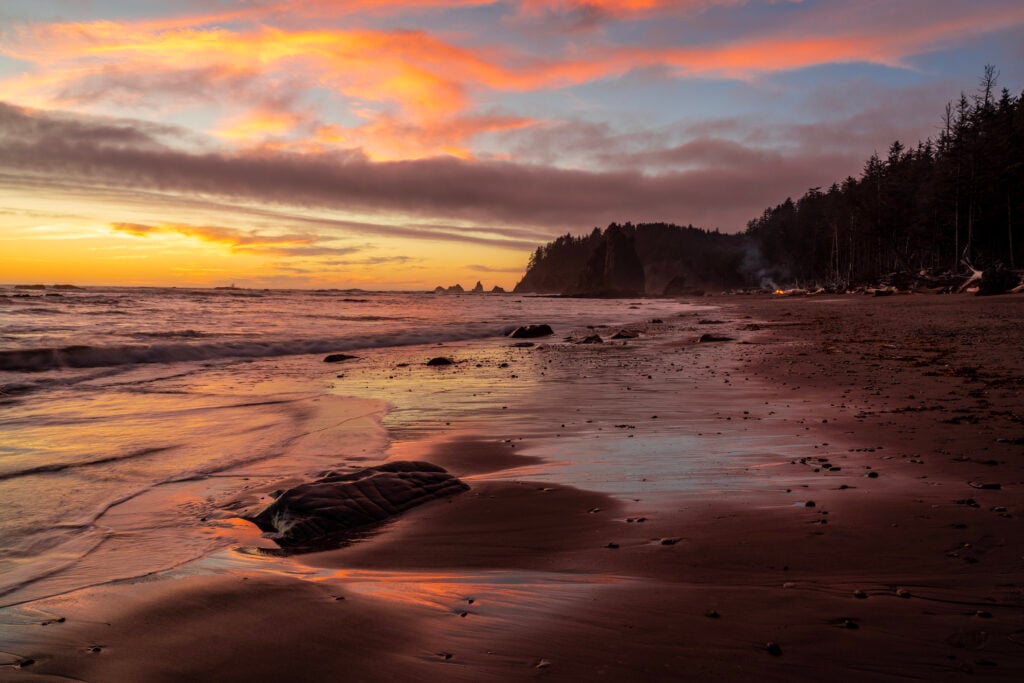
To close out your second day in the park, head out to Rialto Beach around sunset.
The sunset that we caught on our first ever trip to Rialto Beach on a clear August night was undeniably one of the highlights of the 2020’s for us.
It was everything you want in a sunset on the west coast. The soft golden light washed over the beach as the Pacific Ocean lapped at our feet (and the feet of my tripod, which ended up with sand in every crevice), and as the sun dipped below the horizon, the clouds turned a nice shade of pink that got deeper and deeper as the sun disappeared.
It was magical.
All that being said, you should know going in that it’s coastal, so there’s a pretty high chance that you won’t be able to see a sunset at all because of the fog or clouds that enshroud this part of the world for most of the year.
For reference, we’ve been here two additional times – both in August – since that first magical night, and both times it was foggy and drizzly.
However, if it’s a clear day, you’re in for a treat!
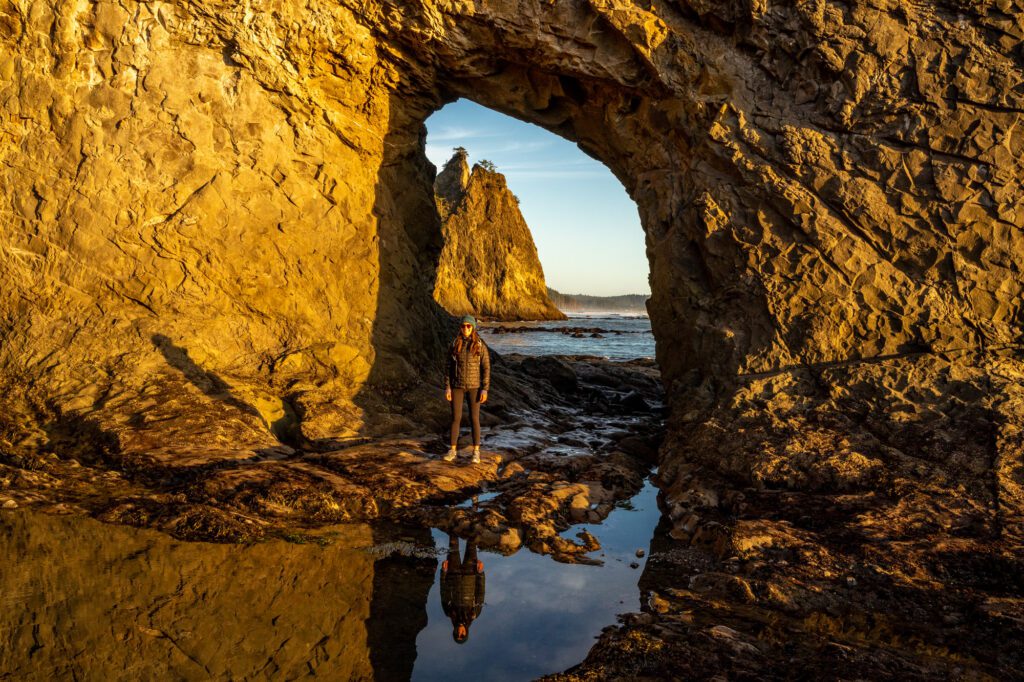
Even if the weather isn’t perfect, you definitely shouldn’t miss the stroll down Rialto Beach to a spot called the Hole-in-the-Wall. Which is pretty much exactly what it sounds like, only prettier.
To get there, you’ll walk for about an hour down the beach, passing by a couple of incredible sea stacks that tower above you.
Eventually, you’ll reach a point where a natural arch has formed in the wall thanks to countless years of erosion.
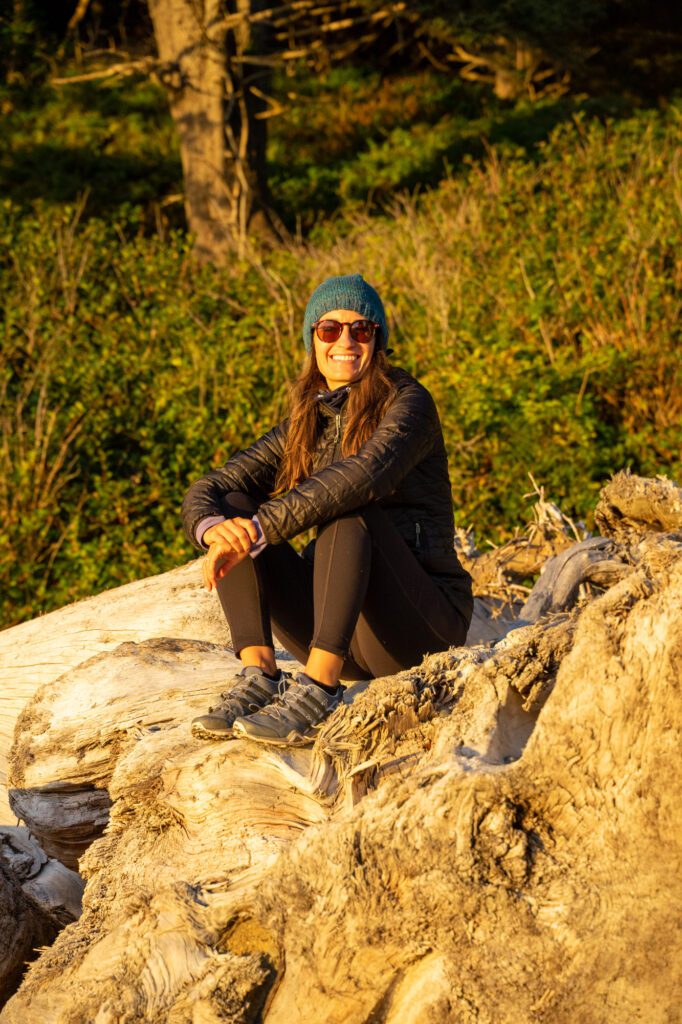
Don’t forget to look up into the trees, where bald eagles like to scout for fish. We’ve seen many bald eagles here over the course of our various trips.
There are some pretty cool tidepools on either side of Hole in the wall to explore – remember not to touch or disturb the sea life!
Make sure to check the tides – you need to do this walk at low tide, otherwise you’ll either not be able to get there, or you’ll get stuck out there and have to do some rock climbing to get back. We used this site to check tides.
Day 3: The Quinault Rainforest, Kalaloch, and Ruby Beach
On your third day, venture further south down the Pacific Coast to explore two great beaches and another exquisite example of a temperate rainforest (with a fraction of the crowds and a very nice lake).
We’d vary your route depending on your timing and whether or not you’re heading home tonight, or staying in Forks for another night.
If you’re returning to Forks, do it the opposite direction, starting with the drive down to Lake Quinault and making your way back north from there.
If you’re leaving the park after this day, do Ruby Beach, Kalaloch, and then the Quinault Rainforest on your way out.
The Quinault Rainforest + Lake Quinault
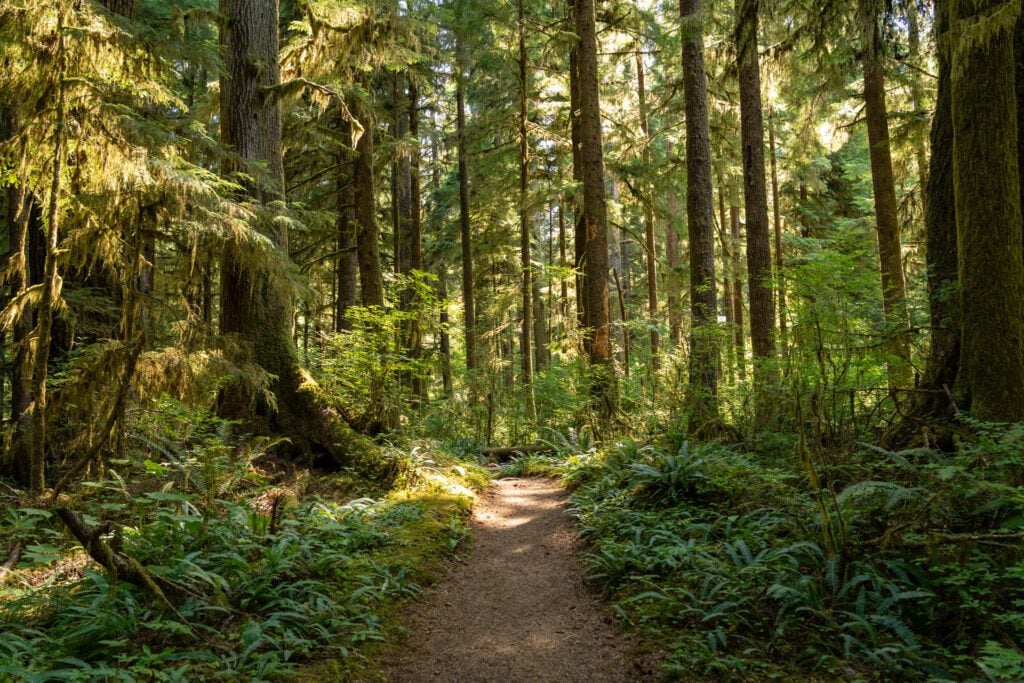
This is ground zero of our “is this rainforest better than the Hoh?” conversation, when the idea that there are excellent examples of that coastal temperate rainforest throughout the peninsula that don’t require hours of waiting in line to access.
If you’re looking for a relatively easy rainforest hike that has similar levels of beauty to the more famous rainforest hikes in the park with a fraction of the crowds, we’d definitely recommend the Quinault Loop, which starts and ends at the historic Lake Quinault Lodge on the lake’s southern shore.
It has a little bit of everything that makes this corner of the park special (technically speaking, it’s actually just outside the park), from stretches of ferny rainforest to a lakefront path.
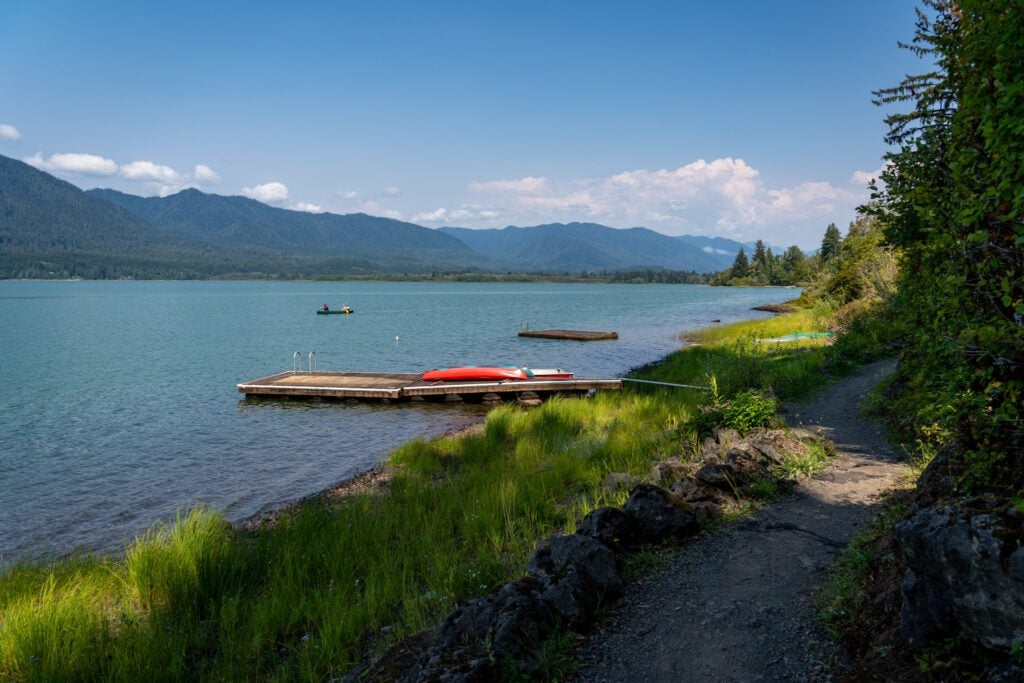
We did this hike and saw 10 or so other hikers on the trail (compared to hundreds in the Hoh Rainforest). We really enjoyed it, and think it punches above its weight.
There is a nice network of trails, including a shorter rainforest loop and a walk to the world’s tallest Sitka Spruce, but the one we’d recommend is the four mile loop that we referenced above.
After your hike, head to Lake Quinault Lodge, one of the historic lodges in the park that sits on prime real estate on the shore of the lake.
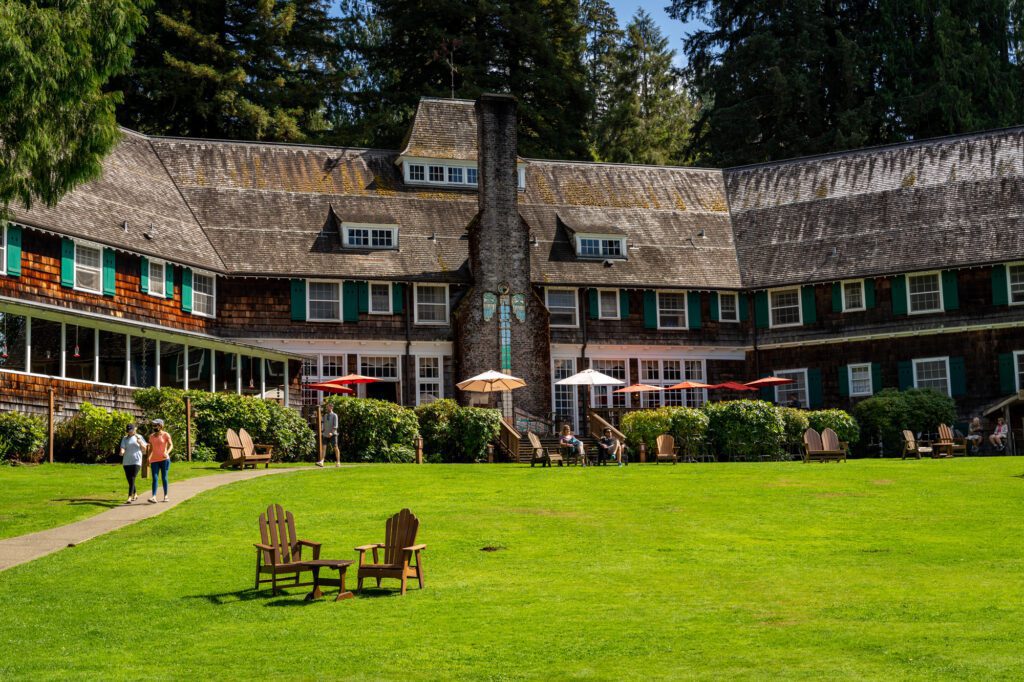
There’s a bar and restaurant onsite (though the food isn’t great, we’ve read), a place to rent boats to go out on the lake, and some nice adirondack chairs and picnic benches on the lawn overlooking the lake.
It’s a good place to sit and relax for a minute before you move on to your next stop.
Kalaloch Beach
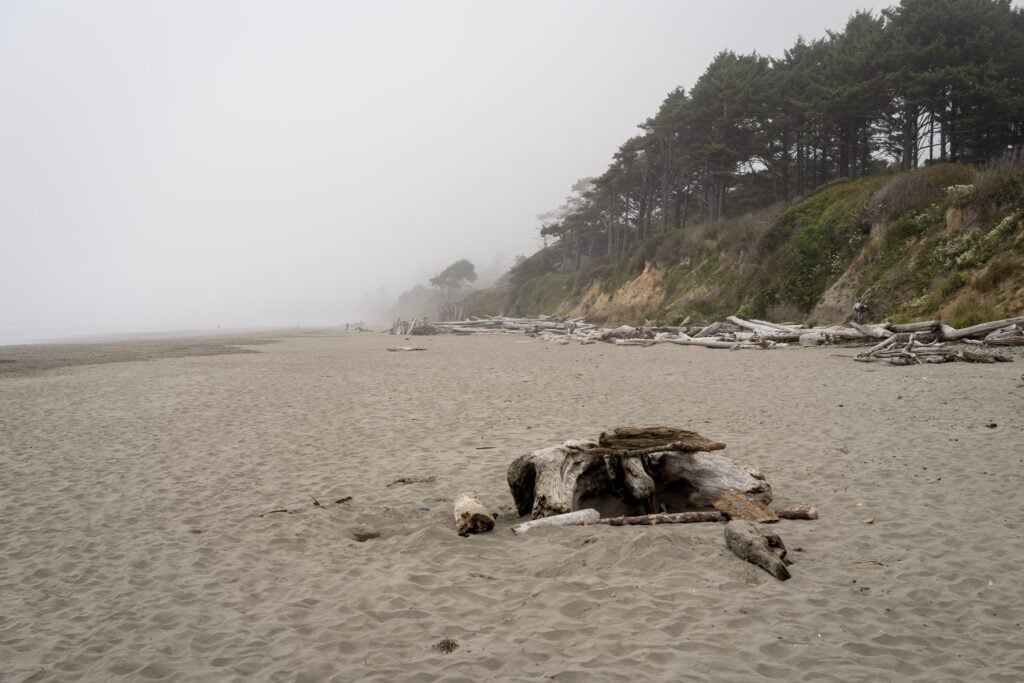
Kalaloch Beach (which is pronounced “clay-lock”) is one, long sandy beach that stretches for miles, and it is the southernmost beach in the park.
It feels very different from many of the other beaches you’ll be hitting on your Olympic adventure.
The beaches further north tend to be more rocky and rugged, tucked into a nice little cove with towering sea stacks just offshore and the rainforest butting right up against them. It gives them a really isolated, wild feeling.
Kalaloch feels more like the beaches on the Oregon Coast to us, with dunes and bluffs separating it from the forest and a beach that stretches further than the eye can see.
It’s decidedly less “wild-feeling”, but it’s equally beautiful.
There’s a nice big campground here, and it’s also where you’ll find the Tree of Life, a tree on the bluff above the beach whose roots have been exposed after years and years of erosion.
The best place to park to get out to the beach and do some exploring is the day use area at Kalaloch Campground (here on Google Maps).
The most famous spot on Kalaloch Beach is the Tree of Life, a big Sitka Spruce that, at one point, was perched on a sandy bluff, but as erosion swept that bluff away, the tree’s roots remain, and it looks like it’s floating.
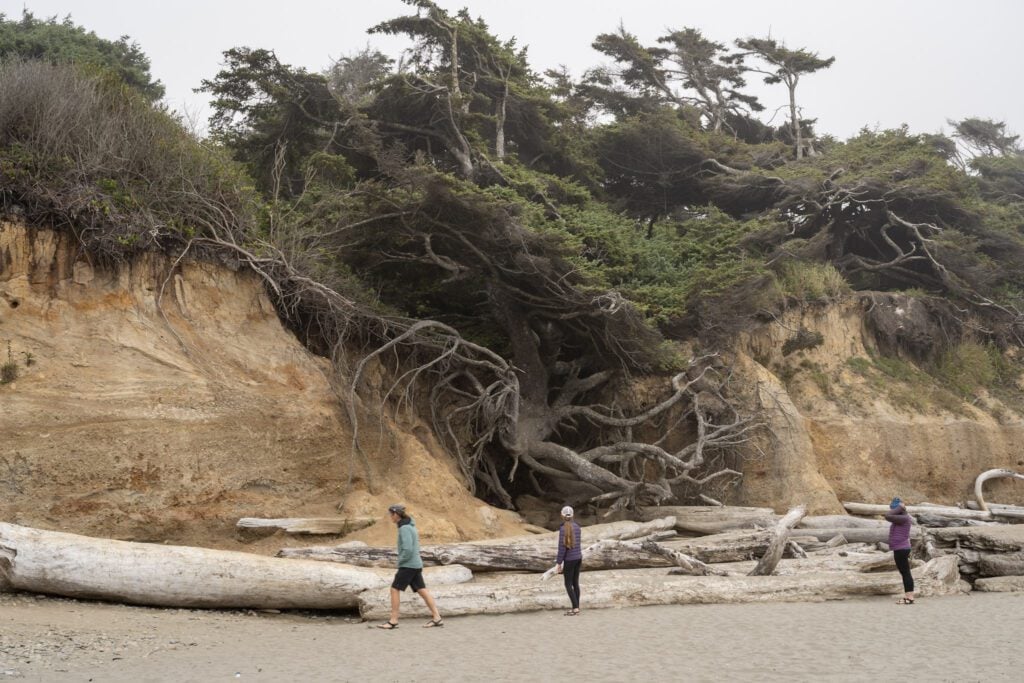
Unfortunately, that erosion hasn’t stopped, so the tree is starting to collapse in on itself as it sinks further and further into the gully. In a few years, it will have completely collapsed.
You should know that it’s an already fragile ecosystem that is made more fragile by the hundreds of people climbing into the root system every single day.
Don’t do that, even if others are, because it directly contributes to the death of the tree.
If you’re looking for the best tidepools on Kalaloch, you should head to Beach 4, which has a small parking area just off of 101 (here on Google Maps).
You can stay at the Kalaloch Lodge in one of their lodge rooms (hotel-style), or one of the oceanfront cabins.
For the price, the facilities are a little run down (as they tend to be in national park lodges, which are almost always at full capacity), but the location and ambiance can’t be beat.
Book well in advance – it’s completely full during the summer.
Ruby Beach
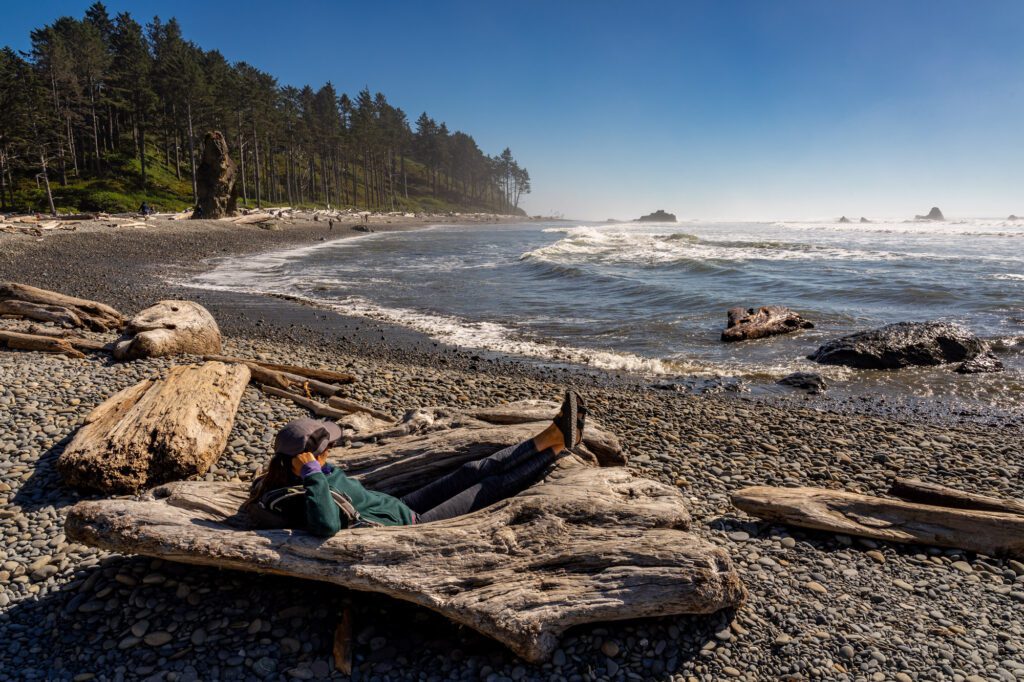
Ruby Beach is tied for second of our favorite beaches in Olympic National Park (after Rialto, and tied with Second Beach).
There are two things that we associate with beaches on the Washington Coast: sea stacks and driftwood. And Ruby Beach has both in droves.
The parking lot for Ruby Beach is relatively big, though it does fill up (especially around sunset). There isn’t a big hike leaving from here, though, so there’s plenty of turnover.
From the parking lot, it’s a short walk downhill and you’re on the beach.
Off to the right, you have a couple of nice sea stacks, notably Abbey Island (the big one to the right when you’re standing on the beach) and Destruction Island (the one with the lighthouse further offshore to the left).
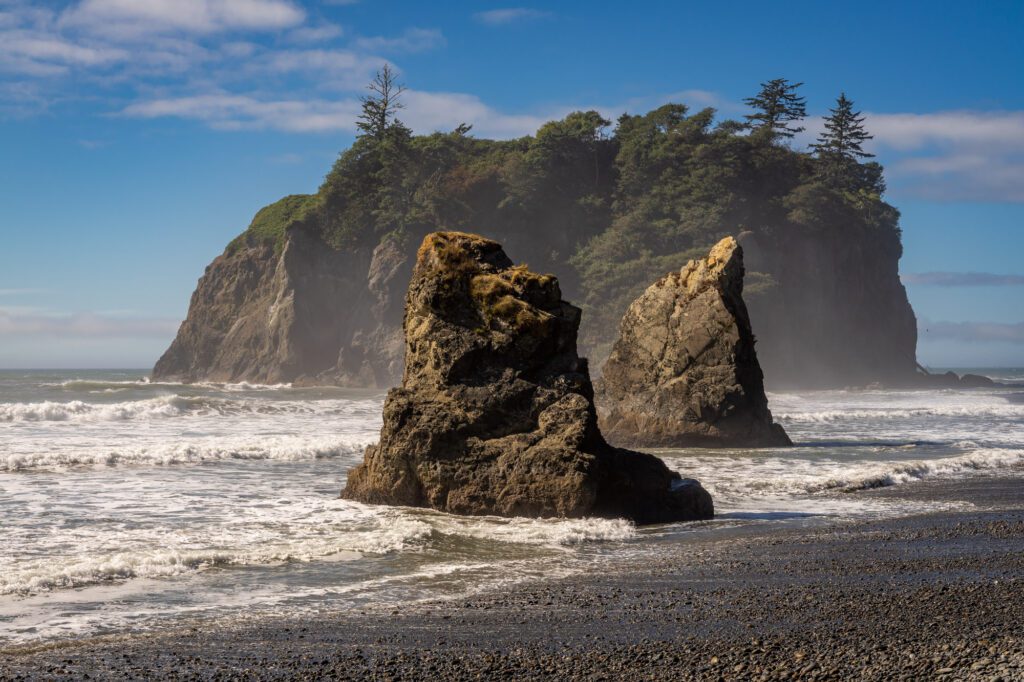
There’s driftwood littering the beach, which makes for a nice foreground for photos.
The driftwood on the beach and the sea stacks just off the coast are gorgeous, and impress us every time we’re here.
What to Add with More Time
Here are a couple of extra things to add with an extra day or two on the Olympic Peninsula.
The Northern Pacific Coast (+1 Day)
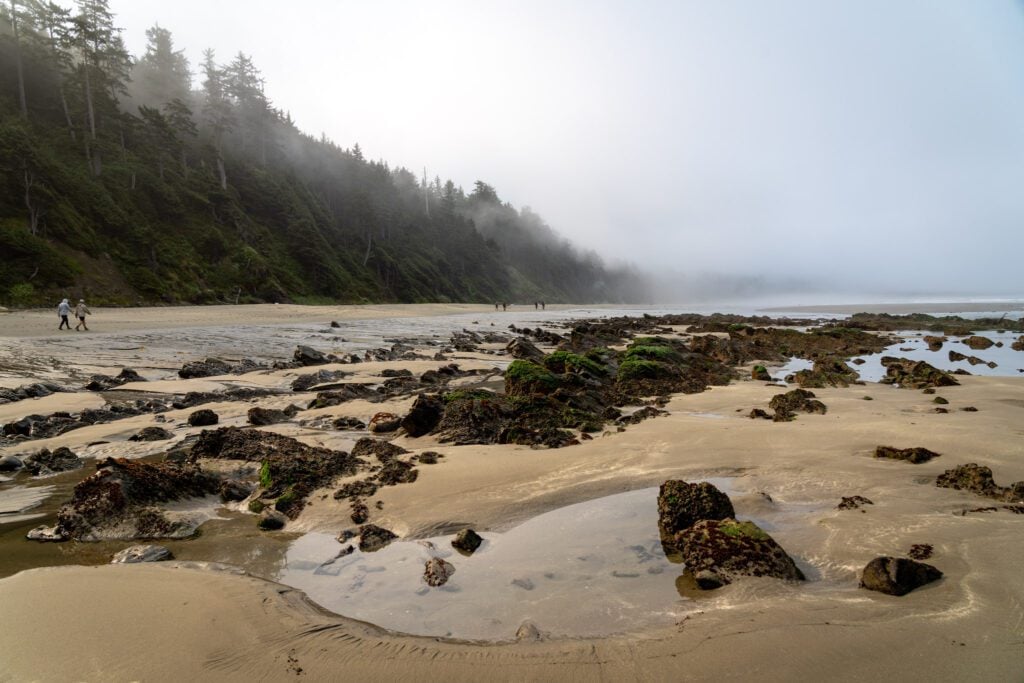
We went back and forth as we were rewriting this guide from the ground up on how to incorporate the Northern Pacific Coast.
The big issue we ran into is the fact that it’s a big time commitment (~90 minutes each way), and in an already limited amount of time, we think you can absolutely use your time more efficiently than heading all the way out to Neah Bay.
Looking at a map, it doesn’t look like it should take that long, but the road to get out there is slow and winding, and there’s no direct route up the coast from Forks, so you have to go a bit out of the way.
All that being said, if you have a fourth day, this would be a great way to spend it!
It makes for a nice transition day as you’re moving between Port Angeles and Forks, which is how we’ve always done it (and how we’d fit it into your itinerary).
This remote part of northwest Washington State is anchored by the town of Neah Bay, and most of the land up here is owned by the Makah Tribe (we’ll talk about them in a second).
There are four main things to do up on the northern Pacific Coast: Shi Shi Beach, Cape Flattery, Hobuck Beach, and the Makah Cultural and Research Center.
If you’re going to make the journey up here, we’d plan on doing all four of them to make it worth the drive to get up there.
Also worth noting that some of the attractions up here are on land owned by the Makah Tribe, which means you’ll need a Makah Recreation Permit ($20, good for the calendar year).
If you’re coming in early, stop at the Makah Mini Mart in Neah Bay (here on Google Maps) as you pass through, which opens at 7am.
If you arrive later, there’s a stand on the roads out to either Shi Shi or Cape Flattery where you can pick one up.
First is Shi Shi Beach (pronounced “shy shy”), which is one of our favorite beaches in the park.
It’s a wide, sandy beach that stretches for miles, and the remote location and (short) hike means that it sees relatively few visitors compared to the La Push Beaches.
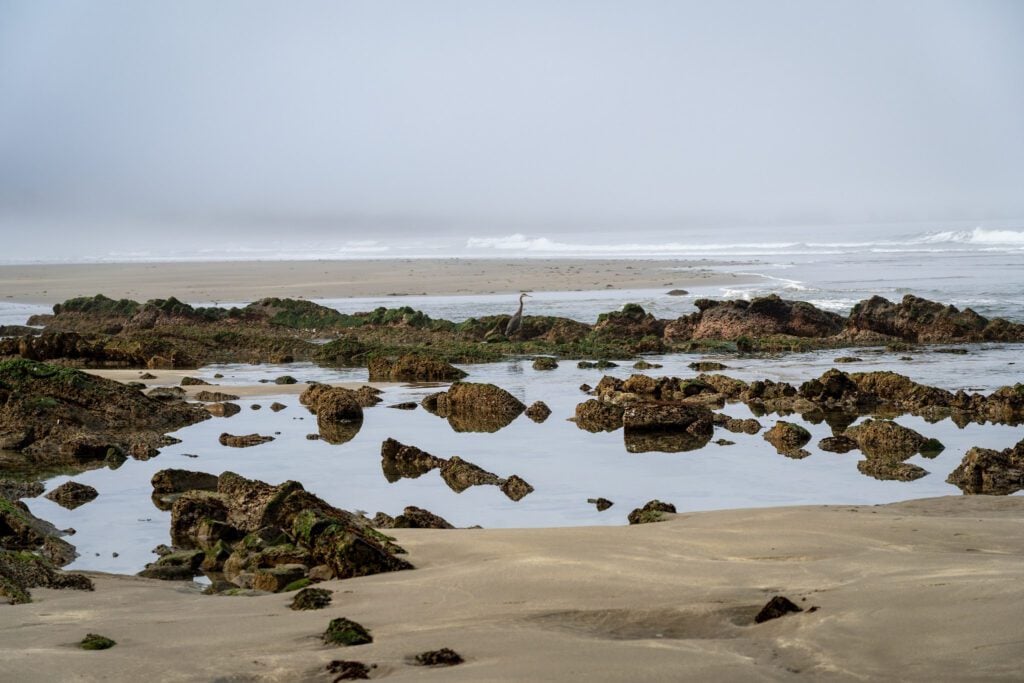
There’s some good tidepooling here at low tide, and you can hike all the way down to the southern end of the beach where you’ll find a beautiful set of sea stacks known as Point of Arches.
Here’s our guide to hiking to Shi Shi Beach for more information.
Next is Cape Flattery, which is a short hike out to the northwestern corner of the contiguous United States.
It’s a short hike with a bit of climbing on the way back (it’s downhill on the way there), and it’s doable for most people who can make the hike to Shi Shi Beach.
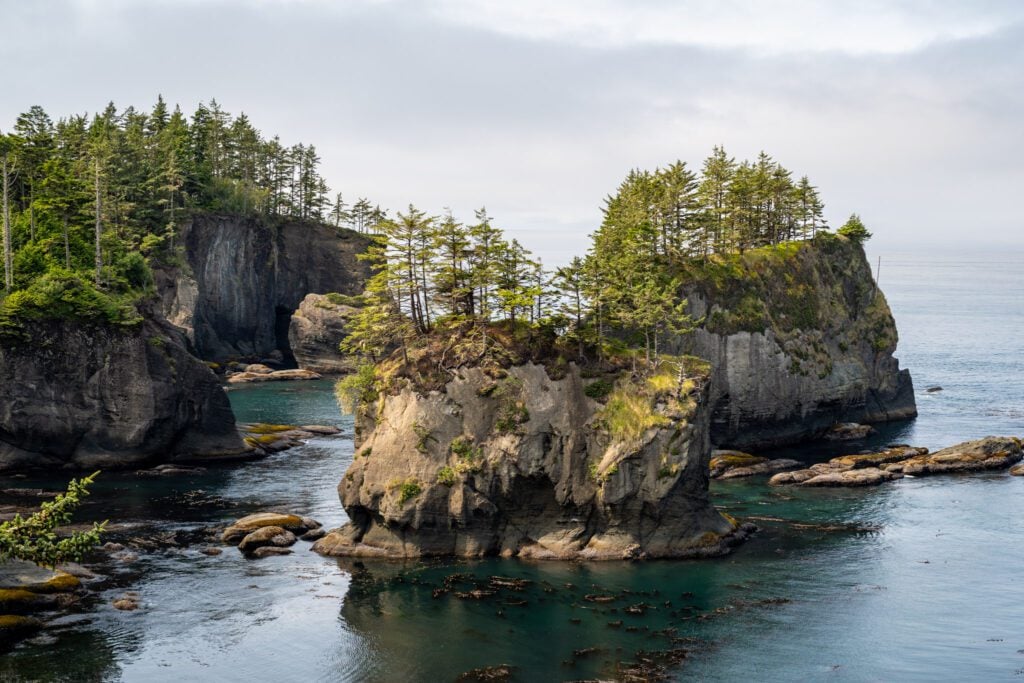
There are some nice sea stacks just off the coast, along with some good sea life (tons of birds!) to see from the end of the trail. Here are the trail details on Alltrails.
Next is Hobuck Beach, which is a good place to eat lunch (if you packed a lunch) or take a little break after a morning of hiking. It’s another sandy beach with good tidepools at low tide.
Last, but certainly not least, is the Makah Cultural and Research Center, which is a museum dedicated to the history of the Makah Tribe that blew our expectations out of the water.
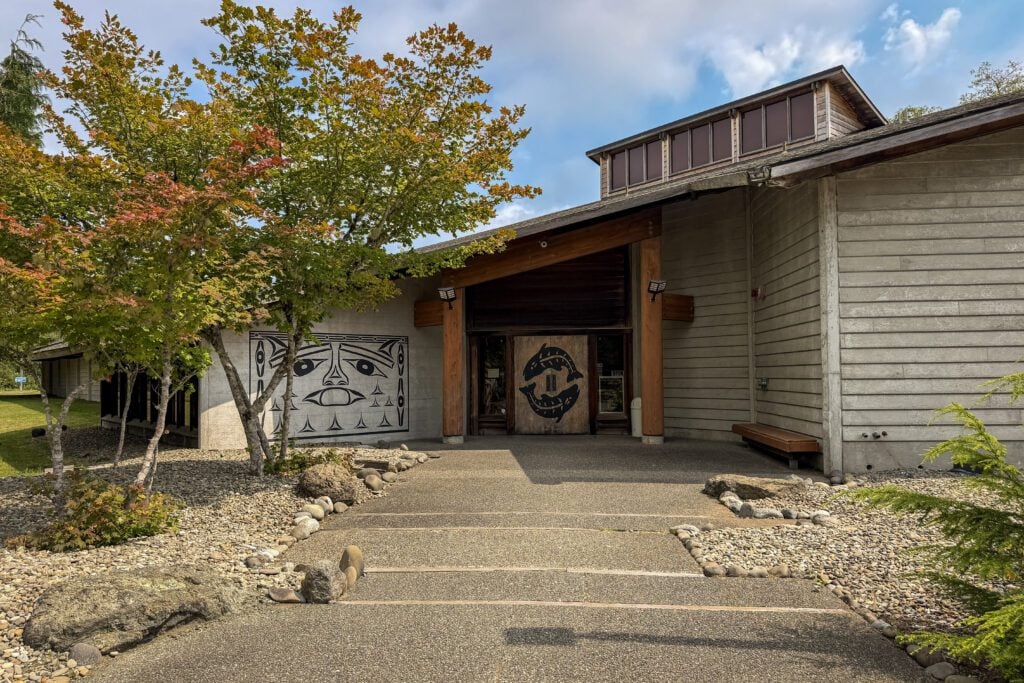
Mostly because of the story around the village of Ozette, which was buried by a mudslide hundreds of years ago and re-discovered in the 20th Century.
At one point, Ozette was a major center of the Makah tribe before it moved to Neah Bay. Sometime in the 16th Century, the entire village was buried by a mudslide.
Which, it turns out, is a great way to preserve things and prevent them from decaying (kind of similar to the ash at Pompeii).
Four hundred years later, a big storm unearthed pieces of the village, and an archaeological dig followed that unearthed an entire village with six wooden longhouses that had been preserved by mud for centuries. Pretty cool!
We thought it was well worth the $10 per person entry price. More details, including opening hours, here.
If you’re looking to grab lunch, there are only a handful of places to eat in Neah Bay, but the place we’d go is BIGGINZ for fish and chips. When in Rome, right? FYI – it’s cash only.
It’s also worth stopping by Take Home Fish Company across the street for freshly caught smoked salmon that is quite literally smoked in front of you.
If you have multiple extra days, we would consider staying at Hobuck Beach Resort up here for a couple of nights, which looks like a lovely place to stay.
Add a Backcountry Hike (+2-4 Days)
If you’re into backpacking, Olympic National Park is a great place for a backcountry trip because there are so many different types of hikes thanks to the diversity of ecosystems within the park.
If you want an alpine adventure, there are a bunch to choose from up around Hurricane Ridge, particularly from the end of Obstruction Point Road.
You could do the Grand Lake Loop and spend the night at Moose Lake for an easy one night trip.
If you’re looking for a longer alpine adventure, we loved the High Divide / Seven Lakes Basin, which we did a few years ago. It’s best as a three night trip, but we did it in two (we couldn’t get the right permits for three nights).
It leaves from the Sol Duc Trailhead (over near Lake Crescent) and does some climbing through the rainforest before bursting through the treeline up onto a rocky ridgeline.
From that ridge – the High Divide – you’ll have up-close-and-personal views of Mount Olympus and the Olympics and a series of nice alpine lakes (you guessed it, there are seven of them in the basin).
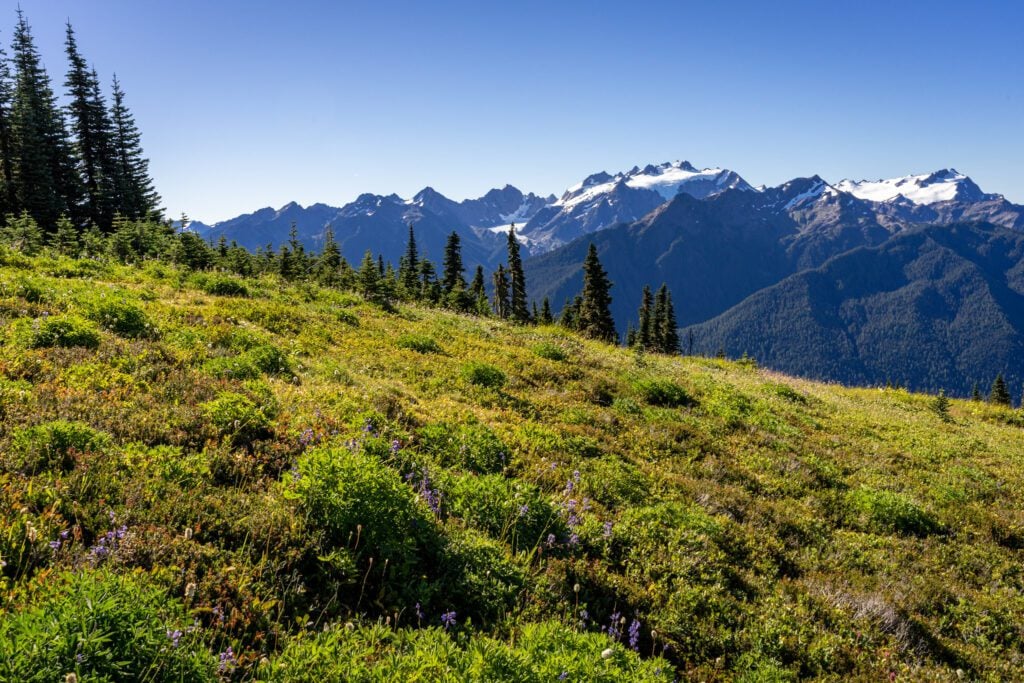
Here’s our guide to hiking the High Divide – Seven Lakes Basin with all the details you need to plan your trip.
If you want a trip to immerse yourself in the temperate rainforest, we also did the Enchanted Valley Trail a few years ago and it was also a great trip.
This one is a good two night trip, though an extra night in the Enchanted Valley itself allows for a side trip.
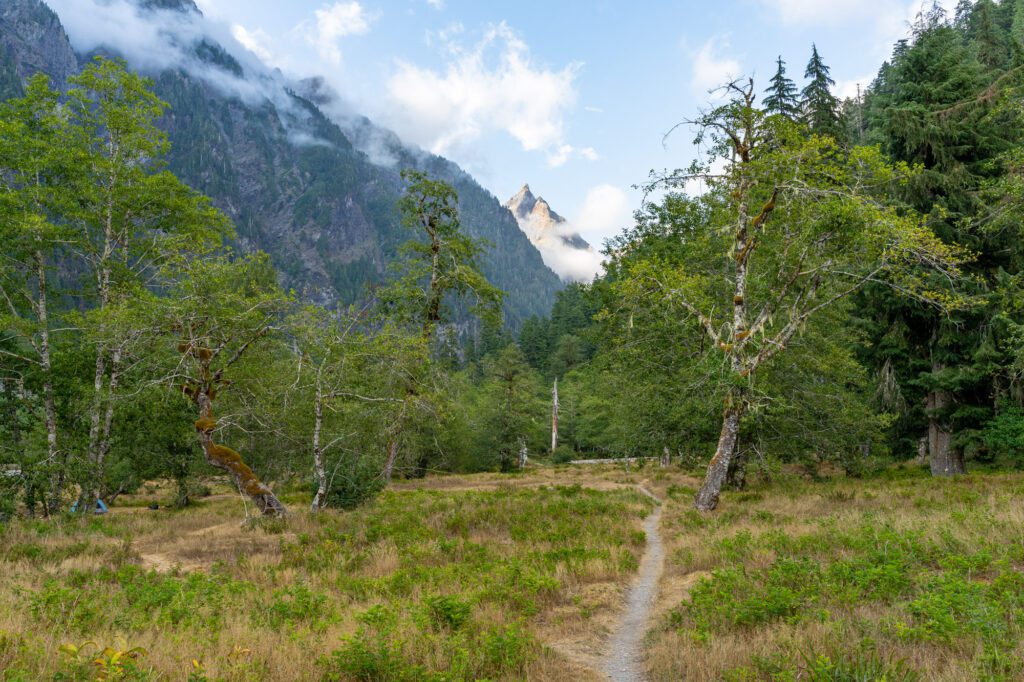
It’s a relatively easy hike, only climbing 3,200 feet over the 26 miles of trail, and it’s almost entirely through a gorgeous rainforest that is every bit as beautiful as the Hoh Rainforest, we think.
If you want a coastal backcountry hike, look at the South Coast route that leaves from Third Beach and heads south down the coast to reach beaches that are only accessible to overnight hikers.
Keep in mind that you’ll need a bear canister for any overnight camping – including on the beach – in Olympic National Park.
We have this one, and highly recommend it. Other friends have one of the clear, screw top ones, and prefer using ours.
If you’re planning to do any overnight backpacking, make sure to stop at the ranger station in Port Angeles to get your backcountry permits, bear canisters (for rent if you need them), and information about the park.
If you’re 16 years old or older, it will cost you $8 per night (plus a nonrefundable service fee).
You need to book your permits in advance (they go on sale for the season on April 15th at 7am) and print them out a few days before your trip. More information on backpacking in the park here.
What to Do with Less Time
If you have less than three days to explore the park, we’d cut the third day in the itinerary above (Quinault + Kalaloch) to focus your time on Hurricane Ridge and Lake Crescent on your first day, and the Hoh Rainforest and Pacific beaches on the second day.
If you don’t want to miss Ruby Beach, add it to the second day after the Hoh Rainforest, because it’s fairly far south and you’ll already be most of the way there when you’re down at the Hoh.
With just two days, you will have a choice to make about whether you make the full loop of the Olympic Peninsula.
Depending on your particular route, you could either go back the way you came towards Port Angeles at the end of your trip to catch the ferry back across the Puget Sound, or finish the loop by driving south on Highway 101 past Kalaloch and Quinault and down through Olympia.
If you do the full loop, you could make a few quick stops at the beaches and rainforest on your way out if time permits.
However, it will add drive time if you’re ending up in Seattle, so it comes down to your particular itinerary and timing.
The Best Time to Visit Olympic National Park
Unlike the other two national parks in Washington State, which are really only accessible for a tiny slice of the year due to their elevation, Olympic National Park is largely at or around sea level, which means that most of the park is accessible year round.
The exception to that rule is Hurricane Ridge, the alpine section of the park, which sits above 5,000 feet above sea level.
That part of the park is somewhat inaccessible during the winter and spring (the road is usually open and plowed on weekends – check the status of Hurricane Ridge Road here).
Generally speaking, though, the best time to visit Olympic National Park is the summer and fall, roughly June through October.
That’s when you’ll have the longest days (we’re talking 16+ hours of sunlight in June), the best chance of clear skies, and the warmest, driest weather.
That being said, this part of the world is famous for the amount of moisture it gets, which is the reason you get the lush greenery in the coastal temperate rainforests.
We’ve been here three different times in August, and two out of the three saw more days full of fog and mist than warm and sunny.
The weather here is unpredictable, even in the summer, and that’s just the nature of the beast.
The thing we would say about visiting the park outside of summer and fall (November to May) is that you should be prepared to be both wet and muddy.
The Pacific Coast, in particular, gets A LOT of rain.
According to the park’s brochure on weather, the Hoh Rainforest gets 12 feet (144 inches) of rain per year.
For context, compare that to Seattle, a city that is universally known as rainy, which gets just over three feet (around 40 inches) of rain per year.
Bring a rain jacket and a pair of shoes or boots that are both waterproof and you aren’t afraid of getting a little dirty (leave the white Nikes at home, probably).
The other thing to know about visiting outside of peak season is that you’re going to be limited on what you can do up at Hurricane Ridge.
You won’t be able to hike most big trails without snowshoes and/or microspikes.
If you’re up for a snowshoe adventure, great! If not, we would probably skip the drive up (which does require carrying chains in the winter).
There’s plenty to do down at sea level, like beaches and rainforests, and we don’t think the big drive up is worth it if you can’t get out on the trail.
Getting to Olympic National Park
As you might imagine, how to get to the park depends very much on where you’re coming from.
There are two basic directions that you might be approaching the park from: the east (from the Seattle area) and the south (from Olympia or Portland).
We have an entirely separate guide to getting to Olympic National Park (including what airport to fly into), which you should read for more detail than we’re going to include in this summary.
Coming From Seattle
If you’re coming from Seattle, which we’d assume most people are, you have two basic options: drive south on I-5 through Tacoma and take the Tacoma Narrows Bridge to get to Highway 101, or take the Bainbridge Island ferry across the Puget Sound.
Generally speaking, both will take you roughly the same amount of time, but the ferry avoids traffic on I-5 south (I-5 between Seattle and Portland is the worst, we hate driving this stretch), is slightly faster if you’re going to Port Angeles first, and is a beautiful ride.
If you’re coming from out of town, we would encourage you to take the car ferry to Bainbridge Island from Seattle (the ferry terminal is here on Google Maps).
The series of large islands just off the coast of mainland Washington and the car ferries that connect them) are one of the most unique aspects of Seattle’s geography, and it’s something I think every visitor should do at least once (especially if you’re here for the outdoor activities).
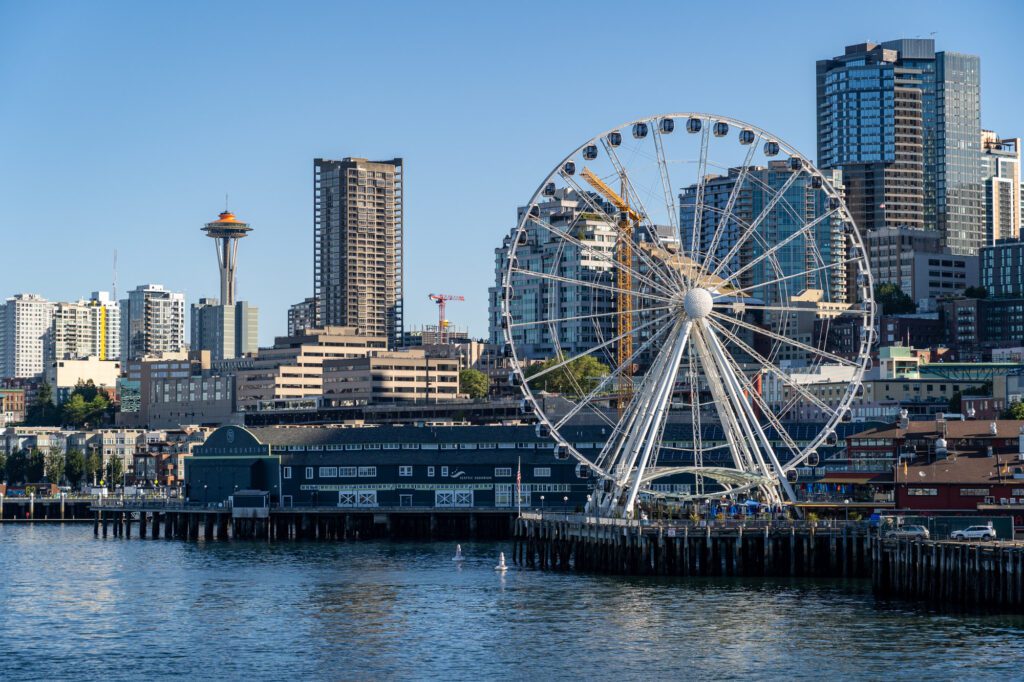
We very much view the ferry from Seattle to Bainbridge Island as part of the adventure, because taking that ferry ride on a clear day is MAGIC.
First, you get an excellent view of the Seattle skyline as you head west on Elliott Bay.
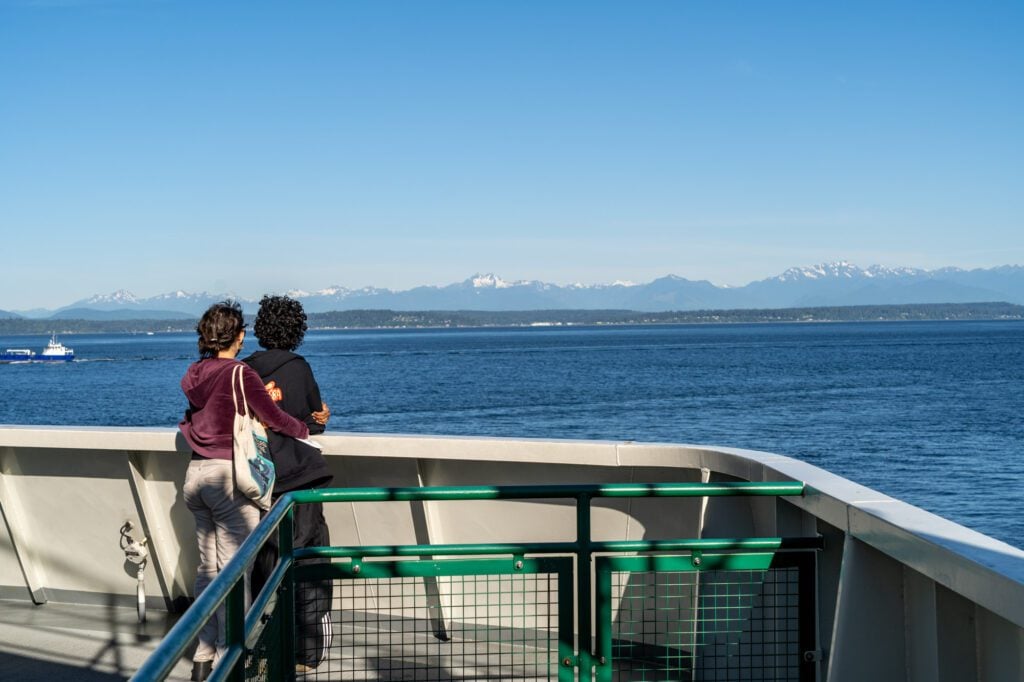
Then, you have views of all the mountains (again, on a clear day), including Mount Rainier to the south, Mount Baker to the north, and the Olympic Range straight ahead to the west.
The only downside is that it’s going to be more expensive (you can use their fare calculator here to see how much it will cost) than driving all the way around.
However, we would say that the benefits (beautiful scenic ride, unique to Seattle, avoiding I-5 traffic) clearly outweigh the downsides.
Just make sure you arrive at the ferry terminal AT LEAST 30 minutes before the departure you want, more like 60 minutes in advance on busy weekend days (check the schedule here).
There are no advance reservations on this route, so you’ll need to show up and wait in line.
Coming from the South (Olympia / Portland)
If you’re coming from the south, your best bet is to take I-5 to Tumwater and head west from there.
You’ll then hit a fork in the road, and which direction you go depends on where your itinerary is starting from.
If you’re starting in Forks, you’ll want to take Highways 8 and 12 through Aberdeen to meet up with Highway 101, which you’ll follow north past the Quinault Rainforest and Kalaloch Beach (both are worth a stop) on your way to Forks.
If you’re starting in Port Angeles, you’ll take Highway 101 north along the Hood Canal all the way to the northern end of the Olympic Peninsula, where it turns west towards Port Angeles.
Planning a Trip to Olympic National Park?
We’d Love to Help!
We have a bunch of detailed guides to visiting the Olympic Peninsula that are all based on our own personal experience exploring the park.
- All of our Favorite Things to Do in Olympic National Park
- How to Plan a Perfect Olympic National Park Itinerary (3-4 Days)
- Where to Stay in Olympic National Park: A Complete Guide
- The Best Hikes in Olympic National Park: A Helpful Hiking Guide
- Hiking the Enchanted Valley Trail: A Perfect 2-3 Day Backpacking Trip in Olympic National Park

Thank you so much for this detailed Itinerary! Best one Ive found. I am planning my July Seattle/ Olympic park trip based off all your recommendations 🙂 My Bf and I are from Florida, first time in the PNW.
We are getting to Port Angeles hotel pretty late in the afternoon (6;30-7;00ish) pm and I’m wondering if the hurricane ridge hike is do-able then. I saw sunset is >8pm in Mid july.
Thanks in advance ! 🙂
It’s probably going to be too late since the drive up to Hurricane Ridge from Port Angeles takes ~45 minutes. The hike is only a mile and a half, so if you arrive on the early end of that window (closer to 6:30) you MIGHT be able to squeeze it in. It’ll be tight, though.
We are planning to hike and stay in around the Olympic Peninsula later this summer. I love all your tips for hiking. Do you have any recommendations for restaurants that have gluten free (Celiac) options in this area?
Sure do! There’s really nothing in Port Angeles or Forks, so plan on cooking your own meals. BUT, in Sequim, you’ll find Nourish Sequim, a 100% gluten free farm-to-table restaurant with chicken pot pie and amazing desserts. Definitely stop there either on the way there or back (or both). It was our post-backpacking meal last time we were out there.
Would any of these locations on this itinerary not allow dogs?
Thanks.
Since you’re in a national park for most of this, dogs are ONLY allowed in places where you can take your car (e.g. parking lots, campgrounds, etc). The only exception is the first half mile of Rialto Beach, where dogs are allowed. No dogs on hiking trails, beaches, or anywhere else, which means it might be best to leave the pup at home if you really want to do this itinerary.
Hi,
We are staying in Forks for a few nights and are looking for restuarant suggestions. They do not need to be gluten free but if you have heard of good places there we are up for ideas.
Thanks for all this info…incredibly helpful!
Beth
We always pack our own food, so I don’t have any restaurant recommendations in Forks. Sorry! In Sequim (on your way home), definitely stop by Nourish Sequim, which is 100% gluten free!
Hi,
Any advice for doing this trip in late December? I’ll be heading there from Seattle for 4 days with 6 people. Also, I was recently diagnosed with Celiac Disease and was wondering if you have any advice for traveling and eating out gluten free safely (this is first major trip since being diagnosed)? I’m aiming to book an airbnb in Port Angeles so I can cook my own food and mostly avoid eating out.
Thanks!
Hey Tyler,
Sorry for the delay on this – we’ve been on the road and missed this comment.
For the most part, I’d say plan on cooking for yourself. There’s not a whole lot of places to eat gluten free on the Olympic Peninsula.
BUT, you should stop by Nourish Sequim (https://www.nourishsequim.com/) which is a 100% gluten free restaurant / bakery on the way out to Port Angeles. Highly recommend – we stop there every time we’re going to / from Olympic National Park.
Cheers,
Matt