How to Hike the Grinnell Glacier Trail in Glacier NP
You’re going to Glacier National Park, which means you’re probably going to want to see a glacier at some point. When in Rome, right? The Grinnell Glacier Trail was one of our favorite hikes in Glacier National Park because it leads to the foot of Grinnell Glacier. Along the way, you’ll hike right up to the Continental Divide through alpine meadows filled with wildflowers in the summer months, experience amazing views of the glacier, Lake Grinnell, and Grinnell Falls with the rocky peaks of the Garden Wall and Angel’s Wing towering behind them, and walk along the shores of two beautiful lakes.
We hiked this trail in July of 2021, and loved every single second of it. It was our favorite hike in the Many Glacier area, and if you only have time for one hike in this part of the park, this should be it (as long as you feel comfortable hiking over 10 miles with a significant elevation gain along the way).
It’s not an easy hike, but the effort is 100% worth it when you’re standing on the shore of the glacial lake with your jaw dropped in awe of the sheer natural beauty unfolding right in front of you. Meadows. Wildflowers. Waterfalls. Glaciers. Blue-green lakes. This hike has everything you’d expect from a high elevation hike in the Rocky Mountains.
If you’re trying to decide whether or not the hike up to Grinnell Glacier is right for you, you’re in the right place. In this guide, we’ll go over everything you need to know to hike the trail safely and confidently. By the end, you’ll know how to get to the trailhead (and where to park), what route to take, and exactly what to expect along the trail.
Hey you! Planning a trip to Glacier National Park? Don’t miss our other Glacier travel guides to help you plan an incredible trip.

Disclaimer: Some of the links in this post, like hotel links, are affiliate links, meaning at no additional cost to you, we make a little bit of money if you click through and book. That being said, we would never recommend something to you that we don’t stand behind 100%.
Trail Details
This trail guide is written for hikers starting at the Grinnell Glacier Trailhead, and hiking up to the foot of the glacier without using the boat shuttles across Swiftcurrent Lake and Lake Josephine.
You can also do this hike starting at the Many Glacier Hotel, and the trail details are roughly the same. The parking lot is bigger, too. The trail from the hotel skirts the east side of Swiftcurrent Lake – the side that the hotel is on – before meeting up with the other trail at the north end of Lake Josephine. From there, the hikes are exactly the same.
Distance: 11 miles
Elevation Gain: 2,600 feet
Trail Type: Out-and-Back
Trailhead Location: Grinnell Glacier Trailhead or Many Glacier Hotel
Highlights: Spectacular views of Grinnell Glacier from up close and personal. Plus, great views of Grinnell Lake and the surrounding valley on the way up!
Starting Altitude: 4,500 feet
Highest Altitude Reached: 6,100 feet
When to Hike to Grinnell Glacier
Like most hiking trails in Glacier National Park, particularly those at higher elevations, this trail is completely inaccessible for roughly nine months of the year. From fall to spring (exact timing depends on the year), the road to Many Glacier is completely closed to vehicle traffic.
The best time to hike this trail is going to be from late June to early September, which is when the trail will be clear of snow, and the weather should be warm. Plus, the days will be long, so you’ll have plenty of daylight to cover the 11 miles you’ll be hiking to reach Grinnell Glacier.
Getting to the Trailhead
The Grinnell Glacier Trailhead is located along the main road coming into Many Glacier, between the Many Glacier Hotel and the Swiftcurrent Motor Inn. You’ll enter the park from the east (the town of Babb is the gateway), drive about 15 miles to reach the trailhead, passing the Many Glacier entrance station along the way.
The road from Babb to Many Glacier is constantly either under construction (it was a one-lane road when we passed through, which caused a 30+ minute delay), or in terrible, potholed condition. Plan on it taking longer than you think it will.
There are flush toilets AND pit toilets (though the pit toilets were closed when we were there) at the trailhead. The ranger station is also just up the road, so you can walk over and check if there are any trail advisories you need to know about before hitting the trail.
If you’re staying inside the park – either at the Swiftcurrent Motor Inn or Many Glacier Campground – the trailhead is walkable from where you’re staying, so you don’t have to worry about parking!
If you’re staying at the Many Glacier Hotel, there’s an alternate first part of the trail that meets up with the main trail at the far end of Swiftcurrent Lake, so it’s also walkable!
If you’re coming from outside the park, read on.
The Parking Situation at the Trailhead
Our experience hiking in Many Glacier was very different from hiking along Going-to-the-Sun Road. Along Going-to-the-Sun road, which is one of the most popular parts of the park and sees an incredible number of visitors every day – trailheads were routinely full by 6:30 am.
In Many Glacier, we found that the timetable was shifted back by 60-90 minutes, so you could reliably find parking at the trailheads until about 8:00 am (even later on weekdays).
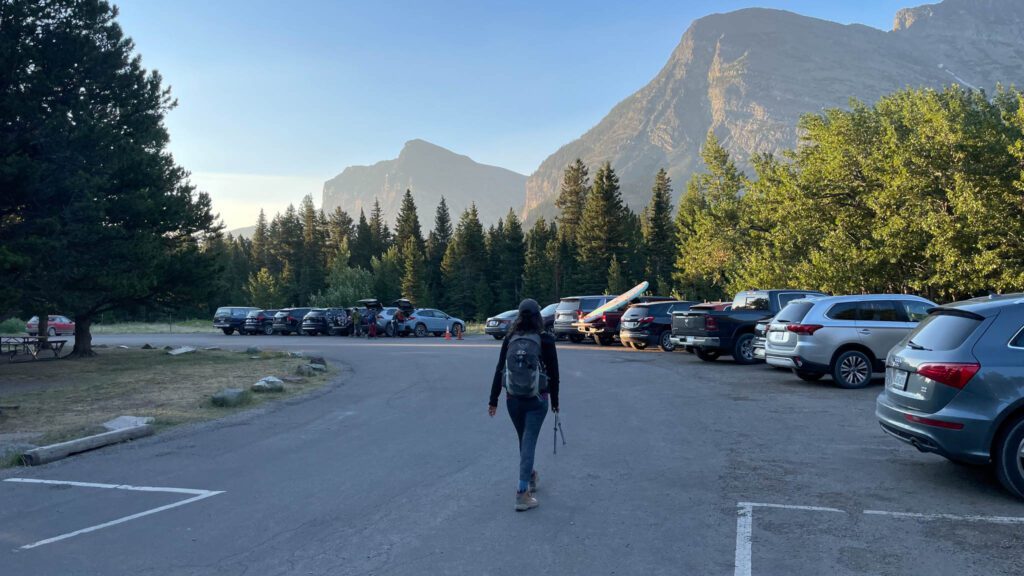
If you want to get a spot in the lot at the trailhead, get there before 8:00 am. Particularly on weekends (Friday to Sunday), when the number of visitors surge.
If you arrive between 9:00 and 10:00 am, you’ll likely have to park either along the road, or in the lot outside of the Swiftcurrent Motor Inn a quarter mile away (ish).
If you arrive after about 10:00 am, park in the lot behind the Many Glacier Hotel and take the connector trail from there. The lot is much bigger, so you have a better shot at getting a parking spot after 10:00 am.
The Boat Shuttle from the Many Glacier Hotel
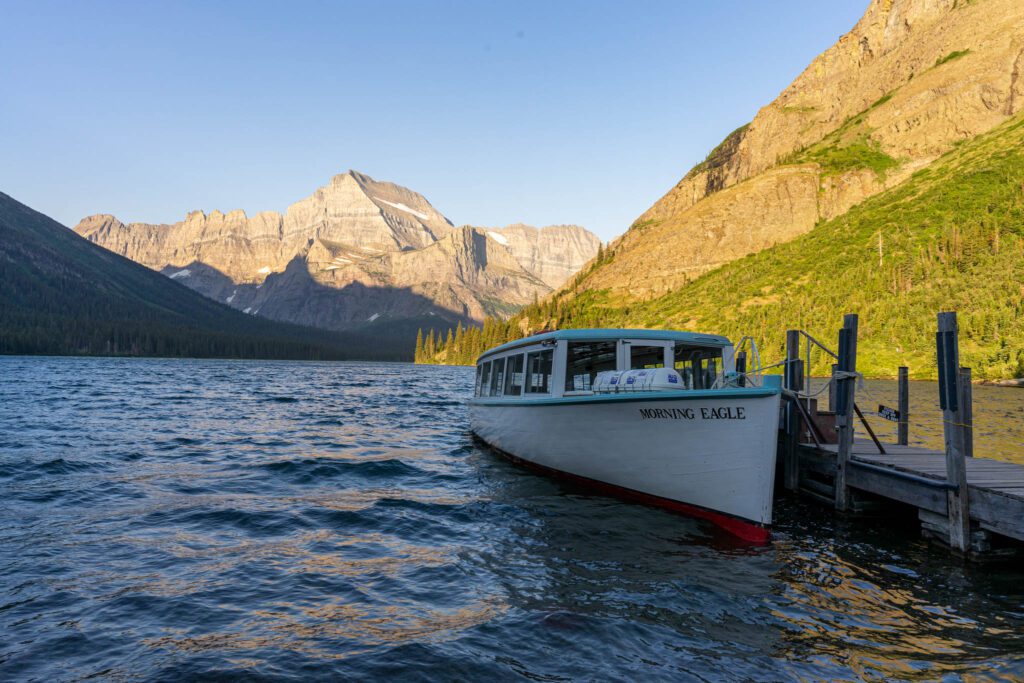
The boat shuttles – there are two of them – cut off roughly 3.5 miles of roundtrip hiking. You pick up the boat from the dock at the Many Glacier Hotel, take it across the lake, get off, re-board a second boat, and get dropped off at the far end of Lake Josephine. However, we wouldn’t recommend using the boat shuttle for two reasons. One, it’s expensive. It’s $35 per person round trip. Two, it cuts 3.5 miles of the easiest hiking on the trail.
The part of the trail you skip is detailed below in the “Lakeshore” section, and it’s essentially flat, first following the shore of Swiftcurrent Lake, then moving along the west side of Lake Josephine to meet up with the trail from the boat dock. Only at that point – where the boat drops you off – does this hike get difficult.
At the end of the day, you cut 3.5 miles and 100 feet of elevation gain by taking the boat. If that seems worth it to you, do it! But we chose not to, and would recommend the same for most people.
Tips For Your Hike
Here are some things to remember before you hit the trail so you can both hike safely, and respect the place you’re exploring.
- Grizzly Habitat. This hike passes through prime grizzly bear habitat. In fact, while we were in Glacier, the trail was closed for several days due to grizzly bear activity along the trail. That being said, we saw exactly zero bears on this trail. Make sure to carry bear spray – and more importantly, know how to use it. But bear spray isn’t the only thing you can do to keep you and the bears safe. Make plenty of noise as you’re hiking – either through conversations with your fellow hikers, or by clapping your hands and yelling. I like to loudly freestyle sing to the bears as we walk – don’t worry, I tell them to growl twice if they want me to stop torturing them with my songs. My latest masterpiece was a version of jingle bells, except we were dashing through the forest, looking for some bears. Unfortunately, bear spray is expensive (I’m convinced there’s a bear spray lobby that keeps prices high and competition low), but you can rent it from Apgar Village if you don’t want to buy it. Remember – you can’t bring bear spray on a plane, so you’ll have to buy it here if you’re flying in (rent it in the park, or buy it at the REI in Kalispell).
- Fees and Passes. To enter the park through the Many Glacier Entrance, you’ll need to pay (unless you already entered the park via another entrance, then just display your receipt or park pass in your car). It’s $35 to enter the park, and your fee is good for seven days. Investing in an Interagency or America the Beautiful Pass ($80), which covers all federal recreation areas including National Parks and Forest Service land, is worth it if you plan on visiting at least three National Parks over the course of the next 12 months. Buy one here at REI before your trip, and show ID with it at the park entrance station.
- Stop by the Ranger Station. The Ranger Station is a quarter of a mile up the road from the trailhead, and you should park and walk over before hitting the trail to check if there’s anything you need to know before starting your hike. They have updates posted on the bulletin board. If you didn’t check, you wouldn’t know if the trail is closed past a certain point (it was when we were in the park for a three to four day period).
- Get an Early Start. This is the most popular trail in Many Glacier (for good reason, to be honest), which means there are tons of people on this trail. We started at 6:30 am and saw less than 30 people on the way up. On the way down? We saw literally hundreds of hikers of all ages and experience levels. It’s a slog on the way down when you have multiple groups of 15-20 people lined up climbing up the trail. Remember that hikers heading uphill have right of way, so you’ll need to find a safe spot to pull over to let them pass!
What to Pack for Your Hike
This hike is strenuous, and we saw a lot of people who were… underprepared.
Any hike over 10 miles means you’re going to need two liters of water, at the bare minimum. We each carry two 1L Platypus Collapsible Water Bottles, which we swear by – they’re truly the best for hiking because they’re so light! On longer hikes, I carry my 3L Hydration Pouch for some extra water to split with Alysha.
The most important hiking gear, after water, is SNACKS. We hike with a mix of sweet snacks and salty snacks in our bags because sometimes you need a little bit of salt on the trail. This essentially comes down to personal preference, but here are some of our favorites that you’ll usually find in our packs: Inka Crops Chili Plantain Chips. Spicy Pistachios. Tosi Bars. Frooze Balls (we discovered these in New Zealand, and they just came over to the US!). Honey Stinger (gluten free) waffles. Taos Mountain Energy Bars and Picky Bars.
This hike climbs (and then descends) a lot, and some of it is on uneven, rocky terrain. Proper footwear is essential. Don’t do this hike in tennis shoes – you will probably regret it. Get yourself a pair of sturdy hiking boots so you have some ankle support. Alysha has the Columbia Newton Ridge boots and loves them – they’d be a great first pair of boots because they’re such a great value. I swear by Salomon hiking boots myself.
What about trekking poles? We wholeheartedly believe that everyone should hike with trekking poles. Years ago, when we were just young whippersnappers, we thought they were lame. “They’re for old people and, apparently, Germans” we said as we hiked our way through New Zealand and encountered an insane number of Germans of all ages using them. We’d careen down the trail, descending fast and furious, without a care in the world. Then, one day, our knees and ankles started to hurt after those steep descents, and we turned to each other and said “are we… getting old?!” Now, we take them on every hike, especially if there’s a lot of climbing. We have these REI trekking poles, which we like because they’re lightweight and sturdy (though the screws in the clamps tend to get all wonky over time).
Here are some other things to pack for this trail.
- A solid daypack (ideally around 20 liters). Preferably with a good hip belt. We’ve used the REI Trail Pack 25, which is probably the best affordable day pack around right now. Alysha loves her Osprey Tempest 20 – a pack made specifically for women’s frames (the men’s version is the Talon 22) – which is worth the extra investment for a better hip belt, better back panel ventilation, and Osprey’s famous lifetime guarantee. I have a Deuter 30L daypack to carry my camera gear, and I would buy it again and again.
- Layers. The wind coming off the glacier is frigid. When you’re all sweaty from the climbing and you sit down at the base of the glacier, you’re immediately going to be freezing. Bring an extra fleece layer and a rain jacket, at the very least.
Hiking the Grinnell Glacier Trail: A Complete Trail Guide
Now, let’s talk about the hike itself. We’re going to give you a bit of a play-by-play of the hike based on our personal experience hiking the trail in July of 2021 so that you know exactly what you’re getting yourself into, and what to expect along the way.
To make it easier to digest, we’re going to break this hike into five parts. They are:
- The Lakeshore
- The Climb to the Valley
- The Final Ascent
In the sections below, you’ll find a trail description of each part, along with the distance covered and elevation gained in each section to help you understand what the hike looks like when you’re actually out there.
Note: The reason that the elevation gain numbers in the individual sections below don’t quite add up to the one in the trail details section above is the fact that there’s a lot of up-and-down along the way. The numbers in the sections below give you a good approximation of the intensity of each section, but aren’t exact because I don’t have a good way to measure that up and down in each individual section of the hike.
The Lakeshore
Distance Covered: 2 miles
Elevation Gain: 100 feet

This part of the hike is a great warm up for the rest of the hike. You’ll leave from the trailhead and immediately enter a dense forest. The trail meanders through the forest, crossing a bridge over the creek, and then meeting the southwestern shore of Swiftcurrent Lake.
The trail winds around Swiftcurrent Lake to its southwest tip, which is where the boat dock is. When you reach the boat dock at 0.7 miles into the hike, you’ll also reach a trail junction. You want to head right, up to Lake Josephine. If you are coming from the Many Glacier Hotel, this junction is where you meet the main trail – heading straight here takes you around the lake to the hotel.
The short 0.2 mile connector trail between Swiftcurrent Lake and Lake Josephine climbs to a point, then descends back to the starting level. At the end of that descent is the Lake Josephine boat dock, which is where you would pick up the second boat shuttle to cross Lake Josephine if that was the option you chose.
Like I said above, the trail here is so easy that you’re not really saving much effort by paying the $35 for the boat shuttle. But you may feel differently.
After you reach Lake Josephine, the trail follows the north shore (that’s the right side when you’re hiking). The trail is basically a set of rolling hills, gently climbing and falling all the way around the lake, ending at the base of the climb at the northwest corner of Lake Josephine.
There’s a trail junction here – up and to the right is the trail you want to follow, which takes you up towards the glacier. The left fork takes you down to the second Lake Josephine Boat Dock, which you can see from the trail once you start climbing.
The Main Climb Into the Valley
Distance Covered: 2.5 miles
Elevation Gain: 1,200 feet
This part of the trail is where you do the bulk of the climbing on this hike. Take some time before you start the climb to grab a snack, drink some water, and shed some layers.
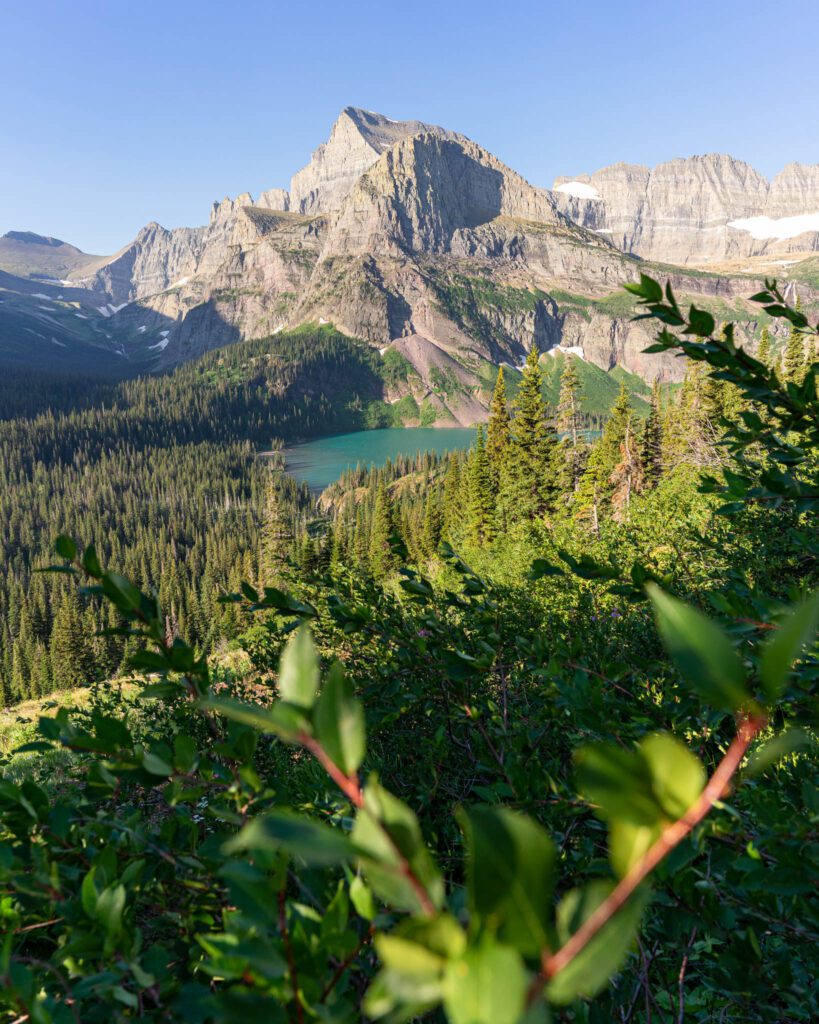
The upside of the climbing? The views over blue-green Grinnell Lake, the countless waterfalls, and the Angel Wing towering thousands of feet above the lake are nothing short of spectacular. We stopped roughly every 90 seconds to “ooh” and “ahh” over the lake, and took many different versions of essentially the same picture from a very slightly different angle. It reminds me a lot of the Canadian Rockies, which is really no surprise since you’re mere miles away from the Canadian border.
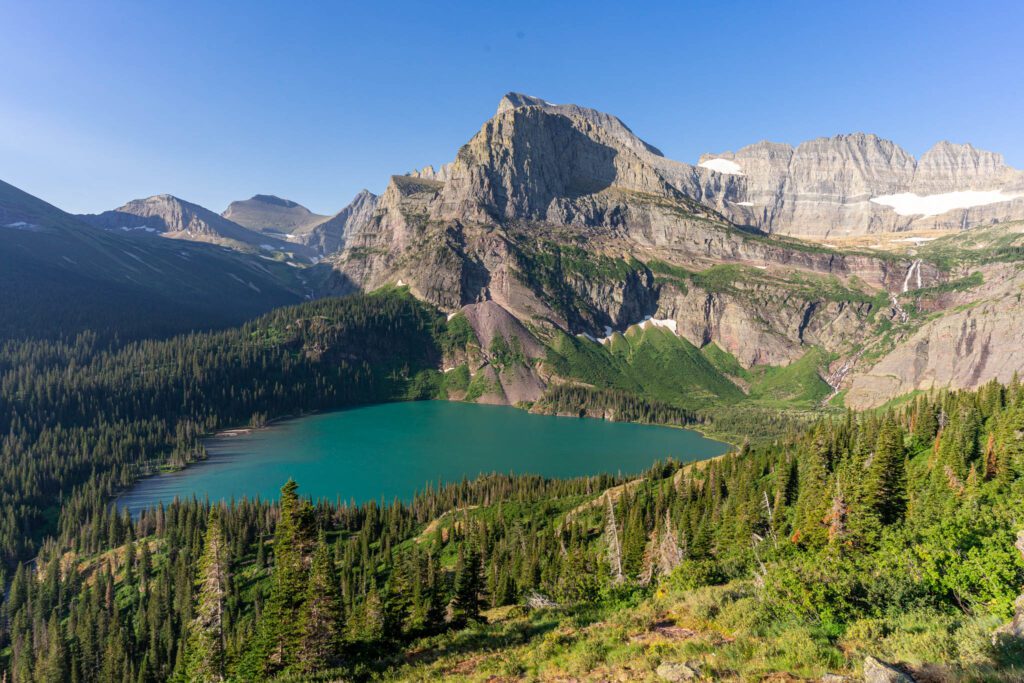
At 2.8 miles into the hike – just over halfway to the glacier – you’ll reach a set of switchbacks that climb pretty aggressively. This is the part of the hike where you’ll start to notice the landscape changing from forested hillsides to rocky, to alpine terrain. In the summer, the wildflowers here are gorgeous.
At the top of the switchbacks, continue climbing. You’ll pass a small stream cascading down the hillside before arriving at the main attraction on this part of the trail – the waterfall – which is at 3.5 miles in.
We went into this hike completely unaware that there was a waterfall that you had to pass through along the trail. Later in the summer, it slows to a smaller obstacle, but in the early summer the waterfall cascades off of a ledge right above the trail, soaking anyone who passes under it.
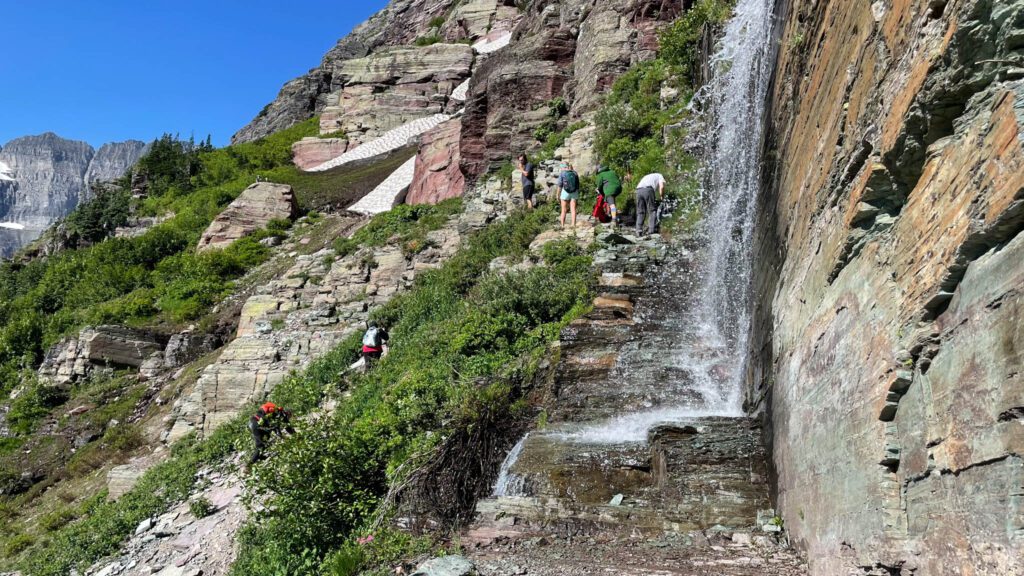
Well, that’s what we thought anyway. My arm and leg got a little bit wet, but it’s not nearly as bad as it looks. We were most concerned about the rocks under the waterfall being slippery, but were pleasantly surprised that it was not at all a problem. There is a trail that people had forged that heads down and to the left, but it’s rocky, slick, and steep, and we saw a few people having issues navigating it.
Our advice? Put on a rain jacket if you have it, put your electronics away, and take the main trail through the waterfall.
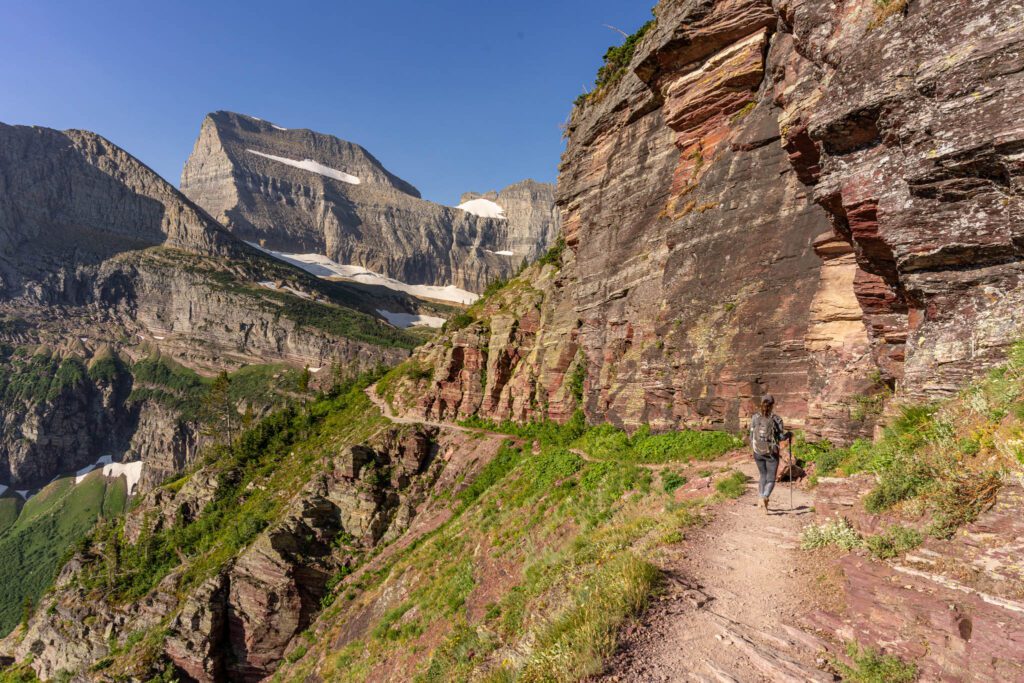
From here, the climb gets steeper and rockier, turning into a narrow, exposed ledge above the valley below for just a hot second before widening out again. The views down to the lake and the cascading waterfall coming off of the glacier – Grinnell Falls – continue to be spectacular from here.
The trail levels out a bit at 3.8 miles, and continues climbing and falling gently before hitting a single switchback that puts you in a clearing where you’ll find a pit toilet and several benches. Take a second to relax, refuel, and then you’re ready for the final ascent to the glacier.
The Final Ascent
Distance Covered: 1 mile
Elevation Gain: 500 feet
This short, steep, and rocky section of the hike consists mainly of steep, rocky steps carved into the hillside. And switchbacks. Take your time, and you’ll be fine. There’s likely going to be a cold wind coming off the glacier, which you’ll appreciate since this part of the trail is pretty exposed – no shade in sight.
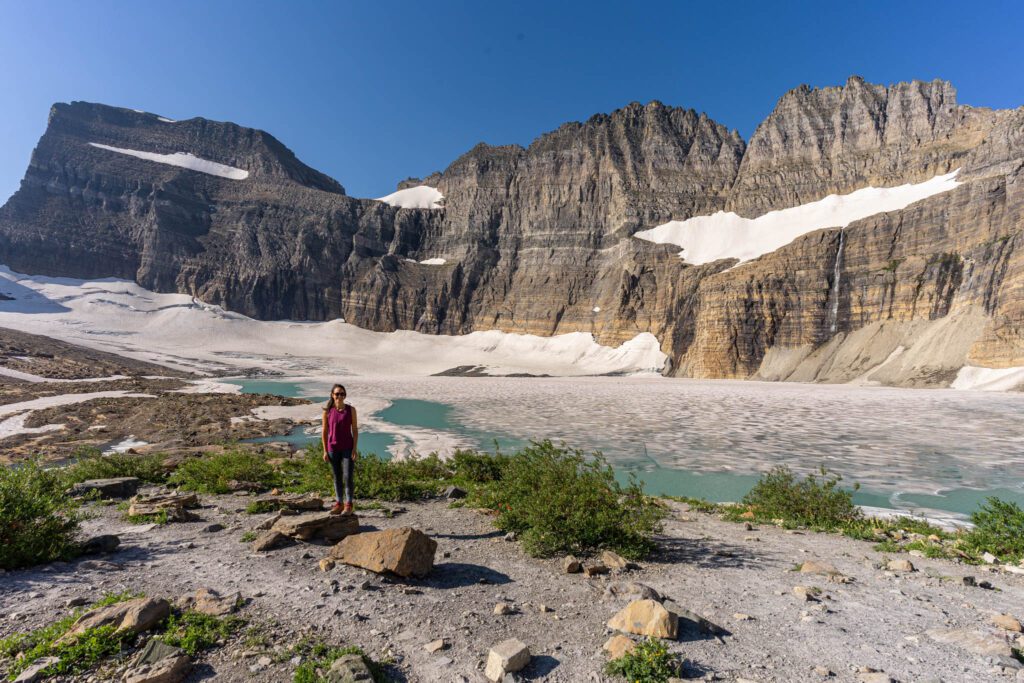
At the top, you’ll immediately be in awe of the blue-green glacial pool at the foot of a towering waterfall, with Grinnell Glacier in all its glory. Rising thousands of feet above the lake is the Garden Wall, which marks the Continental Divide. If you already did the Highline Trail and the Grinnell Glacier Overlook offshoot, you can look up and to the right to see that vantage point (usually you’ll see a few people up there, but they’ll be tiny).
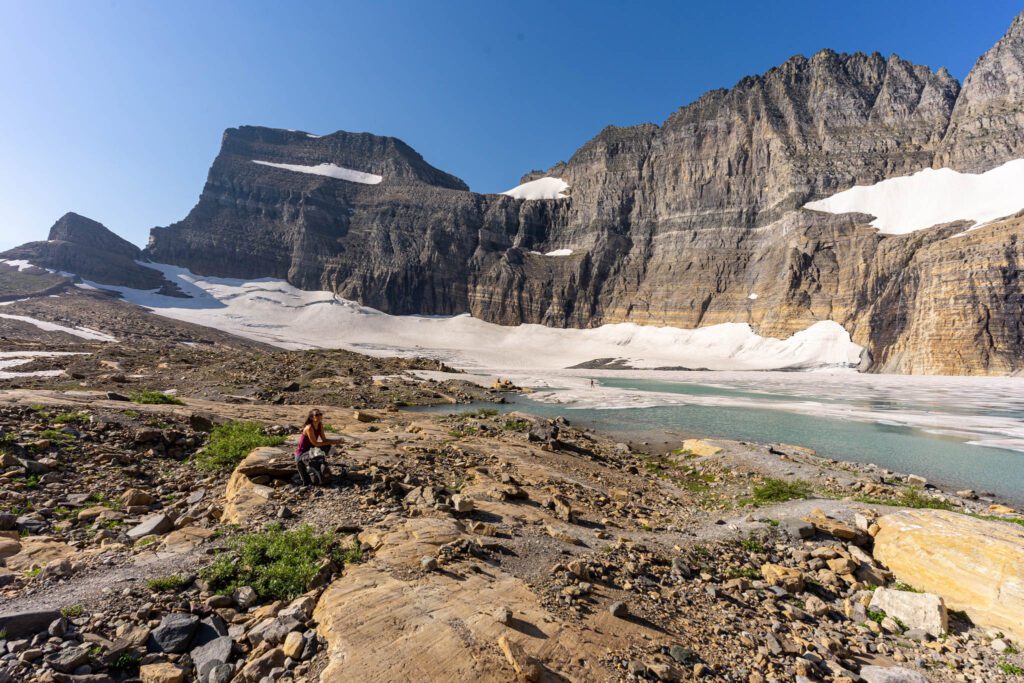
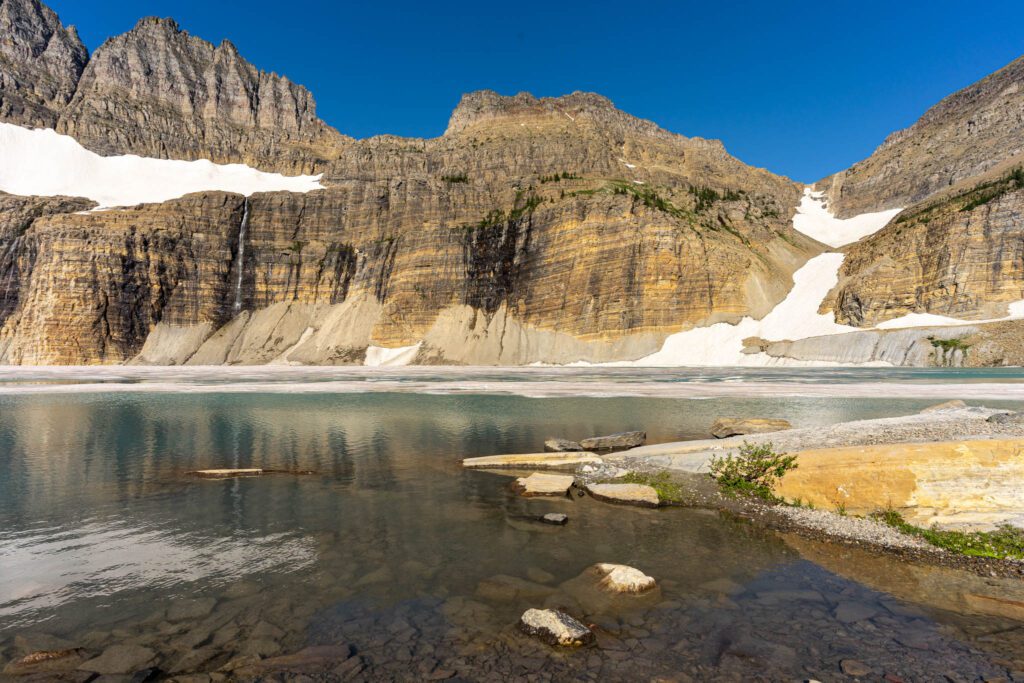
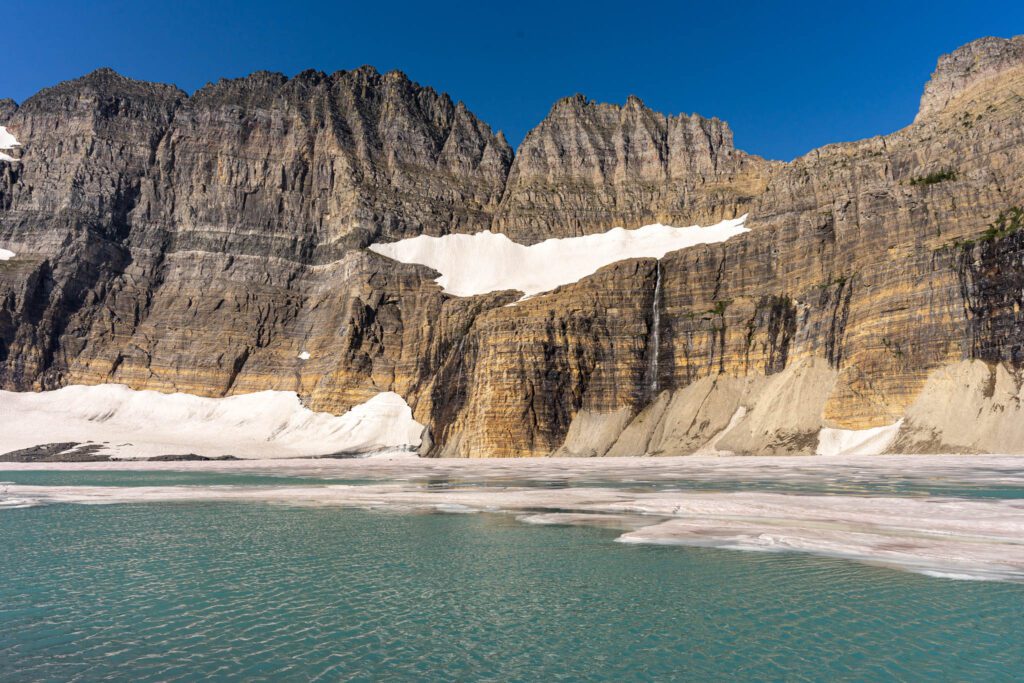
Unfortunately, the glacier is shrinking at an alarming pace as the weather gets warmer and drier year after year.
Head down and to the left to the shore of the lake, find a good vantage point, and take it all in. The trail returns the way you came when you’re ready to start the descent.
Hey you! Planning a trip to Glacier National Park? Don’t miss our other Glacier travel guides to help you plan an incredible trip.
Thanks for sharing this post. Going in June and can’t wait. I hope our age doesn’t hinder us (close to 60).
Enjoy, Lene! Hope you’re able to do it – this is one of our favorite hikes of all time!
Hi! We will be there the first week of June. Will we be able to hike at least part of the trail (at least to where we can take pictures overlooking Lake Grinnell)? Thanks!
Hey Crystal – the first week of June is a little early, I think, but it totally depends on the year. Unfortunately, it looks like this year is going to be a big snow year, but I’d keep track of how things are looking as your trip gets closer. Either way, it’ll be close. Cheers!