How to Hike the Highline Trail in Glacier National Park
Following the Continental Divide that runs through Glacier National Park and the rest of the Rocky Mountains, the Highline Trail is a beautiful hike with breathtaking views around every single bend in the trail. We have done a lot of hikes over the course of the last couple of years when we’ve spent summer and fall living in our van road tripping around the western United States (no, not a fancy-schmancy Sprinter, a temperamental Honda Odyssey named “Homer”), and the Highline Trail in Glacier National Park is on our list of the best hikes in the country.
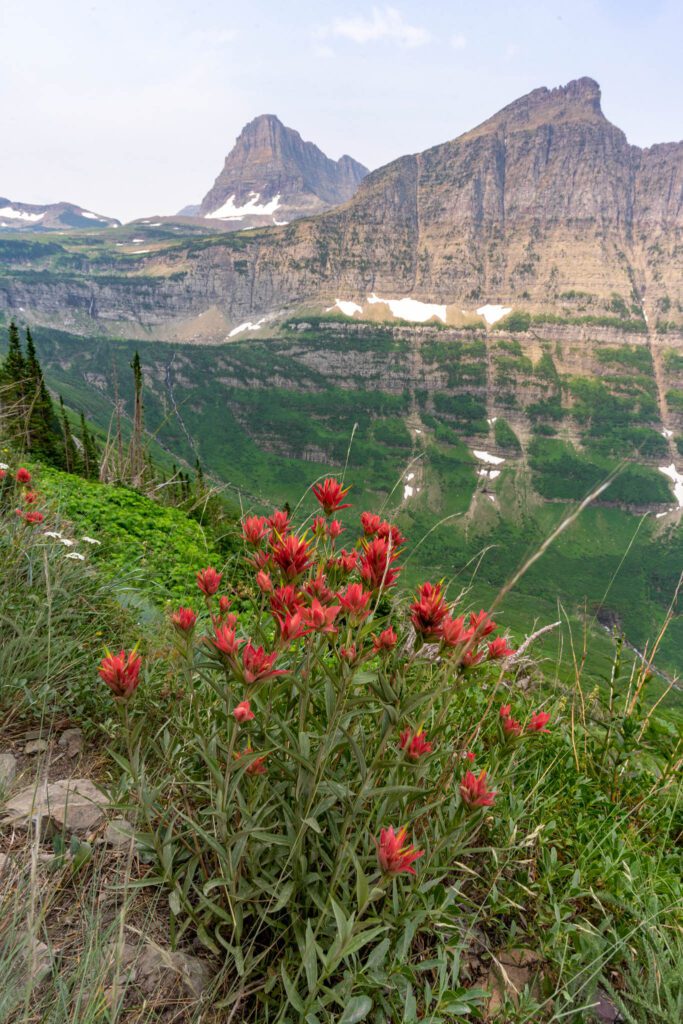
Over the course of 11 miles, you’ll get to take in sweeping vistas of the rocky, snow-capped peaks that have made Glacier famous, lush green hillsides and blooming wildflowers in the summer, and a unique backcountry Chalet. The best part? This hike is long, but it’s really not that difficult. The reward:effort ratio is very, very high here.
In this guide, we’re going to give you the details and logistics you need to know so that you’re prepared for the hike, and know exactly what to expect along the trail. We’ll start with some logistics – like getting to the trailhead (which is actually kind of complicated here) – and end with a play-by-play of the trail, broken up into easy-to-digest sections.
By the end, you’ll be ready to hit the trail and spend most of a day in awe of the beauty of the Rocky Mountains and the fact that you’ve had the good fortune to find yourself hiking the Highline.
Hey you! Planning a trip to Glacier National Park? Don’t miss our other Glacier travel guides to help you plan an incredible trip.
Disclaimer: Some of the links in this post, like hotel links, are affiliate links, meaning at no additional cost to you, we make a little bit of money if you click through and book. That being said, we would never recommend something to you that we don’t stand behind 100%.
Trail Details
This trail guide is written for hikers doing the thru-hike starting from Logan Pass, hiking out to the Granite Park Chalet, and then descending to the Loop.
You can also do this as an out-and-back from the Logan Pass Visitor Center, which we will cover in a section at the bottom. It’s a slightly longer hike with more elevation gain, but it’s a decent option if you only have one car, don’t want to (or can’t) take the shuttle, and aren’t comfortable with hitchhiking.
Distance: 11.2 miles
Elevation Gain: 1,450 feet
Trail Type: Point-to-point
Trailhead Location: Logan Pass Visitor Center
Highlights: Amazing views of Going-to-the-Sun Road and the surrounding mountains, the Garden Wall, and a backcountry chalet.
Starting Altitude: 6,650 feet
Highest Altitude Reached: 7,300 feet
When to Hike the Highline Trail
Like most hiking trails in Glacier National Park, particularly those at higher elevations, this trail is completely inaccessible for roughly nine months of the year. From fall to spring (exact timing depends on the year), Going-to-the-Sun Road is closed to vehicle traffic.
Even if you could get up to Logan Pass at those times, this trail would likely be covered in snow and ice, which makes the narrow section at the beginning even more harrowing.
The best time to hike this trail is going to be from July to early September, which is when the trail will be clear of snow, and the weather should be warm. Plus, the days will be long, so you’ll have plenty of daylight to cover the 11-15 miles you’ll be hiking.
Getting to the Trailhead
Whichever way you choose to do it, you should start this hike from the Logan Pass Visitor Center up on the Continental Divide. You basically have two options to get there: drive yourself, or take the park shuttle from either the Apgar Visitor Center, or the St. Mary Visitor Center.
Driving to Logan Pass
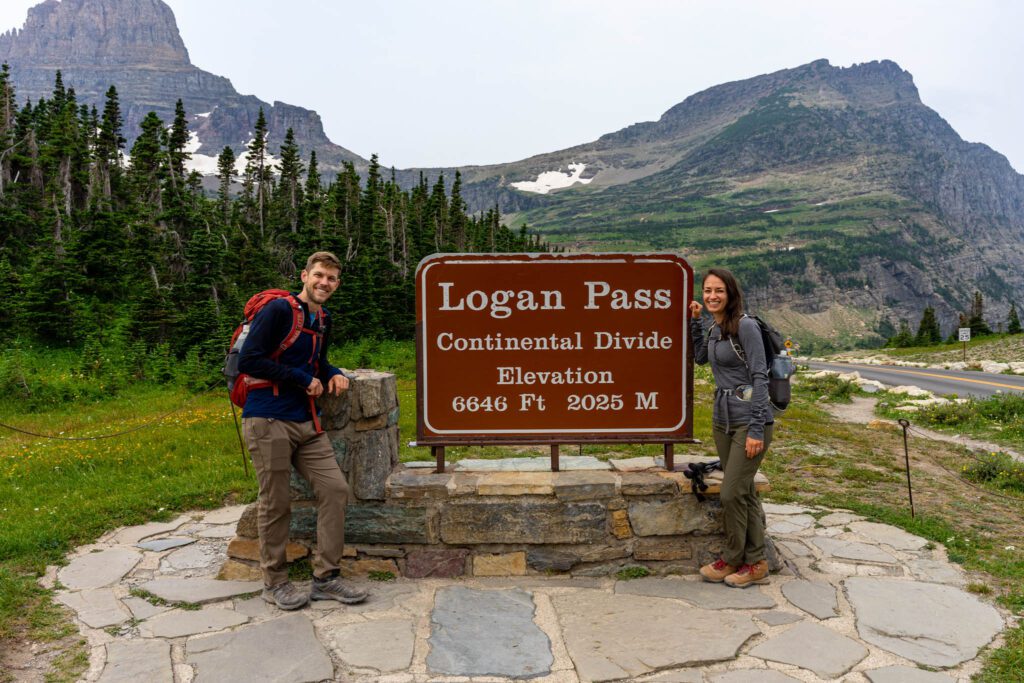
If you decide to drive yourself, remember that it’s a 3,500 foot climb (slightly less if you’re coming from the east) up to Logan Pass, which sits at 6,600 feet above sea level. You’ll be driving along Going-to-the-Sun Road, which is one of the most scenic drives in the country, but it’s not a particularly easy drive. It’s slow-going, crowded, steep, and narrow.
We drove up once, and then decided to use the shuttle in the future (our van – a 2006 Honda Odyssey named “Homer” – was not terribly pleased about the climb). It’s going to take just over an hour to drive from either Visitor Center up to the pass, more if you’re staying outside the park.
The other thing to keep in mind is that, at least in 2021 when the park required a permit to enter between 6:00 am and 5:00 pm, the large parking lot at Logan Pass is completely full by about 6:30 am on summer days (it’s worse on weekends, but only marginally). That means you’re going to need to get up SUPER early to get a spot in the parking lot. There’s not a whole lot of options nearby if you miss out on getting a spot. By about 9:00 am, they completely close the parking lot to new cars, and you won’t be able to even pull in to see if you can snag a spot from someone leaving.
If you do choose to drive yourself, get there as early as humanly possible to get a parking spot.
The other thing to keep in mind if you drive yourself is getting back to your car. This guide is written for the one-way hike that starts at Logan Pass and ends at the Loop. That means you’ll need to either have a car at each trailhead, or you’ll need to hop on the shuttle at the Loop to get back up to Logan Pass (in 2021, this is more complicated because the shuttle requires reservations in advance, which you can read about here).
You can also hike out to the Granite Park Chalet, then back the way you came, ending at Logan Pass. It’s a significantly longer and harder hike that you can read about in a section near the bottom of this guide.
Taking the Shuttle
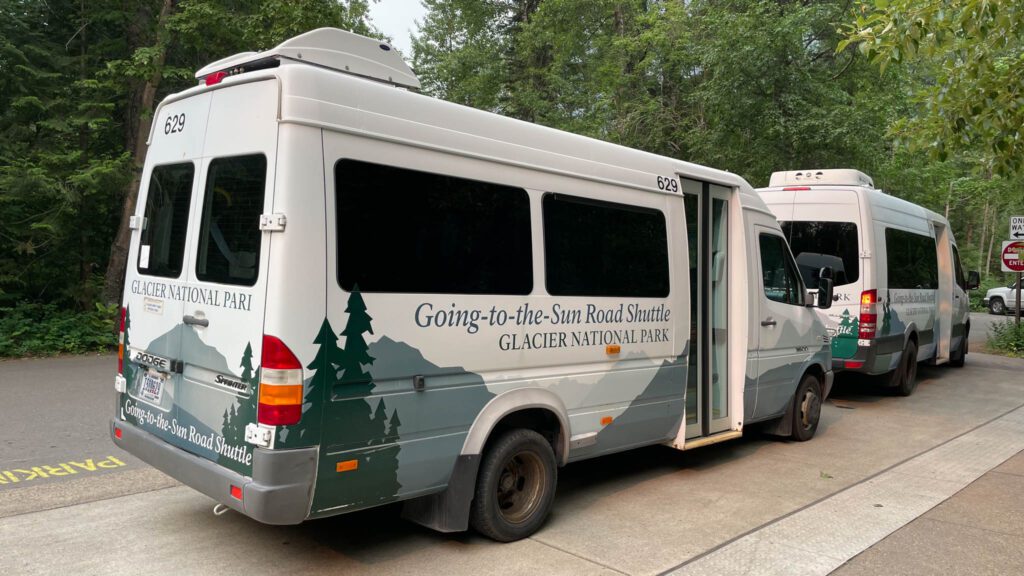
This is by far the best way to hike this trail. You don’t have to worry about parking or waking up at the crack of dawn, and you can sit back and enjoy the ride as you drive up Going-to-the-Sun Road.
For the record, we do think you should definitely drive up and over Logan Pass at some point during your trip to Glacier National Park, but it shouldn’t be the day you do the Highline because it’s going to take you most of the day to complete the hike, and you’ll be exhausted by the end. Save the scenic drive for another day, when you’ll have more time and energy to give some of the stops along the way the attention they deserve.
You can pick up the park shuttle at either Apgar Visitor Center or St. Mary Visitor Center – it really depends on where you’re staying. There’s a shuttle line that runs from either Visitor Center, up to Logan Pass, and back.
In 2021, the park shuttle requires advance reservations in July and August. You will need to pick an hour-long timeslot to start at the Visitor Center, and when you show up during that hour you will get a wristband that is good for the rest of the day. You do need to show up at your specific time slot, otherwise you won’t get on. For example, if you reserve a ticket for 10:00 am-11:00 am, you can show up anytime between 10:00 and 11:00 to get on the shuttle. If you show up at 11:30, you’re out of luck.
Three quarters of the tickets were released on June 1st, and the rest are released on a rolling basis two days in advance at 8:00 am Mountain Time. That means that if you want a shuttle ticket for July 22nd, you need to get on Recreation.gov at exactly 8:00 am on July 20th to try to snag one. They sell out in minutes since there’s not a whole lot that are left by the two day window (we saw mostly 8-12 tickets available for each time slot). Read more about the shuttle system here – there are some important details to know, and we can’t cover them all here (especially because they’re changing constantly).
Unfortunately, we weren’t on top of it enough to get shuttle tickets in advance. However, we have some good news for you if you’re in the same boat. You can ride standby, which means you can hop on the shuttle from one of the Visitor Centers if they have extra seats after everyone with an advance reservation has boarded. We talked to the ranger the day before we took the shuttle, and she said that if you show up around 6:30 am to ride standby, you’re likely to get on a shuttle that leaves before 8:00 am.
Here’s how it works: you show up, get in line, the person administering the shuttle wristbands calls out for people who have reservations, they get on, then they start filling extra seats with the standby passengers.
We showed up at 6:20 am to get in line, and were the second group in line. It was a Tuesday, and the park employees did mention that it’s a little more busy on the weekends. Maybe show up a little earlier if it’s a Saturday or Sunday.
Hiking the Highline: A Complete Trail Guide
Now that we’ve got all the logistics out of the way, let’s get into the trail itself. This trail is one of the best hikes in Glacier National Park, if not the country. You’ll be traversing the Continental Divide, with the Garden Wall towering over you on your right, and the valley and rocky peaks on your left.
To make it easier to digest, we’re going to break this hike into five parts. They are:
- The Narrow Part
- Traversing the Mountainside
- The Pass
- Traversing the Other Mountainside
- The Descent
In the sections below, you’ll find a trail description of each part, along with the distance covered and elevation gained in each section to help you understand what the hike looks like when you’re actually out there.
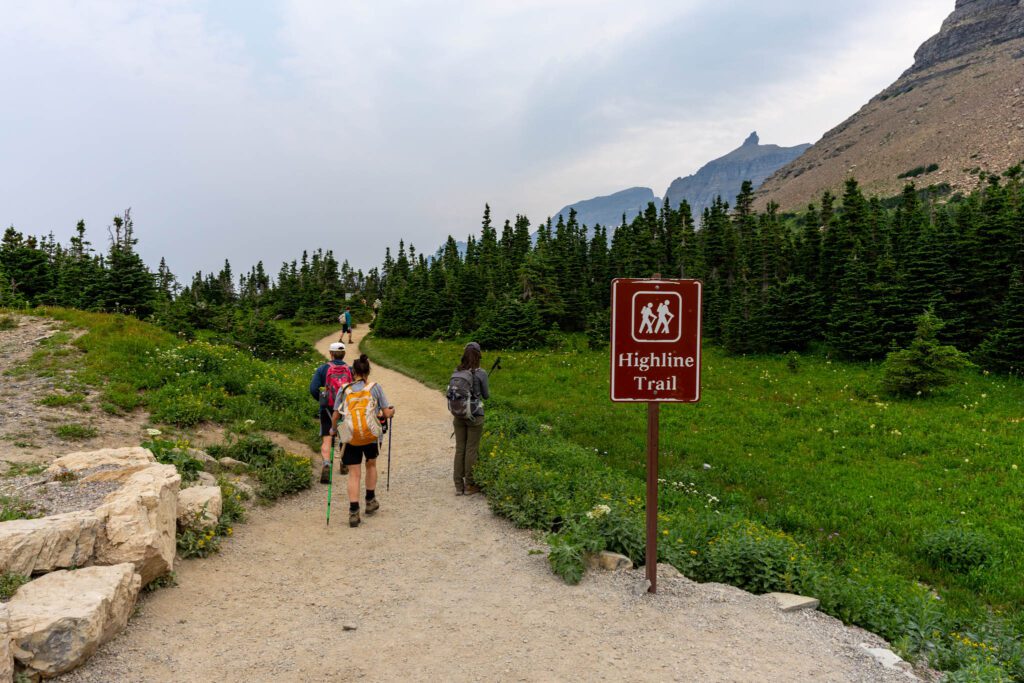
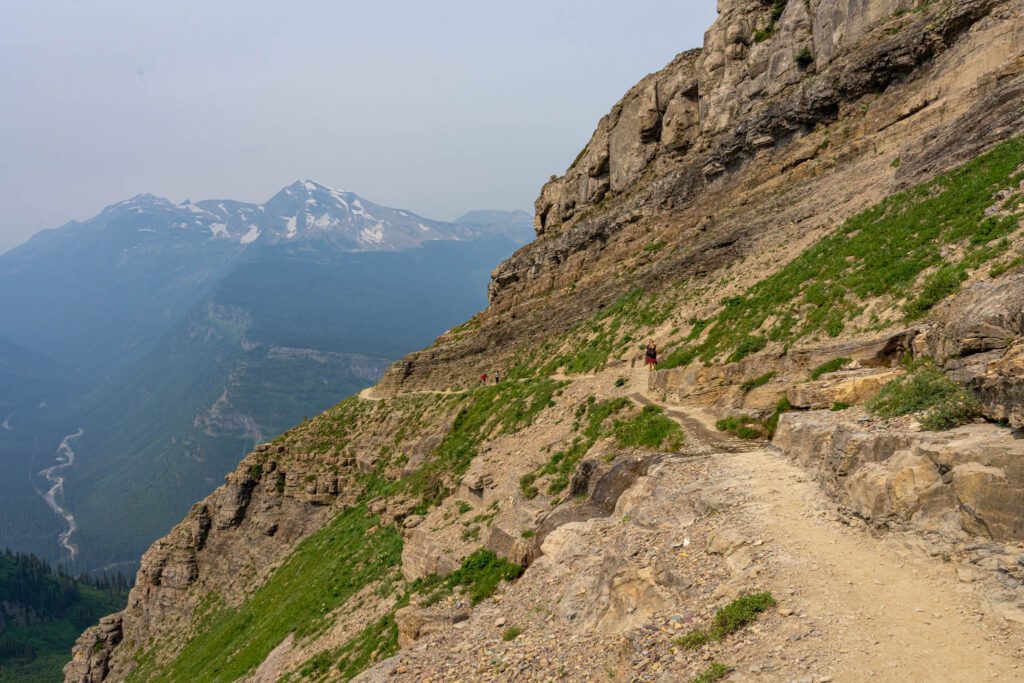
The Narrow Part
Distance Covered: 0.5 miles
Elevation Gain: 100 feet
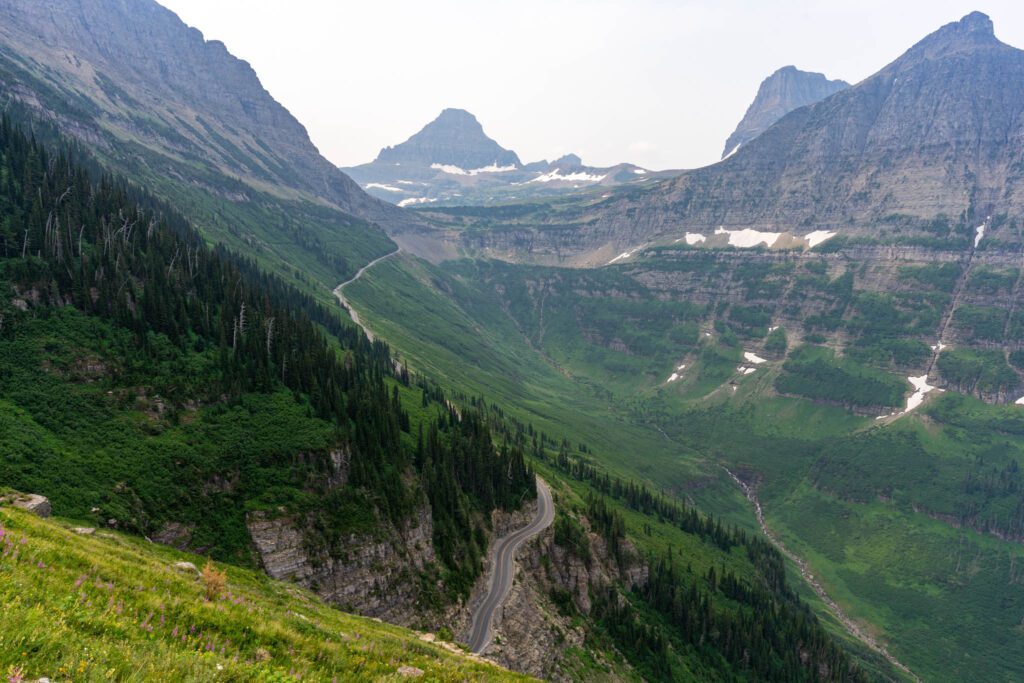
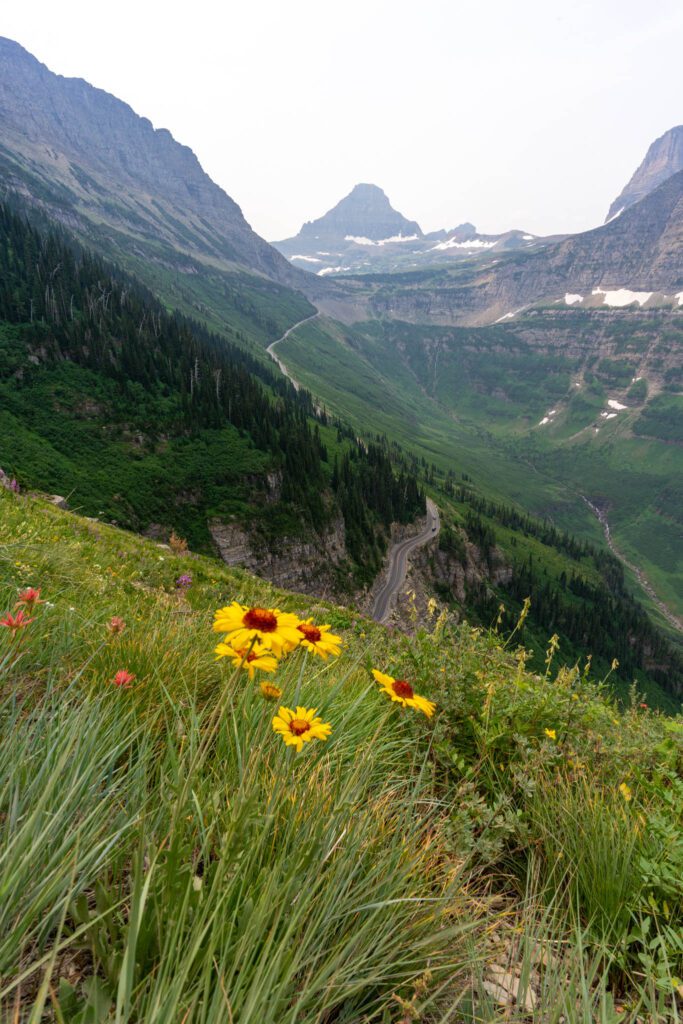
This hike starts out with a short descent from Logan Pass. The initial 0.3 miles or so is a steep, narrow ridge that sits a hundred feet above Going-to-the-Sun Road. It’s a short section, but it’s worth including as a distinct part of the hike because it’s fairly unique.
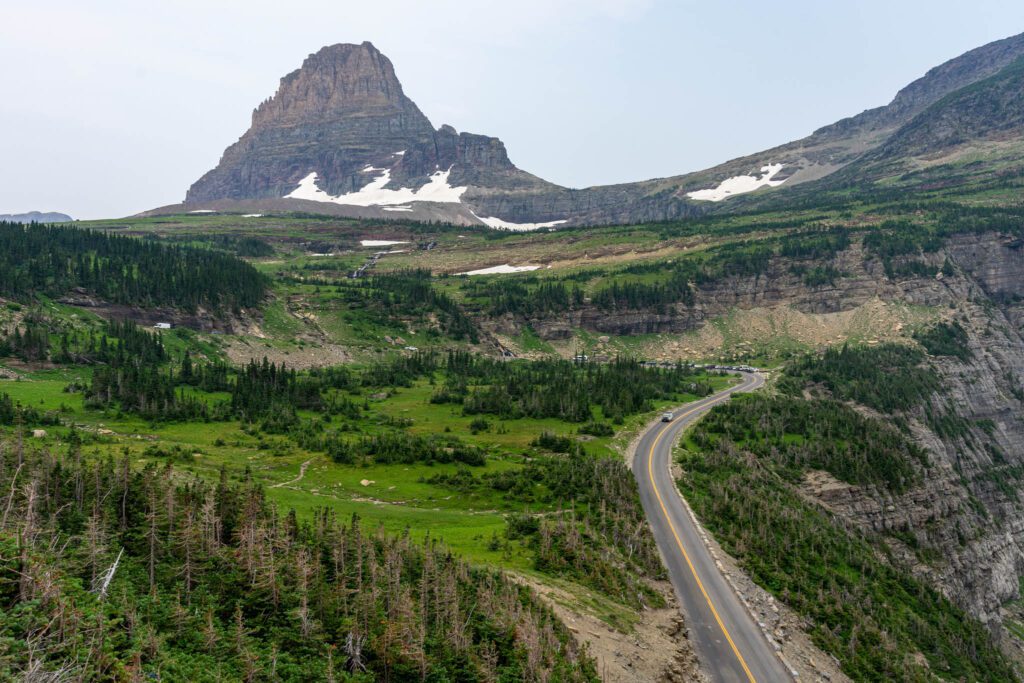
As you hike, make sure to take a second to look back over your left shoulder, where you’ll have a great view of the road below you, and the mountains in the background. The views on your left are pretty spectacular the entire way to Granite Park Chalet, but this one was one of my favorites because of the great leading lines that the road provides, dragging your eyes up to the rocky peak.
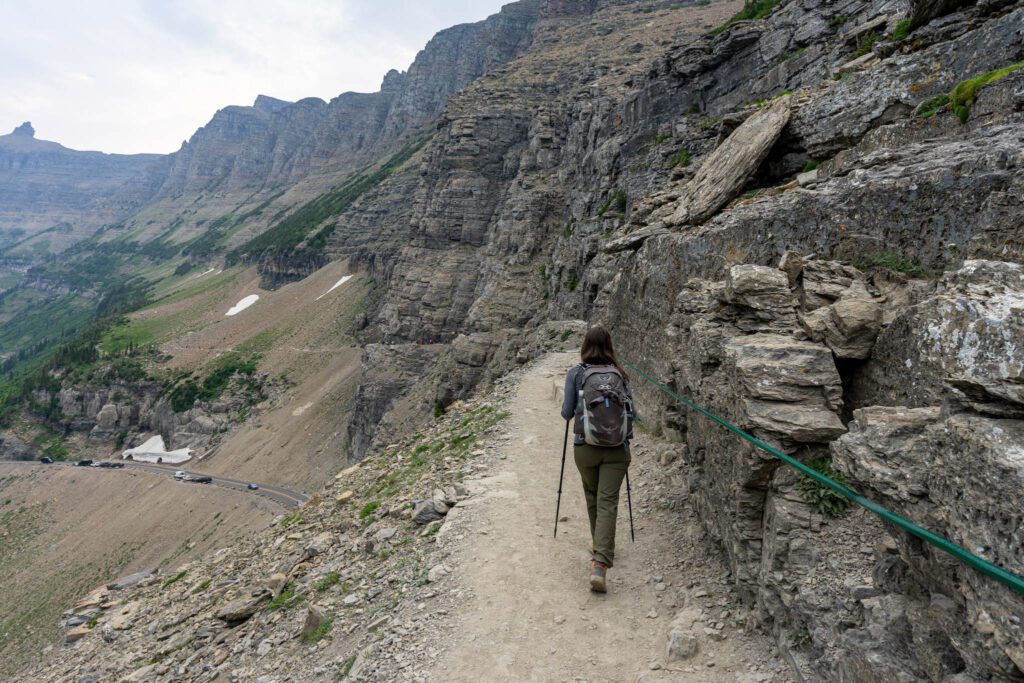
If you’re apprehensive about heights, you should know that I am too. We decided to skip hiking the chained section of Angels Landing in Zion National Park for that exact reason. And I’m here to tell you that this hike is not that bad at all. The trail is about six feet wide, give or take, and there’s a rubber “chain” (read: garden hose) along the inside wall to hold on to. It’s also mostly flat, which helps. Hug the inside if heights make you nervous and push through the first quarter mile or so, which is where the trail gets a bit less precarious.
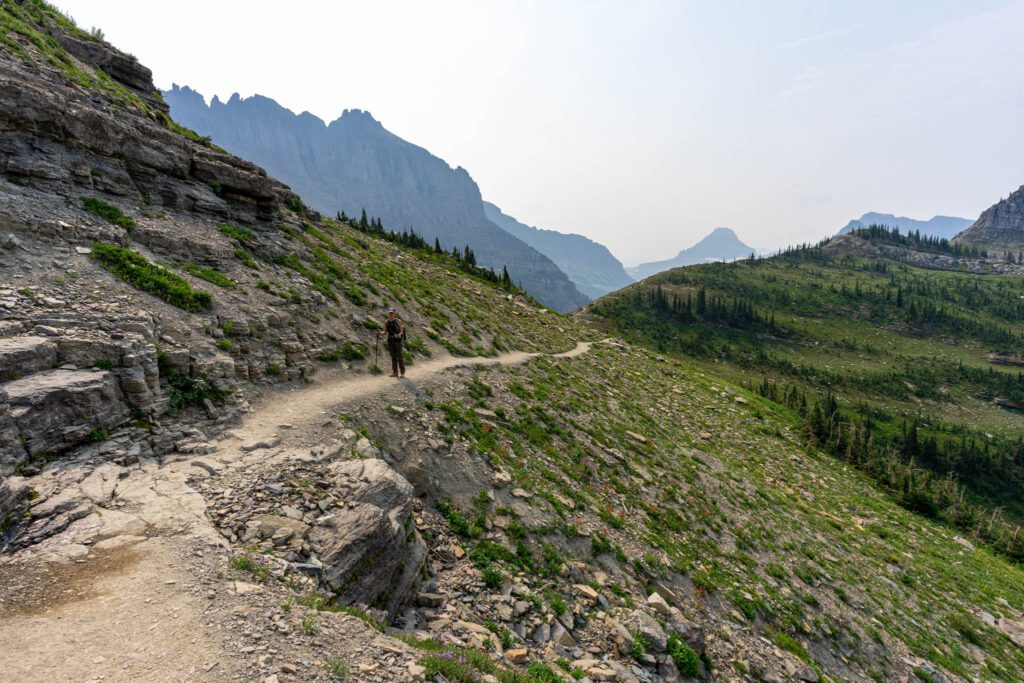
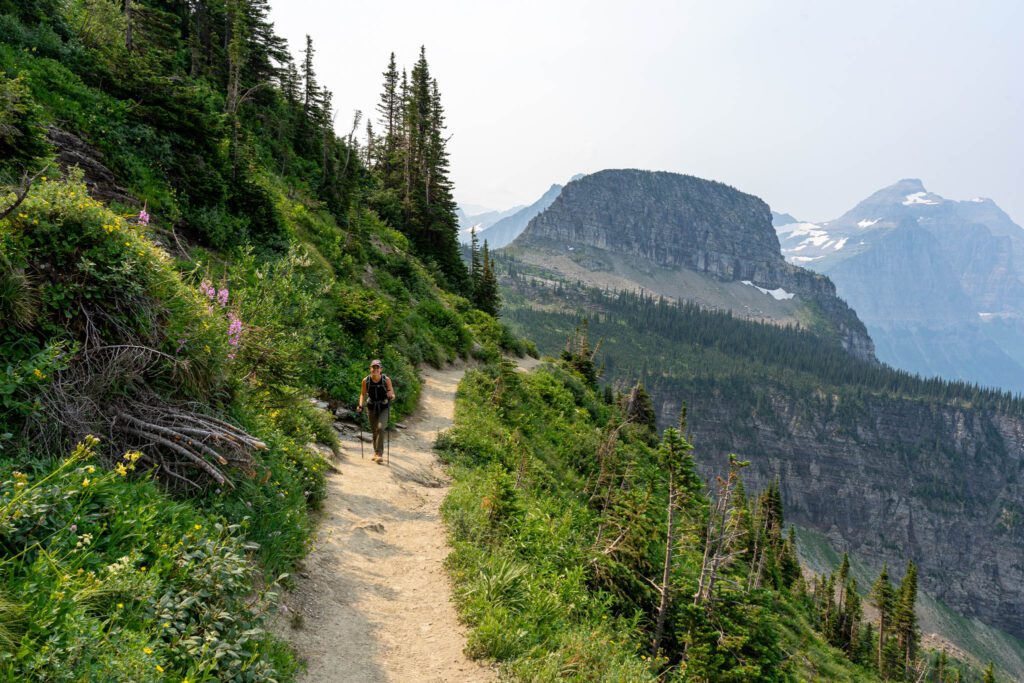
Traversing the Mountainside
Distance Covered: 2 miles
Elevation Gain: 200 feet
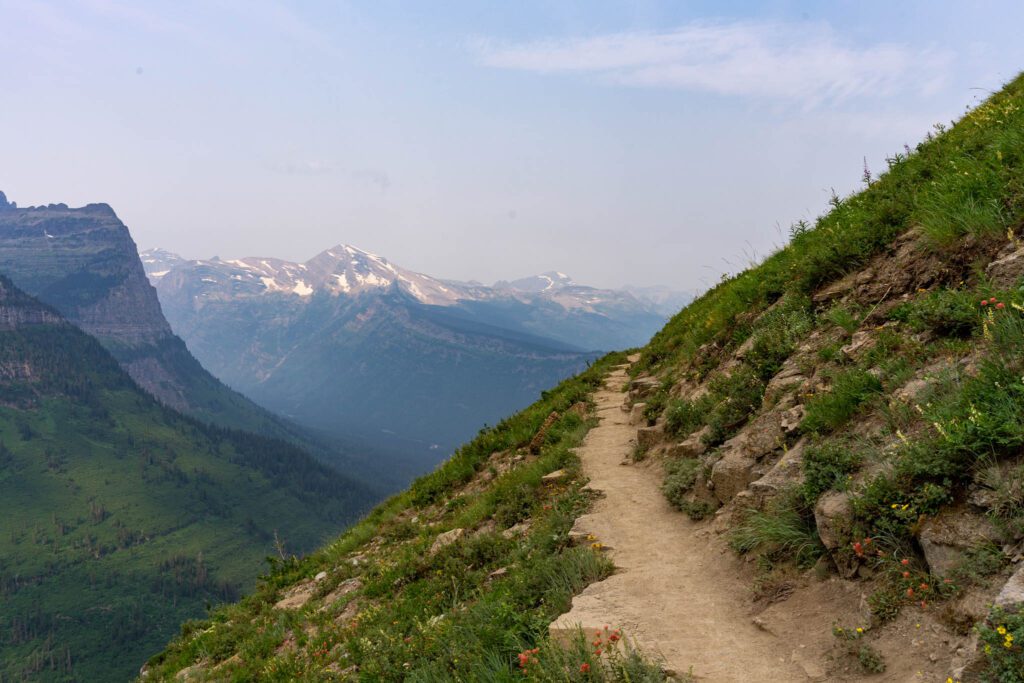
After about 0.5 miles, the trail turns into a beautiful climb across the mountainside. On your right is the Garden Wall, and on your left is a steep drop-off to the road and valley below, with rocky peaks and waterfalls for you to marvel at as you hike.
The Pass
Distance Covered: 2.5 miles
Elevation Gain: 600 feet
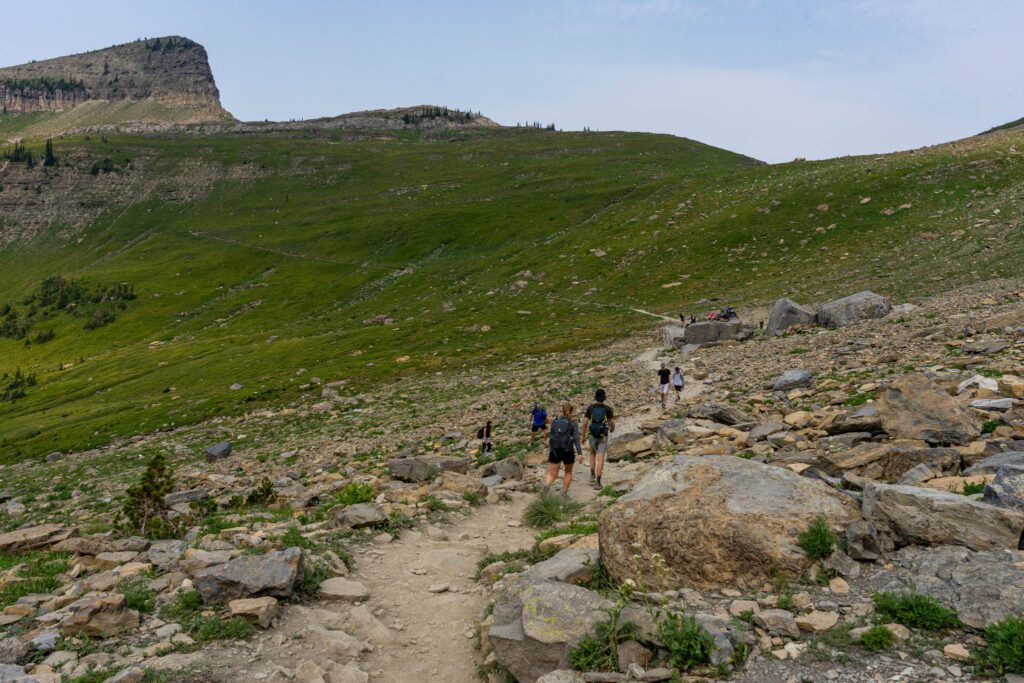
This is the only part of the hike that is difficult. And even then, it’s really not that hard. Plus, the views in this section are some of the best on the entire hike. This part of the hike climbs to the highest point on the trail, then descends back to where you started, where you’ll start another long, mostly flat section of the trail.
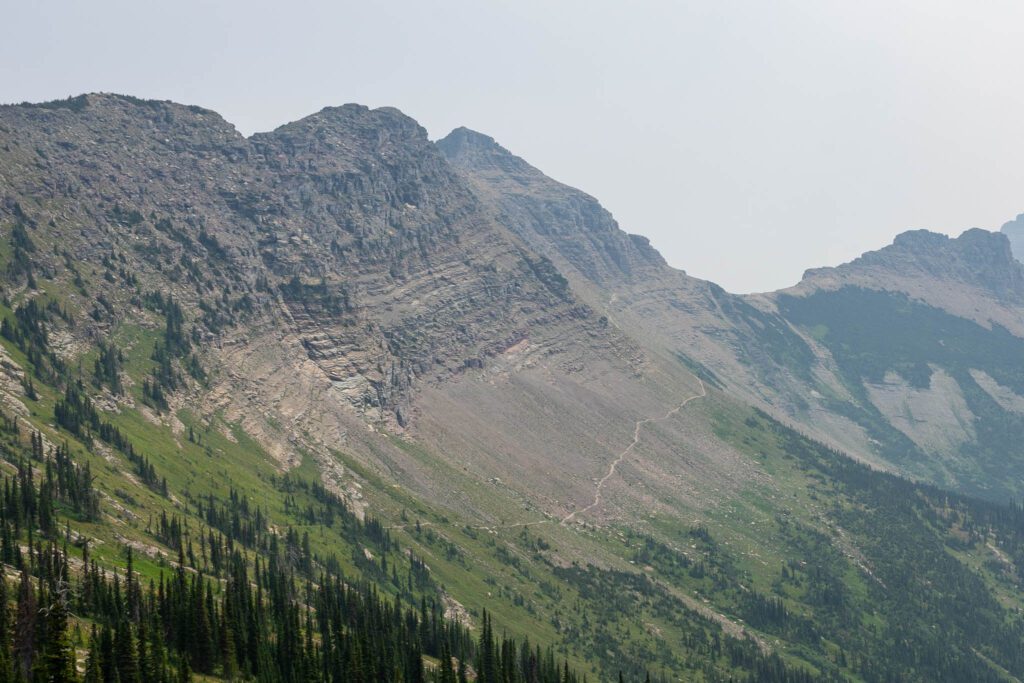
As you come around a bend in the trail, you’ll be able to see the trail climbing the mountainside directly across the valley from you. From this perspective, the trail climbs, switches back once, and you’re at the top of the pass.
Which is both exactly what we thought, and also completely wrong.
The trail continues climbing past the top of the switchbacks, but we’d highly recommend pausing to sit facing the way you came to admire the views, grab a snack, and drink some water before continuing. Simply spectacular – I can’t think of a word that truly does the view justice.
Once you’re refueled, continue the climb for another half mile or so, which is when you hit the highest point on the hike. From there, you descend back to the same elevation you’ve basically been at since leaving Logan Pass with the exception of the climb you just completed.
Traversing the Other Mountainside
Distance Covered: 2.3 miles
Elevation Gain: 150 feet
Like I said, this part of the trail is a long, relatively flat (there’s definitely some up and down, but not too much) stretch that continues to hug the hillside. After about a mile, the Granite Park Chalet will be visible in the distance, and you’ll spend the next mile and a half watching it become progressively bigger as you draw closer.

The most notable part about this trail is the junction for the Grinnell Glacier Overlook at 1.5 miles (6.6 miles in from Logan Pass). We’ve covered this part of the hike below, but it basically climbs 1,000 feet in 0.6 miles to reach the top of the Garden Wall, where you’ll have a spectacular view of Grinnell Glacier and the other side of the Continental Divide. It’s HARD. And you still have quite a bit of hiking to do.
0.8 miles from that junction is the Granite Park Chalet, which is a backcountry hut where you can stay overnight (if you book it six months in advance, to the day). There are restrooms, plenty of benches to relax on, and a small store with a limited selection of food and drinks for purchase, if you so desire.
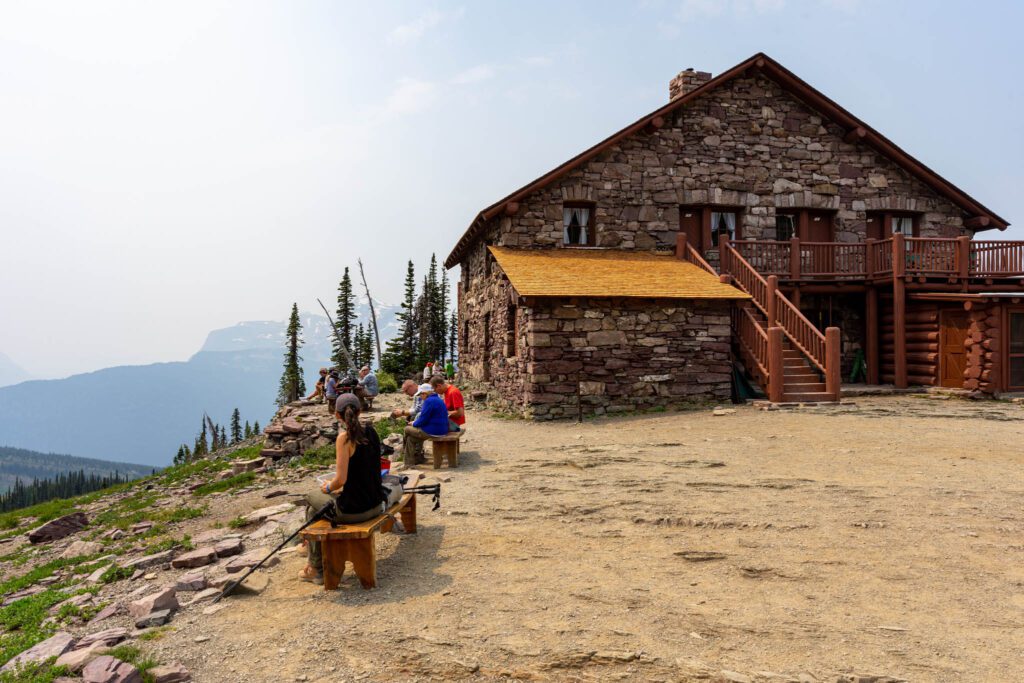
It’s definitely worth stopping for lunch or a snack, a toilet break (one of the hardest parts about this trail is finding a place to pee along the way!), and some poking around the chalet itself to check it out.
The Descent
Distance Covered: 4 miles
Elevation Gain: – 2,300 feet (really, elevation loss)
This part of the hike is brutal. You’re going to be sitting at the chalet thinking to yourself (or, in our case, saying out loud to your hiking partner) “it’s all downhill from here – piece of cake!”
What you’ll be forgetting is that hiking straight downhill kind of sucks. At the end, we turned to each other and wondered if it would have actually been easier to just hike back to Logan Pass, even though it’s more elevation gain (you have to climb that pass again) and almost double the distance.
From the chalet, the trail turns into a steep downhill slog. The most interesting part about this section is the plant life. There was a big fire in this part of the park, which has resulted in two things. First, a bunch of dead, fallen trees littering the landscape. There’s a particular section at about 8.7 miles in where there’s a hillside directly in front of you where half the trees burned, and the other half survived with a very distinct line. Second is the lush greenery that has filled in since the fires. Wildflowers, berry bushes, and ferns abound! It felt a little bit like bushwhacking at times.
The trail winds down, hugging the hillside as you descend. At one point, you’ll see the road below you (which is the Loop, where you’re headed) and then you’ll realize that you’re hiking in the exact opposite direction. For a while. You’ll probably pull out your phone to check that you didn’t miss a trail junction. Eventually, the trail turns back towards the west, and you’re in the home stretch. When you reach a bridge over the creek, you’re less than 0.1 miles away from the end.

You’ll emerge out onto the Loop, which is a busy part of Going-to-the-Sun Road. There’s no sidewalk, and the shuttle stop is a little bit down the road (downhill, thankfully) from where the trail spits you out. Pat yourself on the back – YOU DID IT!- and pick up the shuttle to head back to the Visitor Center.
Alternate / Additional Routes
Like I mentioned above, there’s another way to do this trail, and there’s a couple of additions you could add on if you have unlimited energy and are up for a climb.
In this section, we’ll cover the out-and-back hike from Logan Pass (spoiler: we basically already covered it), and the side trip to the Grinnell Glacier Overlook.
Technically, you could also do this as either an out-and-back from the Loop (it’s straight up and straight down, and you miss the best part of the trail, which is the views between the Chalet and Logan Pass) or as a point-to-point hike from the Loop to Logan Pass (a lot more climbing – we’d do it the other way), but we would recommend either the way it’s laid out above, or as an out-and-back from Logan Pass.
Hiking Out and Back from Logan Pass
If you only have one car, can’t take the shuttle, and still want to do the Highline, you can do it as an out-and-back from Logan Pass.
It’s a longer hike with more climbing, since you do the pass we described above twice. You’ll hike 15 miles and climb 2,300 feet or so.
We’ve essentially already covered this hike above. The only difference is that instead of doing the descent to the Loop from the Chalet, you’ll turn around and hike back the way you came.
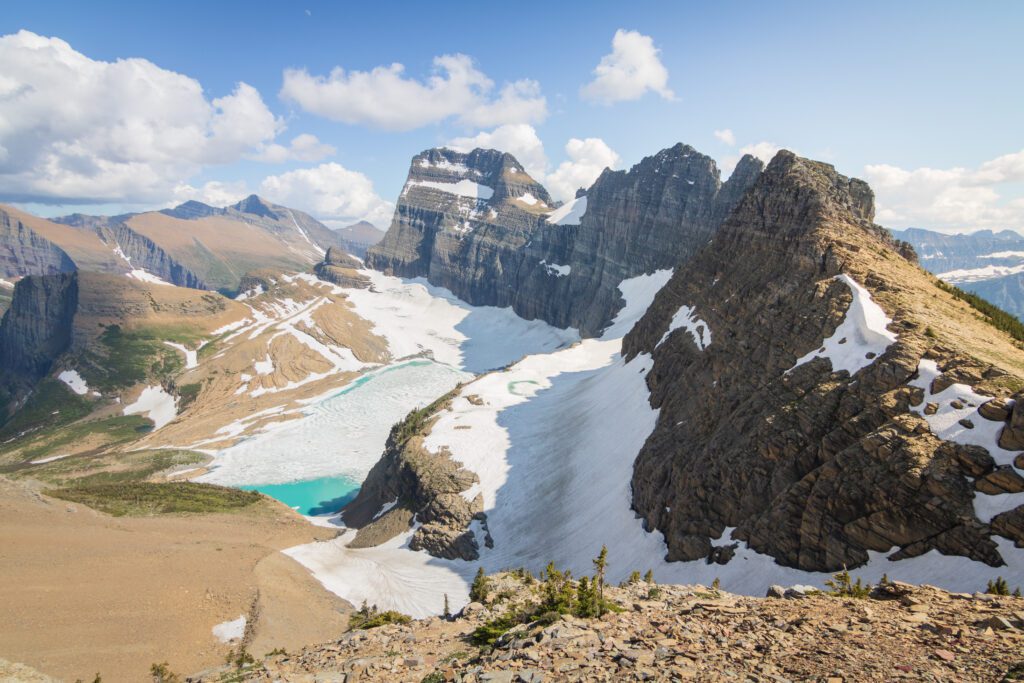
The Grinnell Glacier Overlook
First of all, do not underestimate this climb. It’s roughly 1,000 feet in 0.6 miles to ascend to the top of the Garden Wall, and you still have quite a bit of hiking to do, regardless of which variation of this trail you’re doing.
The views from the top are pretty spectacular though, just know that you’re going to earn them.
The trail is well-marked, forking off to the right of the main trail at the 6.6 mile mark (0.8 miles before you reach the Chalet). It climbs steadily and steeply, turning into a bit of a scramble at some points. Eventually, it levels out a little, running parallel to the top of the Garden Wall, before another steep ascent to the viewpoint.
From the top, you can see Grinnell Glacier. If you’re not heading over to Many Glacier to hike the Grinnell Glacier Trail, which has a slightly better view, this is a good way to see one of the namesakes of this park.
Hey you! Planning a trip to Glacier National Park? Don’t miss our other Glacier travel guides to help you plan an incredible trip.
Your description is very thorough and accurate! Excellent advice!