How to Plan an Amazing New Zealand North Island Itinerary
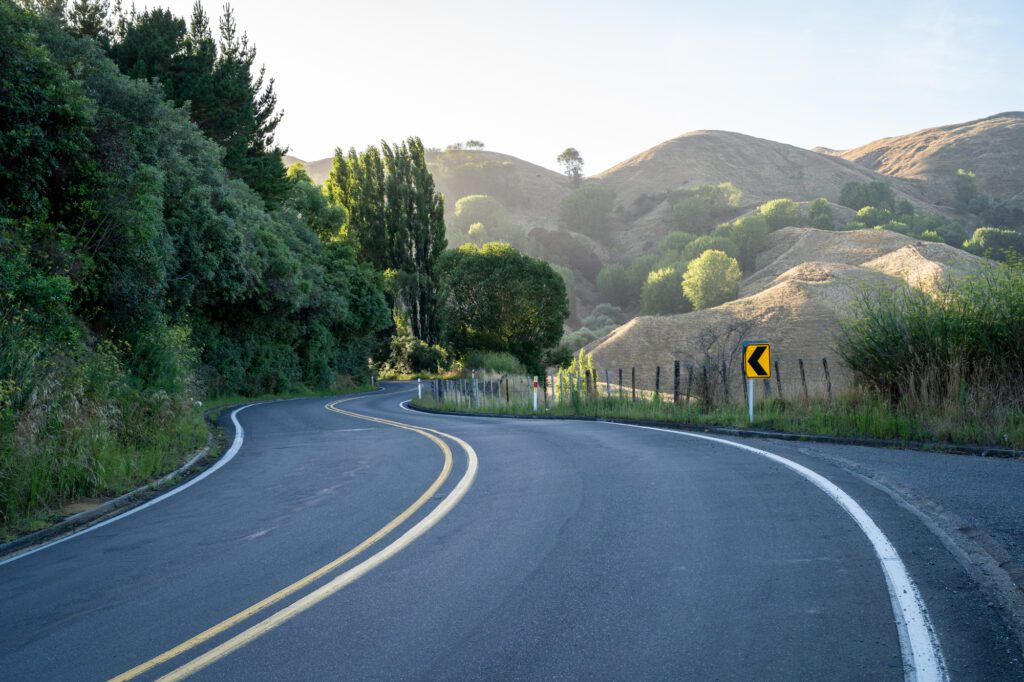
On New Zealand’s North Island, you’ll find a landscape shaped by volcanic activity over countless millennia – which is a unique aspect of this part of the world – along with beautiful stretches of coastline featuring sweeping views and glorious sand beaches, fertile agricultural land producing some of the country’s best produce (and cheese!), and the two best cities in New Zealand (for our fellow city lovers).
At the time of writing, we just got back from our second trip to New Zealand, and spent our time exploring as much of the North Island as we possibly could over the course of more than three weeks on the road.
We had spent time on the South Island before, but weren’t quite prepared for just how different the two islands are from each other (it’s honestly no wonder that the majority of the Māori ended up on the North Island, which feels like a much more pleasant place to live).
In this guide to planning your New Zealand North Island itinerary, here’s what we’re going to cover:
- Exactly how to plan a 14 day New Zealand North Island road trip, including what stops to make, what route to take, and all the important logistics you need to know.
- A guide to what to do, where to stay, and how to get there for each stop on the itinerary.
- Options for shorter (7 & 10 days) and longer trips if you have more or less time than two weeks.
Throughout the guide, we’ll share our favorite finds and experiences in New Zealand based on our trips to help you plan your unforgettable trip.
Sound good to you? Let’s dive into planning your trip to the North Island!
Disclaimer: Some of the links in this post, like hotel links, are affiliate links, meaning at no additional cost to you, we make a little bit of money if you click through and book. That being said, we would never recommend something to you that we don’t stand behind 100%.
How Many Days Do You Need for the North Island?
We spent a lot of time discussing this topic as we wound our way through New Zealand’s beautiful countryside, either on foot or in the car.
For context, we had three weeks to make our way from Wellington at the southern tip of the North Island up to Auckland, which is near the northern edge of the island.
And we felt like that was a solid amount of time to see what we wanted to see (though more time would have been even better!).
However, as we got into the trip, we realized that there is so much to see on the North Island, and it made us realize that, even with three weeks, we were having to skip places we wanted to visit because we just didn’t have enough time.
Unfortunately, we know that many people don’t have three weeks of vacation time to burn (particularly Americans like us).
We’ve chosen to write this guide for two weeks, which is the absolute minimum amount of time we’d recommend if you want to cover the entire North Island between Wellington and Auckland.
That gives you time to explore both Wellington and Auckland – two cool cities that are worth a day of your time on either end of your road trip – and also see the highlights of the North Island’s beautiful landscapes, from the mountains (really, volcanoes) to the sandy beaches.
However, it is worth noting that two weeks gives you enough time to BARELY cover the highlights.
It’s going to be a fair amount of driving, and you won’t have much flexibility if it happens to be raining on a day you want to do a big hike, for example.
If you have more time, we have plenty of ideas in the “with more time” section below the main itinerary.
If you have less than two weeks to spend on the North Island, we have some ideas for that too in the “with less time” section below the main itinerary.
At a high level, we’d recommend covering one half of the island, and which half you choose largely depends on what you’re looking for (which we get into in that section).
One thing we want to note up front is that, after doing a version of this road trip ourselves, you should not stay in a single place for less than two nights.
Otherwise you’ll spend more time in the car driving from place to place (the average drive time between places on this itinerary is somewhere between two and three hours) than you will actually seeing places!
We’ve seen itineraries that suggest spending a single night in 10 different places, and that just sounds exhausting.
Do yourself a favor and spend at least two nights in each place on your itinerary. Your future self will thank you.
Where to Start and End Your Road Trip
The best places to start and end your road trip on New Zealand’s North Island are the two biggest cities on the island, which are helpfully located at the southern tip and near the northern edge.
Those two cities are Auckland, which is by far New Zealand’s biggest city near the North Island’s northern borders, and Wellington, which is the capital of New Zealand that is on the southern coast (and is a very cool city that reminds us a lot of San Francisco, minus the insane wealth inequality).
You’ll want to fly in and out of Auckland International Airport (AKL), which is the busiest airport in New Zealand and is where most international flights will come in, and Wellington International Airport (WLG), which is smaller and will likely require a connection if you’re coming from overseas (typically through Auckland).
So, which direction should you go?
We went south to north, starting in Wellington and ending in Auckland, and would recommend it for a few reasons.
First, it front loads the big hikes in Egmont National Park (should you choose to include it) and Tongariro National Park, which means you’ll work hard at the beginning of the trip and spend the rest of the trip eating local cheese and drinking sauvignon blanc (although, there are also obviously hikes elsewhere, they’re just less intense).
Second, this puts your longest flight connection at the beginning of the trip, when you’re still bright-eyed and bushy-tailed and ready for adventure.
Like we mentioned above, most flights coming into New Zealand from overseas connect in Auckland and continue onwards to the smaller airports elsewhere in New Zealand.
Flying to Wellington likely means you’re connecting through Auckland, which means it’s going to be a little bit of a longer journey to get to.
We’d rather have that longer journey at the beginning of the trip than at the end, when we’re ready to just be home.
Do You Need to Rent a Car for this Road Trip?
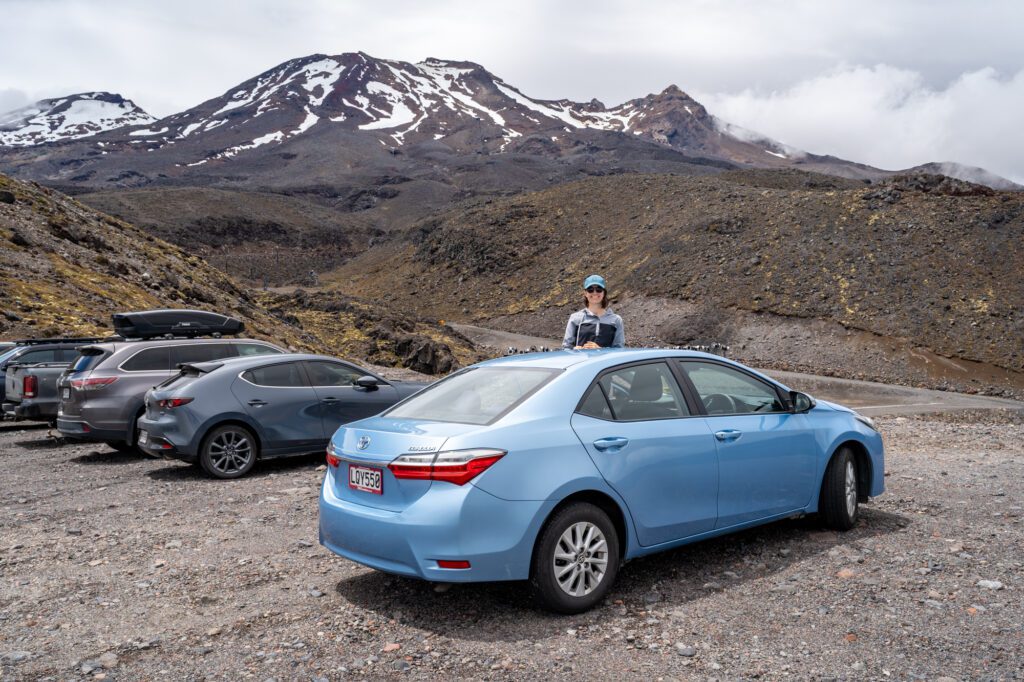
It might be obvious, but you’re definitely going to need a car to do this road trip.
As two people who visited Australia many years ago and chose not to rent a car because it was too scary to drive on the other side of the road, we’re here to tell you that yes, to make the most of your trip you definitely need to rent a car.
Or a campervan, but we’ll get to that in a second.
There just really isn’t enough public (or private, frankly) transportation coverage around the country to make this itinerary work (especially if you have limited time!).
Let’s take Milford Sound as an example.
If you don’t have a car, you can either take a bus to Milford Sound, which doesn’t make any stops along the way and basically just drops you off at the pickup for the cruises, or take a guided day trip that costs several hundred dollars, though it probably includes a few more stops along the way.
Whichever option you choose between those two, you’re going to be missing out on exploring some of the great hikes near Milford Sound, and you’re going to miss the opportunity to see the Sound at sunrise or sunset.
Having a car will give you more flexibility and the ability to do a bit of exploring that just isn’t possible if you don’t have a car.
The best way to do it is to rent a car at the airport when you arrive and drop it off at the airport when you depart.
By flying into one city and out of another, you may incur a one-way fee, but it’s well worth the small extra fee to avoid having to loop back to Wellington (which is roughly 8 hours of driving in perfect conditions and without road construction).
For what it’s worth, we’ve used GoRentals on both this road trip, and our South Island road trip a few years ago, and our experience has been nothing but great both times.
Renting a Car vs. Renting a Campervan
If you’ve never done a road trip in a campervan, New Zealand would not be a bad place to have your first campervan experience.
Scratch that, it would be an absolutely magical place to do it.
For both of our trips to New Zealand, we priced out our own itinerary in a campervan versus renting a regular car, including gas, insurance, and accommodation (campgrounds / private rooms in hostels) fees.
We’re not going to share the exact numbers that we came up with (for a comfortable van, it’ll cost somewhere in the range of $4,000-$6,000 NZD depending on dates, type of van, and destinations), because it varies so much by itinerary, time of year, company, and plenty of other factors.
However, the main takeaway is that it is roughly the same price to rent a budget campervan and stay in campsites as it is to rent a compact car and stay in budget hotels and private rooms in hostels.
It is worth noting here that, in both scenarios, we were planning on having access to a kitchen and cooking 90% of our meals.
If you were going to eat out for every meal in the regular car scenario, it probably becomes less attractive from a price standpoint.
You can pretty easily price it out for your own specific trip (just grab a quote from a couple of campervan companies, calculate the rough distance you’ll drive to get to gas costs).
If you want one of the fancy campervans, like a Mercedes Sprinter (or equivalent), it quickly becomes significantly more expensive than the car + hostel / budget motel option.
The question you need to ask yourself (and then answer) is whether you want to have that unique campervan experience, and whether you’re willing to pay a (slight) premium for it.
Ultimately, we lived in a converted Honda Odyssey for a few years on a never ending road trip around the Western United States (and still spend big chunks of our summers sleeping in a van at home in Oregon), so we didn’t feel like we needed that experience.
However, we also understand that might be different for you, which is why we included this section to give you our perspective on how to think about whether or not a van makes sense for you.
It’s important to note that over the past decade or so, there has been a movement in New Zealand to restrict freedom camping, which just means camping outside of sanctioned campgrounds.
There are several very understandable reasons for this, including the sheer amount of garbage and feces that freedom campers were leaving all over New Zealand.
The implication here is that even with a campervan, we’d still recommend booking campsites to park at rather than just showing up and winging it, because that has gotten significantly more difficult and complicated over the past few years.
The other important consideration here is that most of the big campervan companies don’t have a location in Wellington, which means if you wanted to do this trip by campervan, you’d have to modify it to be round trip from Auckland.
That would add roughly eight hours of driving to your itinerary, depending on how you did it (we’d go from Auckland down the east coast all the way to Wellington, come back north to Tongariro, and then continue on to Auckland).
An Amazing 2 Week New Zealand North Island Itinerary
Now that we’ve covered a few of the most important pieces of logistics, let’s get into the fun part – the itinerary itself!
As we already covered, for this two week itinerary, you’ll start your trip in Wellington and end up in Auckland.
Because it’s generally a bad idea to spend 12-24 hours flying around the world and then immediately hop in a car and drive four hours, we’d spend your first days exploring Wellington, acclimating to the time change and getting ready for an action-packed couple of weeks.
From there, you’ll snake your way up the east coast, straight through the volcanic center of the country, and then up to the northeast corner of the country before ending in Auckland, New Zealand’s biggest city.
Here’s what the itinerary below looks like at a high level (note that we’re not talking about what to do and see each day, it’s just a general idea of where you’ll be):
- Day 1: Arrive in Wellington
- Day 2: Wellington
- Day 3: Hawke’s Bay
- Day 4: Hawke’s Bay
- Day 5: Tongariro National Park
- Day 6: Tongariro National Park
- Day 7: Tongariro National Park
- Day 8: Rotorua / Tauranga (Bay of Plenty)
- Day 9: Rotorua / Tauranga (Bay of Plenty)
- Day 10: The Coromandel Peninsula
- Day 11: The Coromandel Peninsula
- Day 12: The Coromandel Peninsula
- Day 13: Auckland
- Day 14: Auckland
And here is a map of the route to help you visualize it as you’re reading:
Below, we’ll go through each stop individually, highlighting why we think the place is worth your time, some of our favorite things to do and see (and eat and drink), and an overview of where to stay (and sometimes some specific places that we stayed or that caught our eye).
One important note at the top. We believe, based on our own experience, that with two weeks you will have to make a choice between Hawke’s Bay – an incredible food and wine destination – and Mount Taranaki (and New Plymouth), which is the center of a beautiful national park and some of the North Island’s best hiking.
The reason you have to choose is basically geography and, by extension, time.
They’re both about three hours east or west of Tongariro, which is central and is an easy place to continue north towards Rotorua from.
It’s also important to note that both places deserve more than a day, especially given the hefty drive times, so it doesn’t make sense to split the two days between them.
Given the fact that you already have Tongariro on this road trip, we chose to include Hawke’s Bay in the main itinerary, and put Taranaki in the “with more time” section.
However, it’s easy to swap in Taranaki if that’s what you’re more interested in. You can essentially follow the same exact itinerary, just swap in Taranaki for Hawke’s Bay.
Taranaki is also the first place we’d add if you happen to have two extra days in New Zealand.
And now, let’s get specific!
Wellington (Days 1-2)
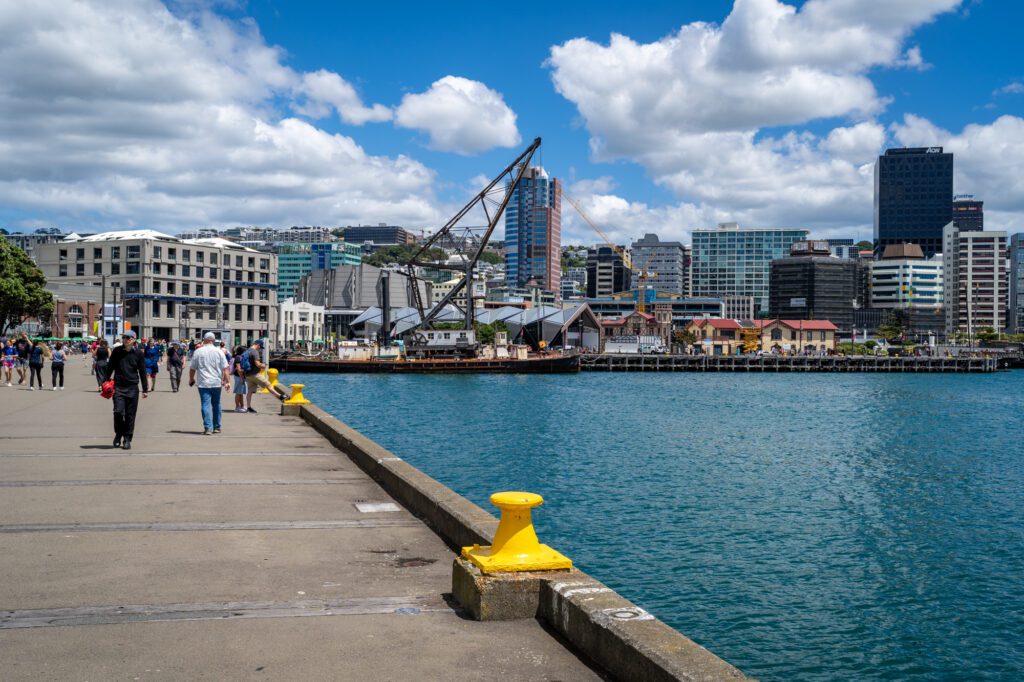
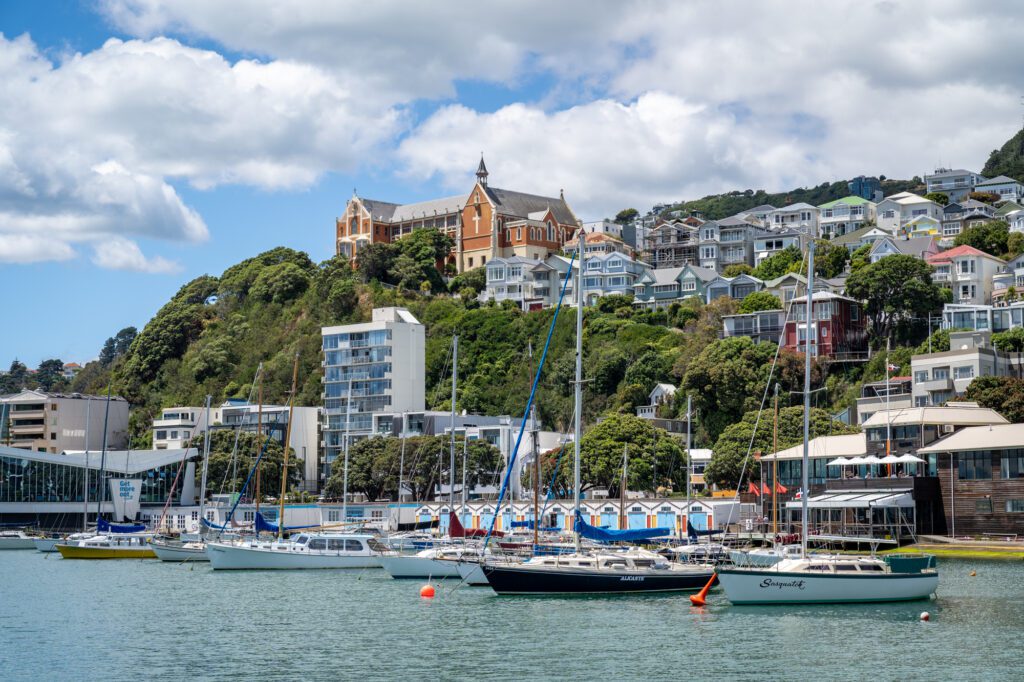
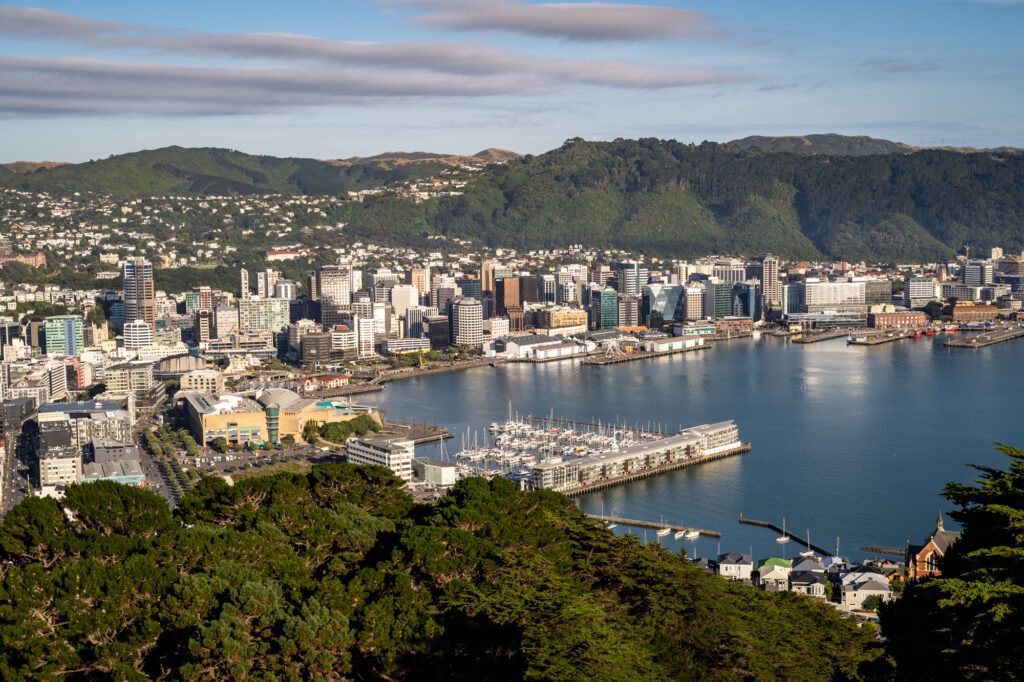
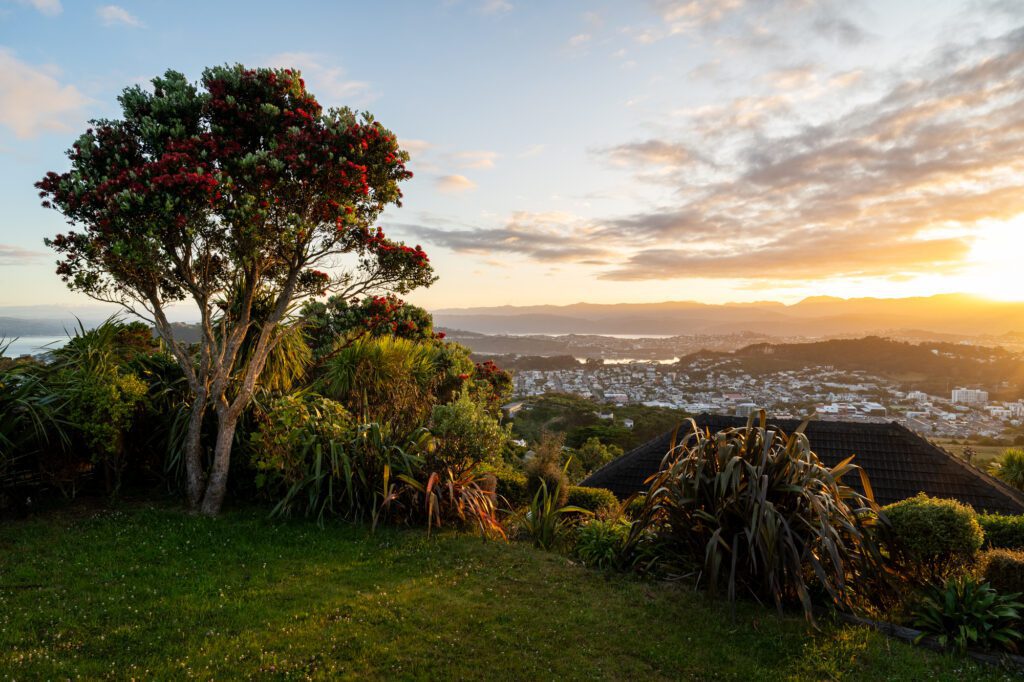
Of the two main cities on the North Island – Wellington and Auckland – we found ourselves innately drawn to Wellington.
It’s a beautiful city set on a nice little bay (who doesn’t love a water feature) with a great food and drink culture (for New Zealand) and great access to the natural beauty nearby, from forests to beaches.
It should come as no surprise that we enjoyed Wellington given that we lived in San Francisco together for a decade, and Wellington reminds us A LOT of San Francisco.
Driving through some of the hilly neighborhoods in Wellington, you could have told us that we were actually in South San Francisco or Daly City and we would have believed you.
Except for one thing: the archaic practice of parking on the side of a two-lane road (which basically means in the middle of the road) with blind curves, which is something we encountered all over the city.
That aside, we spent three days exploring Wellington, and we’d go back in a heartbeat (especially if it didn’t require a 14 hour flight).
It’s a fun, young-feeling city in a beautiful location, and we think it’s a great first stop on your North Island road trip.
We recognize that you are most likely here in New Zealand for the natural beauty – and, for the most part, so were we! – but it’s worth taking a day or two on either end of being immersed in that nature to appreciate the cultural and historical aspects of New Zealand, which is best done in Wellington (and Auckland).
What to Do in Wellington
Here are some things we really enjoyed in Wellington, and we think should be a part of your itinerary.
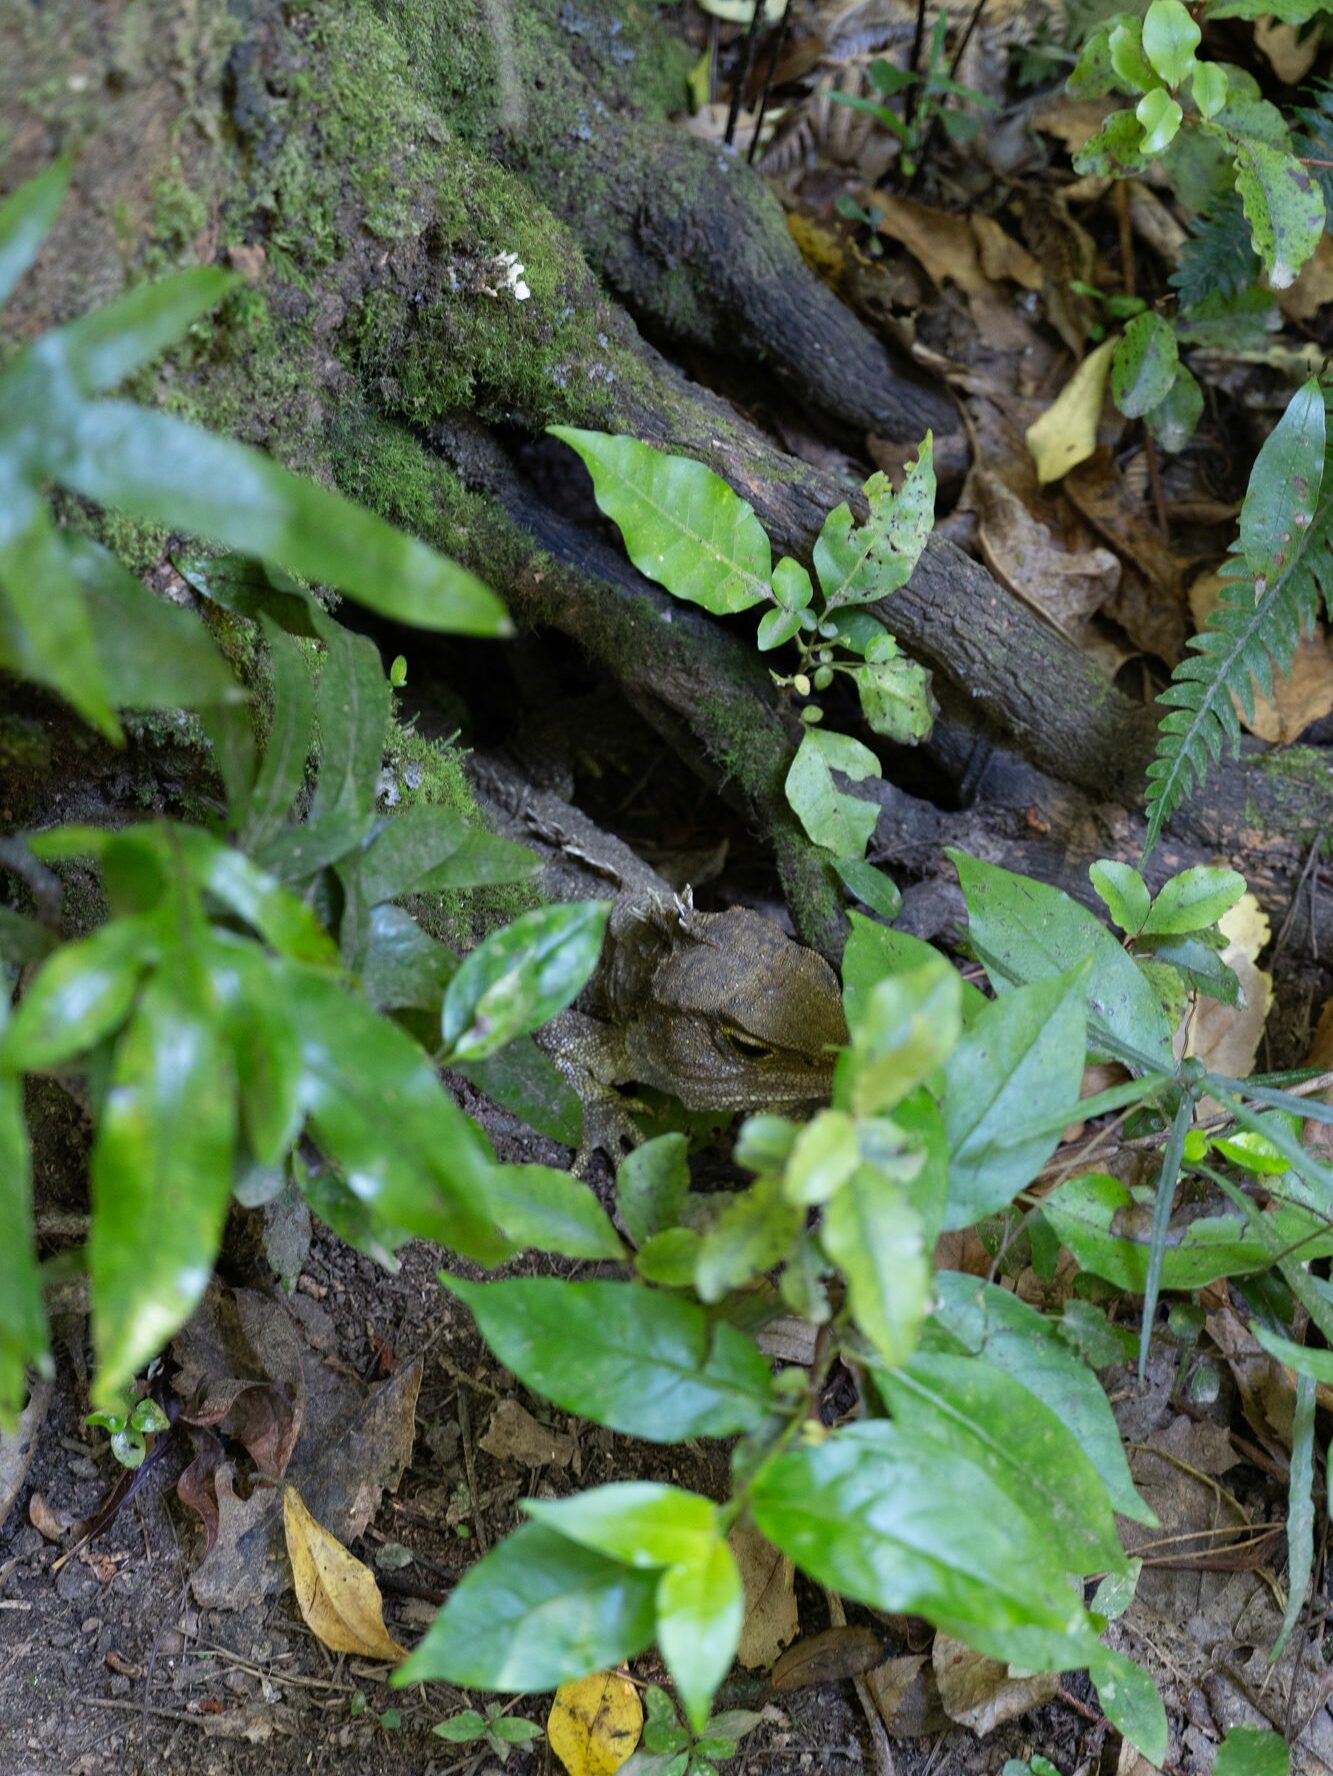
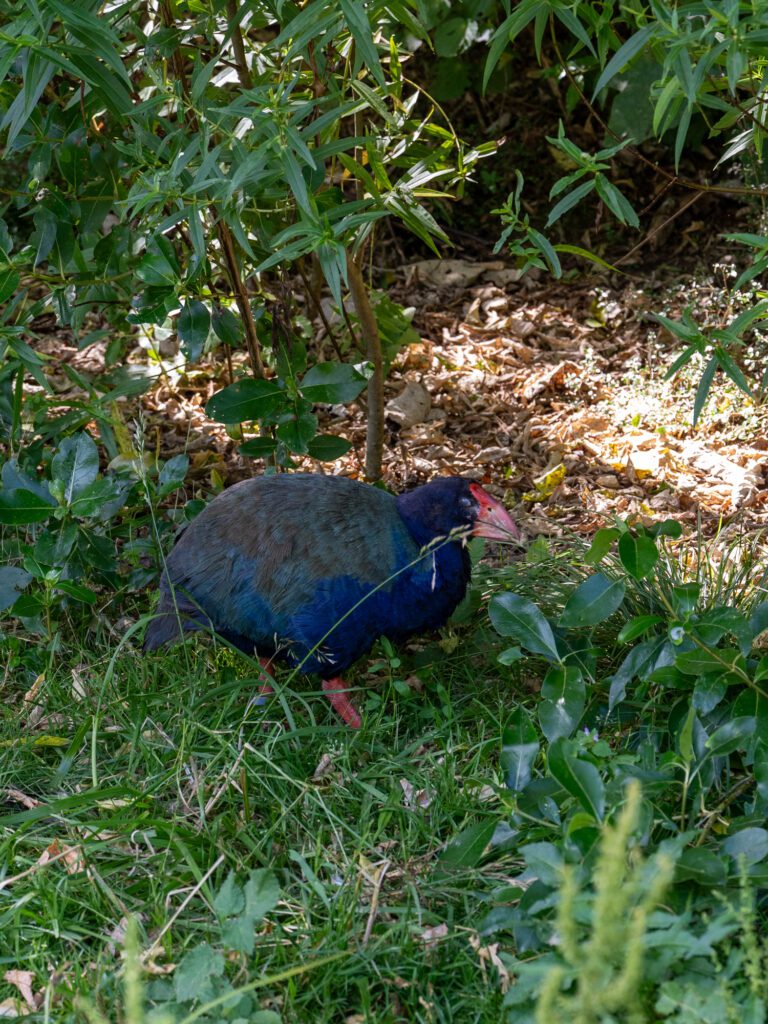
Zealandia
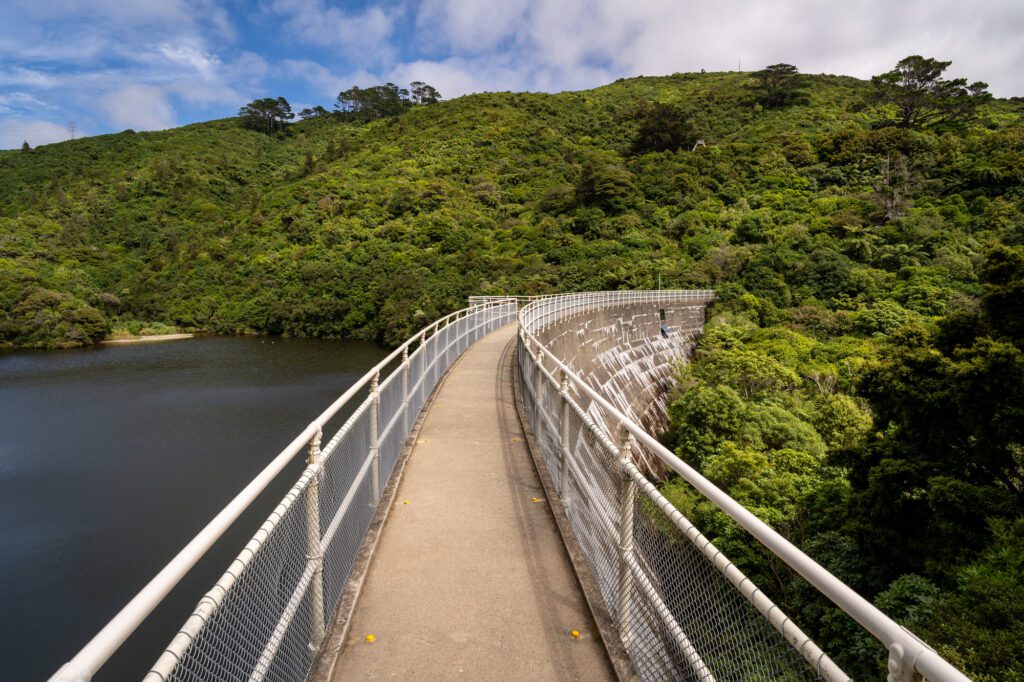
We absolutely loved Zealandia, a wildlife sanctuary just outside of the city center where they’re doing their part to restore wildlife – birds mostly – populations to pre-human arrival levels.
It’s fully fenced (to keep the birds that can’t fly in), and we spent a few hours walking a long loop around the lake where we saw (and heard) tons of birdlife.
Matt’s not usually into birdwatching, but he was excitedly trying to identify different calls in an attempt – usually successful – to catch a glimpse of the plethora of bird species that call this place home.
You can visit on your own, but we really wanted to do a dusk or night tour only to find they were completely sold out for weeks (if you want to do that, book in advance!).
Te Papa
Te Papa is arguably the best museum in New Zealand (plus, it’s free!), this is a great introduction to visiting New Zealand with exhibits on New Zealand’s plant and animal life and geography, the Māori, and a rotating cast of exhibits that, collectively, tell the story of New Zealand.
Sort of, anyway. It’s a very European point of view, evidenced by the fact that I went to two of New Zealand’s top museums (the other being the Auckland War Memorial Museum) and never saw a hint towards the process by which the British took the land from the Māori, which I had to learn about via a podcast later in the trip (this one, for the record, and I thought it was a great introduction!).
We do the same thing in the US around the history of our indigenous communities, but I was disappointed to not find any acknowledgement here in New Zealand given the fact that they seemed much further along in their journey of acknowledging and repairing relationships between communities.
Climb Mount Victoria
Mount Victoria stands tall on the southern side of Wellington’s CBD, and is a short hike away. Here is the route, though there are plenty of different route options thanks to the network of trails here.
You can also drive up to the top, and there is plenty of parking. From the top, you’ll have a great view of the city, along with some nice explanatory signage that tells the story of Wellington.
Make sure not to miss the short walk along the road out to the lookout over the harbor (here on Google Maps), which has a great view over the water out to the north.
Mount Kaukau
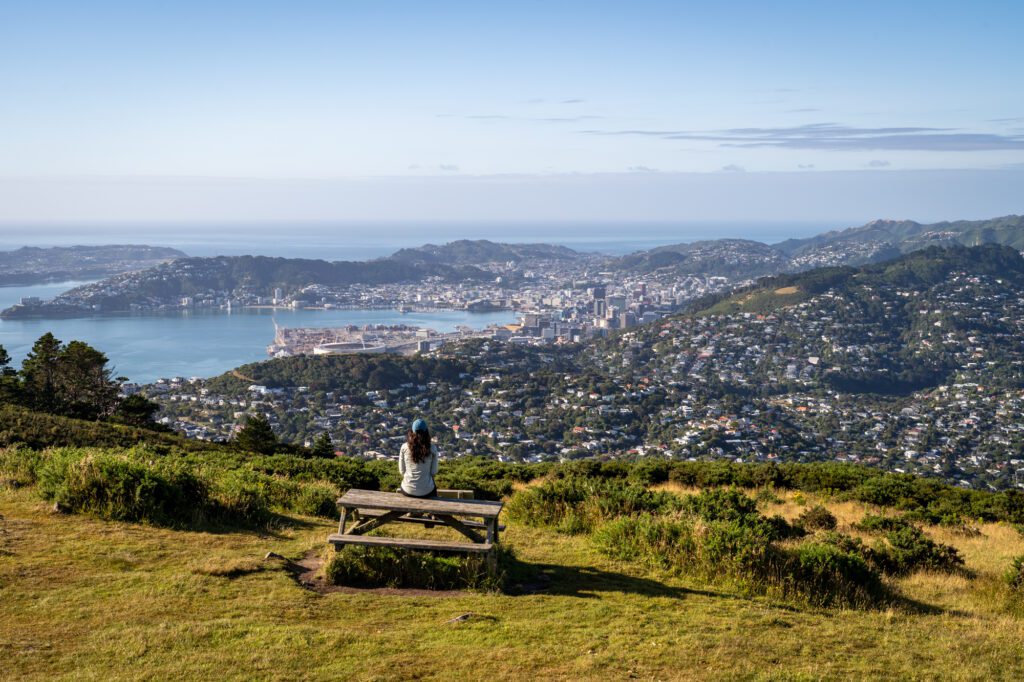
While the view from the top of Mount Victoria is nice, the view from Mount Kaukau is next level.
It’s a short hike that will make you work for those views, but the views back towards Wellington are spectacular, and well worth the effort.
We probably wouldn’t do the loop, which follows a mountain bike track that is steep and pretty unpleasant at points. Here’s the route we’d do.
Wētā Workshop
I, Matt (the resident LOTR nerd) have mixed feelings on Wētā Workshop. And it probably makes more sense to focus on Alysha’s perspective, because she is not really into Lord of the Rings.
This is where the majority of the costume and prop-making magic happened for the Lord of the Rings trilogy.
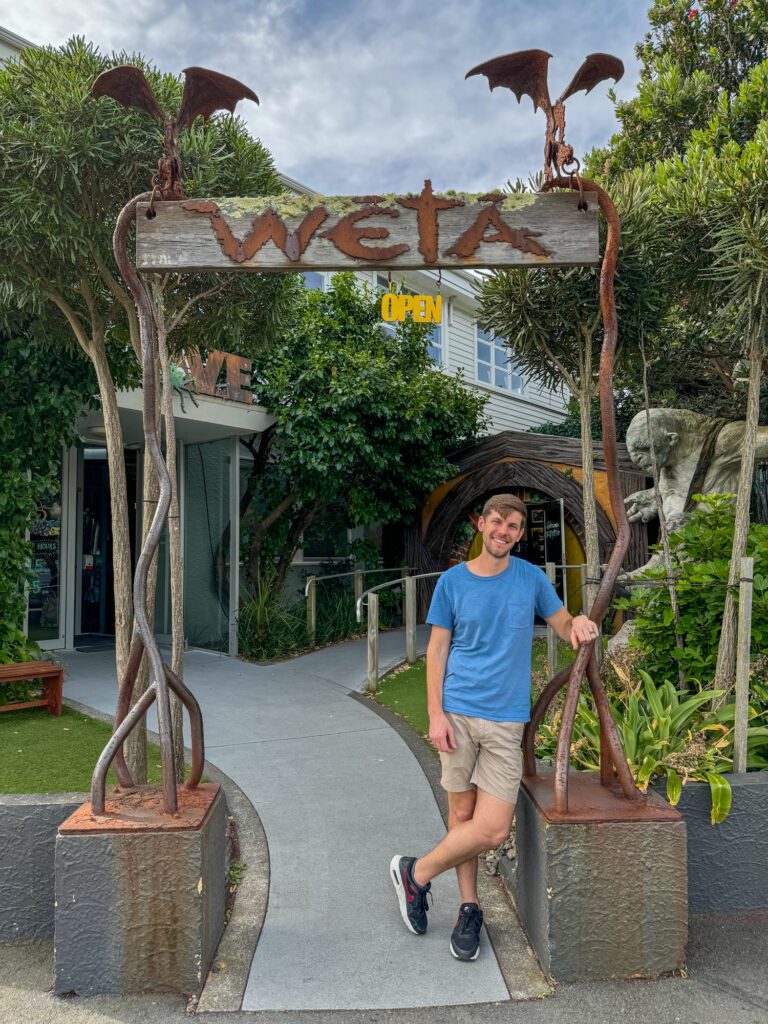

The tour is VERY commercial (almost more so than Hobbiton, which we’ll get to in a bit), and our guide was frenetic and hard to follow (even though they were clearly following a script).
The props and costumes you get to see are cool, but ultimately it was far, far less interesting than Hobbiton.
And with limited time, unless you’re a HUGE fan, we’d choose Hobbiton over Wētā Workshop.
Where to Stay in Wellington
When it comes to choosing a place to stay in Wellington, you have two high-level options that present a sort of fork in the road.
On one hand, you can stay right downtown in the middle of all the action.
On the other hand, you can stay slightly outside of the downtown core on one of Wellington’s many hills.
One of the nice things about Wellington is that the city is very compact (at least the downtown core) and most things are within walking distance – restaurants, museums, bars, the waterfront, etc etc.
By staying outside of the downtown core, you’re sort of missing out on that walkability, which is why our recommendation is to stay somewhere in the city center, especially with a limited time to see the city.
Our top recommendation in Wellington is Ohtel Wellington, and that recommendation is based on an excellent experience in Auckland at their property there (great service, mid-century modern style, and an excellent location, which is true in Wellington too).
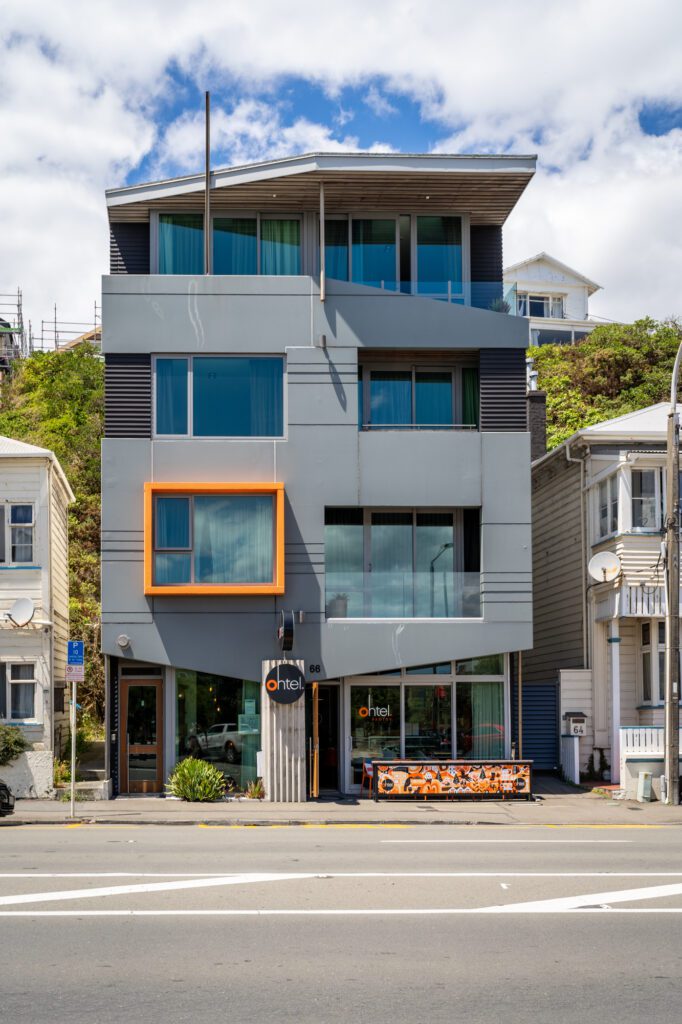
Their property in Wellington is on the south side of the harbor, right under Mount Victoria (it’s a very short walk to the trailhead to climb up, which you should do), and is basically across the street from Te Papa.
For what it’s worth, we stayed slightly outside of the city center (at this gorgeous Airbnb) because we had more time to explore and wanted somewhere quiet and peaceful.
We liked that aspect, but didn’t enjoy the fact that we had to hop in the car and drive every time we wanted to go anywhere.
Hawkes Bay – Hastings & Napier (Days 3-4)
Drive time and distance: 4 hours and 10 minutes // 326 km (203 miles)
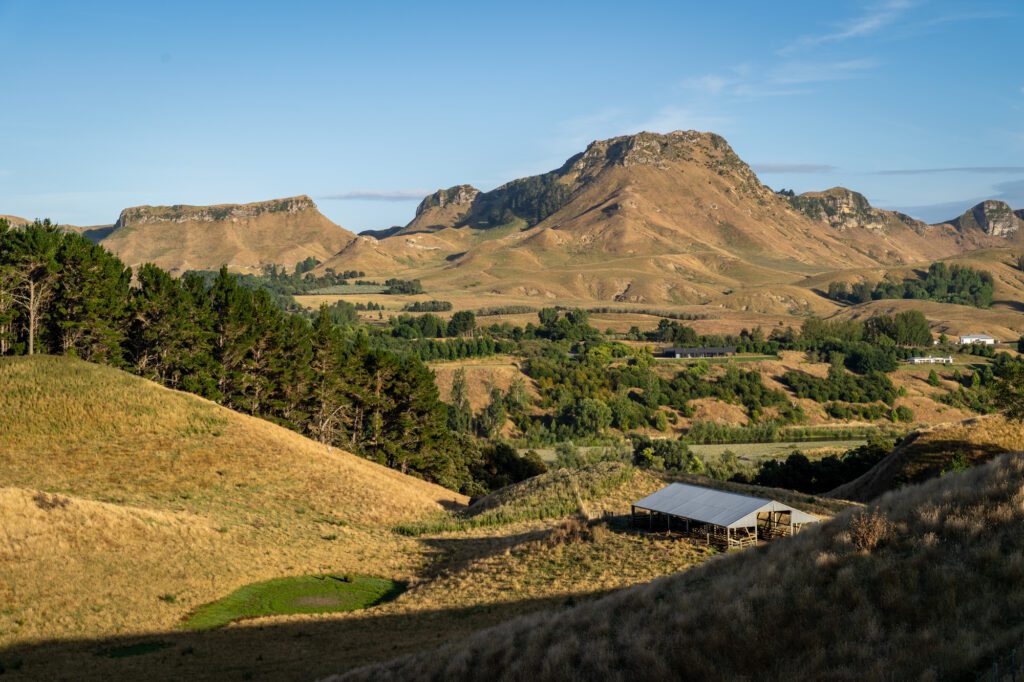
Hawke’s Bay is a fertile, warm, sunny section on the southeast coast of the North Island, and I’m quite literally sitting here on a pleasantly warm summer day eating fresh stone fruit and writing about why I think you should include it on your itinerary.
There are a few reasons why Hawke’s Bay is worth your time, and they are, in no particular order, wine, beaches, and food (specifically, produce).
Let’s talk about each of those reasons in a little more detail.
First up, wine. Hawke’s Bay is one of the three biggest wine producing regions in New Zealand (the others being Marlborough and Central Otago).
However, unlike those other places, the climate in Hawke’s Bay is hot and dry, which means bigger reds like Merlot and Syrah thrive here, versus more delicate varietals like pinot noir and sauvignon blanc, which do well in Marlborough and Central Otago.
It also reminds us a little bit of the Anderson Valley in California, which is basically adjacent to Napa and Sonoma, but offers a little more of a low key, laid back experience (and lower tasting fees, too).
There is a nice range of wineries in Hawke’s Bay, from casual places to enjoy some wine and maybe a cheese plate, to fancier spots to have a 7 course lunch with wine pairings.
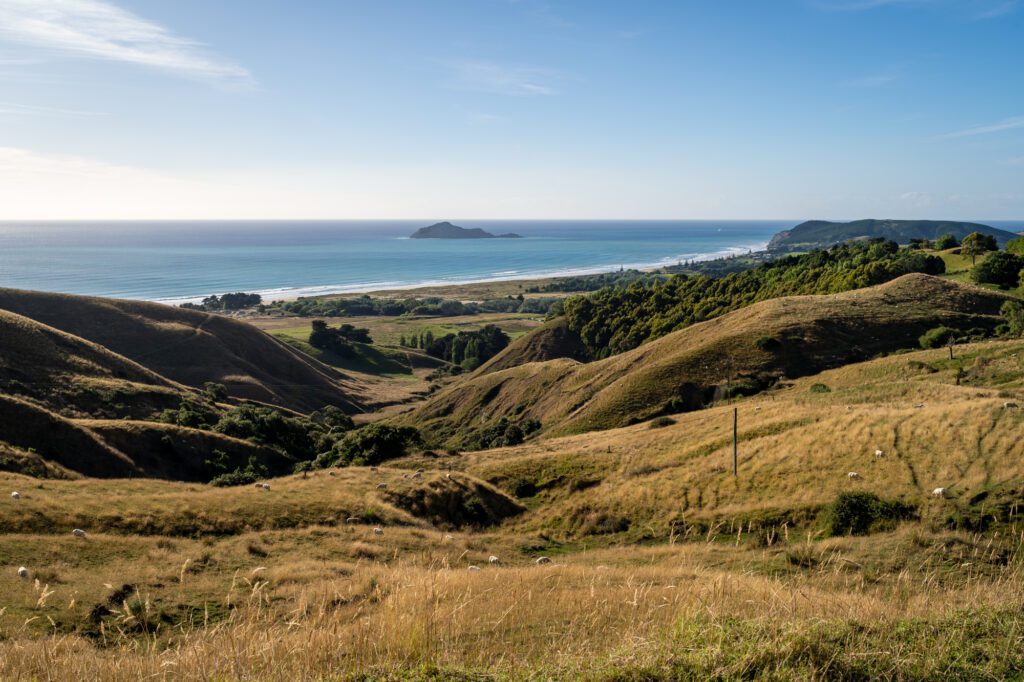
Second is beaches. Hawke’s Bay, as you might imagine, is coastal. Again, reminding us of California, it’s where the rolling golden hills (and apple orchards and sheep paddocks) meet the Pacific Ocean.
There are several really nice beaches right in Napier and Hastings (or just outside), and a bunch more just outside of those towns – particularly to the south – where you’ll find more locals than tourists.
Last is the food. Thanks to the climate and geography, Hawke’s Bay is the perfect place to grow fruit. Berries. Stone fruit. Apples. Grapes. You name it, they probably grow it here.
There are produce stands lining Napier Road selling fruit that was picked a day ago or less, and that bounty of farm-fresh produce (among other ingredients like cheese) translates to some really good food around Hawke’s Bay.
If your idea of a good time is a morning hike to a peak with a great 360-degree view, followed by a well-earned brunch, some wine tasting, and an afternoon on the beach, we think you’re going to love Hawke’s Bay (we definitely did).
What to Do in Hawke’s Bay and Hastings
Here are some of the things to do in and around Hawke’s Bay that we really enjoyed, and think you will too.
First, if you happen to be in town on a Sunday, the Hawke’s Bay Farmers Market is a must-visit, we think.
It’s massive, which isn’t surprising given the area, and has all sorts of vendors from fruit and vegetables to cheese to olive oil to bread to coffee…you get the idea.
Second, we had what might have been the best (gluten free) meal we had in New Zealand at the Te Mata Figgery Cafe.
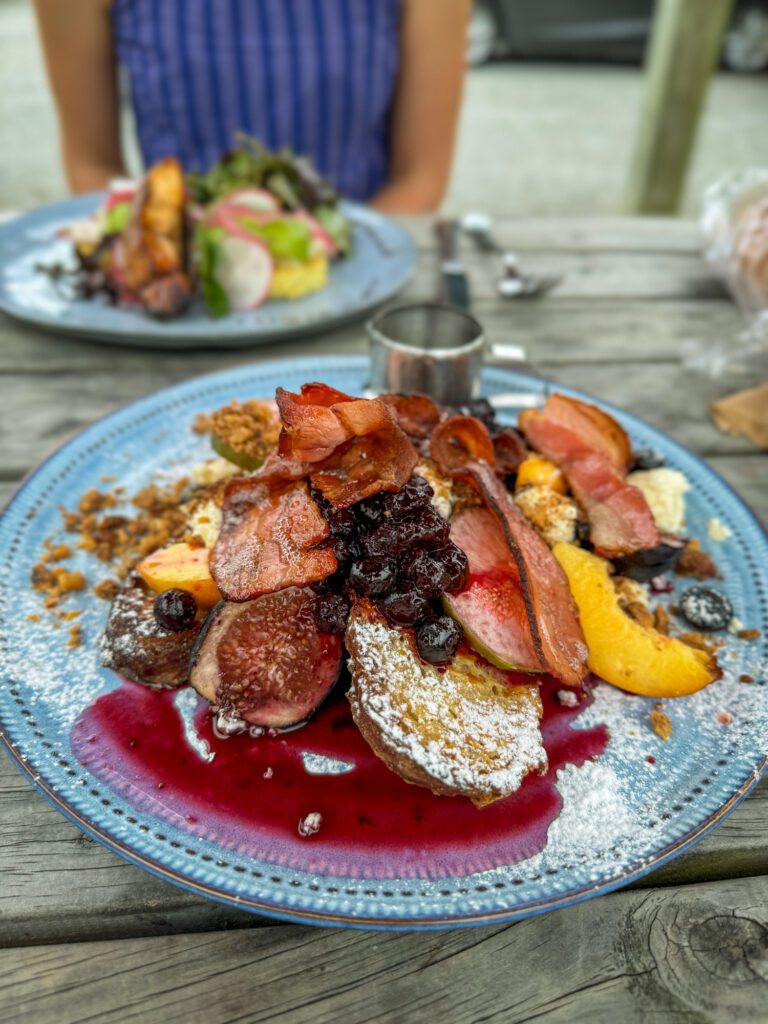
They grow figs (which ripen in late summer, somewhere around February and March) and use them in a bunch of creative ways at the cafe.
The French Toast is amazing, topped with seasonal fruit, ricotta, and bacon (love that sweet and salty combo!).
Te Mata Peak
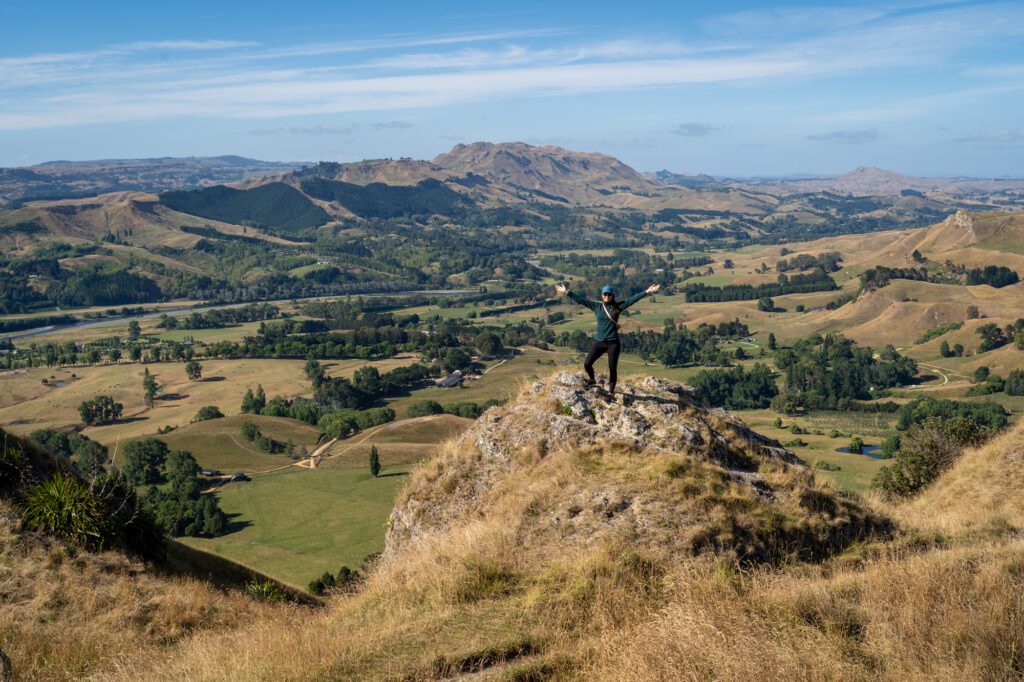
The craggy peak overlooking the valley, this rocky outcropping is home to the best hike in the area.
Start from the parking lot at the entrance to the park (here on Google Maps) and climb up to the highest point in the area, where you’ll have views in all directions on a clear morning.
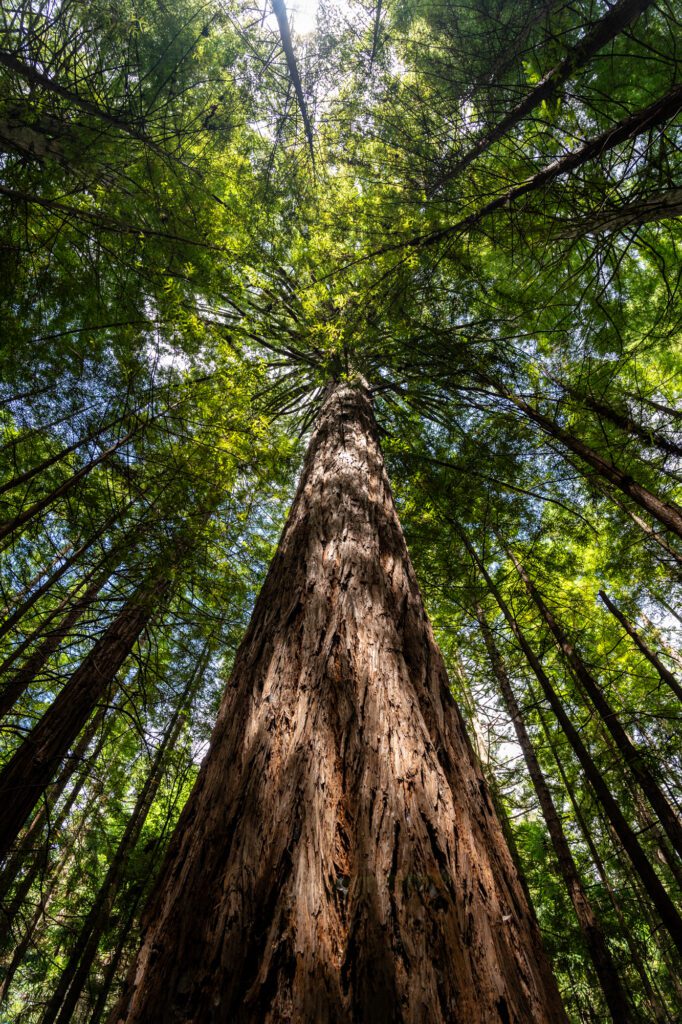
Along the way, you’ll also have some nice views – particularly towards the coast – and you’ll even get to walk through a redwood grove, which provides a nice change in scenery.
You can also drive, though the road is narrow (only room for one car in sections) and parking at the top is limited.
Scenic drive through the Tuki Tuki Valley
Based on a tip from the host of our accommodations, we did an early morning drive down to the southern end of Hawke’s Bay to check out a couple of beaches.
Driving through the Tuki Tuki Valley, you’ll experience rolling hills that continue all the way to the coast and are lined with grazing sheep and exquisite views of Te Mata Peak across the river.
We’d go out to Waimarama Beach, a surfer’s paradise, and stop at Ocean Beach (a better beach for swimming) on the way back.
The drive takes about an hour each way, and we enjoyed every second of it. Here’s a rough route to take.
Wine tasting
As we mentioned above, Hawke’s Bay is one of New Zealand’s premier wine regions.
It’s known for bigger, bolder reds thanks to its warmer, drier climate than, say, the Marlborough region, which isn’t really our thing. We’re much more into white wines and bubbles!
Our favorite experience was at Askerne Estate Winery, where we had a very laid back, casual tasting led by a very friendly Kiwi who happily answered all of our (read: Matt’s) questions.
At $10 a tasting for 5-6 wines each, we loved it. All of their wine comes from fruit grown on their property in Hawke’s Bay, too!
Next is Craggy Range, which is probably the most prestigious winery in Hawke’s Bay. It’s definitely on the higher end, and prices and experience both reflect that.
They have a couple of different tasting and food experiences to choose from, including a full on vineyard tour and wine and food pairing.
Last is Te Awanga Estate, which was a recommendation from our host (though we didn’t actually make it there) as a casual place to try some wine and grab a bite to eat (she specifically called out their pizzas).
Where to Stay in Hawke’s Bay
Once again, you have a fork in the road before you decide on where to stay, and it centers around whether you want to stay in a city or in a more rural setting.
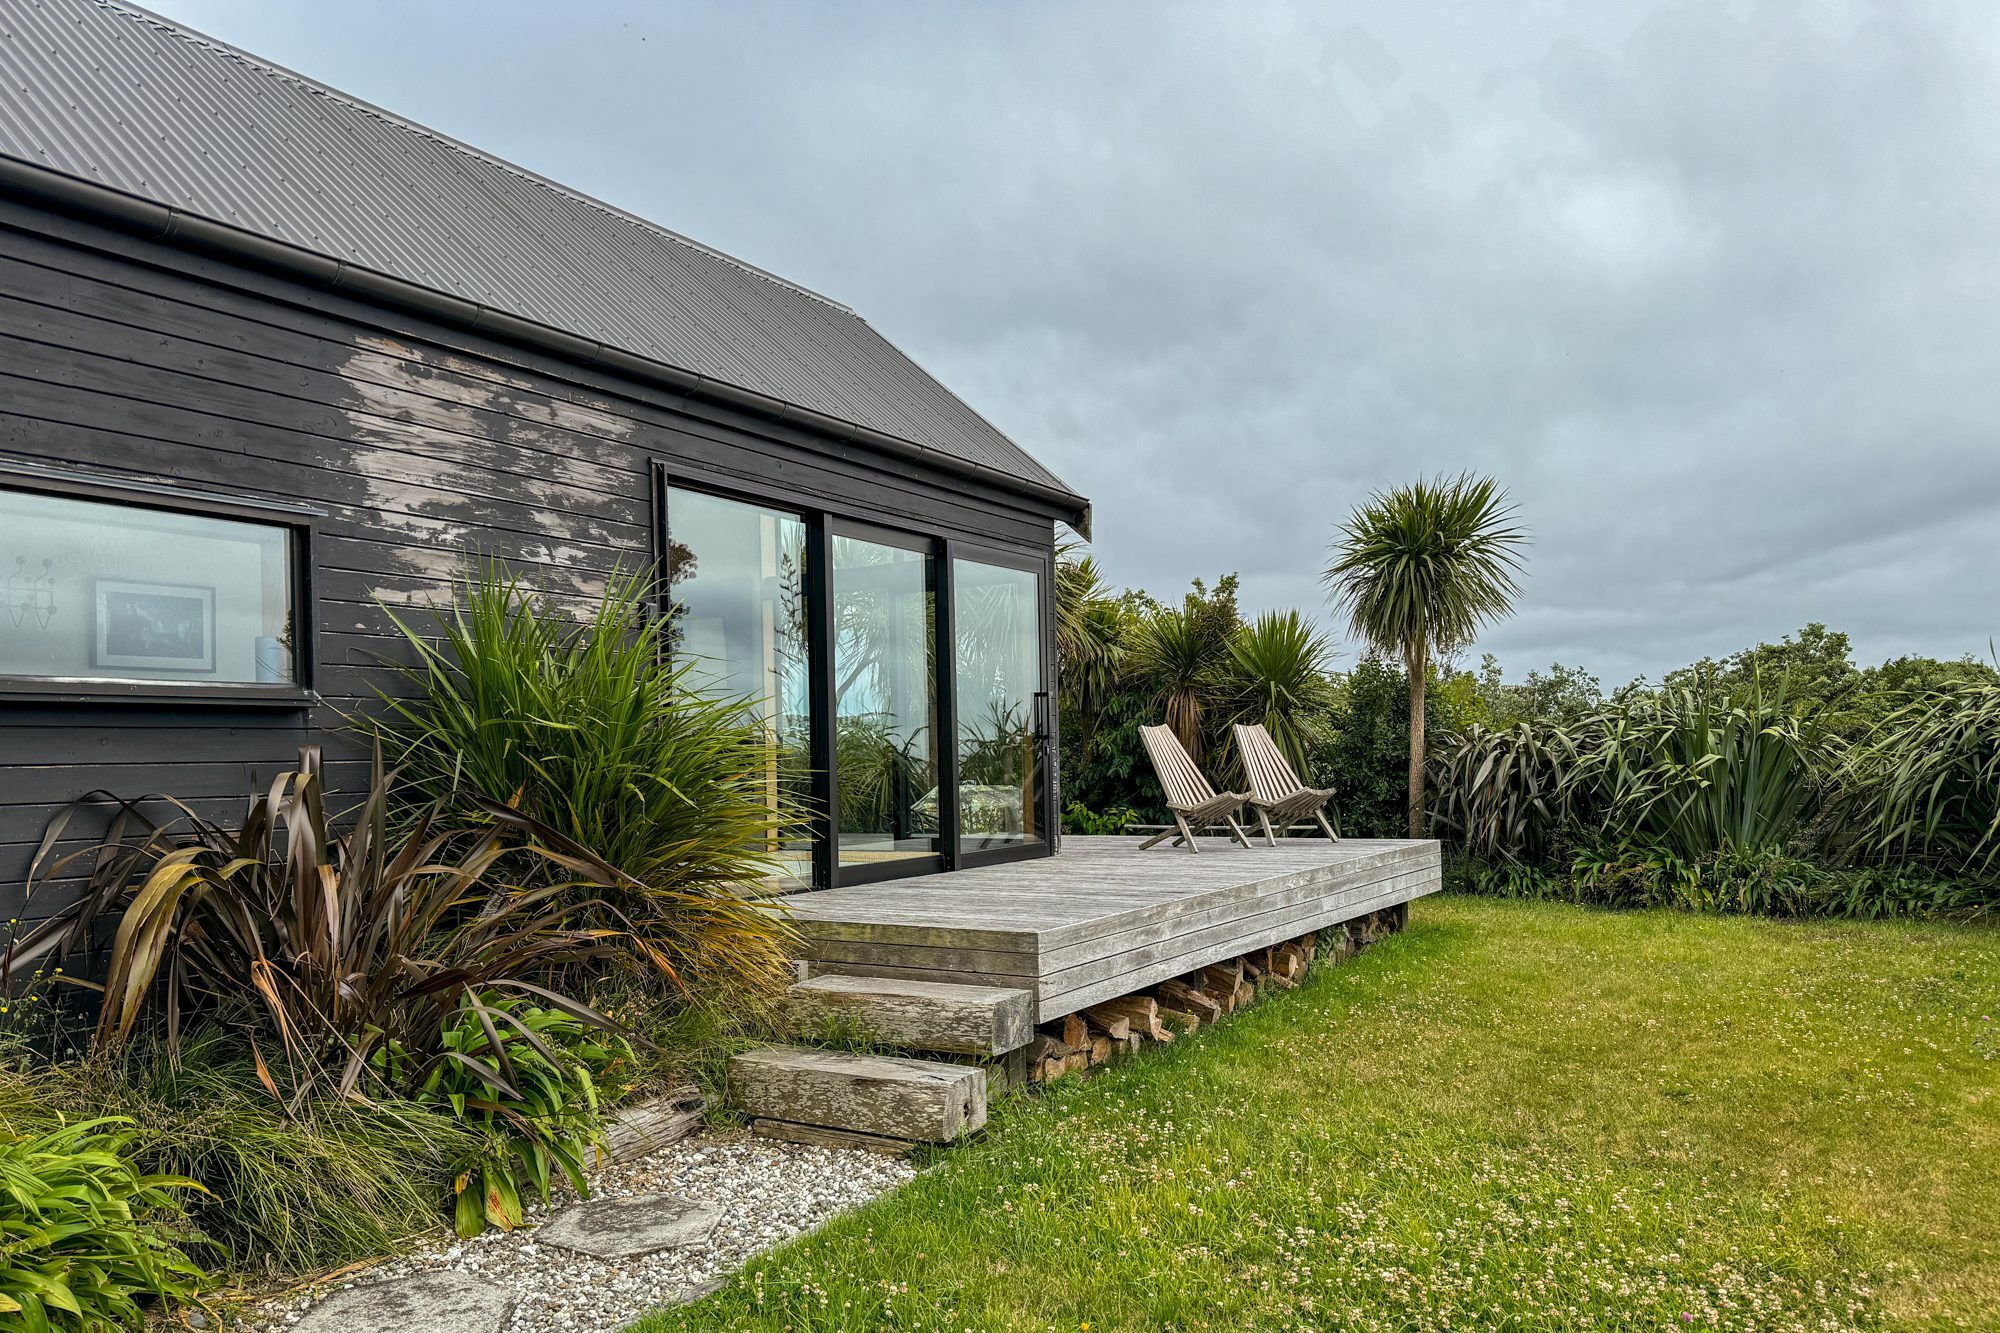
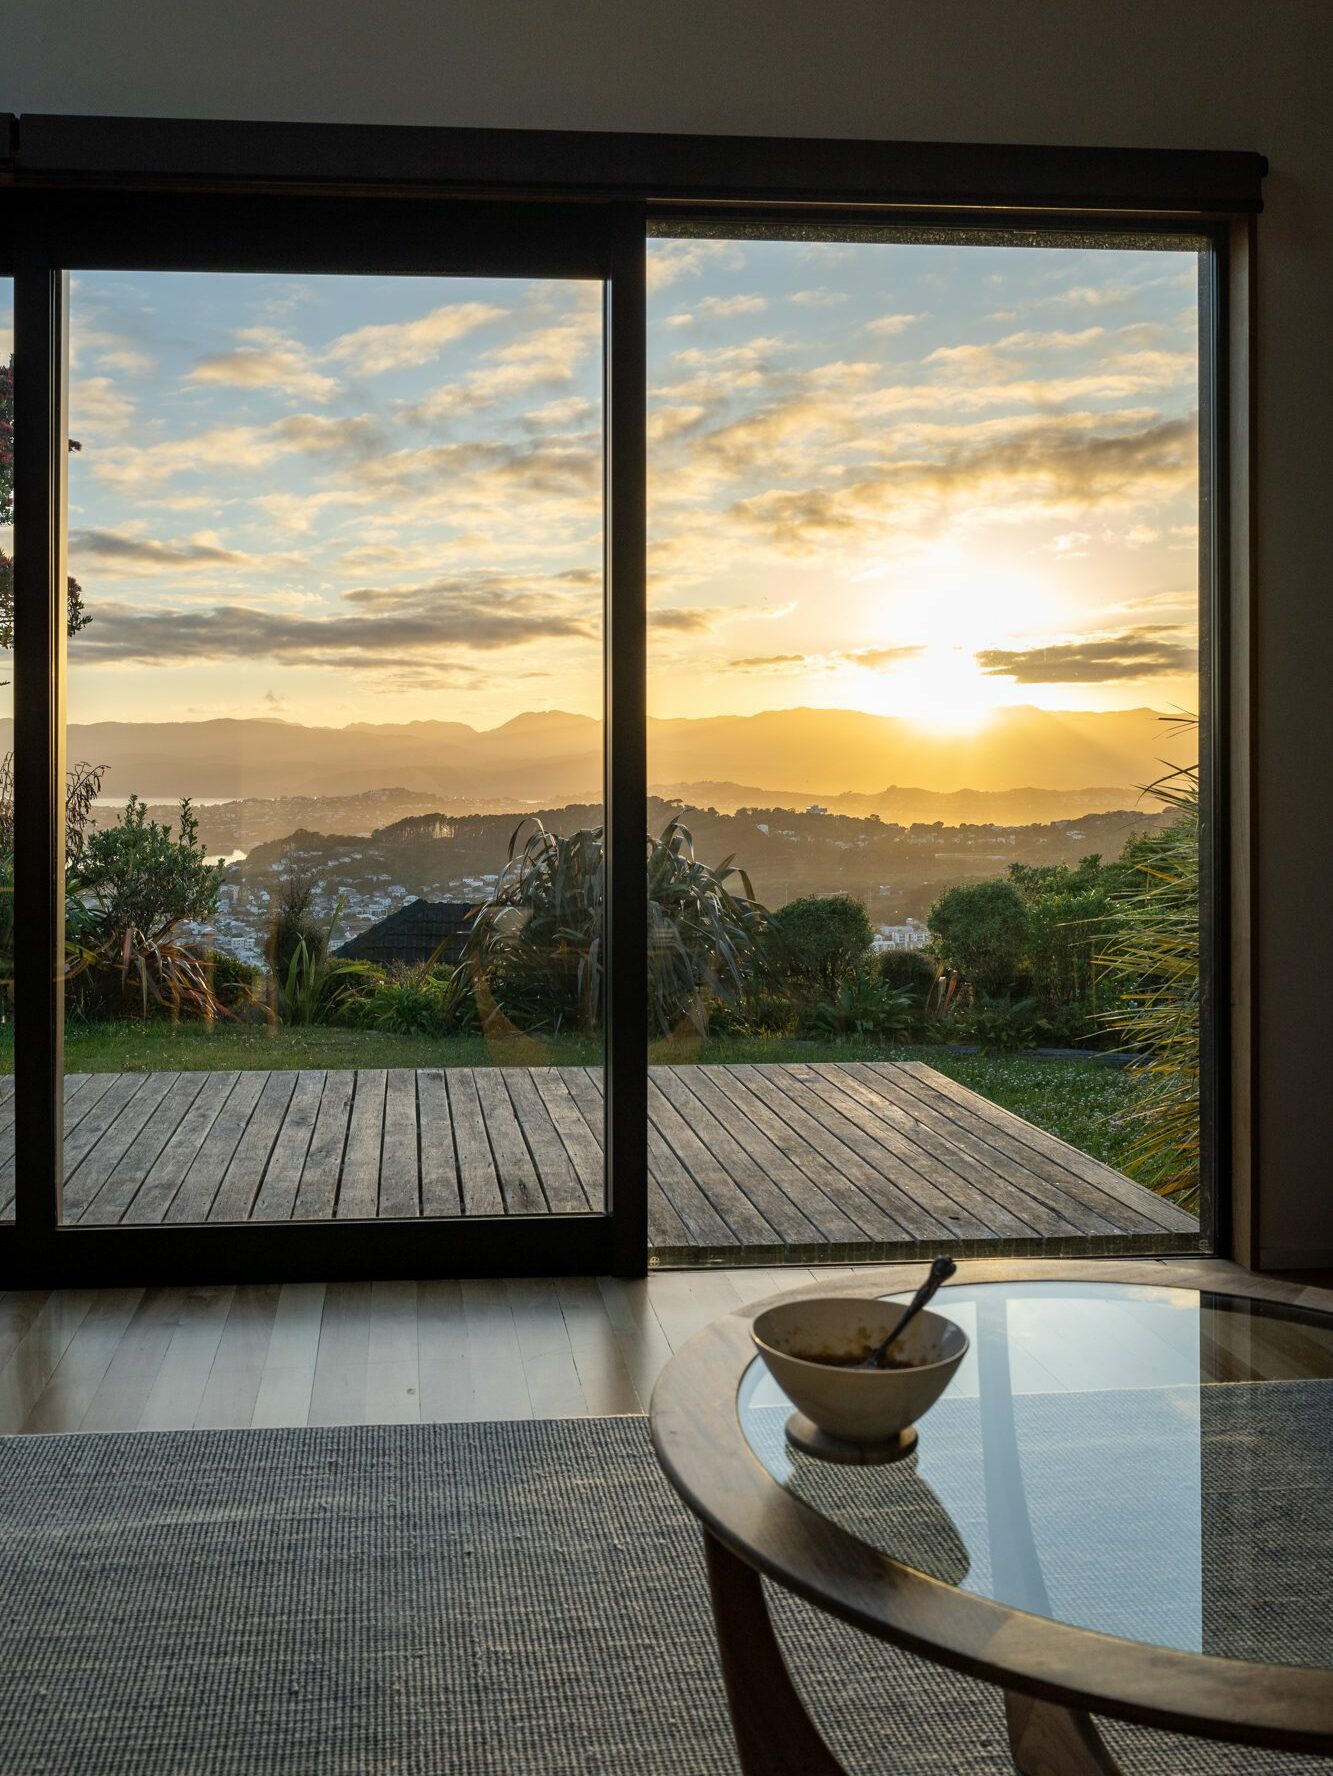
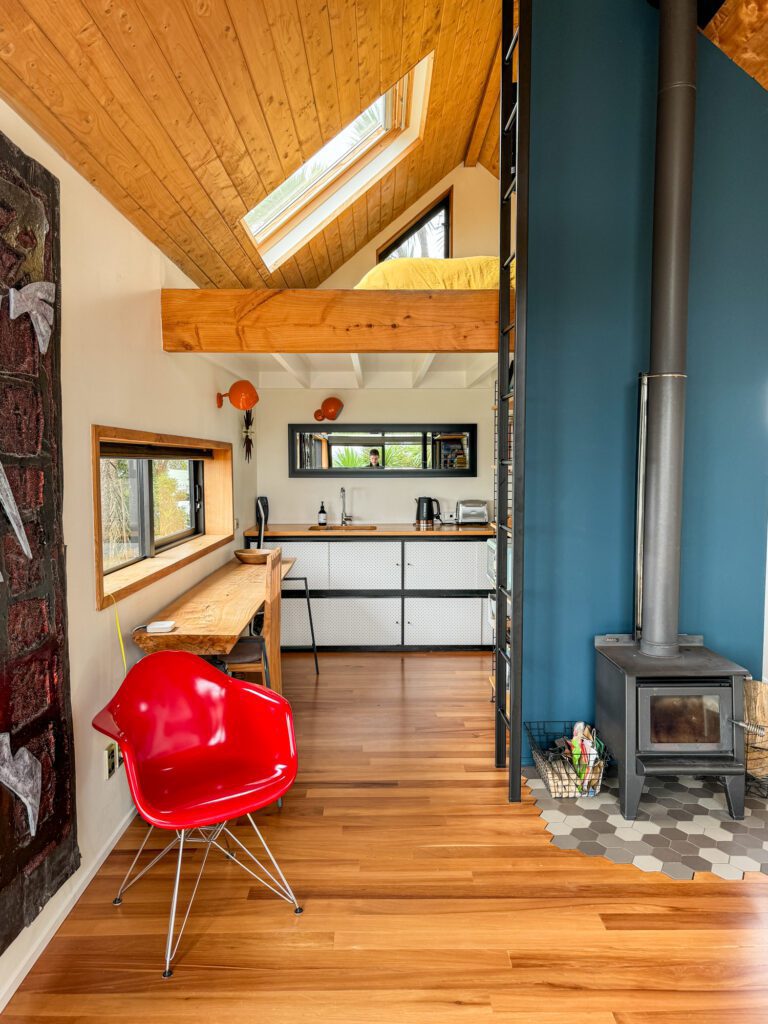
For what it’s worth, we chose a more rural setting and absolutely did not regret it. We stayed at the Freefall Hut down near Te Awanga (south of Hastings and North Havelock) and loved both the location, and the specific place we chose.
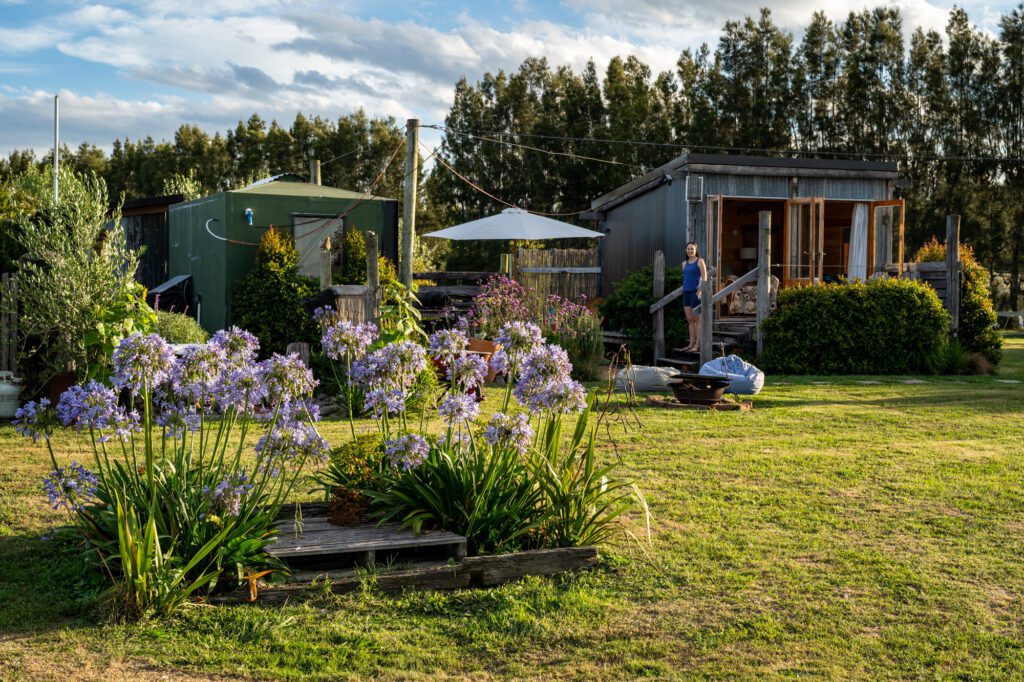
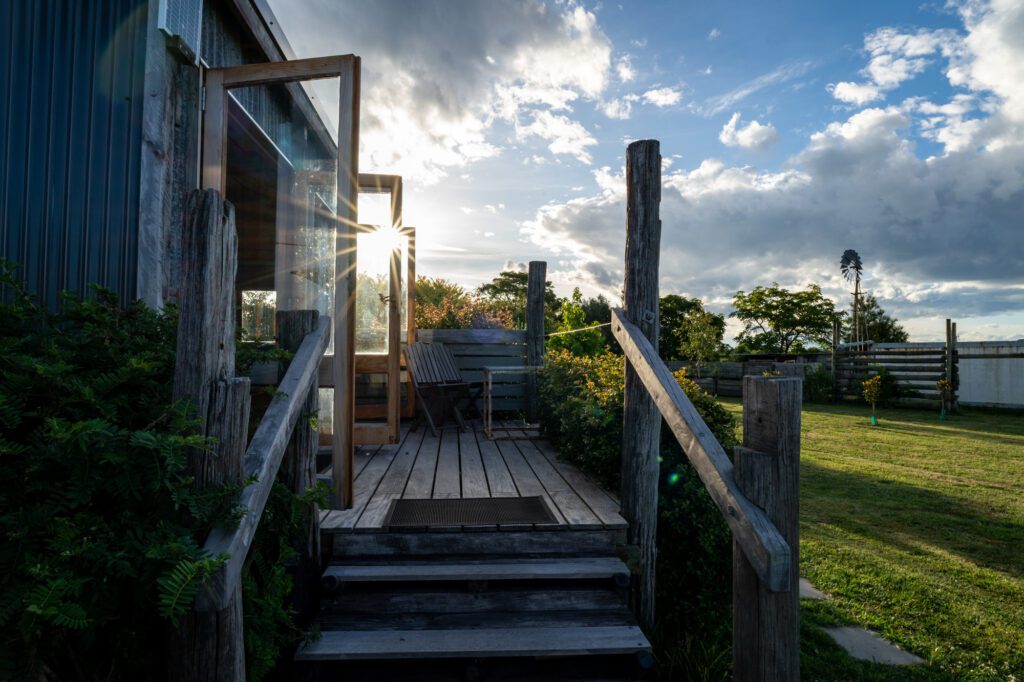
It was quiet, peaceful, private, and we loved spending the evening outside watching the sunset and listening to the cacophony of local birds.
However, it’s certainly convenient to stay in town and be able to walk to restaurants, shops, wineries, and even the beach.
If you would prefer to stay in a city (really, a town), we’d DEFINITELY choose Napier, which we found to be more charming than Hastings.
For a similar experience to our place down south, with a cozy cottage and a quieter environment, check out the Bluff Hill Bed & Breakfast, which is up on the hill just north of the Napier city center (plus, they have a pool!).
Our other recommendation here based on our research would be the Laneway Apartments, which are self-contained apartments (with kitchen facilities!) that are a few blocks from the beach and the rest of downtown Napier, and are both spacious and stylish.
Another option is the Art Deco Masonic Hotel, which is a little cheaper and in a similar location, but doesn’t have a kitchen and the rooms are much more compact (which makes sense given it’s a hotel, not apartments).
Tongariro National Park (Days 5-7)
Drive time and distance: 3 hours // 232 km (144 miles)
Tongariro National Park is almost smack dab in the center of the North Island, and your visit here marks the halfway point on your road trip.
Tongariro is a special place. It was the first designated national park in New Zealand (and sixth in the world), and has since been declared a dual UNESCO World Heritage Site for cultural and natural values.
The summits of the volcanoes are considered sacred to the local Māori iwis (iwis means tribes, roughly), which is one of a few good reasons why you shouldn’t summit them.
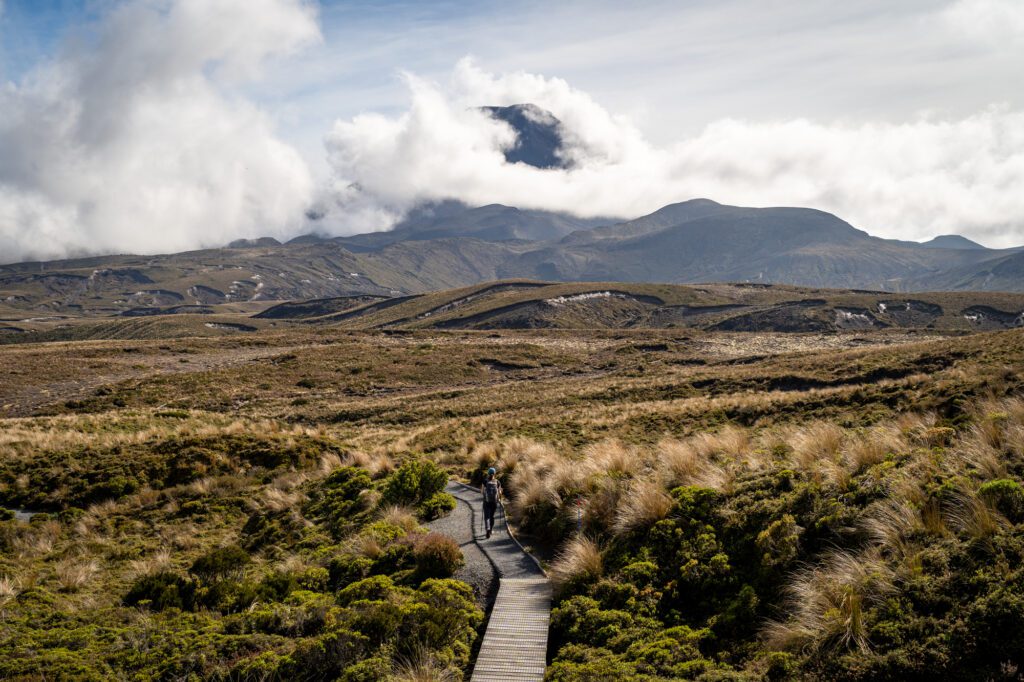
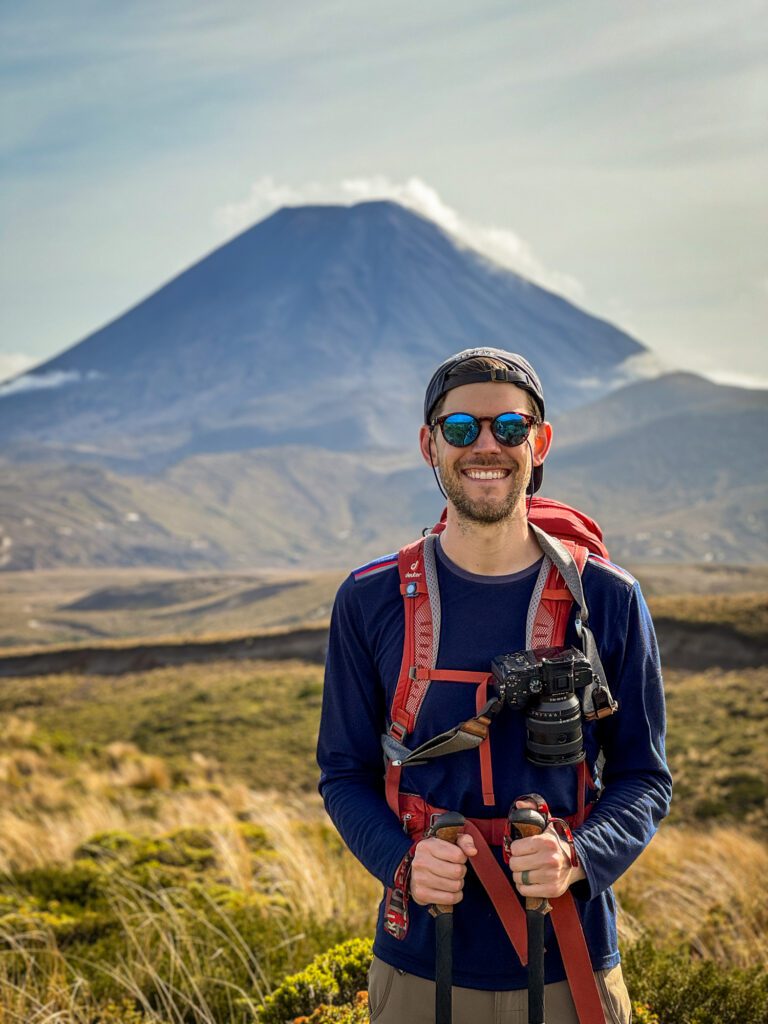
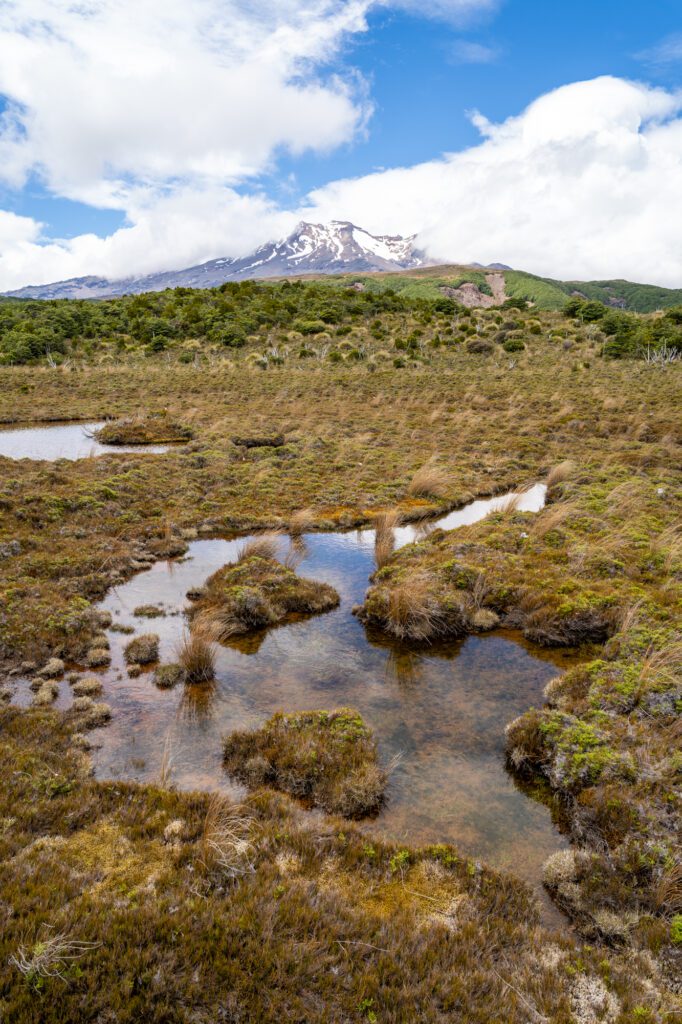
The park revolves around the three active volcanoes in the park – Mount Ruapehu, Mount Ngauruhoe, and Mount Tongariro – all of which you’ll get a glimpse of if you tackle the famous Tongariro Alpine Crossing (which we’ll cover below).
It’s not every day that you can hike along the base of an active volcano! The geography and geology in Tongariro is what we think makes it special and worth your time.
If you’re lucky with the weather, anyway.
The weather in this part of the world is notoriously unpredictable, and the Department of Conservation follows strict guidelines around wind, rain, and temperatures when they determine which trails are open on a daily basis.
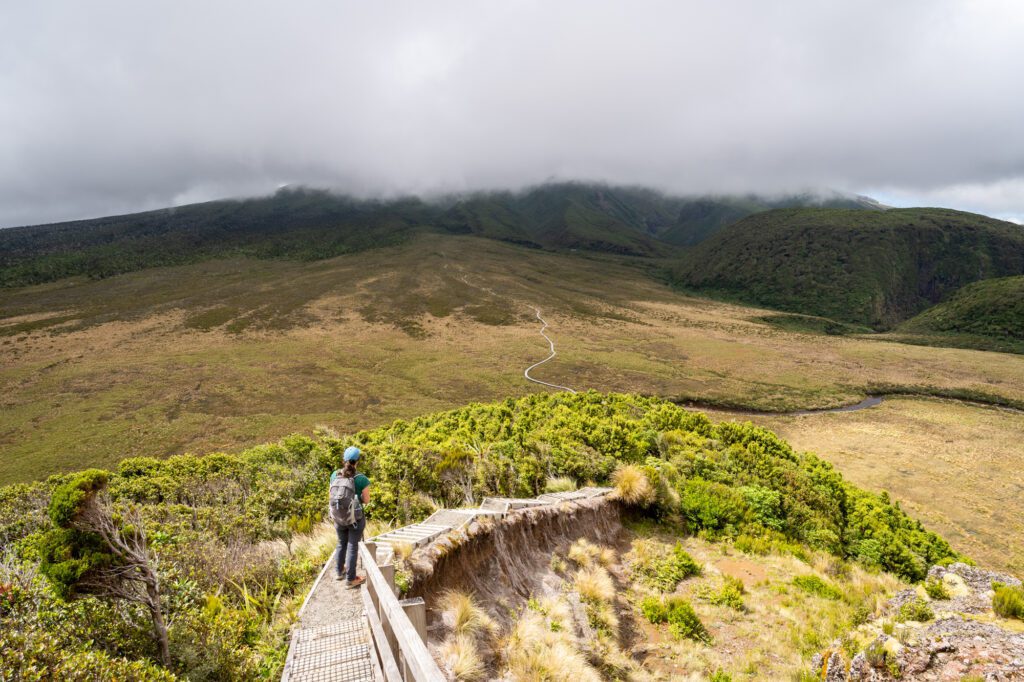
A couple of examples of this in action would be both of the big hikes we did in Tongariro – the aforementioned Crossing and the hike to Tama Lakes.
Our hike to Tama Lakes started out beautifully! Sunny, warm, and perfect visibility so that we could see both Mount Ruapehu and Mount Ngauruhoe.
Half way through, we couldn’t see either peak and the fog was getting thicker by the minute.
By the time we finished, it was raining sideways, we were soaked to the bone despite being clad in waterproof gear, and we were in flash flood territory.
Part of the reason we have you spending more time here than you might expect is to maximize your chances of getting a good weather day where you can see the peaks of the mountains.
We met multiple other hikers who had their shuttles for the Crossing canceled and didn’t get to do the hike because they had to move on, which would be a major bummer.
Plus, there’s plenty to do and see here aside from the Crossing!
What to Do in Tongariro National Park
Before we get into our favorite things to do and see in Tongariro National Park, it’s worth taking a second to talk about the park’s geography.
The park, centered around Mount Ruapehu – the biggest active volcano in New Zealand and the country’s first national park – is big and sprawling, covering almost 800 square kilometers (400 square miles) on New Zealand’s North Island.
While it may be big and sprawling, there are really two areas you’ll be accessing as a visitor for a couple of days; the area on the eastern side of the park near Whakapapa Village (which is a Māori word that is pronounced “fah-kah-pah-pah”), and the area on the southern side of the park near the town of Ohakune.
Both are worth a visit, and we’d recommend driving all the way up to Turoa (a ski resort in the winter, here on Google Maps) on the southern side of the mountain for an up-close-and-personal view of the southern face of Mount Ruapehu.
It probably makes sense to stop at the southern side of the park on your way up from Hawke’s Bay.
Now, let’s talk about what to do and see in the park.
Hike the Tongariro Alpine Crossing
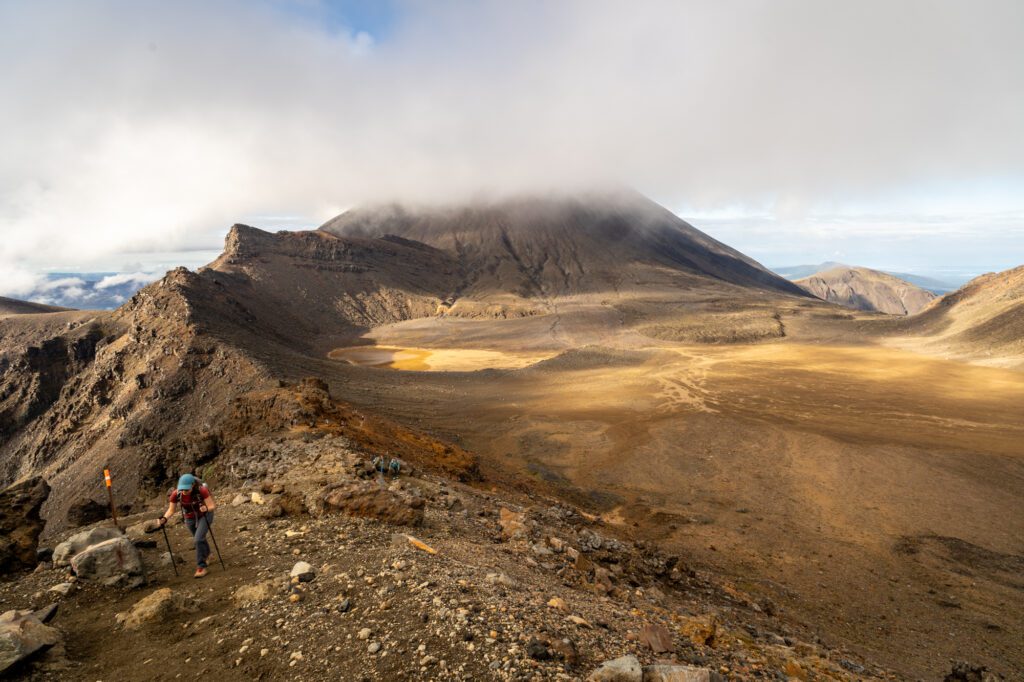
Billed as the best day hike in the country (and one of the best in the world, which we’re not sure we agree with), this is the premier hike in the park.
It’s also the busiest and most complicated, because it’s a one way hike that requires a shuttle service to take you from your car, parked at the end of the trail, up to the trailhead to start the hike.
It’s not an easy hike by any definition – we clocked 12 miles and 2,600 feet of elevation gain – but provided you’re prepared physically and with the right equipment, we’d say it’s worth it.
We have an entire guide dedicated to hiking the Tongariro Alpine Crossing where you can find all the information you need to hike the trail safely and confidently (including all the logistics!).
Hike to Tama Lakes
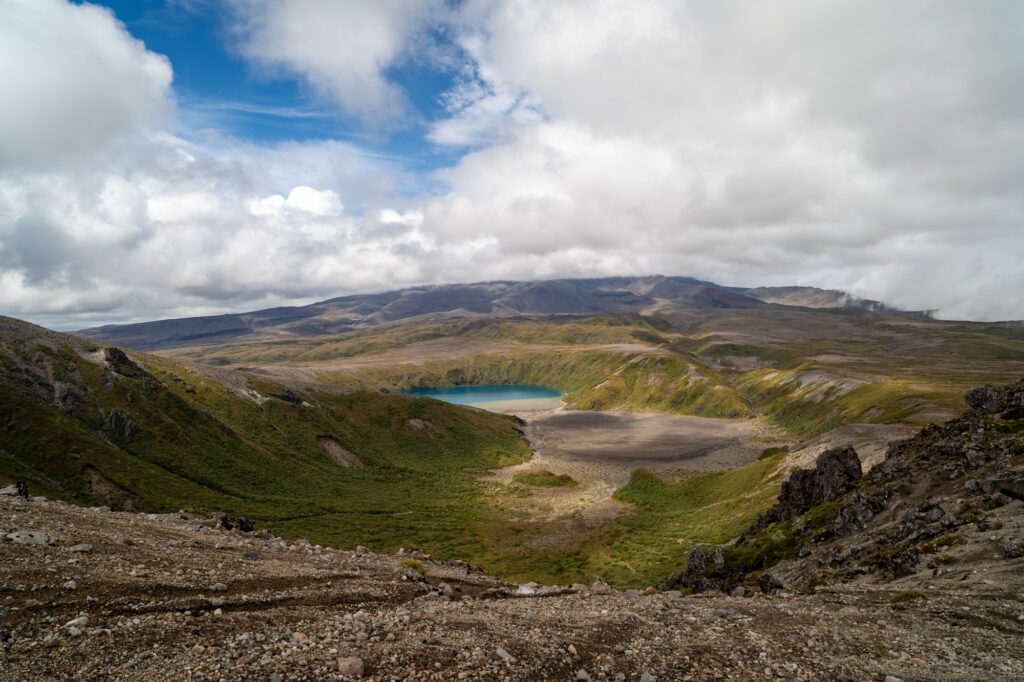
This shorter hike is not quite as spectacular as the crossing, but it’s significantly easier (still a tough day hike, with tons of sun exposure) and less complicated, which makes it an excellent alternative if you want a quieter trail, an easier hike, or don’t want to pay the $60 NZD fee for the shuttle services (per person).
You start near Whakapapa Village and quickly ascend into that barren, desolate landscape that made the perfect Mordor in Lord of the Rings.
It’s a steady climb up to two lakes – and you should absolutely make the climb up the ridge for the second one!
We also have a guide to hiking to Tama Lakes with all the logistics and information you need to hit the trail.
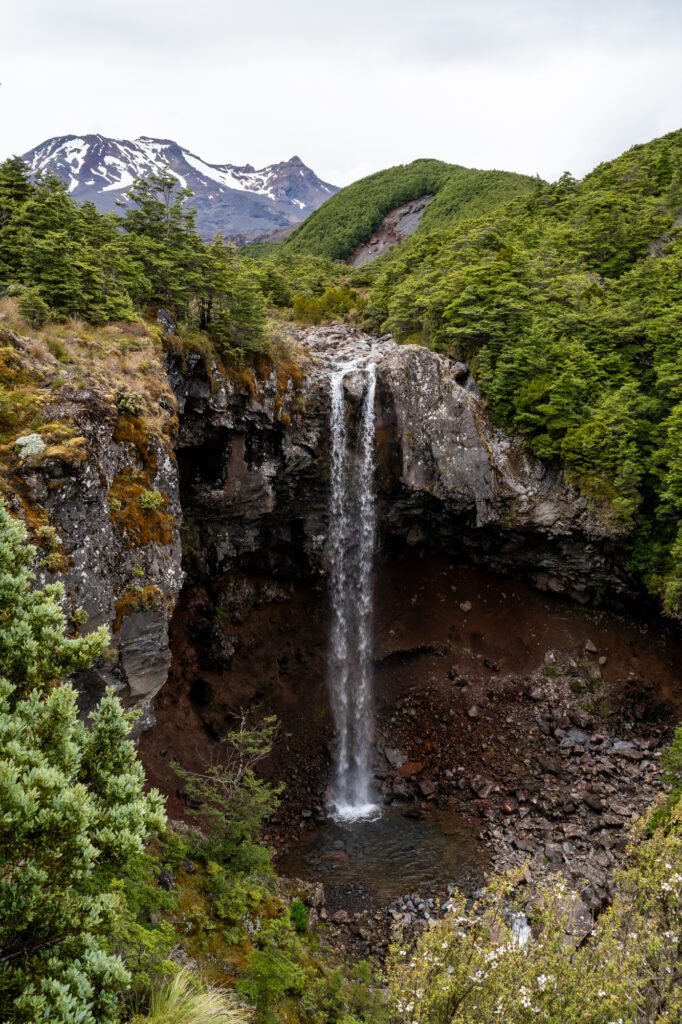
Mangawhero Falls (southern side)
A great waterfall that is a few hundred meters from the parking area.
If you’re lucky and you’re here on a clear day, Mount Ruapehu will be peeking its southern face out from behind the falls, giving you a shot that reminds us a lot of Myrtle Falls in Mount Rainier National Park in our backyard.
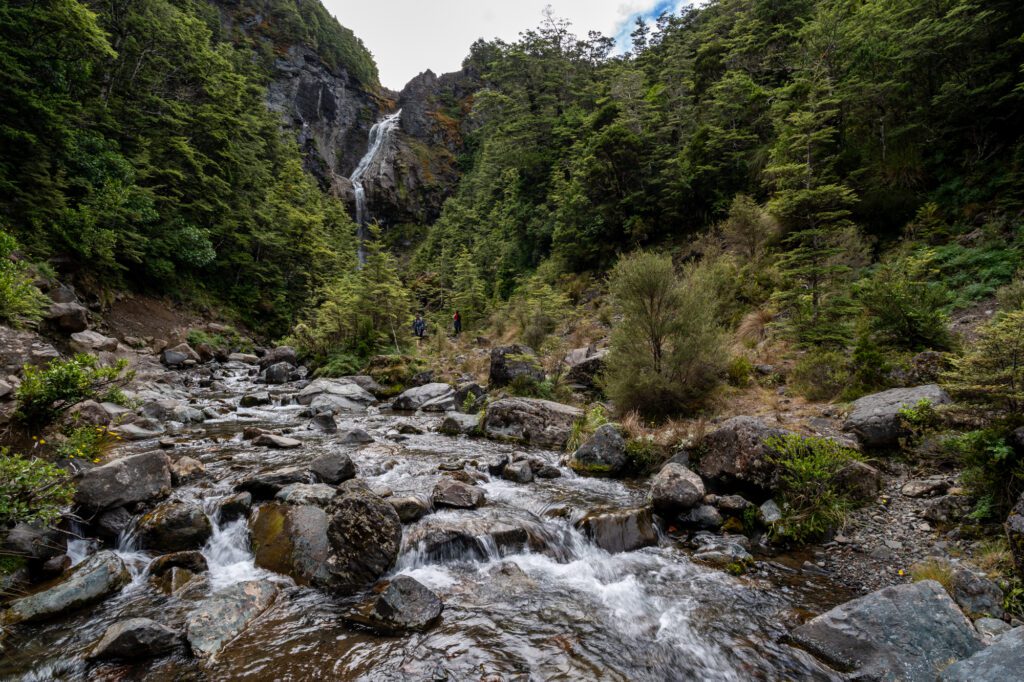
Waitonga Falls (southern side)
A few minutes away from Mangawhero, this is a short hike through the woods to a towering waterfall.
It’s a short hike, but it involves more climbing than we were expecting because you climb up to the top of a hill (where you have an excellent – and unexpected – view of Mount Ruapehu) only to climb back down to a river. Which means two sets of stairs to climb up and down!
Still, we’d recommend it – the falls are beautiful, as is the view of Mount Ruapehu.
Where to Stay in Tongariro National Park
You essentially have three choices when it comes to choosing a place to stay near Tongariro National Park.
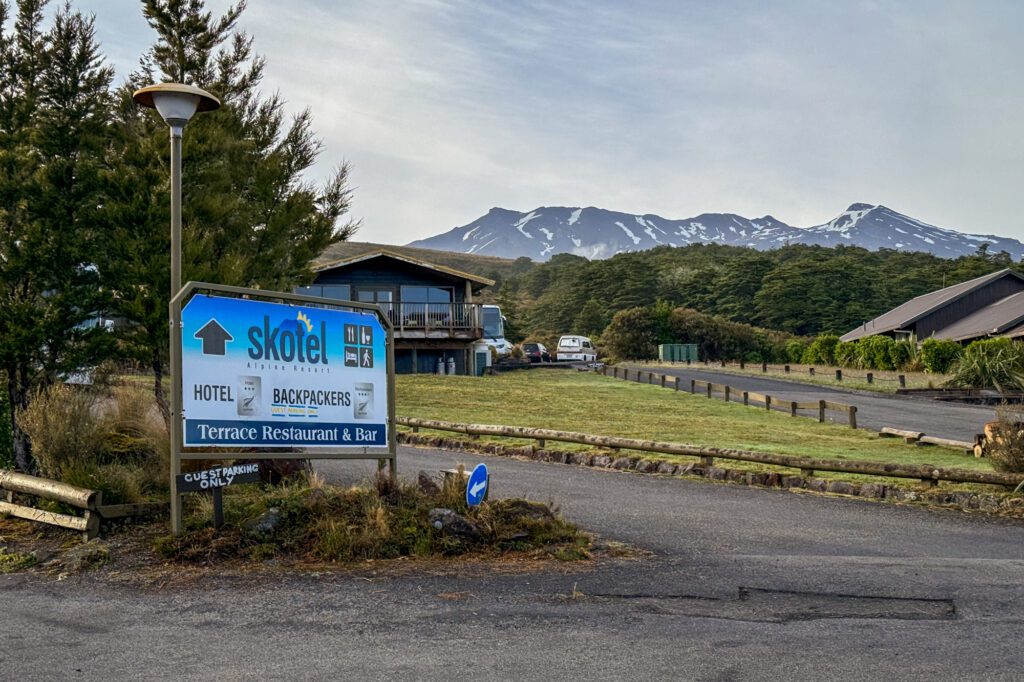
Your first choice is to stay inside the park near Whakapapa Village, which is set around the national park visitor center.
The choices here are slim, but it’s actually not as expensive as you might expect (there’s a backpacker lodge called Skotel that is an excellent budget option).
Your second choice is to stay right outside the main entrance to the park, in a town (fittingly) called “National Park.”
It’s a small town catering mostly to visitors to the park, so there are a few restaurants and cafes, a grocery store, and that’s about it.
Staying here puts you about 10-15 minutes away from Whakapapa Village, which is the main area on the eastern side of the park, and about 45 minutes away from Turoa, the highest point on the southern side of the park.
As you can see, the location is great, but you’re going to pay for the privilege.
There are a couple of nice places to stay here, including the Plateau Lodge (a cross between a hostel and a hotel, with common kitchen facilities available).
Most of them skew towards the budget side of the spectrum in terms of facilities, but prices skew more mid-range.
Your last option, and the one we chose, is to stay further away on the northeastern side of the park in a town like Tūrangi, which is about 30 minutes from Whakapapa Village and an hour from the southern end of the park.
The disadvantage is that it’s a longer drive to Whakapapa Village on the eastern side of the park AND to the southern side of the park.
However, if you’re hiking the Tongariro Alpine Crossing and using one of the many shuttle services offering one-way transportation to the trailhead, this is actually the closest option to the parking lot where you’ll park bright and early in the morning.
We would not recommend staying on the southern side of the park (in towns like Ohakune) because it’s a long drive to both the eastern side and an extra long drive to the parking lot for the Tongariro Alpine Crossing, which you’ll have to be at early in the morning to catch a shuttle.
Rotorua and Tauranga (Days 8-9)
Drive time and distance: 2 hours and 15 minutes // 177 km (110 miles)
We’re grouping these two areas together – which are roughly an hour apart by car – because they are in the same general vicinity (though they do offer different things).
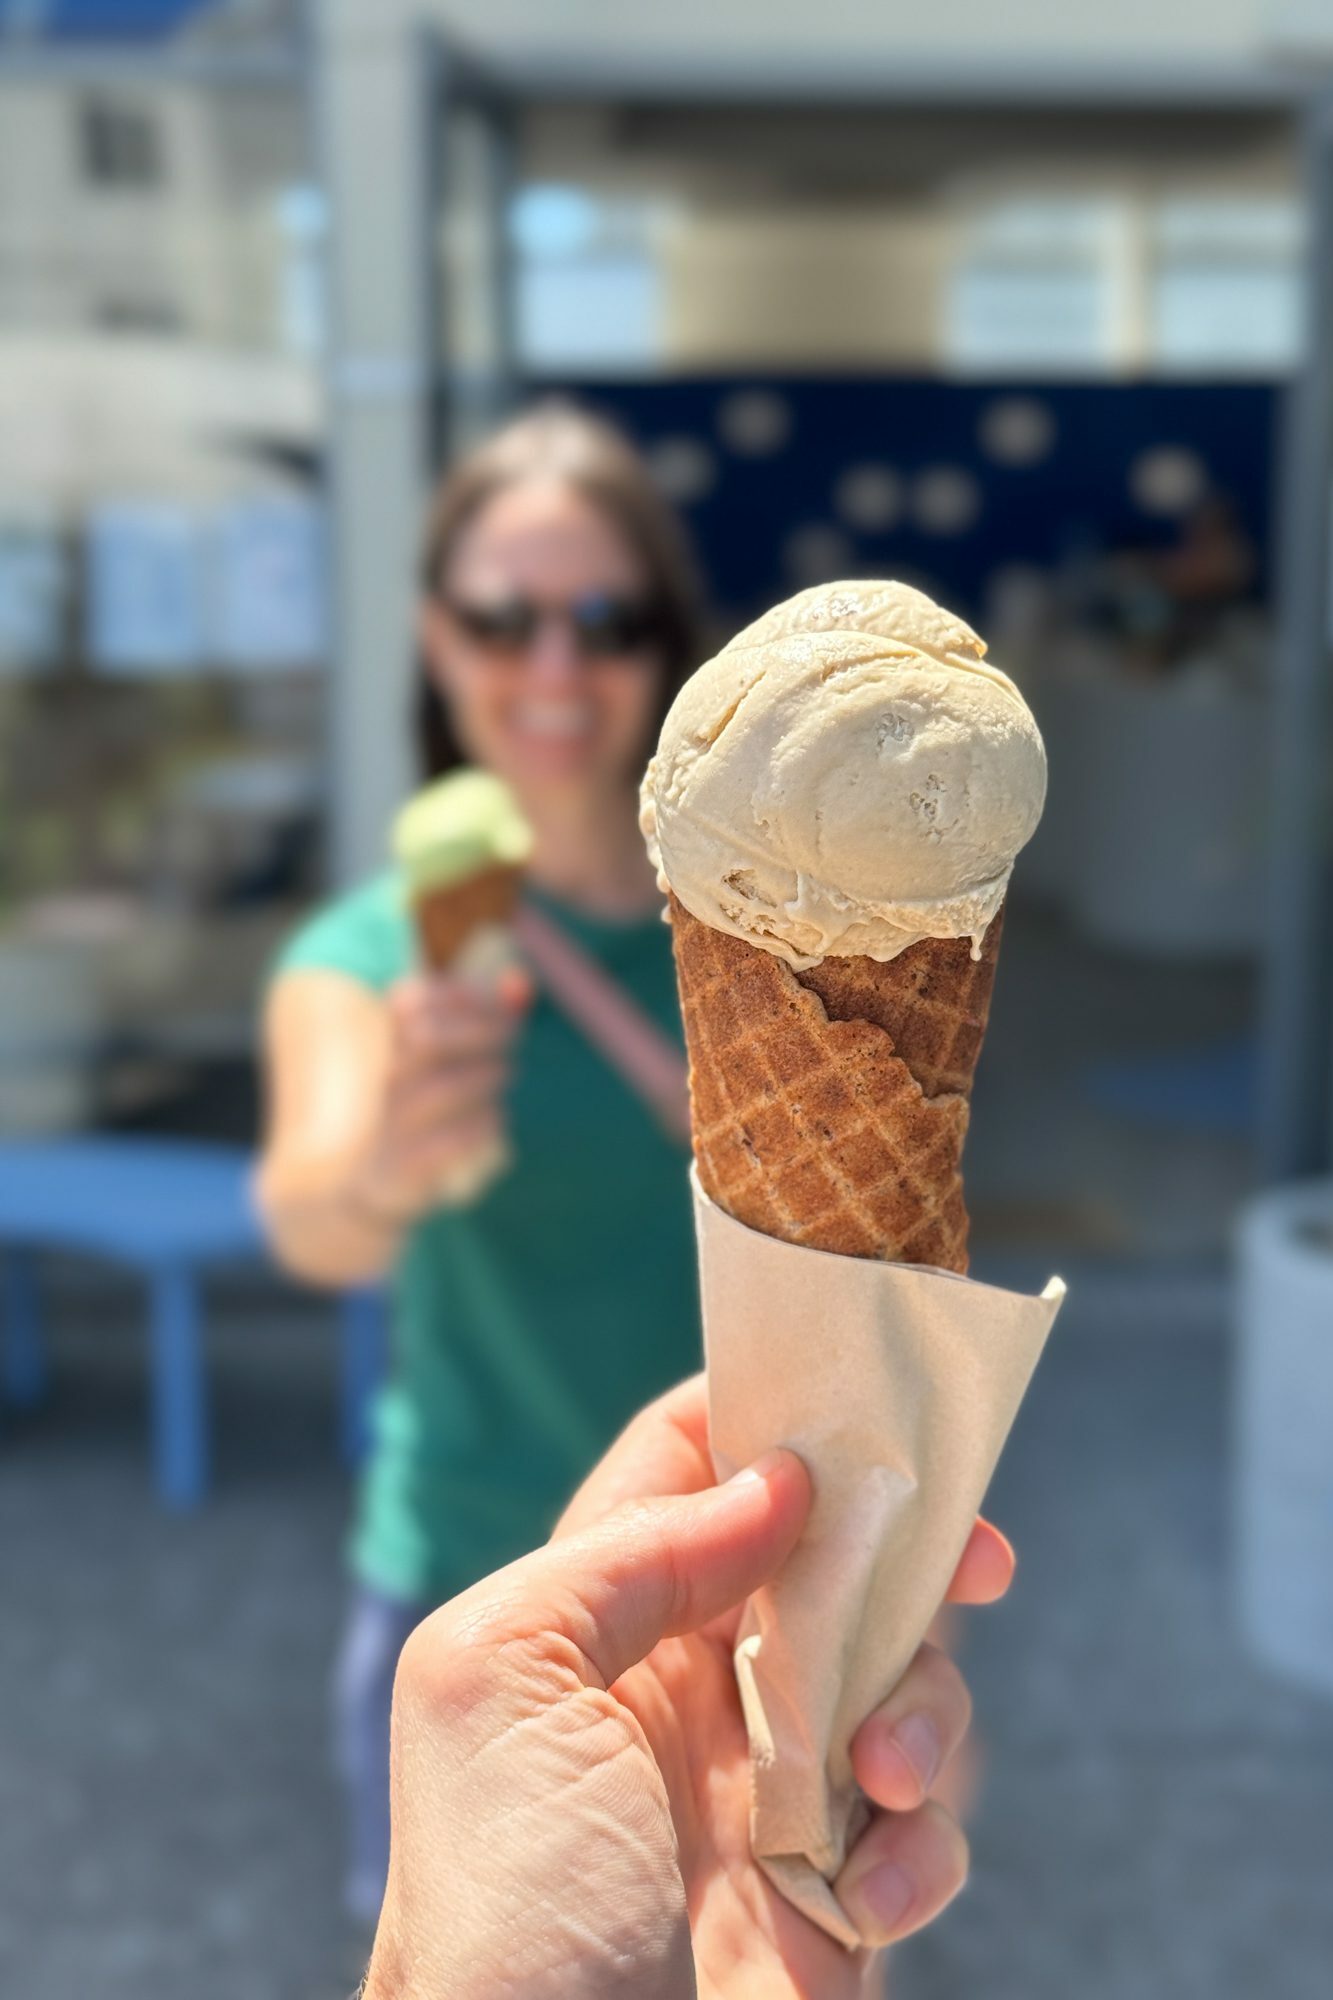
We did a day in Rotorua, spent a morning in Tauranga doing the big hike and enjoying a nice lunch plus ice cream, and then headed to Hobbiton that afternoon.
Two days is probably the right amount of time here.
There are three things that stand out in our minds as reasons to spend a couple of days here, and they are – in no particular order – the intense geothermal activity near Rotorua, the area around Mount Maunganui in Tauranga, and the proximity to Hobbiton, which we think is worth both the detour and the price (especially for Lord of the Rings fans, but not exclusively for them).
The other thing to know about this area is that, if you’re interested in diving deeper into the Māori and their culture, this is one of the best places in the country to do it.
We were excited to visit the Rotorua Museum, but we realized it was closed to all visitors for several more years after earthquakes in 2016 rendered it unsafe to be inside. There is a big renovation project going on at the moment.
However, if it had worked from a timing perspective, we would have absolutely loved to do an external tour with the museum staff, which runs at 11am and covers the history of the gardens and museum (at the time of writing).
The other way to gain some insight into the Māori from a cultural perspective is one of the cultural tours near Rotorua.
We’re always a little skeptical of “cultural tours” that do things like visit a “real life village” of the local indigenous people after several bad, fairly cringeworthy experiences elsewhere that left us feeling icky.
So we skipped that aspect of Rotorua. But if that experience sounds like something you’re interested in, we’d go with this evening tour (with dinner), which gets rave reviews.
If you’re in search of more things to do and see in Rotorua, we’d point you here for crowd-sourced ideas!
Things to Do in Rotorua and Tauranga
Rotorua is most famous for its intense geothermal activity, and that’s probably where your visit should start here. There are multiple options, and we’ll cover them below (and why we chose the one we did).
A special shout out for the Rotorua Night Market, which happens in downtown Rotorua on Thursday evenings and was one of the highlights of our (brief) visit to the city.
The geothermal parks
At a high level, there are three geothermal parks to choose from in and around Rotorua.
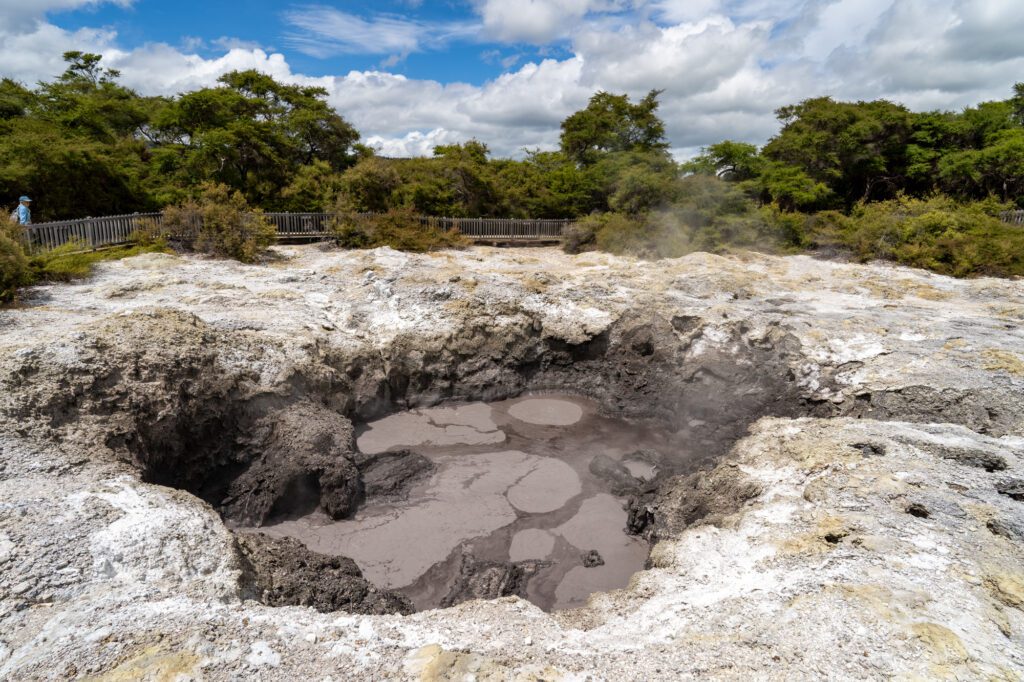
The first, Kuirau Park, is free and is right next to the downtown area. It basically has one bigger pool, some smaller mud pools, some informational signage, and that’s about it. It’s a good option on a budget, but lacks some of the “WOW” factor that the others have.
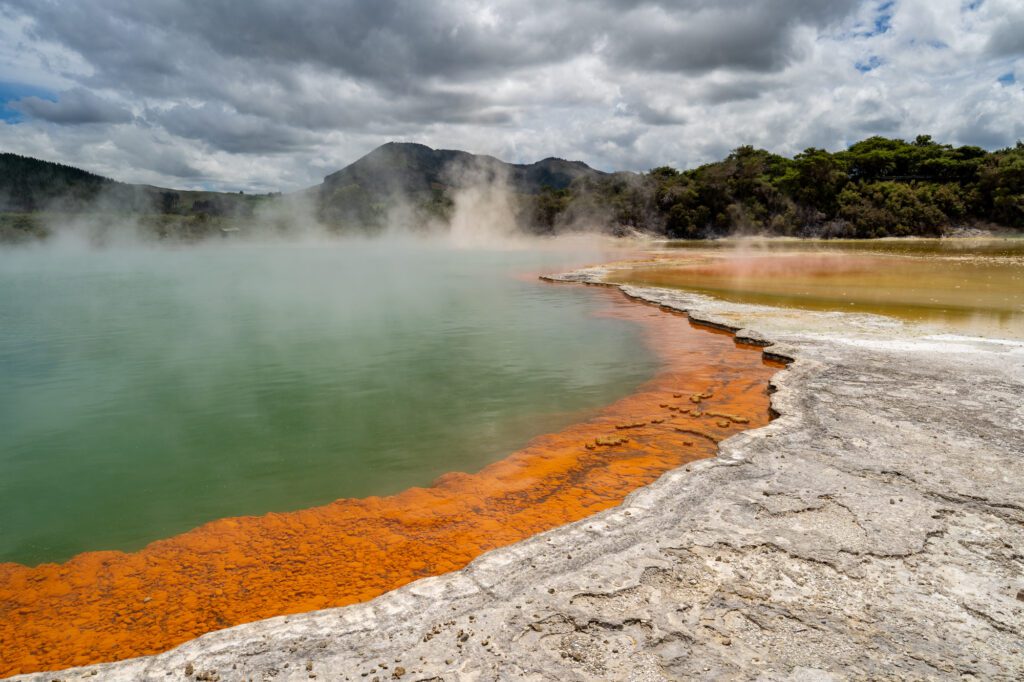
The second option – and the middle option in terms of budget – is Wai-o-Tapu Thermal Wonderland, which is the one we chose.
It has a diverse array of different geothermal features, a nice walking path to follow, and good signage.
It’s a good middle ground between the free option, and the last option that requires an expensive guided tour. It does feel a little bit like a theme park, but we didn’t notice it too much.
Make sure to be there at 10:15am to see the Lady Knox Geyser erupting!
Last, and certainly not least (in terms of price) is Te Puia, another geothermal park.
This one requires that you visit on a guided tour, which is expensive. However, we would say that if you’re interested in more of the cultural and historical context around the geothermal activity, this is a better option (and we kind of wish we had chosen it for our own trip).
Walk through the redwoods
Who knew you could find California Redwoods in the middle of New Zealand?
Whakarewarewa Forest features trails weaving through towering California Redwoods that are planted side by side with native plants like tree ferns. As two former Californians, the juxtaposition was a weird one.
This is a great place for an easy hike, and they have a huge network of both walking and mountain biking trails through the massive park.

Walk the waterfront in Rotorua
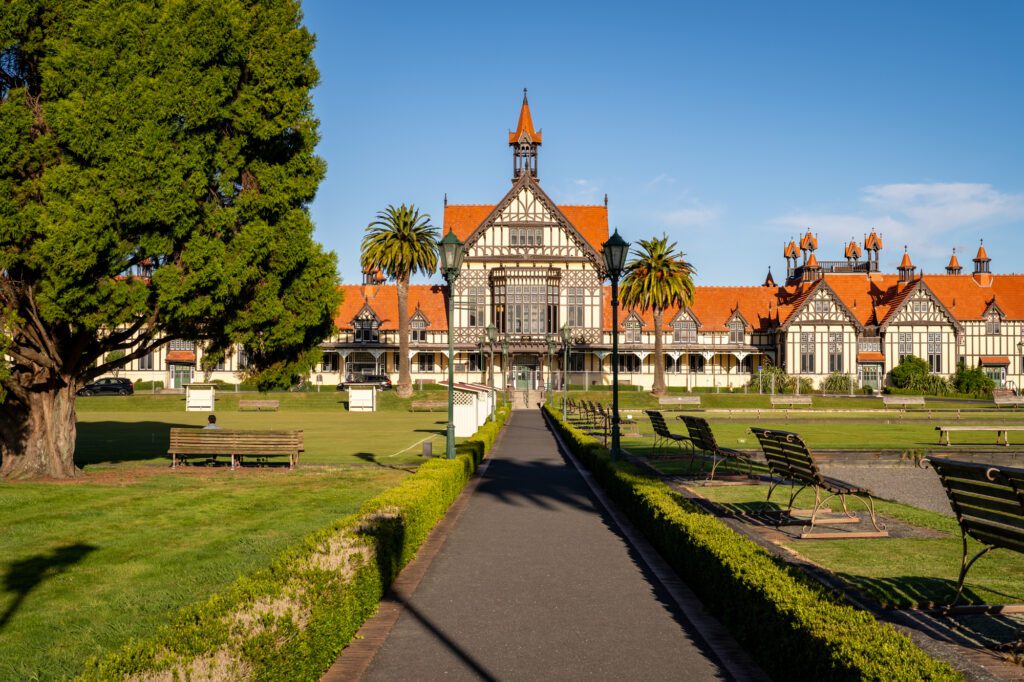
Rotorua is set on Lake Rotorua and there’s a very nice waterfront path that starts near the northern end of the downtown area (roughly here on Google Maps) and continues around the point to the Government Gardens, which are beautiful and worth a visit.
It’s not a long walk, and you shouldn’t miss the odd architecture of the Rotorua Museum.
Here’s a rough route for a nice loop.
Climb Mount Maunganui for spectacular views
To be honest, we went into this “hike” thinking we’d be one of a few people on the trail early in the morning.
We were absolutely flabbergasted when we realized we were not the only ones with the idea to do this hike around sunrise, and that it is a very common early morning activity for locals to climb to the summit and enjoy the view of the sun rising over the beach and the town below.
It’s a quick and easy stair-filled hike to the top, and we’d strongly recommend including the coastal walk around the base as a part of your walk.
It’s beautiful, and reminds us a lot of hiking along the California coast south of San Francisco (near Monterey, specifically).
This is a nice loop that will take you away from the crowds.
Don’t miss Sea People Ice Cream for a post-hike (gluten free and plant-based) treat!

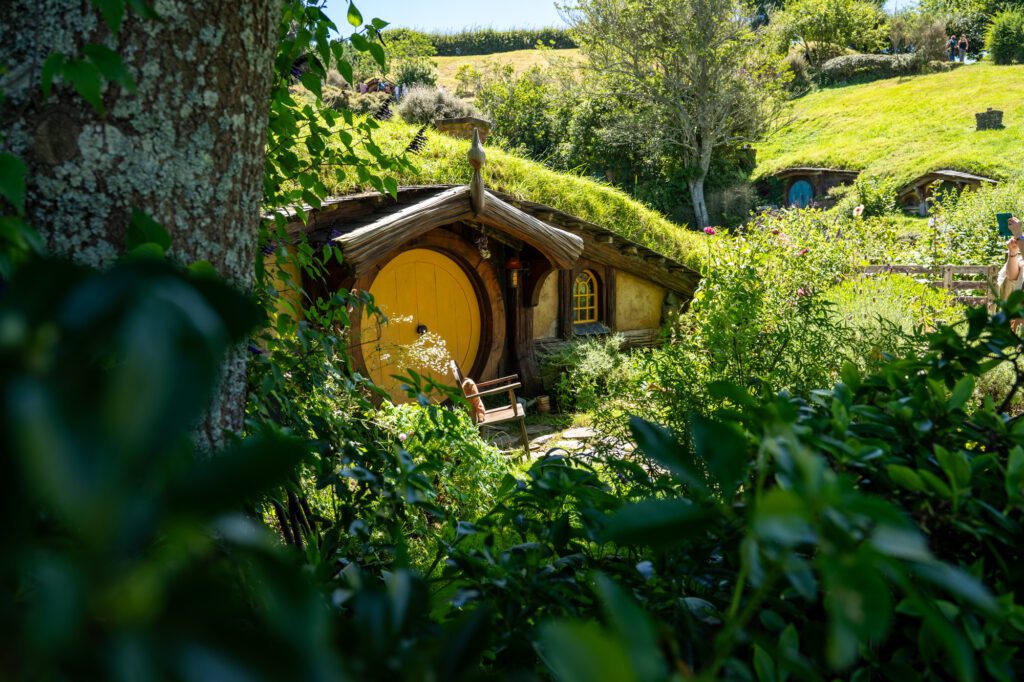
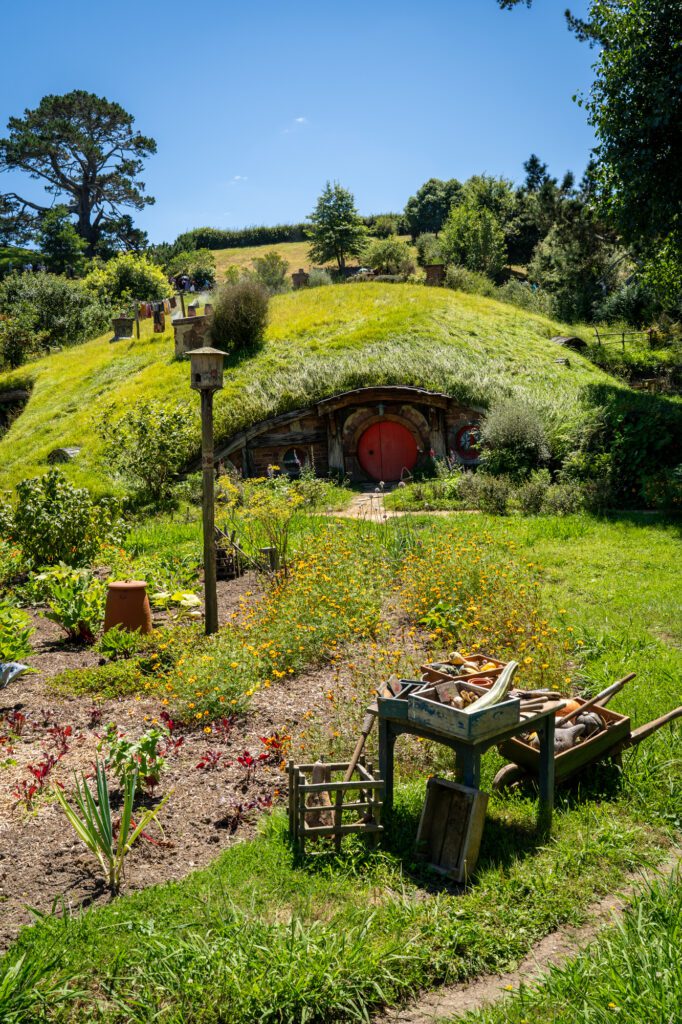
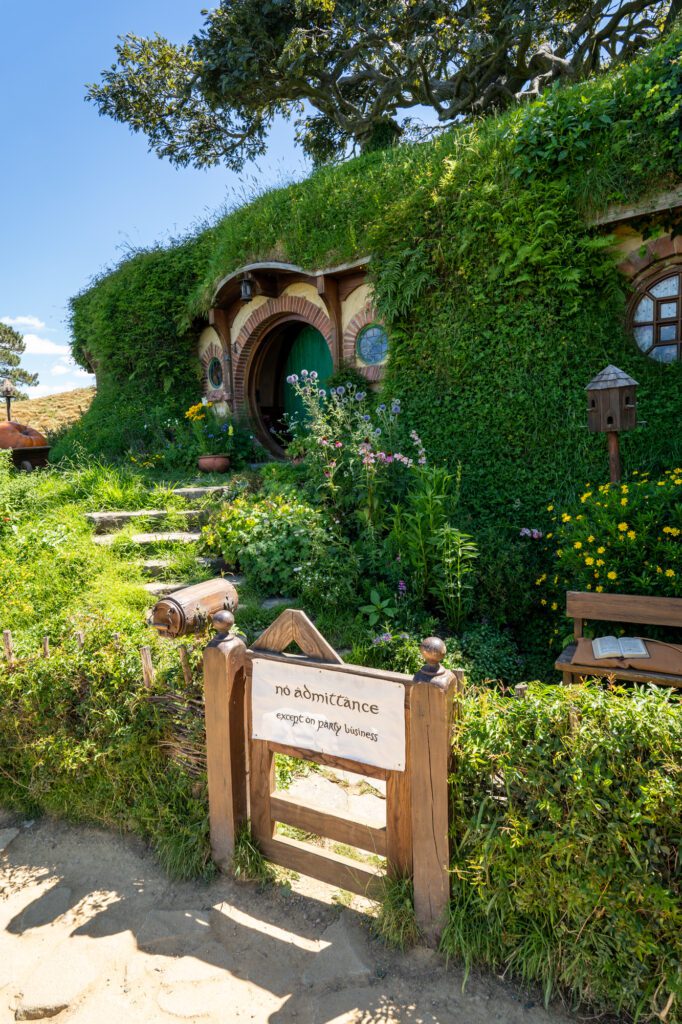
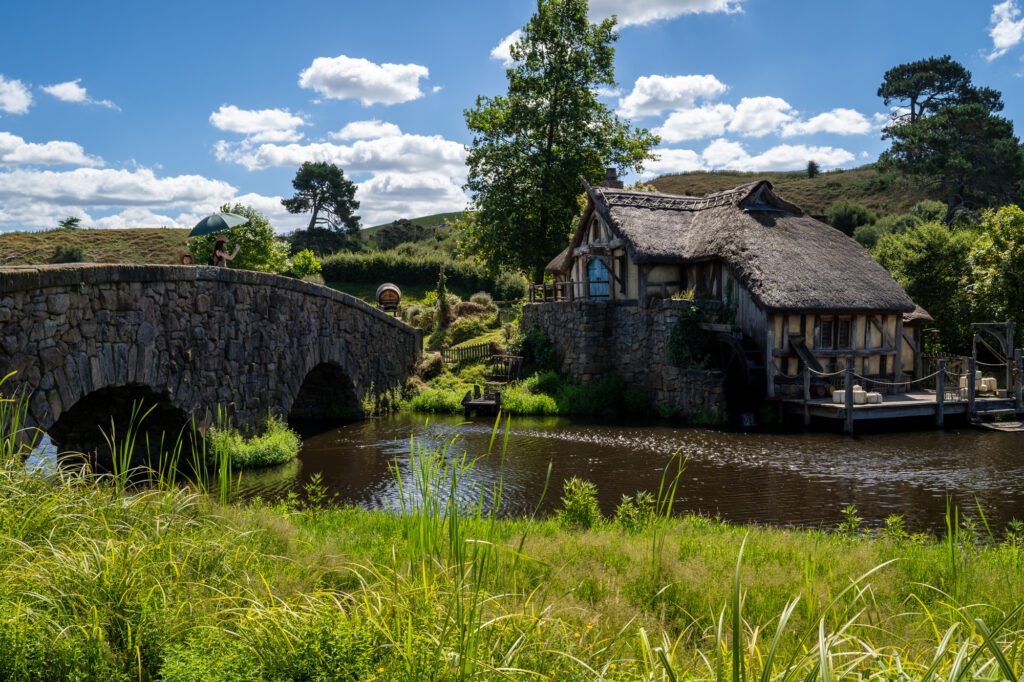
Experience a small slice of Middle Earth in Hobbiton
The first thing you should know here is that Matt is a huge Lord of the Rings nerd.
He has read the trilogy (and the Hobbit, but not the Silmarillion) many times, and watches the movies at least once a year, including a few weeks before our trip (extended editions or bust).
Alysha is, uh, not.
That being said, both of us really enjoyed the experience at Hobbiton.
After filming the Hobbit Trilogy, rather than breaking down the real Hobbiton sets that they had painstakingly built, they decided to keep them intact and turn it into a place where visitors could come and experience the magic of the Shire (and pay them a lot of money for the privilege).
It’s a two and a half hour experience that involves a guided tour through the set, including a drink at the Green Dragon Pub at the end of the tour, which is where the only brew for the brave and true comes from (if you know, you know).
It’s expensive, and it’s a bit of a detour, but we really enjoyed the incredible attention to detail that went into crafting every piece of the set, and think it’s well worth it.
Where to Stay in Rotorua and Tauranga
At a high level, we think you should stay in Rotorua because there is just more to do and see than in Tauranga (in our opinion, anyway).
That’s what we did, and we didn’t regret it.
We stayed at the very nice Paradise Valley Lodge, which is a 15 minute drive from the center of Rotorua.
They have a variety of rooms, including a handful that are perfect for couples, and most have some sort of kitchenette. It’s a lovely property, set in the quiet hills above Rotorua.
We stayed in the Country Room, and slept like babies.
If you want to stay more central, there are plenty of hotel options in the downtown area, which will mean you’re walkable to all the restaurants and shops in that part of the city.
However, we’d also say that the coolest parts of Rotorua are outside of the city center, and we feel the same way about places to stay.
There are some fun lakefront lodges and hilltop B&Bs just outside of town, and that’s where we’d stay if we were you.
The Coromandel Peninsula (Days 10-12)
Drive time and distance: 3 hours // 215 km (134 miles)
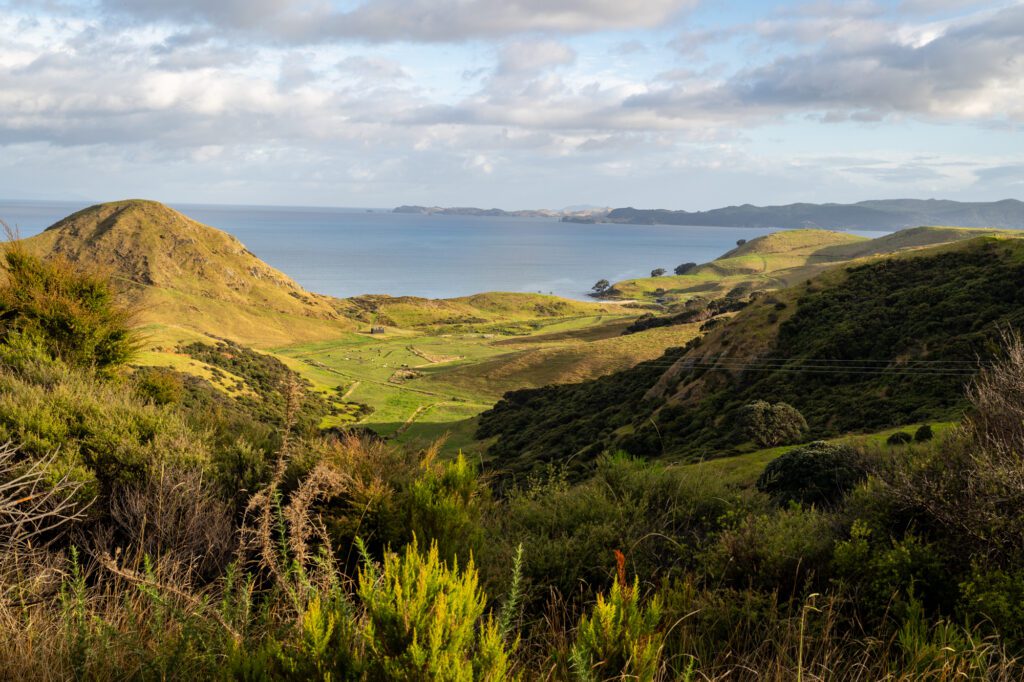
The Coromandel Peninsula is a great final stop before you head to Auckland (and, by extension, get ready to head home) because it offers something very different to the landscapes you’ve experienced thus far (although it does feel fairly similar to a place like Hawke’s Bay).
When we think of famous landscapes in New Zealand, we think of the tussock-laden flatlands butting up to the Southern Alps on the South Island and the pastoral hills covered in sheep that you’ll find all across the country.
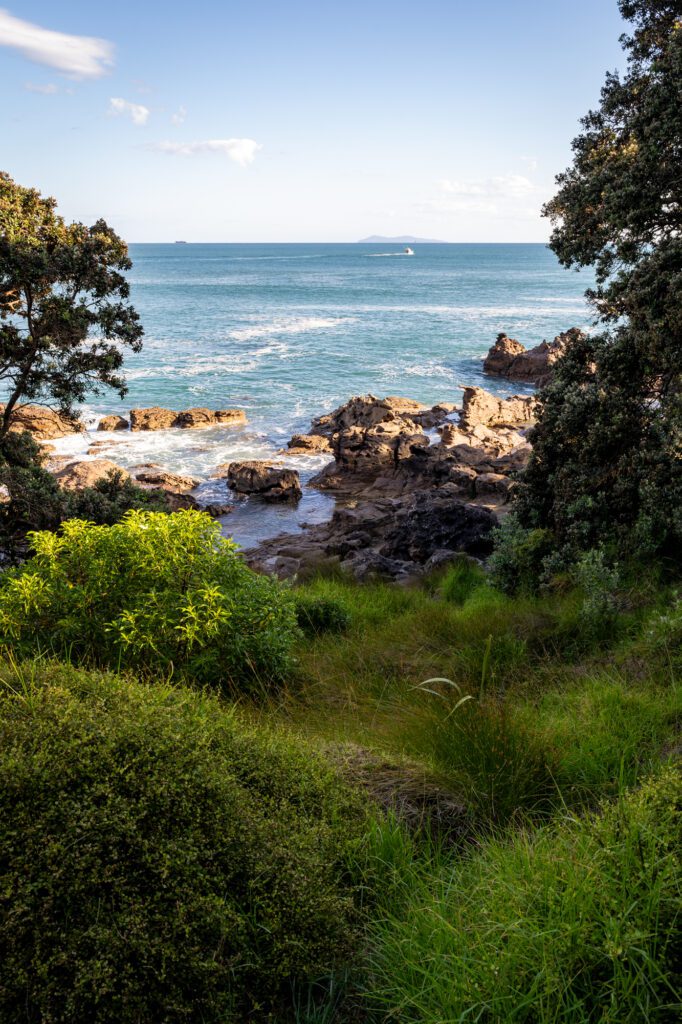
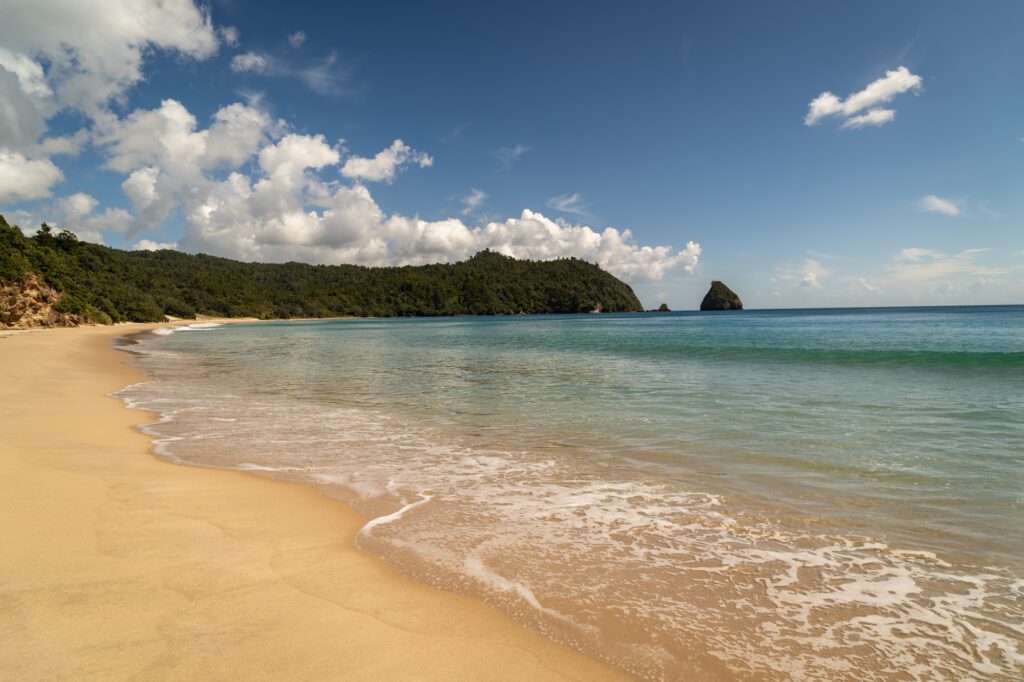
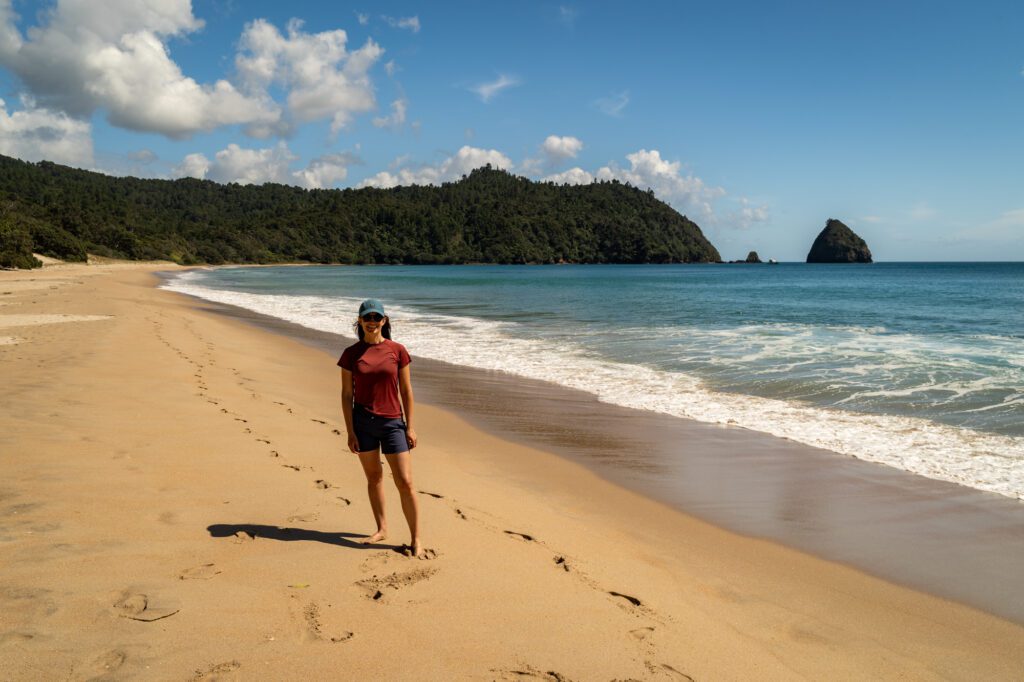
You certainly get a heavy dose of that pastoral feeling here, but you also get something that we didn’t usually associate with New Zealand until spending the better part of a week exploring here: pristine white sand beaches.
The Coromandel Peninsula is just littered with beaches, and after two weeks spent hiking volcanoes and exploring geothermal wonderlands, you deserve a little beach break.
What really stands out to us about the Coromandel Peninsula is the fact that you’ll be driving the windy road through pastoral landscapes with sweeping green hills where cows and sheep graze freely and then BAM, it’s a pristine white sand beach.
Despite the fact that Alysha grew up in Marin County, California, which is sort of similar, we were blown away by just how quickly it went from farmland to beach.
Now it’s worth noting that the Coromandel Peninsula is a big area, and access can be limited as there are only a couple of roads running through the middle of it, which means you sometimes have to drive alllll the way around to get to the other side.
Our favorite portion of the Coromandel Peninsula – and the part that has the highest concentration of great beaches, viewpoints, and more – is the northeastern corner, which is where we’d recommend you focus your time.
What to Do on the Coromandel Peninsula
Here are a few of our favorite things to do on the Coromandel Peninsula.
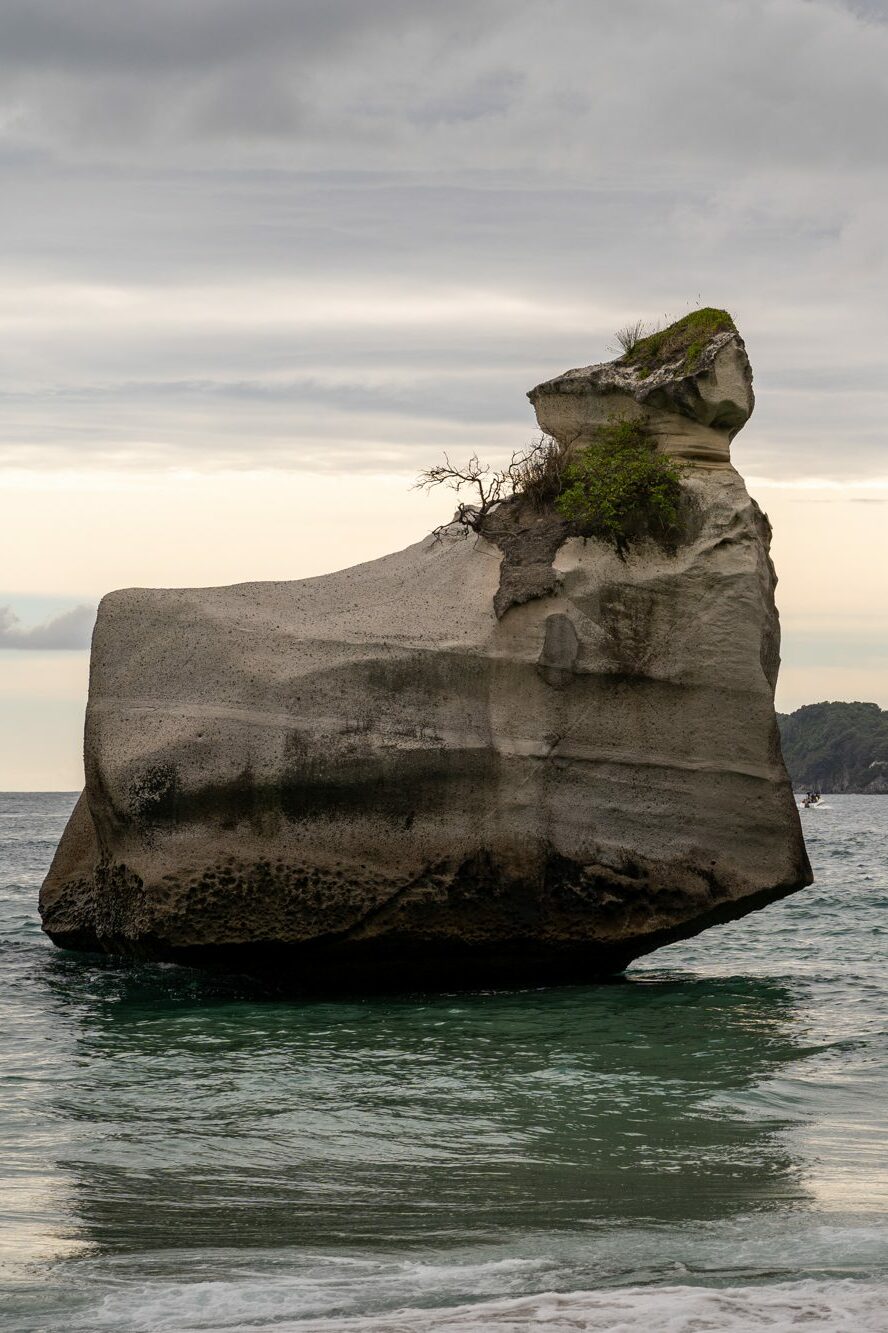
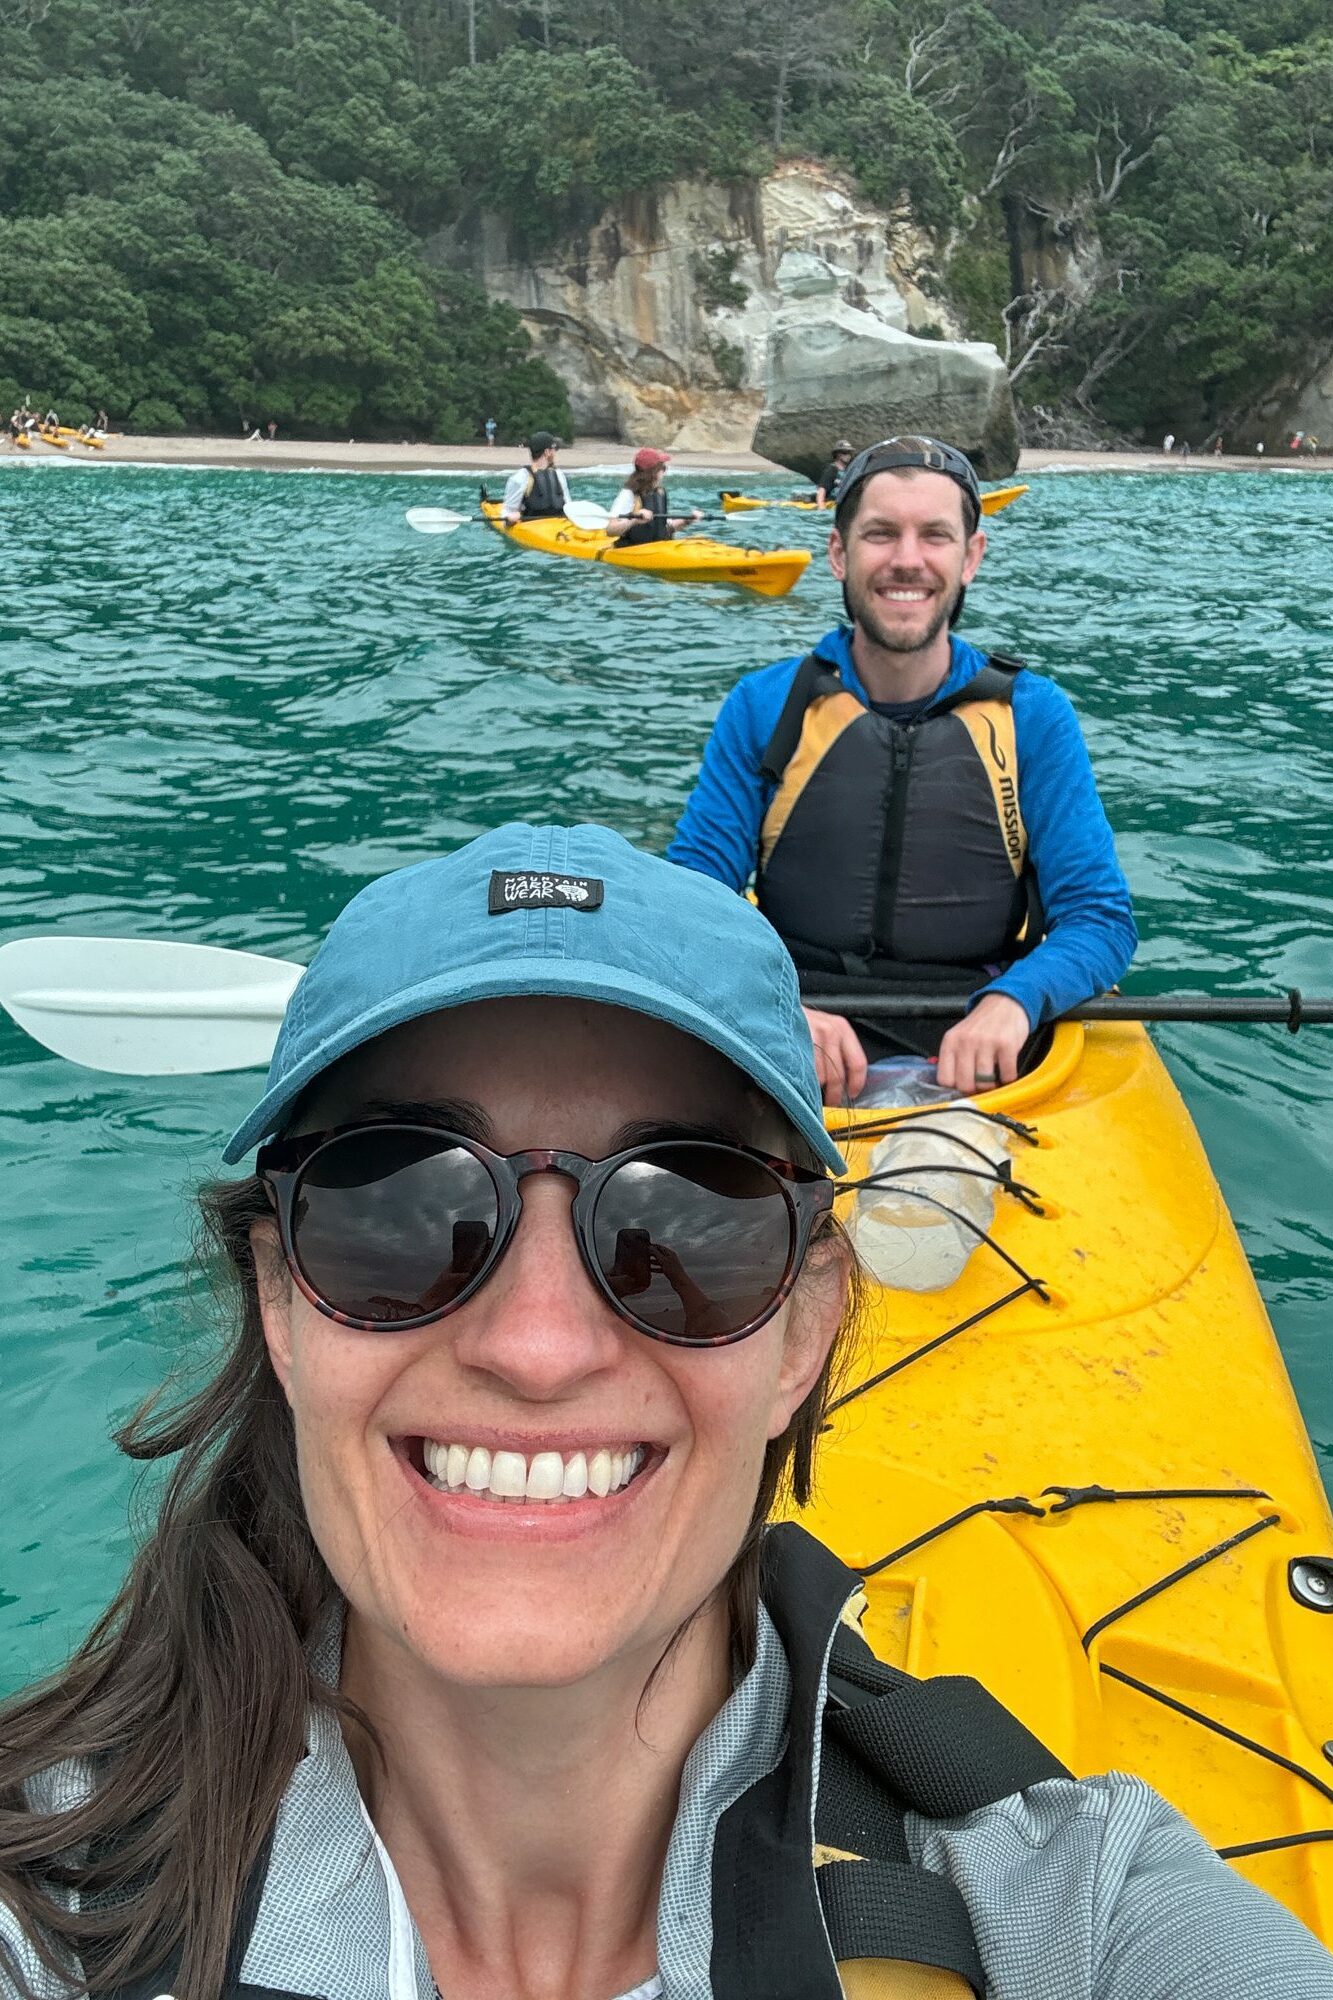
Kayak to Cathedral Cove
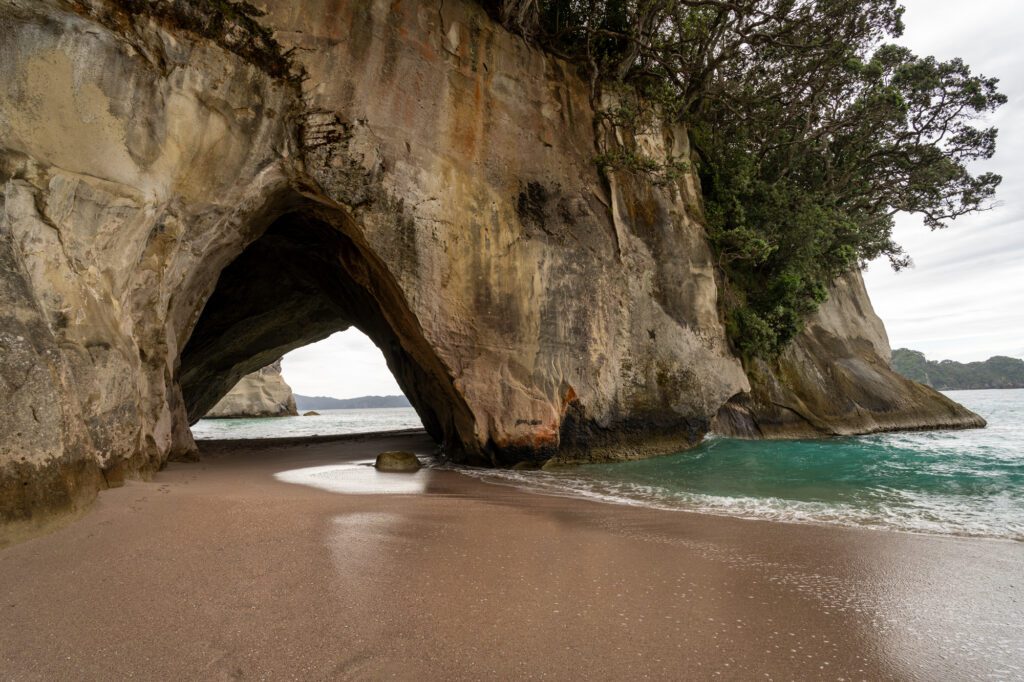
Over the course of your research, you may have come across either pictures or a write up of Cathedral Cove on the Coromandel Peninsula.
Unfortunately, the cove is no longer accessible on foot thanks to a series of huge landslides that happened in 2023, and there is no timetable around reopening at the time of writing.
That means, for better and for worse (fewer people, but more expensive), the only way to access the picturesque protected cove is by boat.
We loved our kayak tour with Cathedral Cove Kayaks, which was a very pleasant three hours spent out on the water exploring the stretch of coast (and the volcanic islands) near Cathedral Cove.
It’s not a hard paddle, so even if you’ve never kayaked it’s worth hopping in a boat and heading out on their morning tour to check out Cathedral Cove.
Hot Water Beach
The volcanic activity that you’ve already experienced in places like Rotorua and Tongariro National Park followed you out to the Coromandel Peninsula!
Hot Water Beach is a beautiful beach, yes, but the real draw here is the fact that it sits on top of two hot springs, and at low tide you can dig a hole and it will fill up with warm water, creating your own little hot spring right on the beach.
It’s very unique, and is worth the trip out there (but check the tides first – you want to be here within an hour or so of low tide).
Hahei Beach
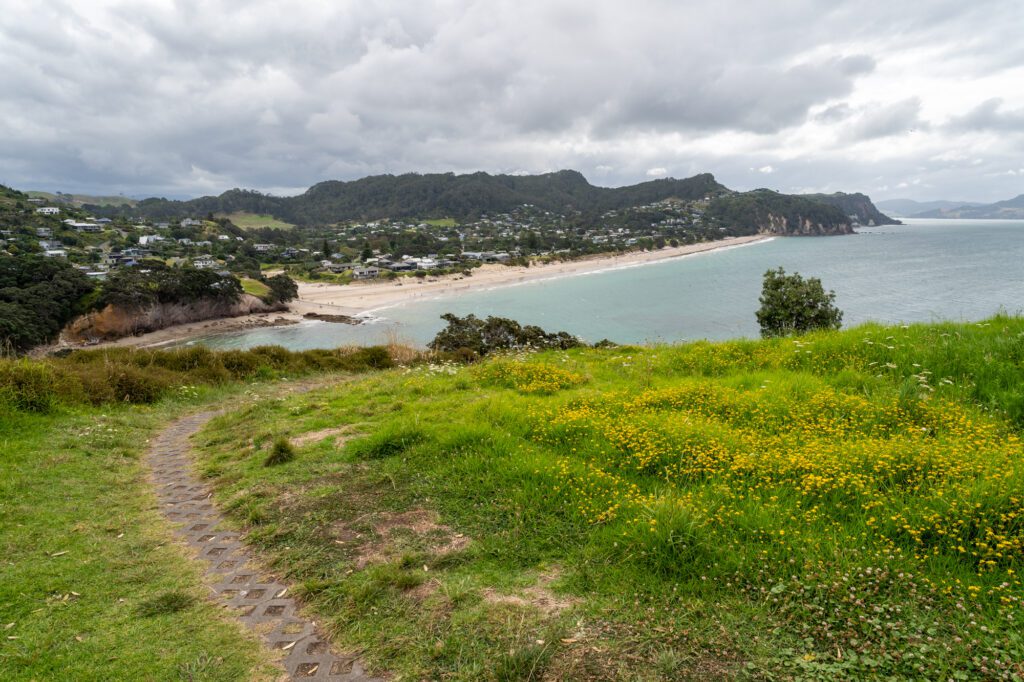
We stayed within walking distance of Hahei Beach for the second half of our time up here, and would rank it either our second or third best beach that we visited on the Coromandel Peninsula.
It’s a good swimming beach and it has a nice hike on the eastern end of the beach that takes you up to the former pā (a defensive settlement in Māori times) at Te Pare Point with sweeping views back towards the beach, and out towards the open ocean.
It gets crowded, but it’s still worth a visit.
There’s a big parking lot here where you can park if the main lot is full (it’s a ~15 minute walk down to the beach).
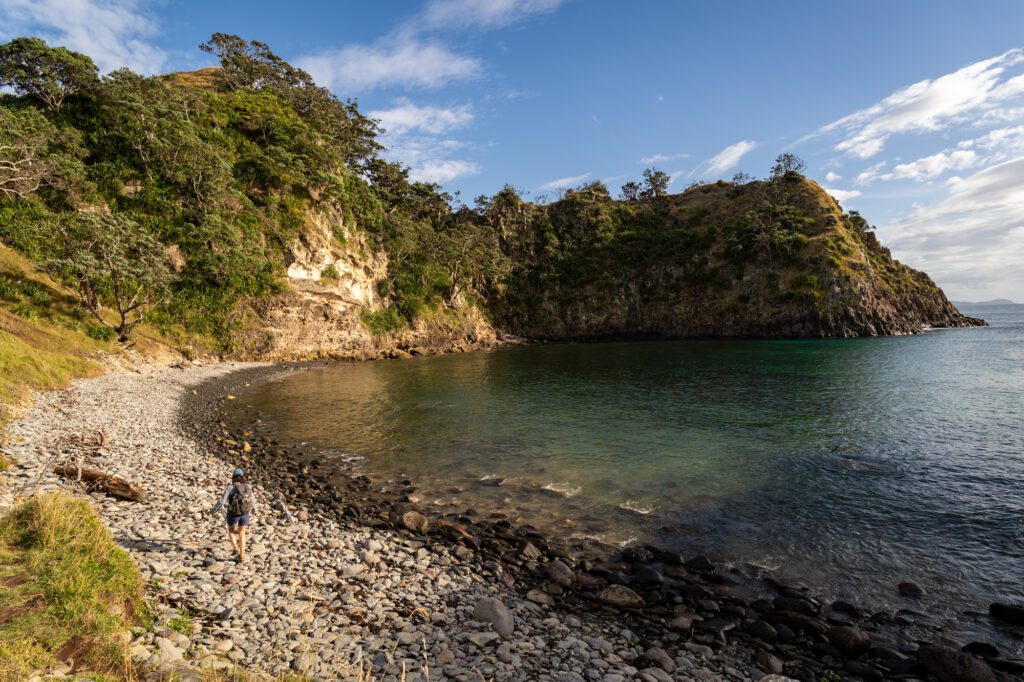
The Northern Beaches
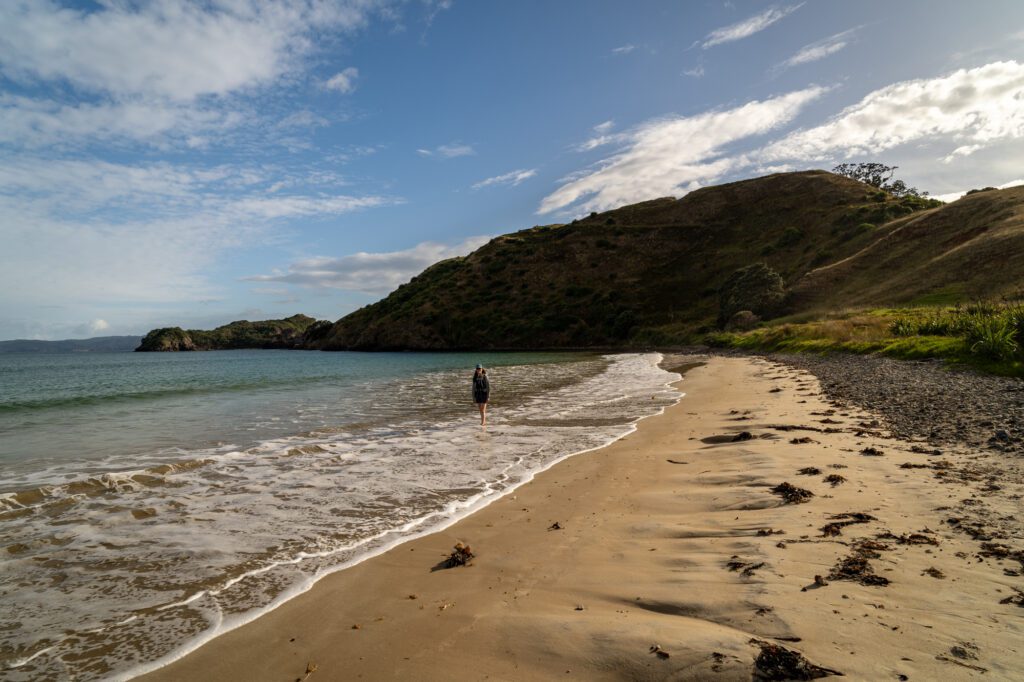
Partially on the advice of the friendly person at reception at the Church (where we stayed for the second half of our time on the Coromandel Peninsula), we set out early one morning for what turned out to be an epic seven hour beach-filled adventure to the northeastern corner of the peninsula.
He recommended three beaches – Ōpito, Otama, and New Chums – and we did a nice little scenic drive up north to hit them all.
Our favorite was Ōpito (here on Google Maps) because it was the best swimming beach AND has a nice little set of hikes at the eastern end of the beach, where you can hike up to the point, or up and over the hill down to Crayfish Bay.
Runner up was New Chums Bay (short trail leaves from here on Google Maps), because it requires a short hike to get there and has no development on its shores, which makes it feel very secluded and special.
Last was Otama (here on Google Maps), but only because the other two are so spectacular.
Where to Stay on the Coromandel Peninsula
As we mentioned already, the Coromandel Peninsula is a big chunk of land, so choosing a place to stay might be the difference between driving 10 minutes to the meeting point for your kayak tour, or driving an hour and 15 minutes to get there.
At a high level, we spent the most time exploring the northeastern part of the Peninsula, between Whangamatā and Matarangi, and that’s where we’d recommend staying.
We spent four nights out here, and we stayed in two separate places (mostly because we were there on the last weekend of New Zealand school kids’ summer break, so the place we really wanted didn’t have availability). And they were VASTLY different vibes.
The first place we stayed was the Top 10 Holiday Park at Hot Water Beach.
If you’ve spent time in New Zealand before, you are almost certainly familiar with Top 10 Holiday Parks, which are all over the country.
It’s essentially part campground with nice shared facilities (including a kitchen, a pool, and laundry facilities), part budget motel.
While we don’t have them, it’s basically paradise for kids (which may or may not be what you’re looking for – if not, see the second place).
We stayed in one of their cabins, and it was nice enough, but don’t go expecting luxury. It’s basically a place to sleep, and you’ll use the shared facilities (including bathrooms).
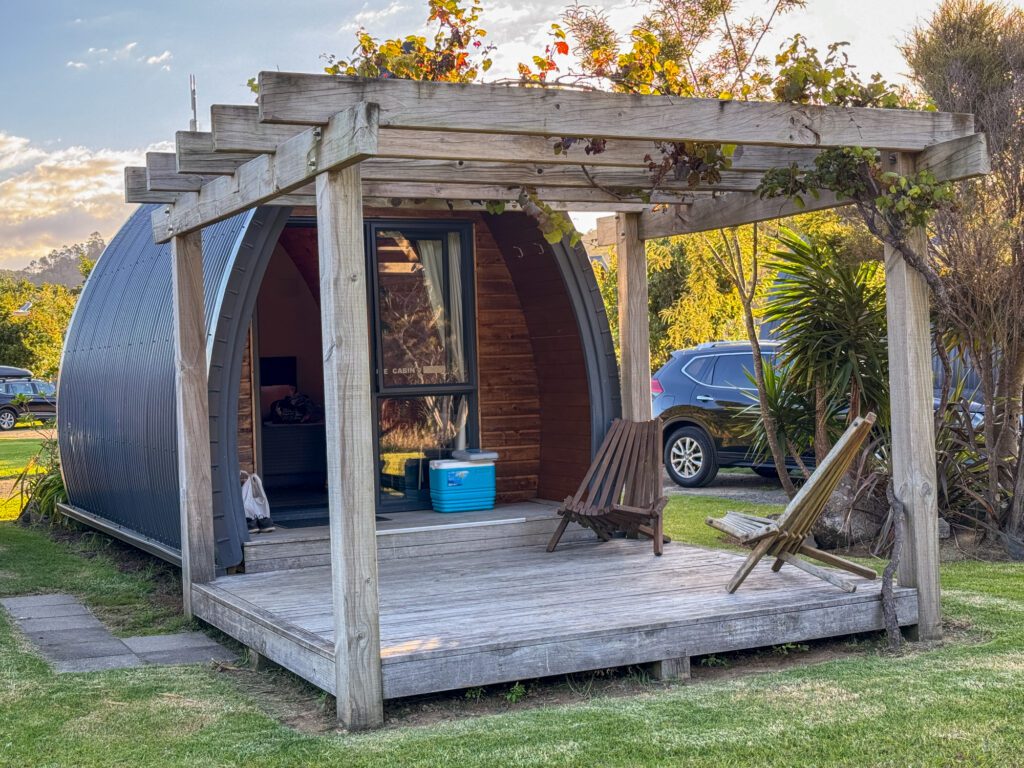
The best part about it is the fact that it’s a 10 minute walk down to Hot Water Beach, which is a nice perk because it’s 24 hour paid parking at the beach, and it gets very, very busy down there.
The second place we stayed was the Church Accommodation in Hahei.
Similar to the other place, this was a 10 minute walk from the beach (which is also where the kayaking tour we did and recommend met and left from).
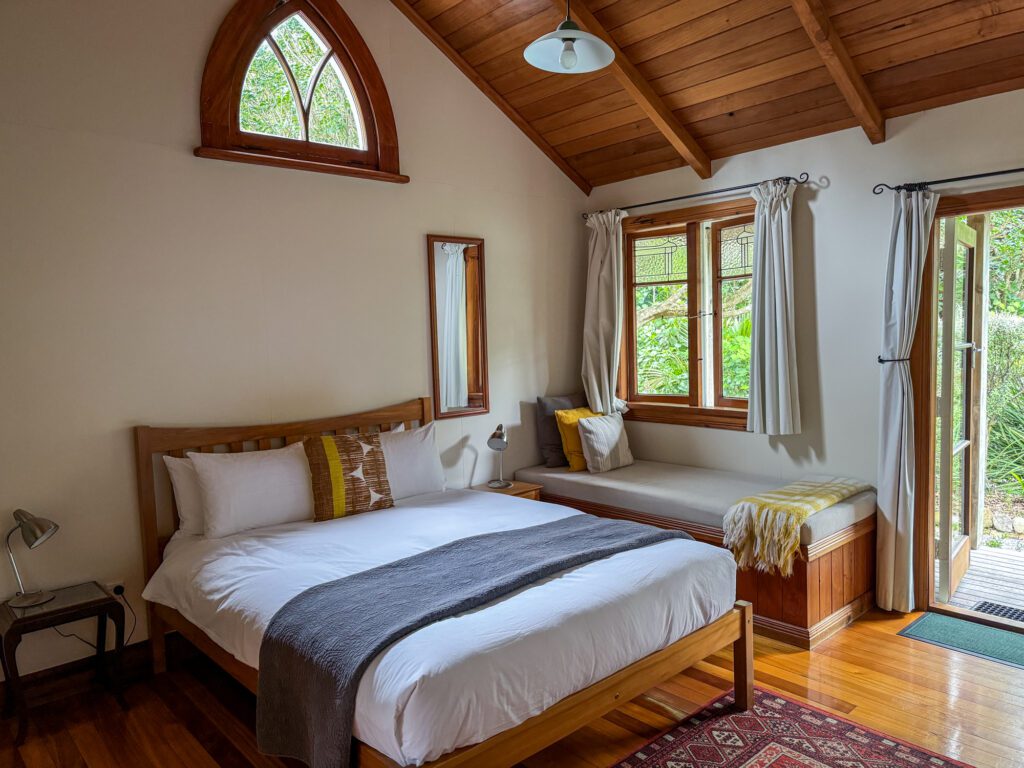
This was a very, very different experience.
They have a set of quiet, private cabins that were a very pleasant place to spend a couple of nights. Plus, friendly and helpful staff and a great location within walking distance from the beach and small town.
Auckland (Days 13-14)
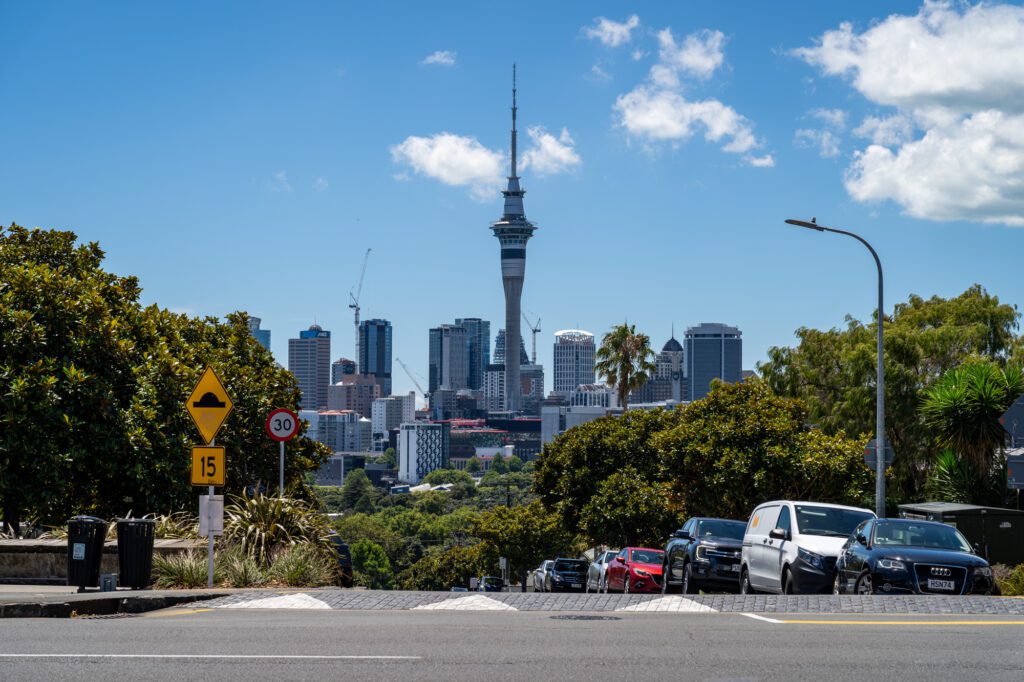
Drive time and distance: 2 hours and 40 minutes // 176 km (109 miles)
Compared to Wellington, which we absolutely loved, we were less enthused about Auckland as a city.
We do love big cities (to visit, not really to live), but even after the better part of a week in Auckland, we didn’t really find that we could put our finger on what it was all about.
That being said, there are two big benefits of visiting Auckland.
As the biggest city in New Zealand – somewhere between ⅓ and ½ of New Zealand’s population lives in Auckland – you get the benefit of a bigger, more diverse group of people.
First and most notable is the better food and drinks than just about anywhere else in the country.
Sure, there are good places to eat and drink sprinkled through New Zealand, but Auckland has by far the best breadth and depth of different types of foods out of any of the bigger cities we’ve visited in New Zealand.
The second big benefit is that the airport has the best selection of international flights (versus having to connect from a smaller city through Auckland and then on to your destination), which means the shortest leg of travel is, hopefully, at the end of your trip.
So, while Auckland isn’t really our favorite city in the world, we do think that it’s an important component of your trip to the North Island.
Many people fly in and immediately leave the city to explore the natural beauty of the rest of the North Island (or head straight to the airport when they’re leaving), and we think that would be a mistake.
What to Do in Auckland
Here are a few of our favorite things to do in Auckland.
Take a walking tour with Aucky Walky
Generally, we’re big fans of starting our time in a new city with a walking tour. The Introduction to Auckland with Aucky Walky, owned and operated by Auckland locals, was an easy choice for us.
Unfortunately, because they limit their tours to a maximum of eight per guide, they were sold out when Matt arrived in New Zealand.
So we actually did this tour on the last day of our trip.
However, it would make a solid introduction to Auckland, covering three kilometers in the center of the city.
You also walk away with a tasty treat, a cheat sheet with the host’s recommendations around what to eat, drink, and see, and more context as you set out to explore the city.
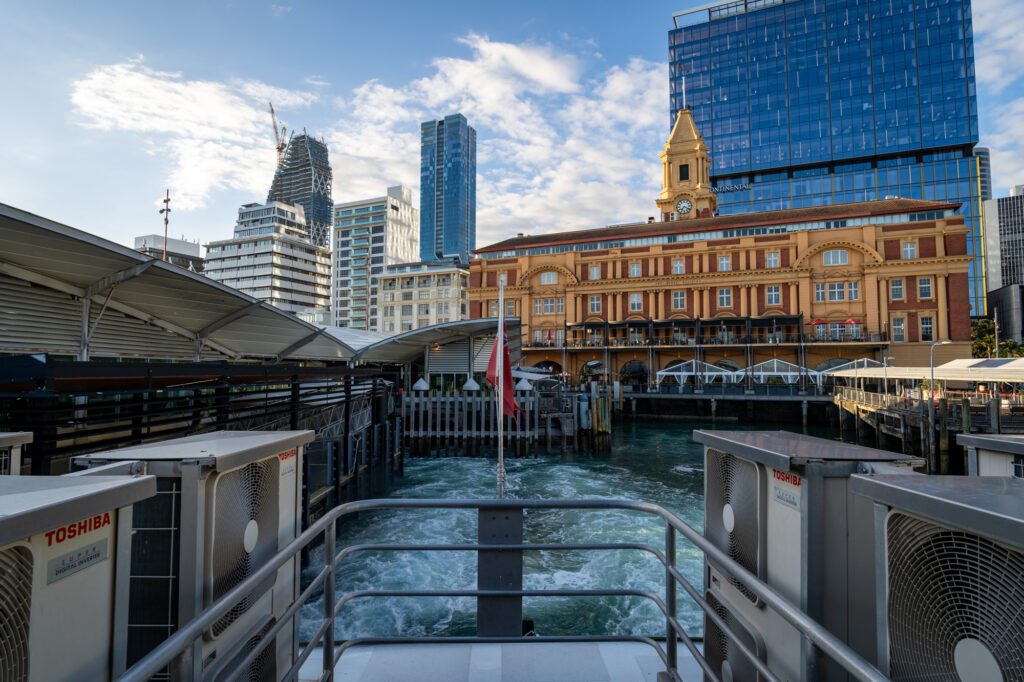
Take the ferry to Devonport
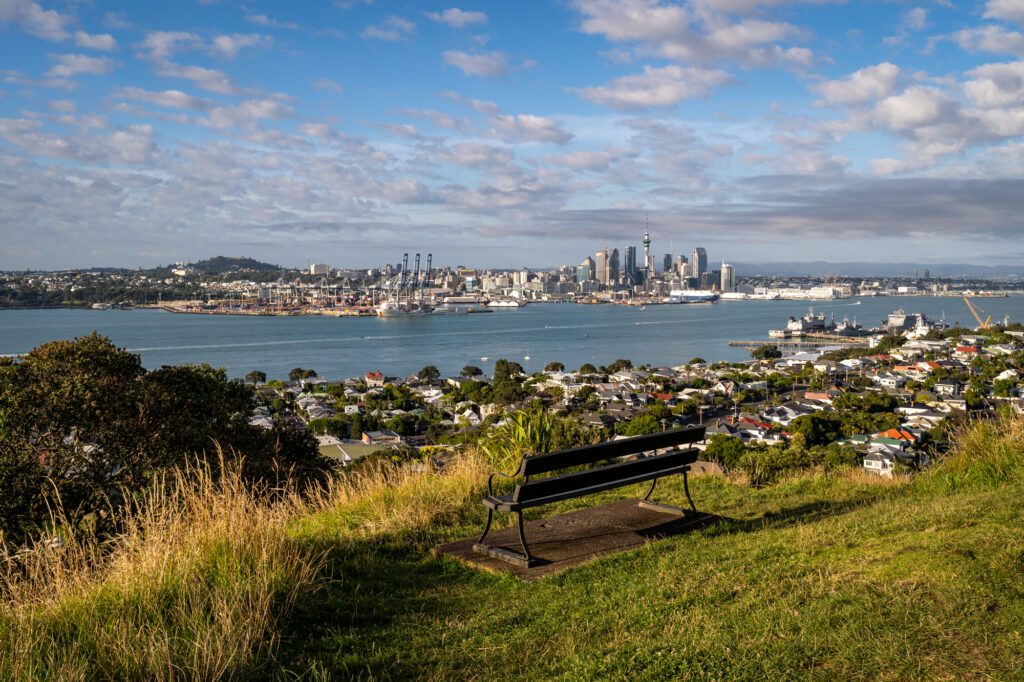
On my (Matt here!) first morning in Auckland, I woke up at 5am after falling asleep at 7:30pm (with the lights on, might I add) and decided I was going to go on a little early morning excursion across the harbor to Devonport.
Devonport is a little waterfront town with a charming array of architecture and bars and restaurants on its main strip along the waterfront along with a couple of great views of the Auckland skyline (most notably from the peak of Mount Victoria, which is about two blocks from the ferry terminal and is worth the quick climb).
To get there, you leave from the ferry building on the waterfront (here on Google Maps) where you can buy tickets.
I walked a big loop from the ferry, up to Mount Victoria, and over to Cheltenham Beach, which is an excellent way to spend a half day or so.
After that walk, grab food and a drink along Victoria Road (the main drag when you get off the ferry).
Here’s a map of what that looks like.
Mount Eden
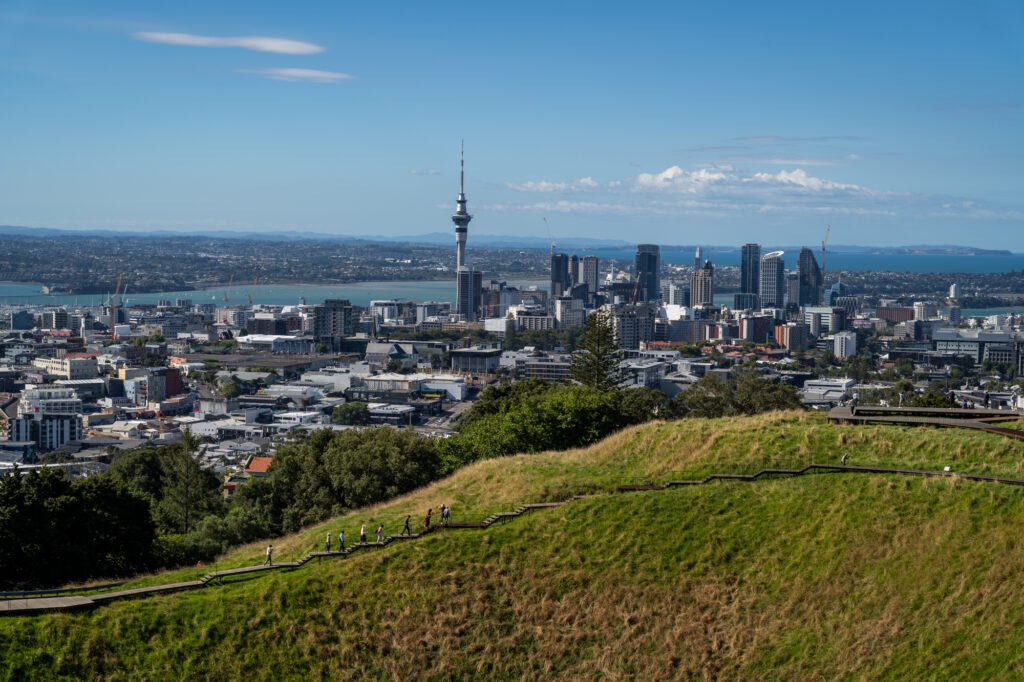
You’ll notice that we haven’t included the Auckland SkyTower in this list.
Most guides (all guides?) do, but we have the same problem with the Sky Tower here that we do with the Space Needle in Matt’s hometown of Seattle.
It costs A LOT to go up to the top and, while the view is nice, it’s missing one key element of the Auckland skyline…. the tower itself!
Plus, there is a great view available for free not too far down the road. And in Auckland, that view is from the top of Mount Eden.
Mount Eden is a dormant volcano with a cone that is 150 feet deep. From the top, you have an excellent view of Auckland’s skyline, plus views in every direction (truly 360 degrees).
It’s a short uphill walk to get to the viewing platform, and a bit further to the true summit (which is worth it).
Start your walk here by either grabbing a bus or a taxi / rideshare from wherever you are, and do the quick little loop around the crater at the top.
The Auckland War Memorial Museum
I was very confused when people recommended the “Auckland Museum” to me, because there are multiple museums in Auckland and none of them are called by that particular name.
However, the Auckland War Memorial Museum is the one they mean, and it’s a great museum covering the history of New Zealand (sort of – they miss the whole colonization and taking of land from the Māori, but at least it’s a start).
The Māori portion of the museum is good too, for the most part, even if it is clearly European-ized. More information here.
Eating and Drinking
As we mentioned above, one of the best parts about Auckland is the diversity that comes with a (much) bigger city than the other ones you’ll find in New Zealand.
Usually, that means there is some great food to be had!
For coffee, Daily Daily was our favorite coffee shop of the entire trip, but it’s further out. Rumours, D.O.S.E., and Kompass are in the CBD are a few blocks away from each other, and are all excellent.
For food, we liked Ponsonby Central, a food hall straight out of Brooklyn (we liked Ola’s Arepas because we’re always in for arepas!), the food court on the top floor of the Commercial Bay shopping mall, Little Bird Kitchen for gluten free and vegan food, plus Duck Island Ice Cream and Giapo for ice cream (the ice cream at Duck Island is better, but Giapo is a 100% gluten free facility and is more convenient right downtown).
Where to Stay in Auckland
With more than a day, we’d strongly consider staying outside the main commercial center of Auckland (the Viaduct, CBD, and Britomart).
However, with only a limited time, we’d stay in either the Viaduct or Britomart to maximize your time, which will put you within walking distance (or a short bus ride) of just about everything.
The Viaduct is Auckland’s waterfront, and while it is very commercial, Matt stayed here for several nights when he first arrived in Auckland (before flying down to Wellington to meet up with Alysha for their road trip) and enjoyed it.
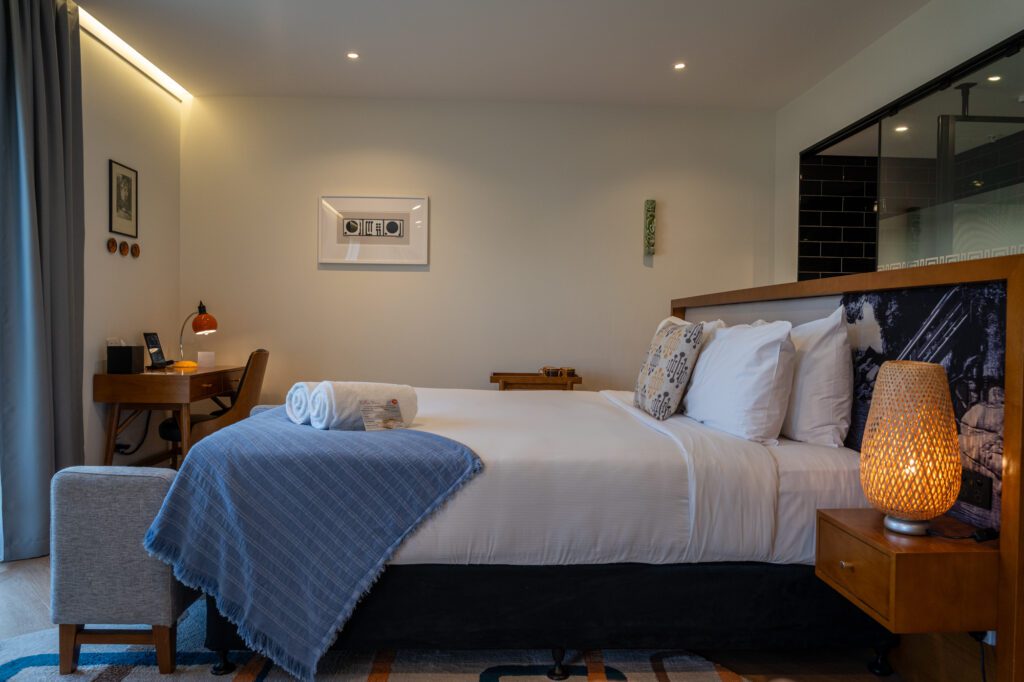
Specifically, he enjoyed staying at Ohtel Auckland, which was among the best hotels we’ve stayed at in New Zealand.
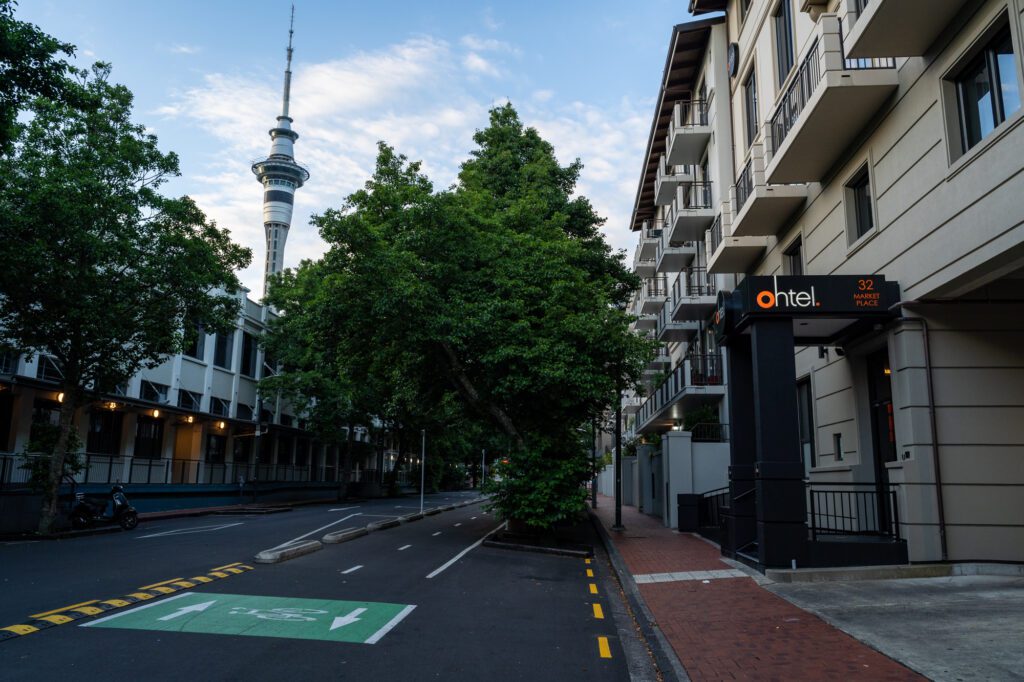
The rooms are decorated with mid-century modern sensibilities, and the service was excellent.
Matt arrived at 7am on the day of check-in, and was able to leave his bags with the friendly staff at the front desk so that he could head out and do some exploring.
The location is also a great combination of convenience and quietness. It’s about a block off of the main walkway along the waterfront, which means you can walk there in roughly 90 seconds, but you’re a bit removed from the noise.
Oh, and there’s a pool for you to use! Though it is shared with the nearby apartment complex.
The other place that was on our list was M Social, which is right on the main drag along the waterfront. Matt chose Ohtel for the quieter location to recover from jetlag, but this would also be a good option.
What to Do with More Time on New Zealand’s North Island
If you have more time to dedicate to your road trip, here is what we’d recommend adding to your itinerary.
Note that some of these places were on our list, but didn’t make on our own trip, so we’ll link out to guides from other people that we found useful and helpful (and, most importantly, were written by humans who had actually had the experiences themselves).
Taranaki, Egmont National Park, and New Plymouth (2-3 Days)
If you have more than two weeks on the North Island, the very first thing we’d add is Taranaki National Park and New Plymouth, which are about three hours west of Tongariro National Park on the southwestern coast of the island.
There are two main reasons that we didn’t include them in the main itinerary above, choosing Hawke’s Bay instead.
First is that it’s a lot of driving if you’re doing both Hawke’s Bay and Taranaki, which sit roughly three hours in either direction of Tongariro National Park.
We did it, and it was fine because we had a little extra time to play with, so it didn’t feel like we were moving at breakneck speed.
If you’re continuing north AND you only have two weeks, it probably makes the most sense to choose between them.
However, if you have more time to spend, it’s absolutely worth adding Taranaki and New Plymouth to your itinerary!
Second is that big swaths of land on the slopes of the mountain are a lush rainforest. Which means it gets a lot of rain, and your chances of showing up to only see a cloud where the peak is supposed to be are pretty high, even in the summer.
Ask us, we spent 2+ days there and only saw the mountain once on the drive in. From then on, clouds and on-and-off torrential rain!
The main reason to go to Taranaki is to hike, we think. It’s a beautiful backdrop.
The main attraction (when we’re talking about day hikes, anyway) is the Pouakai Crossing, which takes you from the North Egmont Visitor Center on the western slopes of the mountain, up through the rainforest to a rocky crossing, down into a massive valley filled in part with a swamp, and then back up atop a rocky ridge for the grand finale (and one of the best views on the hike).

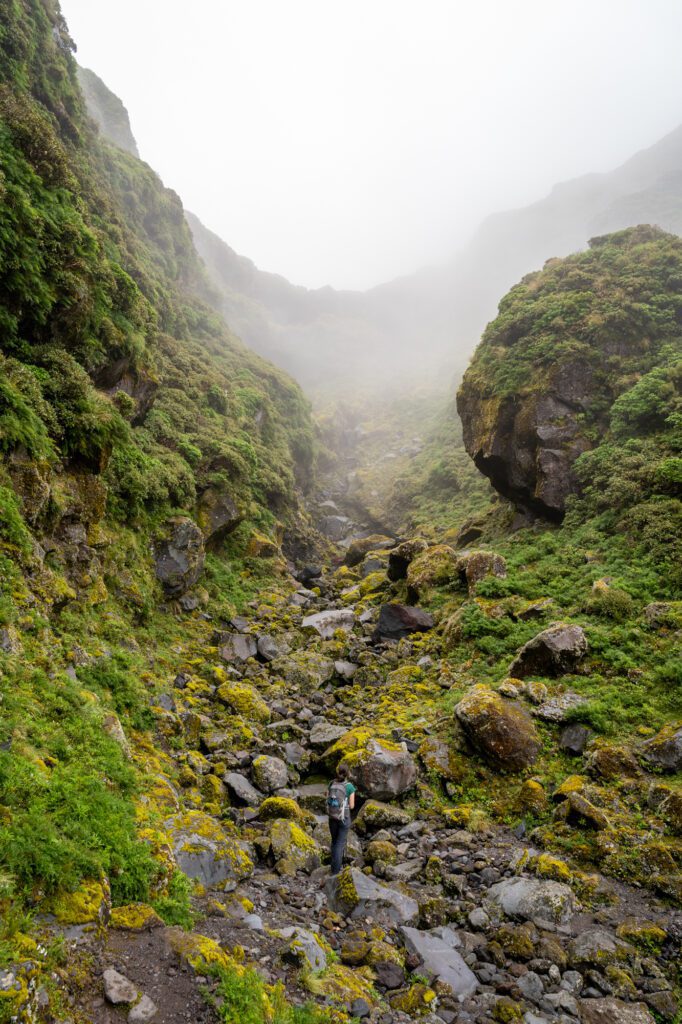
As we mentioned above, we didn’t see the peak of the mountain once on this hike, and we still loved it.
The only problem is that it’s a one-way hike, which means that like the Tongariro Alpine Crossing, you’ll need to arrange a shuttle service.
In this case, you’ll park at the Mangorei Track Trailhead (here on Google Maps), and book Taranaki Mountain Shuttle to take you up to the Visitor Center where you’ll start the hike (that’s what we did, and it was easy and convenient).
If you’re not up for either the long distance on that hike or the cost of the shuttle, then the hike from the Mangorei Track trailhead up to the Pouakai Tarns is a good option (it’s still a very tough hike though, because it’s straight up a set of stairs basically the entire way).
In terms of other things to do in the area, the town of New Plymouth and the coastline north and south of it are the other attractions here.
Drive an hour north to the Three Sisters for some nice sea stacks, and 20 minutes south to Ōakura for a nice swimming beach (shout out to the barista in Wellington who recommended it to us!).
In New Plymouth, we love Ozone Coffee Roasters for coffee and brunch – we first discovered them in London in the UK, and realized they had a New Zealand outpost.
I saved it on my saved places map years ago, and came back to it when I was planning this trip.
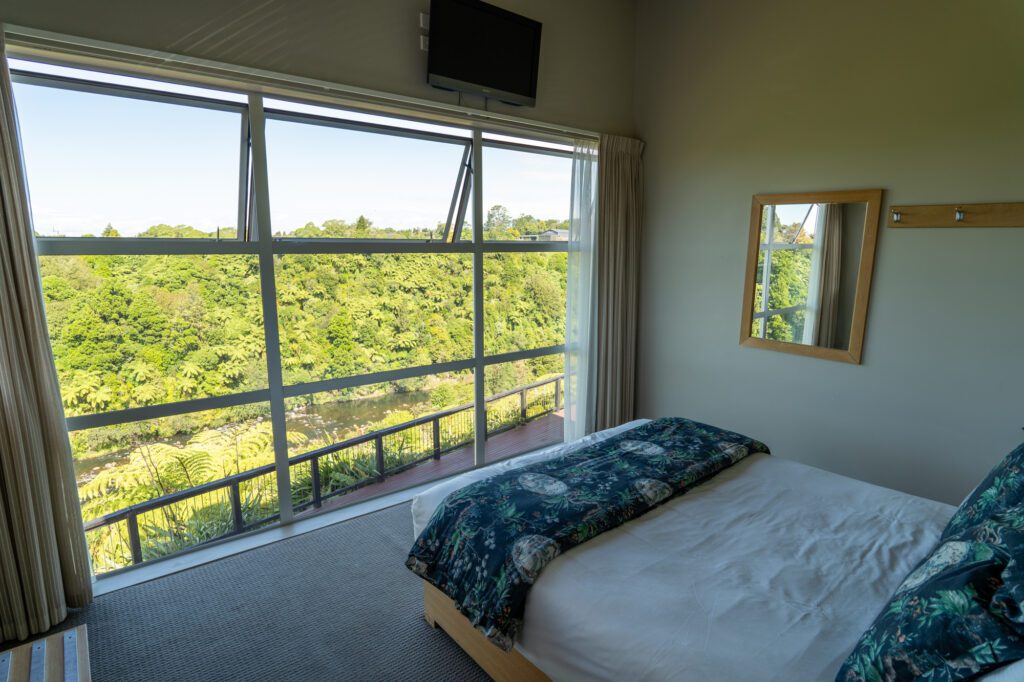
We stayed at One Burgess Hill when we were near Taranaki, and it was among the best places we’ve ever stayed in New Zealand.
Our bedroom overlooked the river, and the apartment we stayed in was a very comfortable home base (with a full kitchen!).
Plus, it’s directly across the road that leads to the parking lot for the Pouakai Crossing or Pouakai Tarns, which is an added bonus.
What to Do with Less Time on New Zealand’s North Island
If you have less than two weeks in New Zealand, here’s how we’d recommend spending your time.
It goes without saying that you can absolutely swap in and out places and things to do and see from the main itinerary above to create your own version.
This is just our take based on our own preferences and experiences on our own road trip.
If you only have 10 days on the North Island, we’d essentially cut the northern half of the island and spend your entire trip exploring the southern end, which is our favorite part anyway!
After a discussion about, knowing what we know after doing a road trip around the North Island ourselves, whether we would do the southern circuit or try to tackle the whole island in 10 days, we settled on the southern circuit.
Before we elaborate on why, here’s what that looks like.
- Day 1: Arrive in Wellington
- Day 2: Wellington
- Day 3: Hawke’s Bay
- Day 4: Hawke’s Bay
- Day 5: Rotorua / Tauranga (Bay of Plenty)
- Day 6: Tongariro National Park
- Day 7: Tongariro National Park
- Day 8: Taranaki National Park
- Day 9: Taranaki National Park
- Day 10: Drive Back to Wellington & Fly Home
There are a few reasons why we’d do it this way if we only had ten days.
First, we much prefer Wellington to Auckland. And it’s not close. So we’re fine cutting Auckland.
Second, you can get a lot of the same pastoral vibes with rolling green hills that descend into white sand beaches near Hawke’s Bay.
And Hawke’s Bay is SIGNIFICANTLY more convenient to get to than the (arguably more spectacular, if we’re being honest) Coromandel Peninsula.
Third, we love Taranaki (and the beaches near New Plymouth), and though we couldn’t find a way to shoehorn it in to the main itinerary because it requires two three hour drives to make it happen if you’re continuing north, it can be done if you’re heading back down to Wellington to fly home!
If you only have a week to spend on the North Island, your first challenge is going to be trying to figure out which highlights to focus on, because you definitely don’t have time to see the entire island.
If it were us, our strong preference would be to group together the highlights on the southern half of the North Island, which include Tongariro National Park – our favorite place on the island.
Here’s what that looks like, written out.
- Day 1: Arrive in Wellington
- Day 2: Wellington
- Day 3: Hawke’s Bay
- Day 4: Hawke’s Bay
- Day 5: Tongariro National Park
- Day 6: Tongariro National Park
- Day 7: Drive back to Wellington and fly home
However, if secluded beaches and limited cell service is more what you’re looking for out of this trip, you might be more into the northern circuit (see below).
If you’re more into mountains than wine and beaches, we’d recommend swapping in Mount Taranaki for Hawke’s Bay.
It would be really hard to do all three (Tongariro, Taranaki, and Hawke’s Bay) in a week, and because Tongariro is in between the other two, it essentially comes down to you and your personal preferences.
If you’re more into white sand beaches stretching as far as the eye can see and intense geothermal activity that makes entire cities smell like someone is cooking eggs, then you might enjoy the northern circuit.
Aside from the differences between landscapes you’ll see here, one of the benefits of doing this version is that you’ll fly in and out of Auckland, which is New Zealand’s easiest airport to fly into from just about every international destination.
Here’s what this seven day version of the itinerary looks like written out.
- Day 1: Arrive in Auckland
- Day 2: Auckland
- Day 3: Rotorua / Tauranga
- Day 4: Rotorua / Tauranga
- Day 5: Coromandel Peninsula
- Day 6: Coromandel Peninsula
- Day 7: Drive back to Auckland, fly home