How to Hike the Tongariro Alpine Crossing: A Complete Guide
This hike, which traverses a barren volcanic landscape in Tongariro National Park on New Zealand’s north island, is on countless “best day hikes in the world” lists.
When we got back from our New Zealand North Island road trip, most of our friends and family asked some version of “what was your favorite part of the trip” and, invariably, our answer was the day we spent hiking along the base of an active volcano.
Is it the best day hike in the world? Probably not. But it is absolutely worth a day of your time because it’s not every day that you get to hike along the slopes of a volcano in a national park that has been designated a dual UNESCO World Heritage Site (for both natural and cultural reasons).
The thing that you should know (and the reason we don’t think this hike is at the top of the list of best hikes in the world) is that the entirety of the best parts of the hike happen in the first half.
The second half is a long downhill slog that features some good views, but is missing that “WOW” factor.
We’re writing this guide literally hours after hiking the Tongariro Alpine Crossing, while everything about the experience is still fresh so that we can give you a comprehensive guide that leaves you prepared for all aspects of this hike (including the somewhat painful logistics).
In this guide, we’re going to do our best to give you a comprehensive guide to hiking this incredible hike in Tongariro National Park.
We’ll cover the important trail details, including the route and start and end points of the hike, along with important logistics and things to know before you hike.
Here is what we’re going to cover:
- The key logistics you need to know – like how difficult the hike is and what to be prepared for, how to arrange a shuttle (and how to decide which service is the best choice for you), and some things to know before you hit the trail.
- What to do if you don’t want to take the shuttle (spoiler: you can’t really do this hike without the shuttle).
- An in-depth overview (call it a play-by-play) of the trail based on our own experience to give you a rough idea of what you’re getting yourself into.
Our intention here is that, by the end of this guide, you’ll have all the information you need to be prepared to tackle the Crossing safely and confidently.
Sound good to you? Let’s get into it.

Disclaimer: Some of the links in this post, like hotel links, are affiliate links, meaning at no additional cost to you, we make a little bit of money if you click through and book. That being said, we would never recommend something to you that we don’t stand behind 100%.
Hiking the Tongariro Alpine Crossing: Trail Details
- Length: 19.4 km / 12.1 miles
- Elevation Gain: 2,765 feet
- Trail Type: Point-to-point (you NEED a shuttle!)
- Difficulty: Hard
- Trailhead Location: Mangatepopo Trailhead
- Dog Friendly? No
How Difficult is the This Hike?
In all honesty, we thought this hike would be harder. Still, the distance and terrain put this hike firmly in the “difficult” category.
However, provided you’re prepared physically and have the right equipment (sturdy footwear, sun protection, rain gear, snacks, and water), you should be able to complete this hike.
It just might take you a while (we took almost exactly six hours, with a long lunch break and plenty of photo stops along the way).
All that being said, we definitely do not want you to underestimate this hike.
This hike crosses alpine terrain, which means the conditions can change almost instantaneously, which we experienced first hand when our beautiful sunny morning turned into a cold, windy, foggy mid-morning at the high point on the hike.
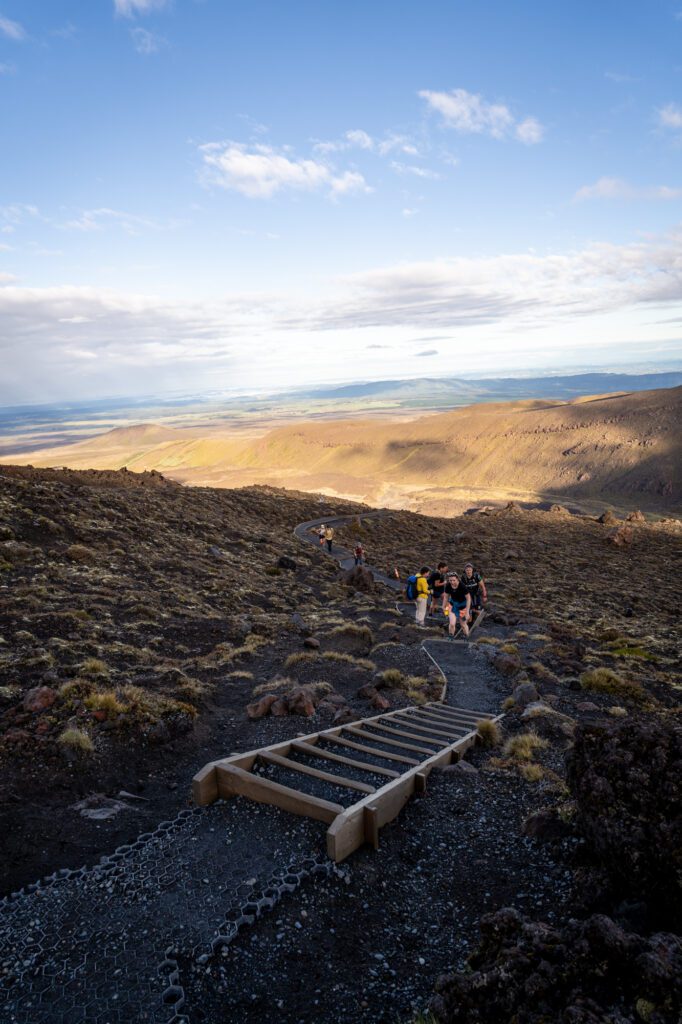
The other thing to know is that the terrain along the course of this track can be difficult, from long staircases (aptly named “Devils Staircase”), to narrow rocky climbs, to sections of trail that are, essentially, a pile of scree that you’re either climbing or descending.
We saw many people struggling with their footing on the descent from the Red Crater past Emerald Lake, and we would absolutely recommend hiking shoes or, even better, high top hiking boots with ankle support for this hike.
Trekking poles would also be helpful, and we’re glad we brought ours along to New Zealand.
We saw people setting out from the parking lot at Mangatepopo with jeans and tote bags, and we are truly curious how their day went because this is NOT that kind of hike.
The Route for the Hiking the Crossing
This hike is a point-to-point hike, meaning you start at one parking lot and hike one-way to another.
Which means you need to arrange transportation to get between the two trailheads, and you need to arrange it BEFORE you start hiking (ideally, several days before).
This is complicated by the fact that there is a four hour restriction at the parking lots on either end of this hike. We’re fast hikers, and it took us six hours to tackle this trail.
We don’t think there are more than a handful of people in the world who could do it in four.
The most common way to solve this problem is by hiring one of the many local shuttle services, which allow you to park at a parking lot near the end of the trail, and shuttle you to the starting point.
We have a whole section on this below with more detailed information.
Anyway, back to the route itself.
Like we mentioned, this is a one way hike starting at the Mangatepopo car park and ending at the Ketetahi car park.
The reason you should do it in this particular direction is that the Mangatepopo Trailhead is about 350 meters (1,000 feet, ish) higher than the ending point, which means you’re doing more downhill hiking if you do it this way.
We also have a trail guide below, with far, far more detail on each of these sections, including all sorts of pictures. This is meant to be an overview of the route.
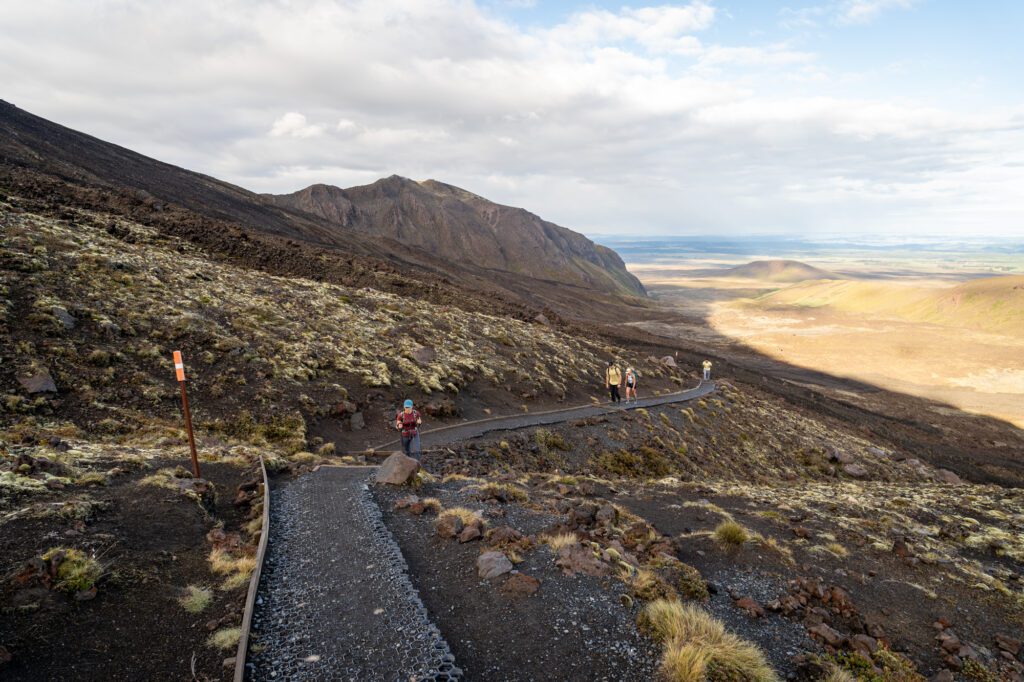
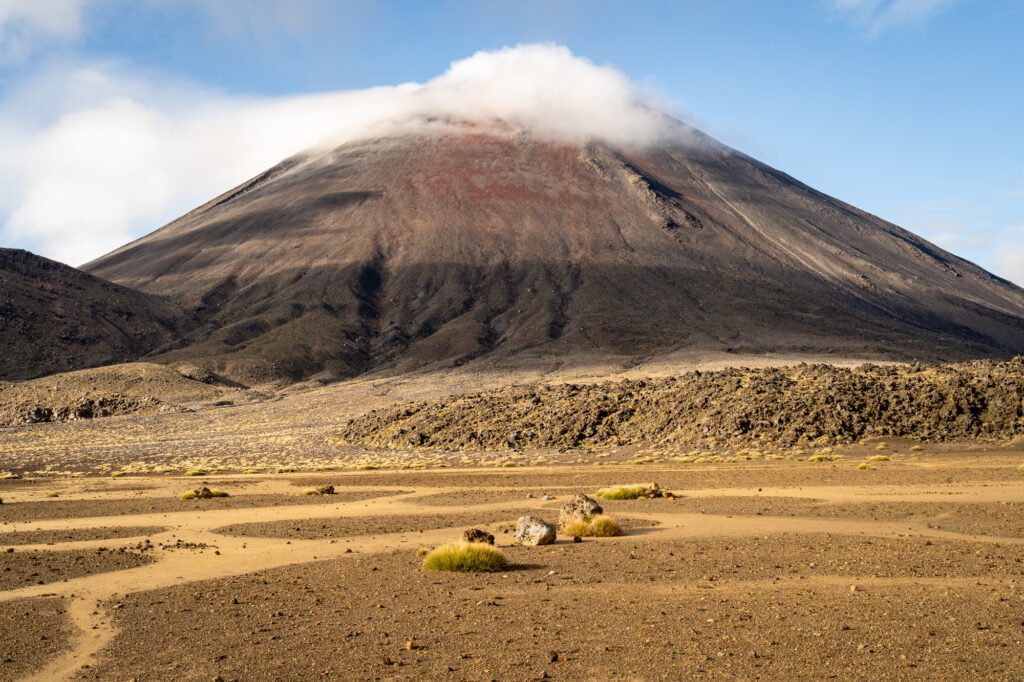
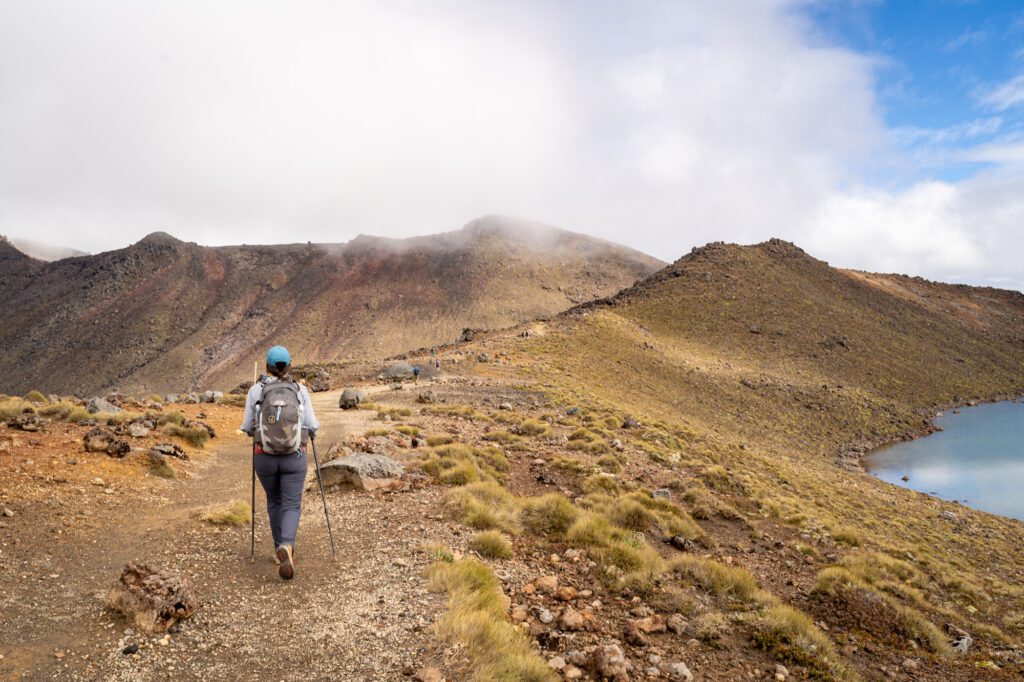
You’ll start at the Mangatepopo Trailhead and begin a gentle ascent through a landscape littered with tussocks, with a great view of Mount Ngauruhoe as you start to climb.
From there, the real fun begins (and by real fun, we mean the real climbing).
You’ll ascend the steep stairs known as Devil’s Staircase to get up to the base of Mount Ngauruhoe, where you’ll cross a very flat section skirting the northern slopes of the mountain (which, for fellow Lord of the Rings fans, is Mount Doom in the films).
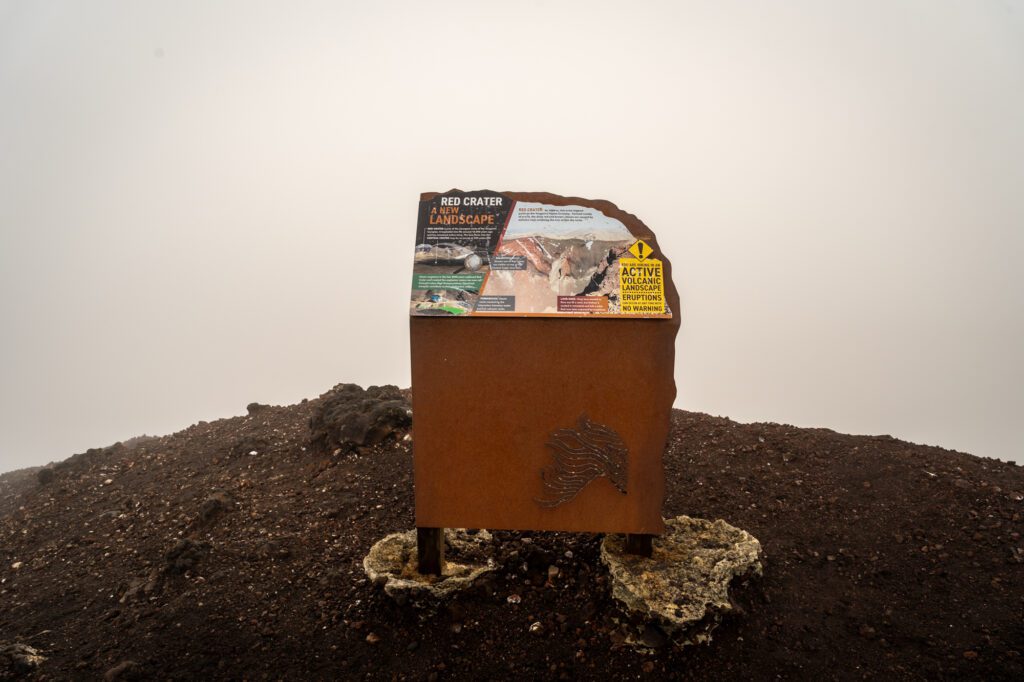
At the far end of that crater is the second of the two tough climbs, which takes you up to the highest point on the hike looking down at the Red Crater.
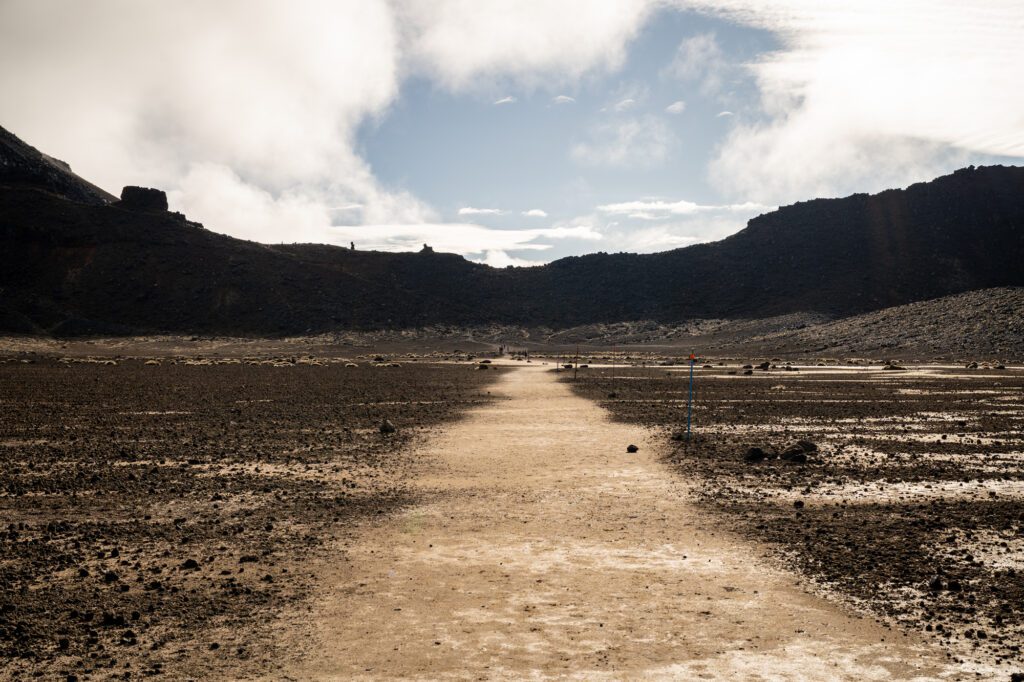
From here, it’s almost entirely downhill for the rest of the hike. You’ll descend past a couple of alpine lakes and lava vents, which smell strongly of sulfur, and then cross another big open crater that is mostly flat, which brings you to Blue Lake (an excellent lunch spot).
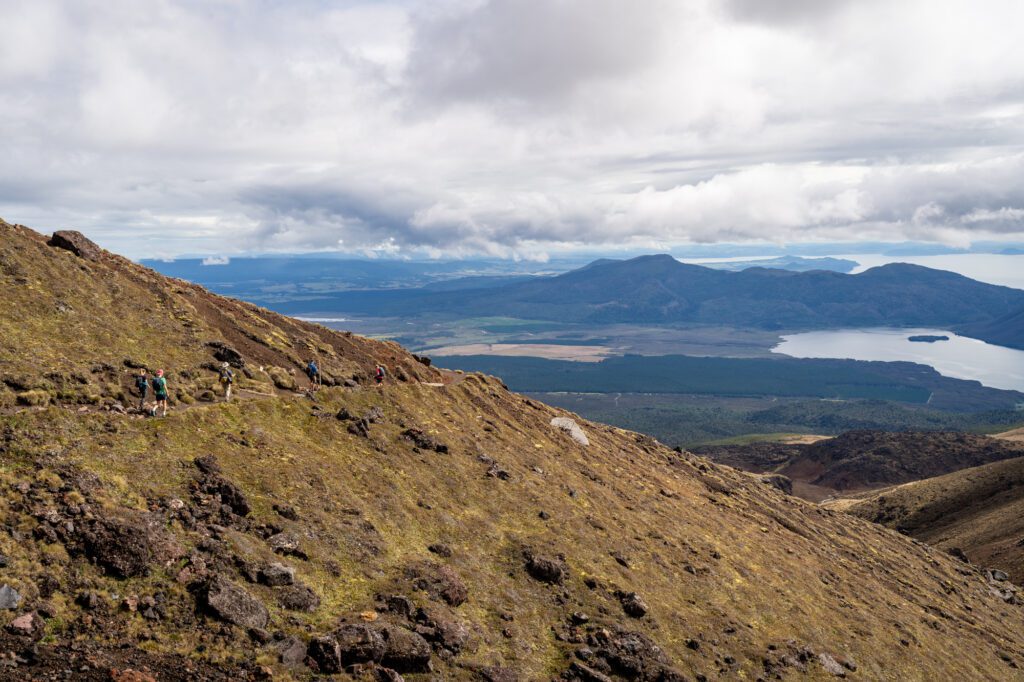
From here, the descent begins. You’ll start on an open section hugging the hillside with excellent views out over Lake Rotoaira and Lake Taupō in the distance.
Then, the real slog begins.
The last third of this hike is a relentless downhill section, starting with lazy switchbacks criss-crossing the mountainside, turning into multiple staircases to descend, and ending with an, all things considered, pretty nice easy meander through a moss-covered forest.
You’ll emerge from the forest at the Ketetahi Car Park, where you’ll either stop to catch the shuttle (if you booked a roundtrip shuttle) or continue down the road to the parking lot for the one-way shuttle companies.
Arranging a Shuttle to Get to the Mangatepopo Trailhead
The most complicated part of this hike is easily the shuttle (although, once you figure out what you want, it’s not actually that complicated).
Here’s what you need to know about choosing which shuttle service to book.
There are many, many options in terms of shuttle companies and also in terms of shuttle pick up / drop off points.
You should know that as of summer 2024 (January), there really is no viable way to do this hike without a shuttle. More on that below.
Essentially, we would categorize the options into two general buckets:
- The one-way shuttle: Park your car at a designated parking area near the end of the hike (there is a big car park along Highway 46 that multiple companies share) and get shuttled to the starting point for the hike. Complete the hike, get in your car, and drive home!
- The round trip shuttle: Get picked up and dropped off from a designated area, either in a town near the park (like National Park, Turangi, or even Taupō), or even at your accommodations (depending on which company you choose). Easy and convenient, but less flexible.
The decision for your particular situation comes down to a few factors:
- Where you’re staying. If you’re staying near one of the round trip pickup points, that might be the best option so you don’t have to drive to the trailhead early in the morning (you can use that extra time to get a few minutes of extra sleep).
- Whether you have a car or not. If you don’t have a car, you don’t have to worry about parking! However, you do need a shuttle to get you to and from the trailhead, and it’ll have to be a round trip shuttle.
- How fast you hike. If you book a round trip shuttle, you have a set pickup time at the end of the hike, which is typically something like 7-8 hours after the drop off. Which could leave you either hustling downhill near the end to try to make the shuttle time, or sitting at the end for an hour or two after you’ve already spent six hours in the intense New Zealand sun. Neither is ideal.
Overall, we’d recommend choosing the one way shuttle where you park at the end of the hike (really, 900m down the road from the end point) and get a shuttle back to the trailhead to start.
That’s what we did – with Backyard Tours, which was great – and we’d do it again in a heartbeat for a couple of reasons.
The main reason is that this gives you the most flexibility on the trail in terms of timing. Instead of hiking with a pickup time in mind, you can take your time on the trail (or, in the reverse scenario, you won’t have to sit at the end point waiting for a pickup after hiking 20 km).
The secondary benefit of the one way option is that, during peak season, it offers a 6am pickup time, which means that you will be among the first people on the trail. Yes, it’s early. But it’s well worth it!
Expect to pay around $60 NZD per person for any shuttle service (though it varies by operator and itinerary – e.g. if you’re getting a shuttle from National Park, it’s going to be cheaper because it’s so close to the start of the trail).
What if You Don’t Want to Take the Shuttle?
On the descent, we were chatting with a fellow hiker (hello, Robin from Grenoble!) about how exactly you would do this hike without a shuttle.
The short answer is, given the four hour parking restriction at the trailheads on either end of the hike, we’re not really sure how you could feasibly do this trail without the shuttle.
You may think that you can do an out-and-back from either trailhead in four hours.
The fact is, if you’re going all the way from the Mangatepopo Trailhead up to Emerald Lake, you probably can’t. It’s roughly 17km and a lot of climbing (somewhere around 1,000 meters of elevation gain).
You might then say “well, maybe we’ll just risk it and hope the rangers don’t catch us.”
This is one of the most popular hikes in New Zealand, and rangers are at the trailhead all day long. They will catch you and either ticket you or boot your car.
The only way we could come up with was hiking out-and-back from the bottom, where you can technically park along the road in very specific and limited sections.
However, this is a HARD hike and a solid 10 to 11 kilometers of slogging uphill before you get any rewards (and then you have to come back down).
Not to mention the fact that you’re hiking from the lower elevation end of the trail, so it’s more uphill.
So, given the fact that hiking the entire Crossing without a shuttle isn’t really feasible, we’d instead recommend heading up to Whakapapa Village to hike the Tama Lakes Track, which we’d say is a close second in terms of our favorite hike in the park.
If your shuttle is canceled due to conditions – which happens fairly often (it happened the day before we did the Crossing), then we’d also recommend that hike as a solid alternative with similar scenery.
Things to Know Before Your Hike
Here are a few things we think you should know before you tackle this hike.
You need to book a permit with the D.O.C. in advance
Now, this is not enforced in summer of 2024, but there is talk of enforcing this rule later in the year to limit the number of people tackling the Crossing.
Your shuttle operator will also ask you for your booking number, so you’ll want to make sure you have it done.
It’s free, it takes two minutes, and you can make your booking here.
There is very little shade on this trail
Except for the last two kilometers or so, which is forested. But for the vast majority of this hike, you are fully exposed to all the elements, including sun.
Remember that the sun is particularly intense in New Zealand, so you’re going to want to apply and reapply sunscreen on this hike.
We tend to like hiking in long sleeves and long pants to cover up, even when it’s really hot out.
Also, sunglasses – especially polarized ones – will be your friend here.
You need plenty of water
Given the exposure and the distance covered here, you need to bring about 2L of water per person. There is no potable water along the trail.
Yes, that sounds like a lot. Yes, on a hot summer day, you will drink it.
We carried 2L each and had finished it by the time we got about halfway through the descent portion (so 75% of the way down).
Be prepared to get wet
As you can see from our pictures, we had great weather on the trail as we made our way up to the high point on the crossing, just above the Red Crater.
From there, the clouds and fog rolled in for about an hour, obscuring the crater and lakes from view and blasting our sweaty bodies with a very cold wind blowing across the ridge.
Then, on the way down, it rained on us.
The point is that weather can change quickly, and you want to be prepared for multiple seasons in the same day.
There are toilets along the trail
You have multiple drop toilets along this trail, including a set at the trailhead, within the first kilometer at the Mangatepopo Hut, right before Devil’s Staircase, at the top of Devil’s Staircase, immediately before the descent begins after Blue Lake, and halfway down the descent.
You should be prepared with your own toilet paper and hand sanitizer, because these toilets have neither.
Oh, and given the fragile terrain you’re traversing here (and the fact that there’s basically no cover), only go to the bathroom in the toilets.
The Tongariro Alpine Crossing: A Complete Trail Guide
In this section, we’re going to go through the hike from beginning to end so that you know what to expect when you hit the trail.
For each section, we’ll give you the (rough) distance and elevation gained in that portion of the hike, along with a relatively short description of the terrain, calling out anything that we think might be useful to know (e.g. there’s a steep section with some scrambling, there’s a toilet, etc).
It’s worth noting that, because this hike descends more than it climbs (the trailhead is higher than the endpoint), the elevation numbers for each section look a bit funky. Take them as directional.
The Initial Ascent to Soda Springs
Distance: 4.5 km (2.8 miles) // Elevation Gain: 275 meters (900 feet)
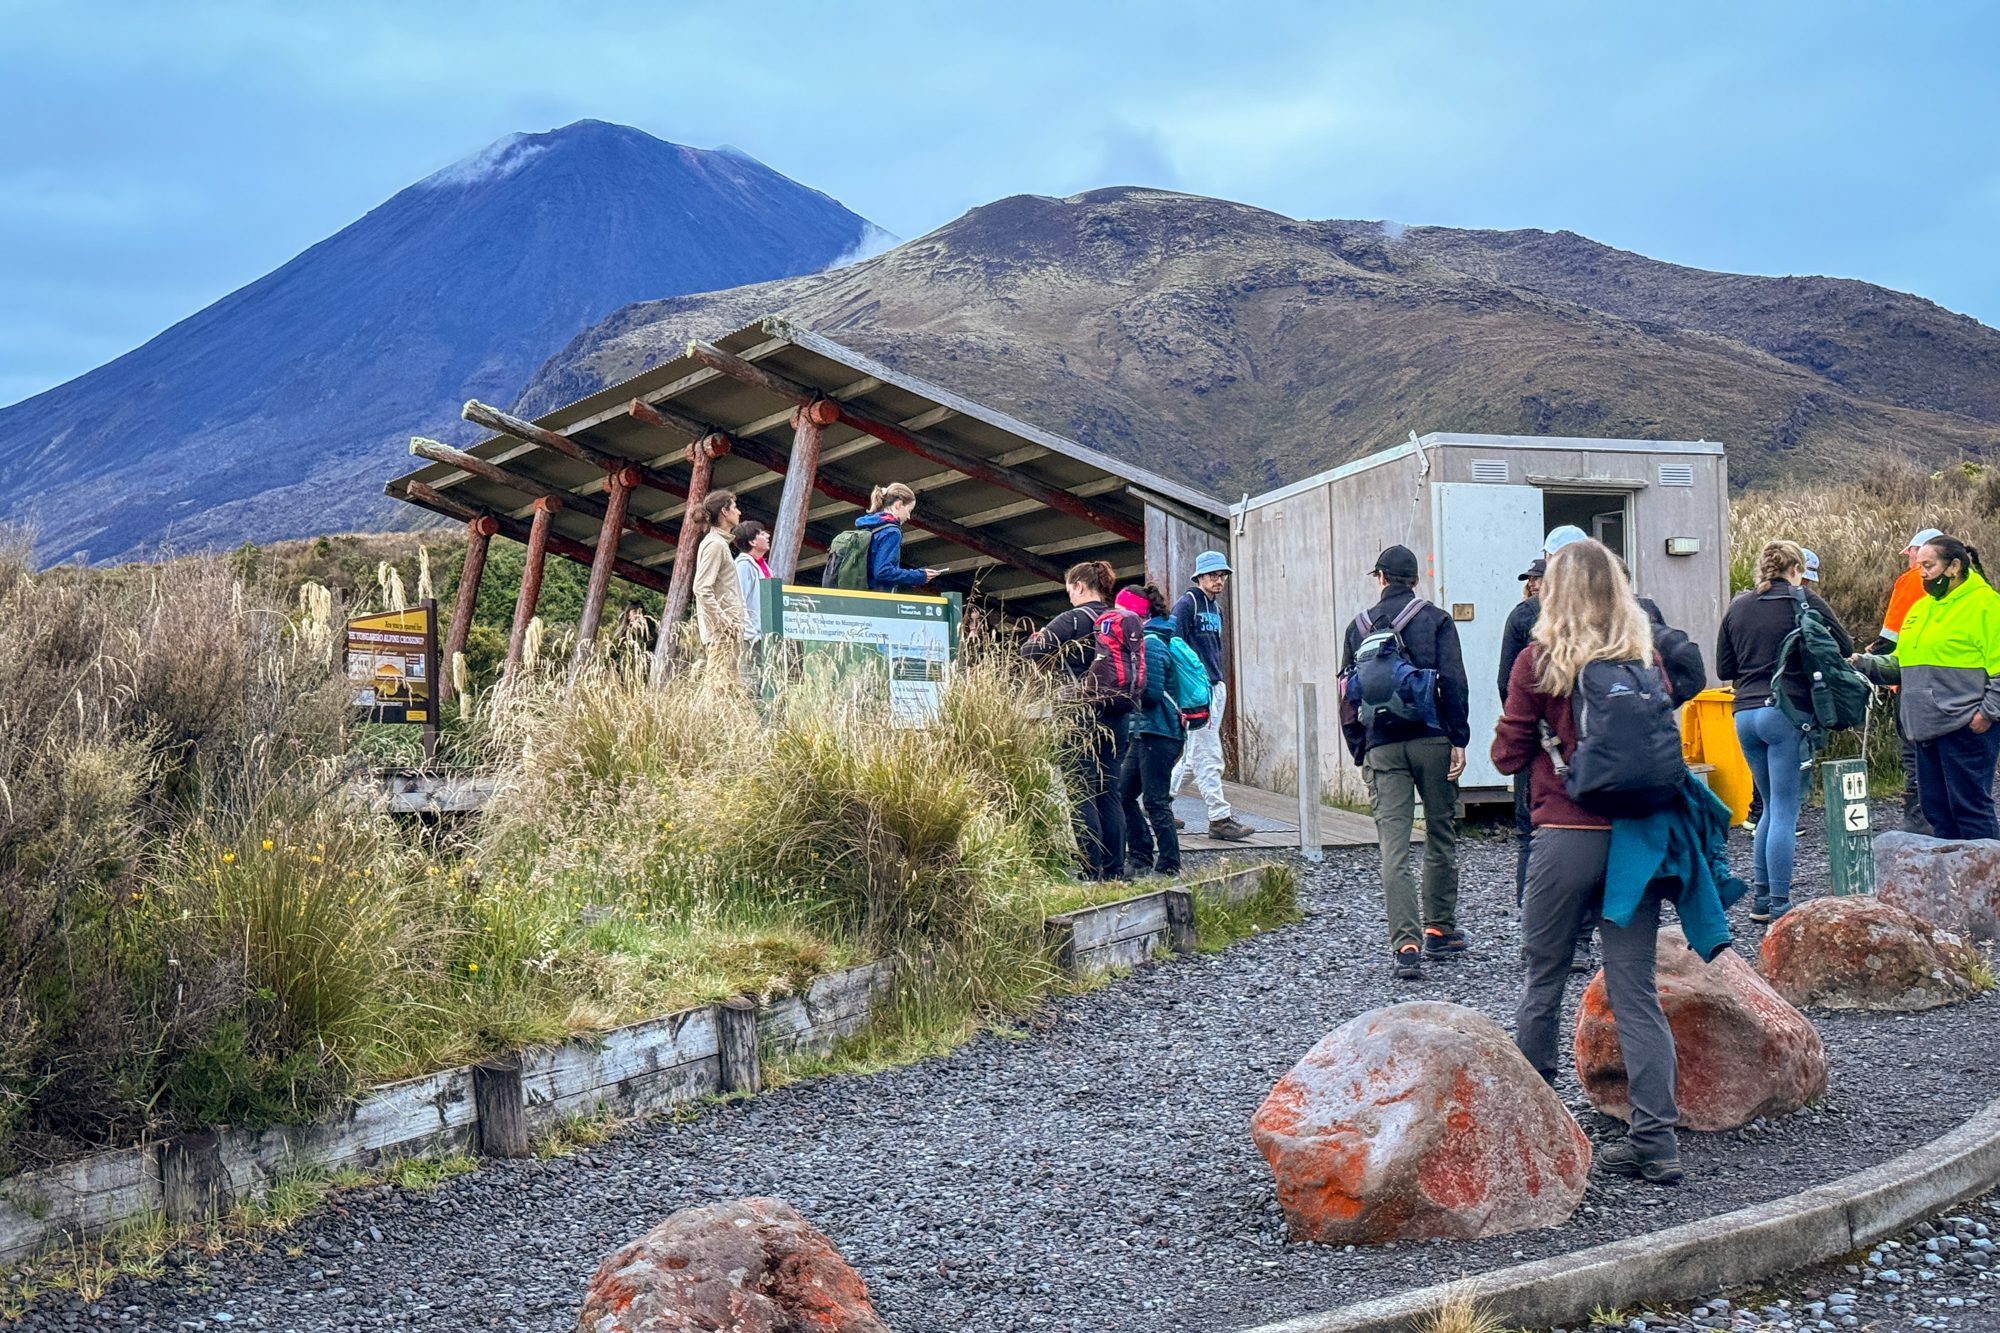
The first section of this hike starts out at the Mangatepopo Trailhead, where there are bathrooms and all the trail information signage you could want.
At a high level, the ascent from the trailhead to the high point on the hike can be broken into three distinct sections (which is what we’ve done in this guide).
The second two sections – Devil’s Staircase and the climb to the high point above Red Crater – are, by far, the most difficult parts of the hike.
Which one is more difficult is debatable, and largely depends on your preferences (e.g. stairs versus steep, slippery rock).
It is undeniable that this first section is the easiest of the first three. This section of trail is a relatively gentle climb, and will get your blood pumping and muscles warmed up for the main event(s) to come.
Think of it this way – it’s hard enough to get you warm enough to shed your layers, but shouldn’t be hard enough to have you saying “what have I gotten myself into?”
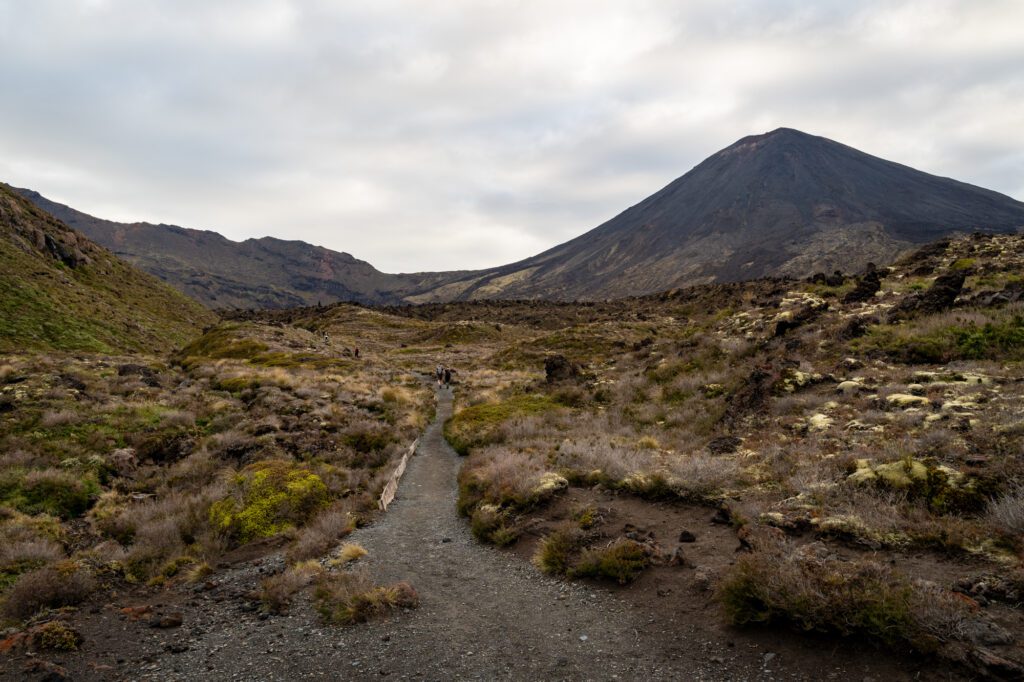
Immediately as you leave the trailhead, you’re met with a view of Mount Ngauruhoe, which is just a taste of what’s ahead of you on this hike.
As you make your way up the trail, the symmetrical cone shape of Mount Ngauruhoe starts to peek out from behind the ridgeline, and fairly quickly you round a corner and find yourself face to face with the volcano in all its glory, from its base (surrounded by dried lava flow) to its peak.
The end of this section takes you along a boardwalk through a swamp. On the left is a ridgeline and a babbling brook (fed by Soda Springs, the end of this section of trail) with a fair amount of greenery.
On your right is a much more desolate landscape at the base of Mount Doom, with lava fields coming into view at the end of this stretch. Very cool, and a very unique landscape to hike through.
Climbing Devil’s Staircase to the Base of Mount Ngauruhoe
Distance: 2.9 km (1.8 miles) // Elevation Gain: 290 meters (900 feet)
Immediately after the short detour to Soda Springs off to the left the real fun begins.
Like we mentioned above, it’s debatable whether this is the hardest section or the short but intense climb to the Red Crater is, but either way this part of the hike is hard.
As you might have guessed, this section is marked by a seemingly never ending set of stairs.
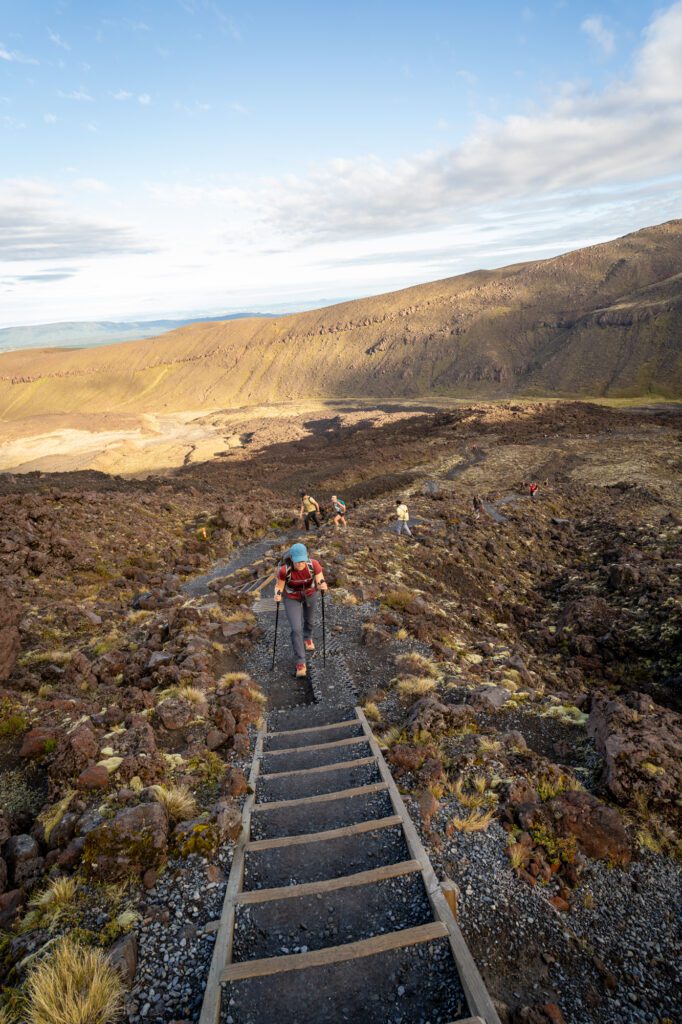
We say never ending because there were four separate instances where we thought we were about to arrive at a saddle or summit marking the end of the climb, only to realize it was another false summit, and the pain would continue for a little while longer.
After the first few sets of stairs, there are a set of toilets off to your right. Then it’s essentially straight up for the next two kilometers or so (just over a mile). You’ll climb a hair over 300 meters over that distance, which is no joke.
However, we have some good news about this section.
Chances are, if you’re like us, you’ll be taking plenty of breaks as you climb.
And the views behind you are spectacular, especially if it’s a clear day and you can see the peak of Mount Taranaki (we could, but we couldn’t get a good picture of it).
Take it slow, take plenty of breaks, and soak up those excellent views (though there are more spectacular views to come, we’d argue).
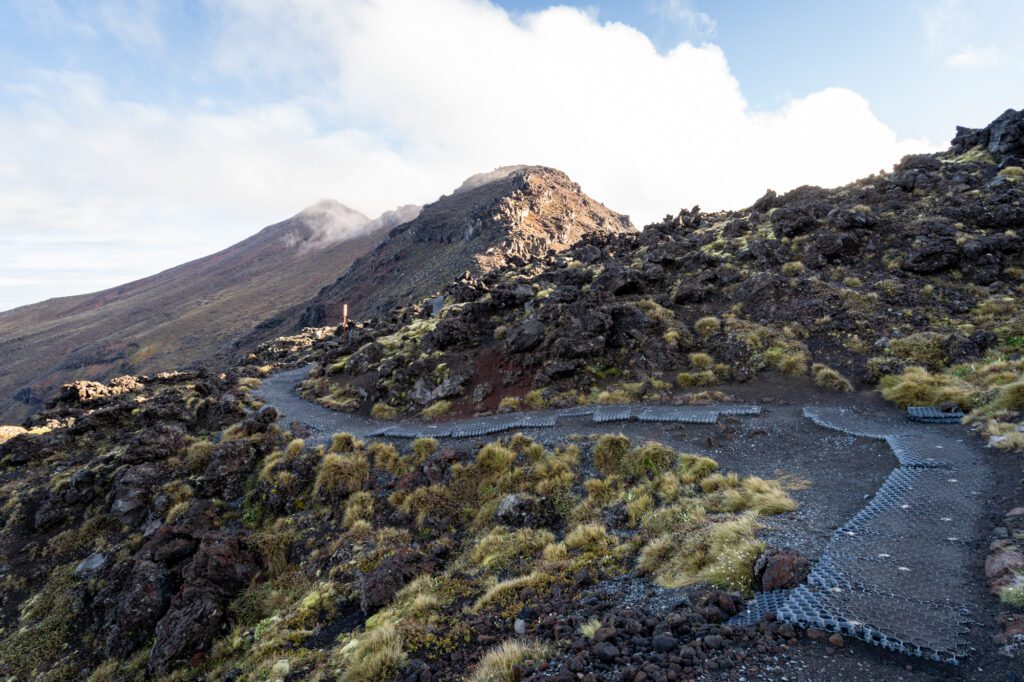
At the top of the climb (after four false summits or so), you’ll finally crest the hill, and the trail levels out and brings you into a valley and a (blissfully) flat trail.
There is another set of toilets on your left shortly after it levels out. A good spot for a break, some water, and a reapplication of sunscreen.
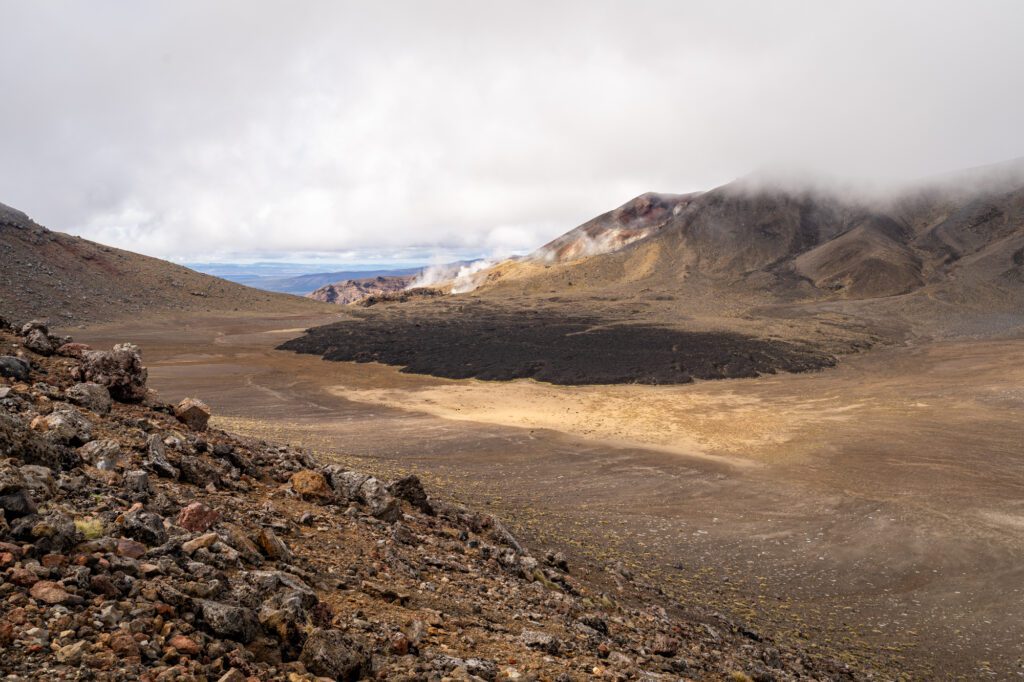
As you enter the crater here – it’s not a crater in the usual sense of the word, meaning it wasn’t created by an impact from the volcanoes – you’re right at the base of Mount Ngauruhoe, and you’ll have some pretty impressive views of the volcano from right at its base.
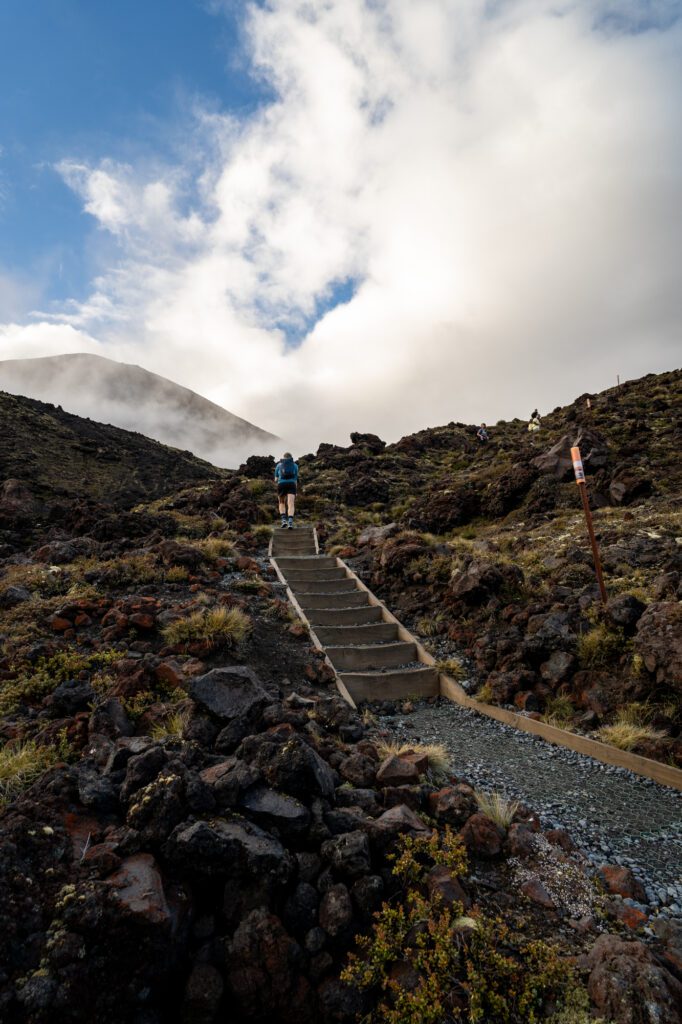
At the far end of this valley, you’ll come to the base of a ridge and see the trail climbing aggressively up and to the left to the top of that ridgeline (which, SPOILER ALERT, is another false summit).
This marks the end of this second section of the ascent, and the beginning of the climb to the highest point on the hike.
Ascending the Ridge to Red Crater
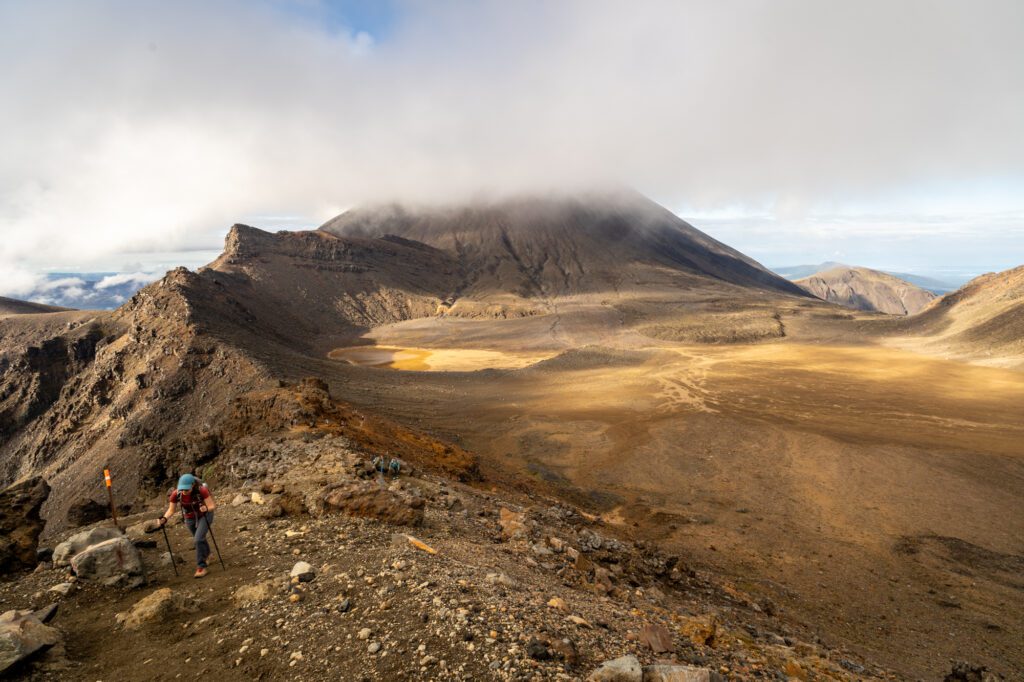
Distance: 1 km (0.6 miles) // Elevation Gain: 185 meters (600 feet)
The highest point on this trail is at the end of this section, and it’s a relatively short but intense climb to reach it.
This section is only a kilometer long, but it’s a kilometer that climbs about 200 meters in total, most of it on a barely maintained track full of loose and/or slippery rocks. It’s steep, but it’s short.
And, once again, the good news is that the views from atop the ridgeline back towards the volcano and out over the valleys on either side of the ridge are spectacular.
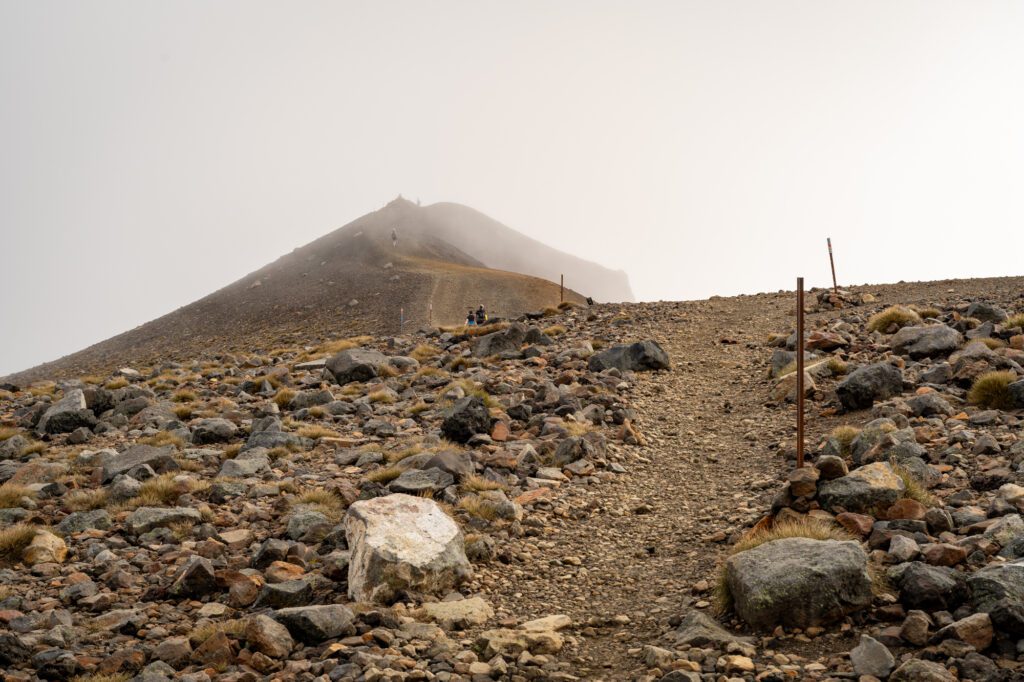
Though, we didn’t get to enjoy the views from the very top of the ridge because the dense fog rolled in and made it so that we couldn’t even see the Red Crater, let alone the valleys beyond.
The one thing to know about this section is that you will likely get all hot and bothered during the intense climb only to be hit with strong gusts of cold wind that rip across that ridge. Layers are your friend!
The Initial Descent Past Emerald Lakes to Blue Lake

Distance: 1.6 km (1 mile) // Elevation Loss: 120 meters (400 feet)
Congratulations, you’ve made it to the highest point on the hike and it is almost literally all downhill from this point on.
Unfortunately, hiking straight downhill for more than 11km is difficult in its own right.
This first downhill section is probably the most difficult section of the hike, especially if you don’t have the right footwear and/or trekking poles. We had no problem, but we saw plenty of people who, to put it lightly, definitely had problems.
Essentially, from the Red Crater down to the shore of Emerald Lakes (we’ll get to those in a minute) is straight downhill on a steep section of loose dirt. We saw several people fall on this section, and the key is to lean backwards so you fall on your butt, not your face!
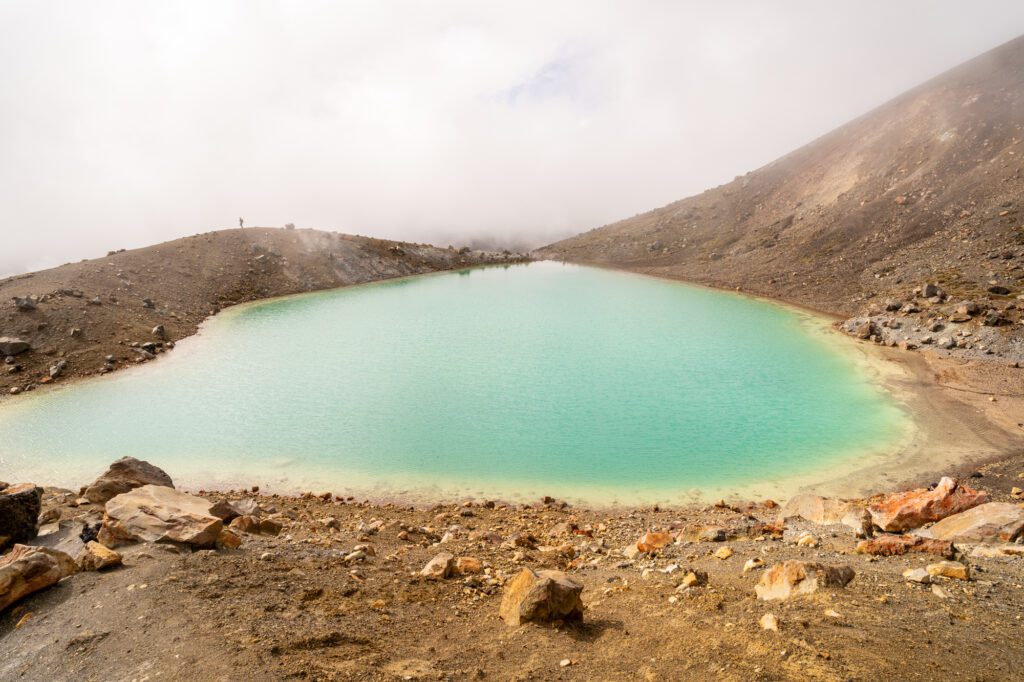
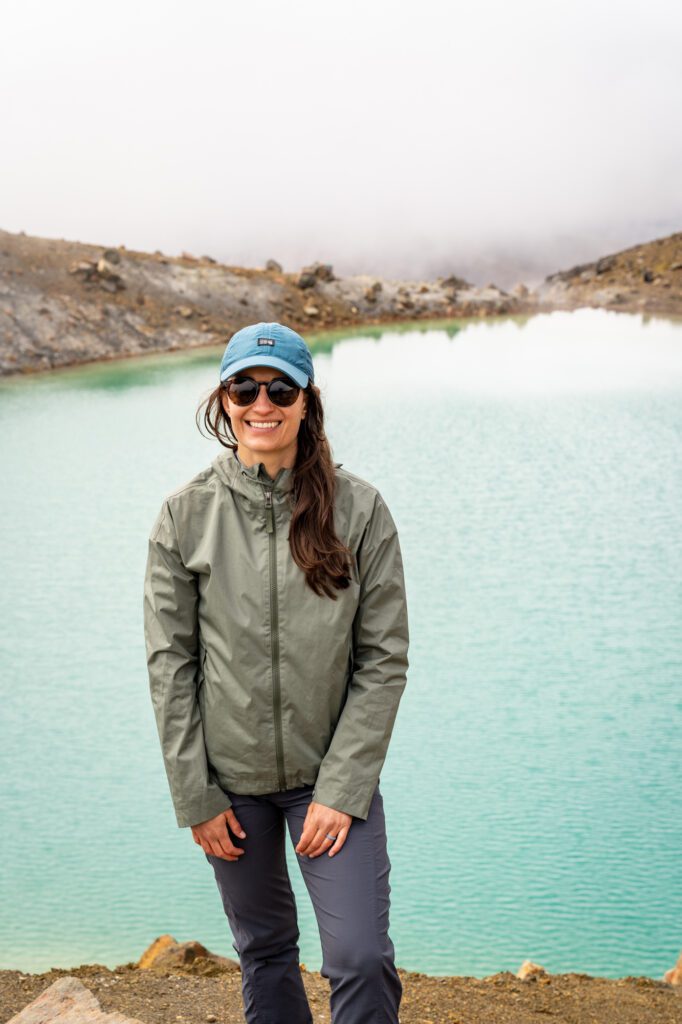
About halfway down, you’ll want to stop and ogle at the beautiful turquoise lake sitting just below you. If you can see it, anyway. We waited here for 20 minutes for the fog to clear (it never quite did).
It has that same turquoise hue that you’ll find in alpine lakes around the world thanks to all the minerals in the water, and it’s far more vibrant on a sunny day (which we did not have) when it lights up and looks borderline fake.
If you look closely, you can see steam vents around the lake belching out sulphur-y air (hence the lovely smell through this section of the hike).
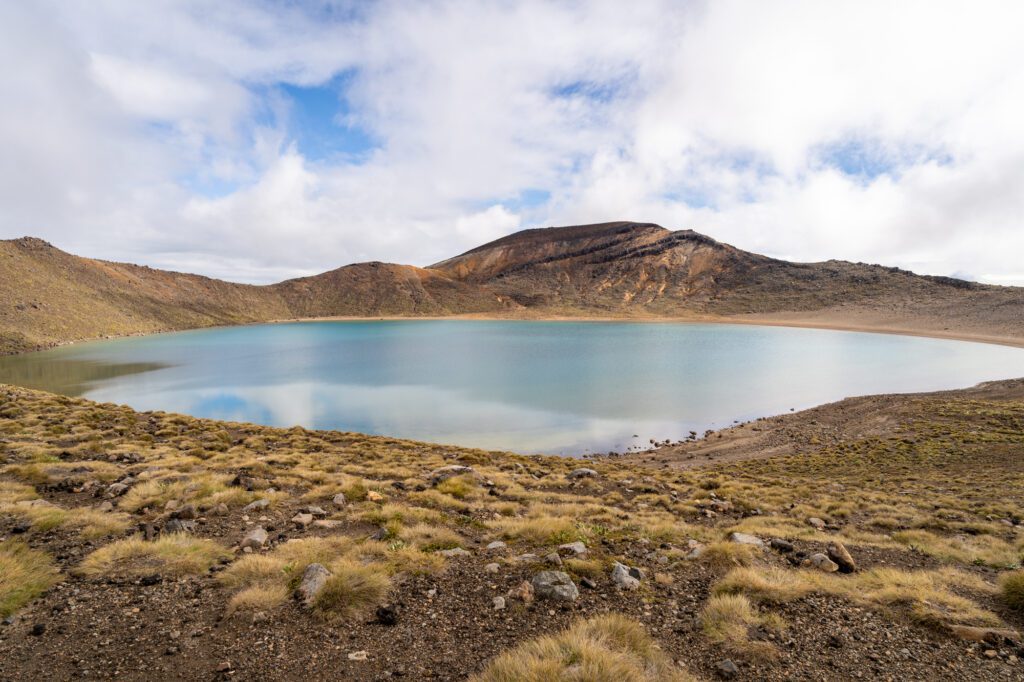
Once you’re done marveling at the geothermal wonderland here, the trail continues on and levels out for a bit before a short climb up to Blue Lake, which is the perfect spot for a snack (or your packed lunch) and a well-earned break.
The Final Slog (It’s a Long One!)
Distance: 9.7 km (6 miles) // Elevation Gain: 975 meters (3,200 feet)
While the second and third sections are roughly tied for the most difficult portion of the hike from a physical standpoint, this last section of the hike from Blue Lake down to the Ketetahi Car Park is easily the most difficult from a mental (and emotional) standpoint.
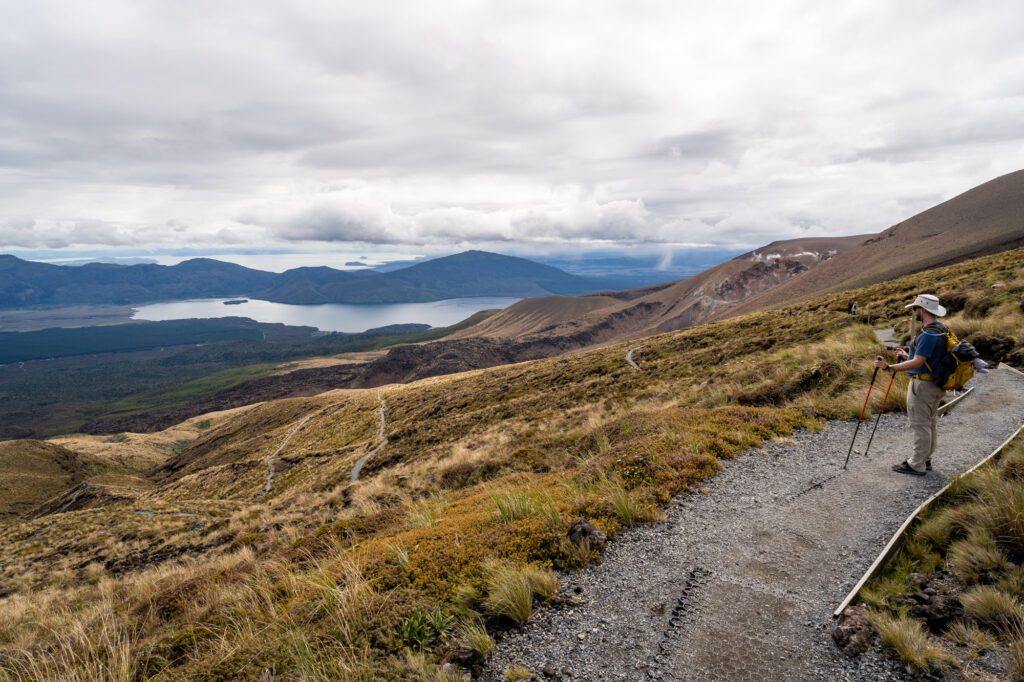
It starts out easy enough. You leave Blue Lake, pass another set of toilets, and are met with a great view out to the northeast featuring both Lake Rotoaira and Lake Taupō. Really, it’s a spectacular view.
However, the next *checks notes* 8km or so of slogging downhill SUCK.
After that first initial section with the nice views, you start down a set of wide, very level switchbacks that are barely descending at all.
Then the trail straightens out a bit, following a ridgeline down to the former location of the Ketetahi Shelter (which closed after the 2012 eruption when rocks came through the ceiling – luckily nobody was inside) where there are another set of toilets.
From here, the trail alternates between steep sets of stairs and relatively level sections of trail for a bit. There are some cool sections here, mostly because of the bright red stained rocks along the trail.
Then, for the last 3 km or so, you enter a wet, mossy forest, which is kind of a nice change of pace.
We enjoyed this section, which follows a stream that, along with the birdsong, provides a nice soundtrack for the end of the hike.
Eventually, you’ll emerge at the Ketetahi Carpark, where there are bathrooms and a shelter from the elements.
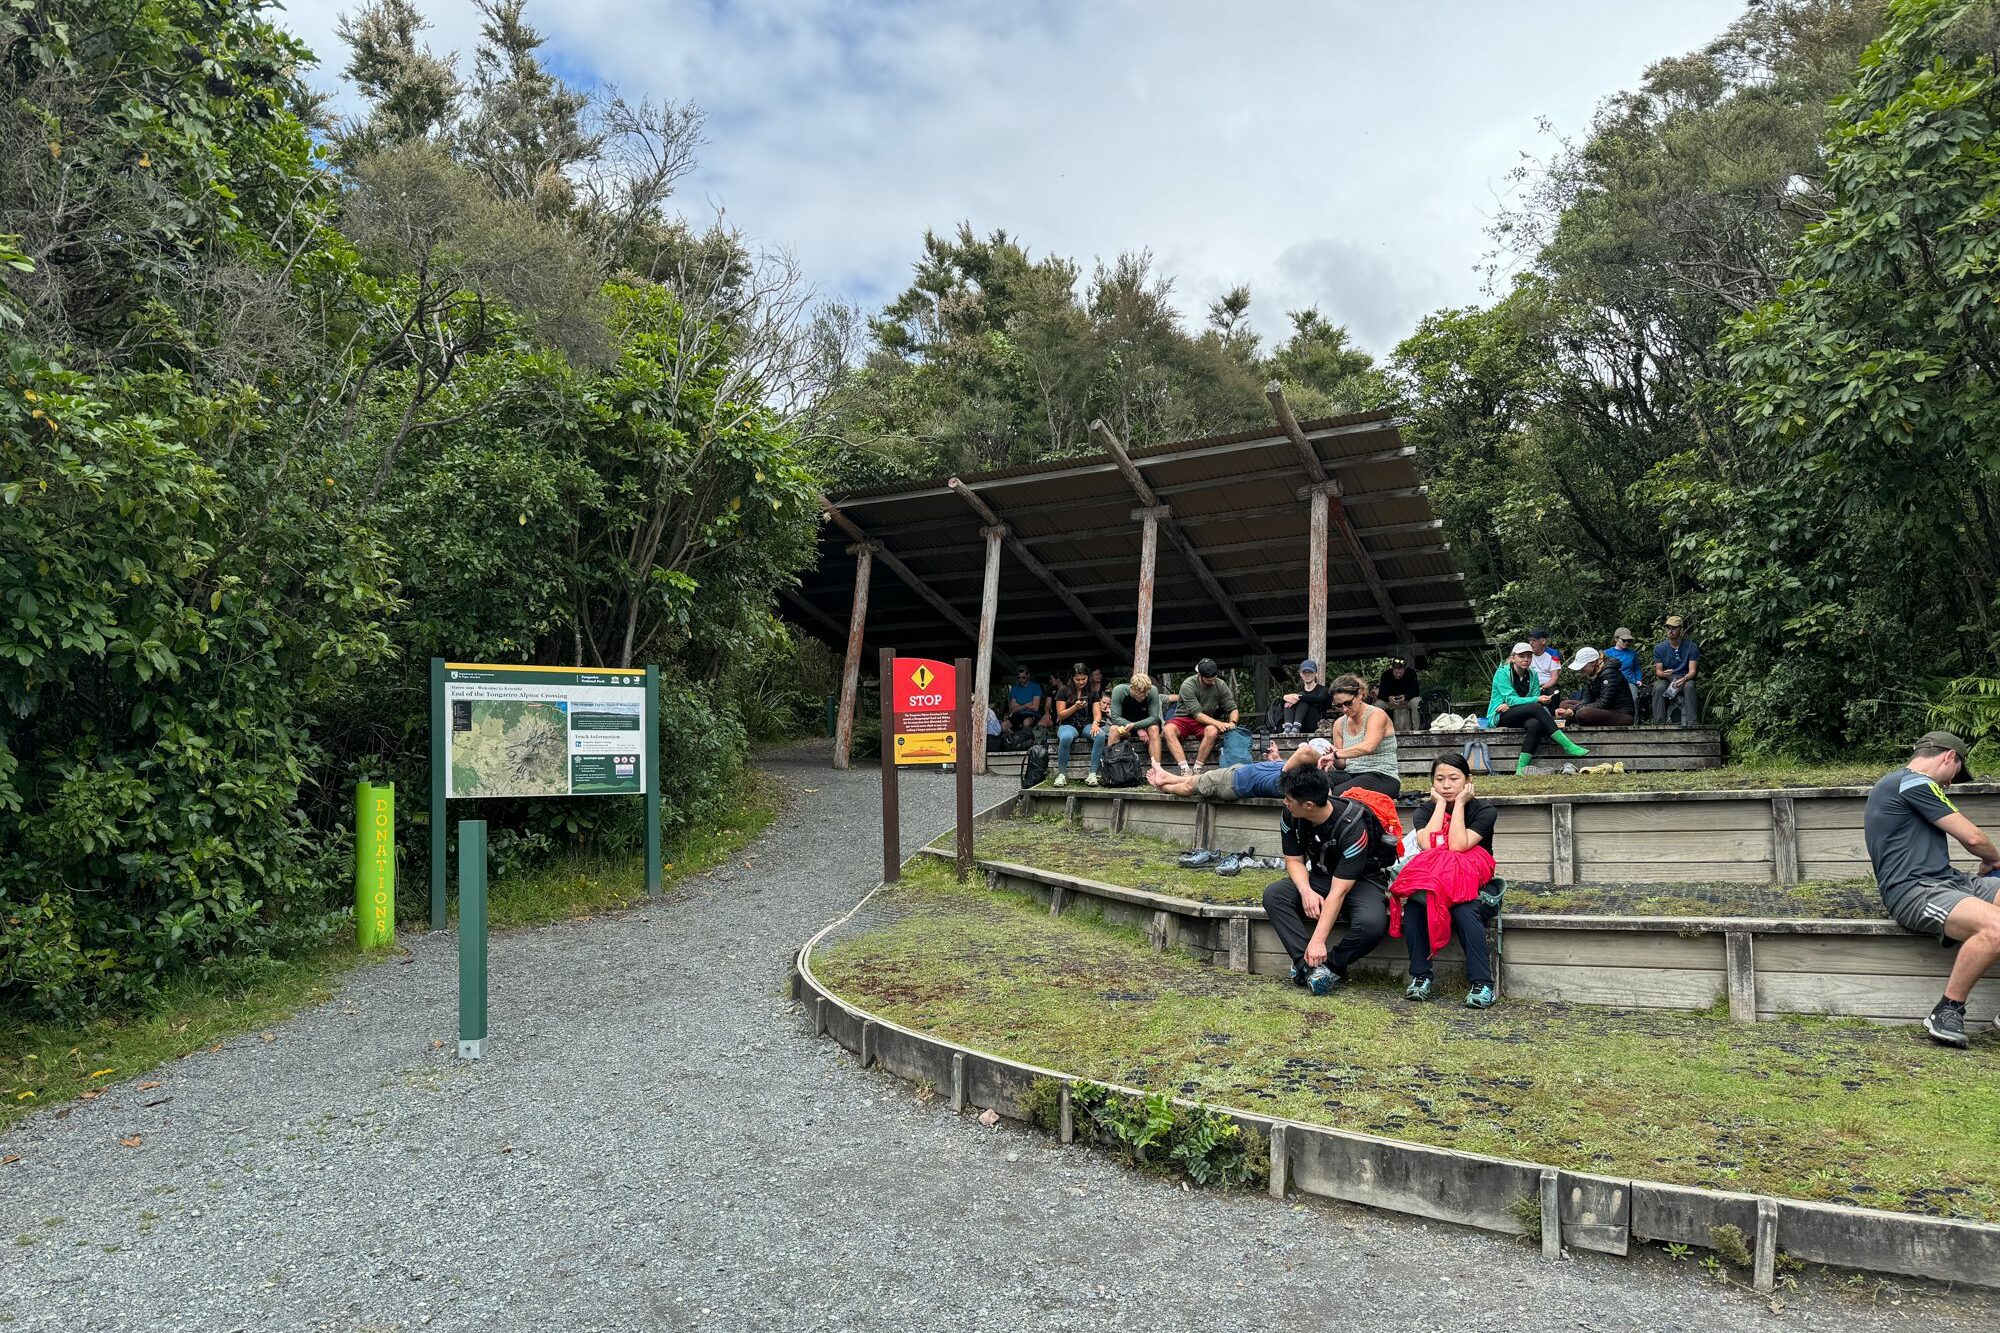
From here, you’ll either wait for the shuttle to take you back to your accommodations / town (if you booked a round trip) or walk another 900m down to the base of the road and cross the highway to get back to your car (if you booked a one way shuttle).