How to Plan an Amazing New Zealand South Island Road Trip
I have never been to a place with as many diverse landscapes packed into a single place as the south island of New Zealand. And I live in California. From the rolling hills of Marlborough’s wine country, to the rocky peaks of Mount Cook and Mt. Aspiring, to the breathtaking beauty of Milford Sound, and up to the tropical (ish) beaches of Abel Tasman National Park, you’ll find a crazy amount of diversity on the south island of New Zealand.
We spent HOURS researching for my trip, and created a huge spreadsheet with all the information. Now, we’re sharing that research, along with our experiences on the trip, with you in the form of this New Zealand south island itinerary so that you can plan the perfect adventure.
Update 2021: We spent three amazing weeks in New Zealand, and have been dreaming of our return trip ever since. Which was planned in 2020, and is postponed for now. Based on our three week New Zealand south island road trip, here is how we would plan an itinerary for 14 days on the south island of New Zealand. We did most, but not all, of the things recommended below, and left out some of the things we didn’t think were worth it.
Disclaimer: Some of the links in this post, like hotel links, are affiliate links, meaning at no additional cost to you, we make a little bit of money if you click through and book. That being said, we would never recommend something to you that we don’t stand behind 100%.
Itinerary Overview
Before we get into the detailed itinerary below, here’s an overview of what you’re going to find.
Day 1: Land in Queenstown, immediately head to Mt. Cook
Day 2: Mount Cook – hike Sealy Tarns or Hooker Valley Track
Day 3: Mount Cook to Tekapo – hike Hooker Valley Track or Red Tarns in am, drive to Tekapo. Do some stargazing.
Day 4: Tekapo
Day 5: Tekapo to Hokitika via Arthur’s Pass
Day 6: Hokitika to Franz Josef Glacier
Day 7: Franz Josef to Wanaka via Haast Pass
Day 8: Wanaka
Day 9: Wanaka
Day 10: Wanaka to Milford Sound
Day 11: Milford Sound
Day 12: Milford Sound to Queenstown
Day 13: Queenstown
Day 14: Queenstown
Day 15 (we cheated, you caught us): Fly home
And here’s a map.
How Many Days Should You Spend in New Zealand?
I spent three weeks just on New Zealand’s south island, and it BARELY felt like I was scratching the surface. The reality is that two weeks in New Zealand is not nearly enough time to do the entire country justice.
However, I know that you probably only have about 2 weeks of vacation, and you want to pack as much as possible into that time.
We’d strongly recommend that you pick one island to explore over that time and save the other one for a future trip.
And we’d strongly recommend that you choose to spend your 2 weeks in New Zealand on the South Island.
Things to Do Before You Get to New Zealand
- GET CASH. Lots of campgrounds only accept cash, and it’s always easier to get it ahead of time – one less thing you have to worry about when you land in New Zealand. You can grab it through your bank at home – we started with $400 NZ.
- Make sure you have a valid passport. For obvious reasons.
- Download some of your favorite audiobooks and podcasts for the drives. You’ll be spending a fair chunk of time on the road, and you’ll want something to listen to. Or maybe it’s just me who is uncomfortable with too much silence.
- Download an offline Google Map of the South Island. This will help when you’re in the remote parts of New Zealand without cell service, or if you choose not to get a New Zealand SIM Card. Here’s how to do it.
- Download Campermate, the best app for finding campsites along the way.
Where to Fly to Start Your New Zealand South Island Adventure
You essentially have two options for flying into New Zealand’s south island – Christchurch and Queenstown.
Either one will work – We’d recommend doing a big circle and flying in and out of the same airport.
For the purposes of this New Zealand itinerary, we’re going to assume you fly in and out of Queenstown. But keep in mind you can absolutely do it from Christchurch instead with a few tweaks.
You could fly into Christchurch and out of Queenstown, but Mt. Cook and Lake Tekapo are between the two, and you’d end up having to do some backtracking to see them. Not the end of the world, but also not super convenient.
If you’re coming from the North Island, you can either fly or ferry. If you’re taking the ferry, it will drop you in Picton at the north end of the island. From there, I’d rearrange the itinerary by cutting out the West Coast and adding Abel Tasman. So you’d head to Abel Tasman from the ferry, then drive down the West Coast, cut over Arthur’s Pass, and hit the south end of the island.
Of course, the West Coast is awesome, but so is Abel Tasman, and that’s the first thing I would add if you have more than two weeks on New Zealand’s South Island. See the bottom of this post for how to add Abel Tasman to your itinerary
How to Get Around the South Island For 2 Weeks in New Zealand
There are a few options for getting around New Zealand, with various levels of cost and flexibility. This New Zealand South Island 2 week itinerary is best if you have your own wheels – car or campervan – which gives you the most flexibility in terms of where you go and what you see.
If you’re looking for a guided tour with all of your transportation and lodging covered, I recommend G Adventures and their New Zealand tours, which you can check out here.
Why G Adventures? They are all about responsible travel. They make sure they respect local cultures and prioritize working with local small businesses over huge international conglomerates.
They even created the “Ripple score” which measures how much of the money from the trip stays in the local community, which is a cool way to evaluate their impact on communities.
Check out this 16 day New Zealand South Island Tour.
Self Drive: Car vs. Campervan
To give yourself as much flexibility to explore at your own pace, you’ll want to rent a car or campervan.
But which should you choose? We struggled with that question for weeks before eventually doing the math.
With a car, you’ll get better gas mileage, but you’ll have to pay for accommodations throughout the trip.
With a campervan, you get the Instagram pics and you save money on accommodations (only have to pay for campervan sites).
We did extensive research and mapped out all the costs for each option and found that staying in budget hotels / Airbnbs with a car was about the same price as renting a campervan and campsites. Keep in mind, that was in February and early March, which is peak season. Costs might be a little more in favor of the campervan option in shoulder seasons.
Since the cost is roughly the same, it comes down to your travel style. I will say that we chose car, and I kind of wish we had chosen campervan for the experience.
Rent a car through Kayak, or a Campervan through Motorhome Republic for the best prices and selection.
A Detailed 14 Day New Zealand South Island Road Trip Itinerary
Here is our recommended 14 day itinerary. It gets you to all the best places in New Zealand, including Milford Sound, Queenstown, and the rugged West Coast, without rushing TOO much.
There’s still a lot of driving, we think it’s worth it in order to get to some of the best places in New Zealand.
Onwards to the super detailed itinerary!
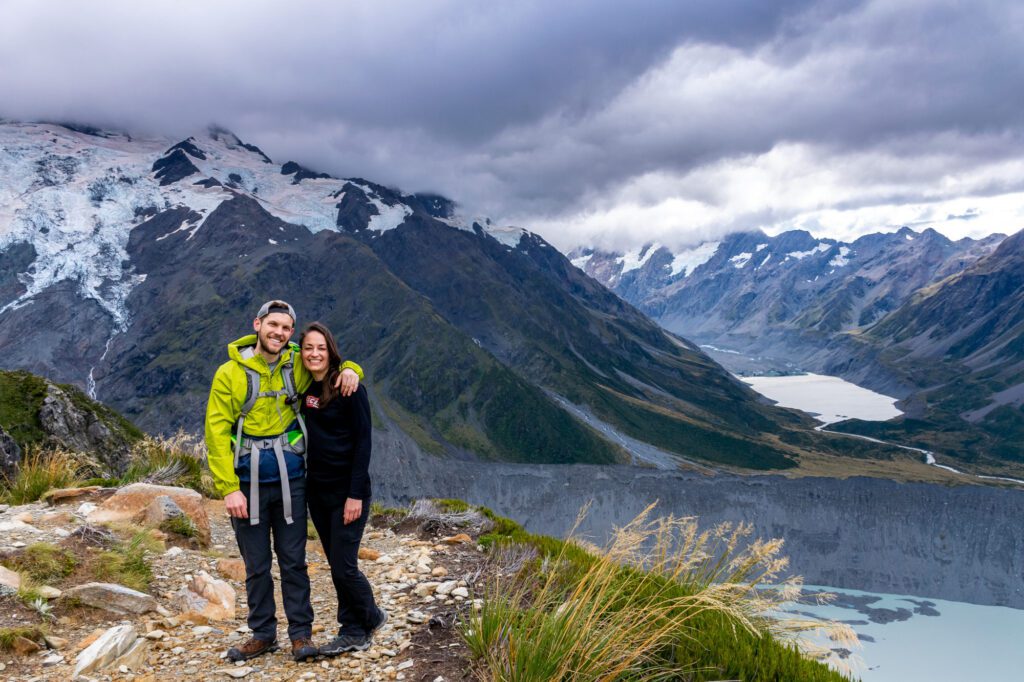
Day 1 & 2: Fly into Queenstown and Head to Mt. Cook
Drive Time from Queenstown to Mount Cook: 3 hours
When you land, there are a few things you should take care of in and around the Queenstown airport.
- Rent your car or campervan. At the airport, you’ll need to call the company you’re renting from to come pick you up. You can ask the information desk to help you out here if you don’t have a cellular plan. Which leads me to my next point…
- If you have an unlocked phone, grab a New Zealand SIM card at the airport. You can grab one from Vodafone at the Queenstown airport. This will be SUPER useful for directions as you’re driving. At the very least, download the Google Map of the South Island so that you can access it offline. Here’s how to do that.
- Head to New World, a grocery store chain in New Zealand, to grab groceries, and the Warehouse, which is like a Target or a Walmart, for things like pots and pans, silverware, and whatever else your heart desires.
Then hit the road, leave Queenstown in the dust, and make the three hour trip to Mount Cook.
Don’t worry, you’ll be back. You’re just going to start your trip in Mount Cook.
There’s nowhere to grab groceries in Mount Cook, so make sure you grab them on the way if you’re planning on cooking for yourself.
Need to eat gluten free? Me too! Don’t miss my guide to the best gluten free groceries I found in New Zealand.
Where to Stay in Mount Cook
Campervan / Campsite: White Horse Hill Campground (DOC). The location truly doesn’t get any better – it’s at the base of both the Mueller Hut (or Sealy Tarns) hike and the Hooker Valley Track. There are flush toilets, running water, and a small kitchen area.
Budget/Mid-Range: Aoraki Court (where we stayed). Lovely little motel, which means something a little different in New Zealand than it does in the US, with spacious rooms, comfy beds, and great kitchen facilities. Your own little apartment in Mount Cook village near the start of the Red Tarns trail.
Luxury: The Hermitage Hotel. If you’re looking for a slice of luxury, the Hermitage is your spot. Stunning views of the surrounding landscape Note: no kitchenette in the cheaper rooms, so you’ll have to eat at the restaurant/cafe onsite. However, you can book one of the motel rooms that come with a kitchenette, so you can save money by cooking for yourself.
Things to Do in Mount Cook
Here are some of the things you absolutely should not miss while you’re near Mt. Cook.
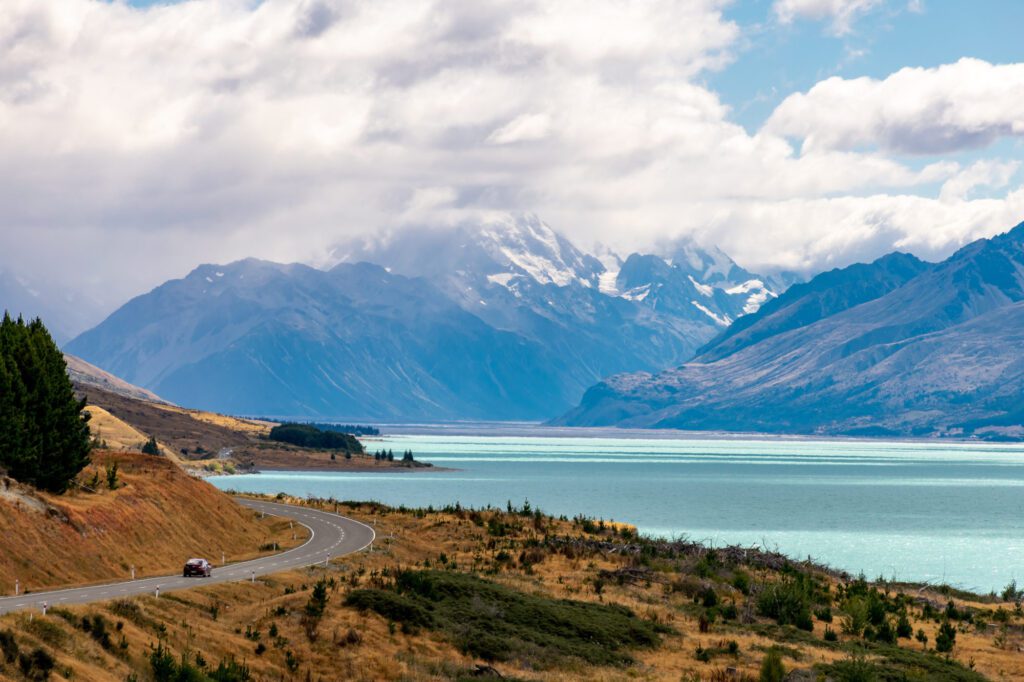
Stop at Peter’s Lookout for stunning Lake Pukaki views
On the way into Mount Cook, stop at Peter’s Lookout for stunning views of the vibrant blues of Lake Pukaki with Mount Cook looming in the background.
Hike, hike, and hike some more.
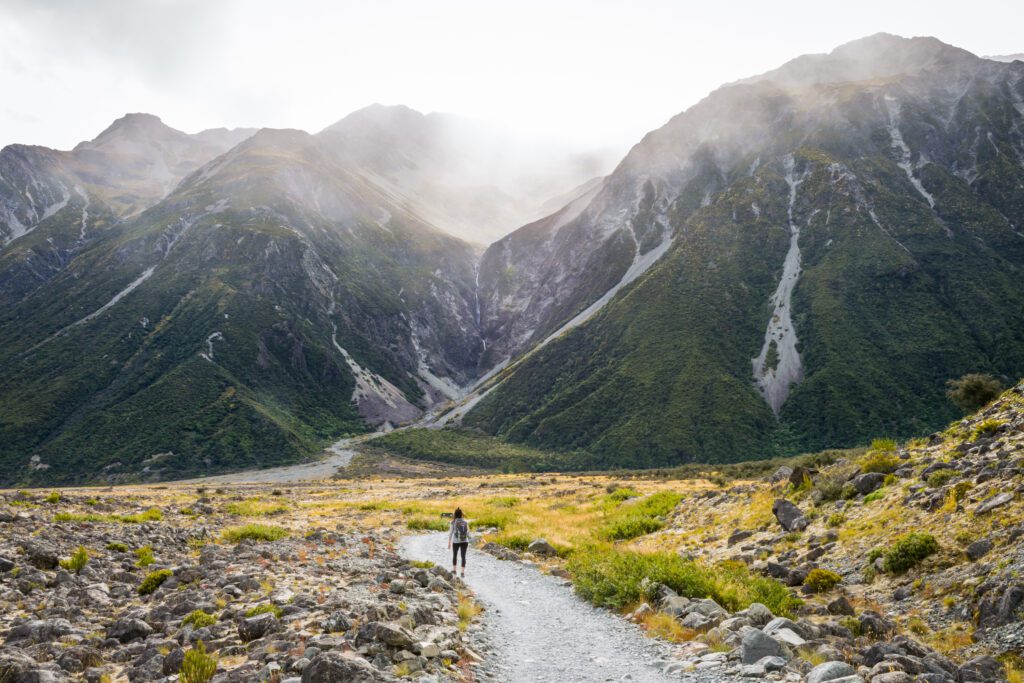
We’re big hikers, and Mount Cook had some of the best hiking on the trip.
If you’re a beginner, take a stroll on the Hooker Valley Track, where you’ll cross three swinging bridges and end at the foot of a beautiful lake.
Up for a climb? Take the 2,000+ stairs up to Sealy Tarns for some unbelievable views of Mount Cook and the surrounding valley. You can also continue up to the Mueller Hut for an overnight trip (book WELL in advance) or a long day hike.
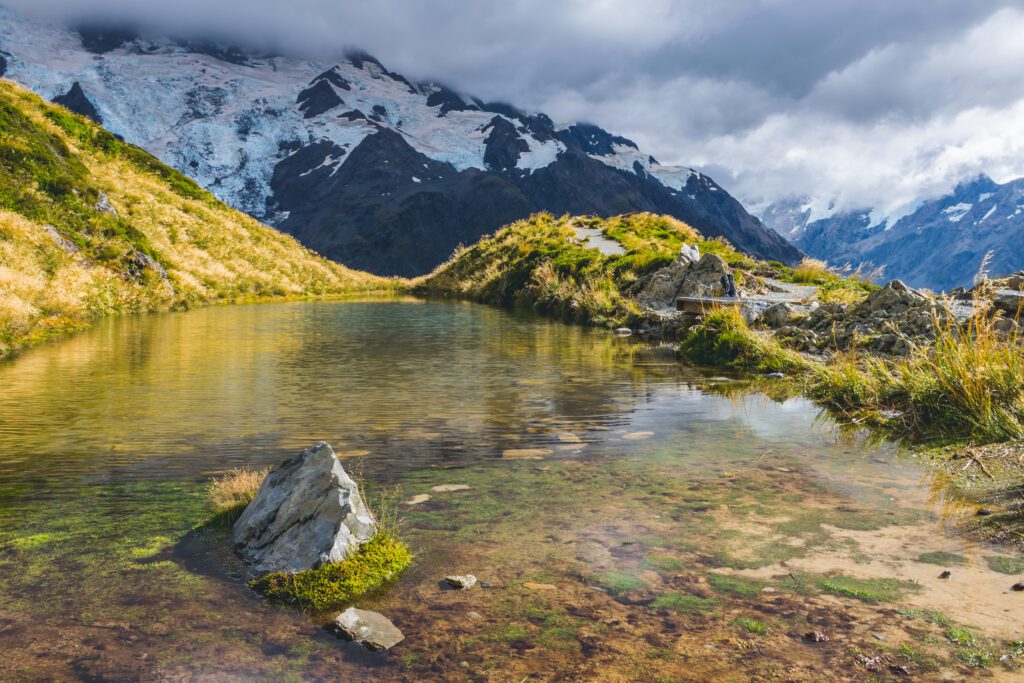
We also loved the shorter Red Tarns track, which starts from Mount Cook Village.
Stop by the visitor center in Mt. Cook Village for current conditions and hike recommendations from the experts.
Read More: What To Pack for a Day Hike: 6 Hiking Essentials
Day 3 & 4: Lake Tekapo
Drive Time from Mount Cook to Tekapo: 1 hr and 15 mins
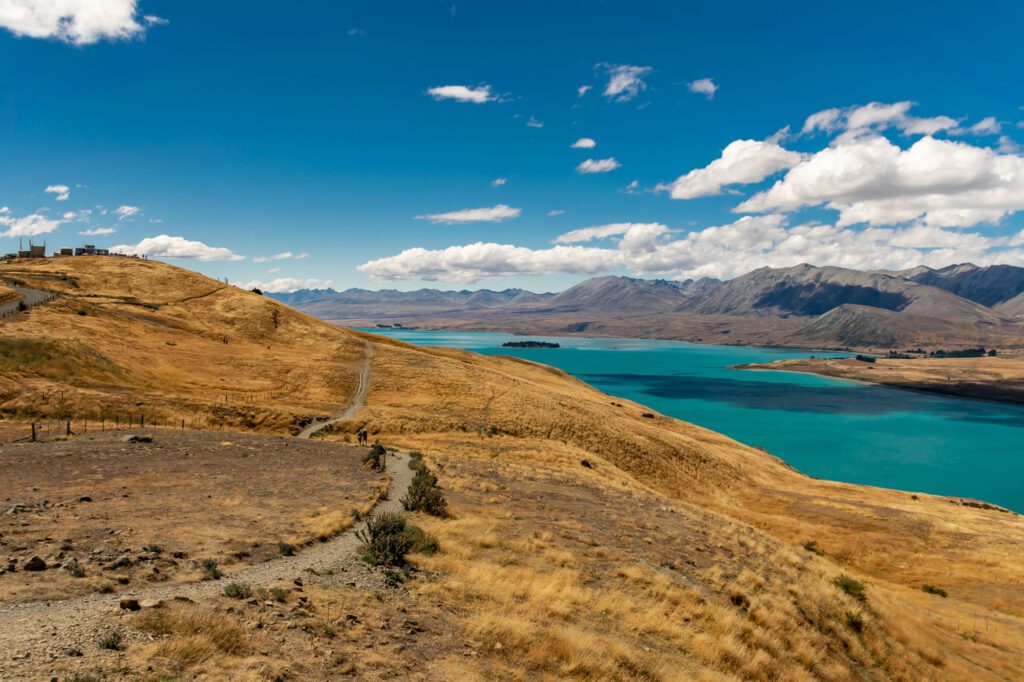
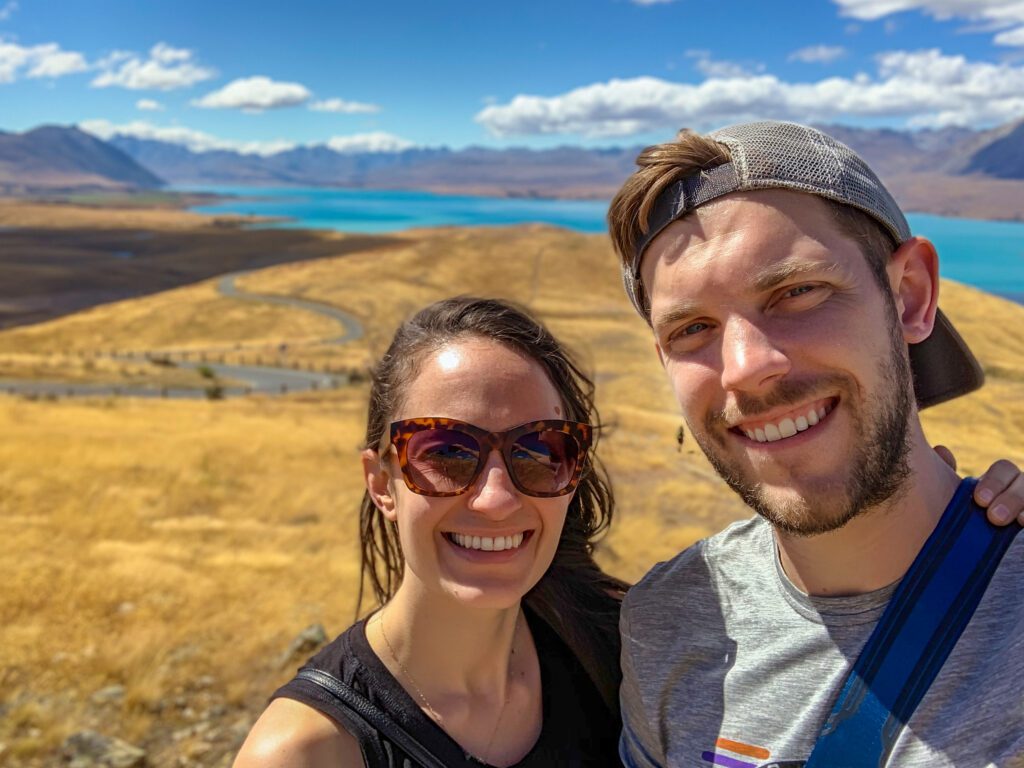
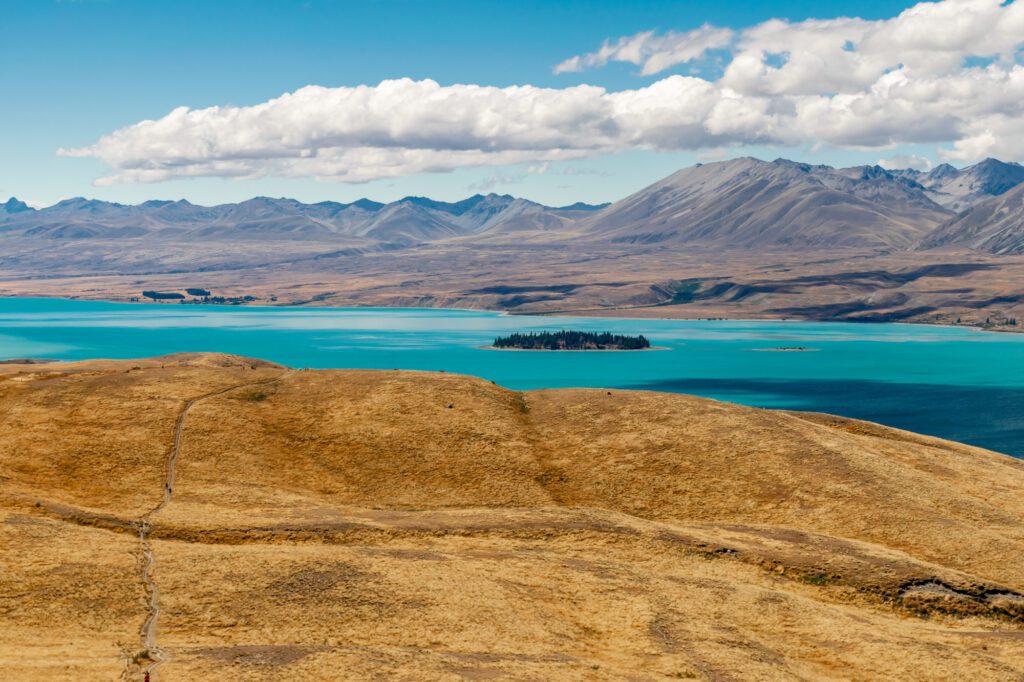
Catch a morning hike, like Red Tarns, eat breakfast, and make the quick trip over to Lake Tekapo. Lake Tekapo is yet another stunning blue lake set between rolling golden hills. The contrast between the hills and lake makes for some pretty incredible views. Like the one above.
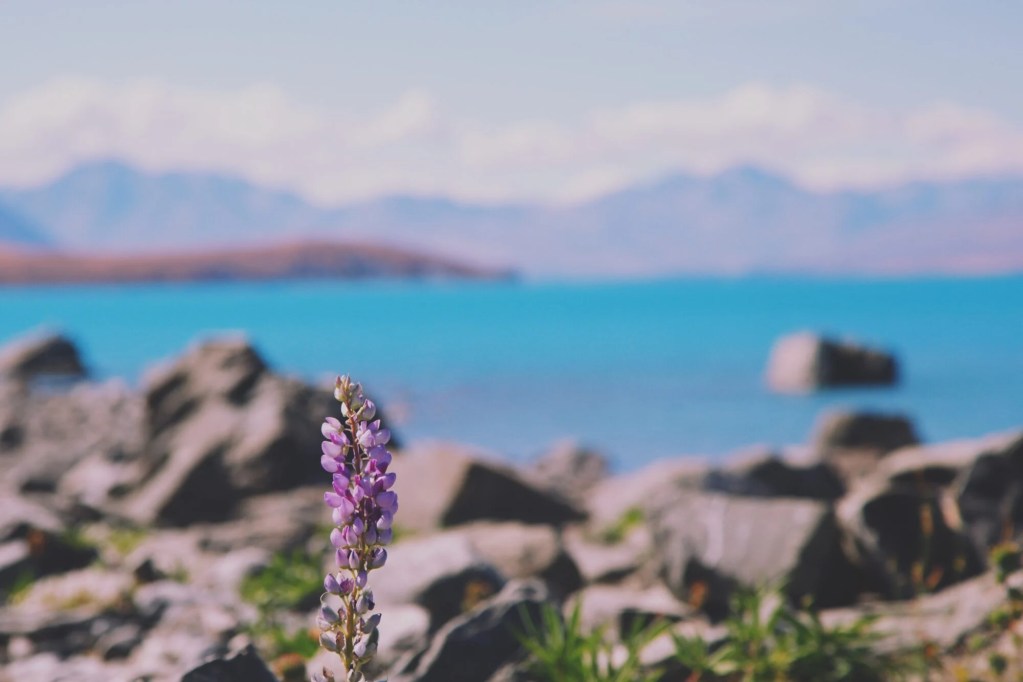
In December and January, you’ll find people flocking to Lake Tekapo to see the picturesque purple lupin bloom. We were there in February, so didn’t get to check them out. Lupin is actually an invasive species, so it’s not great for the surrounding environment. But damn to do they make for an amazing picture.
Where to Stay in Lake Tekapo
Campsite/Campervan/Budget: Lake Tekapo Motels and Holiday Park (where we stayed).
Perfect location on the lake just as you enter town. There are a range of campsites, powered and unpowered campervan sites, and newly renovated cabins and studios that are perfect for a range of group sizes and budgets. We loved the location – there are barbecues and picnic tables facing the lake. It doesn’t get much better than that. Check prices and availability here.

Mid-Range: Lakeview Tekapo
They have a studio and a 2 bedroom apartment with amazing views across Lake Tekapo to the Southern Alps. Modern facilities, including well-equipped kitchens, and floor-to-ceiling windows. It’s also right in the town center, which is perfect. Check prices and availability here.
Things to Do in Lake Tekapo
Here are some ways to spend your day in and around Lake Tekapo.
Mt. John Observatory (+bonus hike)
One of the best things to do in Lake Tekapo is the hike up to the summit of Mount John. The trail starts at Tekapo Springs (more on that in a second), and snakes up to the summit, where you’ll get sweeping 360 degree views of the rolling golden hills and bright blue lake that make Tekapo special. The cafe at the top is a nice refuge from the wind, and is the perfect spot to enjoy coffee with a view after the hike up.
Tekapo Springs
Tekapo Springs is a lovely little oasis tucked away at the base of Mt. John on the shores of Lake Tekapo.
Church of the Good Shepard
Do some stargazing, or just swing by to check it out. Particularly at sunrise or sunset. Its picturesque location, set on the background of Lake Tekapo, is a great spot to take some pictures and catch a sunrise or sunset. See?

Take advantage of the dark sky and do some stargazing
On this part of the island, there is very little light pollution, which makes for some amazing stargazing. Alysha (my wife) and I have been known to sit in our camp chairs and stare straight up at the universe above us, and this was a perfect place to do just that. The Milky Way was on full display. To a degree that I don’t think I’ve ever seen before.
We didn’t do a tour, but next time I’m back I almost certainly will head up to the Mt John Observatory and do one of their tours with a guide that knows a thing or two about the stars and constellations.
As much fun as it is to try and find the big dipper, the expert guide will help you make sense of the vast expanse unfolding above you. Book a stargazing tour in Tekapo here.
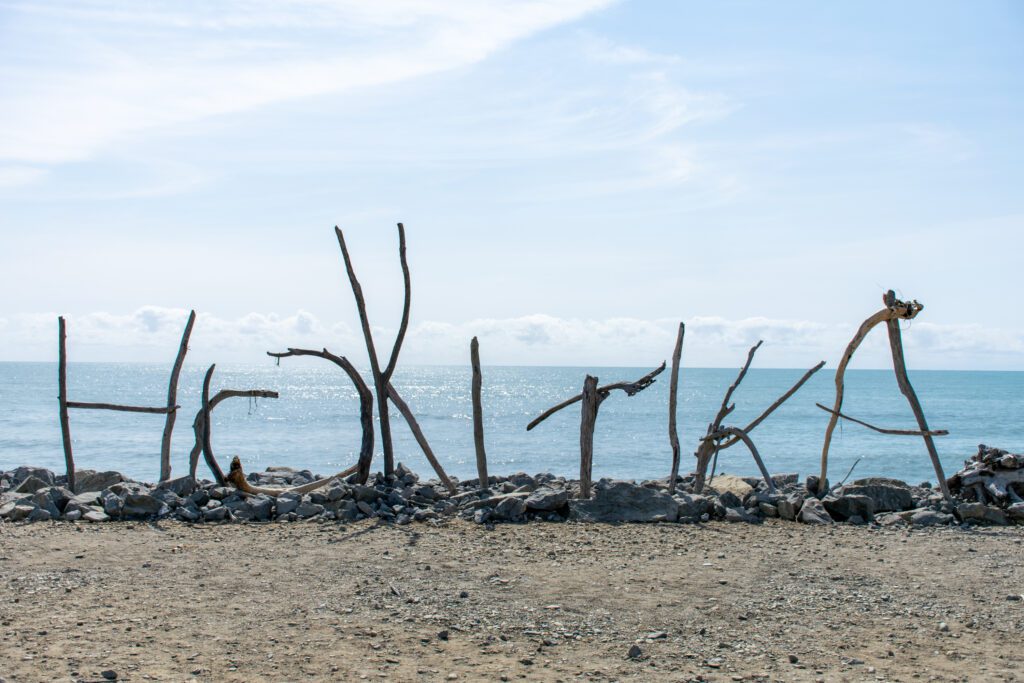
Day 5: Hokitika and the Rugged West Coast
Drive time between Tekapo and Hokitika: 5 hours
This is going to be a long drive, but Arthur’s Pass makes a perfect stopping point in the middle to get out, stretch your legs, and do a hike before hopping back in the car and heading to Hokitika.
You could stay overnight in Arthur’s Pass instead of Hokitika if you’d prefer.
Where to Stay in Hokitika
We stayed at Drifting Sands Beachfront B&B, and it was nothing short of outstanding. You’ll have your own room, but you’ll be sharing bathrooms and kitchen facilities with a few other guests. There’s a beautiful outdoor area out back, with a trail that goes straight to the beach. The owner was very helpful in giving us ideas about what to do for our day in town, and even shipped my jacket to our accommodation in Queenstown after I left it there!
Things to Do in Hokitika
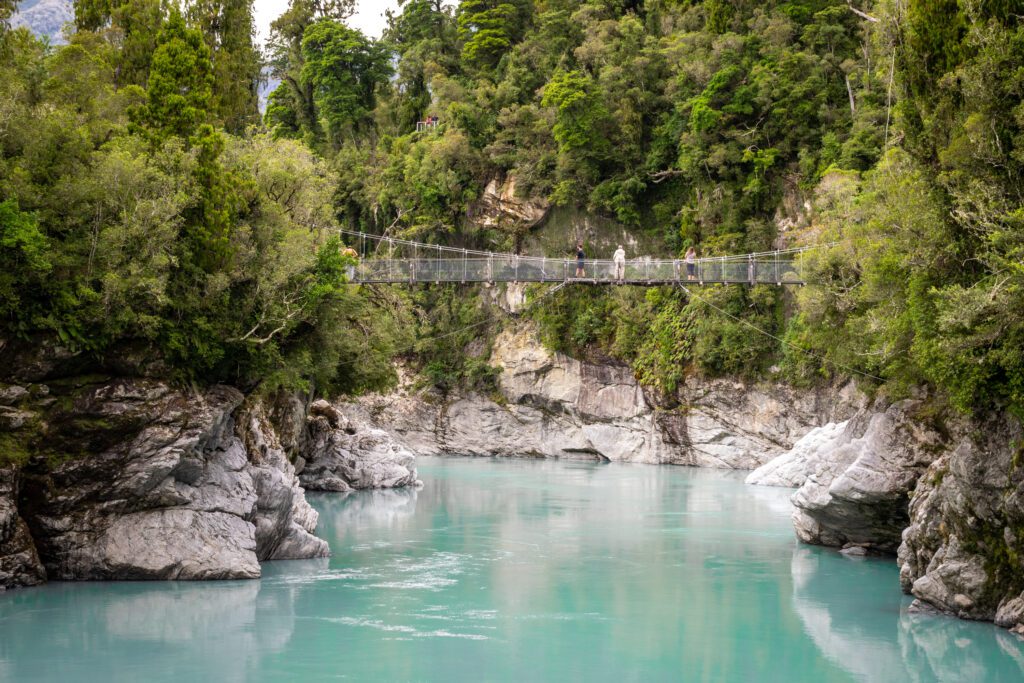
Hokitika Gorge
We’ve seen our fair share of bright blue lakes, between trips to Banff and the North Cascades in North America. But the Hokitika Gorge was a treat.
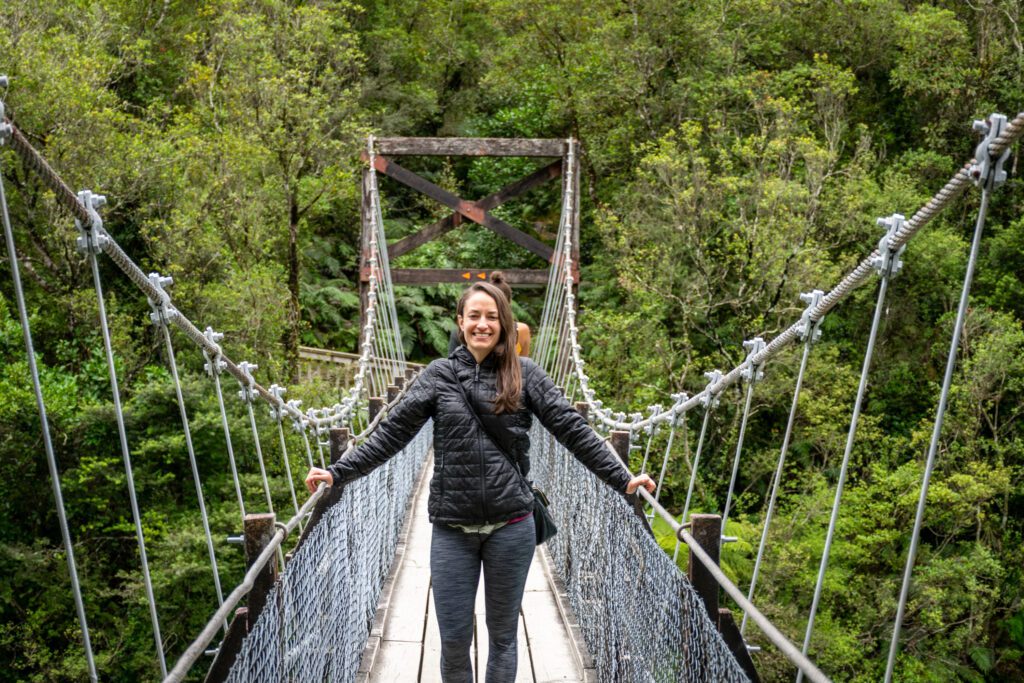
You’ll park and take a quick stroll downhill to the water. You’ll cross a swinging bridge where everyone is trying to get that perfect pic for the ‘Gram (including us), and then wind your way to the waterfront. Spend a few minutes marveling at the bright blue water, take some pictures, and get out. Because flies.
Tip: the flies are particularly annoying at the waterfront, so either wear bug spray or cover up with long pants and long sleeves.
Lake Kaniere
Lake Kaniere wasn’t really on my radar until we were already in Hokitika. Our host at Drifting Sands mentioned that we should stop by on our way to the Hokitika Gorge. So we took a slight detour and drove around the lake on our way back into town. We came (read: stumbled) across a picturesque waterfall as we made our way along the shore, which is well worth a trip. There’s also some campsites, and it’s a great place for a picnic lunch before or after the gorge.

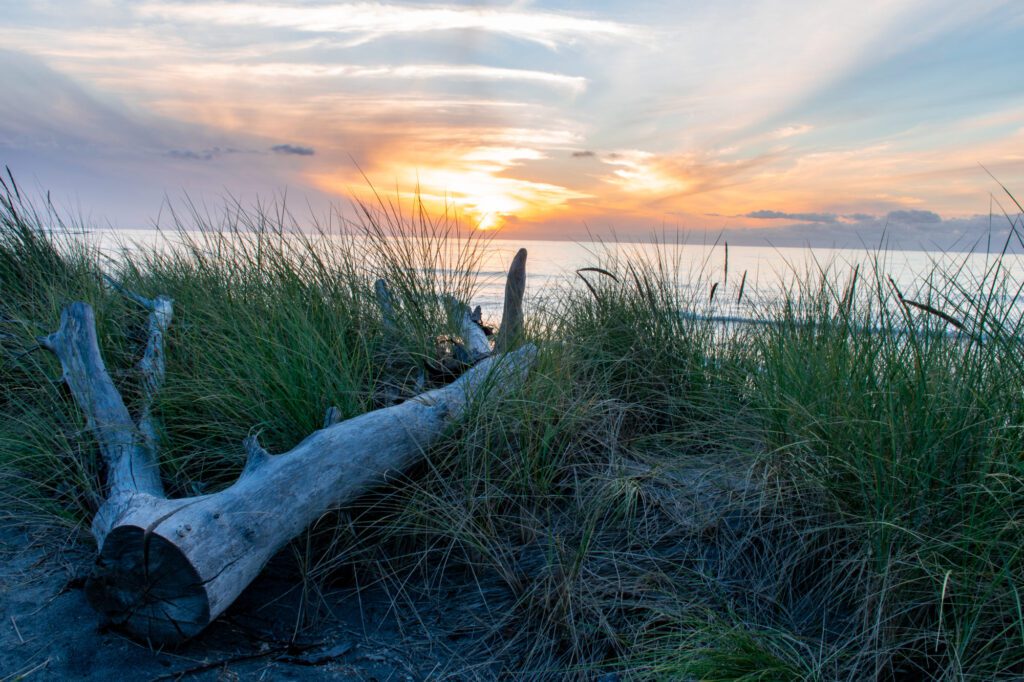
Sunset on the Beach
Hokitika is a little beach community, and the beach is a perfect place to enjoy the sunset. Grab a glass of wine (or four) and head to the beach to watch the sunset with the locals and visitors gathered there.
Day 6: Franz Josef or Fox Glacier
Drive time between Hokitika and Franz Josef: 1 hour and 45 minutes

For what it’s worth, these two are fairly close together and similar in terms of what you’ll see and do. We chose to stay at Fox Glacier, and stopped at Franz Josef on our way in from Hokitika to do the glacier walk. You could also drive through to Fox Glacier and come back to Franz Josef, or hit Fox Glacier on your way out from Franz Josef the next morning. It’s up to you!
Where to Stay in Franz Josef/Fox Glacier
In Franz Josef, stay at Franz Josef Top 10 Holiday Park if you’re in a campervan or on a budget, and Rainforest Retreat if you want a little more comfort.
At Fox Glacier, stay at Fox Glacier Top 10 Holiday Park (where we stayed) if you’re in a campervan or on a budget, and Bella Vista Motel for a little more comfort.
Things to Do in Franz Josef/Fox Glacier
Here are some great things to do between the two glacier towns.
The Glaciers
Duh. This is the place to see glaciers in New Zealand, although they are sadly receding quickly due to climate change.
Both glaciers have a short hike that will lead you straight to the base, along with signage along the way explaining the geology and history behind the glacier.
Make sure to stop to read those so you can see where the glacier was just 50 years ago. If you’re like me, when you see that the glacier used to reach a mile further not that long ago, you’ll suddenly be more conscious of all the things that you do that contribute to climate change.

A Glacier Helicopter Tour and Heli-hike
If you’ve never done a glacier tour, where you take a helicopter up to the glacier and take a guided stroll across the glacier, this is the place to do it. It’s expensive, but honestly where else would you have the chance to have that experience? There’s not that many other places in the world. Check prices, reviews, and book here.
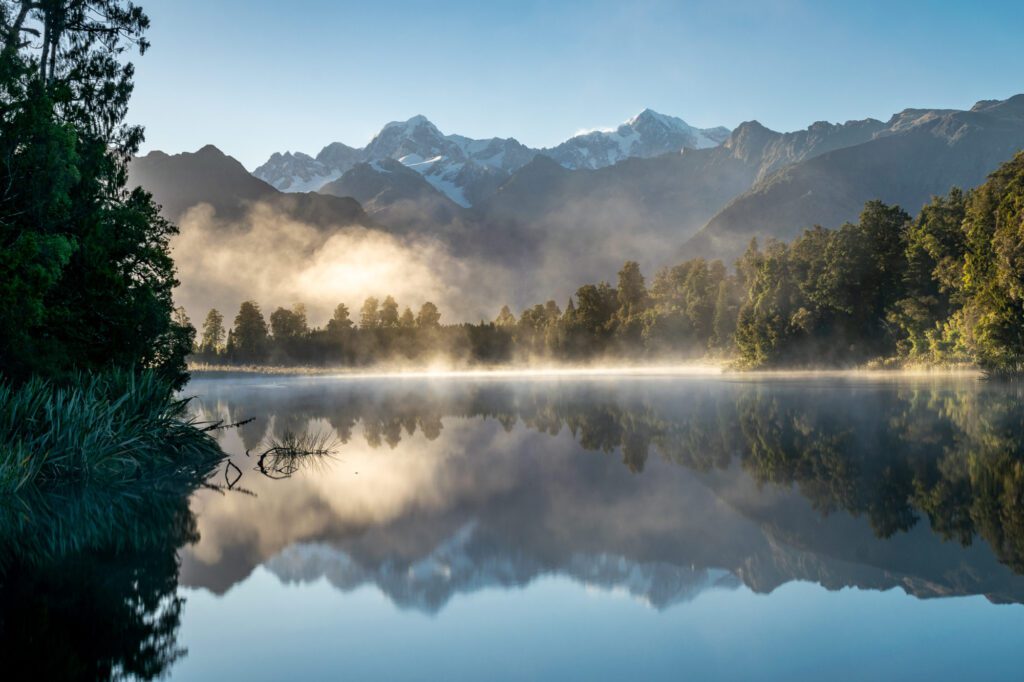
Lake Matheson
For photographers, sunrise at Lake Matheson is a must-do. You and 72 of your new closest friends can set up tripods and get a view of the mountains across the calm water of Lake Matheson. It’s also a nice easy walk around the lake, and is well worth it whether or not you’re taking pictures.
The cafe at the entrance is a good place to grab coffee after your walk, with nice views of the mountains and a sun-drenched outside patio area.


Day 7-9: Haast Pass and Wanaka
Drive time between Franz Josef and Wanaka: 3 hours and 45 minutes
This is probably my favorite day on this itinerary.
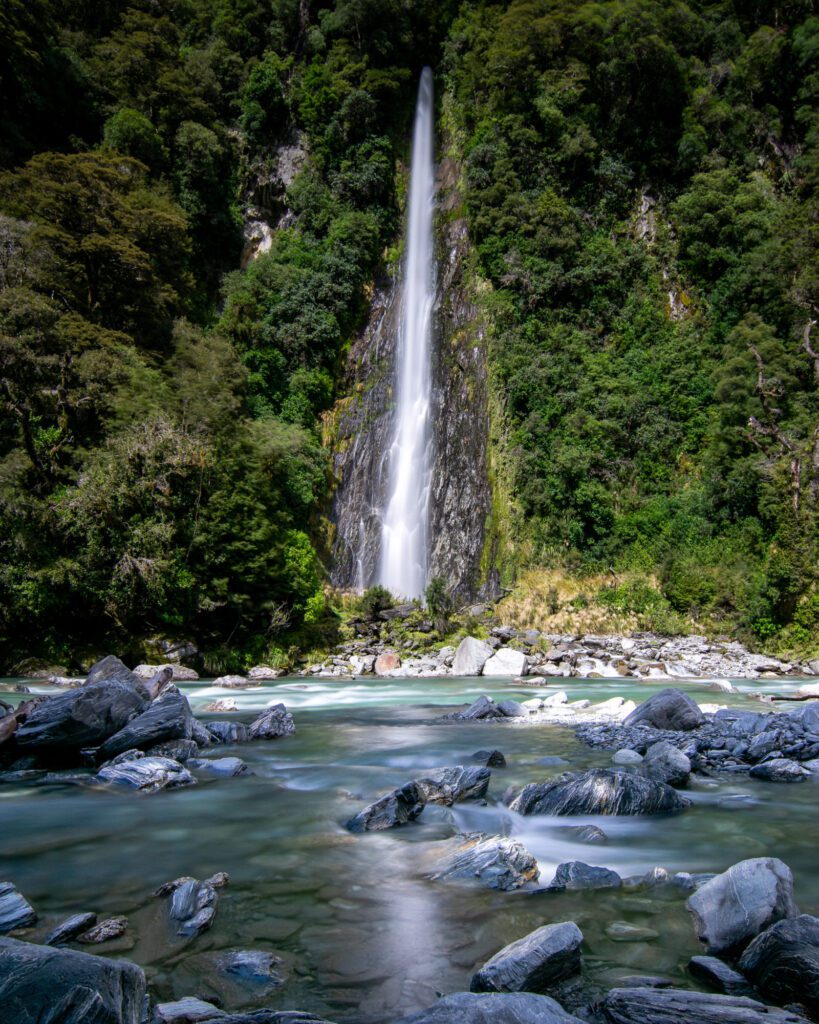
You’re going to drive over Haast Pass, which is one of the prettiest drives I’ve ever done. There are a bunch of phenomenal viewpoints and places to stop along the drive. At the very least, stop at the Blue Pools, Fantail Falls, and Thunder Creek Falls (pictured above).


Give yourself plenty of time, and make sure to stop along the way to stretch your legs, check out some waterfalls, and soak up the sheer beauty of the area.
Then, you’ll make it to Wanaka, which was by far my favorite spot in New Zealand that we visited. As we were driving away towards Queenstown, I turned to Alysha and said “I would totally move here,” putting it on a relatively short list of places like Mexico City, Budapest, and Rome.
If you have more than two weeks, I’d devote several more days to Wanaka and the surrounding area.
Anyway, enough rambling about how much I love this area. Here’s a mini-guide to Wanaka.
Are you a traveling Celiac? Check out my Guide to Gluten Free Wanaka.
Where to Stay in Wanaka
Airbnb: Gecko Airbnb (where we stayed). This is an amazing place to stay in Wanaka. Or more accurately, slightly outside of the city center of Wanaka perched on a hill. It was a splurge, for sure, but it was SO worth it. We loved it – it has a kitchen, an outdoor patio, and a comfy bed. Which you’ll need after hiking in Wanaka. More on that in a second. Check prices and availability here.

Campsite/Campervan: Wanaka Kiwi Holiday Park. A little bit off of the main drag (5 min drive, 25 minute walk), they have really nice facilities. They have powered, unpowered, and tent sites. They also have a motel on site, if you’re looking for a little more comfort. Check prices and availability here.
Budget: YHA Wanaka or Altamont Lodge. Both have nice double or twin rooms with shared facilities, like bathrooms and spacious kitchens. The Altamount Lodge is a ten minute drive out of town if you’re looking for a quiet, romantic getaway.
Best for Families: Alpine Motel. Affordable apartment-style rooms, where you can get a family apartment with a King bed and two twin beds, a kitchenette, and an ensuite bathroom. Alongside a trampoline, a play set, and other great amenities for kids. Check prices and availability here.
Upscale: Edgewater Wanaka. A mix of hotel-style rooms and self contained apartments. Every room has lake views, with either an outside patio or balcony. They also have an onsite spa, tennis courts and a putting green, and a restaurant with highly rated food. Although I’d recommend you spend some time exploring the food options in Wanaka. Check prices and availability here.
What to Do in Wanaka
Wanaka has a pretty astounding range of things to do and see. Here are our picks.
Wine Tasting
A hillside winery overlooking Lake Wanaka? Sign me up! There’s actually a ton of great places to taste wine in the Central Otago region between Wanaka and Queenstown, but Rippon Vineyards is just outside of Wanaka making it the perfect place to take an afternoon and relax.
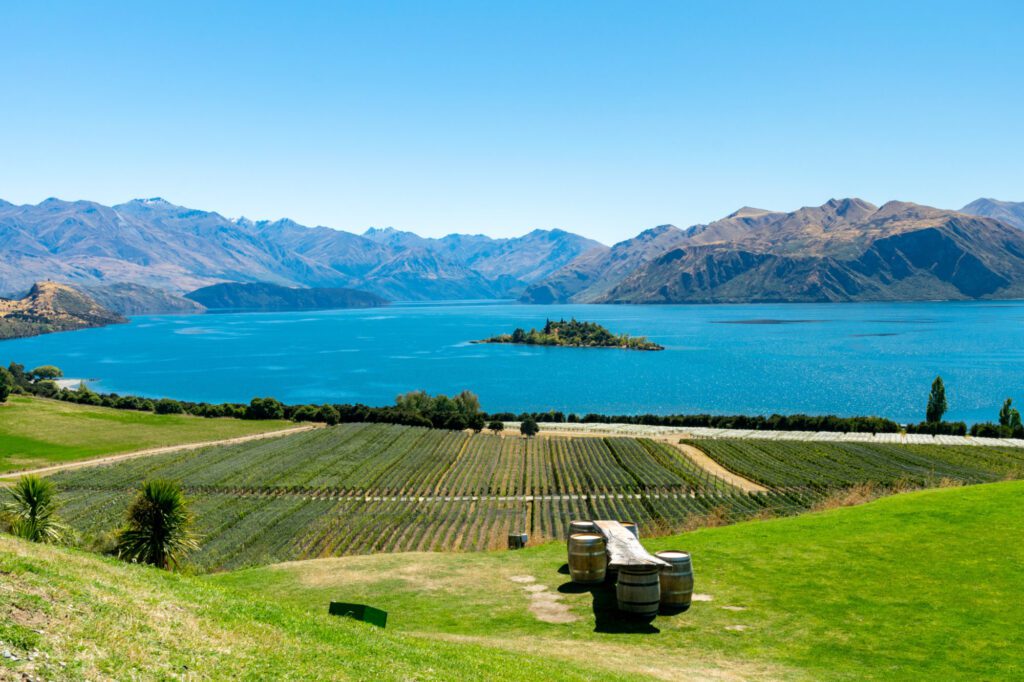
They do a guided tasting and you can try a wide variety of grape varietals that they grow and produce. Fantastic afternoon activity that you should definitely try to do if you can find the time.
You can also book a wine tour of the Central Otago wine region to explore more of New Zealand’s wine scene. Check prices and availability here.
Take a Bike tour
There are a bunch of bike trails in and around Wanaka. If you’re looking to explore a bit, head to Torpedo 7 Bikes and one of their staff will help you find the perfect adventure for you.
Visit the Lavender Farm
Just outside of town, you’ll find heaven on earth. At least according to Alysha. The Wanaka Lavender Farm has picturesque fields of lavender, a bunch of animals like llamas and cows, and an onsite cafe with great tea and ice cream using the lavender they grow on the farm. It’s a great little trip just outside of town that is great for kids and adults alike.

Hiking
I know what you’re thinking – oh great, here comes the “YOU HAVE TO DO ROY’S PEAK IT’S AMAZING.”
Here’s the thing though.
I have no idea if it’s amazing. And the reason is Isthmus Peak.
On the way into town, we stopped at Isthmus Peak to do a “quick” hike before heading into town to our Airbnb. And we were too sore and tired to wake up for a sunrise adventure to Roy’s Peak the next two days.
Oops.
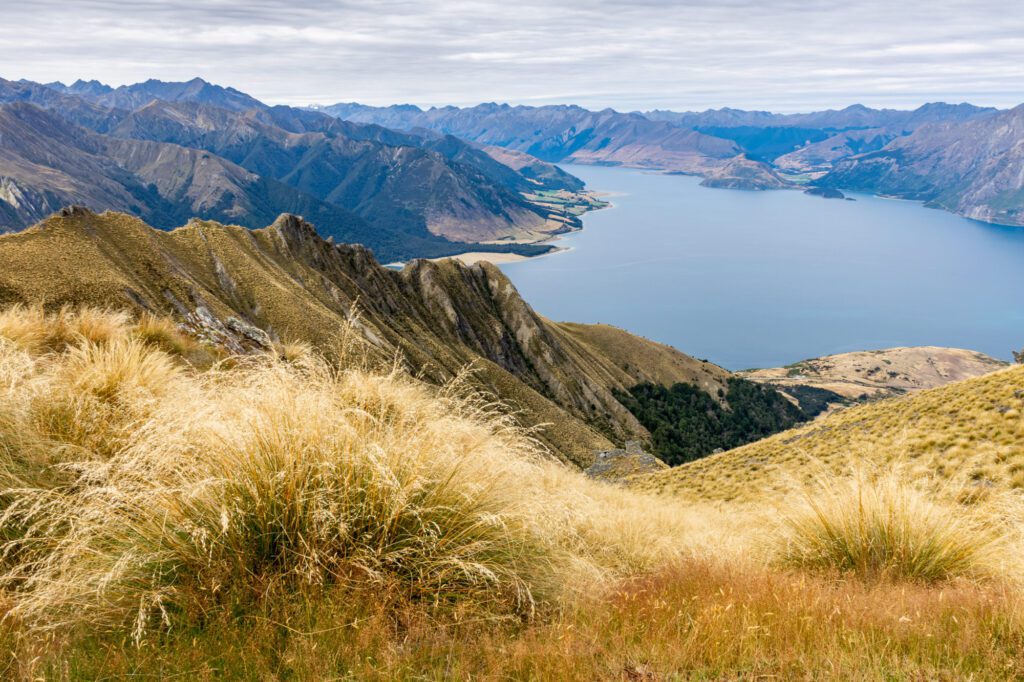
Isthmus Peak is not a quick hike in any way shape or form. In fact, it’s actually one of the most difficult hikes I’ve ever done. From the beginning, you’ll climb. And climb. And climb some more. It’s truly STRAIGHT up. Every time you think to yourself “oh, the top must be just over that ridge,” you get to that ridge, and there’s another ridge in the distance.
It’s an advanced hike – 16km and 1,100 meters of elevation gain – so make sure you’re prepared with plenty of food and water.
While it was hard, it’s also one of the most beautiful hikes I’ve done. We passed sheeps grazing along the trail near the top, and I still find myself wondering if sheep are actually low-key athletic.


If you’re going to do Roy’s Peak, which is the premier hike in Wanaka according to Instagram, get there EARLY. With its popularity on Instagram, I heard stories of lines of people waiting to get the picture at the top. You know the one I’m talking about.
Roy’s Peak is also a difficult hike with 15.5 km and 1,250 meters of elevation gain. You’ll also want to get there early because there’s very little cover from the sun, and it would be even more difficult in the heat of the day.
Looking to pick one of them? Here’s a great comparison of Roy’s Peak vs. Isthmus Peak.

Eat!
Wanaka has some great food options – even for Celiacs. Here were a few of my favorites.
- Erik’s Fish and Chips – Celiac NZ certified truck serving up fish and chips. Take them to go and head down to the waterfront and enjoy.
- Big Fig – amazing little restaurant with Mediterranean-adjacent food and a great location in Wanaka. We ate here four times total on the trip – twice in Wanaka, twice in Queenstown. Good coffee too.
- The Spice Room – amazing Indian food.
- Black Peak Gelato – need I say more?
- Coffee at the Coffee Shack or Urban Grind for coffee
Adventure Sports
While Queenstown is definitely the adventure capital of New Zealand, Wanaka is no slouch. There’s tons of things to explore around Wanaka. Think you’re adventurous? Here are a few options to consider.
- Kayaking the Clutha River
- Cadrona Valley 4×4 Quad Adventure
- Jet Boat Tour with Wilderness Walk
- Explore the Cadrona Valley on Horseback
- Level 2 Waterfall Climb
Day 10 & 11: Milford Sound
Drive time between Wanaka and Milford Sound: 4 hours and 30 minutes
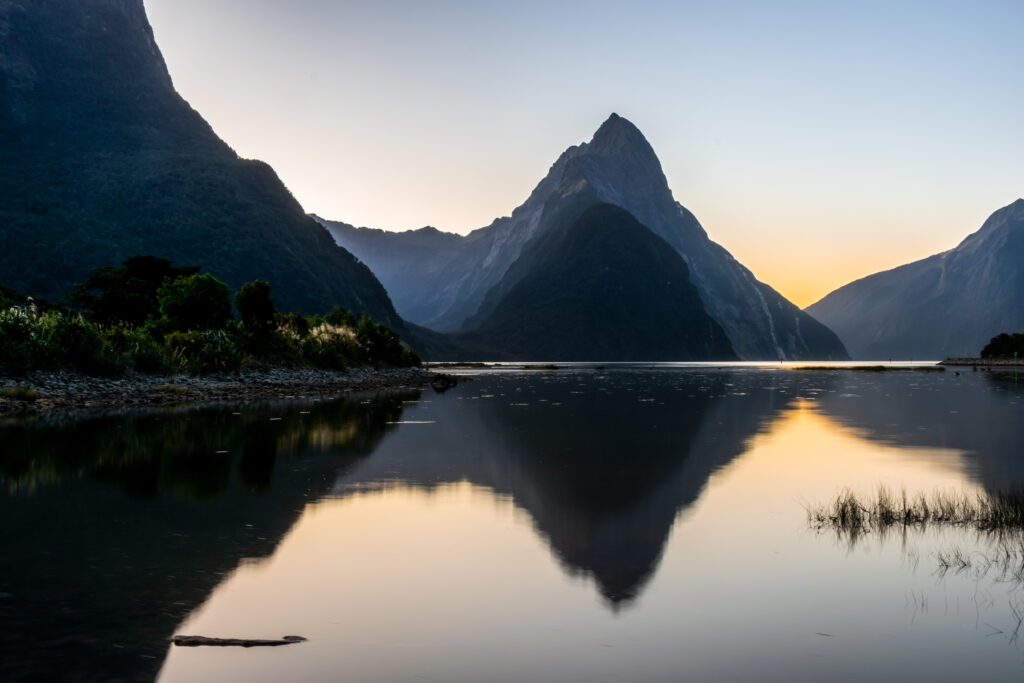
We decided to head straight to Milford Sound rather than Wanaka so that we could spend the last few days of the trip relaxing rather than worrying about making it back to Queenstown to catch our flight. It’s a longer drive by about an hour and a half, but I think it’s worth it on the back end.
Get on the road early to avoid getting trapped behind the tour busses on the one lane road in Fiordland. And to give yourself plenty of time to get out and stretch your legs along the way.
Make sure you have groceries before you get to Milford Sound – there aren’t many options for food once you get there. And by not many, I mean none. Te Anau is the last major stop for food and gas.
We did the hike to Key Summit on the way in, and it was a great way to break up the long drive.
Where to Stay in Milford Sound
Spoiler alert: Milford Sound Lodge is literally the only place to stay in Milford Sound.
A lot of people stay in Te Anau, and make the 2 hour drive into the Sound, but I would STRONGLY recommend you book Milford Sound Lodge well in advance (they do sell out).
They have campervan sites and chalets, which are expensive. They used to have backpacker-style rooms, which is where we stayed, but it looks like they’ve since removed them.
The facilities are great, with a nice kitchen and dining area and nice showers. The restaurant on site looks great too (albeit overpriced), but we didn’t eat there.
Fair warning – it’s going to be expensive to stay here without a campervan.
If you don’t have a campervan and don’t want to stay at the lodge, you’ll have to stay in Te Anau. Find a place to stay in Te Anau here.
What to Do in Milford Sound
Whatever you choose to do, you need to get out on the water AT LEAST once. Whether that’s a kayak tour or a boat tour is up to you. But I ask one question – why not both??
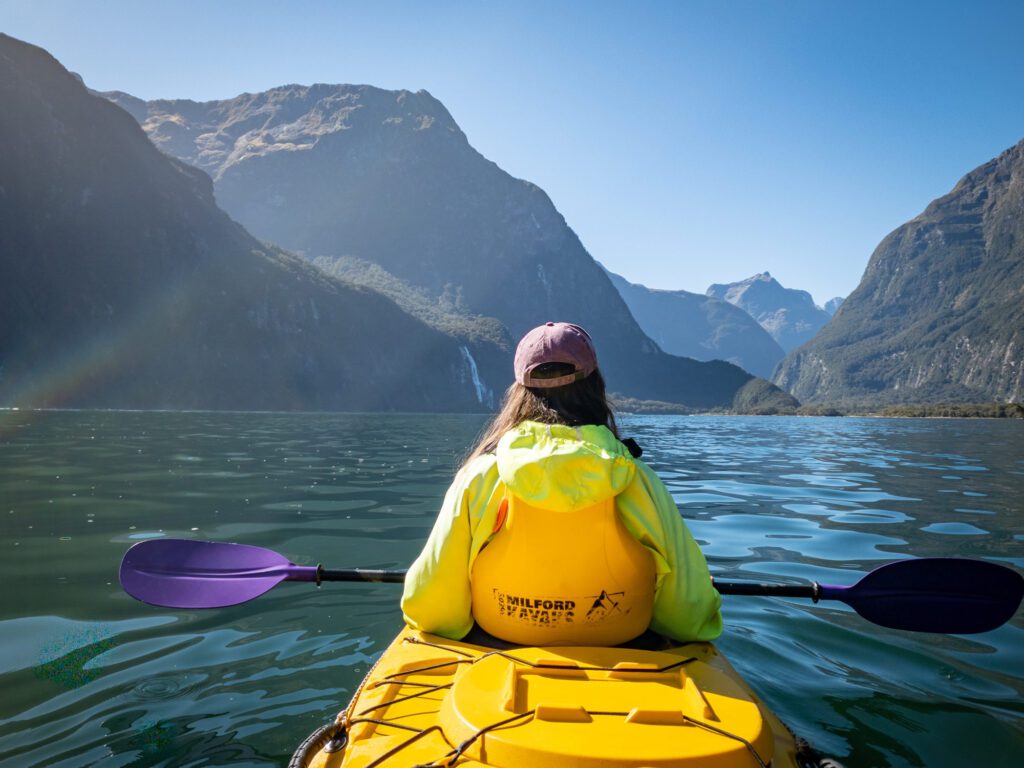
Sunrise kayak tour with Roscoe’s
The Sunriser Classic kayak tour with Roscoe’s was the highlight of our trip, and I cannot recommend the experience highly enough.
You’ll get out on the water early before the tour boats have gotten to it, and you’ll make a big loop around the inner part of the Sound with a knowledgeable guide who will look for wildlife (we saw penguins!) and tell you about the geology and history of Milford Sound.
Beginners are more than welcome – it’s a relatively easy paddle around the Sound, although you will be out there for ~3 hours.
We got super lucky with the weather – it was clear and calm – but keep in mind it’s often rainy and windy in the Sound. Pack and plan accordingly.
Milford Sound Scenic Cruise
The other thing to consider in Milford Sound is a scenic cruise that takes you out into the Sound to explore. There’s all sorts of companies, and they all basically offer the same things. Compare prices and reviews here.
Hiking in Fiordland: A Must-Do
We spent three days in Milford Sound, and did three hikes in the area. They were all spectacular, and I would consider hiking in Fiordland a must-see.
Gertrude’s Saddle (8.4 km / 662 m ascent, HARD)
This hike was easily the most difficult of the three here, but also the most rewarding once we got to the summit (or the saddle, in this case).
You’ll start in a valley, make your way to a mountain, and make a not-so-leisurely ascent straight up. Lots of scrambling and semi-marked trails.
About half way up, you’ll get to a smooth rock face that you’ll need to climb with the help of a rope. Kind of like Half Dome in Yosemite, but not nearly as scary/dangerous.
From there, you’ll be following little orange flags across piles of rocks, scrambling to the top. At the top, you’ll get sweeping views over Milford Sound, which make the climb more than worth it.
We did a kayak tour in the morning, then Gertrude’s Saddle in the afternoon. It was amazing to see the Sound from two different perspectives. Afterwards, as we were eating dinner, I turned to Alysha and said “This is it huh? This is the peak. It’s all downhill from today.”


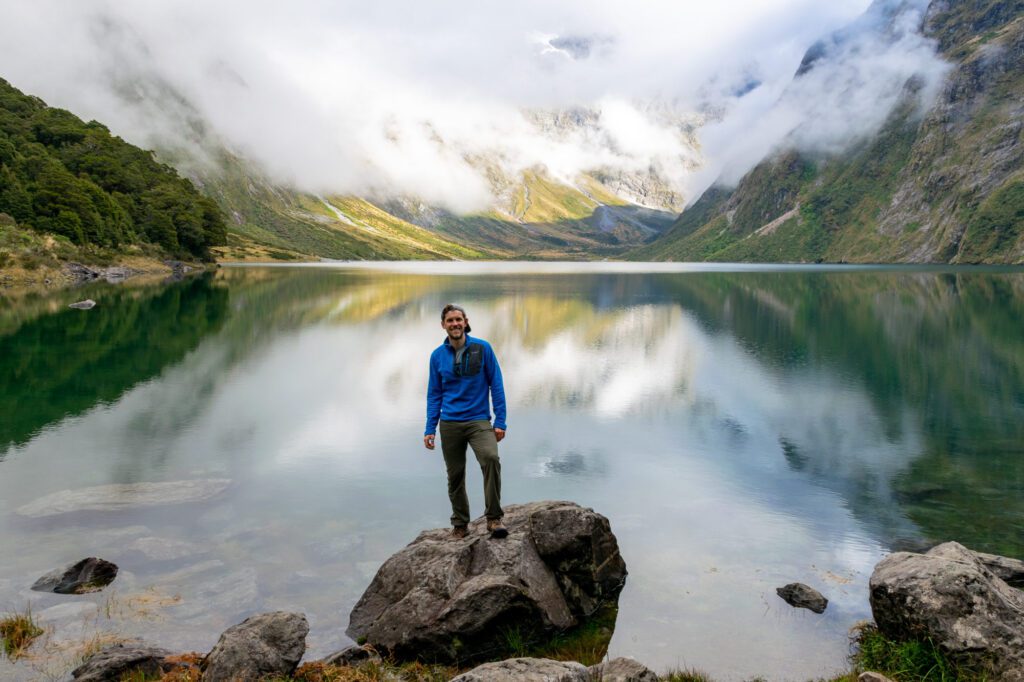
Lake Marian (6.1 km / 421 m ascent, easy to moderate)
Lake Marian is a relatively easy hike that starts with an easy stroll along a river, then winds along through the forest before emerging onto a beautiful alpine lake tucked in between towering rocky peaks.

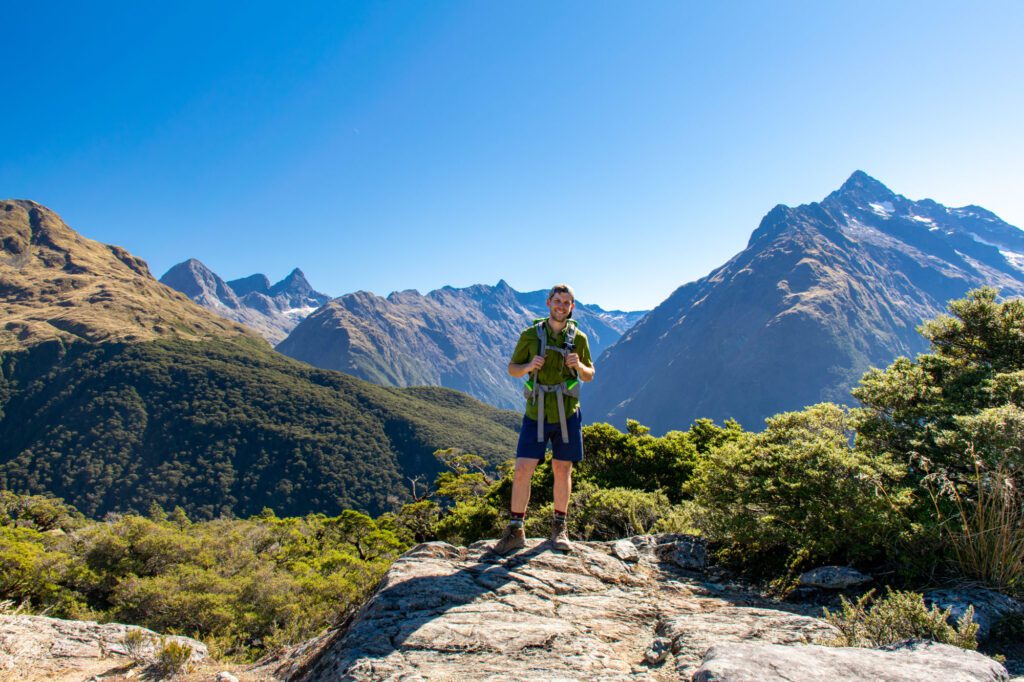
Key Summit (7.7 km / 419 m ascent, easy to moderate)
We stopped on the way in to do this hike, and it was a nice break from driving. It’s straight uphill (sense a theme here?) but it is short, and you’re rewarded with views across the valley and a nice self-guided tour through signs about the flora and fauna that make Milford Sound their home.
You also have the option of doing multi-day hike – one of the Great Walks. Both the Milford Track and Routeburn Track are in the area. You can read more on the DOC website.
Day 12 – 14: Queenstown
Drive from Milford Sound to Queenstown: 4 hours
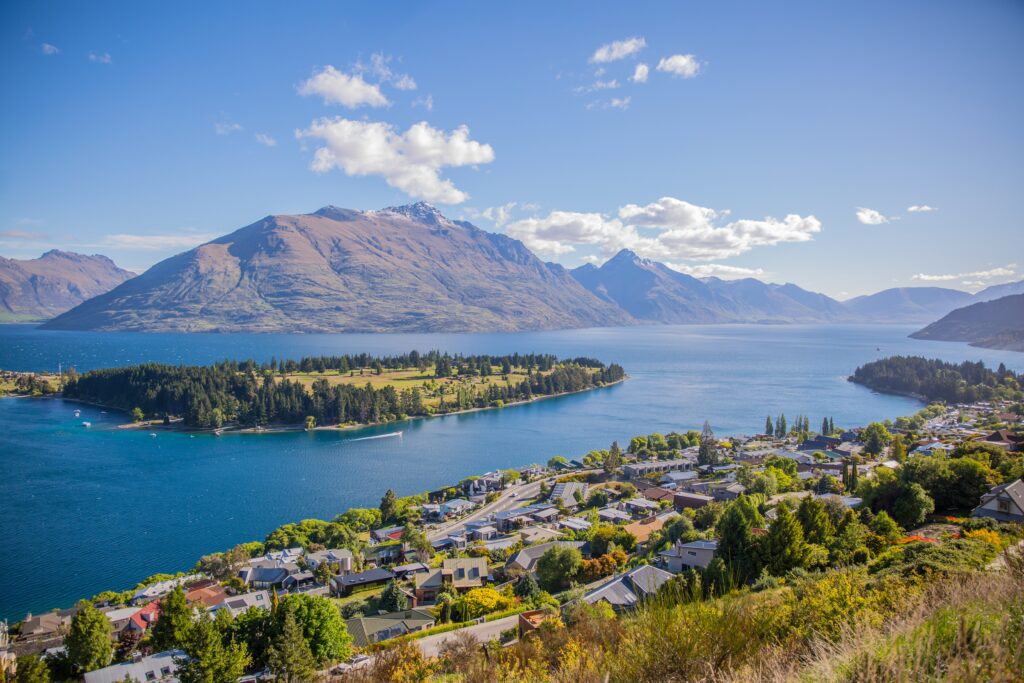
Queenstown is a great spot to end your 2 weeks in New Zealand.
It’s relaxing, but you still have the option to get your blood pumping. Whether it’s skydiving, bungee jumping, or hiking, this is the adventure capital of New Zealand.
There’s also plenty of great food, wine, and leisure activities to do in Queenstown and the surrounding area.
Update 2021: There’s more where that came from! Click here to read my full guide to 3 Days in Queenstown for a detailed guide to what to do, see, eat, and where to stay in Queenstown.
Where to Stay in Queenstown
Airbnb (where we stayed): Modern Lakefront Apartment. Great location – it’s a ~30 minute walk into town along a lakeside path, or a ~10 minute bus ride. All the amenities you could possibly need, including a lakeside balcony. Highly recommend!
Campsite/Campervan/Budget: Queenstown Top 10 Holiday Park or Sir Cedric’s Pod Hostel (no campervan sites at Sir Cedric’s)
Upscale: Hurley’s of Queenstown
What to Do in Queenstown
Adventure sports
Like I’ve mentioned, Queenstown is considered the adventure capital of New Zealand. Whatever your adventurous heart desires, you’ll probably find it in Queenstown. Here’s a starting point:
- Jet Boating on the Shotover River
- Skydiving!
- Rafting the Shotover River
- A Ziplining Adventure Tour
- Bungy Jumping off of the Kawarau Bridge
- Tandem Paragliding!
Hiking – Ben Lomond and Moke Lake
There are two hikes that I’d recommend in and around Queenstown.
First, is Ben Lomond Peak (13km, 1,322m elevation gain, hard). You can either start this hike from the top of the Gondola (get tickets here), or from the base of the Gondola via the Tiki Trail. It’s a beautiful hike up, and once you get about two thirds of the way up, you’ll start your ascent to the peak. It’s a tough climb, especially near the end, but it’s worth it.
Make sure to pack plenty of water, snacks, and sunscreen.

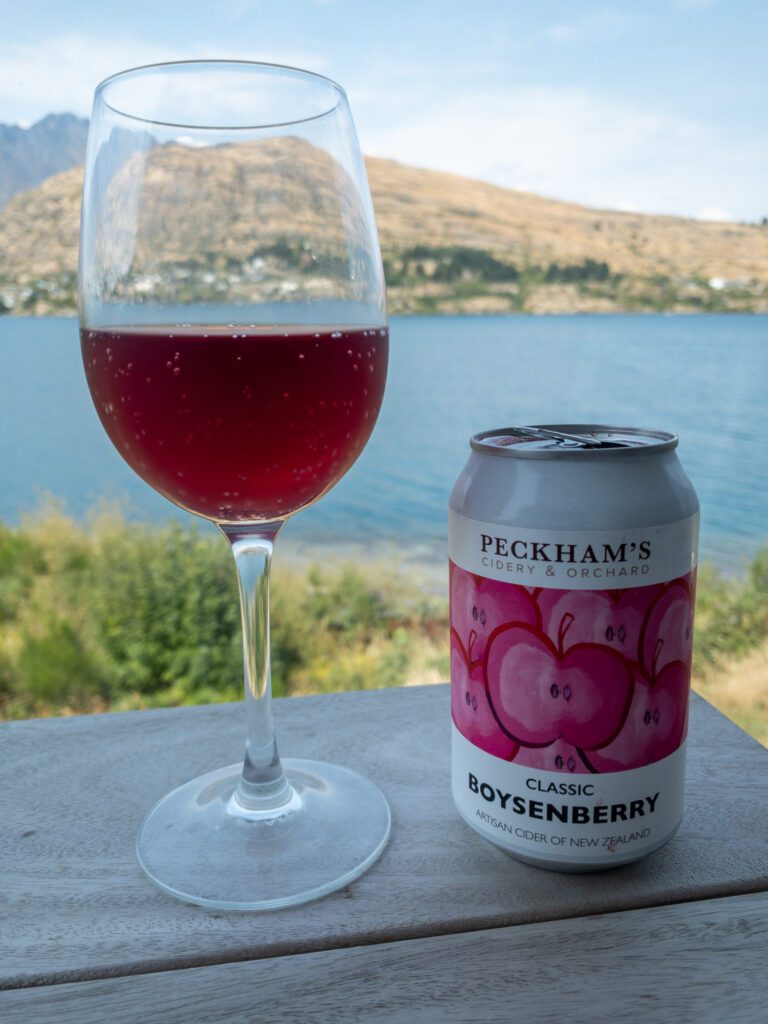
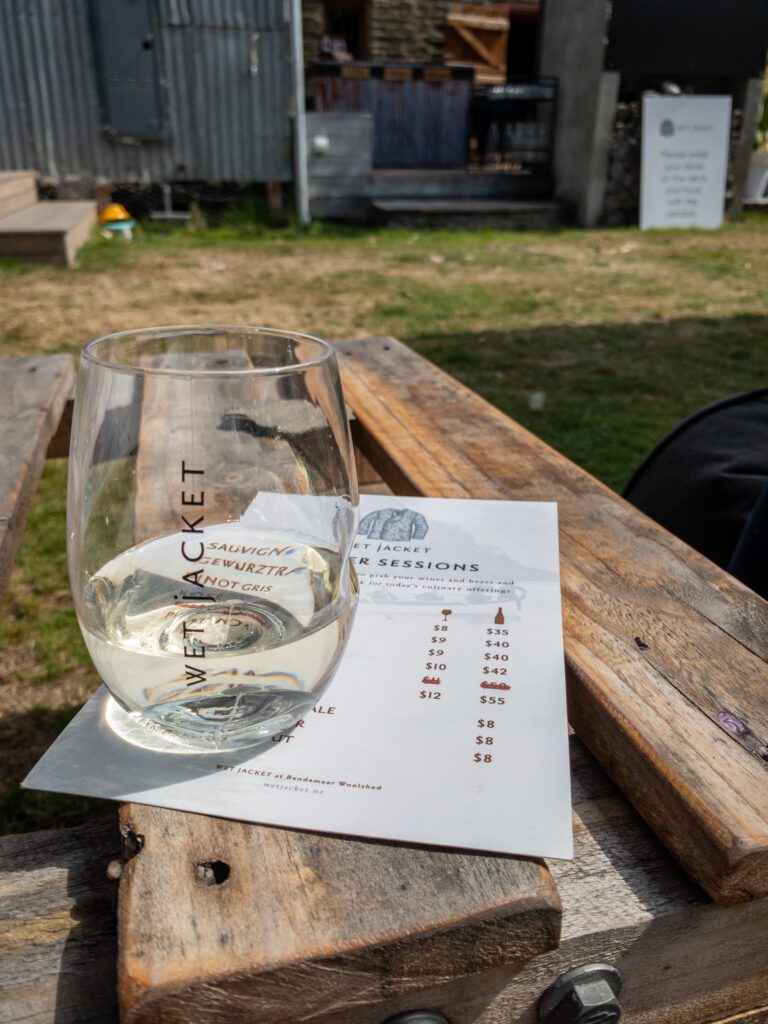
Wine Tasting
The Central Otago region is home to some of New Zealand’s finest wine outside of Marlborough. Just outside of Queenstown, you’ll find a handful of wineries that you can visit and try some of the locally grown and produced wine.
My two favorites were Wet Jacket, whose GEWÜRZTRAMINER blew me away and which also has a Whitestone Cheese tasting room attached, and Peregrine Wines.
If you’re serious about trying some Central Otago wine, check out this guided wine tour. Or, if you’d prefer to do it by bike, check out this one.

Eat at some of Queenstown’s Best Restaurants!
I didn’t necessarily think of New Zealand as a foodie destination at the beginning of my trip, but by the end I found myself impressed with some of the delicious, although somewhat basic, food options. Particularly in Wanaka and Queenstown.
Here were my favorite Queenstown eats, in no particular order.
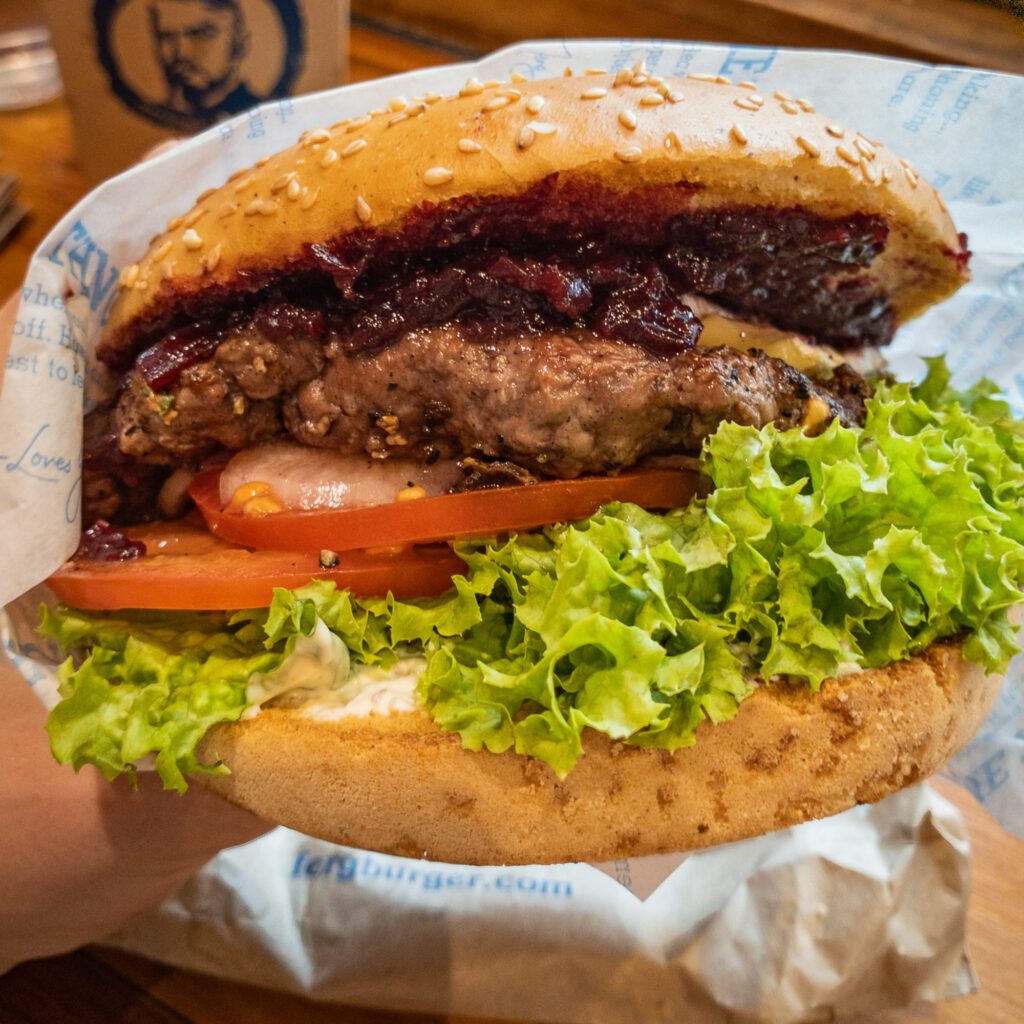
Fergburger: This had to be on the list. They are also fantastic at handling orders for people with Celiac Disease, making the gluten free burgers in the back on a separate grill in a separate part of the kitchen. Be prepared to wait, although the line moves fast. Despite the business, the cashier quickly and clearly explained to me how they prepare the gluten free burgers and made me feel comfortable with their processes for minimizing cross-contamination.
Taco Medic: I’m a sucker for tacos, and Taco Medic hit the spot. Authentic tacos in a small storefront. Don’t miss the hot sauces.

Big Fig, Spice Room, and Erik’s Fish and Chips all have Queenstown locations, and I recommend them for the same reasons that I recommended them in Wanaka.
Don’t miss my Guide to Gluten Free Queenstown if you need to eat gluten free – there are a bunch of great options!
Day 15: Fly Home!
That’s all for your 14 days on New Zealand’s South Island! Catch your flight and head back home with all the memories you created fresh in your mind.
Have More Time? What to Add to Your South Island Itinerary
If you have more time, I would extend your trip to include the North end of the south island, particularly Abel Tasman.
We had three weeks, and Abel Tasman and Milford Sound were our favorite places. Unfortunately, they happen to be at basically opposite ends of the South Island. Lots of driving, but well worth it if you ask me.
If you have three weeks, everything would stay the same, except you would make these additions:
Day 5: Tekapo to Kaikoura (stay at Kaikoura Boutique Hotel)
Day 6: Tekapo to Marahau aka Abel Tasman (stay at the Barn Backpackers)
Day 7 : Abel Tasman
Day 8 : Abel Tasman
Day 9: Abel Tasman to Hokitika
Then, add a few days to either Wanaka, Mount Cook, or Queenstown depending on what you’re into. I’d probably choose Queenstown for what it’s worth.
Here are a few other places that might be worth adding to your itinerary if you’ve got the time:
- Christchurch (between Tekapo & Hokitika or Kaikoura)
- Dunedin and Invercargill (southern tip of the island)
- Blenheim and the Marlborough Wine Region
Well, writing this itinerary has made me want to head back ASAP.
The south island is so diverse in terms of landscapes, things to do, and people I met along the way. From the owner of one of the places we stayed who chased her dreams and moved to New Zealand on a whim, to the German family that was backpacking the South Island for 3 months, and more. Everyone was happy, friendly, and excited to explore.
It seems like the quality of life couldn’t be better.
Some of my best memories of 2019 happened in New Zelanad, and I would recommend it to everyone. Even if you’re not into the outdoors or adventure sports, New Zealand is a place that should be on your list.
Have you been to New Zealand’s South Island?? What were the highlights for you? I’d love to hear from you.
Planning a trip to New Zealand?
We’ve got more travel guides to help you discover something new and plan an amazing trip!
- How to Hike the Tongariro Alpine Crossing: A Complete Guide
- How to Plan an Amazing New Zealand North Island Itinerary
- How to Hike the Tama Lakes Track in Tongariro National Park
- The Perfect Way to Spend 3 Days in Queenstown, New Zealand
- How to Plan an Amazing New Zealand South Island Road Trip
Thank you so much for this! It’s an excellent travel blog with lots of great ideas. We are doing almost exactly the same trip but instead of 1 night in Hokitika and 3 nights in Wanaka we are doing 2 nights in each place. I find it too rushed to stay anywhere for just one night – I like having at least 1 full day in each place. We are also doing a few less hikes and slightly easier ones as we are not super fit but do enjoy exploring nature. Thanks again 🙂
No problem! I generally agree with “never stay in a place for one night.” If I were to do the trip again, I’d spend some extra time on the west coast to do some more exploring. But with limited time, choices were made 🙂
It’s an excellent itinerary! I have the same thoughts of flying in and out of Queenstown. Any reason you don’t plan to travel clockwise-the opposite direction to what your itinerary? I was thinking this way the view might better-saving Tekapo, Mt Cook to the last. Can you point out the downside of my plan?
Thanks Cecilia! Appreciate the kind words.
I’m not sure there’s really a downside, although I would recommend spending a night in Queenstown when you arrive so that you can recover from the long flight before driving out to Milford Sound (if you were doing that first).
Other than that, don’t see a reason why it doesn’t work the other way!