The 9 Best Hikes in Sedona, AZ: A Complete Hiking Guide
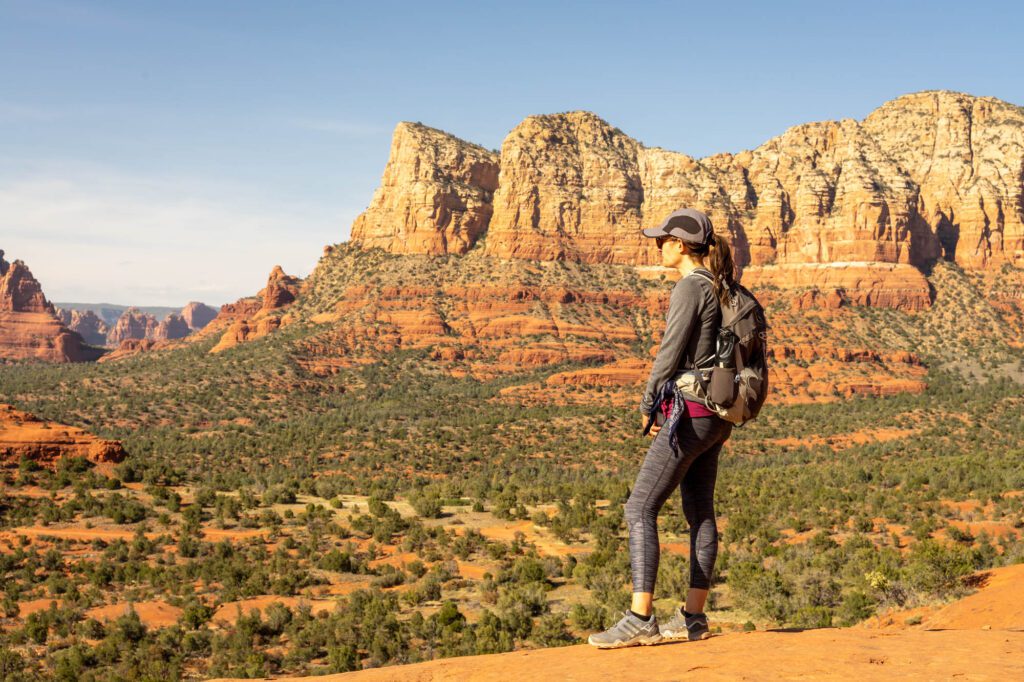
Red rocks as far as the eye can see, paired with lush greenery and beautiful Oak Creek make Sedona an amazing place to visit, even if it’s just for a couple of days. Hiking in Sedona should be at the top of your list of things to do on your Arizona road trip. There are some amazing hikes in Sedona, from grueling climbs that take you up to panoramic views, to easy strolls through surprisingly green canyons with rewarding views at the end. Whatever your experience and fitness level might be, there are plenty of hiking trails in Sedona to choose from.
In this guide, you’ll find our picks for the nine best hikes in Sedona – most of which we personally did on our own trip to Sedona (though, sadly, we didn’t have time for them all) – along with helpful tips on parking, which direction to do the trail, and more insights to help you plan the perfect Sedona adventure.
Planning a trip to Sedona? Don’t miss our complete Sedona itinerary, with everything you need to know to plan an amazing Sedona adventure.
Disclaimer: Some of the links in this post, like hotel links, are affiliate links, meaning at no additional cost to you, we make a little bit of money if you click through and book. That being said, we would never recommend something to you that we don’t stand behind 100%.
What to Pack to Hike in Sedona
While you’re in Sedona, you’re going to spend a lot of time either on a nice, manicured path, or on all fours scrambling up a rock chute that’s nearly vertical. It can get rocky and slippery. It’s also probably going to be hot, unless you’re in Sedona during the dead of winter.
We have a perfect guide for you if you’re relatively new to hiking and you’re wondering exactly what to pack for a day hike.
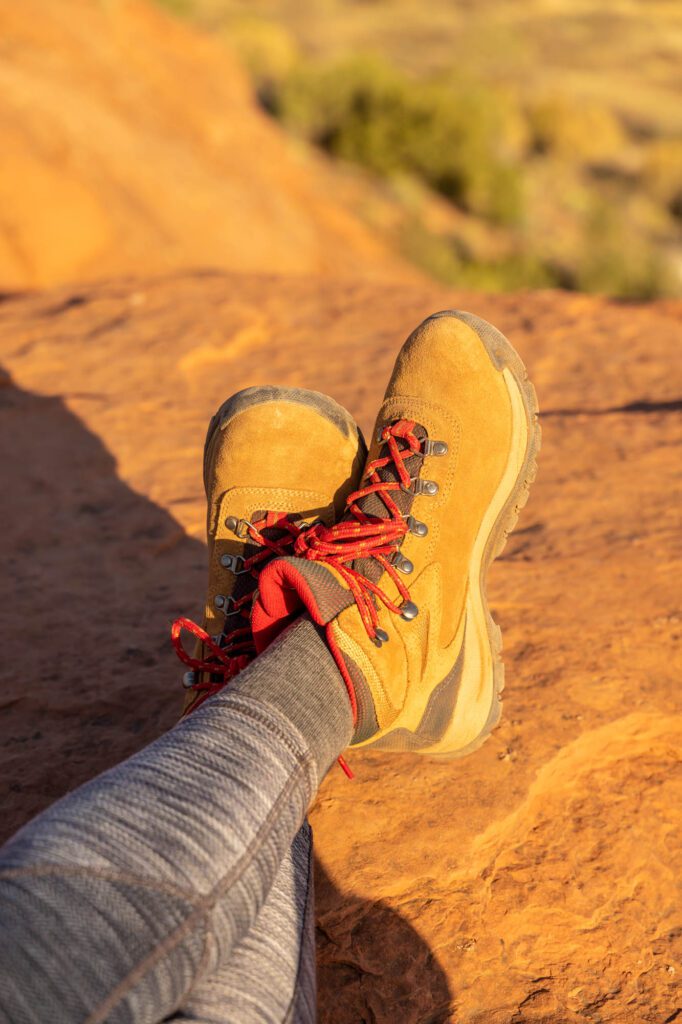
- Sturdy Hiking Boots: There are a lot of rocky scrambles and creek crossings in Sedona, which means a pair of sturdy waterproof hiking boots are going to be your new best friend. Alysha has a pair of the Columbia Newton Ridge boots, which are an excellent first hiking boot, and Matt loves his Salomon hiking boots (these are his recommendation) that have held up for five years and 500+ miles around the world.
- Reusable Water Bottles: Sedona can get toasty, and if you’re hiking in the middle of the day, you need to stay hydrated. We LOVE our Platypus collapsible water bottles, which are the perfect choice for both hiking and traveling. Plus, you won’t be buying plastic water bottles, so you’re saving the planet too! Pro-tip: don’t get the ones with the clip, the seal at the top fails faster and they start to leak.
- A Solid Daypack: I can’t tell you how many people we saw tote bags, grocery bags, and other various bags being used to carry water, layers, and more. Do yourself a favor and get yourself a sturdy daypack that will make carrying all of your hiking essentials easier. REI makes a great affordable daypack, and Alysha loves her Osprey Tempest 20 (the men’s version is the Talon 22).

Wondering what to wear on a hike? Read our guide over on our other site to see our picks: A Complete Guide to What to Wear Hiking
The Best Hikes in Sedona, Arizona: A Complete Sedona Hiking Guide
We spent the majority of our time in Sedona hiking, so we were able to fit in a bunch of hikes in the area. Whether you’re looking to explore a picturesque canyon, or a climb to a viewpoint with panoramic views of the surrounding landscapes, you’ll find it below.
Here are the best hikes that we personally did in Sedona. We’ve listed them in order of our preference, but keep in mind that not every trail below is suitable for all ages, experience, and fitness levels, so be sure to read the trail details to make sure the hike you choose is right for you.
West Fork of Oak Creek Trail
- Length: 6.5 miles
- Elevation Gain: 567 ft
- Trail Type: Out & Back
- Difficulty: Easy
- Trailhead Location
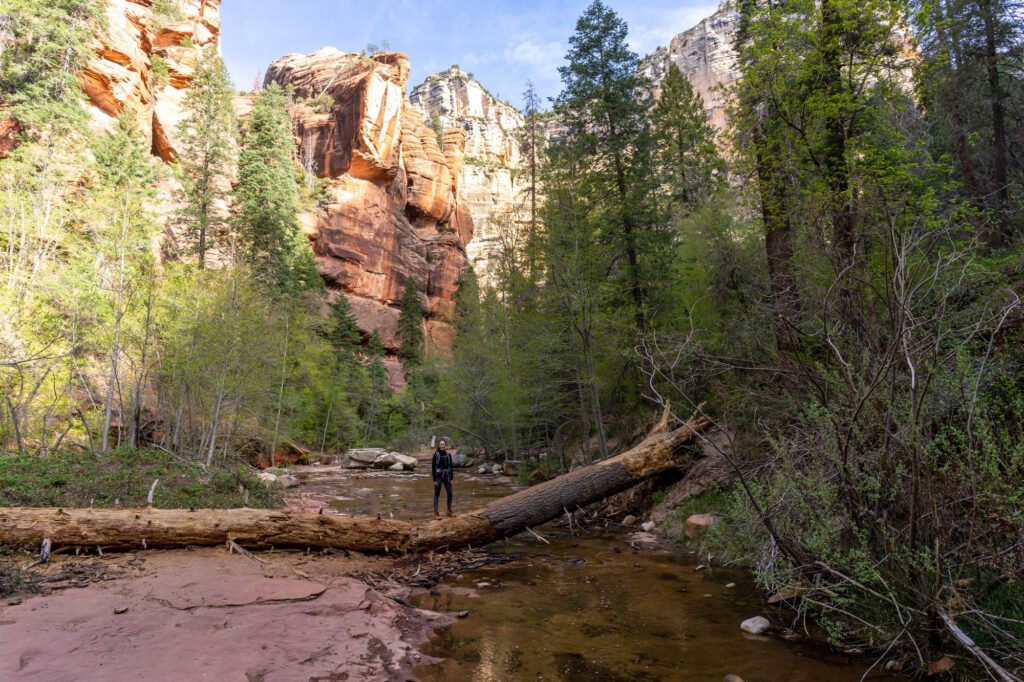
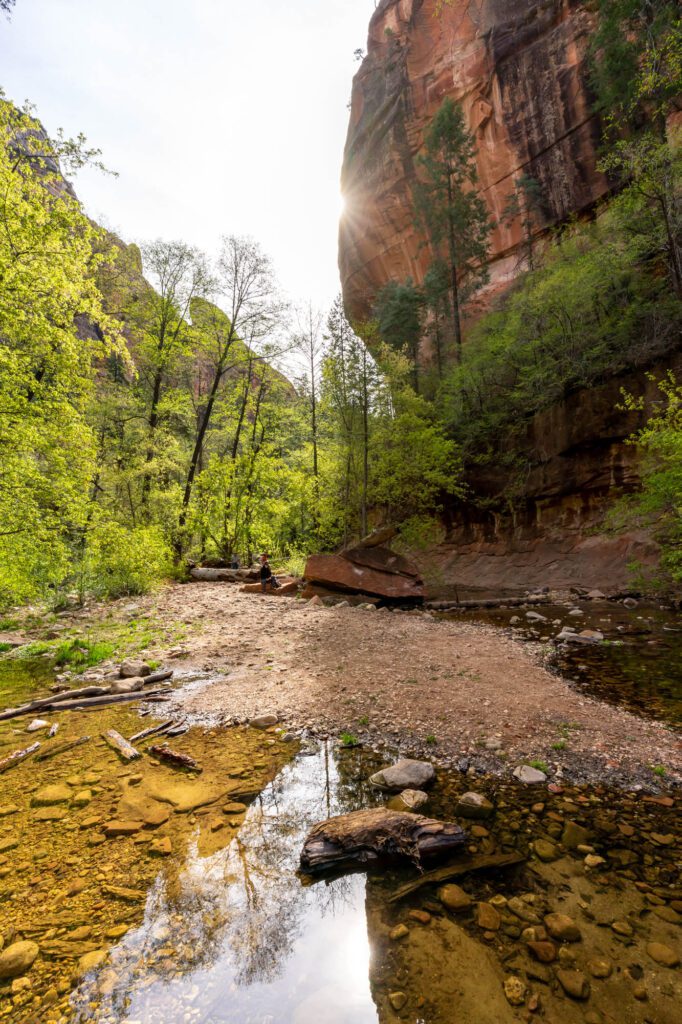
This was our favorite hike in Sedona, and it wasn’t that close. We got an early start (read the parking section below for how we did that) and we saw exactly two people on the trip out to the end of the trail, which is unmarked and unofficial – technically you could keep going for a while if you’re wearing waterproof boots or sandals that you don’t mind getting a little wet.
The trail starts by passing the site of a historic, now demolished lodge where famous rich people used to vacation. There’s a sign explaining the history of the area, which included the fact that there used to be Grizzly Bears in Oak Creek Canyon! Not anymore – an angry guy hunted and killed most of them after one of them killed his friend. What a jerk.
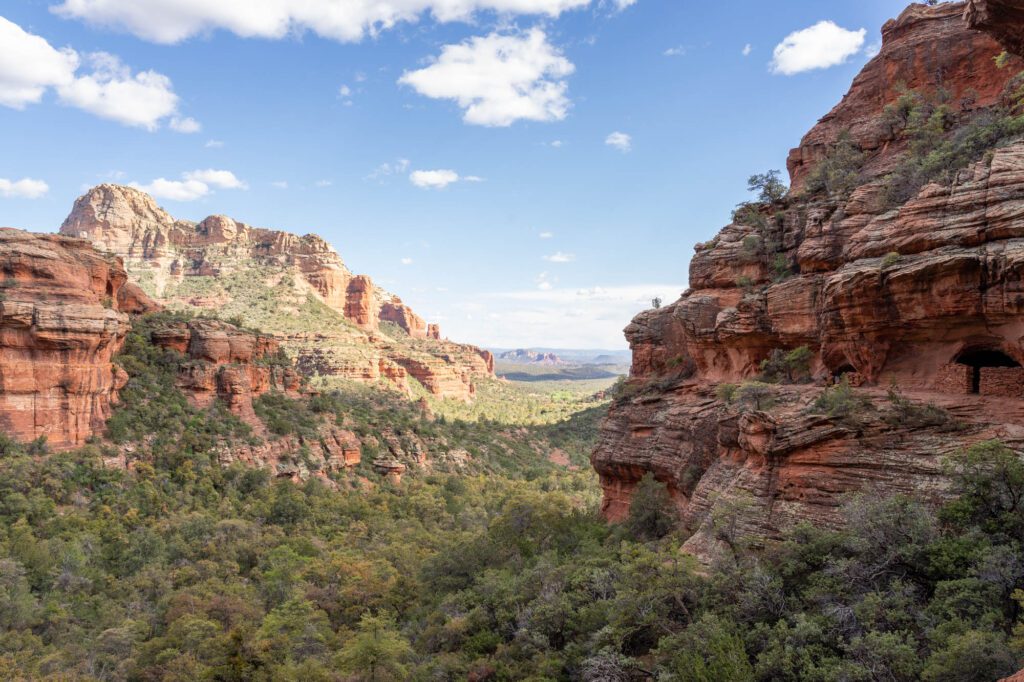
From there, it’s a slow meander along Oak Creek, with the canyon walls towering hundreds of feet above you.
There are 13 different creek crossings along the way – most are easily passable by hopping from stone to stone or balancing on a log, but your life is going to be much more pleasant if you’re wearing shoes or boots that can get a little bit wet.
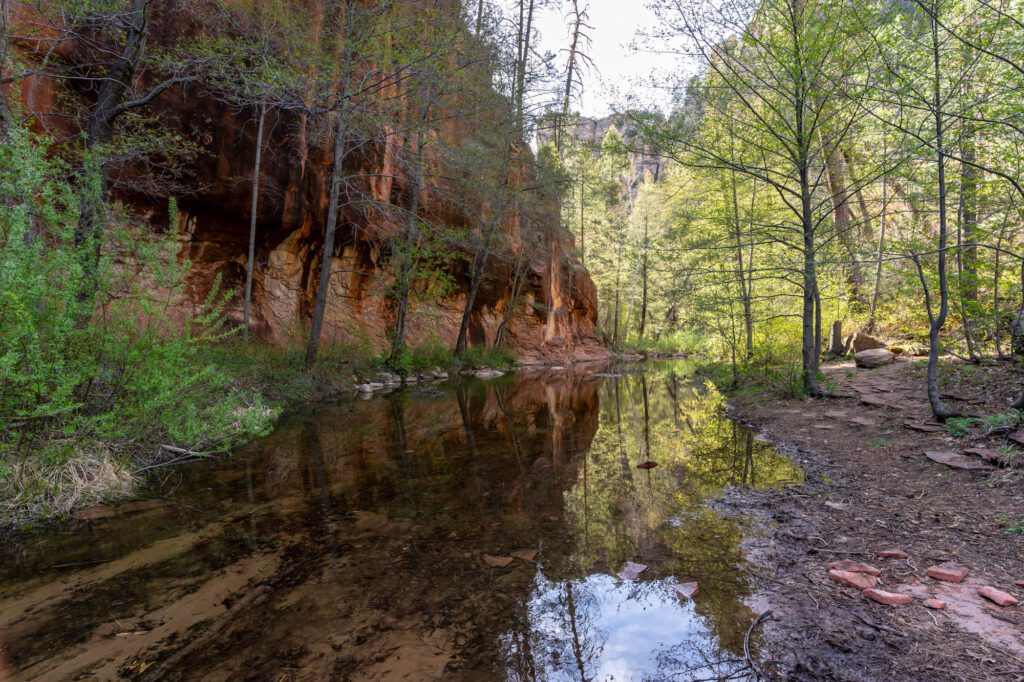
The canyon isn’t particularly narrow, and there are plenty of photo opportunities, particularly in the early morning when you can get the reflection of the red rock canyon walls in the still water of Oak Creek. There is also a lot of bird life along the way – don’t miss the sign at the very beginning before you cross the footbridge that explains the different species of birds you’ll encounter.
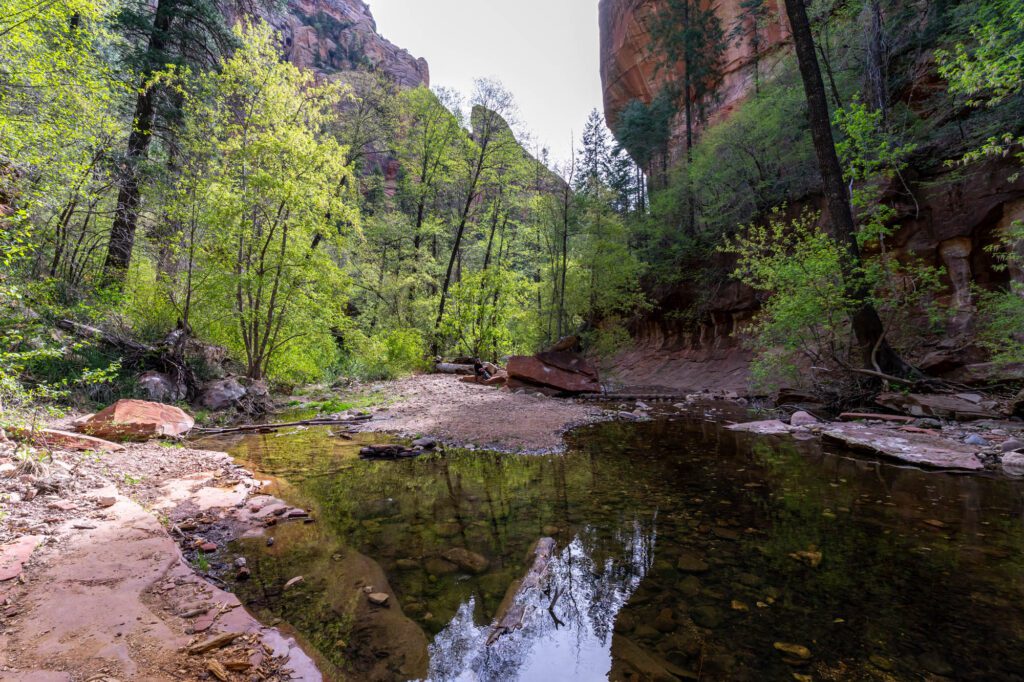
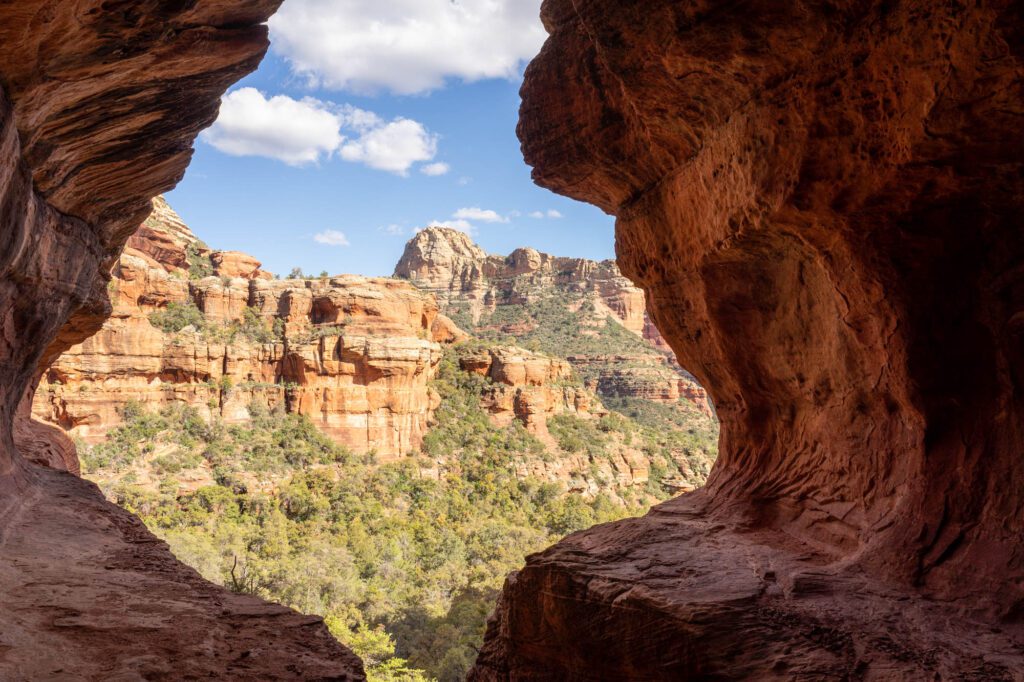
We ended at a little grotto that looks like this (see above). We’re not sure if it’s the official end of the trail, but it seemed like a very pleasant place to plop down, have a snack, and enjoy the serenity of the canyon before the rest of the visitors showed up.
Parking for the West Fork of Oak Creek
Parking for this hike is a little complicated, but nothing you can’t handle if you have all the information (we didn’t, but now we do so you can learn from our mistakes!).
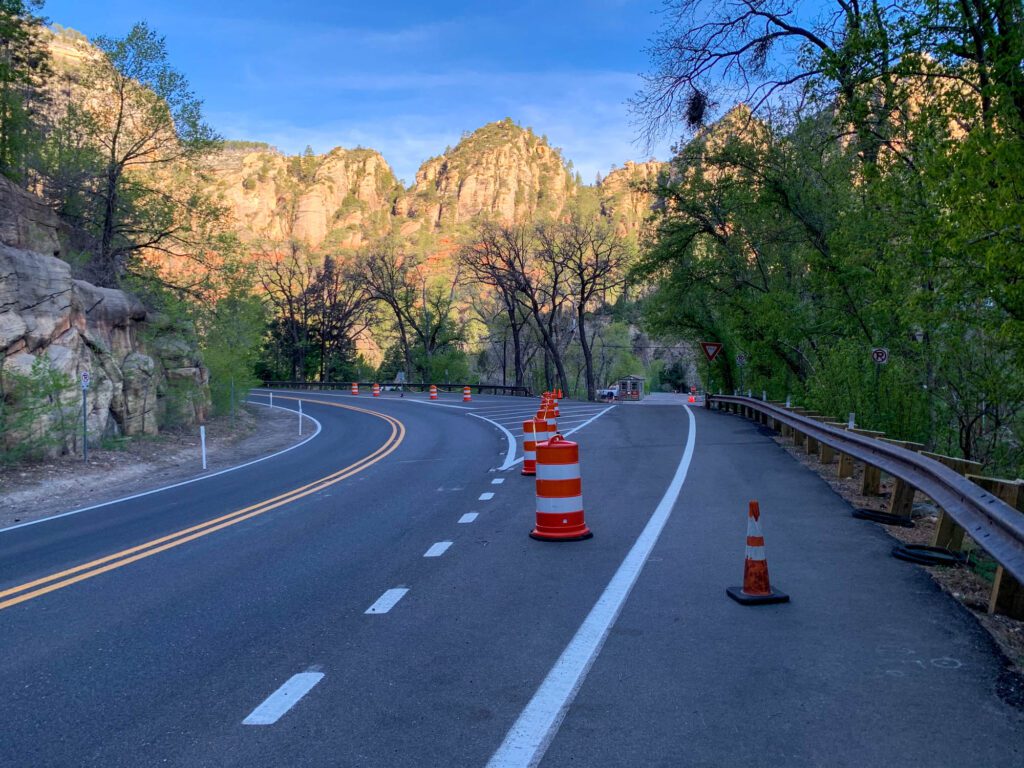
The parking lot doesn’t open until 8 am, and it will cost you $11 to park here (free with the Red Rocks Pass, not included in the America the Beautiful Pass). There are about 30 spots in the lot, and they usually fill up shortly after the gate opens at 8 am. There’s no waiting on the road, so once it’s full you’ll have to park along the road to the north.
Starting about a quarter mile north of the parking lot, there are spots along the road. You can hike in from there, using the path that is on the other side of the barrier on the west side of the road.
We balked at the $11 parking fee and the 8 am entrance time, so we parked along the road at 7am and hiked in from there. Keep in mind that you’ll need to have $2 per person in cash to pay for the walk-in fee (use the envelopes at the entrance station if the booth isn’t manned). We saw two people on the trail on the way out, and about 60 on the return trip when the gate had been opened.
It’s also worth noting that you can’t turn left into the lot if you’re coming from the south (from Sedona). You’ll need to continue along 89 until you can turn around and enter from the north side.
The Boynton Canyon Trail
- Length: 6.1 miles
- Elevation Gain: 810 ft
- Trail Type: Out & Back
- Difficulty: Moderate
- Trailhead Location
The Boynton Canyon Trail might be the perfect hiking trail. It’s challenging at the end as you make the ascent to the endpoint of the trail, but it’s relatively peaceful and easy until then. You meander through different ecosystems, starting in what feels more like the desert and finishing in a relatively thick (for Sedona) pine forest. The only thing I would change about this trail is that, for the first mile and a half or so, you’re skirting the edges of a resort, which means you can hear tennis balls and people yelling.
The parking lot is relatively small, but we snagged a spot in the late afternoon. There were hundreds of cars parked along the side of the road leading into the trailhead, so expect crowds.
Miraculously, though, the crowds seemed to disappear once we got onto the trail. We passed 15-20 people along the way, which had us wondering where exactly the occupants of those cars were. Maybe they were parked there for the nearby (ish – it’s pretty far away) Devil’s Bridge Trail? More on that below.
Bell Rock

- Length: 1.1 miles
- Elevation Gain: 400 ft
- Trail Type: Out & Back
- Difficulty: Moderate
- Trailhead Location
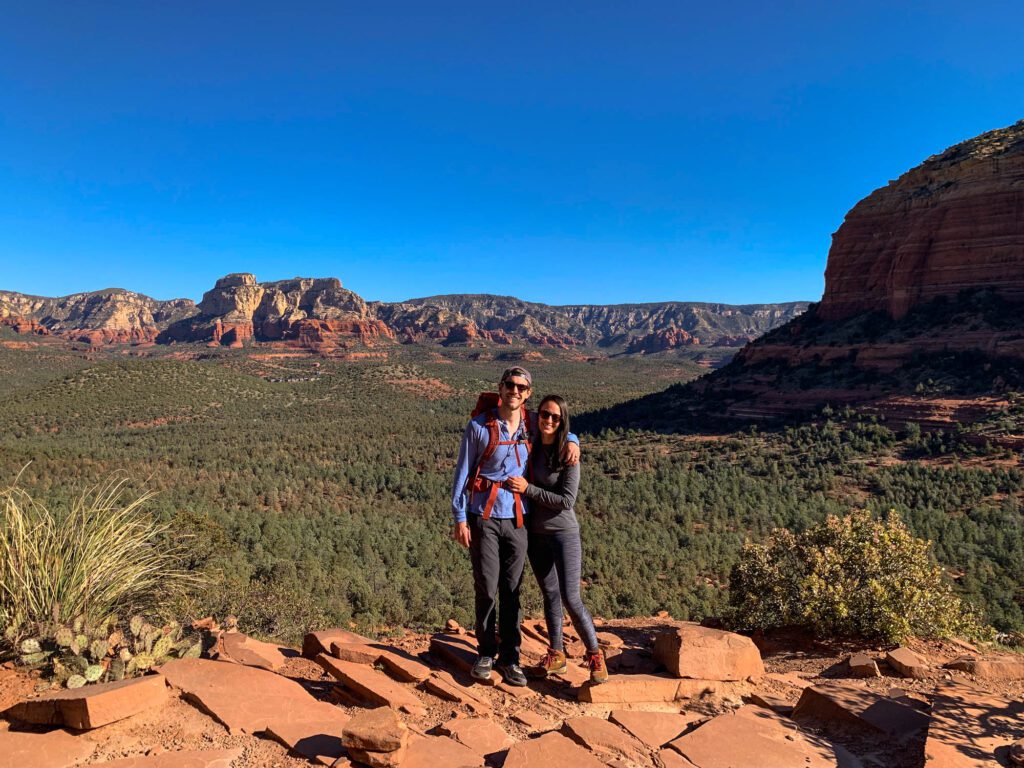
Note: There are a bunch of trails around Bell Rock of different lengths and difficulty levels – the hike we’re talking about here is the climb up Bell Rock from the north side, which gives you panoramic views to the north, including Cathedral Rock and Courthouse Butte, among other things.
This trail is firmly in the moderate camp despite being relatively short because it requires some wayfinding and scrambling along the way. You can’t climb all the way to the top of Bell Rock, but you can get somewhere between ½ and 2/3 of the way up the mountain before it got a little too sketchy for us.
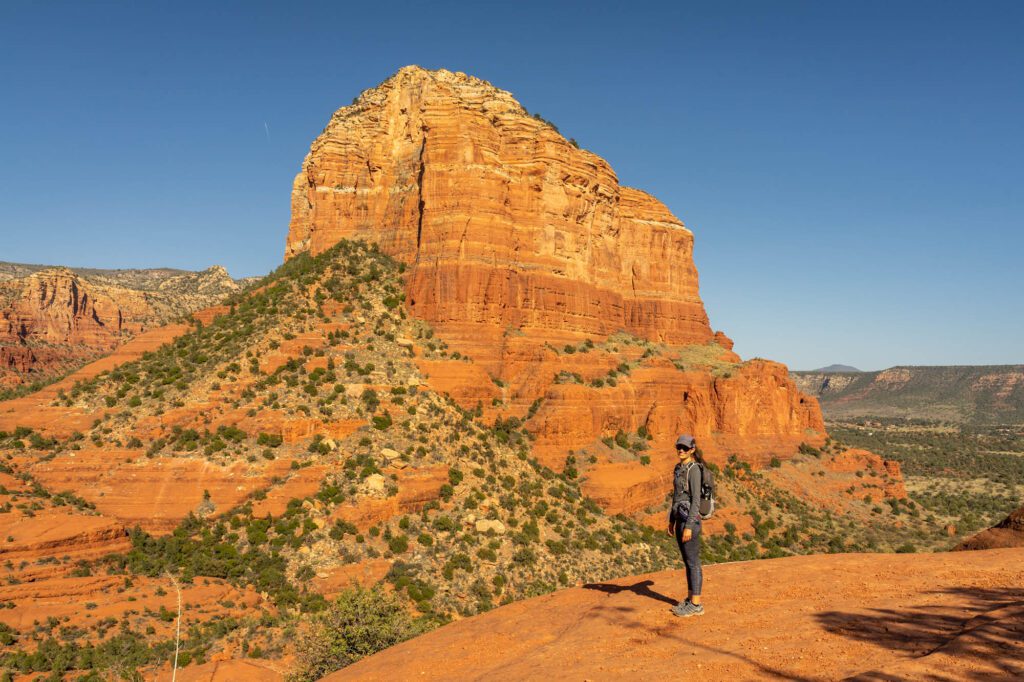
We followed the marked trail from the parking lot for about a quarter of a mile before the marked trail basically ends, and you’ll need to do a bit of wayfinding on your own. For what it’s worth, we stayed right, but met two women at the top who had come up from a completely different direction.
Parking at the trailhead is fairly limited, so we’d recommend getting here either early in the morning, or in the afternoon once the rush of people has calmed down a little (we were there at 3 pm and it was relatively calm compared to some of the other trails in Sedona).
The Soldier Pass Trail
- Length: 5.0 miles (more if you park far away)
- Elevation Gain: 850 ft
- Trail Type: Loop
- Difficulty: Moderate
- Trailhead Location
Before we talk about anything else, we have to address the parking situation for the Soldier Pass Trail. At best, it’s terrible. At worst, it’s infuriating. But fear not – we have you covered with the best way to deal with the parking situation with minimal headaches.
Parking for the Soldier Pass Trail
The main trailhead is located in a residential area made up of very, VERY nice houses. The parking lot has exactly 14 spots in it, no more, no less. There is an electronic gate at the trailhead that closes each night, and reopens at 8 am sharp in the morning.
The locals (somewhat understandably) don’t want tons of people parking in front of their houses and walking through their neighborhood to get to the trailhead, so there’s a strictly enforced ban on parking on the streets there – DO NOT DO THIS, YOU WILL GET EITHER TICKETED OR TOWED.
The closest area to park, other than the trailhead itself, is just outside of the Sedona Dog Park, which is roughly 1.2 miles away, adding 2.4 miles to your hike round trip. On occasion, there’s a hiker shuttle that operates on tips (via cash, Venmo, or the Cash App), that might swing by and pick you up, but I wouldn’t count on it.
IMPORTANT NOTE: DO NOT PARK at the dog park itself, which is one hour parking. It’s the parallel parking spots just to the west of the park along Carruth drive.
Anyway, I know what you’re thinking. “Great! We’ll show up early to make sure we get a spot in the lot!” I know that you’re thinking that because it’s EXACTLY what we were thinking. We showed up sometime between 7:00 and 7:15 am to just hang out in the car and wait for the gate to open. Sounds great, right?!
It was, until the self-appointed (I’m guessing here, but that was the vibe we got) neighborhood watch showed up to yell at us (complete with exaggerating “shooing” motions) and the car in front of us patiently waiting for the gate to open. Then, they parked his pickup truck in the spot, and glowered at us as we drove away.
A quick mini-rant here about this kind of behavior. I totally understand the frustration with your hometown being inundated with tourists clogging your roads and your hiking trails. I get it – I really do. I lived in San Francisco for a decade and rode the cable car to work – tourists can be annoying. However, you know how many times I was rude to a tourist? Exactly zero. You know why? Because tourists are an important part of the local economy, and I like to think of myself as a decently nice human being. If you buy a home in a town that is popular with tourists, don’t be surprised when you find tourists in your town. Nobody in this situation was doing anything malicious or shady, or anything to harm anyone at all, really. It was purely a power trip, and it clearly frustrated me because I just spent a lot of real estate in this guide talking about it.
But the real question here is what should you do about it to avoid an unpleasant situation that we found ourselves in?
We have four options for you, in order of our preference.
- BY FAR the best option – and the one that we ended up with – is parking at the dog park (not actually at the dog park, which is 1-hour parking, but on the street immediately west of it with parallel parking only) and walk the 1.2 miles to the trailhead. You can do this prior to 8 am, which basically means you’ll have the trail to yourselves. Plan on parking and being on your way by 7:15 am, which will give you about a half hour head start on the people waiting to park in the lot.
- Park at the Jordan Road Trailhead and do the loop from there. It adds very minimal mileage since the trailhead is basically on the loop anyway, you’re just starting from a different spot. The catch here is that the road isn’t great, so if you have a low-clearance car (like we do), or aren’t comfortable taking your rental on a rough road, this might not be a great option for you. This parking lot doesn’t have a timed gate, so you can get there early and be just fine.
- Show up between 7:30 and 7:45 am to wait in line to park in the main lot and hope you’re both a) one of the first 14 cars there and b) not subject to the angry neighborhood watch. If you aren’t one of the first 14, or you get politely asked to please leave, then go park at the dog park and walk (or just come back right before 8 am if you want to try again.
- If you’re staying in town or nearby, you could take a rideshare to and from the trailhead to avoid the parking situation altogether, but it’s going to cost you a pretty penny ($20-30 total).
The Soldier Pass – Brins Mesa Loop
The hike itself is nice, and the best way to do it is the loop up and around to connect with the Brins Mesa Trail. If you do it early, go clockwise so that you hit the three main sights before the crowds arrive.
The highlights of this trail are:
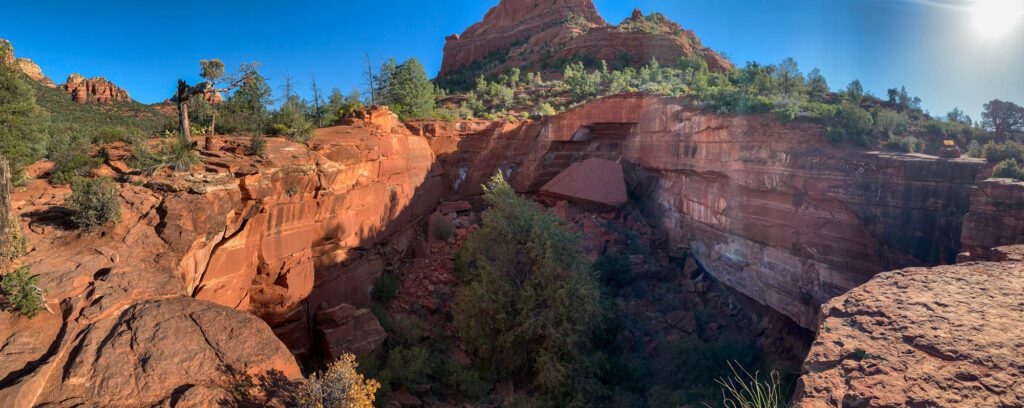
- Devil’s Kitchen: Basically right after you leave the trailhead – less than a quarter of a mile – you’ll come to a big sink hole called Devil’s Kitchen. Head to the east side of the hole for the informational sign that tells you how exactly this came to be.
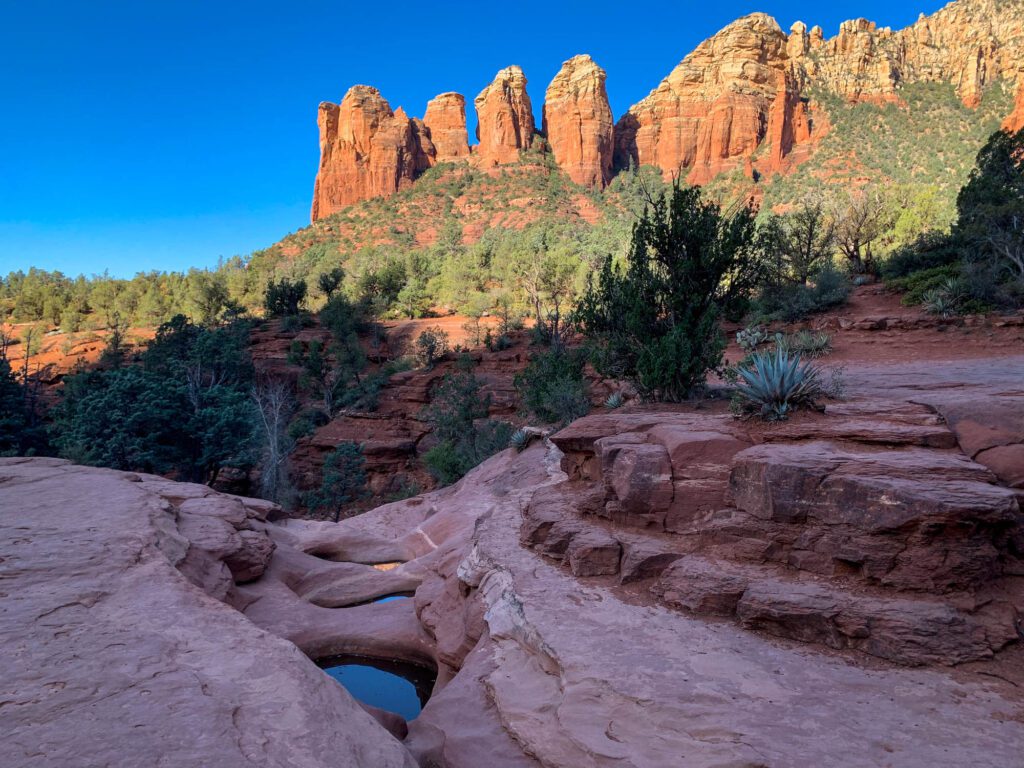
- The Seven Sacred Pools: About half a mile from the trailhead, you’ll come to the seven sacred pools, which may or may not be photogenic depending on the day and the recent precipitation.
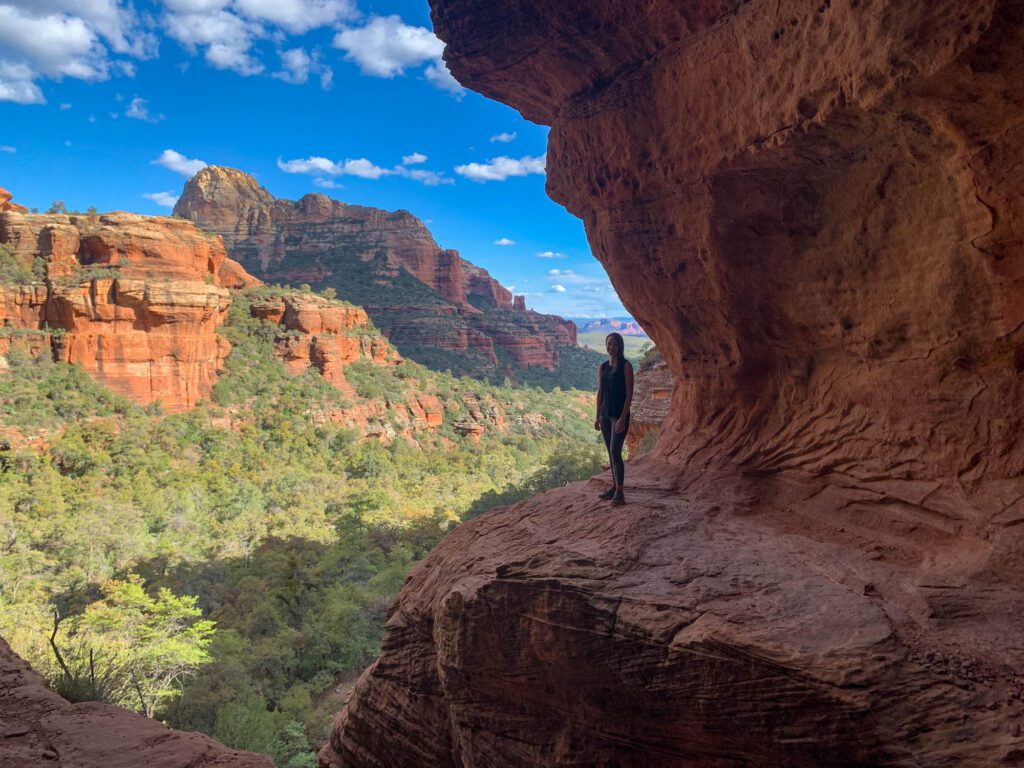
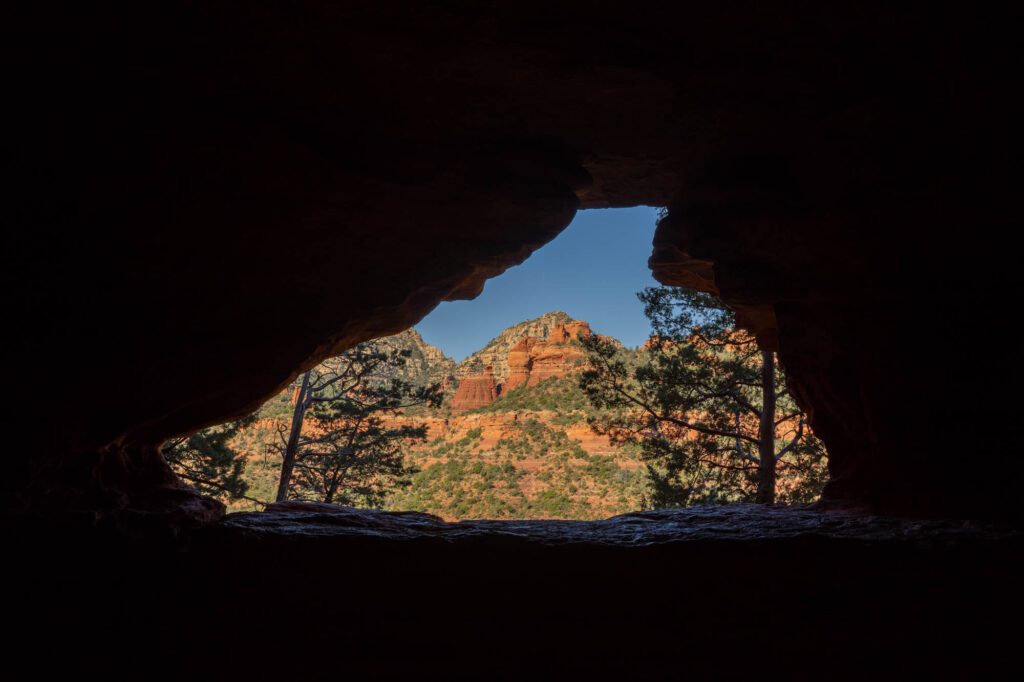
- The Caves: This was cool. At 1.2 miles in (if you’re doing the hike clockwise) there’s a turn off that takes you up to a couple of caves that you can climb up into. It’s a scramble to get up to the caves, and then a vertical climb up slick rock (with a half-assed rope assisting you for part of it) to get into the cave. It’s not for the faint of heart, and you’ll need to be careful and make sure you’re wearing proper footwear. Do some exploring nearby to see what else you can discover here.
After the caves, keep climbing to Soldier’s Pass, which has some nice views back the way you came. From here – and by here, I mean wherever you decide to turn around because there’s really no set end point if you’re doing this out and back – you can choose to head back the way you came, or complete the loop using the Brins Mesa Trail. It’s slightly longer, but adds some new scenery, and loops are better than out-and-backs, at least in our opinion!
If you park at the alternate trailhead at Jordan Road, you should definitely do the loop, which will be shorter from this point.
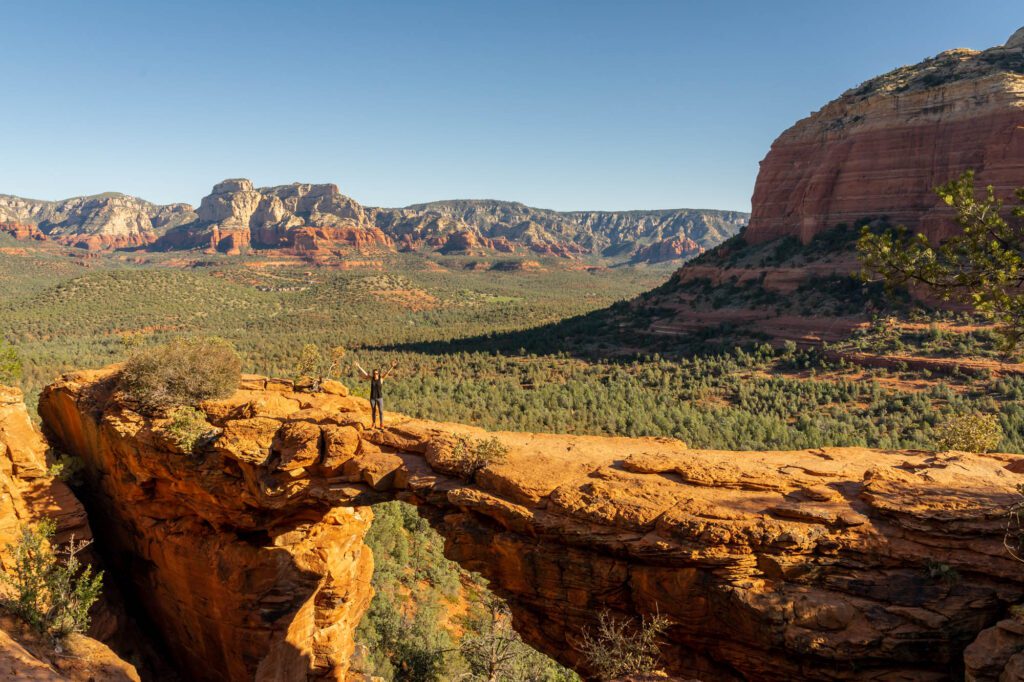
Devil’s Bridge Trail
- Length: 4 miles
- Elevation Gain: 550 ft
- Trail Type: Out & Back
- Difficulty: Easy / Moderate
- Trailhead Location
This is one of the more popular hikes in Sedona. To give you a taste of just how popular this trail is, we arrived at the trailhead at 6:15 am, thinking we were golden, and snagged the LAST spot in the lot. At 6:15 am. On a Tuesday. In April. Wild. When we left, there were cars parked along the road for at least a half mile in either direction.
You should also know that, despite arriving before 7 am, we had to wait 30-40 minutes to take a picture on the bridge. The line moves relatively slowly because you’ll have to wait for groups to walk out on the bridge, which is wider than it looks (according to Alysha and just about every person that came off of it), take their pictures, and walk back. Rinse and repeat for the 20-30 ish groups that are probably in line, and it’s going to take a while.
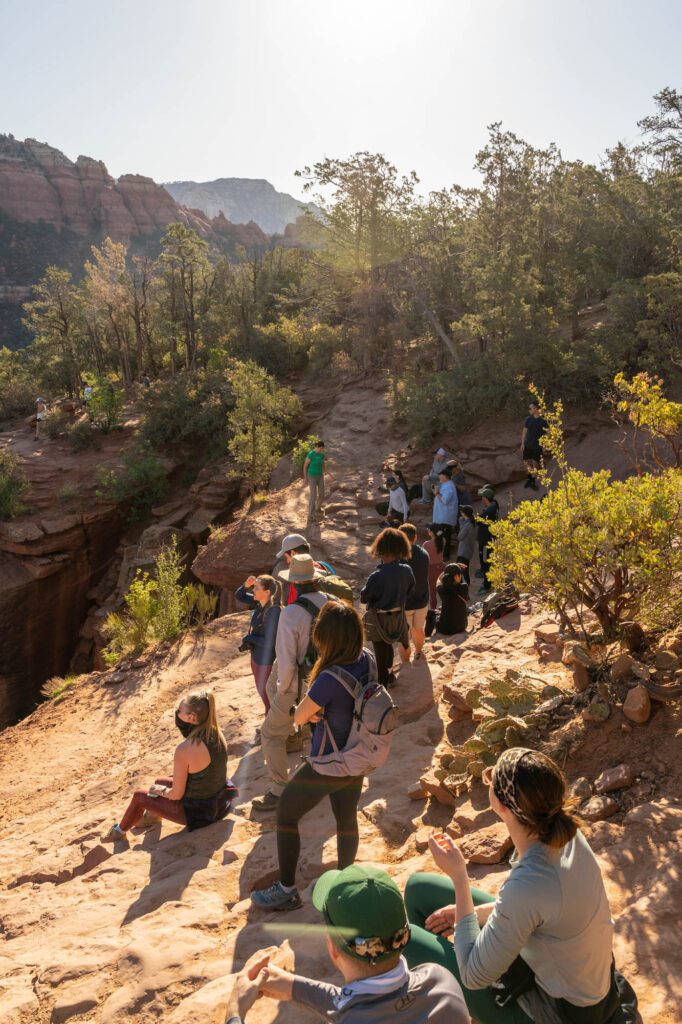
While we were there, there was a couple who arrived at the end of the line, asked us if we were all in line to take pictures, and then proceeded to walk to the front of the line and essentially bypass the line because…they deserved it? Don’t be that person. You know there’s going to be a line going into it. Wait your turn.
To be honest, we think there are better hikes to do. The bridge is pretty cool – don’t get us wrong – but you can get equally spectacular views on other hikes nearby.
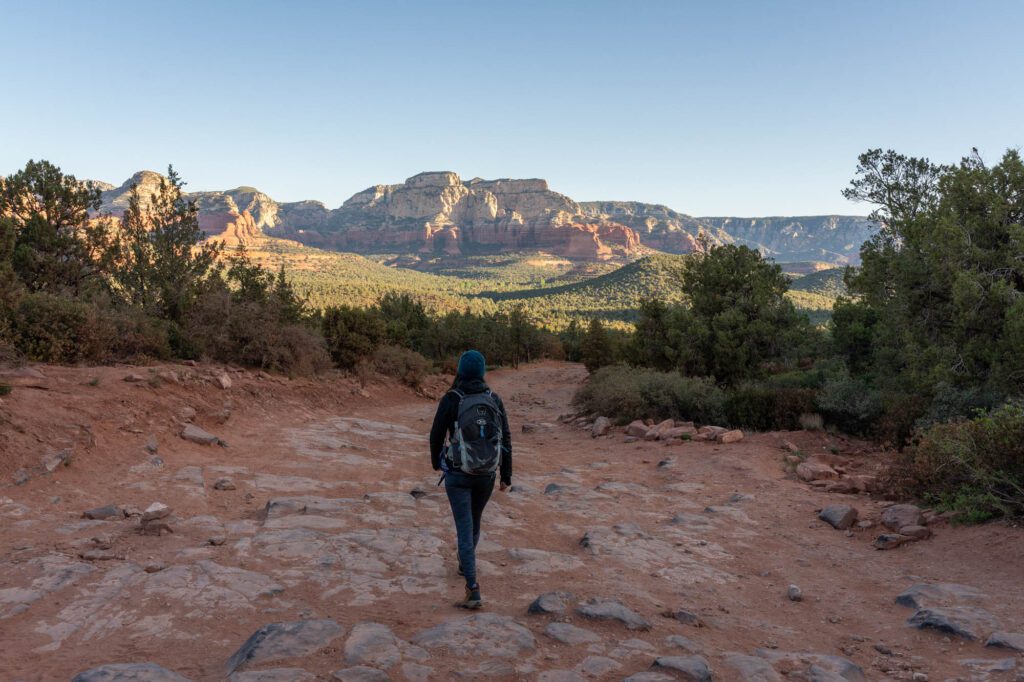
The trail itself is super easy until the last quarter mile, where you’ll ascend some stone steps to reach the bridge itself. For the first portion of the hike, we’d recommend following the forest road at the entrance to the parking lot, which makes it a 3.9 mile hike round trip. You can also take the Chuckwagon trail and cut over to the forest road after about a quarter mile, or take the Chuckwagon Trail all the way around (which makes it almost six miles).
Parking for the Devil’s Bridge Trail
There are three ways to handle parking for this hike. We’re not including parking at the trailhead at the base of the hike, which is at the end of a gnarly road that is only passable by (very) high clearance 4×4 vehicles with experience driving on rough roads, which means it’s inaccessible to most people.
- Arrive at the main lot by 6 am. It’s probably going to be earlier during the summer, which is insane to me. The alternative is to show up around 9:00 or 10:00 am and hope that people coming down are leaving so you can snag their spot, but “hope” isn’t really a good strategy here.
- Park at the nearby Mescal Trailhead and connect to the Devil’s Bridge Trail via the Chuckwagon Trail. It’s about the same distance as hiking from the main parking lot, and it’s far less popular. Though, it’s a small parking lot with only a handful of spots.
- Park along Dry Creek Road and walk in, picking up the trail at the forest road the leaves from the entrance of the trailhead. Make sure to park safely off the road, and be careful walking along the road.
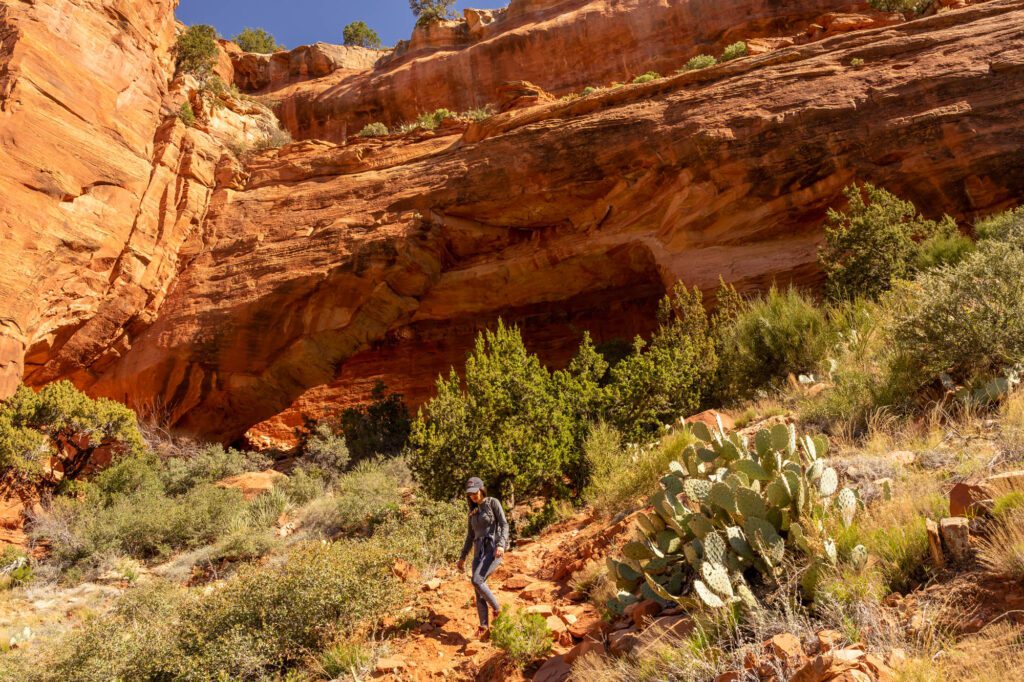
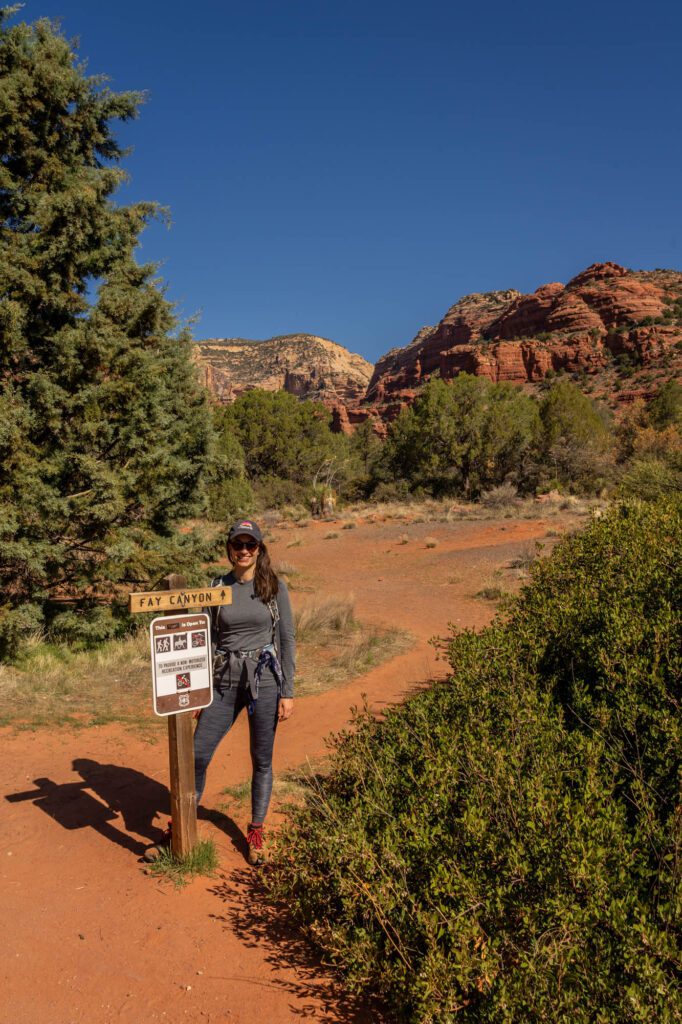
Fay Canyon
- Length: 2.6 miles
- Elevation Gain: 400 ft
- Trail Type: Out & Back
- Difficulty: Easy
- Trailhead Location
This is a nice, easy hike that makes a good alternative to the Boynton Canyon Trail if it’s too crowded for you. We’d say this is a good family-friendly hike. Seeing as we saw a toddler CRUSHING IT in some awesome pink shades and flip flops, we think it’s suitable for almost everyone (though you should still make sure to bring plenty of water on a hot day).
The trail meanders through the canyon, staying mostly flat along the way. It’s partially shaded, but there are definitely some portions where you’re going to be in the full sun, so wear sunscreen and a sun hat!
There is a turnoff to climb up to a hidden arch, which you don’t really realize is an arch until you’re basically underneath it. This portion of the trail goes from easy to moderate, and is probably not suitable for families with young kids or inexperienced hikers. It’s a lot of climbing up slippery rocks and narrow passages that can be dangerous if you don’t have proper footwear or experience.
Even MORE Great Hikes in Sedona
While we didn’t personally get a chance to experience these hikes, here are even more hikes that are on our list for our next trip.
The Cathedral Rock Trail
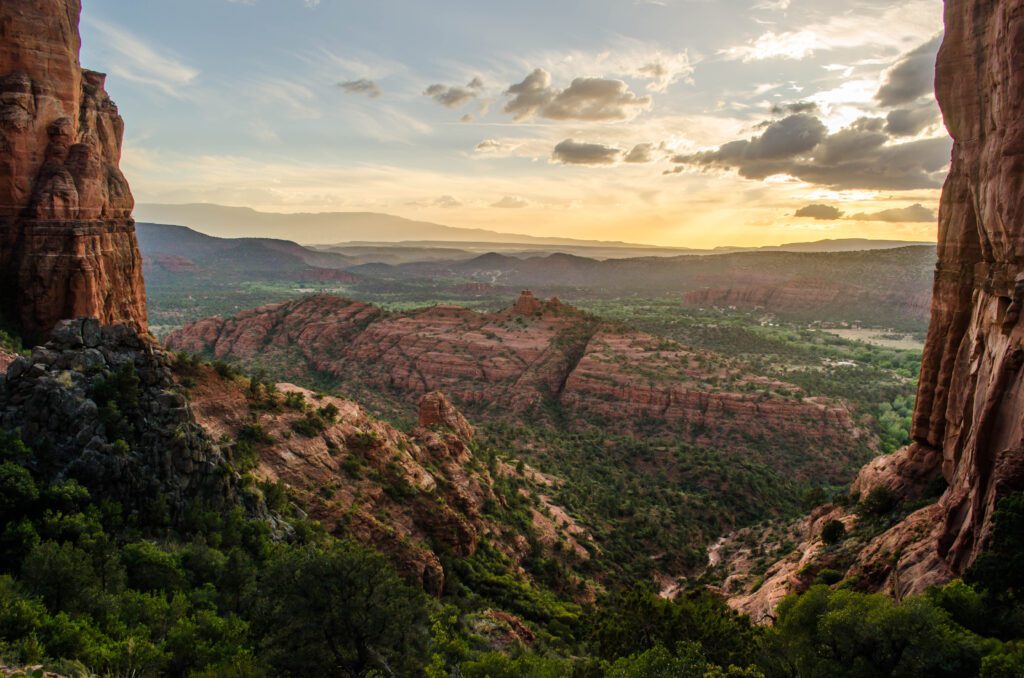
- Length: 1.2 miles
- Elevation Gain: 720 ft
- Trail Type: Out & Back
- Difficulty: Moderate / Hard
- Trailhead Location
Look – this is an iconic Sedona hike, but when we showed up at 4 pm on a weekday and saw a long line of cars, then looked up to the trail and saw hundreds of little people all tackling the semi-scramble all at the same time, Alysha and I looked at each other and said “do we REALLY need to do this one?” And the answer turned out to be “NOPE!” Still, the views from the saddle of Cathedral Rock are pretty spectacular.
It’s a scramble all the way up, which makes this a decidedly moderate trail that is harder than you think it’s going to be.
Alternate Route: The better way to do this hike is to park at the Baldwin Trailhead (sort of a rough road, but it’s passable in most cars if you take it slow) and hike from there, where you’ll have far less competition for parking. That journey is 4.4 miles and climbs 1,000 feet, but you’ll have great views of Cathedral Rock along the way out there, since it’s directly in front of you for most of the first part of the trail. It follows the river east towards Cathedral Rock, where it meets up with the trail that climbs up to the saddle.
Bear Mountain Trail

- Length: 5.0 miles
- Elevation Gain: 2,000 ft
- Trail Type: Out & Back
- Difficulty: Hard
- Trailhead Location
If you’re looking to escape the seemingly ever-present crowds in Sedona AND you’re an experienced hiker looking for a challenge, might we suggest the Bear Mountain Trail?
It’s the hardest hike on this list – by a lot – which means it’s also the least-visited trail featured here. It’s 5 miles round trip, and over the 2.5 mile trip to the top, you’ll climb 2,000 feet. This trail is FIRMLY in the “difficult” category.
Get an early start – it starts to get hot between March and October between 9 and 10 am, and you don’t want to be doing this climb in the heat of the day.
Views at the top are spectacular, and are worth the effort it takes to get there.
Broken Arrow Trail
- Length: 2.8 miles
- Elevation Gain: 400 ft
- Trail Type: Out & Back
- Difficulty: Easy / Moderate
- Trailhead Location
This is primarily known as a 4×4 road, which is why we weren’t super enthused about hiking it. It’s relatively short and easy with spectacular views throughout – including Mushroom Rock and the Chicken Point Overlook – and is less trafficked by hikers than some of the other hikes on this list. However, the Pink Jeep Tours frequently drive along this trail, which can get a bit annoying.
The Best Easy Hikes in Sedona
If you’re looking for an easy hike in Sedona, our top picks are:
- West Fork of Oak Creek: Though it is a 6.5 mile hike on paper, this trail is relatively easy and we saw plenty of kids making the journey. You can turn around at any point, which makes it perfectly customizable. The trickiest part is going to be the creek crossings, which are totally doable, and are easier if you have waterproof footwear on so you don’t have to worry about getting a little wet.
- The Fay Canyon Trail: Covered above, this trail is a nice meander through Fay Canyon, which is arguably just as gorgeous as some of the more popular canyons in Sedona (like Boynton, for example). We saw a toddler doing just fine on this trail (with the COOLEST pink star-shaped sunglasses), and it’s a good one for families with young kids.
- The Boynton Canyon Trail: We’d rate this hike as “easy” up until the last quarter of a mile or so, where it turns into a rocky climb to the trail’s endpoint. The first four or five miles are totally doable for most people, and it’s a pleasant hike through the canyon with plenty of shade and rest spots to be had along the way.
When to Visit Sedona
One of the reasons Sedona is so great is that the climate is downright pleasant for most of the year.
Summer: It can get hot in Sedona over the summer – but you’re at 4,000 feet elevation, which means it’s not going to be as hot as, say, Phoenix. In the summer, get an early start on the trail and drink plenty of water. If you’ve never been to Arizona in the summer before, you’ll also experience monsoons in the afternoon, which can bring rain and thunderstorms every single day at the same time.
Fall and Spring: We were in Sedona in the spring, and it was pretty much perfect. 70’s during the day, 40’s and 50’s at night. Not too hot, not too cold – perfect hiking weather! Though, it is the most popular time to visit, so expect crowds (seriously, so many people) and book your place to stay in Sedona early. Weather in the fall and spring is going to be a little more unpredictable than summer, but April through June is actually the lowest season in terms of precipitation. Fall has higher precipitation than spring, but October and November are super pleasant times to visit Sedona.
Winter: Temperatures will be significantly lower than the fall and spring, but it’s still going to be in the 50’s and 60’s during the day, occasionally dropping down to freezing for a few days at a time. This might not be the best time to camp in Sedona, but if you have a nice warm hotel room to return to after a day of hiking, it won’t be so bad. Plus, you might get a taste of the red rocks with a dusting of snow, which is going to be gorgeous! This is also the low season in terms of crowds, so some of the overcrowding issues might be less of an issue for you in the winter.
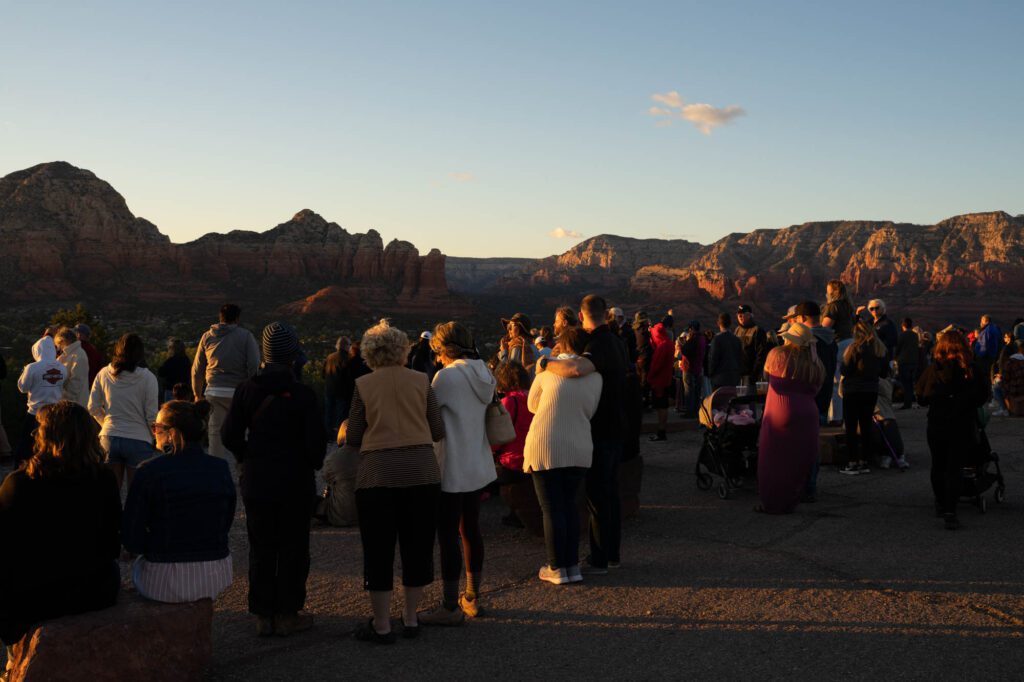
Overtourism in Sedona
I want to take a second to address the pretty obvious over tourism in Sedona.
There’s no question that Sedona faces a dilemma that places like Bend, Oregon and Boise, Idaho (along with countless similar cities) have faced over the past decade or so – tourists bring money and value to the local economy, but also have negative impacts on the community of Sedona and the surrounding natural beauty.
My perspective is this: I don’t think that the beauty of Sedona’s hiking trails should be only experienced by locals who can afford to live there. I believe (and I’ve been known to be wrong on things before, so take this with a grain of salt) that more people experiencing the natural beauty that our country has to offer is ultimately a good thing, and has the potential to make people want to protect it at all costs, if for no other reason than wanting to selfishly experience it for themselves.
However, I also recognize that we need to collectively, as tourists in someone else’s home, mitigate the downsides that come with tourism. Here are three things you can do to experience Sedona responsibly.
- Practice Leave No Trace Principles. On hiking trails, if you bring it with you, it needs to make it back to your car with you. I saw countless discarded plastic water bottles (buy a reusable one – it’s cheaper and better for the environment!), orange peels, and toilet paper. I can’t think of any other way to say this – if you do this, you are being incredibly disrespectful. Who do you think is going to clean that up? Put it in your backpack, pocket, or carry it with you until you get back to the trash cans at the trailhead. It’s not hard.
- Stay on Marked Trails. Look, I know you might think that the view just over that ridge right there might make for a perfect Instagram picture, but by walking up that hill and trampling all the plants, you’re destroying the precious ecosystems that make this place special. Please stay on the trail.
- Avoid Short Term Vacation Rentals. In places like Bend and Sedona, along with the major cities on the West Coast, housing costs are soaring. While the primary cause is definitely not vacation rentals like Airbnb, there’s no doubt that they’re a contributing factor. As a traveler with Celiac Disease who needs access to a kitchen, staying in Airbnbs has been a lifesaver for me. But I’m starting to realize that the negatives outweigh the positives, especially in places like Sedona that are particularly attractive for tourists, where every other house seems to be a vacation rental, leaving less space for the local community. Stay in a hotel or campground instead.
There are some cool spots in Sedona that are now Insta-famous. I’ll be honest, I saw the pictures and said “yeah, I want to see that!” But in the guide below, you won’t find exact coordinates or directions to those spots – that just means you’ll have to do some exploring and sleuthing, which is all part of the adventure!
That’s all we got! We think you’re going to love Sedona – just make sure to get out early to beat both the stifling heat and crowds that descend on the town in the spring.
More Arizona + Utah Travel Guides
If you liked this guide, you’re going to love our other Arizona and Utah travel guides.
Phoenix: Plan a perfect weekend in Phoenix, and figure out where to stay in Phoenix.
The Grand Canyon: Planning a trip that includes the Grand Canyon? We’ve got you covered with a guide on exactly how to plan an amazing Grand Canyon itinerary and how to find the perfect place to stay.
Sedona: Plan the perfect weekend getaway to Sedona, and learn everything you need to know to go hiking in Sedona.
If you’re making your way into Utah, you’ll want to read our guides to:
- Zion (2 day itinerary and where to stay)
- Bryce Canyon (the best hikes and how to spend one day in Bryce Canyon)
- Moab (a perfect itinerary, the best hikes in Arches, and the best places to stay and things to do)
Plus, our 10 day Utah National Parks road trip is a super detailed guide to exploring Utah, if you’ve got the time. Otherwise, save it for later.