How to Plan an Amazing Grand Canyon Itinerary (2 Days)
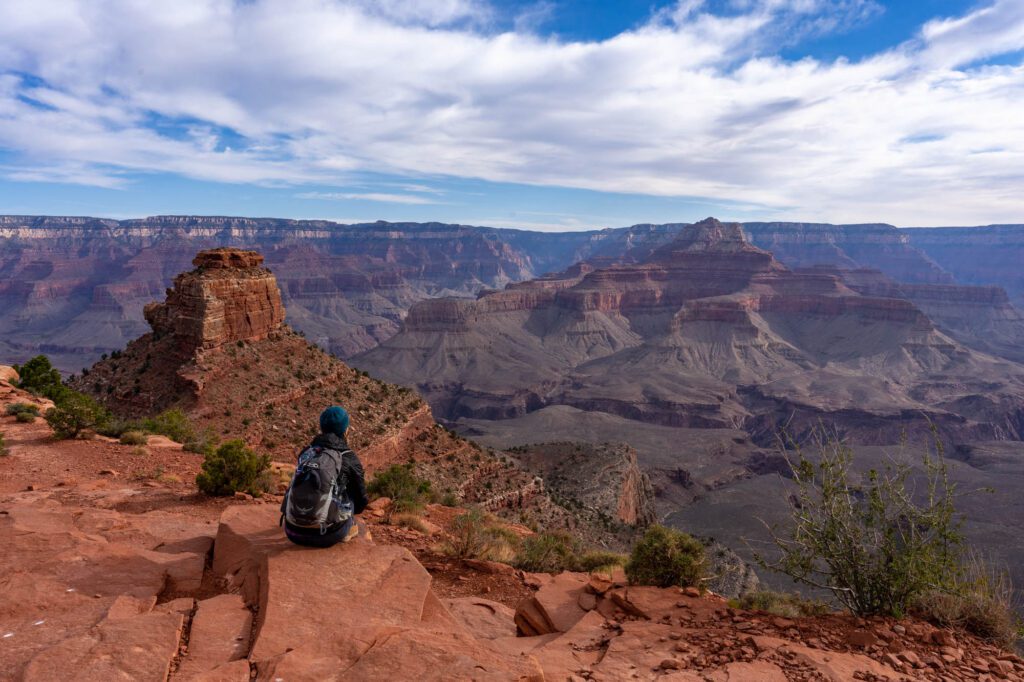
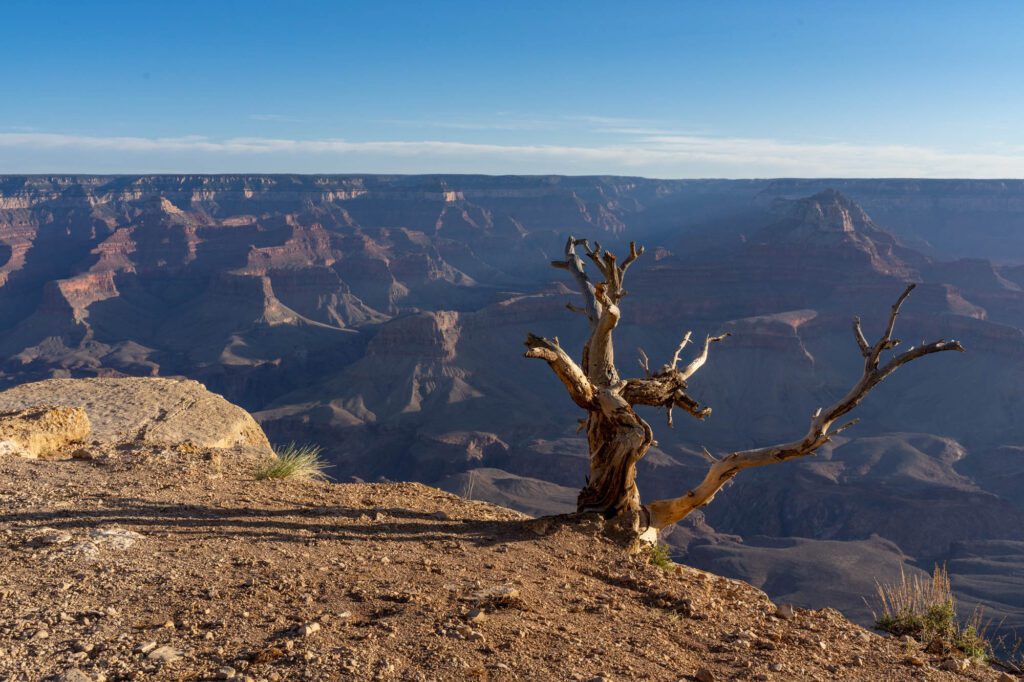
The scale of the Grand Canyon is absolutely mind-blowing. Standing on the rim of the canyon, you’ll be staring thousands of feet down into crags and crevices winding through the world-famous chasm that millions of people flock to every year.
It’s one of those places that makes you go “I wonder what the first people who came across this place thought?”
It was probably something like “Whoa, what do we do now?”
Though I, Matt, have been to the Grand Canyon multiple times over the years, we spent more time on our latest trip, which allowed me to explore a little deeper into the canyon (both literally and figuratively).
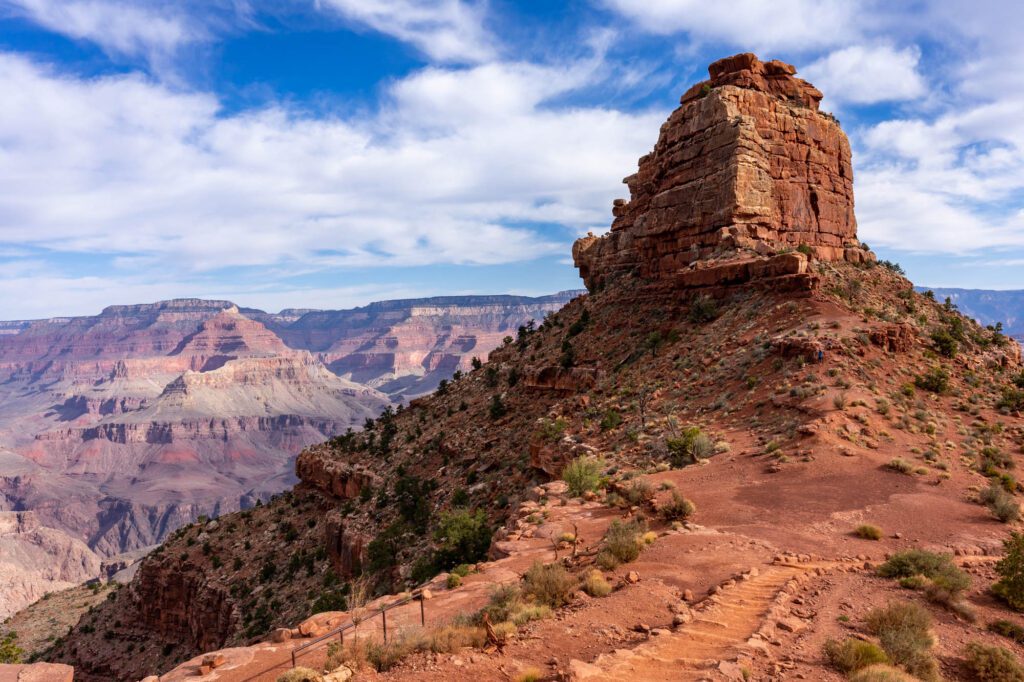
One thing I will say is that, in order to truly appreciate the “grandness” of the Grand Canyon, you should do your best to do a hike that takes you down below the rim.
From below the canyon rim, you’ll be looking up at towering rock structures that, just hours before, you were looking down on. And they look A LOT bigger from the bottom, especially when there’s a steep climb back to the rim ahead of you.
We put together this 2 day Grand Canyon itinerary to help you make the most of your time in Grand Canyon National Park.
If you have more time – 3 days in the Grand Canyon – or less time – one day in the Grand Canyon – we have suggestions at the bottom of the itinerary for how you might adjust this for your trip. Plus, you’ll find all the logistics you need to know to plan the perfect trip.
Wondering where to stay at the Grand Canyon? We’ve got you covered with a complete guide to the best places to stay at the Grand Canyon, plus exactly how to choose where to stay based on your style and budget.
Disclaimer: Some of the links in this post, like hotel links, are affiliate links, meaning at no additional cost to you, we make a little bit of money if you click through and book. That being said, we would never recommend something to you that we don’t stand behind 100%.
South Rim vs. North Rim? Which to Choose
The two rims of the Grand Canyon – the more visited Grand Canyon South Rim and the more remote North Rim – may be under 20 miles apart at the widest point as the crow flies, but it actually takes several hours to drive around.
Because, you know, there’s a big canyon in the way.
If it’s your first time in the Grand Canyon, then you should focus on the South Rim. Full stop.
If you’ve been to the South Rim before and done a few of the hikes, seen the sights, and feel up for something new, then consider the North Rim.
Be aware, the North Rim is 1,000 feet higher in elevation, which means the season is much shorter (it’s basically only summer through early fall). It’s also pretty hard to get to, at least compared to the South Rim.
This itinerary will focus on the South Rim, though we have some suggestions on what to do with more time that includes the North Rim too.
How Many Days in the Grand Canyon?
After spending four days on this trip (and having been multiple times in the past, though never together), we think two days is the perfect amount of time to spend on the South Rim of the Grand Canyon if you want to see the main sights.
Two days allows you to do the three things that we think are “must-do” while you’re there: Do one hike below the rim, Walk the Rim Trail, and drive Desert View Road at sunset.
However, it’s not like you’ll be able to see EVERYTHING in just two days. Here are some things that you might want to add, and how much time to add on for each.
- If you want to do another big hike, like the Bright Angel Trail, add an extra day.
- If you want to do the bucket list-worthy overnight hike into the canyon down to Phantom Ranch and back, add two to three extra days. You could also hike rim-to-rim, which is more like five days.
- If you want to visit the North Rim, add one or two extra days and be prepared for a long drive to get from rim to rim.
Tips for Visiting Grand Canyon National Park
Here are some tips that we picked up over the course of our trip that you may (or may not) find useful as you plan your trip to the Grand Canyon.
- We didn’t really realize how high the Grand Canyon’s rim is until we were researching for our latest trip. The South Rim is at 7,000 feet., and the North Rim is over 8,000 feet! Be prepared for the elevation – stay hydrated, bring chapstick (I’m writing this at our campsite at Mather Campground and can confirm that my lips are a disaster), and give yourself a day to acclimate before attempting one of the hikes below the rim.
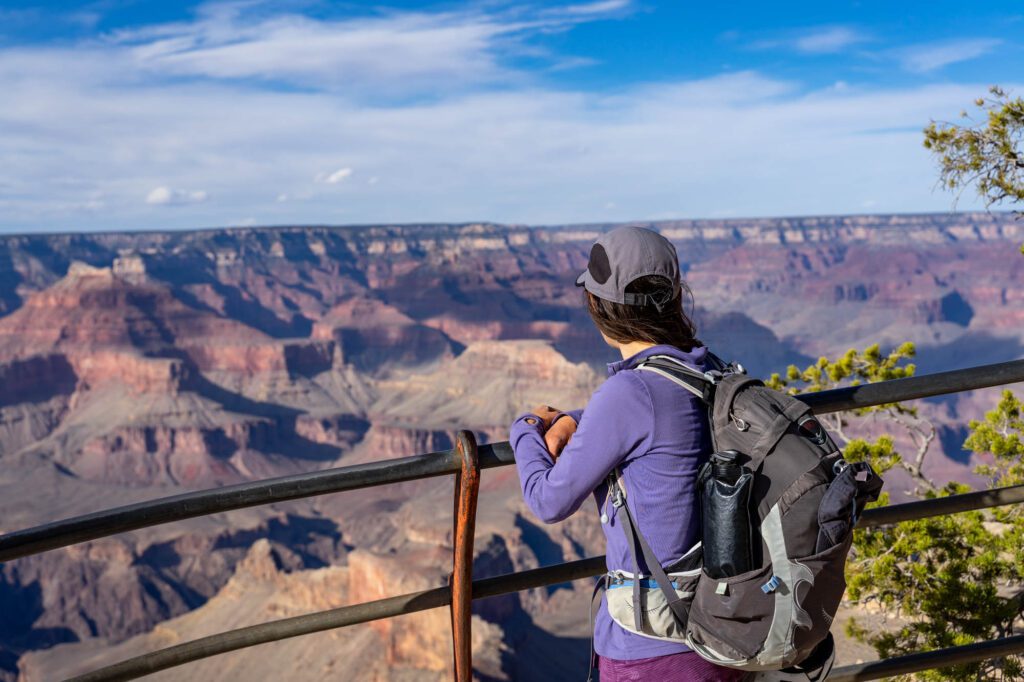
- Sun protection is essential. In the summer, it’s blazing hot. The National Park Service has to rescue countless people every summer who are suffering from heat exhaustion. To avoid being one of those people, wear plenty of sunscreen, a sun hat, drink a gallon of water a day (can’t tell you how many people we saw hiking with one small plastic water bottle – do not do that!), and plan on being off the hiking trail between 10 am and 4 pm to avoid the hottest part of the day.
- Related to the note on high temperatures, as you drop into the canyon, the temperature rises FAST. There’s often a 20+ degree difference between the temperature at the rim, and the temperature in the canyon. We were skeptical, but as soon as we hiked down into the canyon and back, we understood. Many of the hikes are fully exposed in the middle of the day, which can make it feel even hotter.
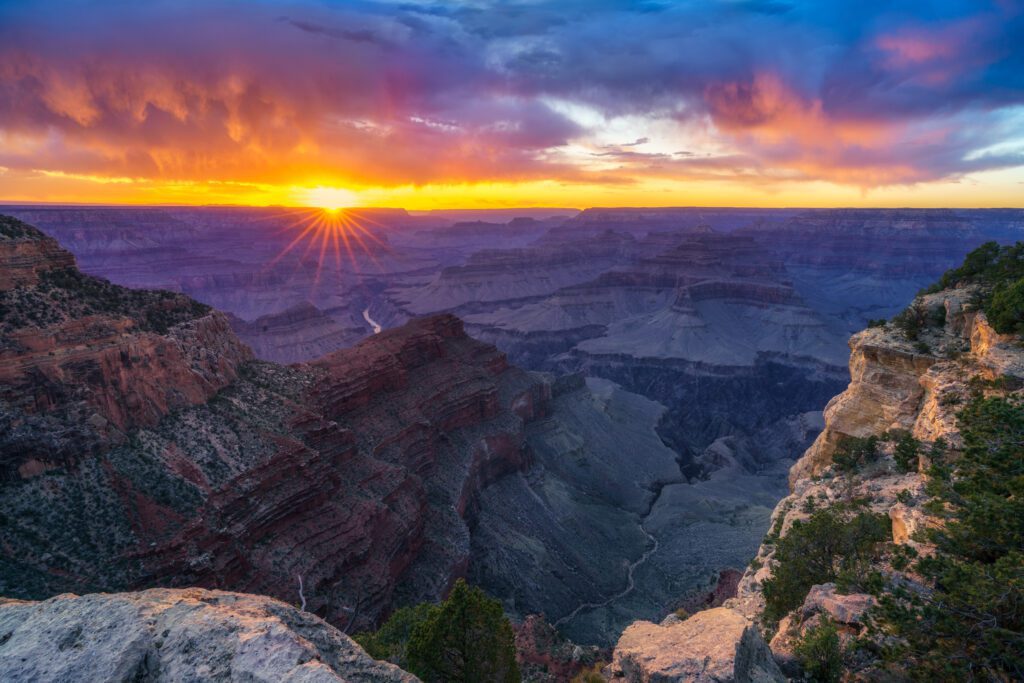
- Arizona has spectacular sunsets. We’re from the West Coast, where the marine layer and rainy days ruin countless sunsets. Not so in Arizona! Plan on catching sunset every night you’re at the Grand Canyon – you won’t regret it. The best places to catch a sunset are Mather Point, which is a five minute walk from the main Visitor Center, Hopi Point out on Hermit’s Rest Road (you’ll have to shuttle), and Desert View near the East Entrance of the park.
- Monsoon season arrives in July and stays through August, which means daily afternoon thunderstorms. I’ve done a houseboat trip on nearby Lake Powell in August with my family, and got caught on a jet ski in a monsoon and I wholeheartedly do not recommend it. Plan on being inside during the monsoon hour.
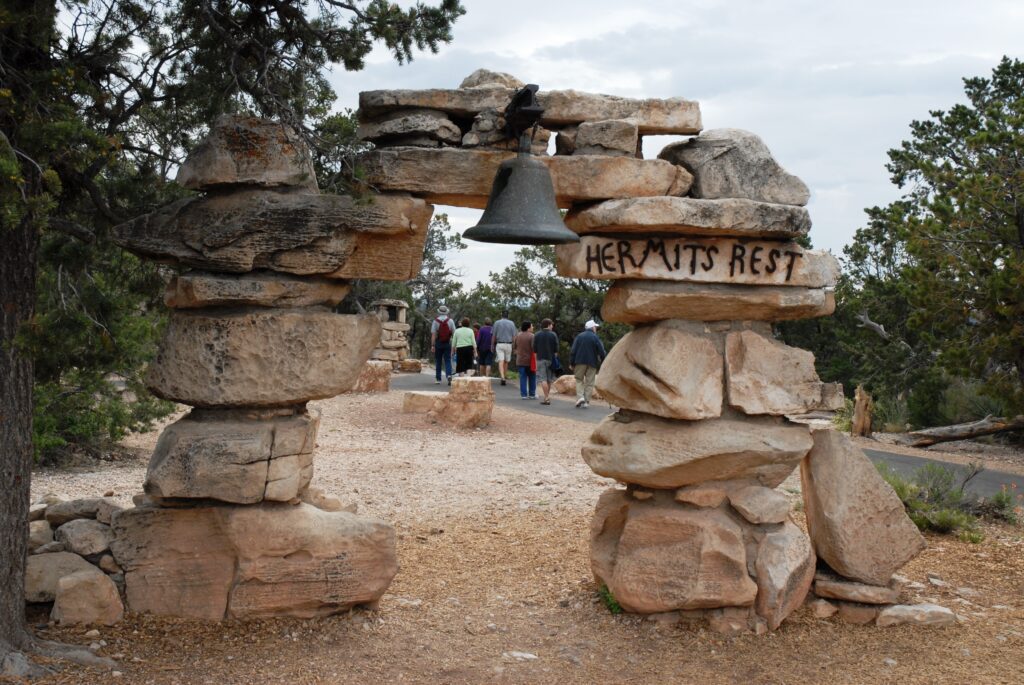
- The Rim Trail, which we think you should DEFINITELY walk a portion of, runs from Yaki Point at the eastern end all the way to Hermit’s Rest at its western end. Along the way, you’ll notice subtle changes in the canyon as you see it from all sorts of slightly different angles, and there are a bunch of informational signs along the way.
2 Days at the Grand Canyon: A Perfect Itinerary for First Timers
Below, you’ll find a fairly detailed guide to our take on how to plan an amazing 2 days in the Grand Canyon with a focus on the South Rim, which is more easily accessed year round.
Plus, below that, we have an additional section on what to do with some extra time in the park
Note: We’re assuming you arrive in the Grand Canyon the night before, and have two full days to spend on the South Rim, leaving on the morning of the third day to head home, or onto your next stop (might we suggest Zion National Park or Sedona?).
Day 1: The Entirety of the Rim Trail
On your first day, we wouldn’t recommend tackling a big hike, since you’ll be acclimating to the elevation (it’s 7,000 feet above sea level!).
Instead, we think it’s worth doing the entire rim trail, which runs from Yaki Point to Hermits Rest.
To do that, you have a few options.
- First is hiking, but you won’t be able to hike the whole thing.
- Second is the shuttle, which is a viable option.
- Third is renting bikes from Bright Angel Bicycles (adjacent to the main Visitor Center) to do part of the rim trail on two wheels.
We think a combination of the three is the way to go, which is what you’ll see below.
The Rim Trail is special because you’ll get to see how the Grand Canyon changes drastically as you traverse the rim. At points, you’ll only be able to see the opposite rim. At others, you’ll get a view down the canyon, either to the east or west. You’ll even catch glimpses of the Colorado River on Hermits Road!
Notice the subtle changes in the canyon as you move from east to west, and marvel at the scale of what you’re seeing and the time it took to become what it is today.
Rent Bikes and Ride Along the Rim to Yaki Point
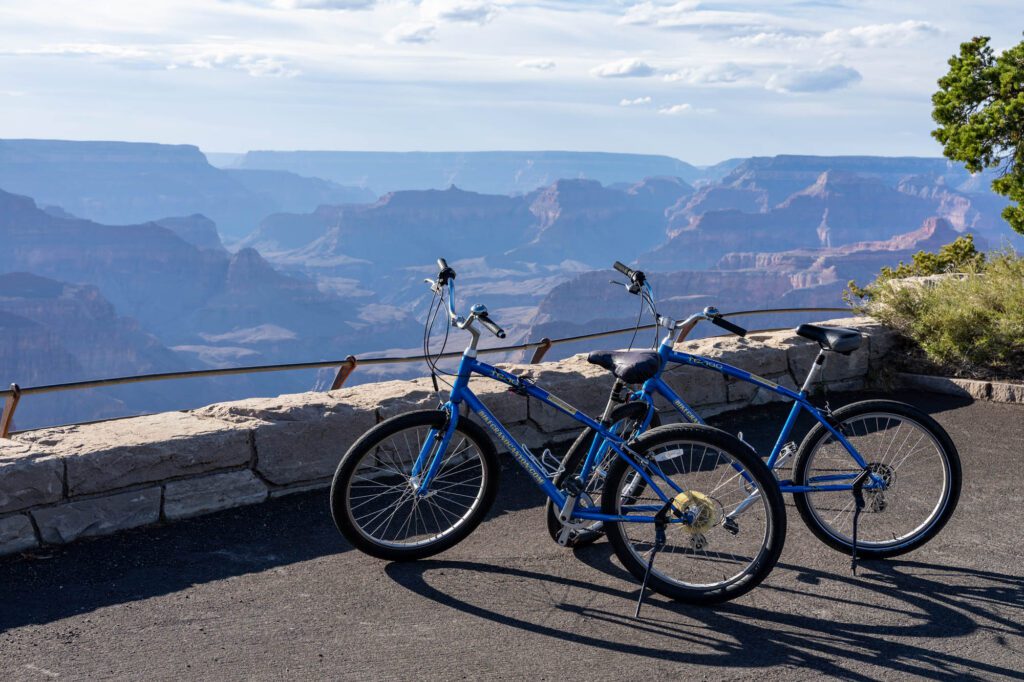
Riding bikes along the rim was one of the highlights of our trip, which is why you’ll find it here in your itinerary. You can’t bike along most of the rim trail, but you CAN on the way out to Yaki Point, which is a gorgeous ride.
First, head to Bright Angel Bicycles at the Visitor Center.
They rent bikes from 8 am to 5 pm (though you can rent them for 24 hours, which means you can keep them overnight which is what we did), and you can rent them by the hour, for a half day (five hours), a full day (more than five hours – rent and return same day), or 24 hours (keep it overnight).
They also have rentals for kids, various attachments for shuttling kids around, and even tagalong bikes.
As far as routes go, they also have helpful maps that are useful for planning your trip.
We did both the ride to Yaki Point and the ride out on Hermit Road. You can’t follow the rim between the Visitor Center and Bright Angel Lodge, which is why we recommend walking that section below.
If you wanted to ride on Hermit Road, do Yaki Point first, then head out that way, where you’ll ride along the same road as the shuttle bus – when you hear / see a shuttle behind you, you need to pull completely off the road and stop to let the bus pass.
Keep in mind, the first mile or two of that road is steep! Then, return the bikes, and do the walk from Mather to the Bright Angel Lodge.
From the Visitor Center, take the bikes on the greenway trail out to Yaki Point.
It’s a mostly flat ride, with some rolling hills that aren’t too bad. Along the way, you’ll pass the South Kaibab Trailhead and Pipe Creek Vista, which are both worth a stop.
There are also plenty of other unmarked viewpoints along the rim trail that are worth stopping for as you ride by.
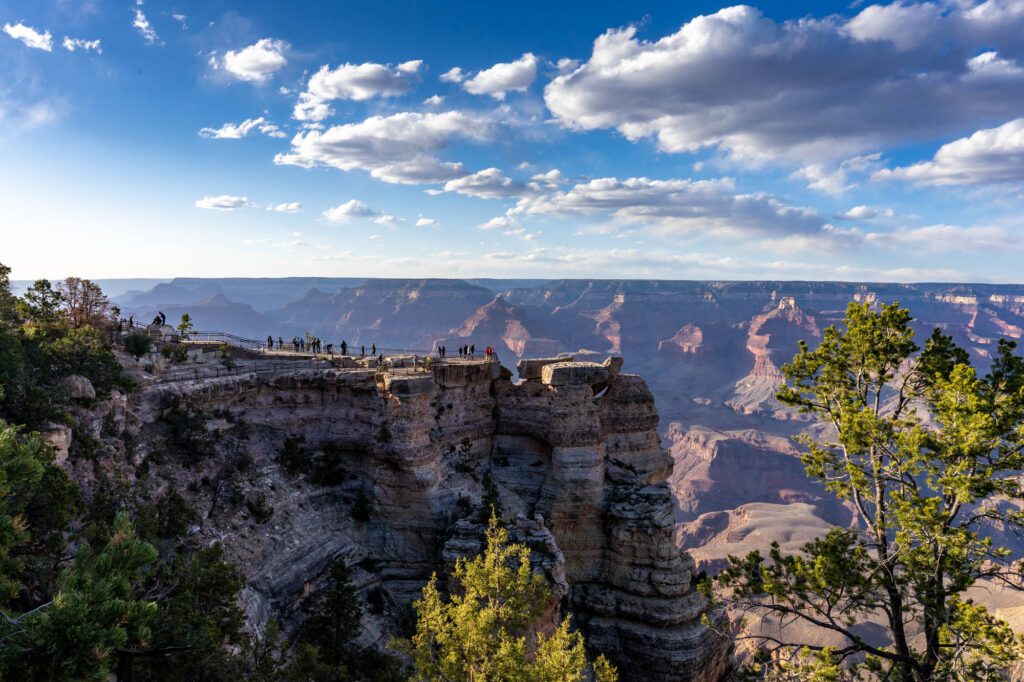
Walk from Mather Point to the Bright Angel Lodge
After you drop your bikes off, head out to Mather Point from the Visitor Center.
It’s about a five minute walk to the most popular viewpoint in the Grand Canyon, mostly because of its accessibility.
From the well-developed viewing platform, you can see up and down the canyon in both directions.
This is where your stroll along the rim begins. It’s just over 2.5 miles from Mather Point to Village Route Transfer, which is where you’ll pick up the shuttle for the afternoon adventure on Hermits Road.
For the trip out there, there are a couple of stops worth making.
- Yavapai Point: More panoramic views of the Grand Canyon? BOOOOORING. Just kidding – stop here and admire the vastness of the canyon.
- Yavapai Geology Museum: Worth a stop for the information about the Grand Canyon’s geology.
- Trail of Time: Not necessarily a single stop, but a series of informational signs tracking the formation of the Grand Canyon over the years. Coming from the east, you’ll start with the most recent times and go back in time as you walk the rim. The signage and information is fantastic.
Use the Shuttle to Explore Hermits Rest Road
Grab lunch at the Bright Angel Lodge or El Tovar Hotel (or eat your packed picnic lunch along the rim, which is what we do since we’re on a budget) and take a minute to relax and admire the views of the canyon.
Then, get ready to head out to Hermit Road, which was a highlight of our time in the park.
Note: We loved biking this route because Hermit Road is accessible only by shuttle to most people (March – November), which means you’ll have the road largely to yourself. If that sounds like fun, take your rental bikes out to Hermit Road for the afternoon, giving yourself plenty of time to get back to drop them off before 5pm. It’ll take you about three to four hours to do the whole thing, depending on how fast you’re traveling. This does mean you’ll likely miss sunset at Hopi Point because you’ll have to return the bikes before sunset. We’d recommend Mather Point for sunset if that’s the case.
The best time to do the journey out to Hermits Rest is late afternoon to sunset, so you might have a few hours to kill depending on how long the morning takes you.
Spend it either at your hotel, or by walking a portion of the Rim Trail out on Hermit Road, which gives you a more up-close-and-personal perspective of the Grand Canyon than the road, which is what shuttles and bikes take.
Refill water bottles for the afternoon journey at one of the many water filling stations (the easiest ones are probably at the Bright Angel Trailhead) and head over to catch the shuttle along Hermit Road from Village Route Transfer.
From here, the shuttle goes all the way out to Hermits Rest, which as one of the shuttle drivers put it “is just an excuse for another gift shop.”

We think you should stop at every stop along the way, get out, and check out the viewpoints.
The shuttles run every 10-15 minutes, so you shouldn’t have too much of a problem getting on. That leaves the perfect amount of time to get out, ooh and ahh, take some pictures, and catch the next shuttle.
Our favorite stops were:
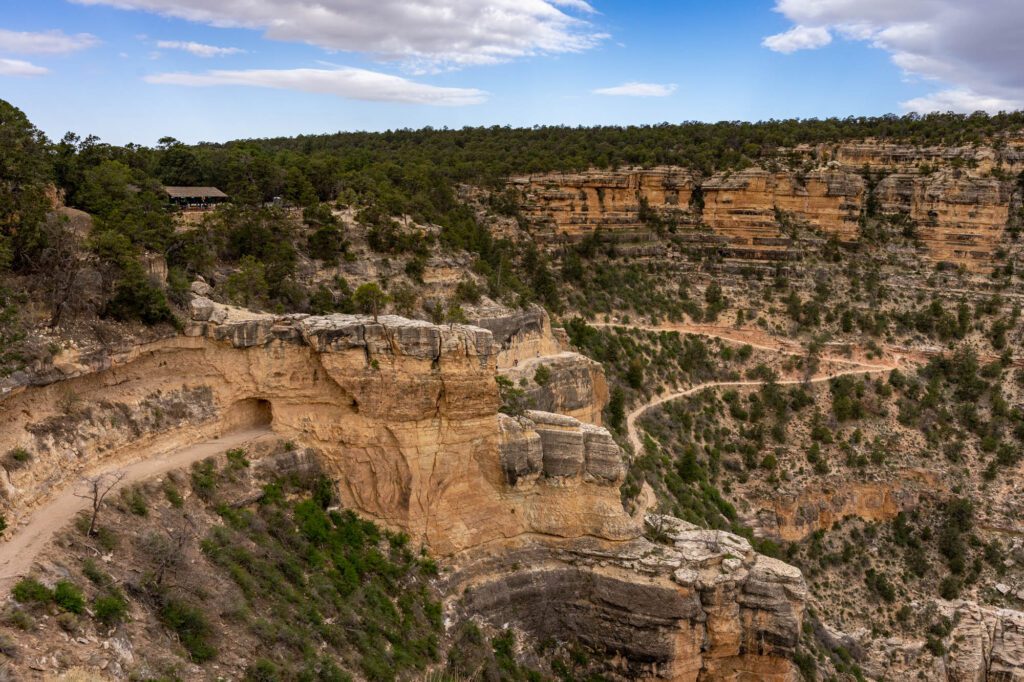
- Trailview Point: This is the first stop along the route. Cool view of the Bright Angel Trail, the San Francisco mountains in the distance, and across the canyon to the North Rim.
- The Abyss: A little different than other viewpoints because it’s basically a sheer cliff.
- Hopi Point: One of the best sunset spots in the park, according to at least one ranger and at least one bus driver.
Once you reach Hermits Rest, grab the shuttle back to Hopi Point, which is a great sunset location – you can see out to the setting sun to the west which illuminates the canyon straight ahead and out to the east with brilliant colors ranging from yellow to red.
Day 2: The South Kaibab Trail and Desert View Road
On your second day in the Grand Canyon, hike the South Kaibab Trail before driving Desert View Road, the most scenic drive in the park open to private vehicles (except in the winter, when Hermit road allows private vehicles), and end with sunset at Mather Point.
Hiking the South Kaibab Trail
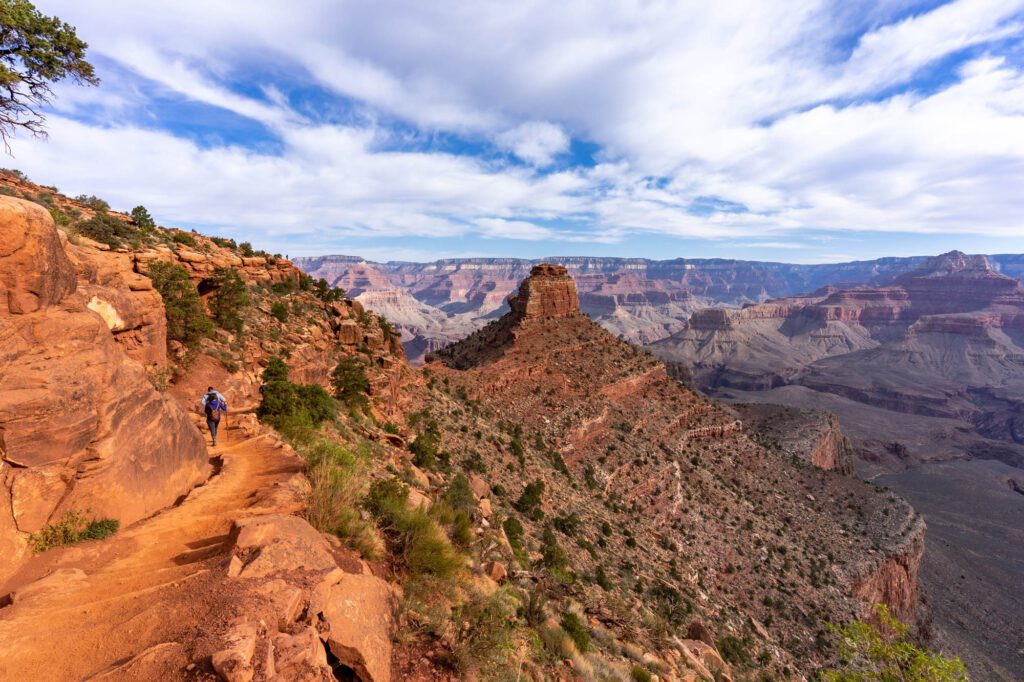
Like we mentioned above, the South Kaibab Trail is our pick for the best hike in the Grand Canyon if you only have time for one day hike.
To get to the trailhead, take the shuttle from the Visitor Center out to the South Kaibab Trailhead (it’s the Orange Line). It’s a popular route, so try to get there early.
You can also drive to the point where Yaki Point Road meets Desert View Road, park, and hike the extra half mile from there to the trailhead, which adds a full mile (roundtrip) to your hike.
This hike is super customizable, with turnaround points at 0.75 miles in (Ooh Aah Point), 1.5 miles in (Cedar Ridge), 3 miles in (Skeleton Point), and 4.5 miles in (the Tipoff).
Keep in mind those distances are one-way, so you’ll need to double them to get roundtrip distances.
For most hikers, we’d recommend going no further than Skeleton Point, ESPECIALLY IN THE SUMMER.
There is no water on this trail, and it will likely be 90 – 100 degrees, if not hotter in the canyon during the summer.
The heat is no joke, and you’ll have to climb 3,000+ feet back to the rim if you go further than Skeleton Point.
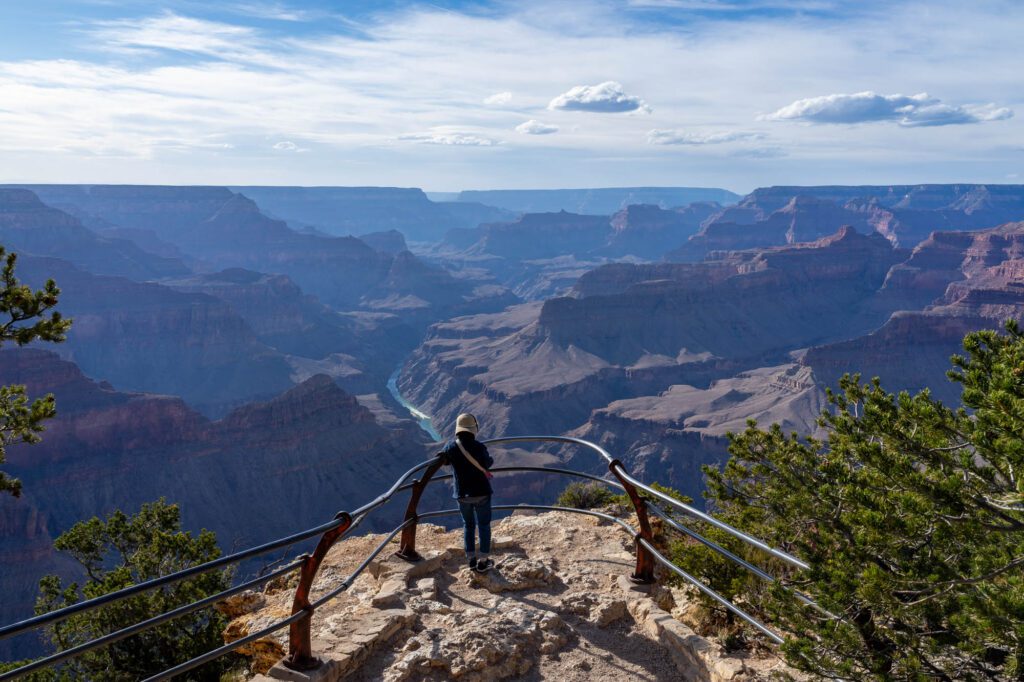
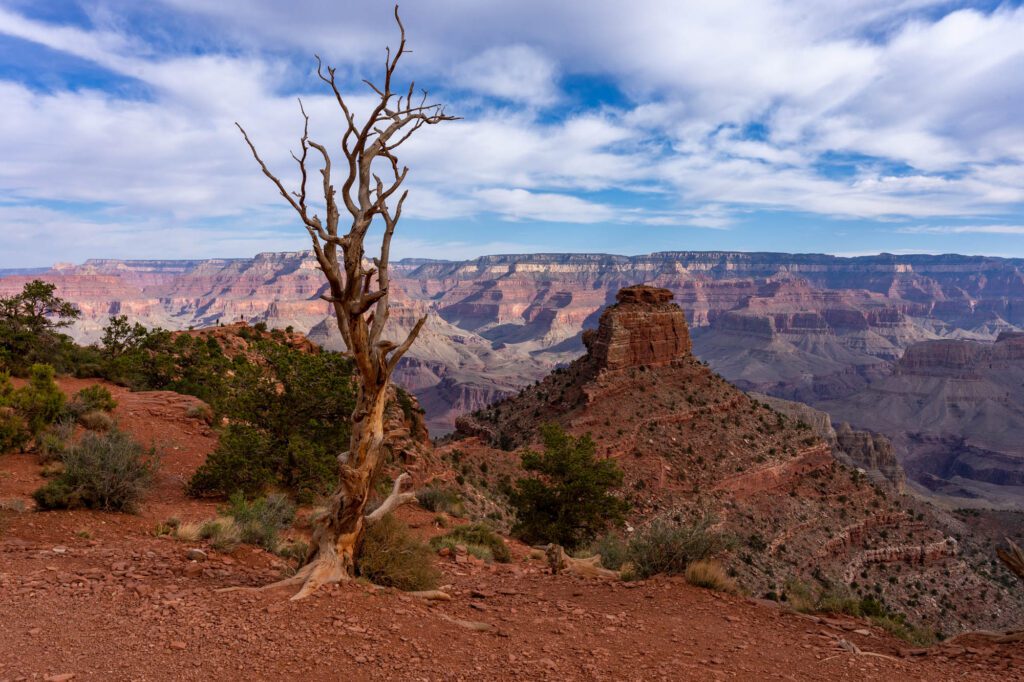
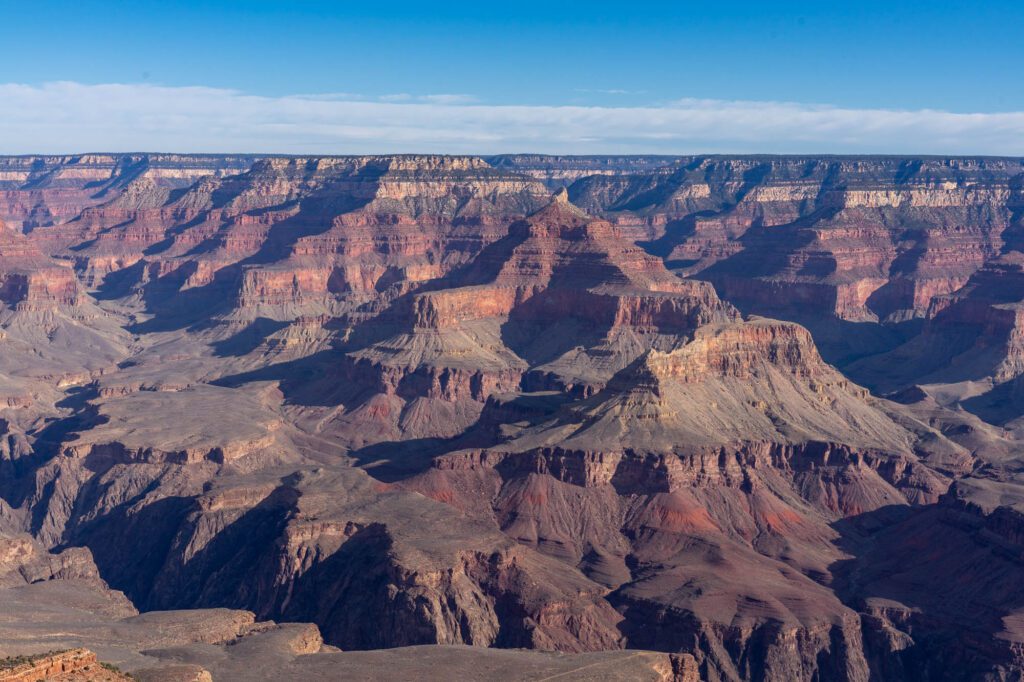
From Skeleton Point, you can see the Colorado River, and get views both east and west into the canyon.
It’s a 6 mile hike, with 2,000 feet of elevation gain on the way back up to the rim. Pack plenty of water and snacks for the journey.
The South Kaibab Trail vs. the Bright Angel Trail
A quick note here to talk about the two main big hikes on the South Rim, which are the South Kaibab Trail and the Bright Angel Trail. We’ve done them both, and we have opinions!
Both of these hikes are pretty spectacular, but if you only have time for one, which should you choose?
We think it’s the South Kaibab Trail, and we don’t think it’s that close.
For the majority of the Bright Angel Trail, you’re looking at exactly the same landscape from a slightly different perspective.
It’s just zig-zags its way down the canyon wall until you get to the plateau, when the views start to change slightly.
However, unless you go all the way to Plateau Point, which is a 12 mile hike with 3,000 feet of elevation gain on the way back up and full sun for the middle 3 miles, you don’t get a glimpse of the river.
There is, however, drinking water along this trail, which is a plus I suppose. And two bathrooms at 1.5 miles in and 3 miles in.
We think the South Kaibab Trail is the way to go if you only have time for one of them.
The landscape varies, and you traverse a ridge out into the canyon where you’ll have views east and west down the canyon. Plus, you can see the river starting at 3 miles in! There’s no drinking water along the trail, so be prepared with plenty of water for the climb back to the trailhead.
For most hikers, the hike to Skeleton Point is more than enough in terms of beauty and effort – it’s six miles with 2,000 feet of elevation gain on the way back up.
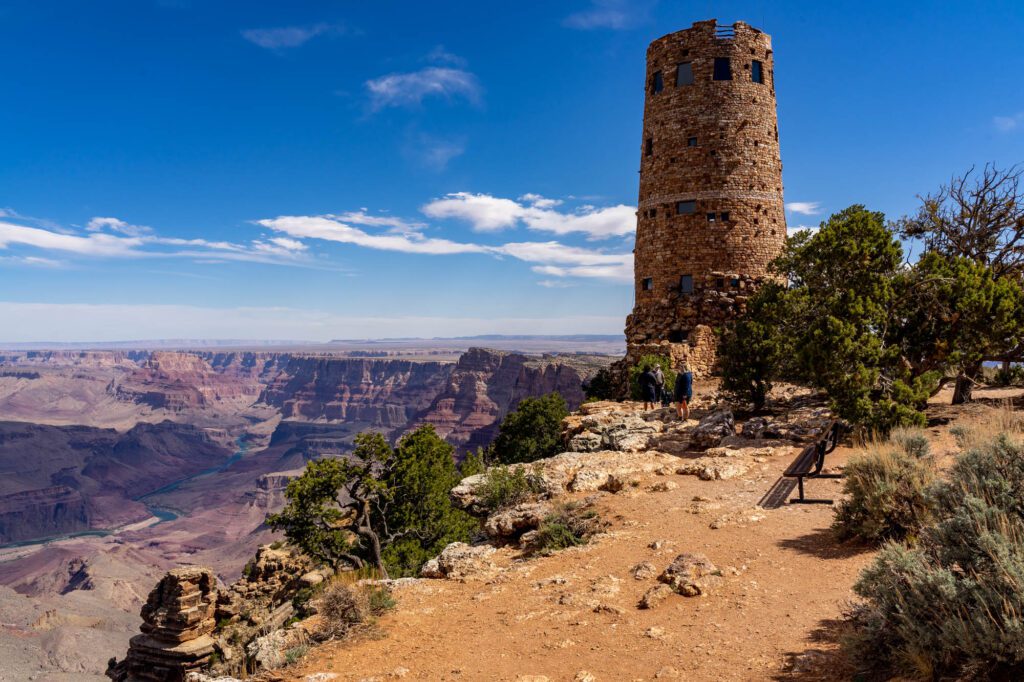
Driving Desert View Road

After your hike, head back to camp or your hotel and take a mini siesta and eat some lunch.
In the afternoon, head out to Desert View Road, which is the best scenic drive in the park that’s open to private vehicles year round.
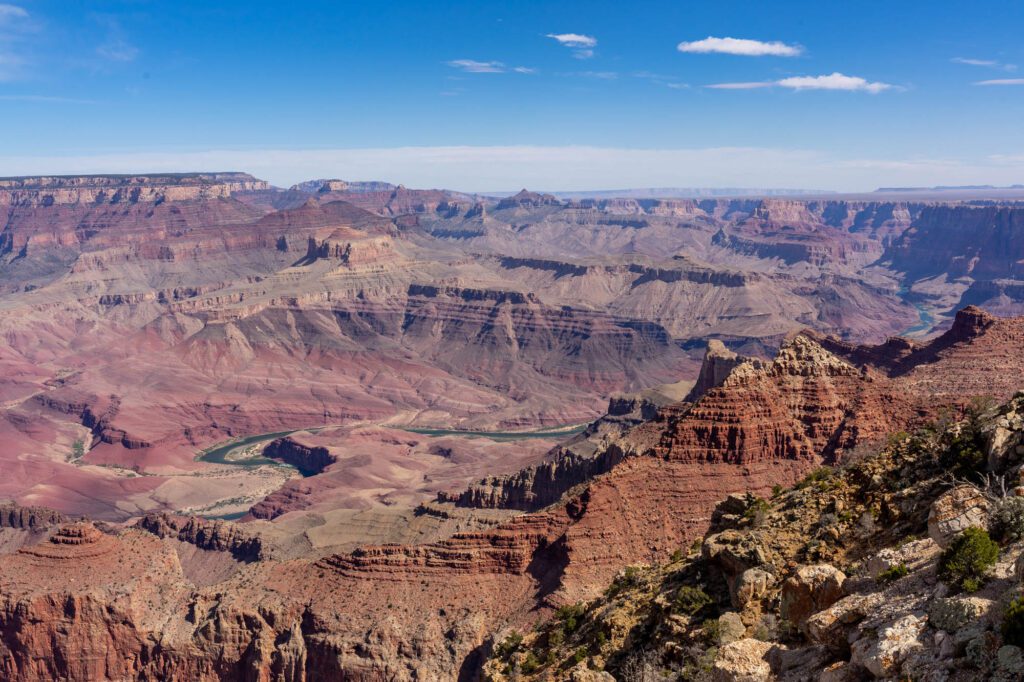
Stop at all the viewpoints, starting with Pipe Creek and ending with Desert View itself.
We were stunned at the changes in the canyon along this 22 mile drive. Eventually you can see multiple different views of the river, which you have to hike 5-10 miles to see from the part of the canyon around the Visitor Center.
We were particularly enamored with Moran Point (where we caught sunset), Desert View, and Grandview Point (mostly because there’s a story about a hotel on one of the informational signs, but no mention of why or how it disappeared – what a mystery!).
Here are some pictures, which someone once said are worth a thousand words (honestly, it’s probably more when it comes to the Grand Canyon).
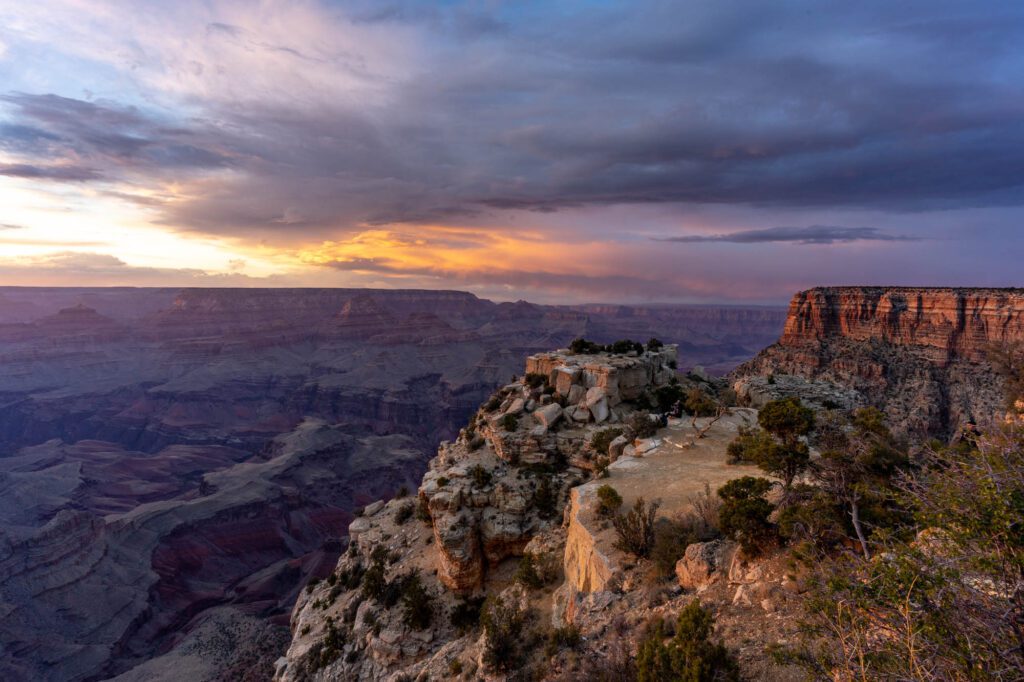
Sunset at Mather Point
The drive to Desert View is best in the late afternoon, which gives you exactly enough time to head back to Mather Point for sunset.
Finish out your time in the park with a spectacular sunset (just guessing, because it’s Arizona) at Mather Point.
It’s a busy spot since it’s so close to the Visitor Center, so you might be sharing it with a crowd. Bring a cold beer, some snacks, and watch the light show as the sun descends towards the horizon, and the Grand Canyon lights up with shades of yellow, orange, and red.
The colors of the canyon really pop when the sun dips low, and if you’re lucky you’ll have some clouds to add color in the sky.
What to Do with More Time in the Grand Canyon
With an extra day, we think you should follow the 2 day itinerary above and add another of the long hikes down below the canyon rim on the third day.
Both of the hikes below are hard because of the elevation gain on the way back up to the rim, but the Bright Angel Trail is far more customizable if you’re not an experienced hiker – you can just go down to 1.5 mile guesthouse (3 miles roundtrip).
The two best options, we think, are the:
- Bright Angel Trail (which we covered above) down to 3 mile resthouse (6 miles / 2,000 ft of elevation) or Indian Gardens (9 miles / 3,000 ft of elevation). Unfortunately, the scenery really doesn’t change that much along the way, as it never really heads out into the canyon until you get to Plateau Point, which is too long for a day hike for most people.
- Grandview Point to Horseshoe Mesa (5.5 miles / 2,400 ft of elevation). This hike starts out on Desert View Road and makes its way down to Horseshoe Mesa, where you’ll have great views of the canyon. This is not an easy hike, and there is no drinking water along the trail – bring AT LEAST 3L of water with you if you plan to tackle it, and start early – it gets hot FAST in the canyon below the rim.
What to Do with One Day in the Grand Canyon
If you only have one day in the Grand Canyon, we’d put a few elements of each day of the itinerary above together.
Start your day early by catching the shuttle from the Visitor Center out to the South Kaibab Trailhead.
Do the hike from there down to Cedar Ridge (3 miles / 1,100 ft elevation) or Skeleton Point (6.3 miles / 2,000 ft elevation), which will take most of the morning.
Take the shuttle out to Yaki Point, ooh and ahh over the views, and hop back on the shuttle to the Visitor Center.
Eat lunch, refill water bottles, and head out to Hermit Road (either via the shuttle, or by renting bikes) for the afternoon. Stop at all the viewpoints along the way (see above for our favorites), which will take you another three hours or so.
In the late afternoon around sunset, tackle Desert View Drive, and stay at Desert View for sunset before heading back to your hotel to get some rest after your action-packed day.
The Best Time to Visit the Grand Canyon
In general, spring and fall are the most pleasant times to be at the Grand Canyon. Weather is more mild (though it can be unpredictable – we got a hailstorm in April), and crowds are slightly more thin than the summer, which is peak season.
Here’s a breakdown by season of what to expect in the Grand Canyon.
In the spring, temperatures are mild, ranging from the 50’s to the 70’s during the day, and it can get below freezing at night.
Crowds are thinner than the summer, which is the most crowded time to visit, but the milder weather and spring break mean spring is still a popular time to visit.
In the fall, the weather will be similar to spring, especially in October and November, which means it’s a very nice time to be at the Grand Canyon.
Plus, there’s no spring break in the fall, which makes it a slightly less crowded time than the spring. September, after Labor Day, is a lovely time to take your trip.
In the summer, temperatures are HOT, particularly below the rim, where it can be more than 20 degrees hotter than at the rim.
It’s downright unpleasant at times, and it’s best to restrict your hiking below the rim so that you’re not out there climbing a couple thousand feet in the heat of the day, between 10 am and 4 pm.
Summer is also the most popular time to visit, with throngs of people out on their classic summer road trip. Book accommodations early, and plan on waiting in line for the shuttles if you get there after 10 am.
In July and August, it’s monsoon season in Arizona, which means afternoon showers and thunderstorms basically every day.
In the winter, crowds are very, very thin. With the high elevation of the rim, it’s cold, and probably not a great time to be camping unless you have an RV. You also might encounter snow, which can be simultaneously gorgeous and annoying.
Most of the trails below the rim become icy and require crampons to descend into the canyon, so this is not the time to visit if you want to do one of the amazing hikes below the rim – the South Kaibab Trail or the Bright Angel Trail.
The upside of the winter is that you can drive Hermit’s Rest road between November and February (it’s closed to private vehicles the rest of the year, and requires taking the shuttle).
Getting to Grand Canyon National Park
Phoenix and Las Vegas are the two best entry points to the Grand Canyon if you’re flying in from out of town.
If the Grand Canyon is part of a broader Arizona road trip or a road trip through the Southwest, then you might be coming from Zion National Park or Bryce Canyon National Park, both of which are a relatively easy journey.
From Las Vegas
Las Vegas is, by far, the most convenient airport to fly into to get to the Grand Canyon.
It takes just about four hours to drive from Las Vegas, and you’ll arrive through the west entrance of the park.
If you’re flying in, plan on flying into McCarran International Airport, picking up your rental car, and heading east.
From Phoenix (or Sedona)
Getting to the Grand Canyon from Phoenix will take you roughly the same amount of time as Vegas, and which route you take really depends on what else you’re going to be doing on your trip.
On the way from Phoenix you’ll pass through Sedona, which is worth a stop for a day or two if you have the time.
From Phoenix, it’s about four hours to the South Rim. It’s two hours from Sedona to the South Rim.
That’s all we’ve got! I think we covered everything you need to know to visit the Grand Canyon. It’s a spectacular landscape, and we know you’re going to love experiencing it for yourself.
Your post has given a good roadmap and I felt seeing the Canyon was overwhelming with all the different points. Thank you. My only question is what is a good time to start off day 1 and day 2? We will be staying in Williams for our trip in April so I wonder if leaving before sunrise is a good idea as it might get crowded later during the day.
Hey Samantha! The canyon definitely gets more crowded as the day goes on, and we found that we had a couple of the viewpoints completely to ourselves early in the morning! I’d recommend as early a start as you can muster (but it will be cold in the mornings, so pack layers!).