6 Incredible Hikes in Bryce Canyon: A Complete Hiking Guide
Bryce Canyon National Park was our favorite stop on our Utah Mighty 5 Road Trip. The hoodoos and incredible, sometimes mind-boggling rock formations are a unique feature that you can only really find in a handful of places in the country.
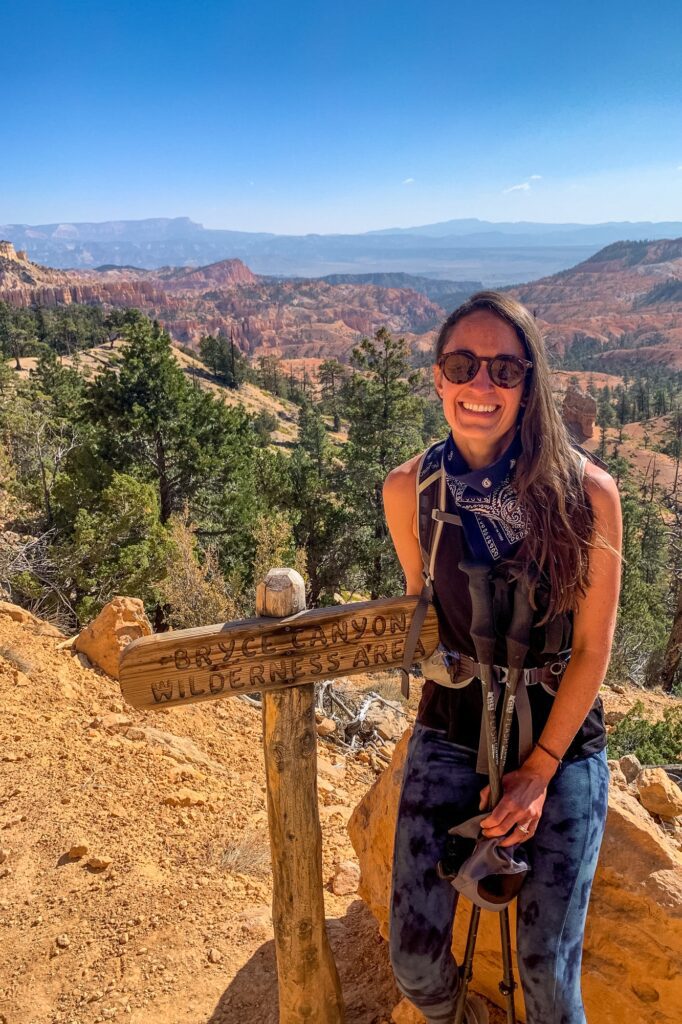
While some of the viewpoints along the rim have spectacular views, the best way to see the park, in our opinion, is to get below the rim of the amphitheater, which means you’re going to have to hike!
Most of the hikes that you’ll find below start from the top of the rim, descend down into the canyon, and then ascend on the return, which is very much the opposite of the way hikes usually go in our home states of Washington and California.
Below, you’ll find our picks for the best hikes in Bryce Canyon National Park from our personal experience hiking in the park. We loved Bryce Canyon, and think you will too.
Disclaimer: Some of the links in this post, like hotel links, are affiliate links, meaning at no additional cost to you, we make a little bit of money if you click through and book. That being said, we would never recommend something to you that we don’t stand behind 100%.
The 6 Best Hikes in Bryce Canyon National Park
Let’s get straight to it – you’re here to figure out which Bryce Canyon hikes to add to your itinerary, and we’re here to help you figure out the answer to that question.
There are essentially three amazing loops in the park – the Fairyland Loop Trail, the Peekaboo Loop, and the Navajo / Queens Garden Loop.
Our recommendation would be to combine the latter two loops to do one long day hike on your first day (you could also split them apart and do them both separately if the length seems too aggressive for you). Then, tackle the Fairyland Loop trail on your second day in the park.
- Length: 6.5 miles
- Elevation Gain: 1,600 feet
- Trail Type: Loop
- Difficulty: Moderate / Difficult
- Trailhead Location
This is, without a doubt, the best hiking trail in Bryce Canyon (although the Fairyland Loop is a close second!).
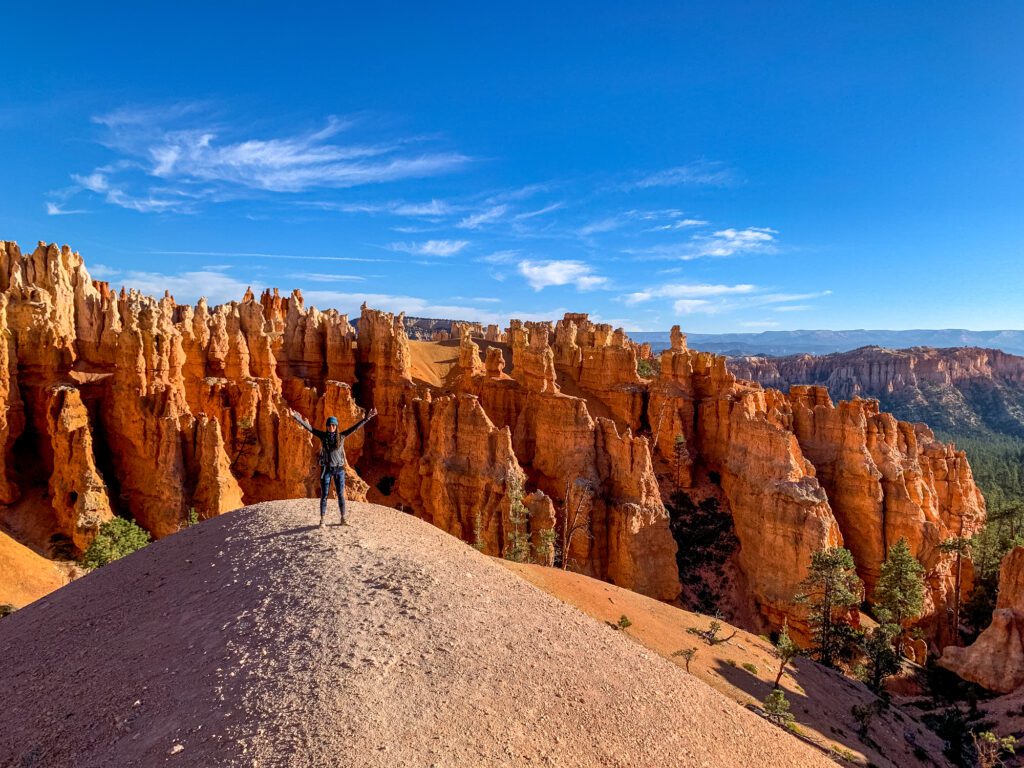
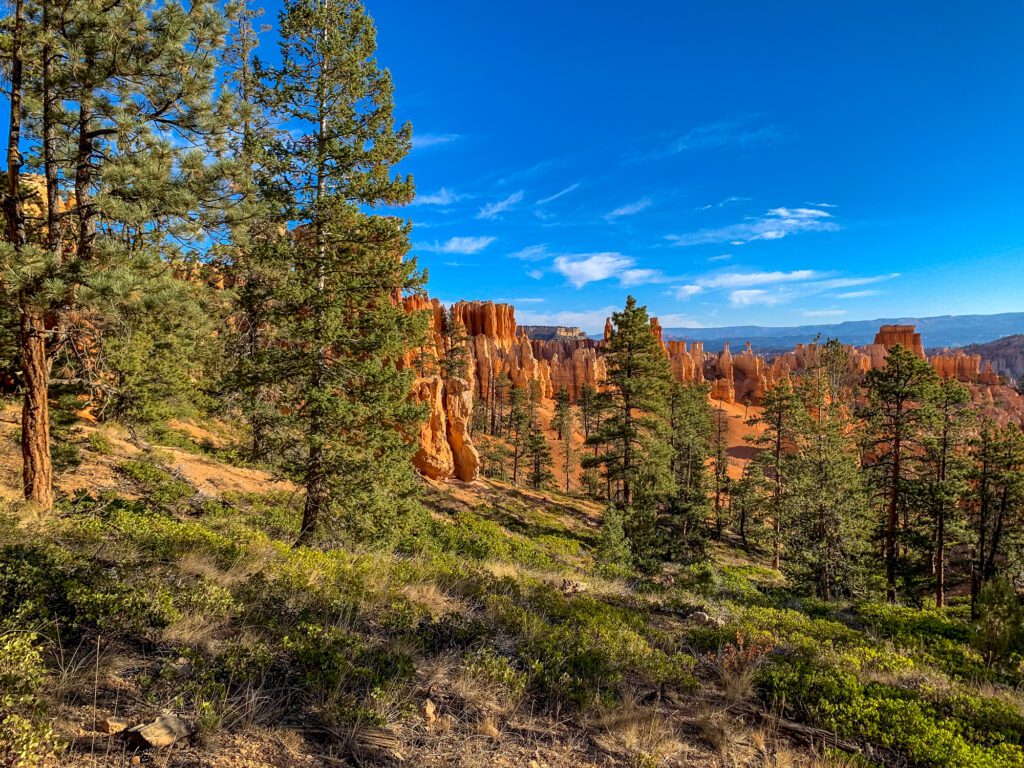
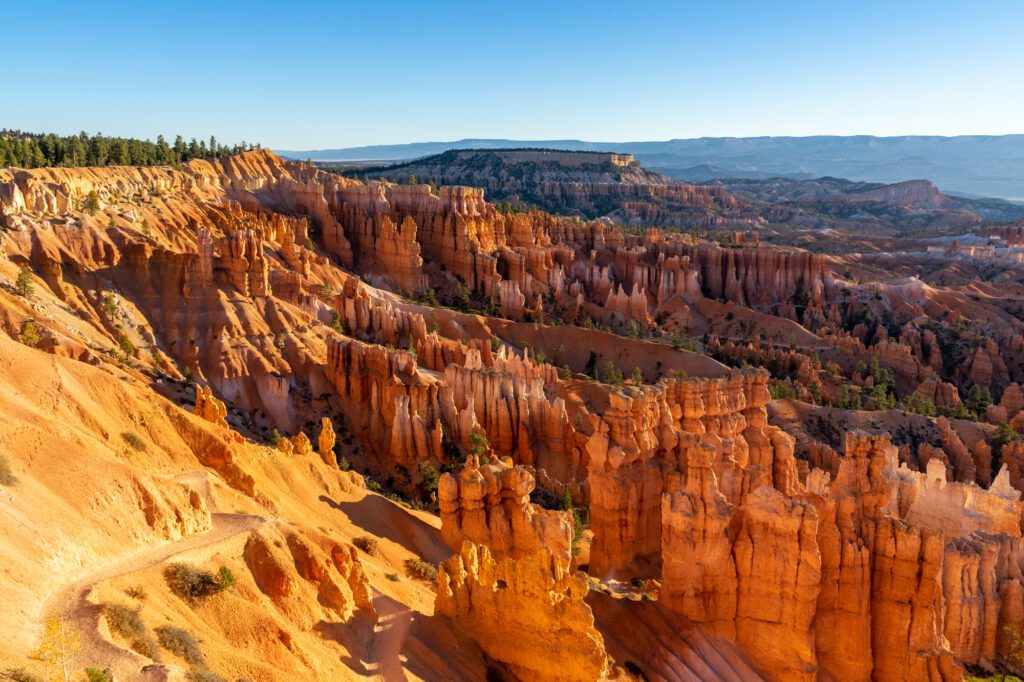
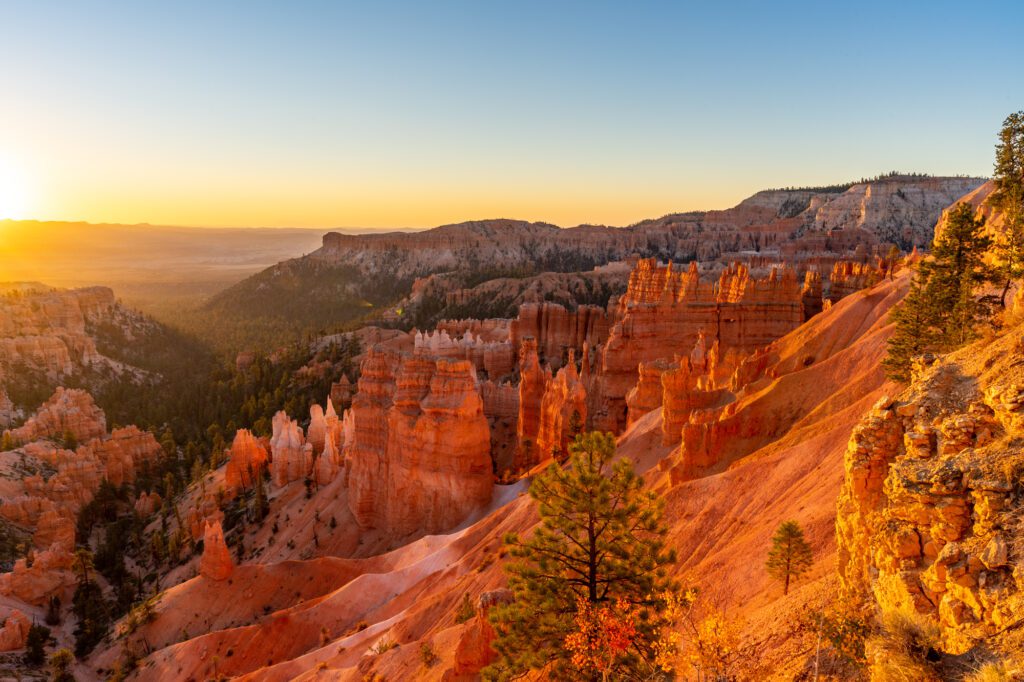
This combines three hiking trails into one longer set of two loops. It’s long, but still achievable for most hikers who are in decent shape, as long as you’re prepared with food, water, and the right footwear. Along the way, you’ll be up close and personal with the hoodoos, along with some other cool formations, and you’ll see the lush greenery down in the canyon that we thought made Bryce Canyon super unique.
You’ll park in the parking lot for Sunset Point, which gets very, very crowded as people show up for sunrise, empties out as the people who came for sunrise leave, and then immediately fills up again.
We got there well before sunrise, and saw countless people turned away from the parking lot by the attendants. The point is, GET THERE EARLY.
We did this loop by going down Wall Street, doing the Peekaboo Loop counter-clockwise, and then coming up the Queen’s Garden Trail. We think that’s how you should do it too.
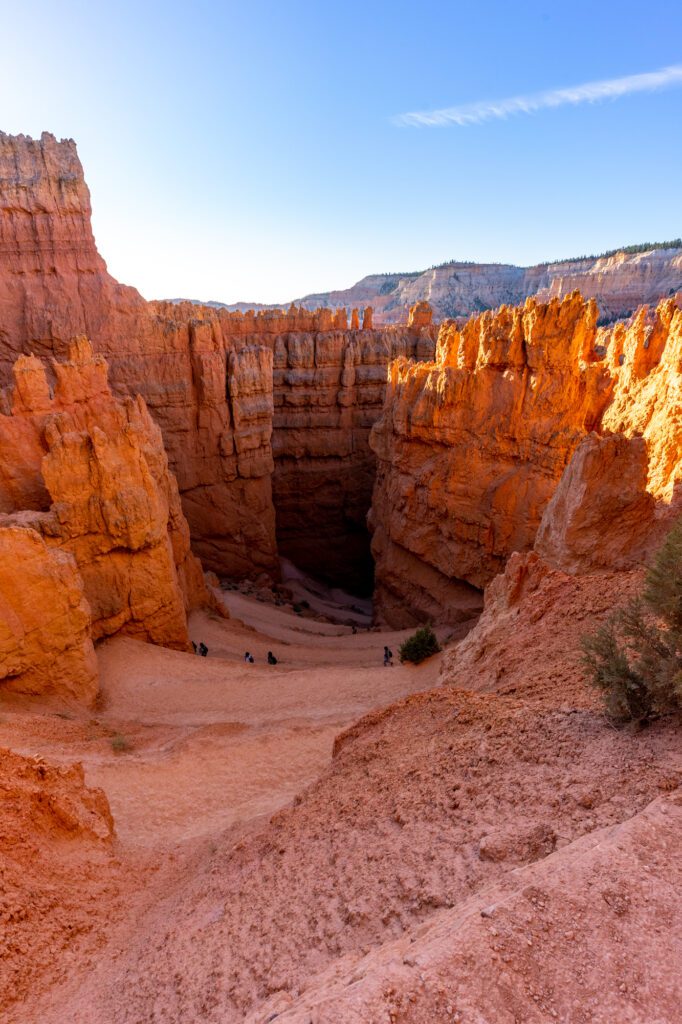
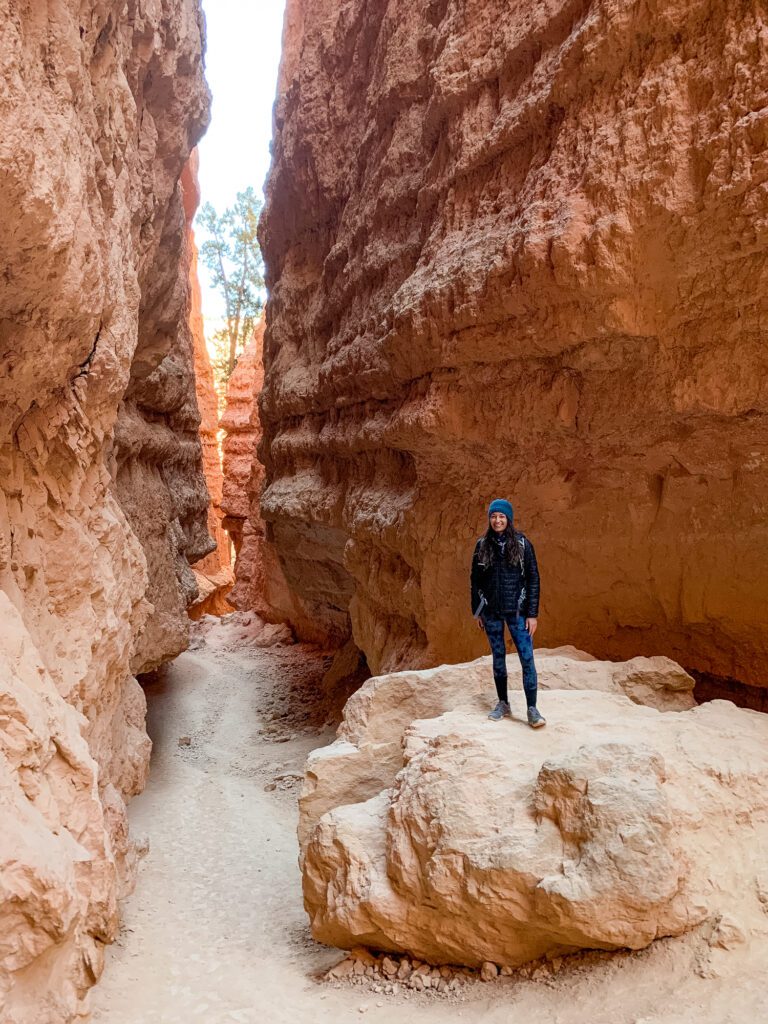
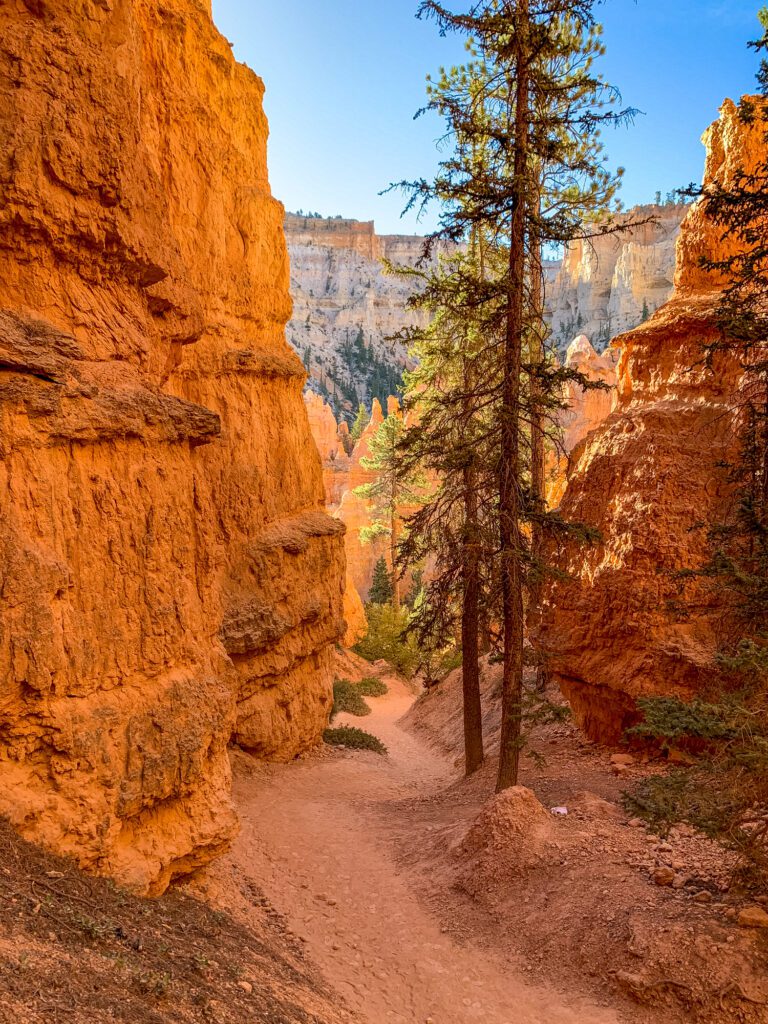
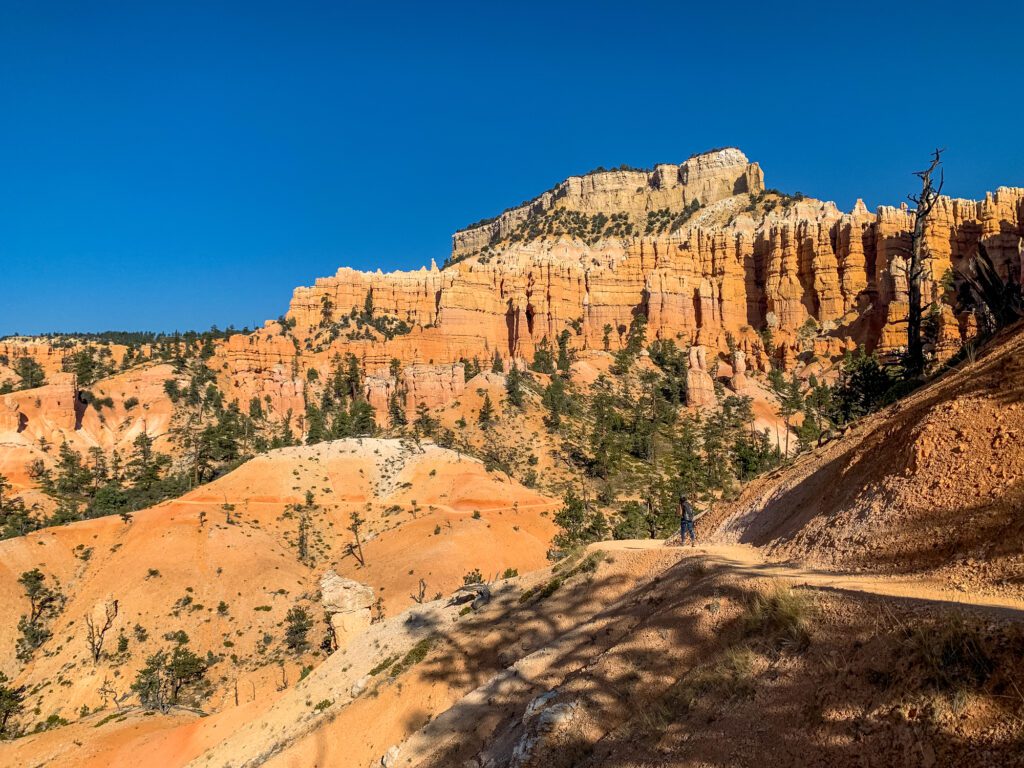
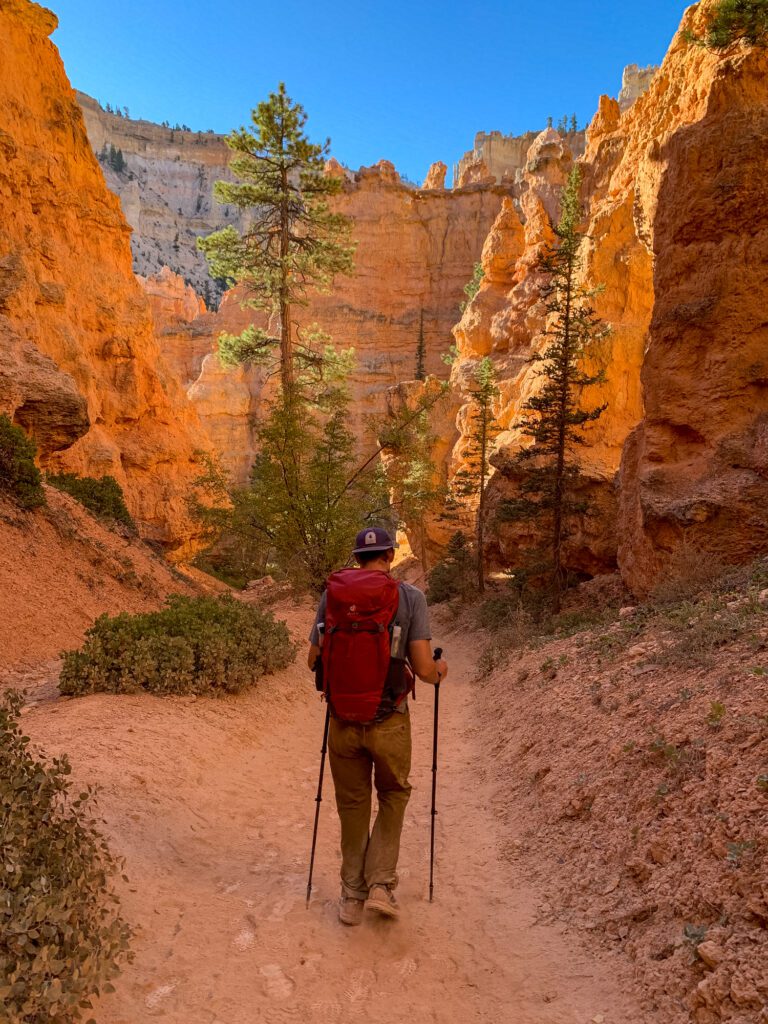
From Sunset Point, the trail begins by descending down through Wall Street, a picturesque series of switchbacks that drops you down below the rim. This was one of our favorite parts of the hike, but we did it early enough that we were one group of only a few who were on the trail. Later in the day, it’s packed wall to wall with people.
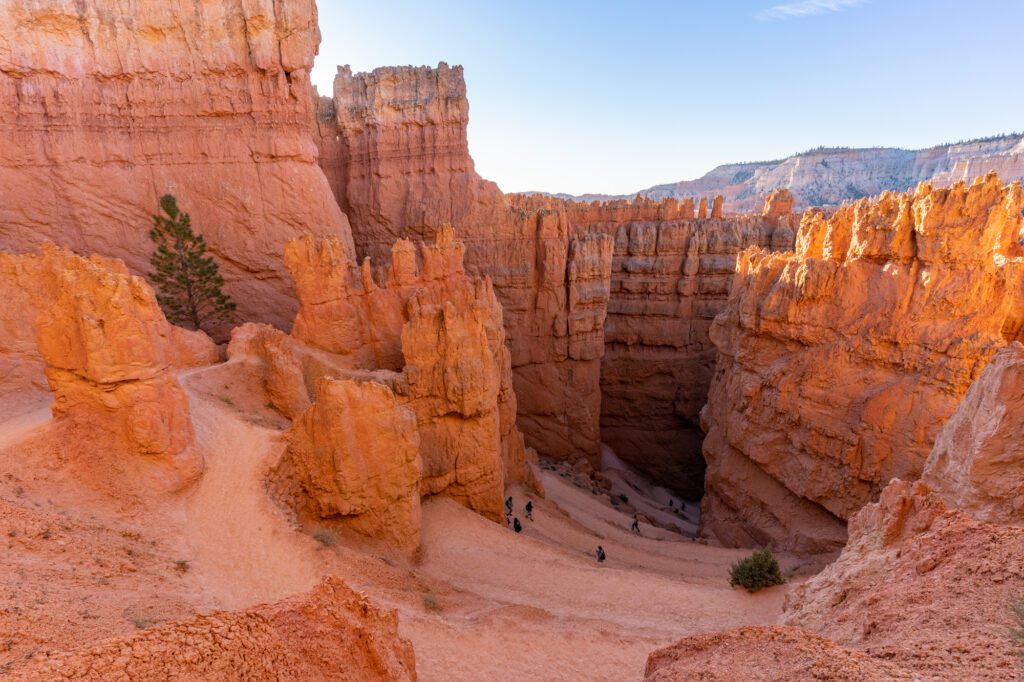
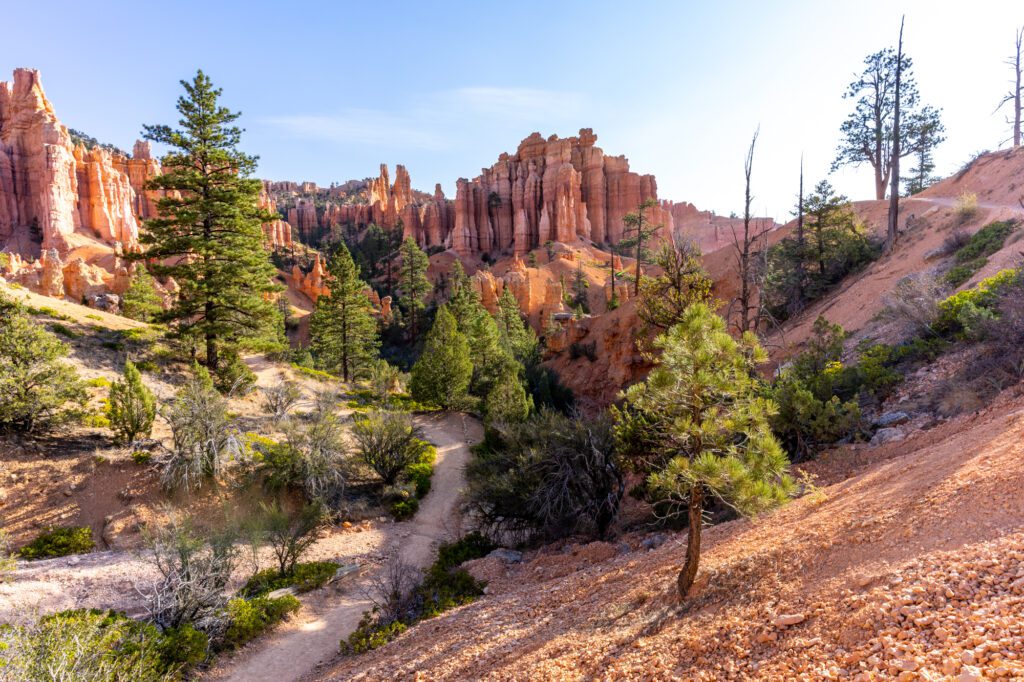
You’ll meander down through a narrow canyon that is surprisingly lush before meeting up with the Peekaboo Loop.

Here, you’ll be at the bottom of the loop, so it doesn’t really matter that much which direction you tackle it in. We did it counter-clockwise, and it was great. You’ll do some climbing, then descend back to the same place you started from.
Make sure to look up to see the cool rock formations called the “Wall of Windows” up towards the canyon rim!
When you arrive back at the starting point for the loop, veer right to start the ascent back up to the rim via the Queens Garden Trail. You’ll climb back up to Sunrise Point, which is a few hundred yards from the parking lot where you’re parked.
The two hikes below are shorter versions of this hike that chop it up into more manageable pieces.
The Peekaboo Loop Trail
- Length: 5 miles
- Elevation Gain: 1,500 feet
- Trail Type: Lollipop
- Difficulty: Difficult
- Trailhead Location
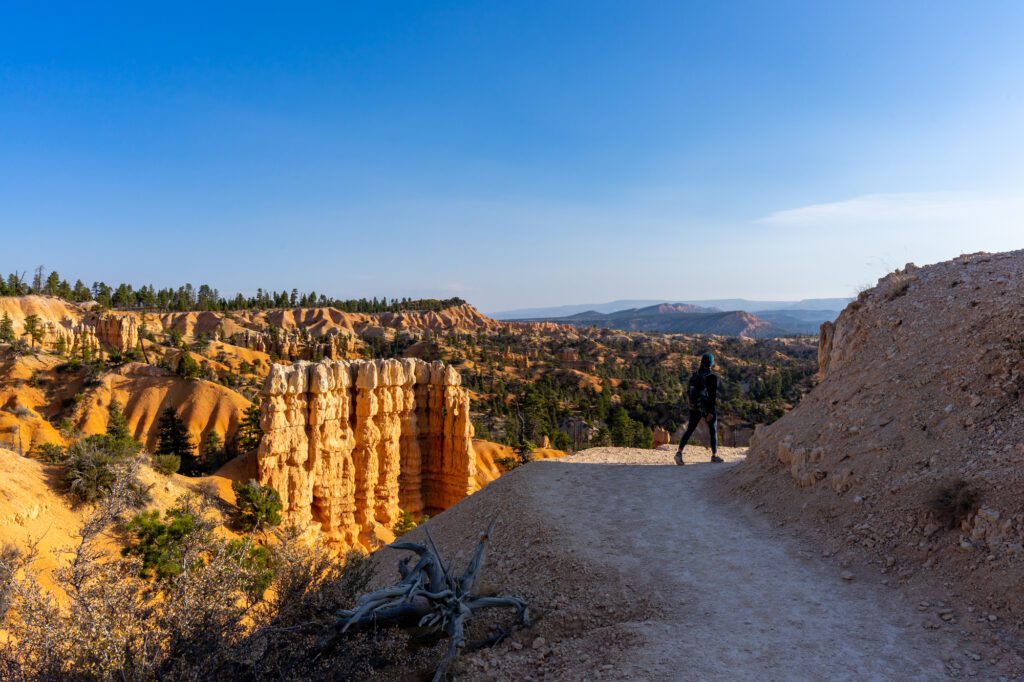
This is the second loop of the figure 8 loop above, and it starts from Bryce Point. The first mile of the trail is a steep drop into the canyon, where it meets up with the Peekaboo Loop (that’s the reason the distance above seems high – you have to hike one mile each way to even get to the trail).
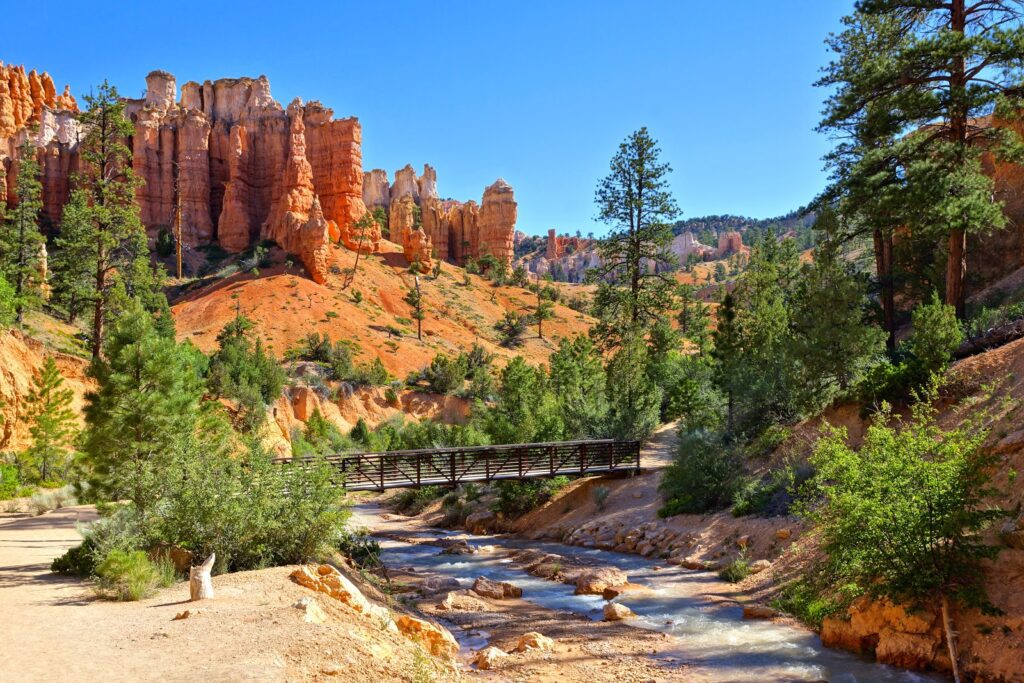
You’ll then complete the three-mile loop through the canyon, with some pretty spectacular views all around, before ascending back up to Bryce Point to end the hike. There’s a restroom along the way (although it was closed for the season when we were there).
- Length: 3 miles
- Elevation Gain: 600 feet
- Trail Type: Loop
- Difficulty: Easy / Moderate
- Trailhead Location
If you’re looking for an easy hike in Bryce Canyon National Park, this is probably the trail we’d choose.
This hike is a relatively relaxed hike that takes you from Sunset Point, down Wall Street, and up the Queens Garden Trail.
You can do this hike either direction, but we did it counter-clockwise, and that’s probably how we’d do it if we were going to do it again. We’d prefer the steep descent down Wall Street rather than climbing up that trail at the end of the hike.
The Fairyland Loop Trail
- Length: 8 miles
- Elevation Gain: 1,700 feet
- Trail Type: Loop
- Difficulty: Difficult
- Trailhead Location
First of all, another small parking lot for 20-25 cars means this is another one that you’ll want to show up to as early as possible to make sure you get a spot in the lot. Otherwise you might be waiting a while. There’s no overflow parking either.
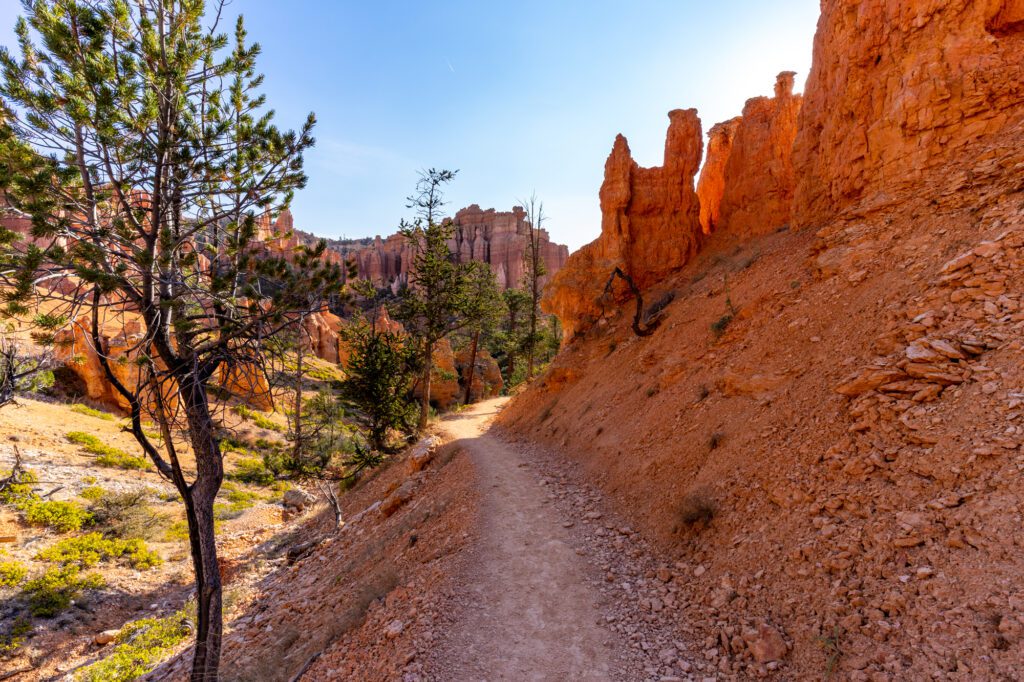
The scenery along this hiking trail is pretty spectacular basically all the way through.
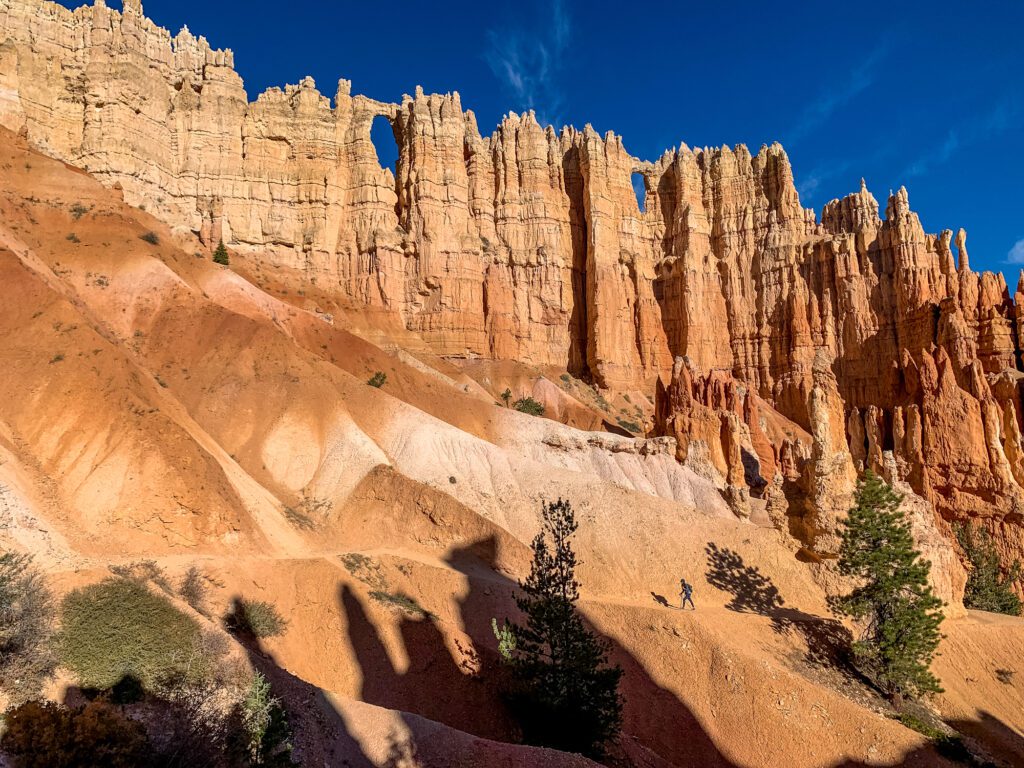
If you do it clockwise, you’ll start with a descent into the canyon. Along the way, marvel at the hoodoos on all sides towering over you as you weave your way along a trail that climbs and falls over rolling hills. You’ll wander along the valley floor for a few miles, with a few small climbs here and there, before starting the ascent back up to the rim, which isn’t an easy one.
Right before the ascent starts, about half way through (4 miles in), you’ll reach Tower Bridge. There’s a very short little detour that takes you to the base, but we thought the better view was actually from the switchbacks across the little valley that you just came down.
From there, it’s a straight shot up to the rim of the canyon near Sunrise Point, and then you’ll take the rim trail back to Fairyland Point where your car is parked. From the Tower Bridge viewpoint, you’ll climb 1,000 feet to get back to the rim.
You can also do this trail from Sunrise Point, which is what we did. We had parked at Sunrise Point to catch the sunrise, and followed the Rim Trail along the canyon rim to Fairyland Point, where we dropped into the canyon and completed the hike clockwise.
It’s the same thing, just from a different starting point that might be more convenient if you’re already at Sunrise or Sunset Point.
Mossy Cave Trail
- Length: 1 mile
- Elevation Gain: 200 feet
- Trail Type: Out & Back
- Difficulty: Easy
- Trailhead Location
The Mossy Cave Trail is actually outside the park – the trailhead is in nearby Tropic, about a 15 minute drive from the Visitors Center – but it’s worth the short journey for the waterfall at the end of the trail.
It’s a SUPER busy trail, so plan on doing it early in the day or later in the day. It’s another small parking lot right along the highway, so there’s really no overflow options.
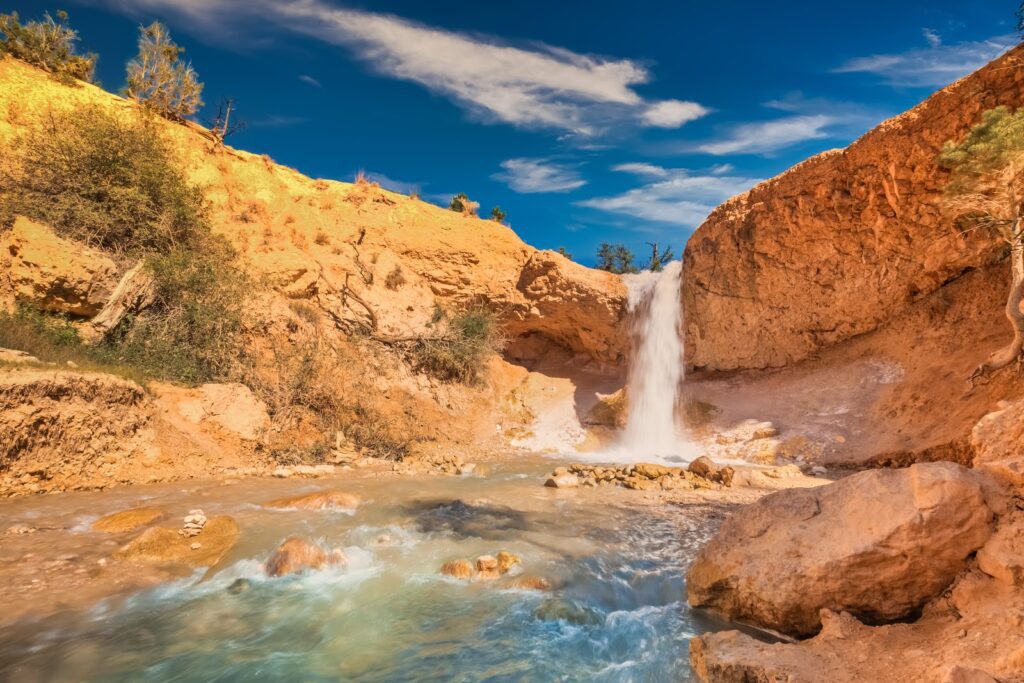
The hike itself is easy – a half mile stroll takes you to a gorgeous waterfall, complete with a nice little foot bridge over the creek. At about a third of a mile in, you’ll hit a T in the trail – make sure to head both right, which takes you to the waterfall, and left, which takes you to the mossy cave that the trail is named for.
In the winter, the bigger waterfall is sometimes completely frozen, which is kind of cool.
Sunrise to Sunset Point + Thor’s Hammer
- Length: 1 mile
- Elevation Gain: 200 feet
- Trail Type: Out & Back
- Difficulty: Easy
- Trailhead Location
This is a super easy walk along the canyon rim to two great viewpoints of the hoodoos below. It’s completely flat, paved, and totally accessible for families with small kids.
It’s a half mile between the two points, and you’ll start at one, walk to the other, and return to the point you started at (that makes it sound way more confusing than it is – just go from one to the other and back!).
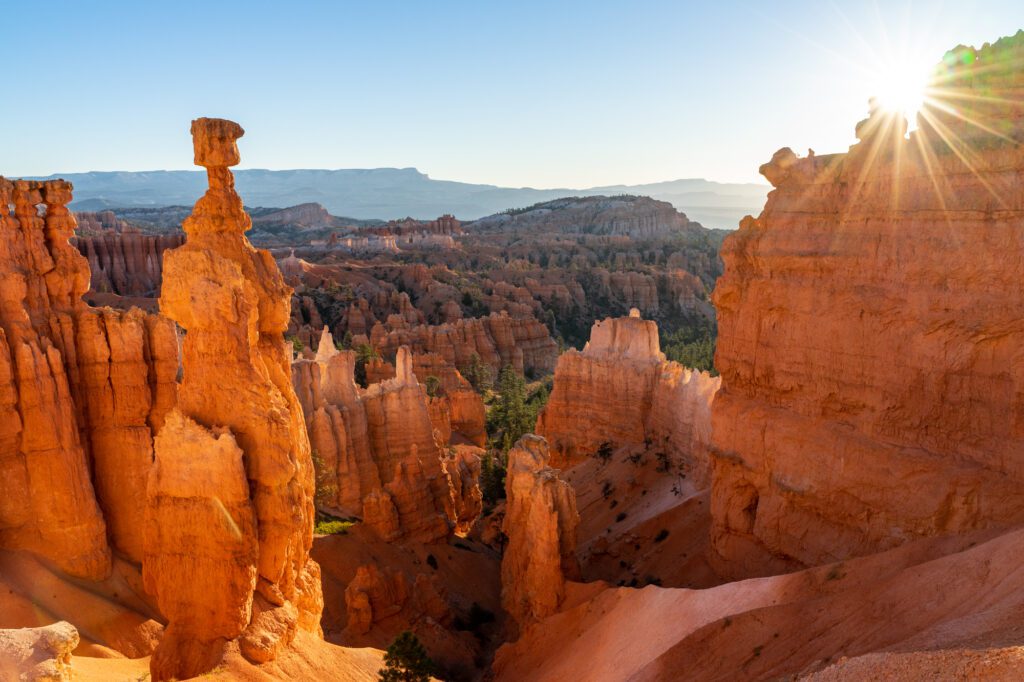
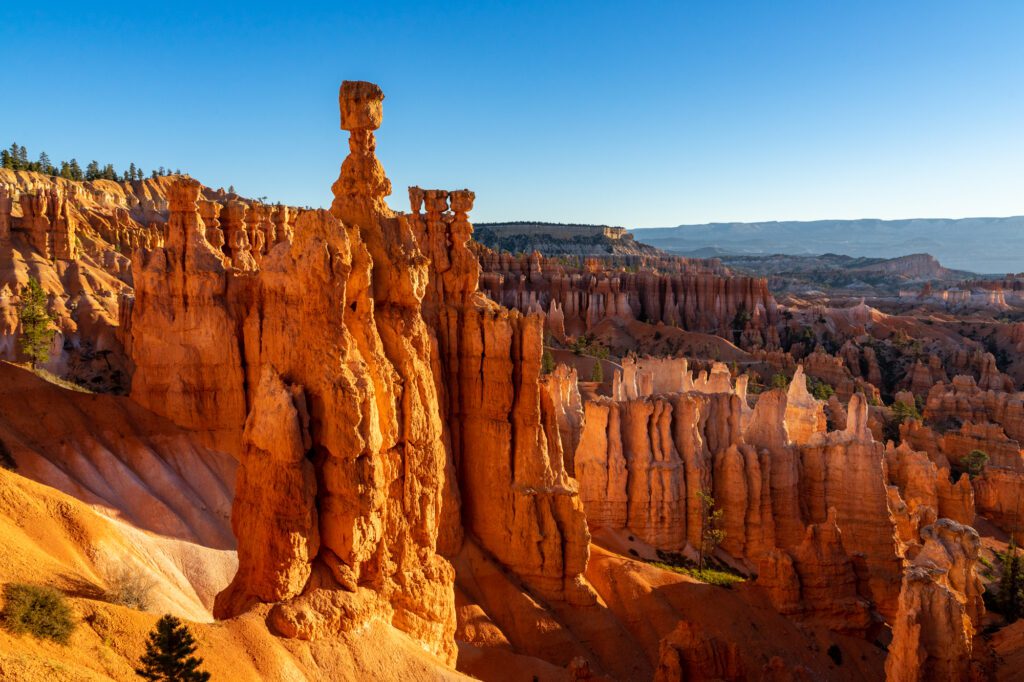
I’d recommend a detour down to Thor’s Hammer, which looks like the Marvel Superhero’s… hammer? It’s a cool formation, and it’s right below Sunrise Point, so it’s easy to get to.
On your way back up, sneak over to the top of Wall Street to see the neverending switchbacks from above.
The Rim Trail – Bryce Point to Fairyland Point
- Length: 5.5 miles (one way, 11 miles out and back)
- Elevation Gain: None (downhill from Bryce Point to Fairyland Point)
- Trail Type: One Way
- Difficulty: Easy / Moderate
- Trailhead Location
The Rim Trail runs all the way from Bryce Point to Fairyland Point. If you had two cars, you could walk the entirety of the Rim Trail and get a ride back to your starting point, which would be about a 5.5 mile hike, one way.
If you do it from Bryce Point to Fairyland Point, it’s almost entirely downhill, with a few short climbs, mostly between Sunrise Point and Fairyland Point. Though, if you don’t have two cars, you’ll have to return the way you came and climb back up to Bryce Point, which involves about 600 feet of climbing.
Tips for Hiking in Bryce Canyon National Park
There are a few things that are good to know before you visit Bryce Canyon. If you have another question that you don’t see the answer to below, you might find it over in our Bryce Canyon itinerary. If not, shoot us a note – we’re always happy to help!
Here are some quick tips for visiting Bryce Canyon, specifically to go hiking.
Entrance Fees
To enter the park, you’ll need to either pay the $35 entrance fee, which covers entry for your vehicle and the people in it for 7 days, or show a valid America the Beautiful Pass (that’s the US National Parks Pass).
Should you buy the America the Beautiful Pass? If you will be visiting three or more national parks in the next 12 months, the pass will save you money. It costs $80 for a year, and it’s good for 12 months from the date you purchase it. If you’re visiting Bryce Canyon as a part of a broader Utah National Parks road trip, it probably makes sense to buy it. You can get it from REI.
Stay Hydrated, My Friends!
Because of the elevation, make sure to drink plenty of water. If you’re coming straight from somewhere that is at sea level, take it easy on your first day to give your body time to acclimate to the elevation.
We love our super lightweight and packable Platypus water bottles, which have quite literally been around the world with us, including on our Utah adventure. We each carry two of those bottles, and on longer hikes, I usually also carry their 70 oz water bottle as well.
The Sun is Intense
Even though it’s not blazing hot, like some of the other parks in Utah and Arizona, the sun is intense. Sunscreen and a good sun hat will go a long way to preventing heat exhaustion and gnarly sunburns. We swear by Sun Bum, because we like to smell like we just bathed in coconut milk. Here’s the body sunscreen we like, and here is the face sunscreen.
It Gets Cold at Night / in the Morning
Layers are your friend. Remember, the elevation means that it can be very cold in the morning as you start a hike, but as the sun rises it warms up quickly, which means you’ll be shedding layers. Make sure to pack a few extra layers, and a daypack big enough to stuff them into when you inevitably get too hot.
A Comfortable Daypack is Essential (Around 20L)
Speaking of daypacks…bring one! You’ll need a sturdy daypack to carry water, snacks, and layers, particularly if you’re doing one of the longer hikes below.
20L should be plenty, and we love Osprey Packs. Alysha has the Tempest 20 and would buy it again and again, and the men’s equivalent would be the Talon 22 (which I don’t have personally, but would wholeheartedly recommend based on Alysha’s experience and my other experiences with Osprey).
Sturdy Footwear is a Must
You’ll be hiking primarily on some combination of loose dirt, gravel, and rocks, so you’ll want footwear with good traction.
We’re partial to Adidas Terrex Hiking Shoes (Alysha has almost exclusively hiked in them for the past seven years), Keen Hiking Boots (the Keen Targhees are my go-to hiking boots), and Alysha recently got a pair of the Columbia Newton Ridge hiking boots, which are a great combination of style, affordability, and quality.
Pack a Lunch
There are very few food options inside the park (the Bryce Canyon Lodge is basically the only reliable option), so you’ll want to pack a lunch to avoid having to drive back out of the park to Bryce Canyon City for lunch, which would mean that you may have to wait in a long line to get back in.
Using the Park Shuttle to Get Around
Bryce Canyon has a handy shuttle system which is useful if you’re planning on showing up later in the morning, when parking inside the park can be a nightmare.
The parking lots at most popular trailheads fill up in the morning as people come into the park and spend a few hours hiking, which means there’s one big traffic jam inside the parking lots as people scrounge for parking spots, following unsuspecting hikers back to their cars in hopes of swooping in and snagging a prime spot.
If you’re planning on hiking in Bryce Canyon, this is a good option to use so that you don’t have to do the parking lot shuffle. It’s particularly useful for one-way trails like the Fairyland Trail, cutting off a couple of miles of walking back to the starting point at the end of a long, hot hike.
The shuttle is free, and it only runs from April to October, when the park is most congested, and all you need to ride it is either your park admission receipt or your America the Beautiful Pass.
Here’s a map of the shuttle routes.

The shuttle comes roughly every 15 minutes, and the best places to pick it up are stop 1 (the shuttle station) and the Bryce Canyon Visitor Center – both should have ample parking. The other stops in Bryce Canyon City are useful if you’re staying at one of the hotels / campgrounds outside the park.
More information on taking advantage of the shuttle system here.
When to Go Hiking in Bryce Canyon National Park
Bryce Canyon’s climate is slightly different than many of the other National Parks in Utah and Arizona because it is 8,000 – 9,000 feet above sea level. That’s no joke!
In the summer, it doesn’t get nearly as blazing hot as, say, Arches National Park. It’ll be in the 70’s and 80’s during the day, sometimes creeping into the 90’s, and in the 50’s at night. Overall, fairly pleasant, but a bit cold at night.
In the spring and fall, which are also good times to be there, you’ll find cooler temperatures during the day – 50’s and 60’s – which can drop into the 30’s at night. We were there in October, and it was downright freezing when the sun went down. It was incredible how fast the temperature changed.
Winter is the time to be there if you want to have the park all to yourselves. For the most part, anyway. However, it will be cold, and there’s a solid chance of snow, which will dust the hoodoos and make for some amazing pictures that you may or may not have to sacrifice a few toes for. You’ll find 30’s during the day, and it will get into the teens at night. Probably not a great time to camp – book a hotel instead if you’re coming in the winter.
Where to Stay Near Bryce Canyon
If you’re planning on spending a couple of days exploring Bryce Canyon, you’re probably going to want to either camp inside the park, or stay in the town of Bryce, just outside the park entrance.
Camping in the Park
There are two campgrounds inside the park. If you want to camp, which is a great choice, you’ll need to reserve well in advance, or plan on showing up extremely early to snag a first-come-first-served site.
Sunset Campground is the bigger of the two, and is the only one that takes reservations. You’ll need to book well in advance, or be prepared to check the availability daily for a cancellation, which is how we ended up getting a spot for a night. The location is great, right across from Sunset Point, which will mean you can walk over and skip dealing with the parking nightmare that is that parking lot in the morning. Oh yeah, and the bathrooms are heated, which I’ve never encountered before at a campground. More information here.
North Campground is basically right on the rim of the amphitheater, which also means that you will be able to leave the car at camp and walk to the two best hikes in the park. There are 99 sites, and they’re all first-come-first-served. In high season, the sites will be gone by 8am, so if you want to snag one you’ll need to show up early. More information here.
Staying Outside the Park
If you don’t want to camp (or you’re visiting in the winter, when it’s in the teens), the town of Bryce is your best option. Unfortunately, there aren’t too many places to stay in Bryce, but there are a few, and the location really can’t be beat. It’s five minutes outside the park entrance.
If you want to camp or stay in a cabin, check out Ruby’s RV Park and Campground, which is where we stayed in our van for a couple of nights. It was nice, and I’d stay there again.
If you’re looking for a hotel, the best option in Bryce is going to be the Best Western Plus Grand Canyon. It’s right in the middle of town, and would make a great home base for exploring.
Your other option, which is slightly further away (about 15 minutes from the park entrance) is the small town of Tropic, which has some solid hotels and cute cabins to offer.
More on Utah’s National Parks
- How to Plan an Incredible Utah National Parks Road Trip
- 4 Days in Moab: A Complete Moab Itinerary
- 12 Awesome Things to Do in Moab, Utah
- The Best Places to Stay in Moab, Utah
- How to Spend One Day in Arches National Park
- A Complete Guide to Hiking in Arches National Park (6 Hikes)
- How to Spend One Day in Bryce Canyon National Park
- 6 Amazing Hikes in Bryce Canyon National Park