Hiking the Helen Lake Trail in Banff: A Complete Trail Guide
There are quite a few things we like about the Helen Lake Trail in Banff National Park, but we’ll give you two here at the beginning of this guide.
First, bursting forth from the treeline into the meadows that sit at 7,000 feet above sea level is one of our single favorite moments on the trails in the Canadian Rockies.
The second stretch of the hike has wildflowers, lush green meadows (with marmots!), and rocky ridge lines enveloping you in a gorgeous valley.
Second is the fact that there are a few good extensions if you’re up for a longer excursion, including the climb to Cirque Peak for amazing views of the surrounding landscapes.
It makes an excellent early stop on your drive along the Icefields Parkway, and is probably our second favorite hike on that drive (the first being Wilcox Pass thanks to its great views of the Athabasca Glacier from above).
In this guide, we’re going to cover everything you need to know to get out and hike the Helen Lake Trail yourself.
We’ll start with the logistics – where to park, and other things you need to know for a smooth trip – and then go into a trail report based on our own experiences hiking the trail.
Our intention is to set you up for hiking success by the end of the guide so you can get out on the trail safely and confidently, prepared for the trail and knowing what to expect.
Sound good to you? Let’s get into it.
P.S. We’re American, as are the majority of our readers, so we talk in feet and miles in the guide below. We’ve tried adding both measurements to our guides before, and it ends up getting very cluttered and confusing, so we have decided to stick with miles and feet, especially since that’s what we know best. It’s pretty simple to convert it to kilometers and meters using an online calculator, if you need to.

Disclaimer: Some of the links in this post, like hotel links, are affiliate links, meaning at no additional cost to you, we make a little bit of money if you click through and book. That being said, we would never recommend something to you that we don’t stand behind 100%.
Hiking to Helen Lake: Trail Details
- Length: 7.2 miles
- Elevation Gain: 1,600 ft.
- Season: July – October
- Trail Type: Out and Back
- Difficulty: Moderate
- Dog Friendly? Yes
- Pass Required: Parks Canada Admission OR Parks Canada Discovery Pass
- Trailhead Location
How Difficult is the Helen Lake Trail
This hike is squarely in the moderate category, at least for us.
The interesting part about this hike is that the forested section, where you’ll do a majority of the climbing, alternates between stretches of trail that are basically flat, and stretches that are really, really steep.
There are a few sections where the grade is intense, and the trail is full of rocks or tree roots, so sturdy hiking boots are going to be your best friend (Alysha loves her Columbia Newton Ridge boots, an excellent choice for a first hiking boot).
Once you’re through the forested section, roughly halfway through the hike, you emerge out into the alpine meadows where Helen Lake sits, and the rest of the way is a gentle incline up to the lake, with excellent views in all directions.
One of our favorite views of the lake is from the far side of the lake about halfway up the switchbacks, which requires some extra effort to reach.
That climb is short but intense, but still fits into the moderate category, we think.
The hike onwards from Helen Lake to further out destinations like Dolomite Peak, Cirque Peak, and Lake Katherine are quite a bit harder because of the climb on the far side of the lake (which you then have to climb back up if you drop into the valley on the other side to go to Dolomite Pass).
Getting to the Helen Lake Trailhead
The Helen Lake Trailhead is along the Icefields Parkway, right across the road from the Crowfoot Glacier viewpoint and the shore of Bow Lake.
It’s 23 miles (roughly 30 minutes) north of Lake Louise, and 57 miles (a little over an hour) from the city of Banff.
Parking at the Helen Lake Trailhead
The parking lot at Helen Lake is big enough for about 20 cars, give or take a few.
It was about half full at 7:30am when we got started, and we ended up being the first ones up to the lake (some of the cars must have been backpackers).
There is a pit toilet at the trailhead.
There is one additional thing that we think is worth noting about parking here: we saw many, many people stopping into the parking lot to use the bathroom (resulting in a 5-7 person lineup to use the toilet).
Those people also took up valuable parking spots (or just parked in the middle of the lot), and left after 5-10 minutes.
If you show up from midday through the afternoon, don’t despair if you see the full parking lot – there’s a chance some people are leaving in a few minutes.
The Best Time to Hike to Helen Lake
Like most of the best hikes in Banff National Park, the Helen Lake hike is best done in the summer and early fall, roughly July through October in most years.
However, there is one consideration here for the summer and fall, and that’s smoke from nearby wildfires, which will continue to be an issue for the foreseeable future.
We first visited Banff in mid-September, and experienced smoke so thick that we really couldn’t see anything when we drove the Icefields Parkway for the first time. About half of our days were smoky.
So, we thought, we’ll visit in the early summer (first part of July), before fire season really gets going.
Well, we had more or less the same conditions, with smoke from Canadian wildfires rolling in for our entire time in Jasper.
Turns out, fire season is basically six months of the year now, and it’s going to be a crapshoot in terms of weather when you’re up in the Rockies.
We like using IQAir to check air quality and forecasts, though it will likely change day to day.
Are Dogs Allowed on the Helen Lake Trail?
Yep! We hiked to Helen Lake with our dog, Lupine, and she loved it. Here’s proof:
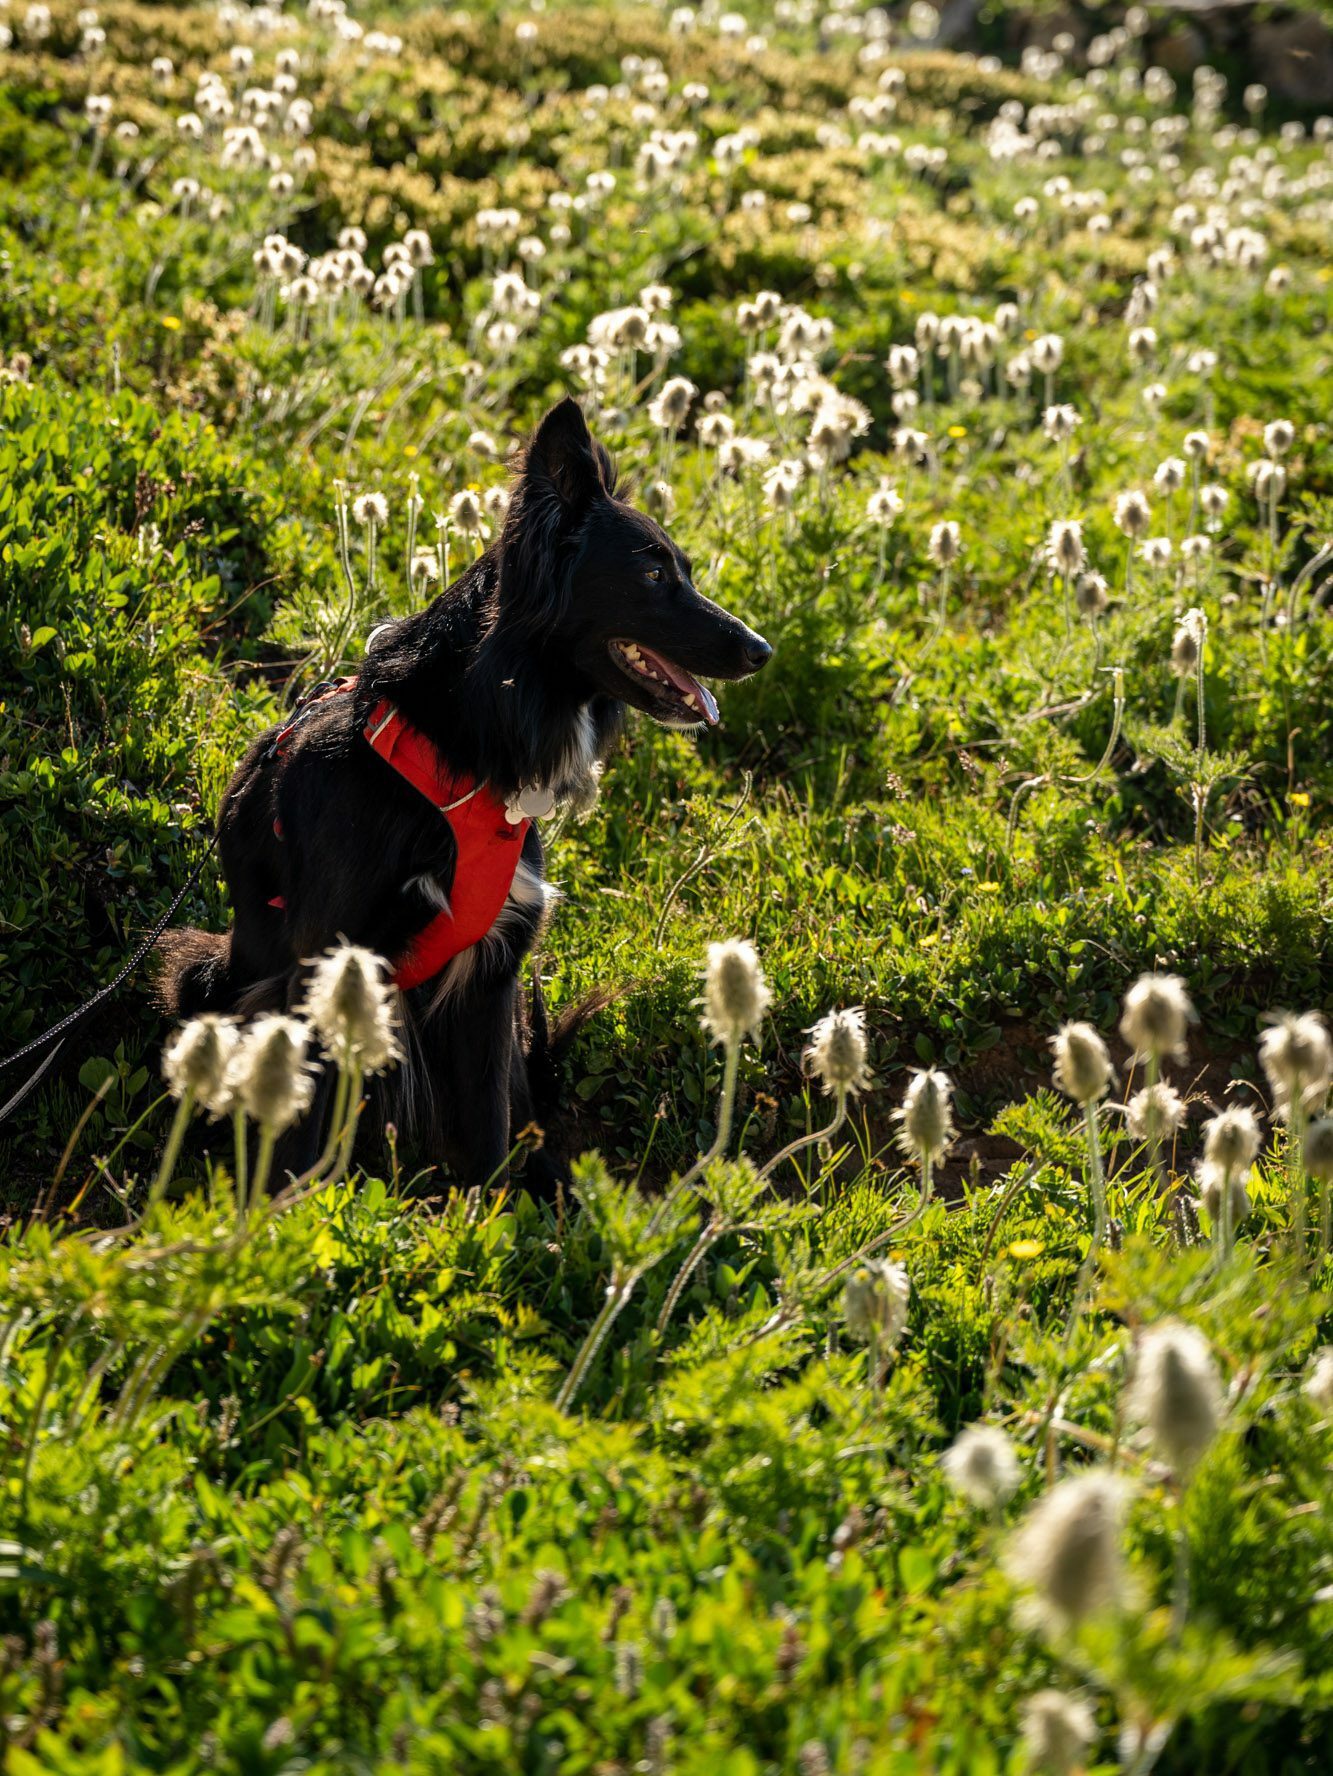
While dogs are allowed, they need to be on a leash at all times in the park, and you need to pack out any trash (read: dog poop) with you.
We have Ruffwear saddlebags for Lupine so that she can carry her own water, snacks, and waste.
Things to Know Before You Hike the Helen Lake Trail
Here are a few things to keep in mind before you go.
You need a Parks Canada Pass while you’re in Banff National Park. You have two options – buy a pass for the number of days you need it for, or buy a Discovery Pass, which gives you access to all national parks in Canada for a full year.
At a high level, the math on the Discovery Pass works out if you’re spending 7 days or more in the parks, though there are some permutations around family passes that might make the math change in your particular instance.
You can buy both versions at the park entrance stations, or online in advance.
You’re hiking at elevation. Remember that you’re at elevation in the Rockies (the parking lot here is at 6,400 feet above sea level, and you’ll get up to about 8,000 feet by the end of the hike), so if you’re coming from sea level, the hike is going to feel a little harder than you’re used to.
This is why we recommend starting with an easier hike first to get acclimated, and tackling the more difficult hikes later in your trip.
You can read more in our Banff itinerary or Canadian Rockies itinerary (which includes Jasper and Yoho).
You’re in bear country. Both black and Grizzly bears live in the Rockies, and we saw both (though never up close on a hiking trail, thankfully).
Our biggest tip is to make plenty of noise on the trail – Matt is known for freestyle singing as we hike – so that you avoid any surprise encounters.
You’ll also want to have bear spray, which you can get in town if you’re flying in (you can’t bring bear spray on a plane).
You should check with your hotel or lodge because many of the best places to stay in Banff will lend it to you.
Expect afternoon thunderstorms in the summer. As if you needed another reason to get an early start, we got thunderstorms nearly every single day sometime between noon and 4pm. If you do a hike above the treeline, you’ll want to be on your way down by the time they roll in.
Trail closures are fairly common in the Canadian Rockies. Mostly because of bear activity or weather. Check here for current conditions.
The Helen Lake Trail: A Complete Guide
Now that we’ve covered most of the information we think you need to know before you get out on the trail, let’s talk about the trail itself!
The hike to Helen Lake is a pretty straightforward affair, but we’re going to break it into three distinct sections to make it more digestible, and so that you’ll be able to keep track of where you are on the hike when you’re on the trail.
Those three sections are:
- The Forested Ascent
- The Open Meadows
- Hiking to the Far Side of the Lake (for the views!)
For each, we’ll give you the distance and elevation gain you’ll cover, a trail description to help you understand what to expect, and, of course, some pictures we’ve taken.
At the end, we’ll suggest three good options if you’re looking to extend your hike.
Full disclosure – we haven’t done those extensions, but we’ve done the research to figure out what it takes to get there.
The Forested Ascent
Length: 2 miles // Elevation Gained: 1,000 feet
This first stretch of trail starts from the trailhead, enters the forest, and immediately starts climbing.
This section is interesting because it alternates between nice and easy sections that are basically flat, and are nothing more than a stroll through the woods.
Then you’ll find yourself climbing a steep, root-filled stretch of trail that has you sweating and wondering why you do this to yourself. Then it flattens out again, and the cycle repeats.
There are certainly some stretches that are hard, but it’s interspersed with those flat stretches to give a nice balance.
Along the first mile or so, there are a few creek crossings where we got our feet a little wet, but nothing too intense.
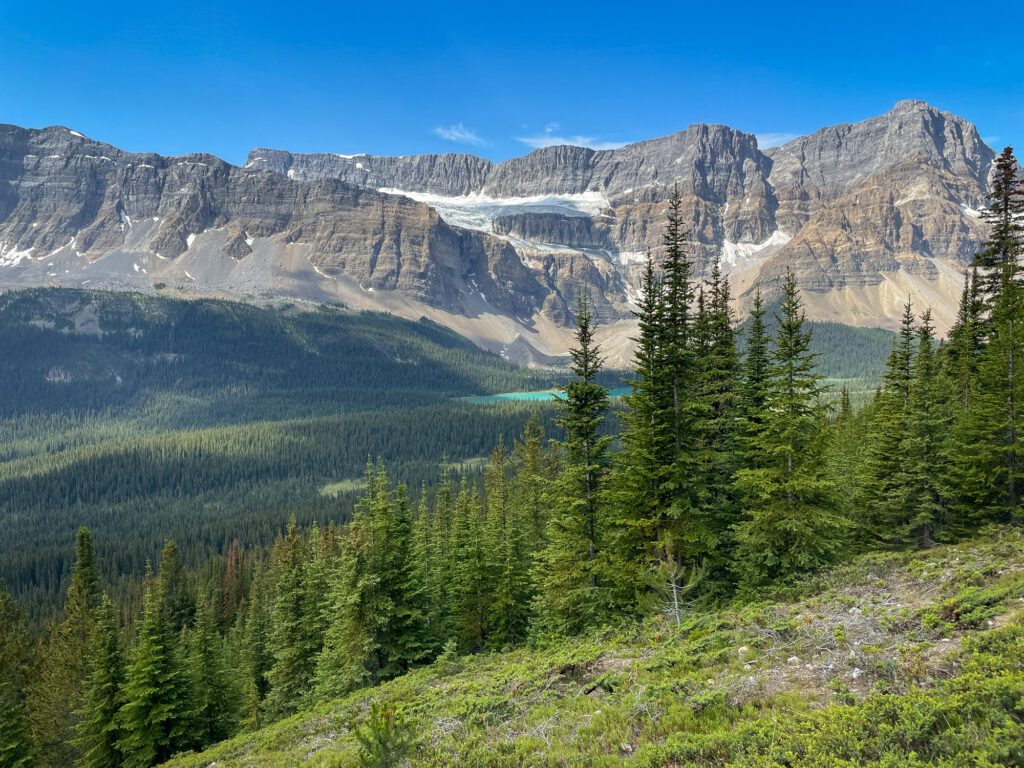
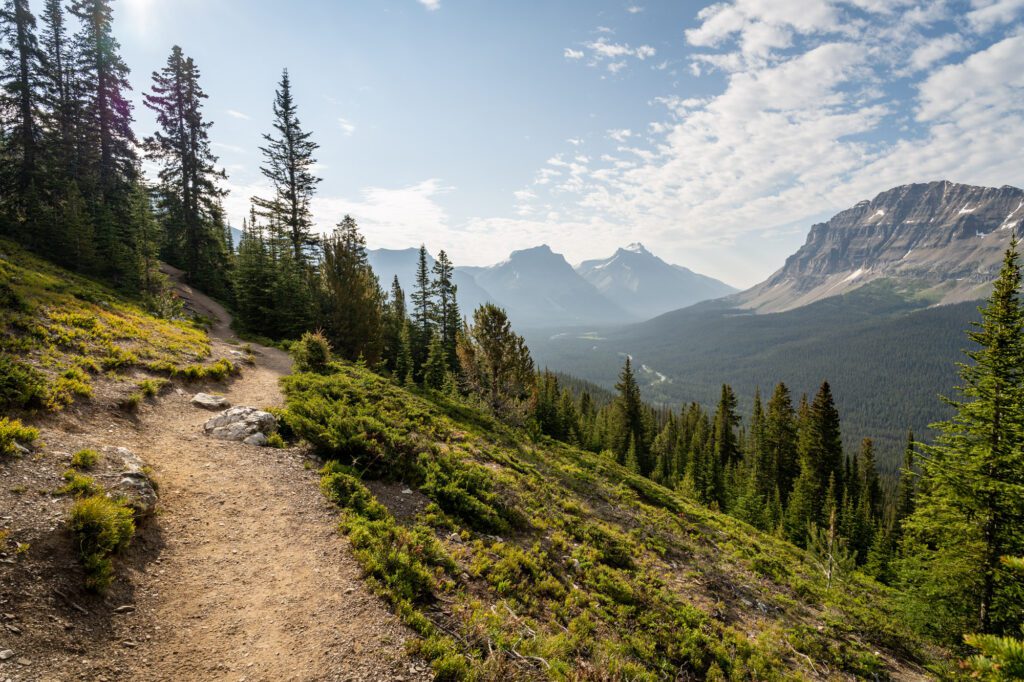
In the second mile of hiking, the views back to the south and west start to open up intermittently, and there are a couple of good views out over the valley and the turquoise waters of Bow Lake.
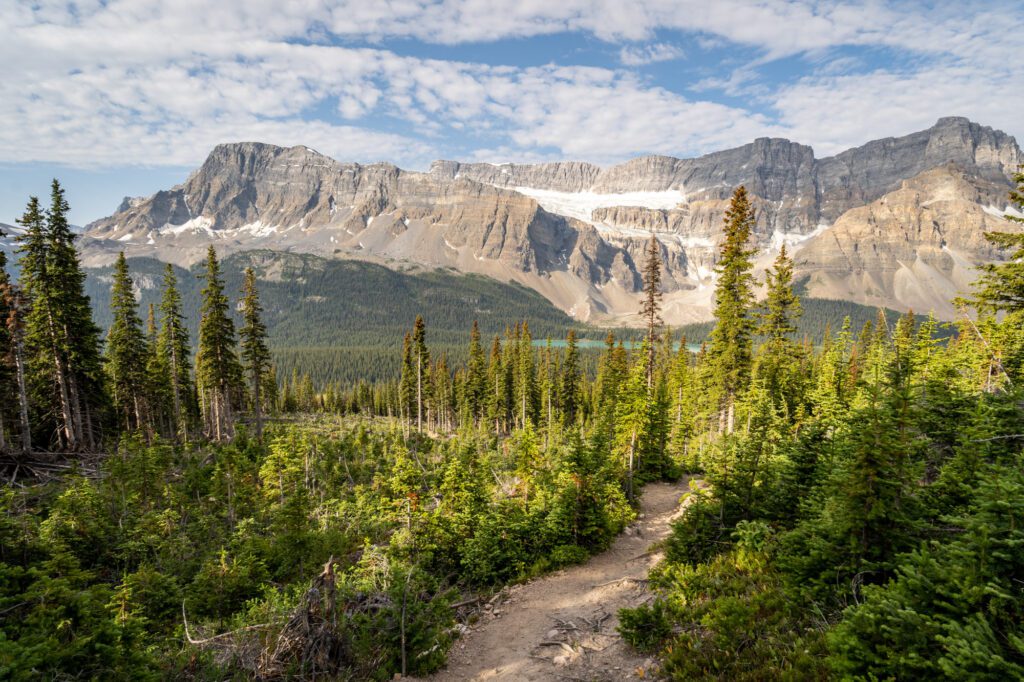
These are excellent places to take a break from the climbing, grab some snacks and water, and admire the scenery.
Emerging into the Open Meadows
Length: 1.5 miles // Elevation Gained: 400 feet
At roughly two miles into the hike, you turn a corner – both literally and figuratively – and burst forth from the treeline into the subalpine meadows that make this hike special.
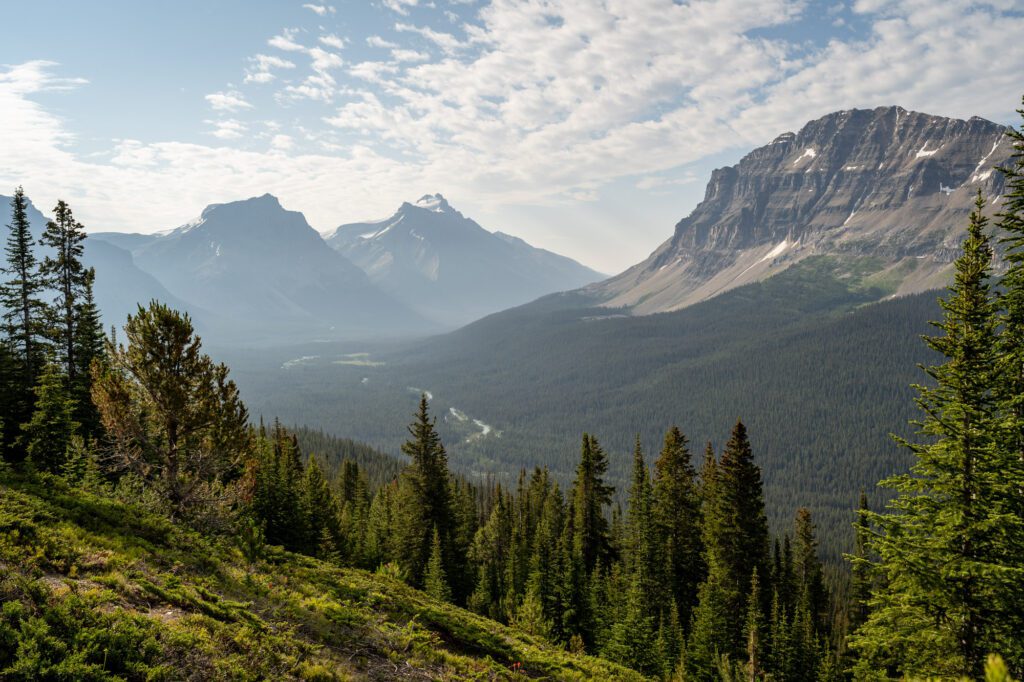
Emerging from the forest also means that the views start to open up, and there are jaw-dropping views to be had in all directions. Including behind you, so don’t forget to turn around as you climb.
This stretch of trail is a very gradual grade, gently climbing through the marmot-filled meadows.
You’ll be accompanied by the relentless squeaks of the ground squirrels that call this territory home, who Lupine was infatuated with.
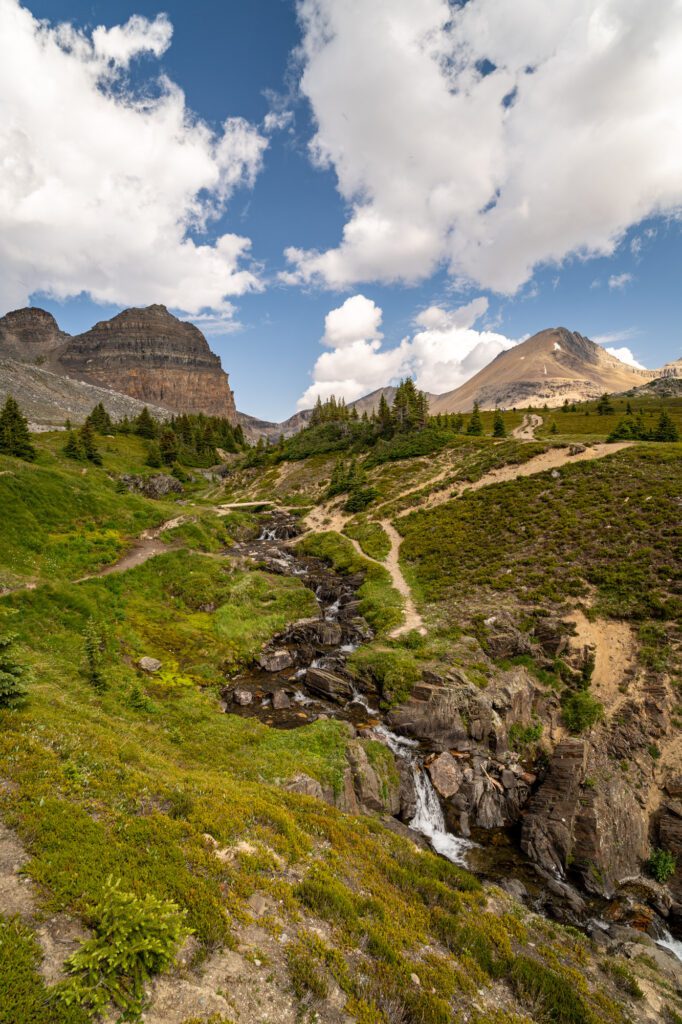
Almost exactly a mile into this stretch you’ll encounter Helen creek, which you can cross over using the handy wooden bridge. Before you do, don’t forget to stop and look up the trail.
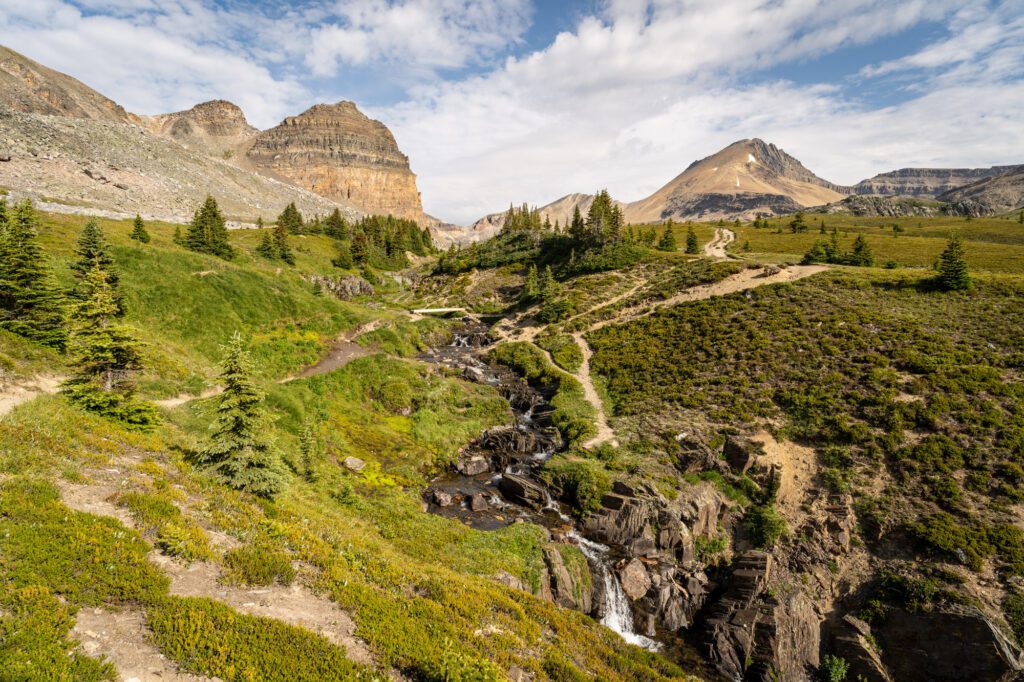
It’s a great view with the cascading levels of the creek and bridge in the foreground, and the mountains looming in the background.
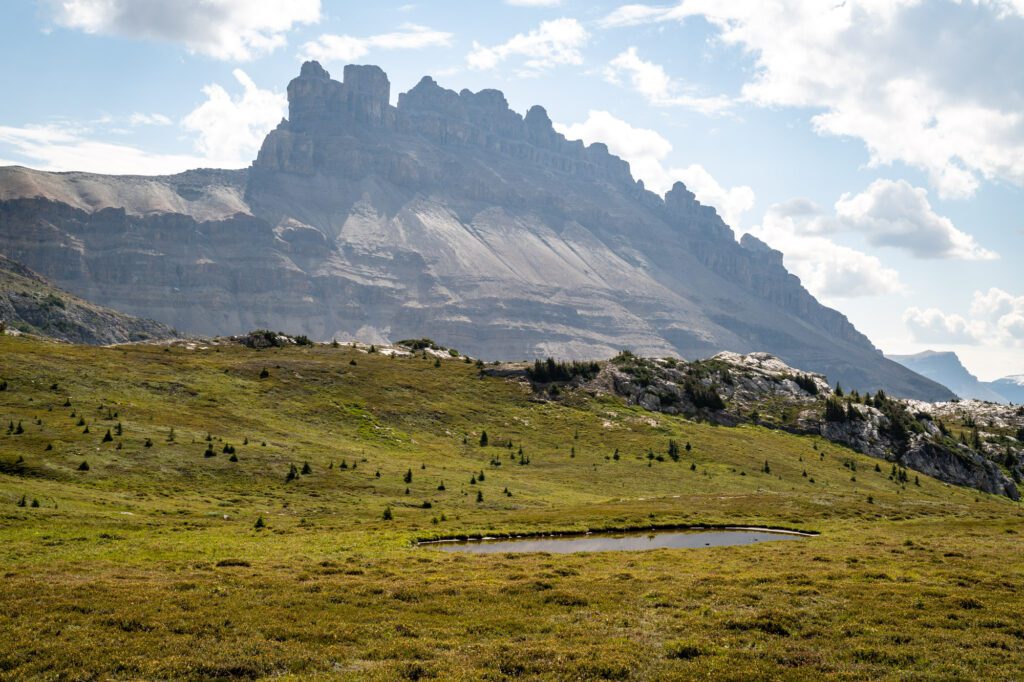
Once you cross the creek, the trail widens as you pass through the valley created by Crystal Ridge on your left and Helen Ridge on your right.
Straight ahead is Cirque Peak (covered in our “extending your hike” section below).
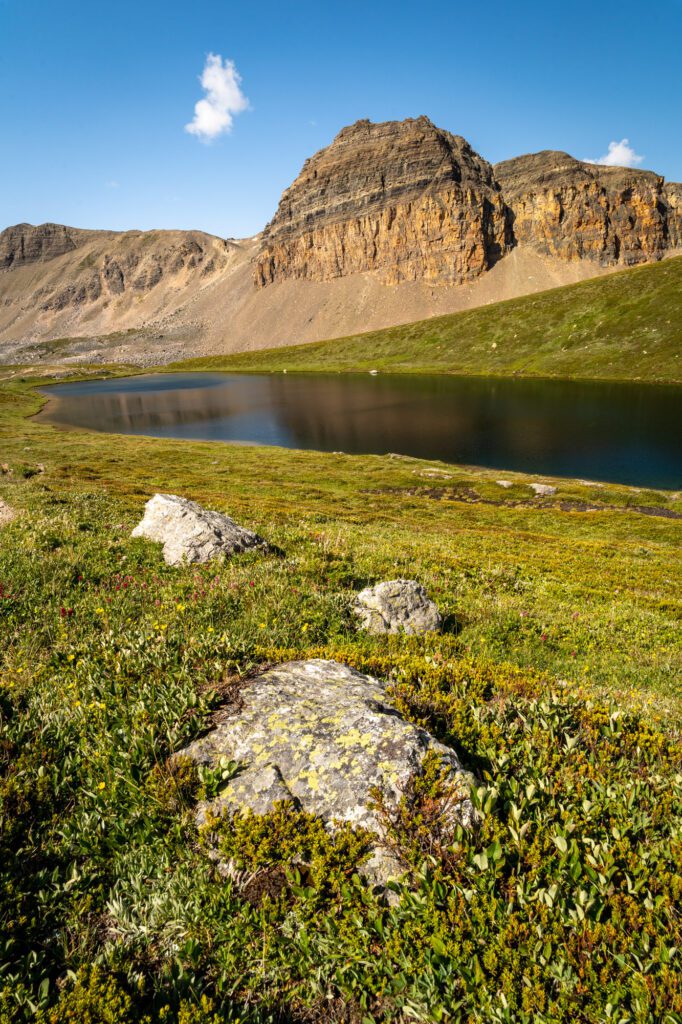
Sitting below Cirque Peak is the lake, which you can’t quite see over the rise until you’re right on top of it.
There is a great view of the lake from the near side, with Cirque Peak rising over the far shore. The vast majority of people on this hike get here, stop and admire the lake, and turn around.
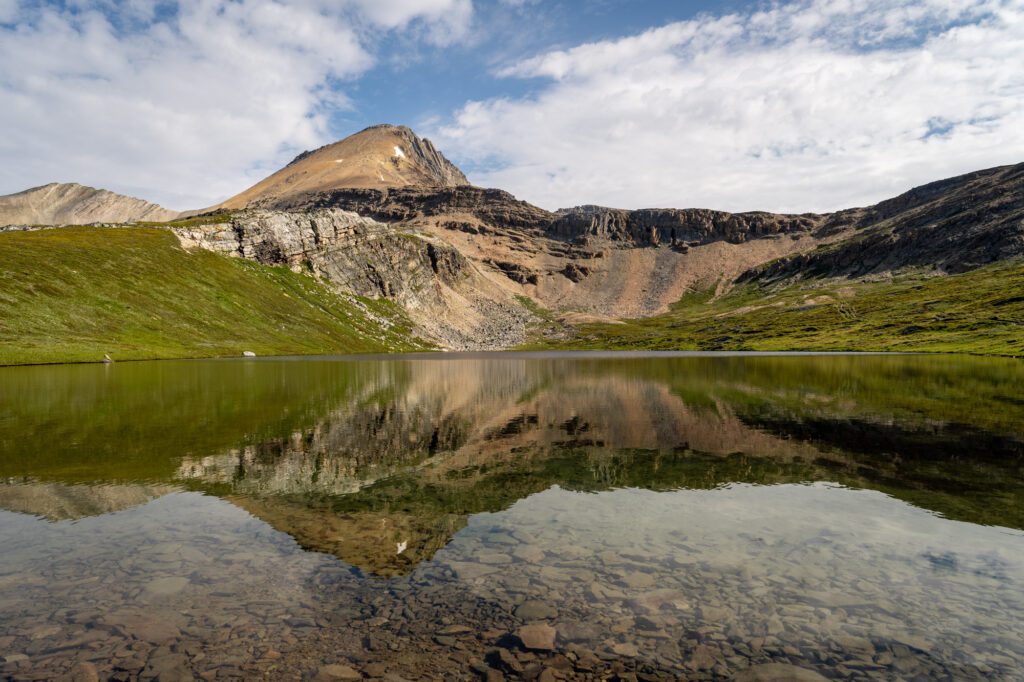
But we actually think the best views are from the opposite side of the lake looking back towards Crystal Ridge.
Hiking to the Far Side of the Lake
Length: 0.5 miles // Elevation Gained: 350 feet
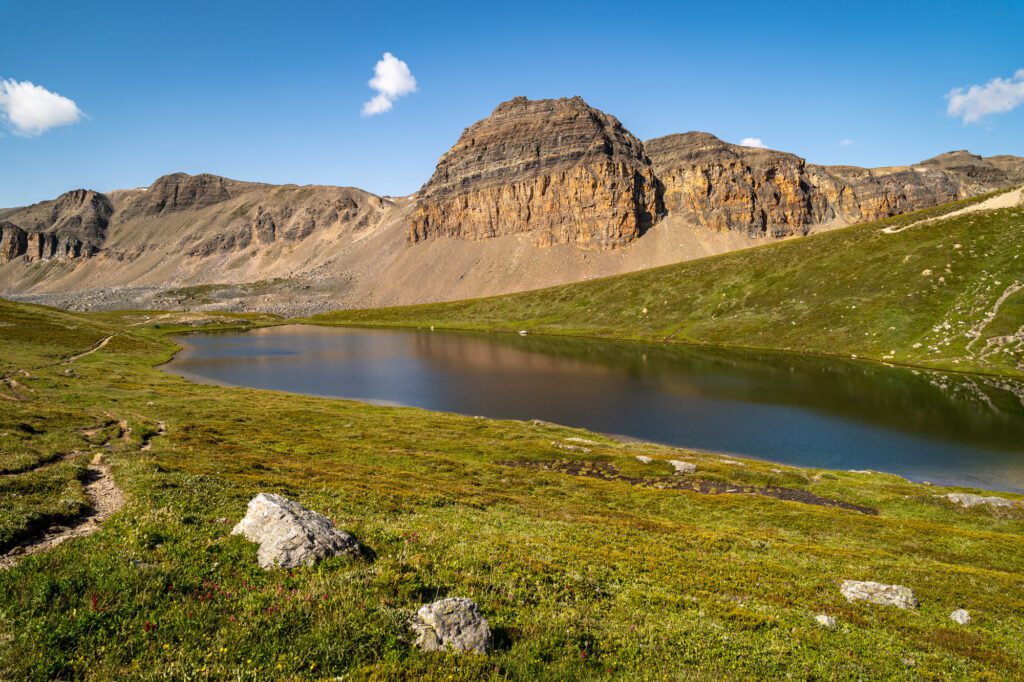
If you want to get those views back over the lake, you’ll hike along the right (east) side of the lake to the base of the switchbacks, which you can see snaking their way up the hillside across the lake.
The views throughout this stretch are great, and we’d go up to the point where the trail sharply switches back, which sits at exactly four miles into the hike and 8,000 feet above sea level.
From there, you have a nice view of the lake, the mountains, and down the valley that you came in on.
Extending Your Hike: Dolomite Pass and Cirque Peak
From the switchbacks at the far end of the lake, you’re essentially halfway to the top of the ridge where you’ll find a trail junction with multiple options for extending your hike.
If you’ve got more gas in the tank, there are several different extensions to Helen Lake that are worth the extra effort.
We stopped at the lake because it was our first summer of intense hiking with the dog, and we weren’t quite sure how she’d handle 7-10 miles a day for an extended period (spoiler: she was more than happy to hit the trail every day).
We met multiple hikers along the way who were heading up to either Dolomite Pass or Cirque Peak.
Here are three options for extending your hike.
The first two follow the same route, heading northeast towards Dolomite Pass.
Keep in mind that this means you’ll have to descend down into the valley on the other side of the ridge…which means you also have to come back up.
The last option – Cirque Peak – turns into the scramble at the end and involves some intense climbing.
If you’re not comfortable with loose footing and light route finding, we’d stick to the other two.
Katherine Lake (10.3 Miles / 2,800 ft. Elevation Gain): This is the most accessible of the three options. Once you’re atop the ridge looking over Helen Lake, you’ll descend into the valley on the other side to reach the north shore of Katherine Lake. You’ll leave the lush, green meadows around Helen Lake behind for the rugged, rocky alpine territory that thrives above 8,000 feet.
Dolomite Pass (13 Miles / 3,700 ft. Elevation Gain): Another mile and change past Katherine Lake you’ll find Dolomite Pass, which involves a lot more climbing to reach. However, this brings you further into the alpine ecosystem, trading grass for rocks. It’s rocky and rugged, and there are some great views to be had back towards Katherine and Cirque Peak.
Cirque Peak (10 Miles / 3,600 ft. Elevation Gain): From the trail junction at the top of the switchbacks, this trail heads left and begins an intense climb up to the top of Cirque Peak, which involves double the elevation gain you’ve covered already in about a mile. And the last push to the summit is a scramble – like using both your hands and feet kind of scramble. I liked this guide, which has some nice pictures and descriptions to help you understand what the scramble portion looks like.