How to plan an Amazing Canadian Rockies Road Trip Itinerary
The Canadian Rockies are nothing short of spectacular. In many ways, it was our first trip to the Canadian Rockies years ago that set us (mostly Matt, who wasn’t into hiking and the outdoors until relatively recently) onto this path to running this site full time.
It seemed like around every bend in the road or trail, there was a somehow more spectacular view awaiting us.
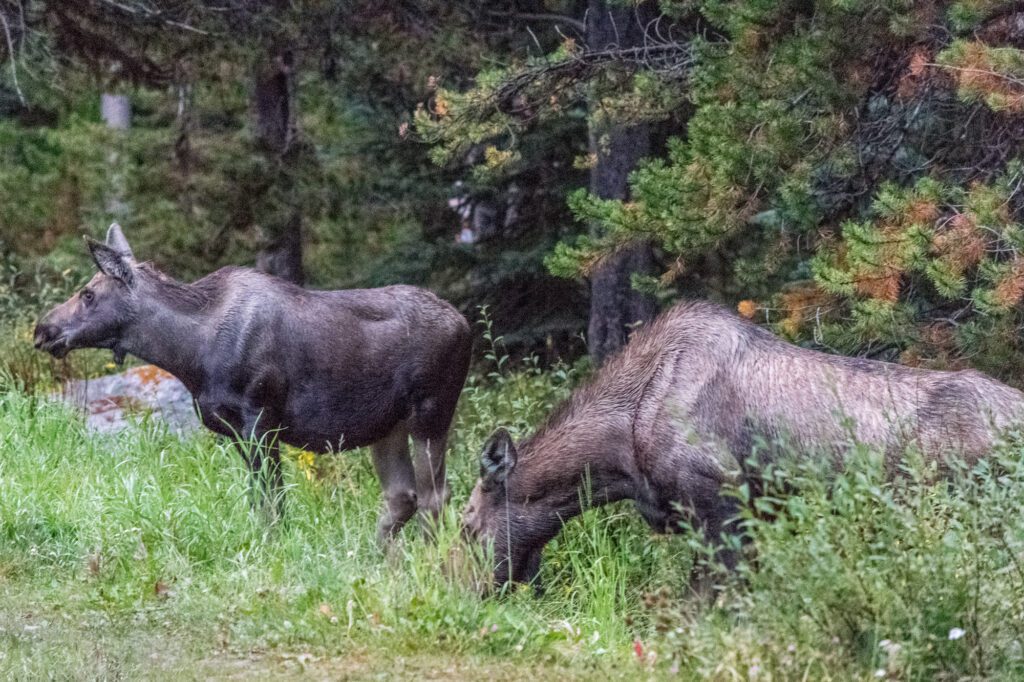
How can one relatively compact place (relatively is doing a lot of work here) contain so much sheer natural beauty? Glacier-fed alpine lakes with that trademark shade of turquoise. Never ending ranges of rocky peaks. Abundant wildlife, including moose and Grizzly bears.
It’s no wonder that so many people – including us – flock to this slice of alpine paradise.
And, to be clear, there will be A LOT of people, but we’re going to do our best in this guide to give you specific tips based on our own trips to the Canadian Rockies to help you avoid the worst of the crowds.
In this guide, we’re going to go through ALL the information we think you need to plan an incredible 10 day Canadian Rockies itinerary.
We’ll start with some important logistics – like where to fly in and out of, how to structure your trip to maximize your time, etc. – and then move on to a day-by-day itinerary that you can copy and paste for your own trip (in this case, we’re okay with plagiarism!).
The intention is to put all the information you need to plan your once-in-a-lifetime Canadian Rockies road trip all in one place.
Plus, it’s all based on our own personal experience over multiple trips to the Canadian Rockies, and we’ll give you the lowdown on what’s worth it, what’s not, and what we wish we’d done differently.
Sound good to you? Let’s get into it.
P.S. Strap in with a cup of coffee (or wine, no judgement here), because this guide is LONG and DETAILED. We really tried to shave it down, but a lot of the details we’ve included are essential for planning your trip, so we’re leaving them in!
Disclaimer: Some of the links in this post, like hotel links, are affiliate links, meaning at no additional cost to you, we make a little bit of money if you click through and book. That being said, we would never recommend something to you that we don’t stand behind 100%.
How Many Days Do You for This Itinerary?
To see the best of Banff, Jasper, and Lake Louise (including Moraine Lake), you really need a MINIMUM of 7 days. It’s a lot of driving, and trying to pack it all in just 7 days is going to mean you’re missing key highlights and hikes.
Plus, with only 7 days, you basically have no flexibility when it comes to the weather (I’m currently writing this on a rainy July morning in Jasper).
We’ve written this itinerary for 10 days. Those extra few days allow you to get a little off the beaten path (to the extent that even exists in Banff and Jasper) to see some of Yoho National Park, a less-heralded park just west of Banff National Park, and have some flexibility to spend a rainy morning waiting for a break in the weather, if needed.
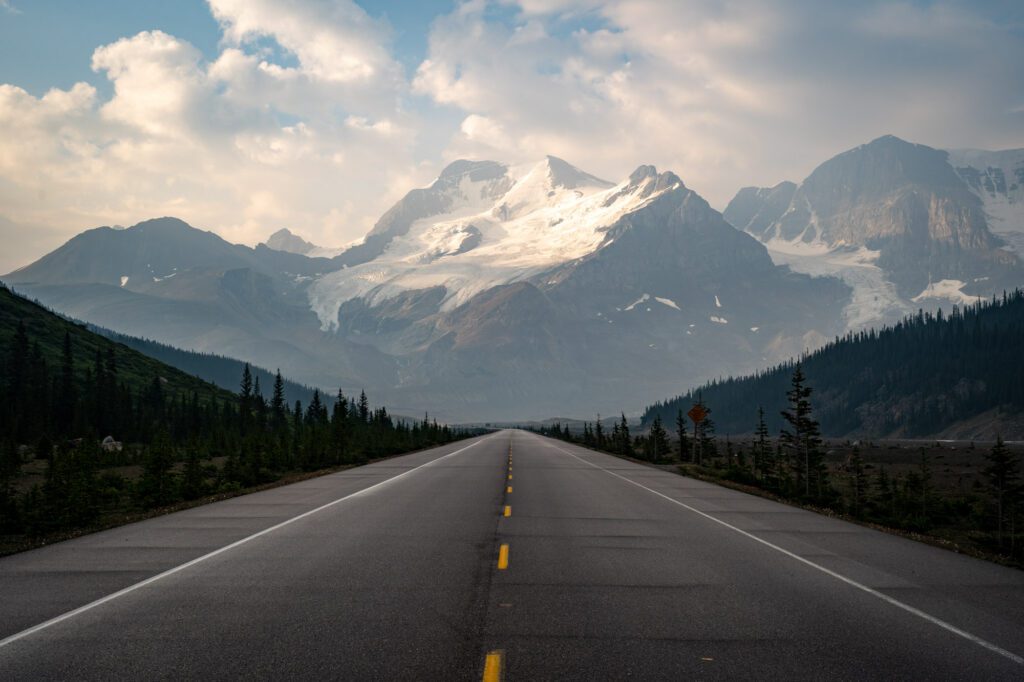
Plus, it gives you more time to dive deeper into the Icefields Parkway, the incredibly scenic road trip from Banff to Jasper, which deserves more than a couple of hours on your itinerary.
We’ve got two half days dedicated to that drive, which is packed with raging waterfalls, epic vistas, and great hikes.
If you have more time (11-14 days) or less time (7-9 days), we have some ideas on how to alter this itinerary at the end.
If you have 7 days, you should also read our guide to planning a 7 day Banff and Jasper itinerary (coming soon-ish!), which packs the highlights into a week.
Heads up: If you haven’t heard, Jasper suffered a devastating fire during the summer of 2024, and it’s unclear what the future looks like and how it will affect what you can do and see in Jasper in future years. If you want to donate to support the recovery, you can do so here or with the Canadian Red Cross.
Where to Start and End Your Road Trip
This one is easy! If you’re coming from somewhere out of the area, the answer is going to be Calgary, which is about an hour and a half away from the town of Banff.
You’ll want to fly into Calgary International Airport (YYC), which has some direct flights, but is likely going to require a connection if you’re not coming from one of the airline’s hubs. Still, it’s by far the most convenient airport to fly into.
If you’re coming from the Pacific Northwest like us, driving to the Canadian Rockies is doable, but you should keep in mind that it’s a long drive.
We drove from Portland up to Vancouver, where we spent a couple of days before embarking on a Vancouver to Banff road trip.
Because it adds a significant amount of drive time (9 hours from Vancouver to Banff, one way), we’d only recommend this option for people with 14 days or more.
Do You Need to Rent a Car for This Itinerary?
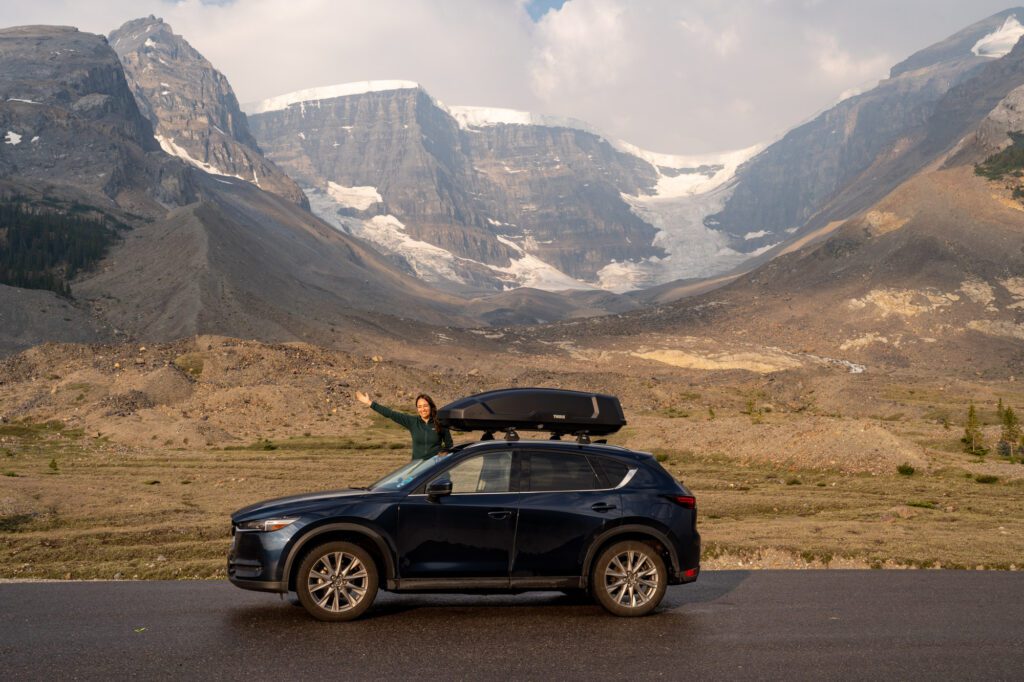
The short answer is yes, we think you definitely need to rent a car to make the most of your trip to the Canadian Rockies.
And you should rent it on arrival at Calgary International Airport, and drop it off at the same location when you’re heading home.
However, I will say that, unlike our trip more than five years ago, Banff has come a long way in terms of public transportation, and it is now possible to piece together an itinerary using a combination of public transportation and guided tours.
There are public buses (via ROAM Transit) between Banff and Lake Louise, Moraine Lake, Sunshine Meadows, and Johnston Canyon.
However, the thing to know here is that you’re going to be sacrificing A LOT of flexibility.
While they exist, the routes don’t always come terribly often, and the first bus of the day is often later than we’d recommend getting the day started.
The other major downside is that you’ll end up missing a bunch of the stops along the Icefields Parkway, which would be a shame.
There are tours that tackle it, but they’re not going to make as many stops as we think you should.
So, the long answer is that yes, you should definitely plan on renting a car, but it’s possible to put together an itinerary without driving.
How to Structure Your Itinerary
We’re adding this as a separate section up top because we think it’s pretty important to consider how you structure your itinerary to maximize your time.
At a high level, we’d break up your trip into three distinct parts, staying in a different place for each of them to use as a home base for the region.
Those three parts are Banff (and around), Jasper, and Lake Louise.
Here are a few reasons why we strongly believe that’s the best way to structure your itinerary.
The first thing to know is that it’s a 45-60 minute drive from Banff to Lake Louise.
To make the most of your time and be able to see the lake multiple times without committing to 90 minutes of driving each time, we’d strongly recommend trying to stay near the lake for two nights.
It’s worth seeing the lake at both sunrise and sunset, we think, and this will allow for an early start on the very busy trails.
There aren’t that many options and they’re kind of pricey, but we think it’s worth it to avoid driving back and forth a bunch of times.
For the record, we did that on our first trip (but not on our second) and wish we had done it on that second trip.
The second thing to consider is that it will take you nearly four and half hours to drive from Jasper National Park to Calgary.
For that reason, we’d recommend ordering your trip to start in Banff, head up to Jasper, and then return to Lake Louise at the end so that you’re set up for a more manageable drive back to the airport (2 hours, ish).
This is also true if you’re driving back home, unless you live in Edmonton, which is up near Jasper.
This is what the resulting 10 day trip looks like, at a high level:
- Day 1: Arrive in Calgary (Sleep in Banff)
- Day 2: Banff
- Day 3: Banff
- Day 4: Drive Banff to Jasper (Sleep in Jasper)
- Day 5: Jasper
- Day 6: Jasper
- Day 7: Drive Jasper to Lake Louise (Sleep in Lake Louise)
- Day 8: Lake Louise
- Day 9: Lake Louise / Moraine Lake
- Day 10: Drive Back to Calgary (Yoho in AM if you have time)
Where to Stay for This Itinerary
Now that we’ve covered some of the important logistics and laid out our thoughts on how to structure your itinerary, let’s talk about where to stay.
As we’ve covered already, we think you should break up your trip into three chunks – Around Banff, Jasper, and Lake Louise – and choose a home base near each place to use to explore.
This will cut down on driving back and forth, and allow you to get an earlier start on hikes and viewpoints, which is important in the summer when crowds are intense.
In this section, we’ll go through an overview where to stay for each of those regions.
For more detail, including more options, you should go read our guides to where to stay in Banff (which includes Lake Louise) and where to stay in Jasper.
Staying Around Banff

This is your first decision point, because you have two distinct options when it comes to choosing a home base for exploring around the town of Banff.
The two options are staying in the town of Banff, which is right in the middle of all the action, or staying in Canmore, a suburb (ish?) of Banff that is just outside the national park boundary.
In general, Banff is going to be a little more convenient in terms of location because it’s further west, closer to key trailheads like Johnston Canyon.
While Canmore is an extra 15 minutes away from things, it’s far more charming, with a better food and drink scene (we think) and a more laid back vibe.
Plus, it’s more affordable, and the accommodation options are more modern and updated (while some places in Banff feel a little dated because they’ve been constantly full for decades).
For what it’s worth, we’ve stayed in both places and, after this latest trip when we stayed in Banff, we decided we will always stay in Canmore on future trips because we like it better as a town, and it’s generally a better value.
In Banff, we stayed at Tunnel Mountain Resort, which is just up the hill from town on – you guessed it! – Tunnel Mountain.
It’s a good location, with free parking and a bus line that runs right into town from right in front of the resort.
Our room was kind of a dim cave situation (which might be because we needed a dog-friendly room), and it probably needed a fresh coat of paint and some new fixtures to justify the price we paid for it. But, it’s Banff, so you’re never REALLY going to get a great value, are you?
We’d cautiously recommend it, especially if you need a dog-friendly place to stay with a kitchen, which is how we ended up there.
If you don’t need those things and you want to be based in Banff itself, look at Basecamp Suites Banff. We stayed at their location in Revelstoke and absolutely loved it – wish we’d stayed at their location in Canmore on this trip!
They have locations all through the Canadian Rockies, and this particular location is a suite hotel, where you have the amenities of a hotel like housekeeping and a front desk, while the units are all apartments.
Basecamp also happens to have multiple locations in Canmore, which is where we’d recommend staying if you’d rather stay in a less hectic town (and, also, is where we’ll be staying on our next trip).
Staying in Jasper
Jasper is a little more straightforward than Banff because you really only have two options here.
Your first option is staying at one of the many hotels right in town, which puts you within walking distance of all the amenities like grocery stores, restaurants and bars, and shopping in downtown Jasper.
Your second option is staying somewhere outside of town, which is going to be a more rustic experience, but is less convenient when it comes to accessing those aforementioned amenities.
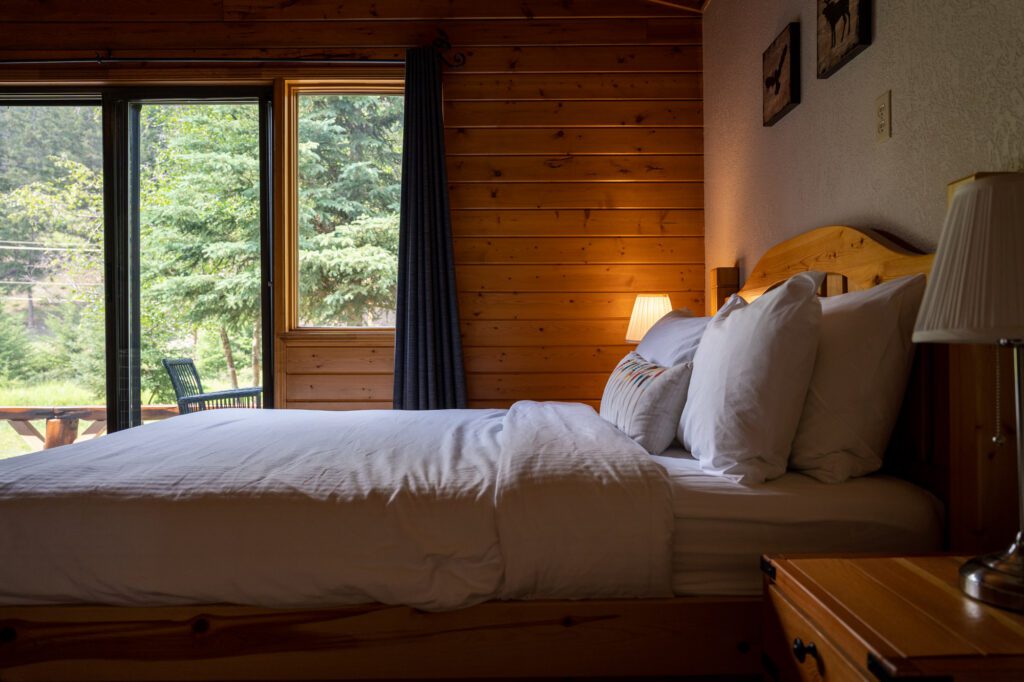
For what it’s worth, we stayed at Bear Hill Lodge on our last trip, and absolutely loved both the cabins themselves, and the proximity to downtown Jasper (it’s a 10-15 minute walk).
Our other recommendations here would be either Pine Bungalows Resort, which is right across the river from downtown (though it’s not walkable), or the Pyramid Lake Lodge, which (as you might guess) is right on the shores of Pyramid Lake just outside of downtown Jasper.
Staying Near Lake Louise
As we’ve already covered, we really think the best way to experience Lake Louise is to stay nearby, which is what we’ve done on our trips, and we haven’t regretted it one bit.
There are very, very few options near Lake Louise when it comes to hotels, and there are two that stand out to us as a good value (we’re not counting the Fairmont Lake Louise here, which is far out of our budget).
The two options we’d recommend are Paradise Lodge and Bungalows, which is where we stayed on our first trip and it has since been renovated and expanded, and Basecamp Baker Creek, which is a little further out, but looks like a lovely place to stay operated by our favorite hotel company in the Canadian Rockies.
The other great option is Lake Louise Campground, which you’ll need to reserve basically when the window opens in the spring (that’s what we did).
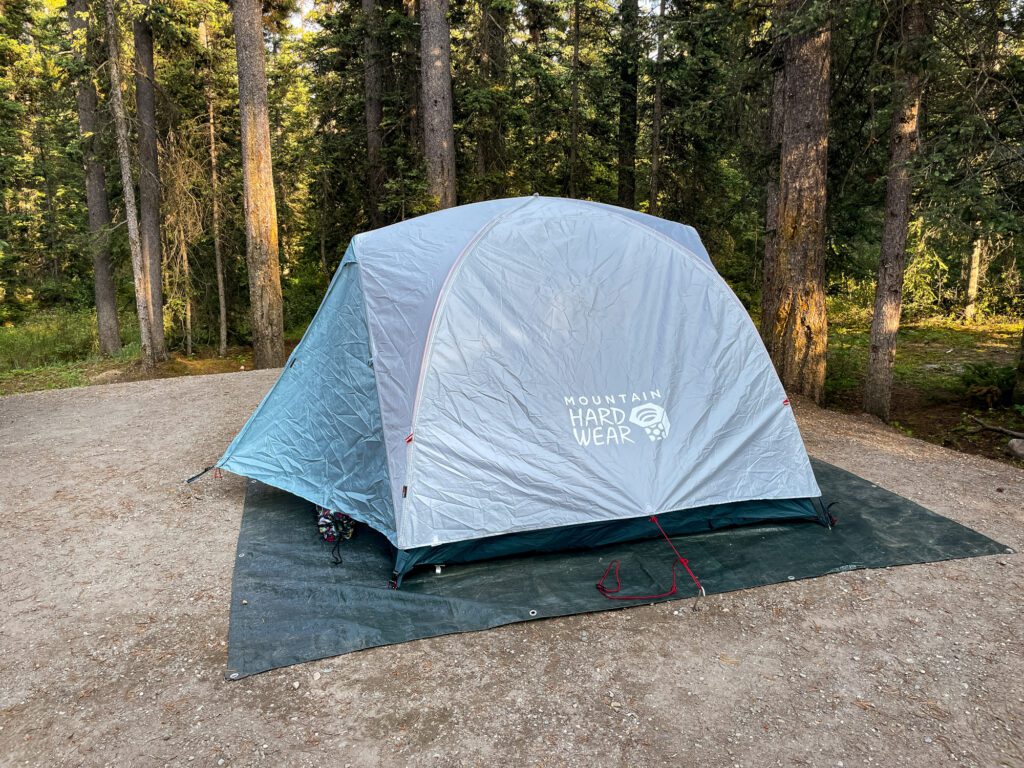
You can read more about the reservation procedures here, which are far more structured and relaxed than the US National Park processes. Obviously, that only works if you have camping gear with you.
The Best Time to Do This Road Trip
Summer and early fall, between July and mid-October, is going to be the best time to do the road trip we’re going through in this guide.
You’ll have the best weather, snow-free trails and roads, and longgggg days (we’re here in July, and sunrise is at 5:30am, sunset is at 10pm) to explore.
The big downsides of summer are crowds and prices, and they’re somewhat related. Summer is, by far, the most popular time to visit, which means trails are packed, and prices in Banff and Jasper are at an all-time high.
If you’re visiting in the summer, you’re going to want to book your accommodations as early as possible, too. Same with campsites – book them on the day they go on sale (which you can find here).
Banff is a good winter destination, too, but that trip is going to look very, very different, with more skiing and snowshoeing, and less driving around and hiking.
Keep in mind that winter driving is serious business in the mountains, and many roads require winter tires from October/November to April.
This is particularly important for the Icefields Parkway, which closes intermittently in the winter due to storms. Once you drive it yourself, you’ll understand why it wouldn’t be ideal to drive it during a winter storm.
Things to Know Before Your Trip to the Canadian Rockies
We’re going to use this section to cover important logistics – like shuttles, permits, and safety tips – that you should know before you hit the road.
Park entry fees and passes. You’ll need to pay a fee when you’re in any of the national parks on this itinerary.
You have two options – buying a pass for the number of days you need it for, or buying a Discovery Pass, which gives you access to all national parks in Canada for a full year.
At a high level, the math on the Discovery Pass works out if you’re spending 7 days or more in the parks ($10.50 per day, $72.25 for an annual pass) though there are some permutations around family passes that might make the math change in your particular instance.
You can buy both versions at the park entrance stations, or online in advance.
Remember that you’re at elevation. The town of Banff sits at 4,500 feet above sea level, and Lake Louise is at 5,250 feet above sea level (Jasper is slightly lower).
Two things to know here – stay hydrated, and give yourself a day or two to acclimate if, like us, you’re coming from around sea level.
This is the reason we have you starting off with a lower intensity hike on the first day of the itinerary below.
Expect it to be busy busy busy. If you’re in the Canadian Rockies in the summer, don’t expect to find a whole lot of solitude unless you head into the backcountry (and even then…).
The best way to avoid crowds is to get a very, very early start.
We arrived before 8am to trailheads (before 7am at Lake Louise), and found that we were often one of the first few groups on the trail, with far more people coming up the trail as we headed down.
Book your Lake Louise and Moraine Lake shuttles ASAP. Especially if you want to get on one of the early morning departures, which you should.
We’ll cover getting to Lake Louise below (if you choose to drive, get there before 7am to secure parking and be ready to pay $21 for the day), but Moraine Lake is only accessible via shuttle, and it’s SUPER competitive.
You need to book it in advance, which means you’re unfortunately going to have less flexibility when it comes to weather. More information on the shuttles here.
Know where to find gas stations. You’ll want to have a full tank of gas as you start your drive on the Icefields Parkway, because there’s exactly one gas station between Lake Louise and Jasper at the Saskatchewan River Crossing, and it’s more expensive than getting gas elsewhere.
There are plenty of gas options in Canmore, Banff, Lake Louise, and Jasper.
Wildlife is…wild. Banff and Jasper are amazing places to see wildlife. On this last trip, we saw Grizzly bears, black bears, elk, moose, bighorn sheep, mountain goats, tons of marmots, among other things.
However, it is very very important that you remember that these are wild animals we’re talking about, and your actions impact their lives.
Give them plenty of space, and avoid stopping in the middle of the road to gawk at them (though this inevitably happens – make sure to pull off the road and stay in your vehicle). Read this Parks Canada guide to responsible wildlife viewing before your trip.
How to Plan a Picture Perfect 10 Day Canadian Rockies Itinerary
And now, on to the actual itinerary!
We’ve written this as a day-by-day itinerary, with suggestions on exactly how to spend each day.
Obviously, as you’re planning your own trip, things are going to come up like shuttle availability and weather.
So, while you could just copy and paste this itinerary, you’re probably going to have to shift some things around.
That being said, we’d strongly recommend keeping the Banff-Jasper-Lake Louise structure intact, if you can.
Remember that structure as you’re reading through the itinerary, because it means that the highlights of Lake Louise and Moraine Lake are at the end of this itinerary (days 8-10), where you’ll find some useful tips on accessing the lakes, hiking, and more.
Day 1: Arrive in Calgary, Drive to Banff, Two Jack Lake for Sunset
Your first day is going to be at least half travel time, depending on when your flight lands in Calgary.
We’d strongly recommend booking the earliest possible flight in (and the latest one on the way out) to maximize your time in the Canadian Rockies.
You’ll land in Calgary (assuming you’re flying in) and head over to the rental car agency to pick up your car.
It takes about two hours to go from the airport to Banff, depending on traffic and where exactly you’re going. Head to your accommodations, check in, drop your bags, and set out for an afternoon of exploring nearby.
If you’re not flying into Calgary to start your trip, you’ll want to make your way to Banff (and you’ll likely have an extra half day or so in and around Banff to hang out).
Lake Minnewanka & Scenic Drive
Your first stop is going to be Lake Minnewanka, which is a massive lake out to the east of Banff. It’s only about 15 minutes away, but by the time you’re on the lake, you might as well be in the middle of nowhere.
The drive out to the lake (and between this lake and Two Jack Lake, which is SPOILER ALERT your next stop) are particularly good places to see wildlife like bighorn sheep and elk. We’ve seen both, multiple times, along this road.
There are a couple of things to do at Lake Minnewanka, and the first is definitely the boat cruise (which we skipped because of the dog, but we absolutely would have done it if we were sans Lupine).
The cruise takes you out to Devil’s Gap at the far end of the lake, and brings you back. More information here.
The second thing we want to call out is renting a canoe or kayak. The lake is huge – it’s 13 miles long! – and it’s impossible to get very far on foot (more on that in a second).
Getting out on the water in your own watercraft will allow you to get out to different parts of the lake that most people never make it to.
The third and final thing is hiking around Lake Minnewanka. There are two trails in particular that we’d consider.
The first is the simple lakeshore trail, which isn’t totally flat, but also isn’t a huge climb and would make a good first hike as your body gets acclimated to the elevation in the Rockies.
This is a nice option because you can easily customize it to how you’re feeling, going for a mile or two and then turning around, or going the entire way to the end of the maintained trail.
The second is C-Level Cirque, which is a short but intense hike up to a rocky bowl with great views back towards the lake. It does involve some scrambling near the top, but it’s relatively easy compared to some of the other scramble trails in the area.
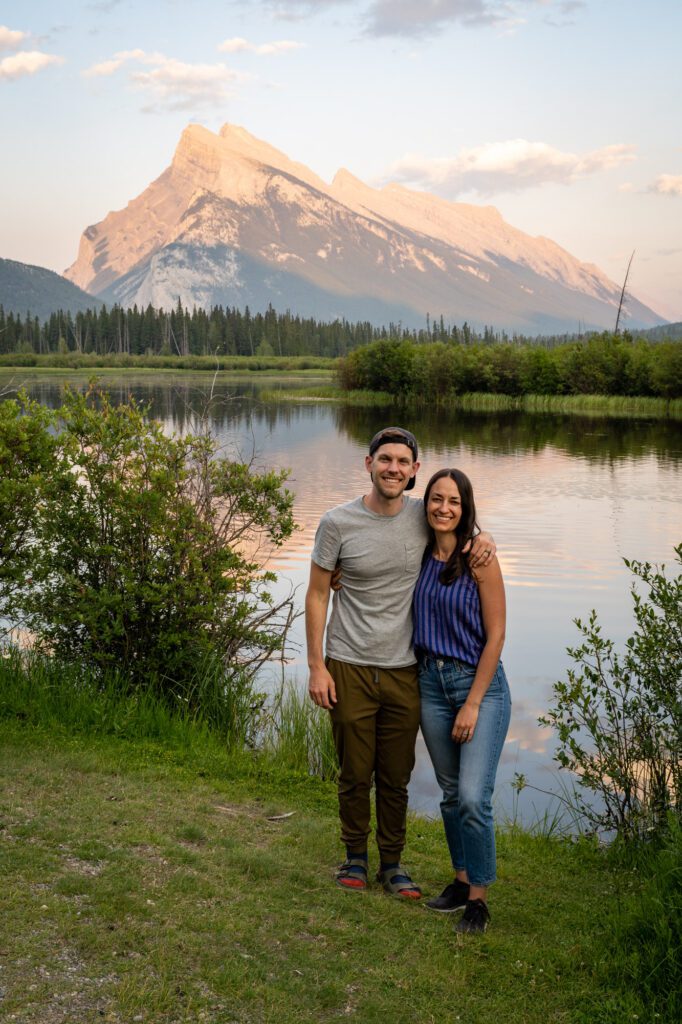
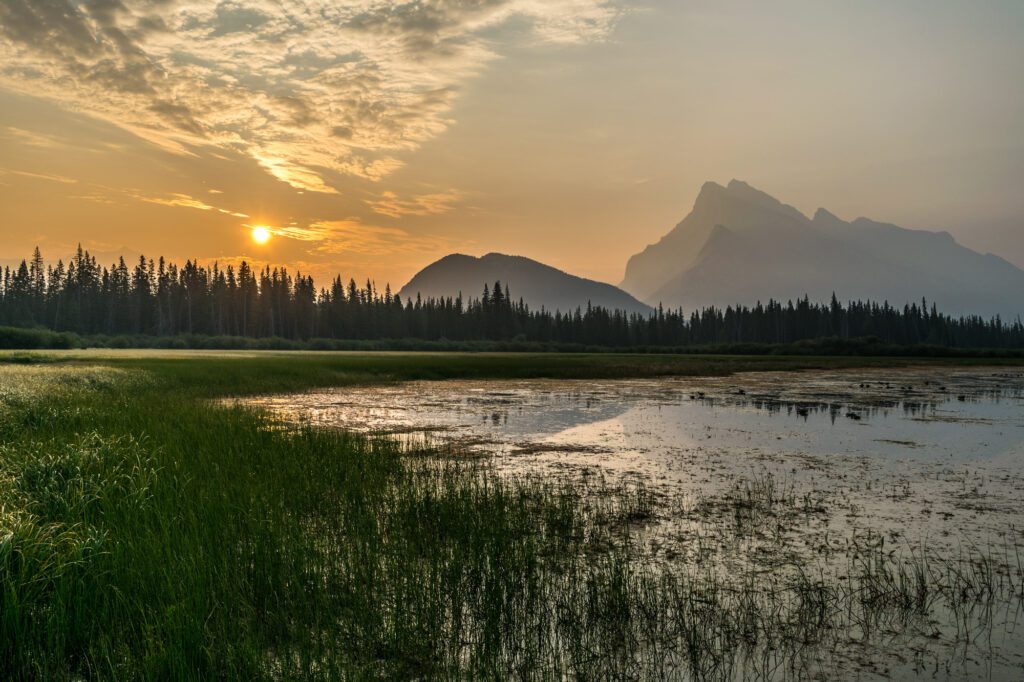
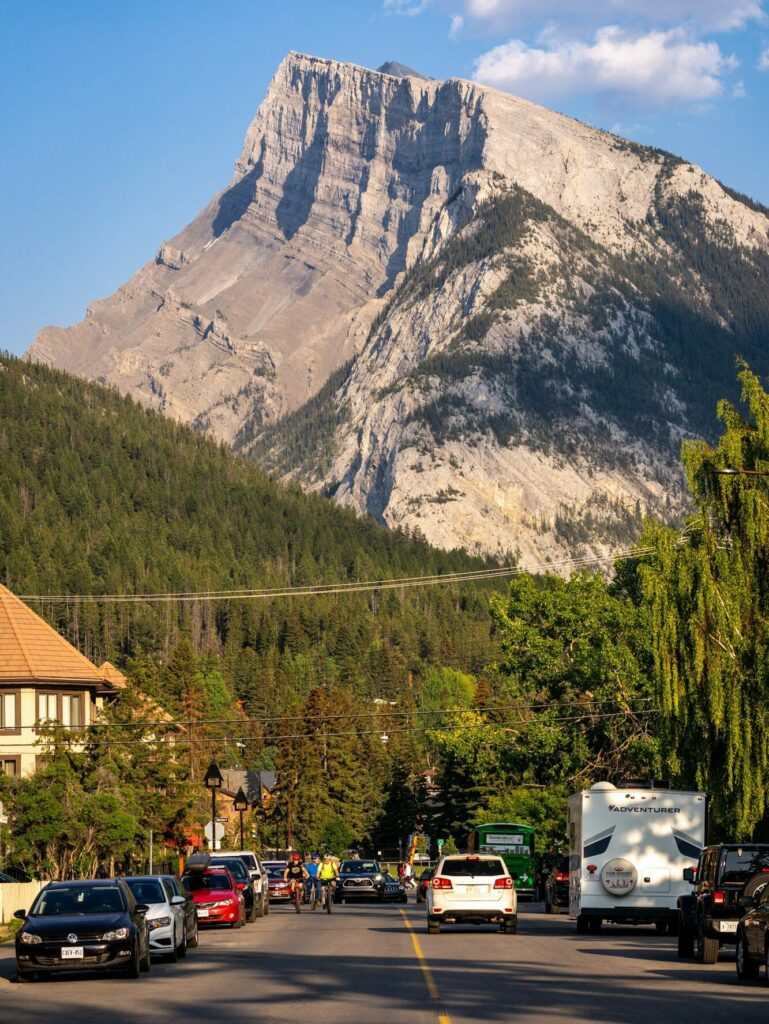
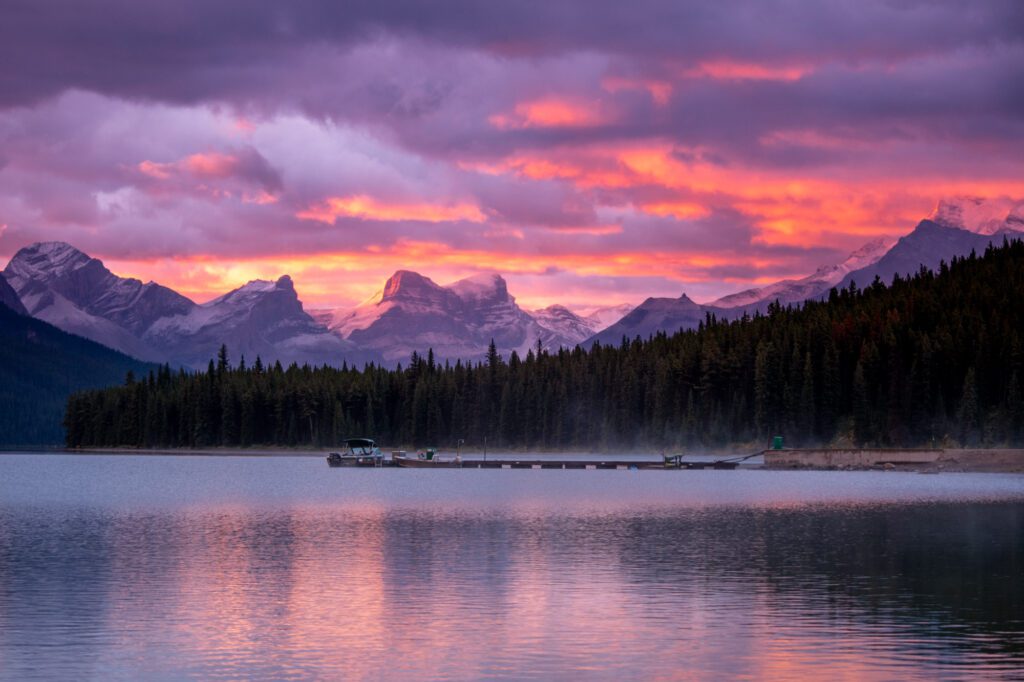
Two Jack Lake at Sunset
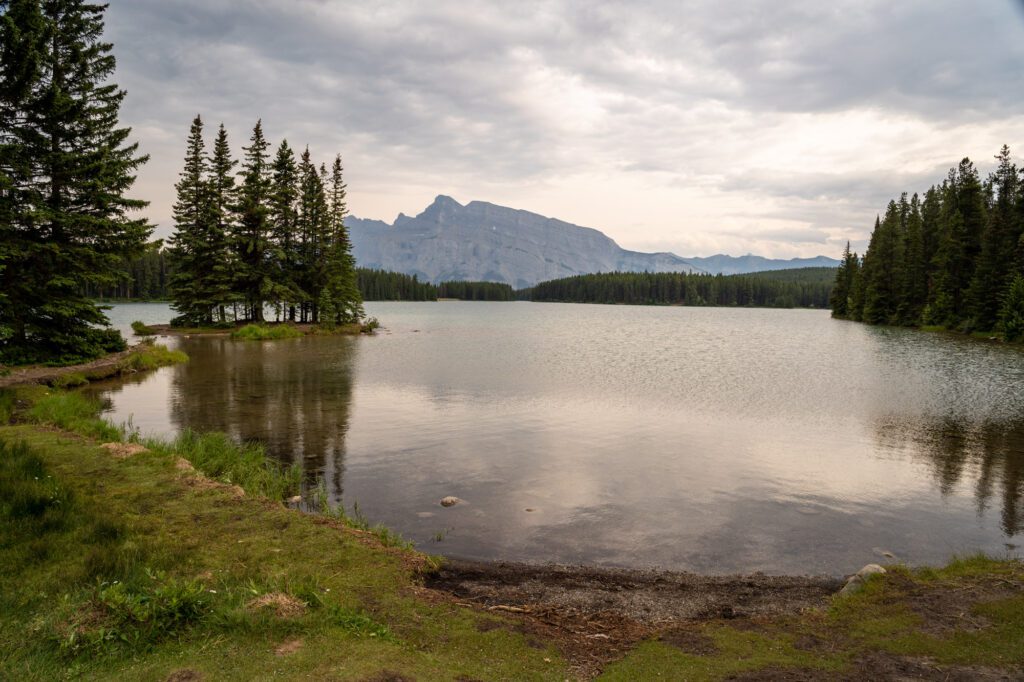
Spend your first sunset in Banff at nearby Two Jack Lake, which is a smaller (but arguably equally picturesque) lake near Lake Minnewanka.
Park in the lower parking lot and grab one of the picnic benches, either on the beach right there, or on the little spit out to the right, and watch the golden glow of the setting sun over the silhouette of Mount Rundle in the distance.
Day 2: Vermillion Lakes, Johnston Canyon, & the Town of Banff
On your first full day in Banff, start with an early morning (ideally, sunrise) trip out to Vermillion Lakes to admire the reflection of the curved peak of Mount Rundle in the still water of the lake (and look for elk and moose along the shoreline).
Then, tackle your first hike of the trip into Johnston Canyon (with an optional extension to the colorful ink pots) before spending the afternoon and evening in the town of Banff.
Vermillion Lakes
We love Vermillion Lakes at any time of day, but it’s particularly special in the early morning and late evening hours when the water of the lake is calm and you have the chance to get a perfect reflection of Mount Rundle in the still water.
This is a very popular spot for photographers for obvious reasons, and our favorite photo spots are along the stretch of shore just outside of town (here on Google Maps).
This also happens to be a great place to see wildlife – we have seen elk along the road, and a variety of birds out on the lake (plus, muskrats).
Johnston Canyon (and the Ink Pots?)

From Vermillion Lakes, head over to the Bow Valley Parkway to start the drive to your hike for the day, Johnston Canyon (with an optional extension for the Ink Pots).
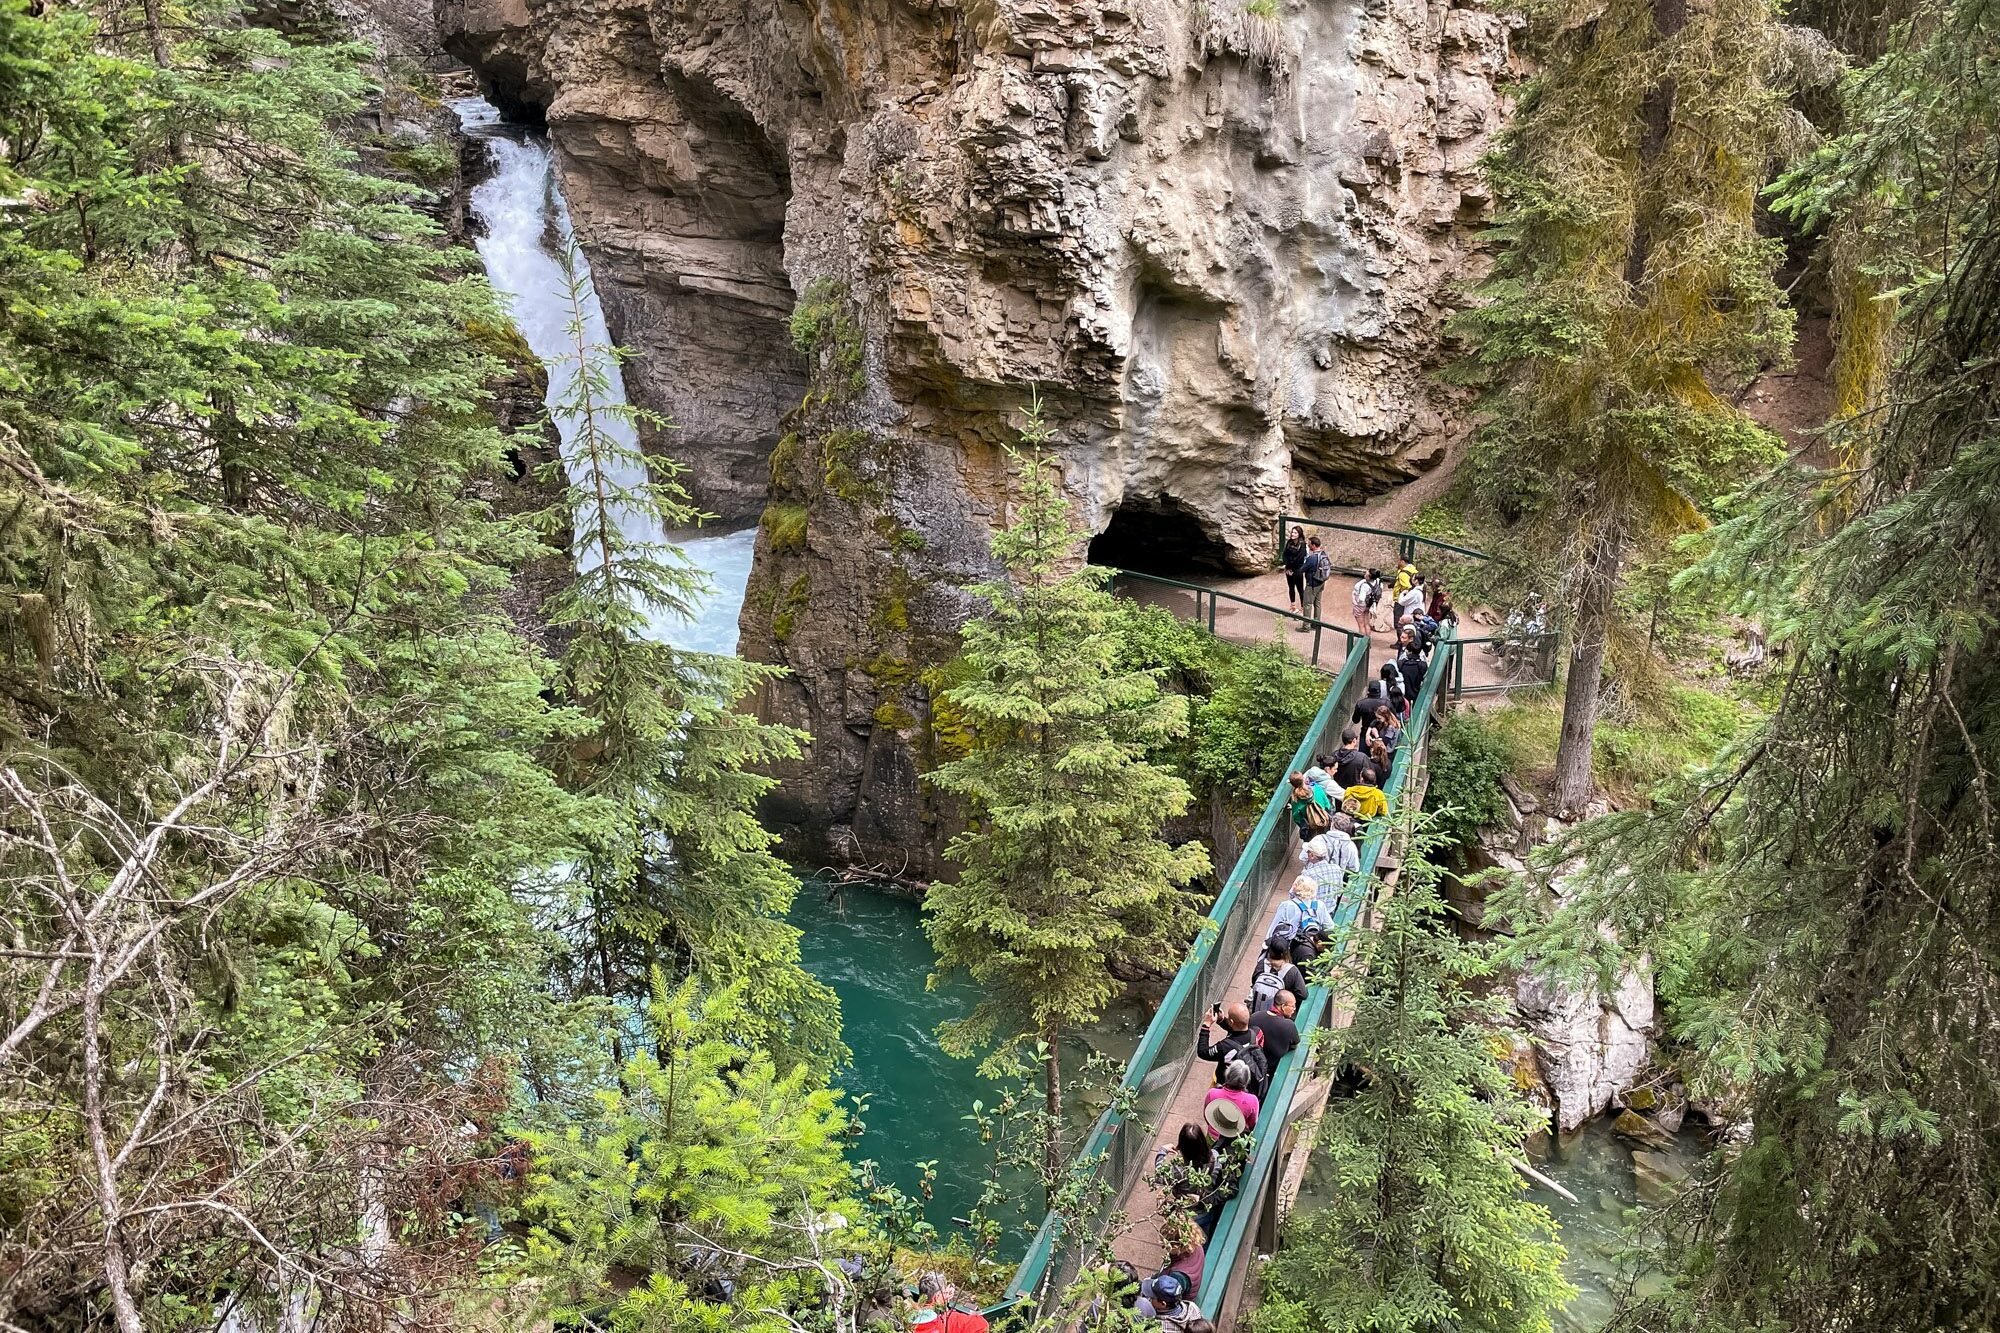
Johnston Canyon is a unique experience, but it’s one that you really need to have before the crowds show up. We would arrive NO LATER than 8am or so for this hike, but the earlier the better.
At about 10am, the narrow boardwalk is packed with people. We know, because we came back down the trail and spent two miles trying to keep Lupine on one side of the narrow boardwalk when there were just SO MANY PEOPLE to get pets from.
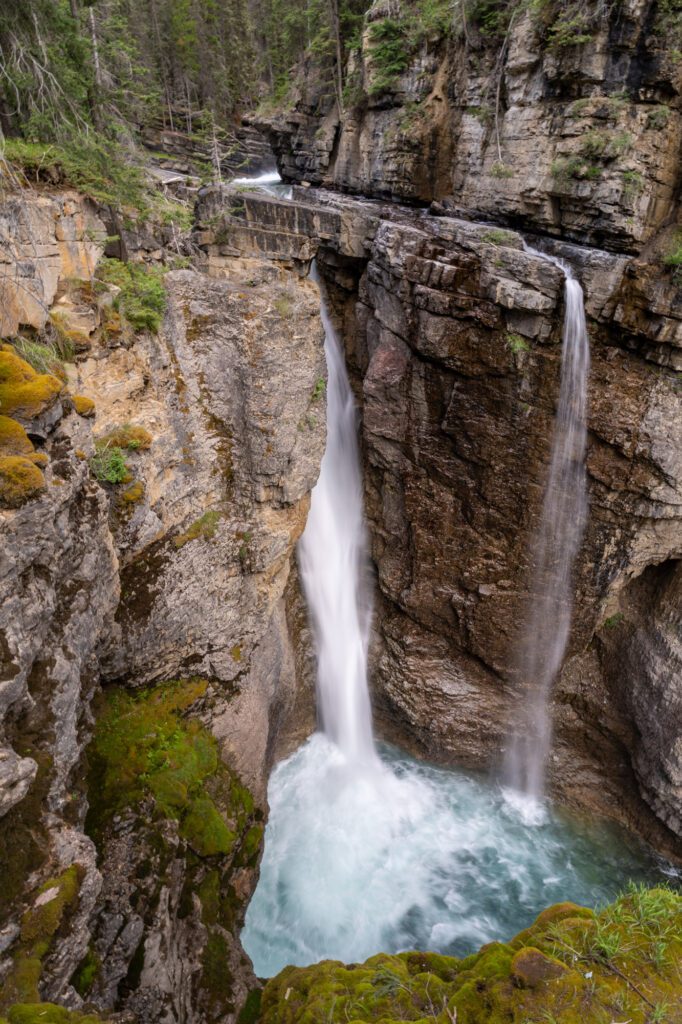
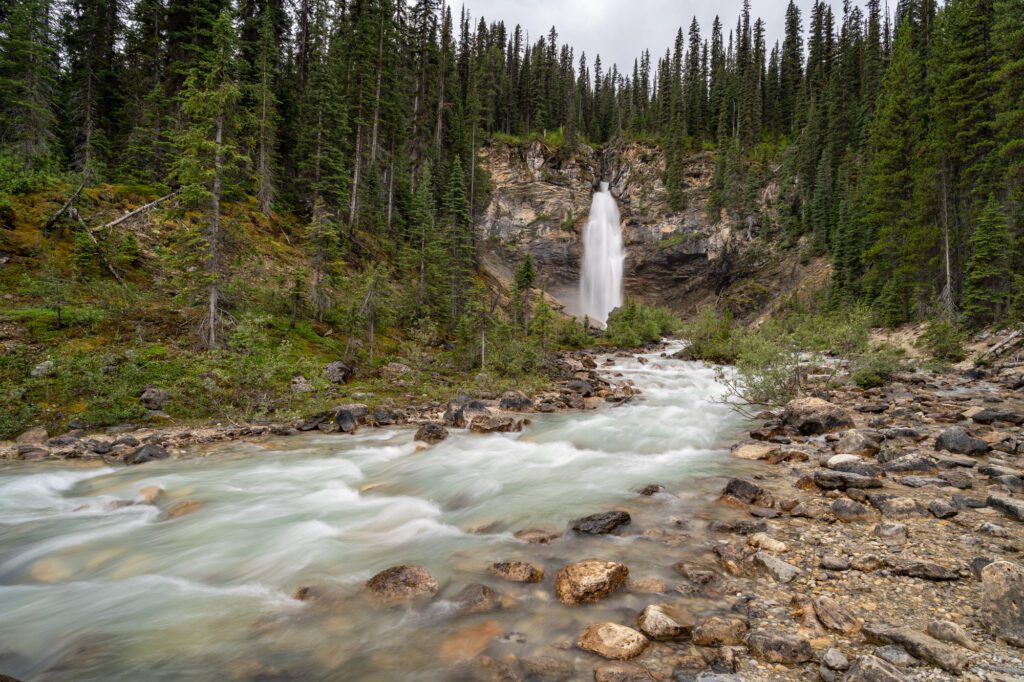
The hike is worth it, though. You’ll follow a boardwalk through a canyon with high walls and a river running through it, and the crown jewels of the hike are the upper and lower falls.
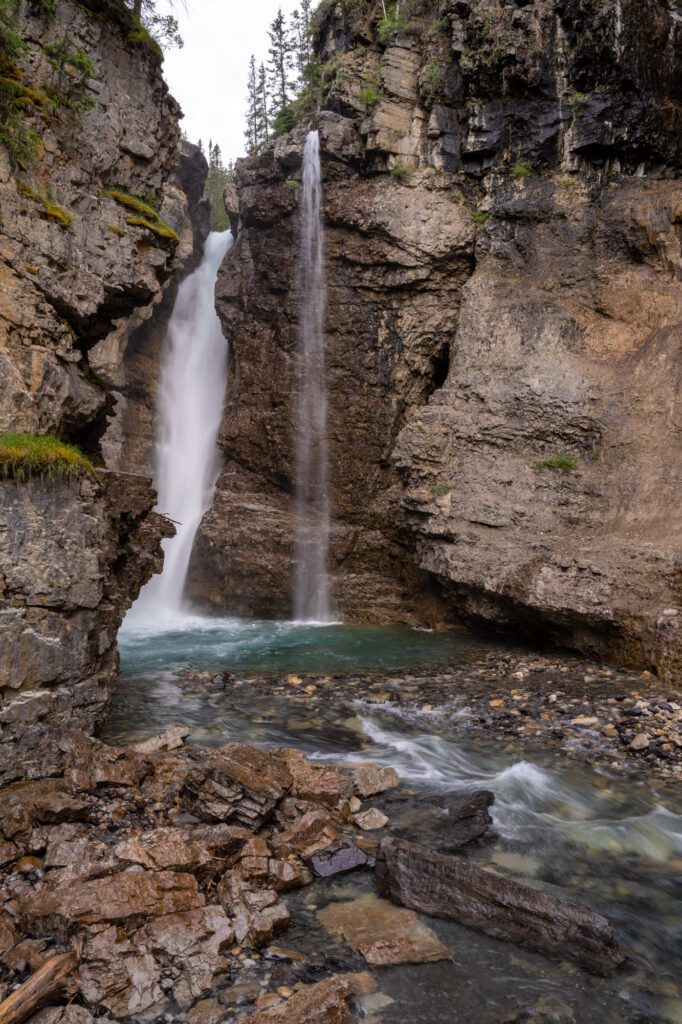
Looking for another reason to get an early start? The lineup to see the falls at 11am or so was wild.
Here’s a picture.
Looking to escape the crowds? We have some good news. The vast majority of people only go to one or both of the falls, which means you’ll have the continuation of this hike out to the Ink Pots – colorful pools in a beautiful valley – largely to yourself.
To get to the Ink Pots, it’s about a 2 mile hike in the woods, climbing the entire way.
It’s a bit of a slog – there are no views or redeeming features of that stretch of trail to speak of – but the end point is worth it, we thought.
The Ink Pots are cool because they’re formed by thermal activity, but they’re not hot like thermal pools in Yellowstone, for example.
If you look closely at the bottom of the pools, which is made easy by the fact that they’re completely clear, you’ll see little swirls at the bottom which is where the water is coming up from below.
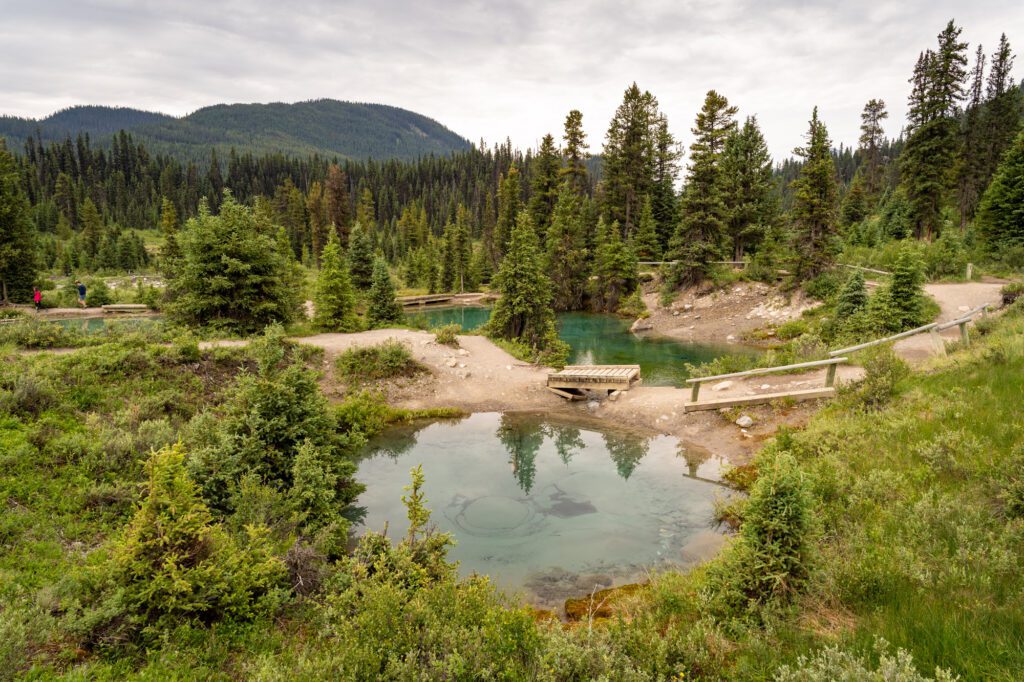
They’re particularly stunning on a sunny day, when the rays of the sun make them vibrant and bright, but we were there on a cloudy day and still thought it was worth the journey.
Exploring the Town of Banff
Spend your afternoon in and around the town of Banff, which is on the one hand very “touristy” in the sense that nearly everyone you’ll encounter outside of service workers is a tourist, but also has some pretty cool spots to check out.
The main drag in town is (unsurprisingly) called Banff Avenue, and it’s where you’ll find the vast majority of restaurants, shops, and other places of interest in that vein. However, there are also a couple of walkable/driveable places with nice views that are worth seeking out.
Here are a few of our favorites.
Surprise Viewpoint: This is the classic view of the Fairmont Banff Springs Hotel backed by the mountains. You can walk there from town, but it is uphill along a busy road.
However, that’s probably preferable to navigating the parking situation, which is usually full of tour buses.
Bow Falls: Probably not the most impressive waterfall you’ll see on this trip (especially if you make it over to Yoho National Park), but definitely the most accessible from downtown Banff thanks to the short flat riverside trail.
Arguably the best views are actually not of the falls, but of the mountains towering over town (Norquay and Rundle).
Cascade of Time Garden: This was Alysha’s discovery, and it’s worth walking through on your way back to town. It’s a little oasis with nice views of downtown Banff and some fun landscaping.
If you’re up for a little more walking, you can do all three of them as a fun little loop from town. Here’s a map of what that looks like.
There are also plenty of bars and restaurants in town for dinner and drinks.
Here’s the Eater guide for the Canadian Rockies for some inspiration.
Special shout outs for the Balkan (where we’ve eaten and enjoyed) and to the Bistro at the Juniper Hotel for the views (we haven’t eaten there, but have admired the views and considered it).
Day 3: Choose Your Own Hiking Adventure & Canmore
On your second full day in and around the town of Banff, enjoy a morning hike before heading down the road to Canmore, a charming little mountain town that quickly became our favorite place to go to eat, drink, and shop.
Choose Your Own Hiking Adventure
While we like to hike a bunch of miles a day when we’re in the Canadian Rockies (less so as we get older and recovery becomes harder!), we also recognize that not everyone is up for 10 miles a day.
For your hike today, you have a few options depending on what you’re up for.
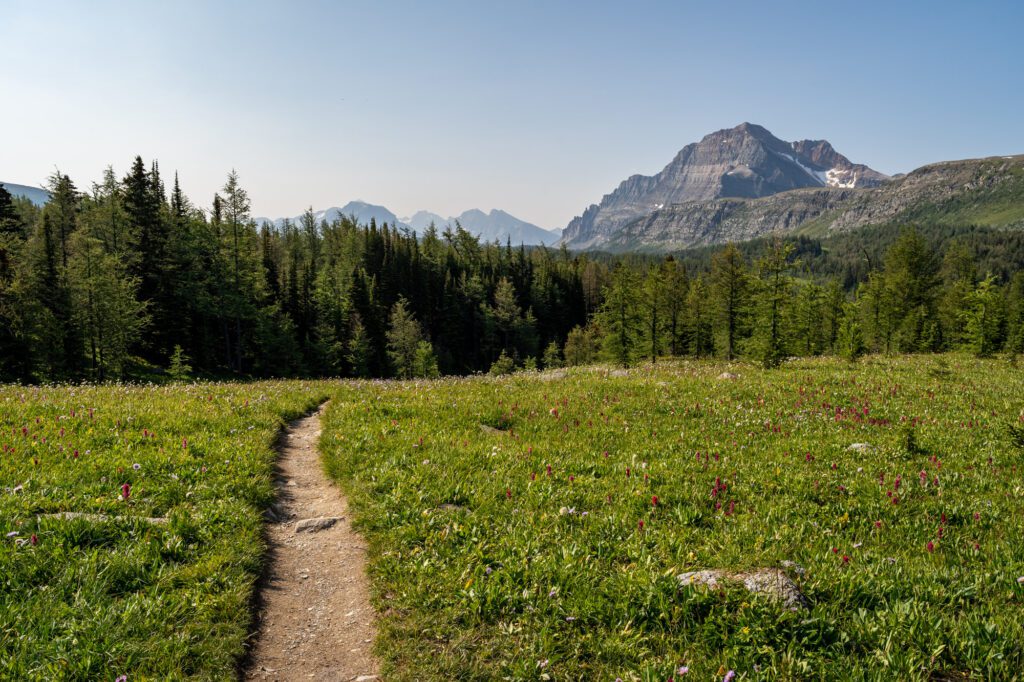
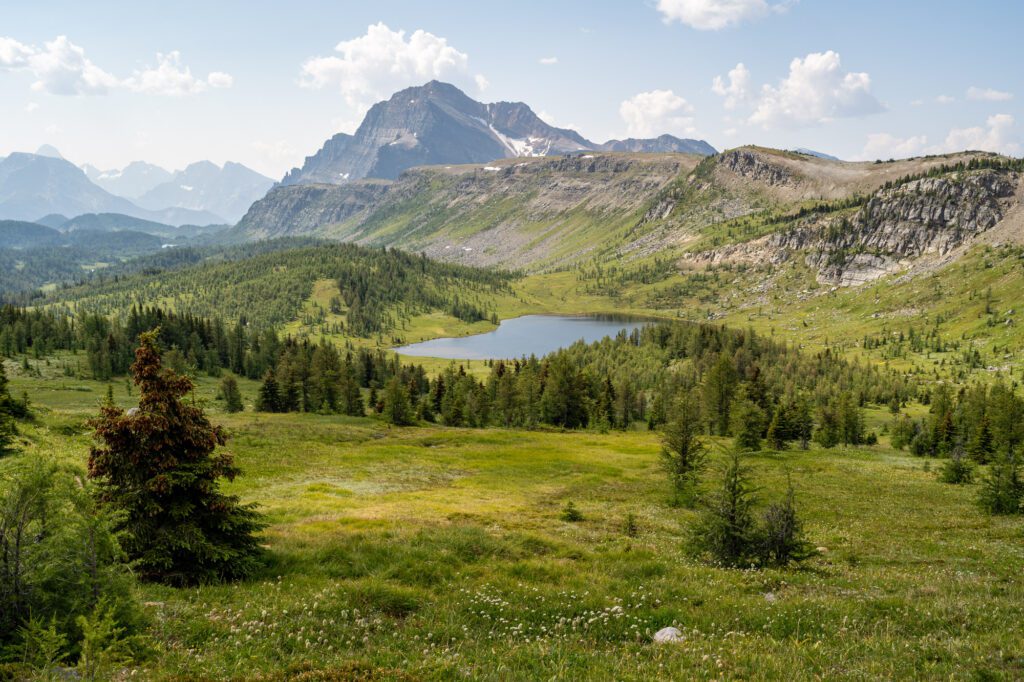
If you are up for some mileage, we highly recommend Healy Pass. It’s a long hike, but it’s relatively easy in terms of elevation gain and intensity.
And the views from the pass are downright magical, especially in the early summer when the meadows are blanketed in wildflowers and fall when the larches are golden.
Healy Pass (11.1 miles / 2,814 feet elevation gain): We loved this hike. It’s a must-do if you’re in the Rockies in early summer (call it mid-July?) for the stunning wildflowers or mid-October when the larches are lighting up.
From the pass, you have a nice view of the Ramparts and the Monarch in one direction, and the peaks backing Egypt Lake in the other.
It also leaves from the Sunshine Meadows parking lot, which is giant, which means there’s no parking nightmare.
C-Level Cirque (5.8 miles / 2,490 feet elevation gain): We mentioned this earlier as an option around Lake Minnewanka, and we’re mentioning it here again as a moderate option that’s an easy drive from Banff.
You climb up through the forest for the first few miles before emerging into a rocky bowl, at which point it’s a quick scramble up to a viewpoint back towards the lake.
Tunnel Mountain (2.7 miles / 879 feet elevation gain): If you’re looking to take it easy for the day, we really enjoyed Tunnel Mountain.
It’s a quick drive (or walk, depending on where you’re staying) from Banff, and the trail is the kind that gets you sweating a little bit, but not so much that you can’t wear those same clothes later.
There are some nice views out in both directions from along the trail, with the final view looking out over Banff and the valley beyond.
Exploring Canmore
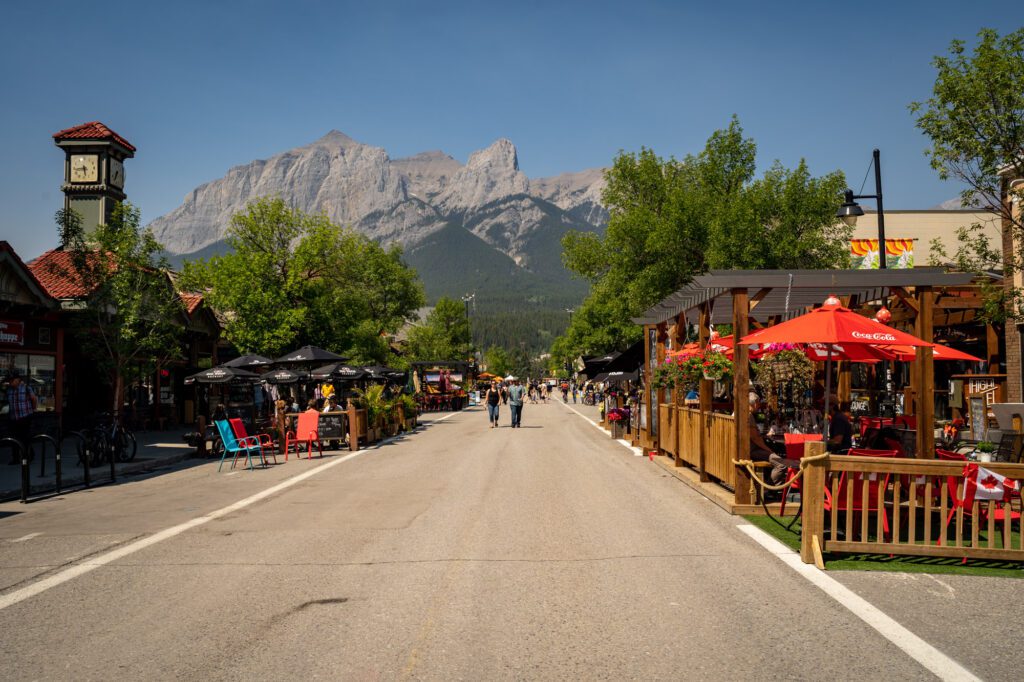
For the afternoon, head 15 minutes east from Banff over to what turned out (again) to be our favorite town in the Rockies, Canmore.
We liked Canmore so much that, while we will definitely be back to the Canadian Rockies and Banff National Park, we will likely never ever stay in the town of Banff again. It’s all Canmore for our future selves!
Canmore is our ideal version of a small-ish mountain town, because while it is very clearly on the tourist track (it’s 15 minutes from Banff, though it is technically outside of Banff National Park), it also feels like people actually live there. Which is not something we’d ever say about Banff.
The fact that people actually live in Canmore (the population has been increasing, especially since the events of 2020 and the rise of remote work) means that, unlike Banff where, for example, there is not one single good coffee shop, there are a bunch of businesses catering to both tourists and locals.
And it’s truly just as beautiful as Banff, with downtown Canmore sitting along the Bow River, backed by the Three Sisters – which you’ll see and hear a lot about in the brief time you spend in Canmore.
Similar to Banff, there’s one main drag in Canmore – 8 Street – and that’s where we’d recommend you start with your explorations.
Here are a few of our favorite spots in Canmore.
Eclipse Coffee: This was a recommendation from the barista at Prototype Coffee, one of the best coffee shops in Vancouver, and I’m so glad I mentioned that the Banff area doesn’t have any good coffee because I was SO wrong.
They have two locations – one right on the main drag, and one over near the Safeway in a strip mall – and they roast their own beans. If you’re looking for good coffee in Canmore, head straight to Eclipse – do not pass go, do not collect $200.
Mixed Culture: For the best selection of craft beer, cider, and wine in Canmore, go here.
This is another one we stumbled upon, and the owner was extremely helpful in helping us choose some ciders AND gave us a great tip on finding wineries in the Okanagan Valley by connecting us with his natural wine distributor’s online guide.
Highly recommend if you’re looking for some cans or bottles to enjoy at camp, or at a lake, or basically anywhere.
Core Values Cider: On the recommendation of the owner at Mixed Culture, we moseyed over here to find them working hard on their new taproom, which should be open now.
I was definitely not expecting to find a cidery in Canmore, but here it is! They specialize in dry, wild-fermented cider too, which is very much in our wheelhouse.
Communitea: We’ve now eaten here four or five times over a few trips, and are deeply in love with this little corner cafe in Canmore with a great food and tea menu.
We like the Pad Thai (even though it’s not REALLY pad thai, if we’re being honest) and basically all of the salads and bowls. Good gluten free options, too).
Stonewaters: We stumbled upon this cool store, which is a fun place to pop into for locally made (mostly, anyway) gifts, cards, and other fun stuff.
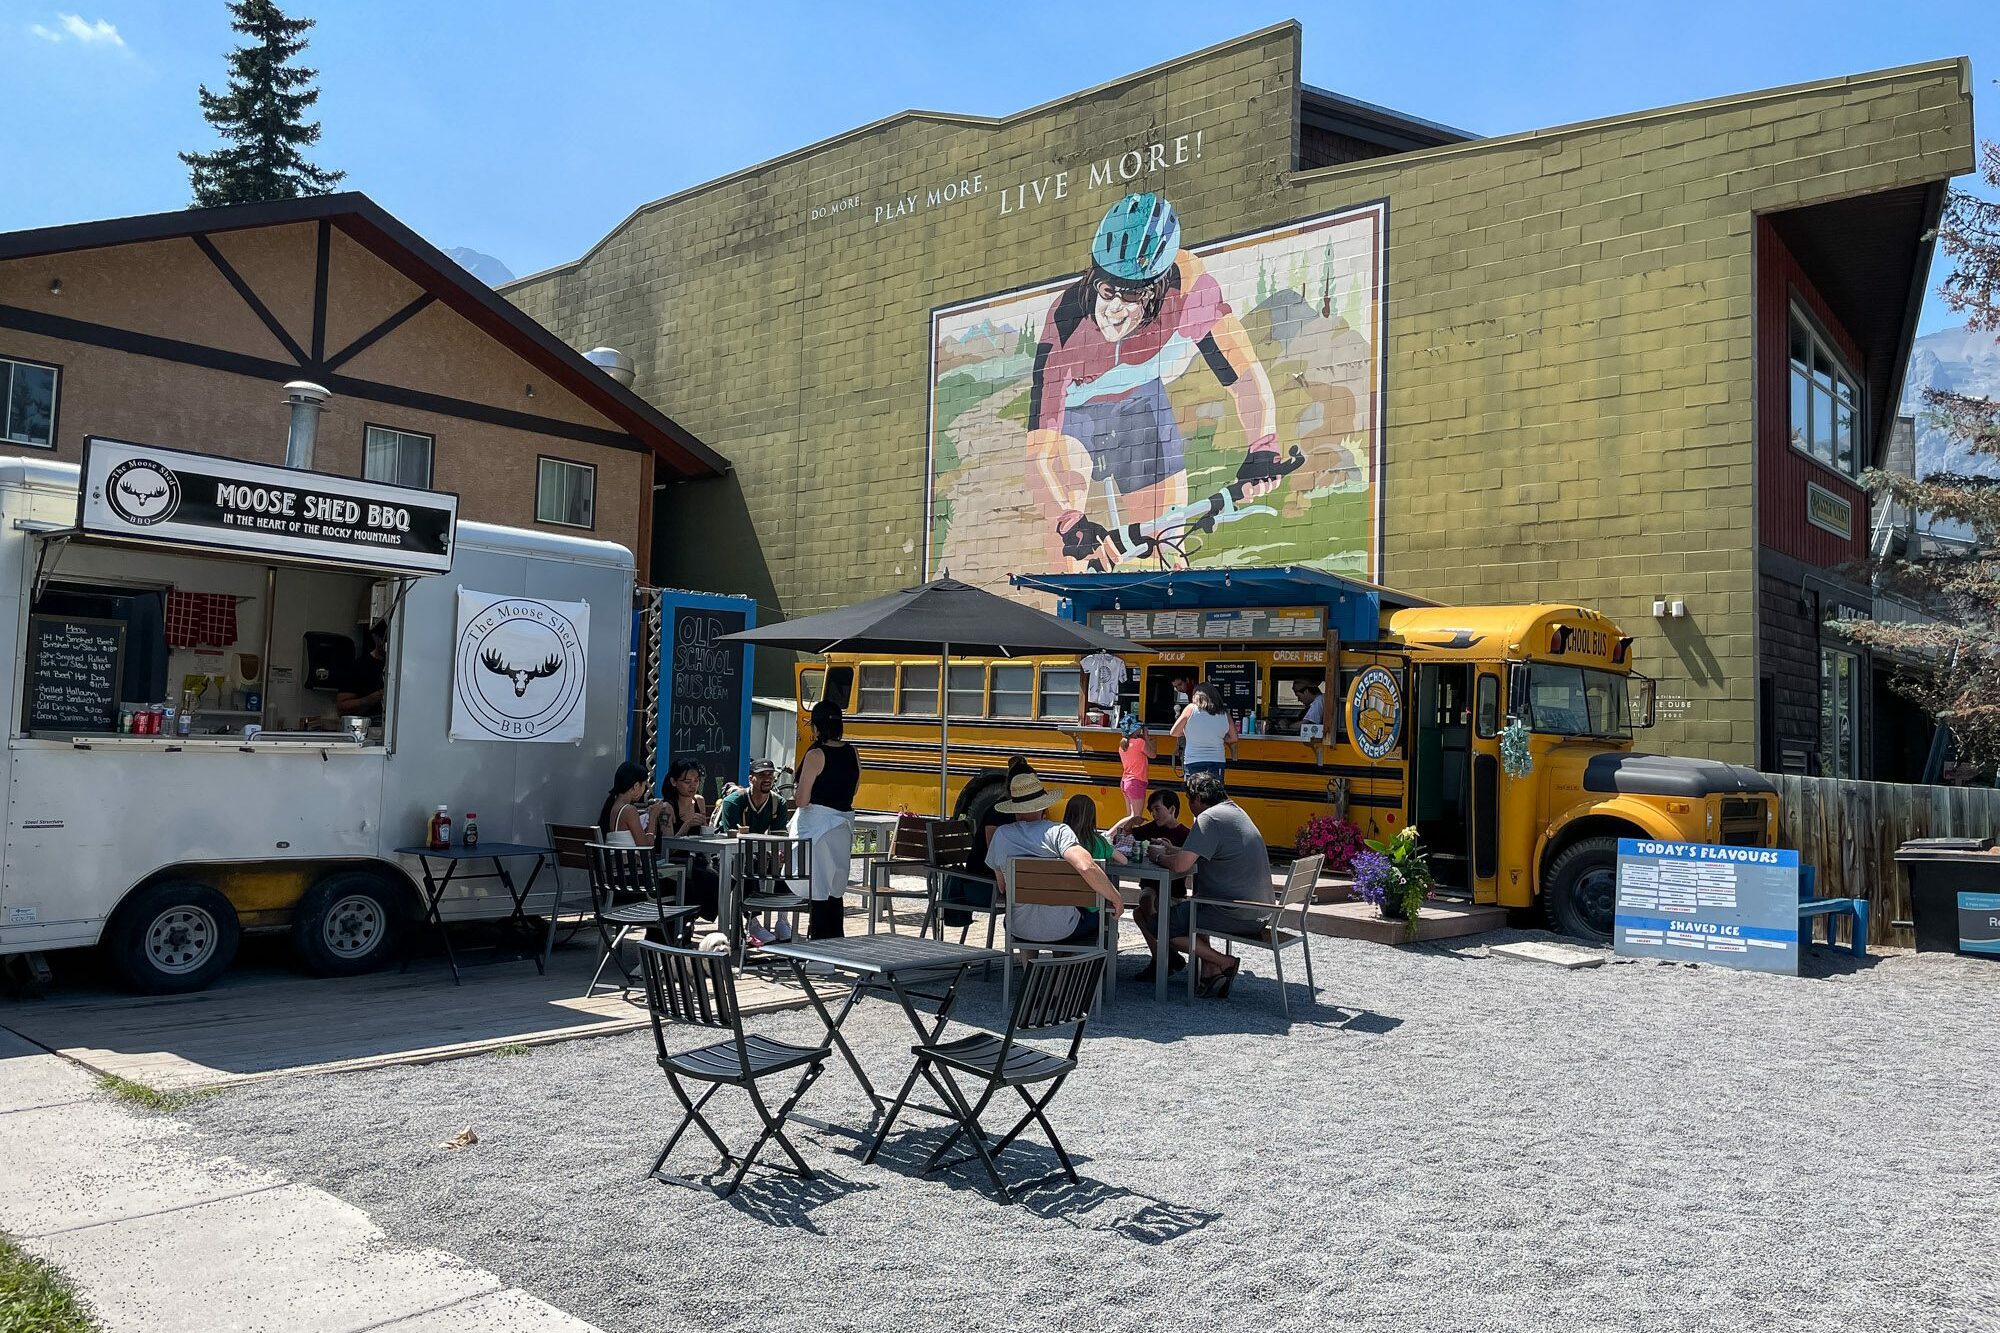
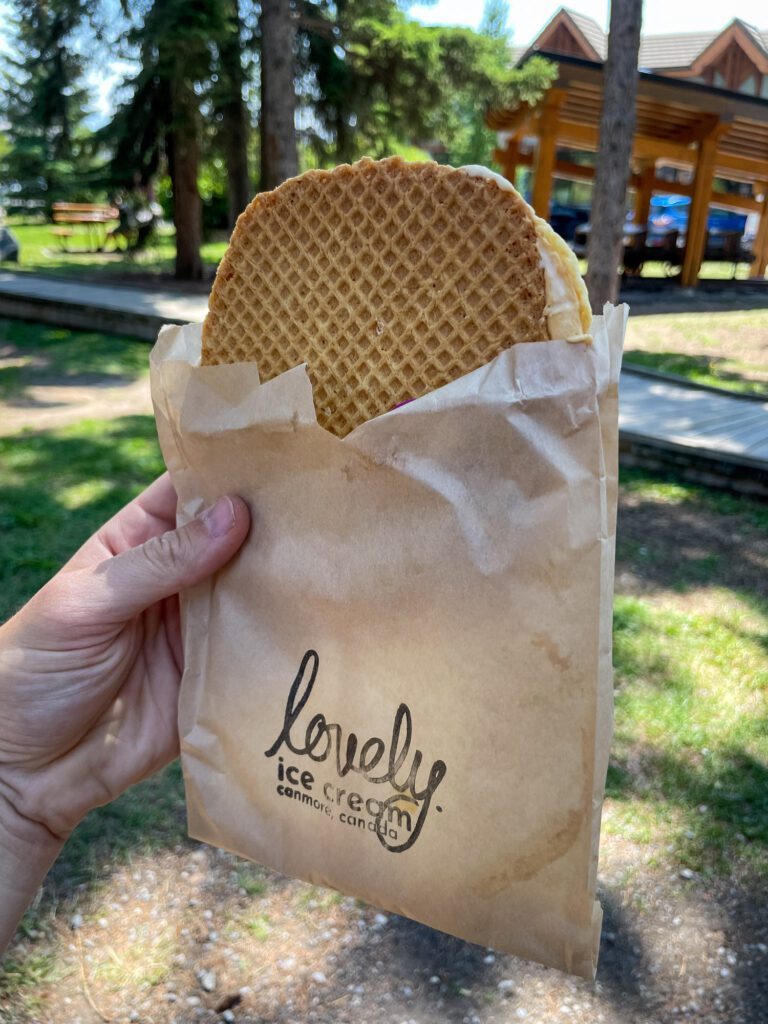
Lovely Ice Cream: Right outside of Stonewaters is a little cart slinging cups of ice cream and ice cream sandwiches, all gluten free! We went here multiple times, and would recommend it for a nice sweet treat.

Aside from the food and drink (and shopping) scene, there are a few other spots in Canmore that are worth your time.
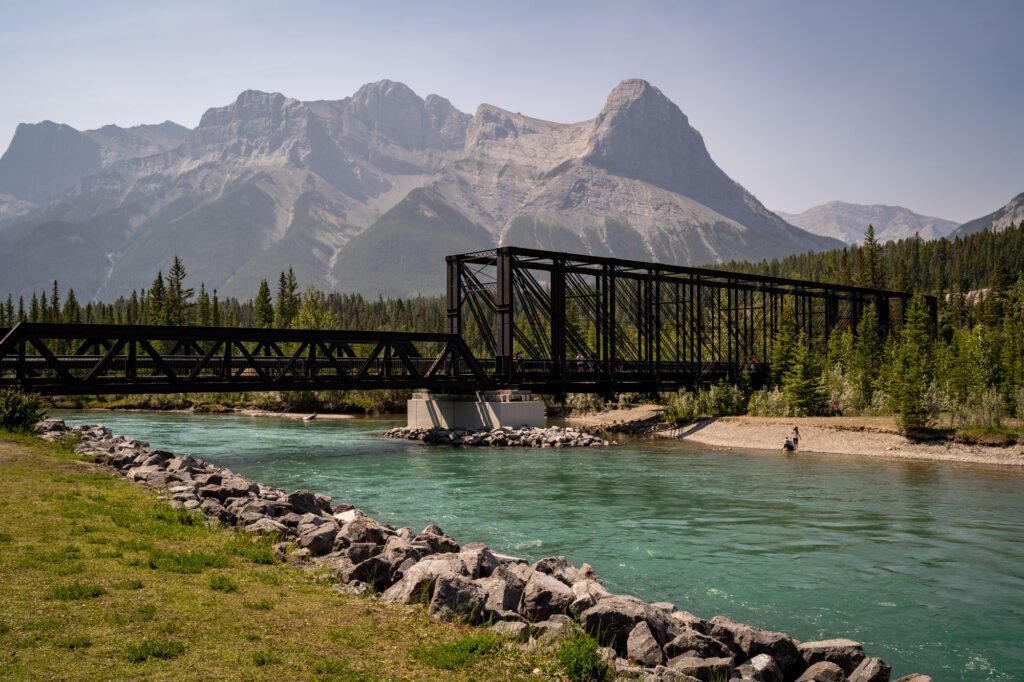
Bow River Trail: We don’t have a specific route, but we do think you should walk along the river out to the Canmore Engine Bridge (here on Google Maps), which is a cool view with the bridge in the foreground over the river, with the Three Sisters in the background.
Three Sisters Viewpoint: This is a drive from downtown, but it’s the best view of the Three Sisters. It requires some navigation (park here and walk under the railroad tracks), but there’s a little pond with a nice reflection of the peaks.
If you’re into photography, it’s worth coming back at sunrise, when the alpenglow lights up the Sisters just before the sun crests the horizon.
Grassi Lakes & Quarry Lake: Some short hikes near Canmore, also with nice views of the Three Sisters. Quarry Lake is in a nice park with an easy, flat trail along the lakeshore.
Grassi Lakes is a little more involved, and takes you out to a couple of bright greenish-blue lakes.
Mount Norquay for Sunset
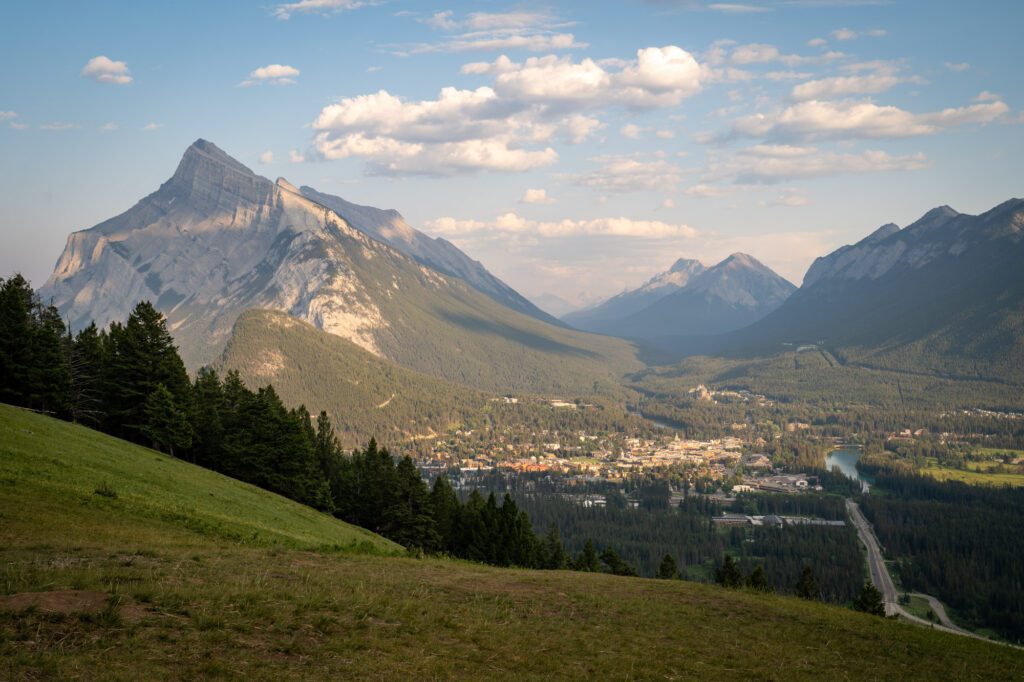
End your day up at Mount Norquay, which is across the Trans-Canada Highway from the town of Banff.
This was, perhaps, our favorite discovery of our time in Banff itself, because it’s hard to beat the view of Rundle towering over the city from the grassy slopes just below the parking area for the ski resort (which is what Mount Norquay is really famous for in the winter).
The lookout is almost the entire way up the mountain (here on Google Maps), and this would be an excellent place to watch the sunset with one of those beers, ciders, or wines that you got at Mixed Cultures in Canmore earlier in the day.
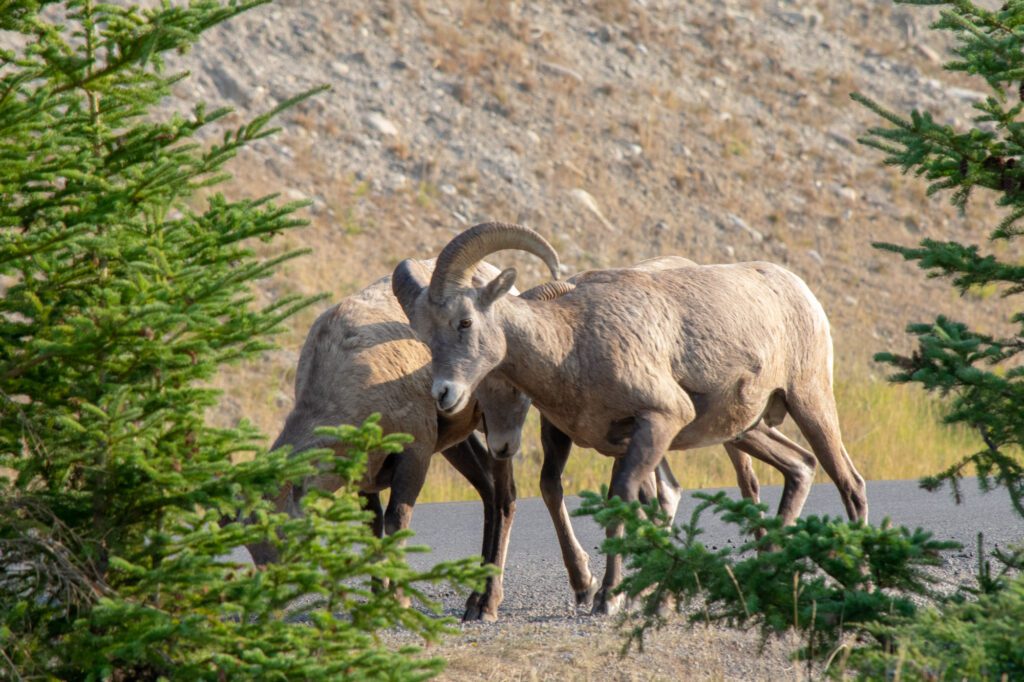
Plus, this is one of the better places in Banff to see Bighorn Sheep – we saw a family (including babies) on the road on the way up, and got out the telephoto lens to watch them frolic a little bit.
Day 4: Driving the Icefields Parkway from Banff to Jasper
Today, the star of the show is the Icefields Parkway, which is the incredibly scenic drive from Banff to Jasper that will leave your jaw on the floor of the car at every bend in the road.
The first time we ever did this drive, it was so smoky that you could not see 50 feet in front of you, so we truly had no idea what we were missing until we came back down from Jasper on a clear day, and were flabbergasted at the sheer natural beauty on display along this two and a half hour drive.
We’ve allocated basically a day and a half of this itinerary to this drive, and we’d definitely plan on taking your time here, stopping often for short walks out to viewpoints.
We have an entire guide to driving the Icefields Parkway, which you should read for a full list of all the stops we’d recommend along the way. Here is a selection of our favorites, including a great hike to do along the way.
If you miss a stop on the way up, you have to make the drive back down in a couple of days anyway, so you can hit it then!
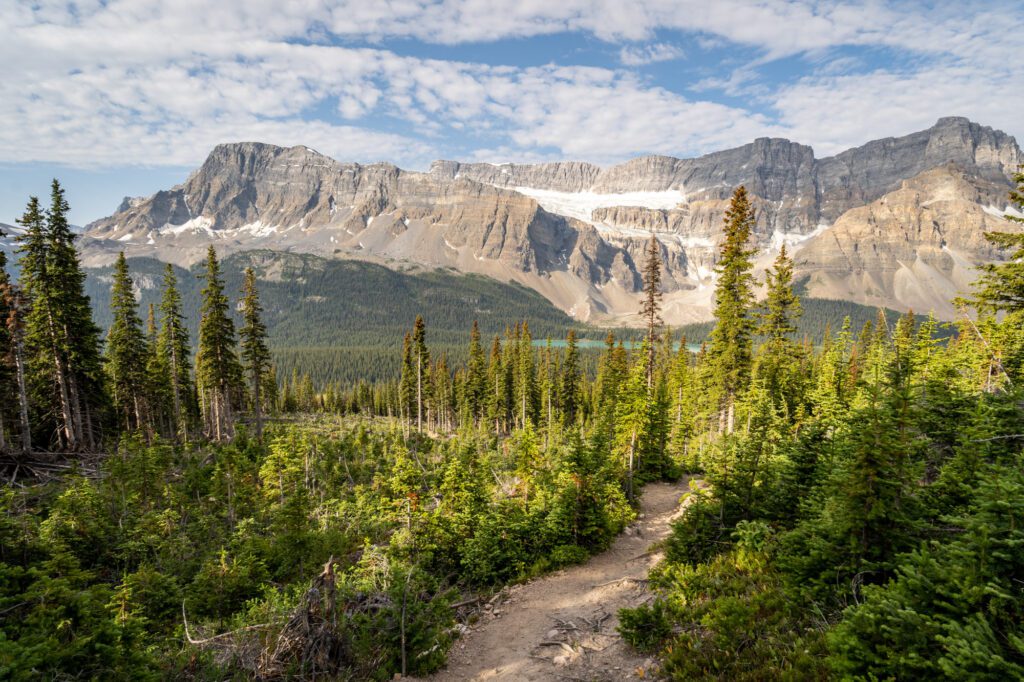
The Helen Lake Trail

The trailhead for Helen Lake is just across the Icefields Parkway from the first Bow Lake viewpoint, and it fills up in the morning on most summer days.
The trail climbs through the forest for the first mile and a half or so, oscillating between mostly flat sections and sections that are surprisingly steep and rocky, making it seem harder than it is.
As you climb, you’ll start to get some nice views of Bow Lake behind you, so make sure to turn around and admire it when gaps in the trees appear.
The real show starts when you get above the treeline into a vast alpine meadow, full of flowers and marmots galore (at least in the early summer).
This stretch of trail is excellent, and it’s a slight uphill grade all the way up to the lake.
From the lake, you can continue on to the top of Cirque Peak, the mountain you see on the far side of Helen Lake.
It’s another few miles (round trip), and double the elevation gain (including scrambling and route finding), so it’s not for the faint of heart.
We skipped it, but we did go around the lake and climbed the switchbacks on the far side to get a view back over the lake, which we’d recommend.
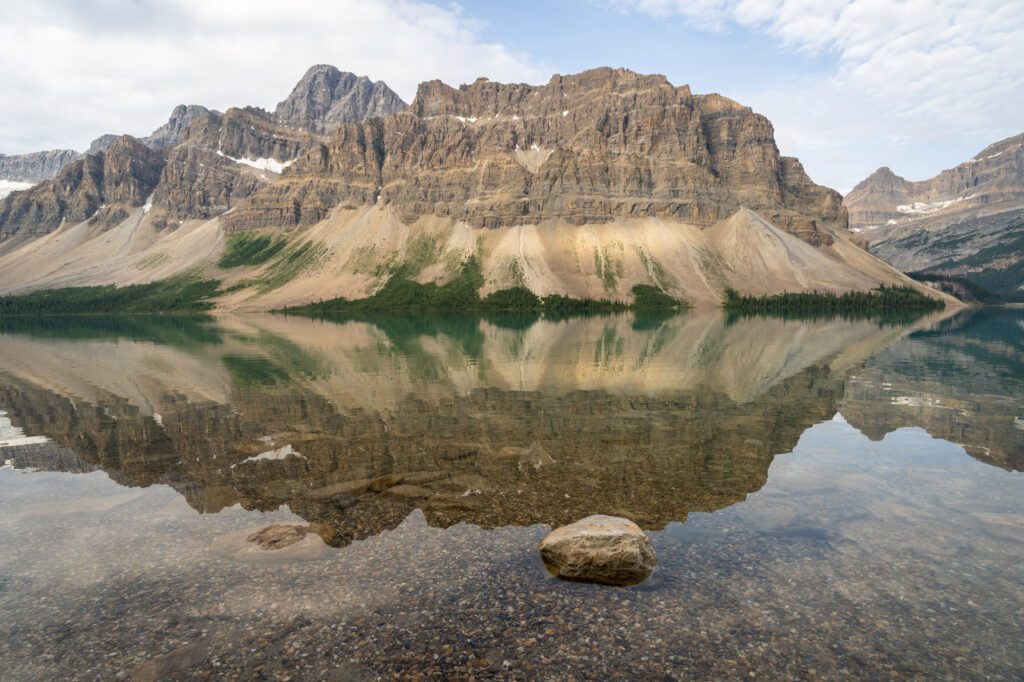
Bow Lake
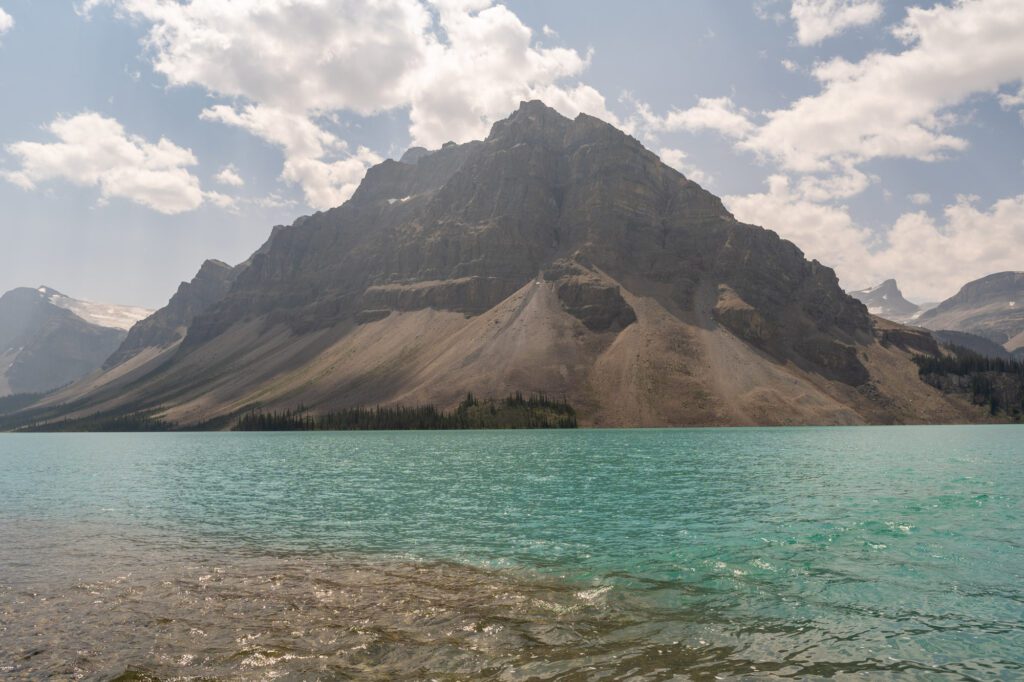
Bow Lake is one of the many majestic glacial lakes on the Icefields Parkway that features that brilliant turquoise water thanks to the glacial sediment in the water. It’s backed by Crowfoot Mountain (and the glacier of the same name).
There are two things to do at Bow Lake.
The first is to stop at the Bow Lake viewpoint, which is basically right across the road from the Helen Lake trailhead (here on Google Maps).
From there, if you get down to the water level, you have a great view of Crowfoot Mountain across the cloudy blue water of the lake.
The second is to park at the historic Num-Ti-Jah Lodge on the northern shore of the lake and explore that area.
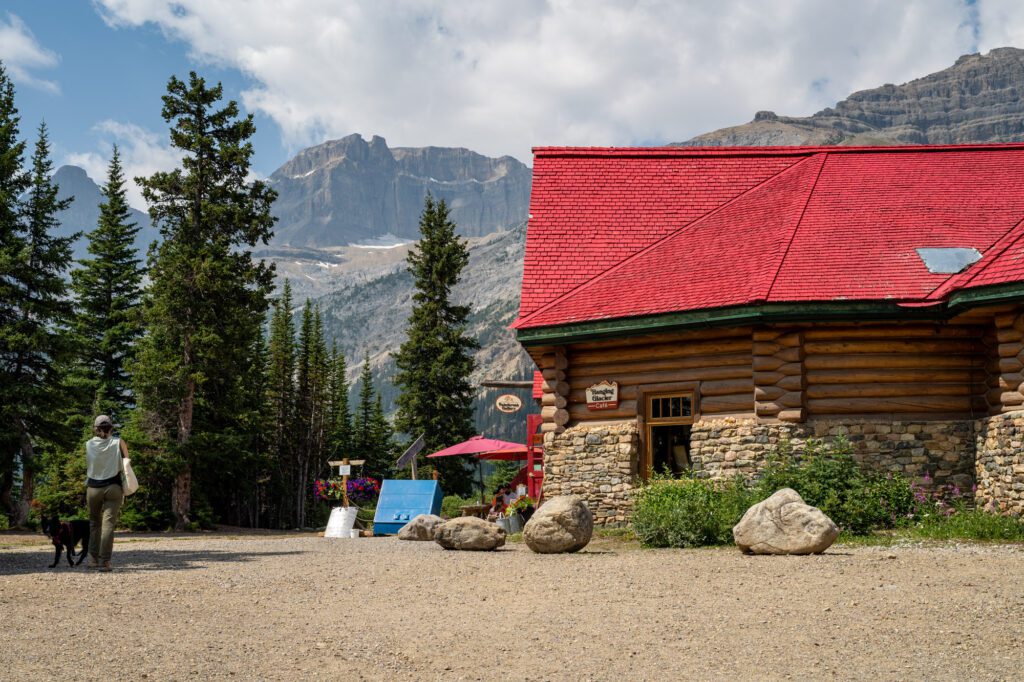
The cafe at the lodge, which has a nice little outdoor patio, is a good place to grab a snack and a cup of tea or coffee (or in our case, a well-earned cider from Core Values in Canmore).
Just a few steps from the cafe is the lakeshore, which has some pretty spectacular views.
We definitely think you should leave the crowds behind and walk out along the northern shore of the lake for a bit, where you’ll get a nice view of Crowfoot and a distant view of Bow Glacier falls in the distance.
If you’re up for it, there’s also a hike around the lake up to Bow Glacier Falls.
We skipped it, opting to do Helen Lake, Wilcox Pass, and Parker Ridge instead.
However, all three of those hikes are fairly intense, while Bow Glacier Falls is in the easy/moderate category. It’s a good option if you’re looking for something a little more low-key.
Peyto Lake
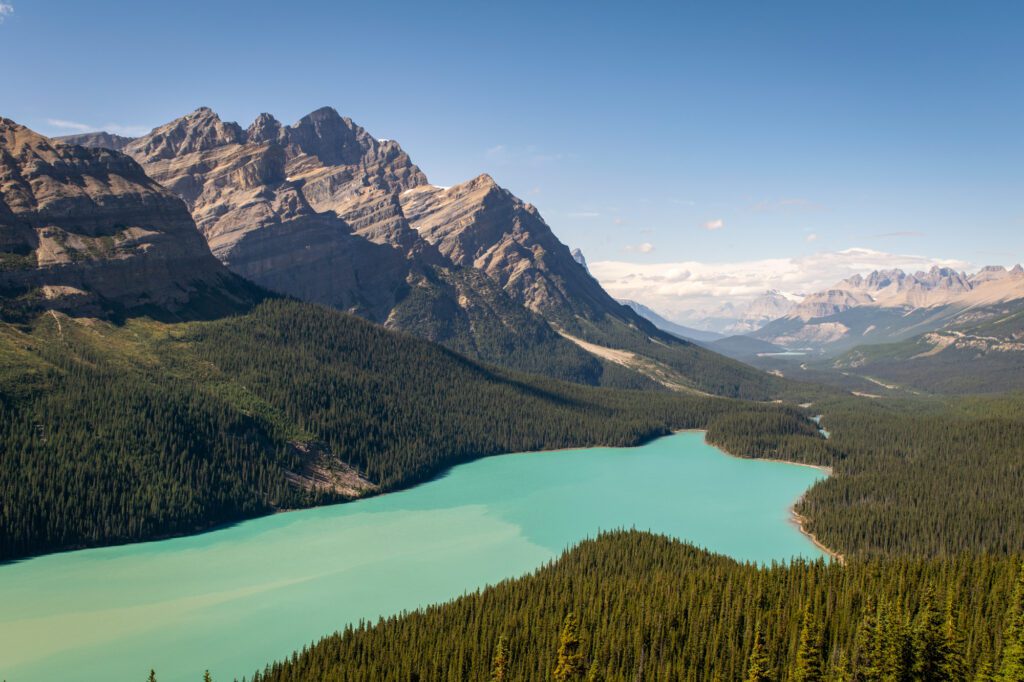
If you’ve seen pictures of Banff, you’ve probably seen at least one picture of Peyto Lake.
It’s that vibrant turquoise glacier-fed lake. Oh, there are tons of those in the Canadian Rockies? Right. Peyto Lake is special because you view it from above, and have the mountains backing it.
The timing here is a little unfortunate – if you follow this itinerary, you’ll be hitting the lake in the afternoon sometime, and that happens to be the busiest time to be there.
But there’s no real way to fix that (unless you skip the hike to Helen Lake, in which case we’d probably go here first then double back to the other stops), so it is what it is!
It’s a short half mile walk to the upper viewpoint, which you’ll certainly be sharing with hundreds of your new closest friends.
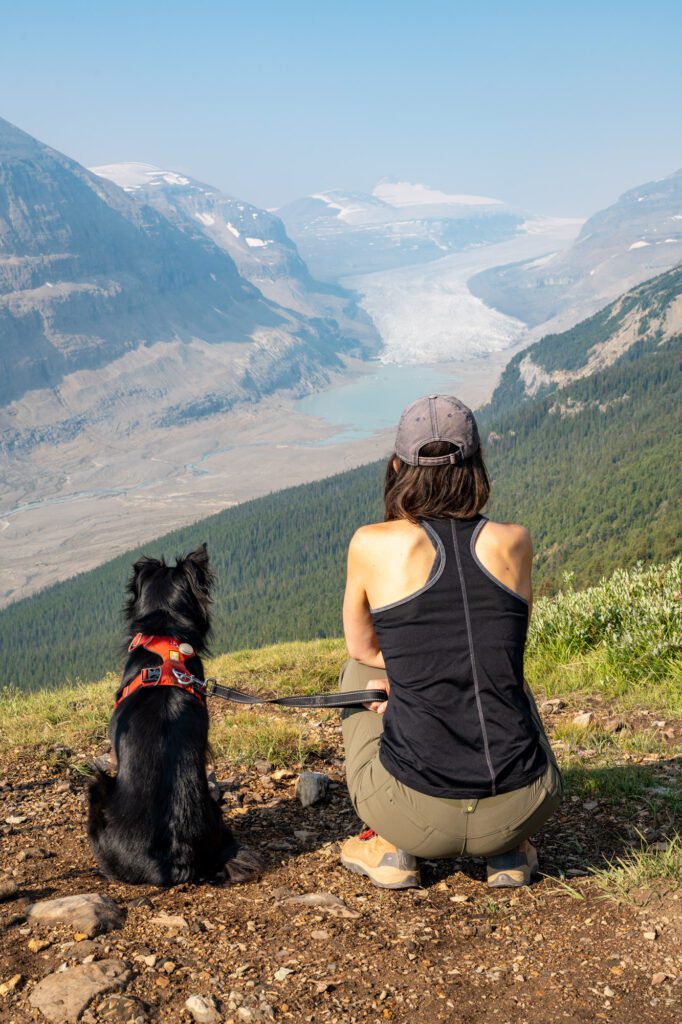
The Columbia Icefields Discovery Center
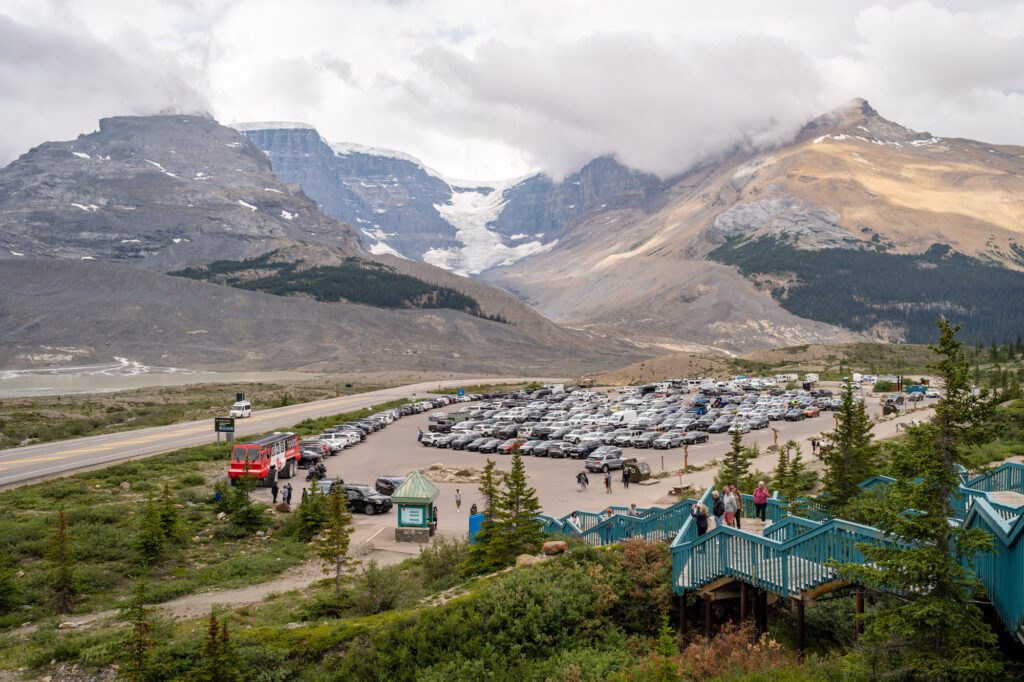
After another hour or so of driving (there are a couple of stops along the way that are worth making, like Waterfowl Lakes and Mistaya Canyon), you’ll cross over the border into Jasper National Park (saving our favorite hike, Wilcox Pass, for the trip back down to Banff) and arrive at one of the most impressive parts of the drive: the Columbia Icefield.
Which, by the way, is the largest icefield in North America (though it is shrinking at an alarming rate).
There are 125 square miles of ice here, and from the roadside pullouts and Discovery Center, you’re only seeing an impossibly miniscule fraction.
If your vision for your trip includes walking on a glacier, this is the place to do it. You can’t go by yourself, though. You can book an Ice Walk to get out with a guide and all the equipment you need.
It’s worth stepping inside the Discovery Center and going to the lower level, where there is a cool interactive display that talks all about the ecosystems here.
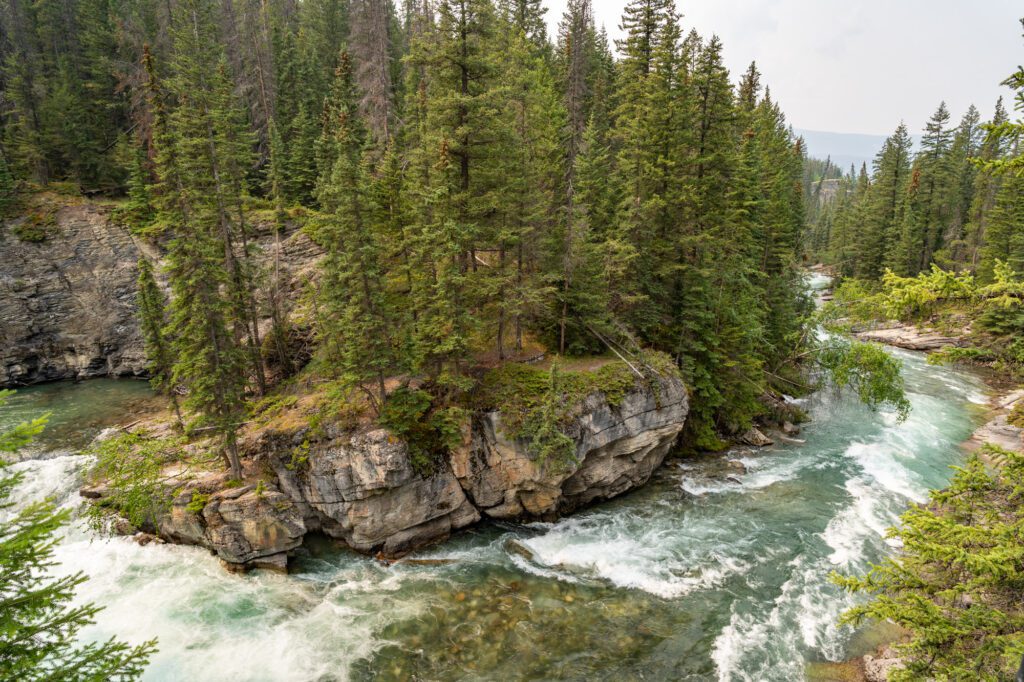
Athabasca & Sunwapta Falls
This pair of waterfalls will be among your last stops as you roll into Jasper at the end of the day. They’re fifteen minutes apart, and they are both worth stopping for.
Athabasca is the first one you’ll encounter as you’re driving north.
To be honest, it’s hard to take a picture of this waterfall that really does it justice because it comes through a little gorge, which obstructs the view of the falls from straight on.

From the side, you can see the top of the falls, but you don’t get the view of the 80 foot drop.
Follow the trail from the parking lot to see the falls from multiple views, including the two we just mentioned.
Aside from, you know, the beautiful waterfall, the best part about Athabasca Falls is the short hike down into the canyon, which a tiny fraction of the people at the falls actually do.
From there, you get a more bottoms-up view of the canyons formed by this impressively powerful waterfall.
Sunwapta Falls is a little further up the road, and is arguably more impressive, with the island of trees in the middle of the river just before it tumbles over the falls.
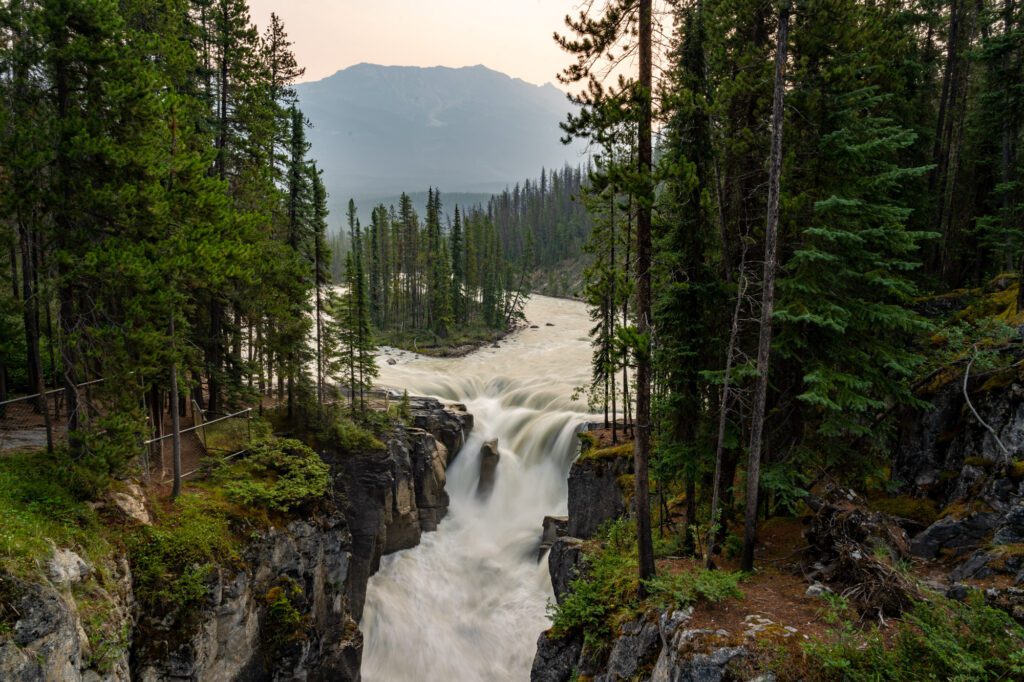
The drop here is shorter than Athabasca at just 61 feet, but we prefer the views of Sunwapta.
From Sunwapta Falls, it’s a nice short drive into the town of Jasper, which will be your home base for the next few days.
Day 5: Wildlife Drive, Maligne Lake, & Maligne Canyon
Jasper is more “wild”, for lack of a better word, than Banff, which probably has to do with its more remote location.
While Banff is an easy two hour drive along the Trans-Canada Highway from Calgary, Jasper takes around four hours to get to from nearby big cities like Calgary or Edmonton.
For that reason, along with the fact that many people who visit Banff just never make it up to Jasper because they have limited time, it feels more rugged and out there than most places in Banff.
However, with 7-10 days, we definitely think it’s worth visiting, and two days is a good amount of time to spend in and around Jasper.
One thing we will say about Jasper is that it just doesn’t have the amenities that Banff has.
We found Nesters to be the best grocery store in town, and loved both Sunhouse Cafe (coffee and tea) and Neighborhood (wine and small plates), but that’s about all we got excited about.
On your first full day in Jasper, you’ll tackle what we think is the main attraction – Maligne Lake – and the surrounding area.
It’s an hour-long drive from the town of Jasper out to Maligne Lake, but there are two nice stops along the way in Medicine Lake and Maligne Canyon that are worth your time.
We’re organizing the day as Medicine, Maligne Lake, Maligne Canyon to optimize for wildlife viewing in the early morning at both Medicine Lake and Maligne Lake, which does mean you won’t have Maligne Canyon all to yourself. But that’s the order we’d recommend.
Medicine Lake
While this entire stretch of land is a great place to see some wildlife – we saw a mama moose and her baby completely by accident in the parking lot of the Bald Mountain trailhead before sunrise – Medicine Lake is renowned as a hotspot for seeing moose, elk, bighorn sheep, and more.
As we’ve already mentioned in some of the Banff sections, the best time to see wildlife is going to be dawn and dusk, so if you’re serious about it, you’ll want to be out at Medicine Lake around sunrise (an early wake up call, we know).
For what it’s worth, we’ve always had our best luck seeing wildlife within an hour of sunrise or sunset.
Aside from the wildlife, there’s not much to do at Medicine Lake. It’s worth noting that the lake is actually seasonal, and disappears when the water runs out (which is unusual in the Rockies, which is full of glacier-fed lakes).
You’re about halfway to your destination here, so you’ll continue your drive onwards to Maligne Lake once you feel like you’ve seen enough.
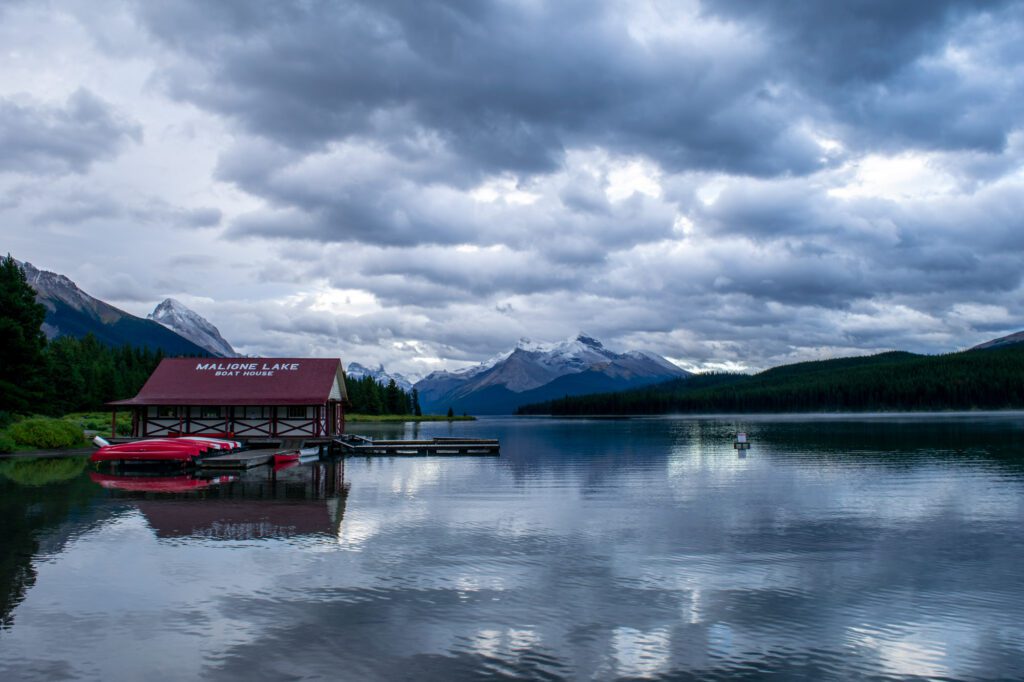
Maligne Lake (+optional boat cruise)
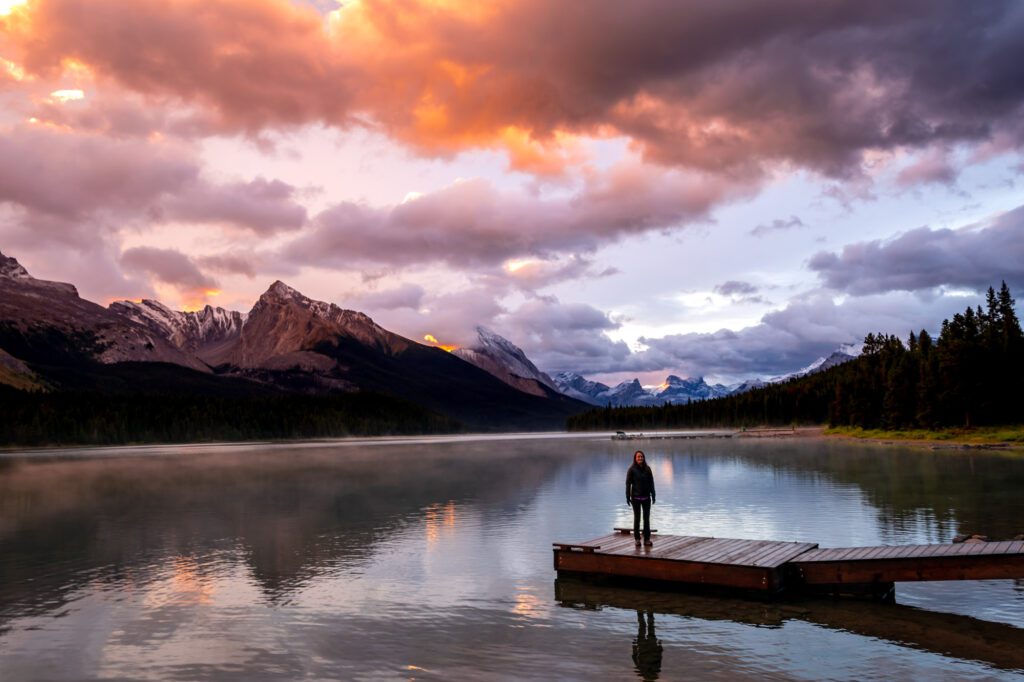
Maligne Lake is the crown jewel of this corner of the world. You’ve undoubtedly seen at least one picture of it on Instagram (probably of Spirit Island, a little tree-covered island miles and miles south from the parking area that’s only accessible by boat).
There are ample opportunities for hiking and other outdoor recreation at Maligne Lake. We’ll give you three ideas in terms of how to spend a half day at the lake.
First is the boat cruise out to Spirit Island, which is one of the only ways to get that far out into the lake and see pieces of wilderness that only a tiny fraction of visitors get to see.
However, you will likely be crammed into a motorized boat (which, honestly, isn’t great for the lake) with other visitors, so don’t expect to find solitude out there. It’s a 90 minute cruise.
Second is a self-guided tour out to Spirit Island which, if you’re up for it, is the best way to do it from both an environmental and experiential perspective.
You can either rent a canoe or kayak from Maligne Lake Boathouse ($160 a day for a canoe), which is both the most convenient and also the most expensive option (funny how that works), or you can rent from Wild Current Outfitters in Jasper ($125 a day for a 1-2 person canoe).
With Wild Current, you book in advance and then pick up the canoe at Maligne Lake, so you don’t need to worry about transporting the boat to and from the lake.
From the boat dock out to Spirit Island is a hair under nine miles, which is no joke.
We’d suggest booking either an early morning or late afternoon rental (the latter would change your itinerary a bit) so that you avoid the bulk of the crowds and boat cruises heading out there. Bring lots of water, snacks, and sun protection!
Third is hiking near Maligne Lake. There are several trail options nearby, from easy flat loops to tough climbs.
Here are a couple of hiking options near Maligne Lake, some of which we’ve done personally (Bald Hills is great, but be prepared for wind at the top) and others that were on our list for our latest trip, but either got smoked out or didn’t allow dogs.
Moose Lake (1.7 miles / 472 feet elevation gain): Super easy hike that takes you southwest from the boat house and parking lot to a nice lake.
There’s a reason they call it Moose Lake, and if you can get to the lake early in the morning (or around dusk) there’s a nonzero chance you’ll get to see a moose frolicking in the lake.
Mary Schaeffer Trail (2 miles / 275 feet elevation gain): Another easy loop, this time along the lakeshore and then back through the forest. Less about the moose and more about the views of Maligne Lake.
Opal Hills (5 miles / 1,696 feet elevation gain): This one is more in the moderate category, and it’s a good way to get a sense for how the landscape changes as you gain elevation.
As you climb, there’s an abrupt shift from green, lush forests to a barren rocky landscape. It’s a distinct line that you can see from afar, which is odd. If you’re feeling spicy, continue on to Opal Peak.
Bald Hills (9.3 miles / 2,559 feet elevation gain): This is the hike we’ve done, and while we enjoyed it and the view from the top is spectacular, the wind and cold up there made it so miserable that I legitimately have only one or two pictures of the entire hike (rather than the hundreds I have from other hikes).
Maligne Canyon
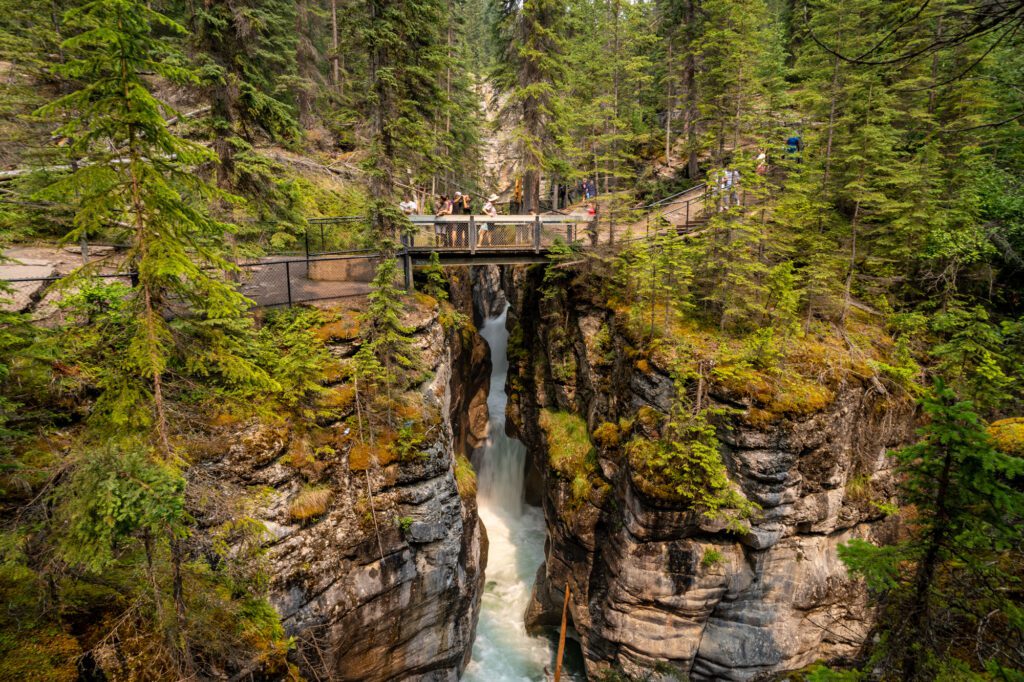
On your way back to Jasper, it’s worth stopping at Maligne Canyon for a short hike down into the canyon, where you’ll have a bottom-up (sometimes top-down) view of the tall limestone walls and the rushing river.
This is another popular spot, but it’s a big parking lot, so parking isn’t as much of an issue as it is at some of the other stops on this itinerary.
One tip here: we’d strongly recommend this version of the hike, which is an out-and-back that follows the river the entire way, rather than doing a loop that takes you away from the canyon.
We did the loop, and the part of the hike that’s not in the canyon is pretty “meh.”
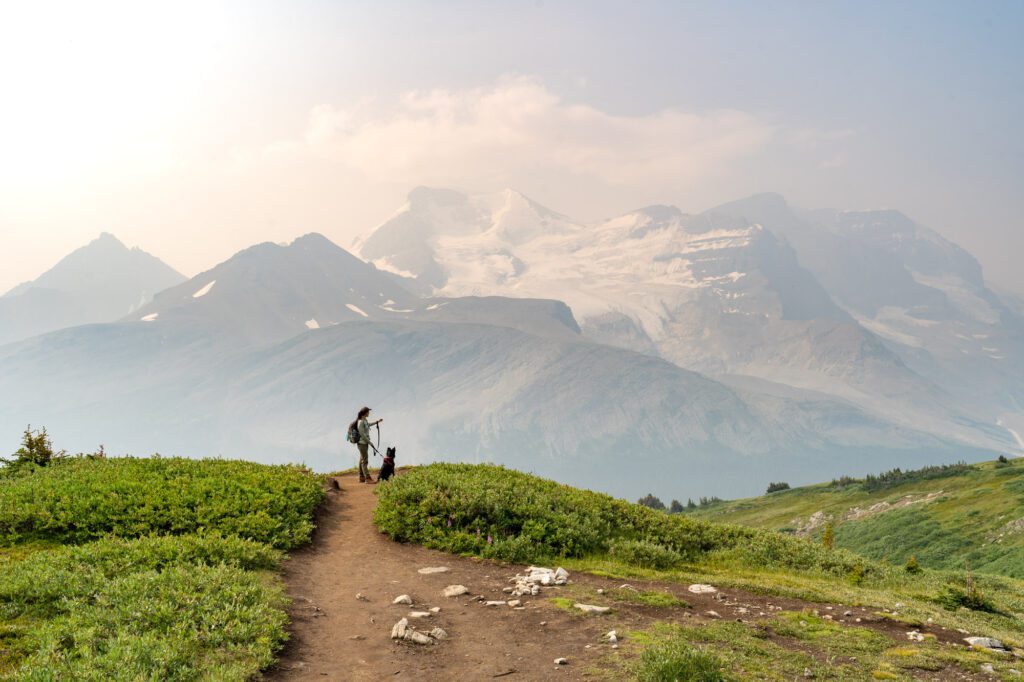
Day 6: Valley of Five Lakes OR Edith Cavell Meadows & Pyramid Lake
On your second full day in Jasper, pick from three of Jasper’s most iconic trails for your morning hike, and then head up to Pyramid Lake for the afternoon before ending in downtown Jasper.
A Morning Hike: Choose Your Own Adventure
Can you tell we’re big fans of giving you a few hike options to choose from based on how you happen to be feeling that particular day?
That theme continues here, where we have a couple of good hikes within an hour of Jasper that offer different experiences and intensities.
Edith Cavell Meadows (5.1 miles / 1,879 feet elevation gain): We did this one on our first trip, and we’re glad we did because it’s not dog-friendly and wouldn’t have been nearly as pleasant with the smoke we encountered on our second trip.
It starts with a short hike to the base of the Angel Glacier (and the glacial pond at its base) before continuing up into the alpine meadows beyond.
Then, it quickly turns into a barren, rocky alpine landscape, and the views open up to include the rocky ridge that towers over the parking lot and first section of trail.
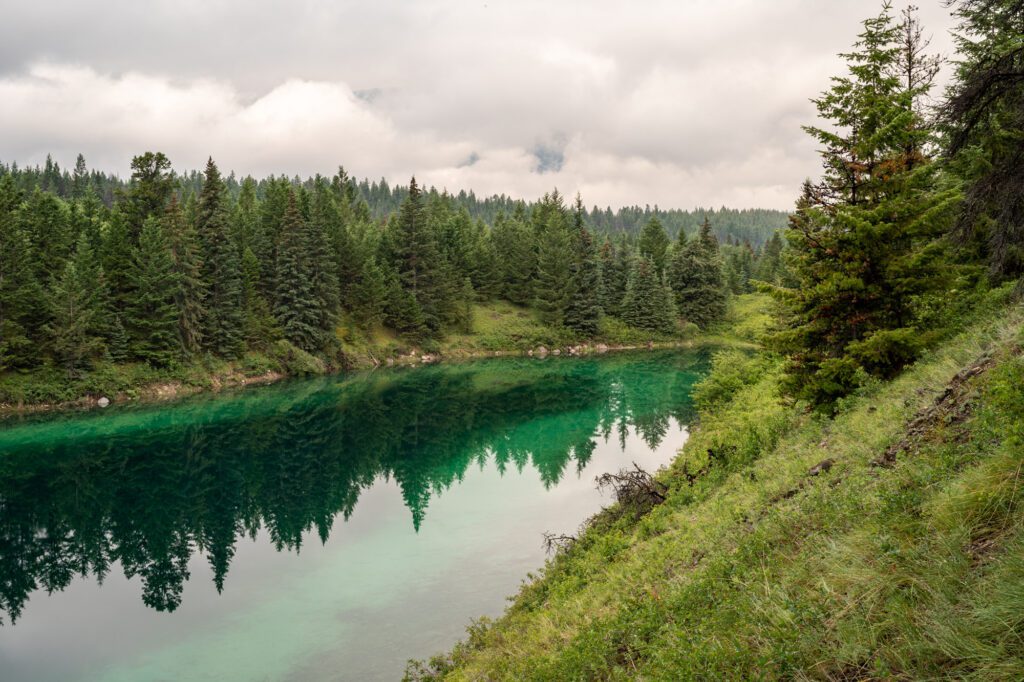
Valley of the Five Lakes (3 miles / 534 feet elevation gain): We did this hike on our latest trip, and it’s a lovely, mostly easy stroll that takes you past – you guessed it! – five lakes.
It’s a good hike, though we’d caution you that the longer loop takes you through a very poorly maintained stretch of trail on the northwestern end of First Lake.
If you want a longer hike, we’d go along the north shore of First Lake, then come back along that same route to head back to the parking lot (rather than going around the lake, which doesn’t actually follow the lakeshore).
Sulphur Skyline (4.9 miles / 2,142 feet elevation gain): One of the premier hikes in Jasper National Park, this is a tough hike that starts about an hour away from the town of Jasper (to the northeast).
The climb isn’t going to be easy, but the views from the top are equal parts expansive, with 360 degree views, and spectacular, with rocky mountain spines and winding rivers.
Pyramid Lake
After a break for lunch and a little siesta, head up to Pyramid Lake, which is about 15 minutes north of Jasper.
For what it’s worth, we saw TONS of elk on this stretch of road, and got a kick out of the fact that Lupine saw them out the back window of our car and, after driving for another 10 minutes or so up to the lake, immediately leaped out of the car and scoured behind it for said elk. Guess dogs don’t necessarily comprehend distance traveled in a car.
You’ll pass Patricia Lake on the way up, and aside from the nice Patricia Lake Bungalows along the lakeshore, there’s not much to do or see there (though it is, unsurprisingly, beautiful).
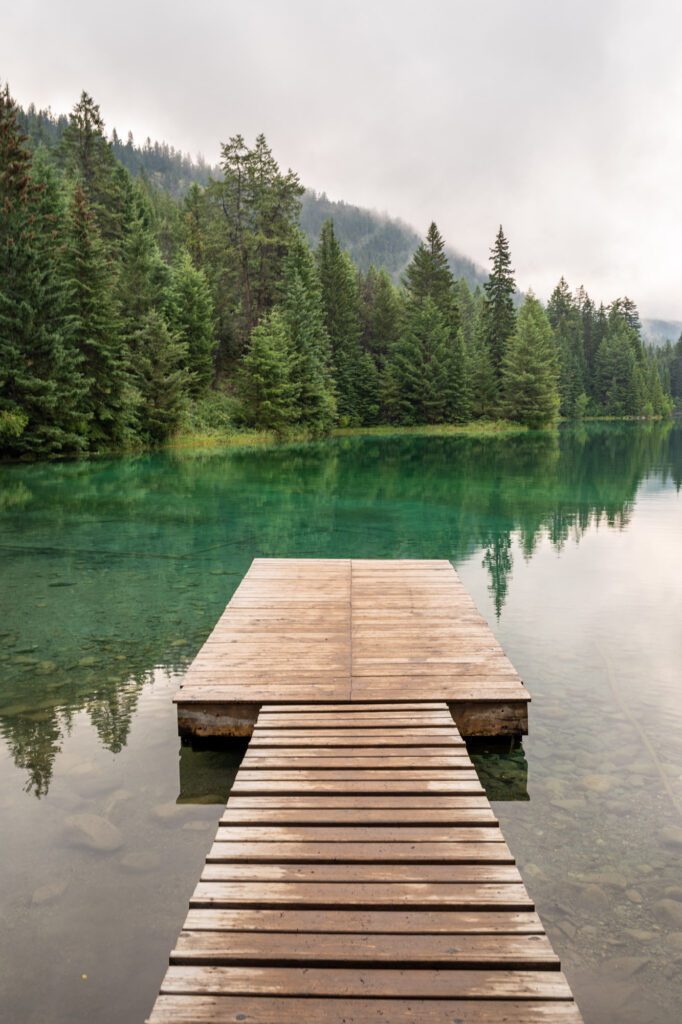
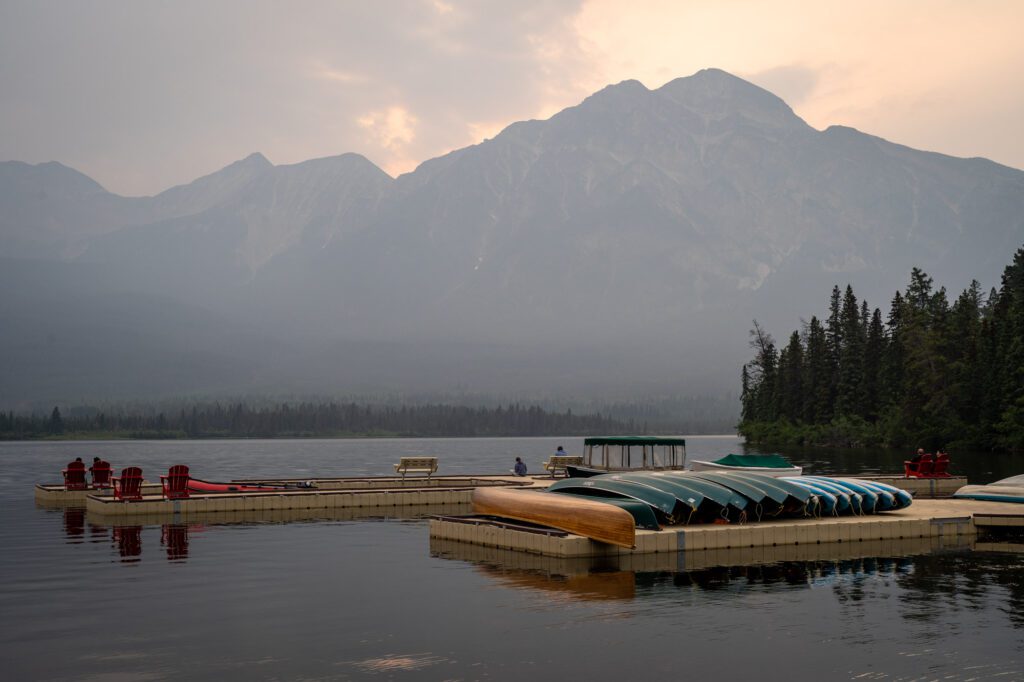
There are three destinations up at Pyramid Lake that are worth your time, and the first is the dock outside of the Pyramid Lake Lodge, which is THE place to rent a boat of some kind to paddle the lake.
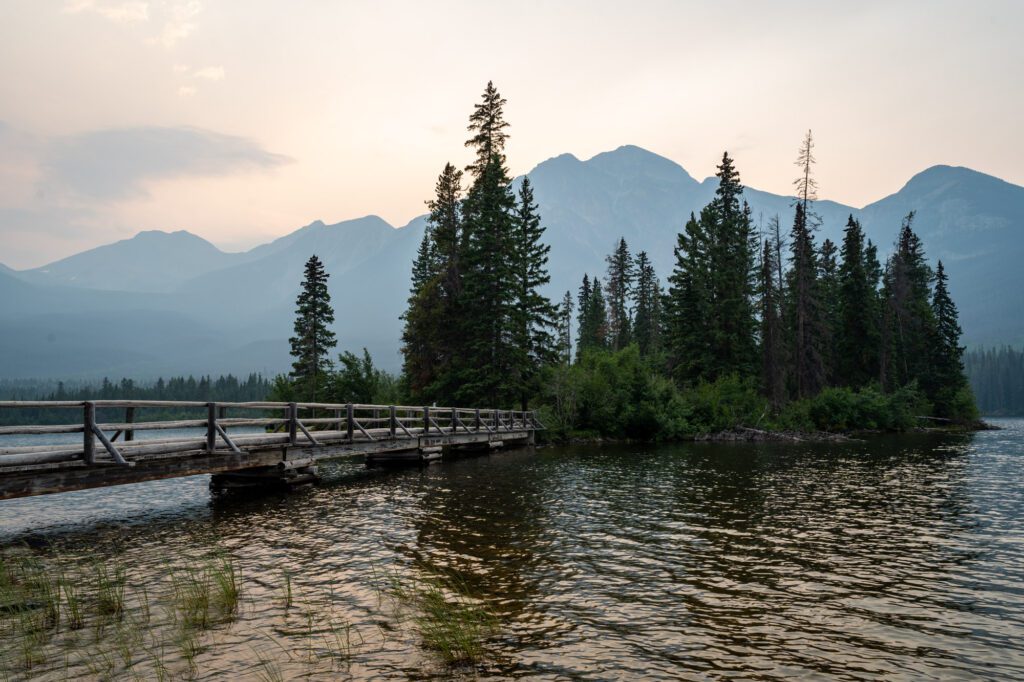
The second destination, and the arguably most famous of the three, is Pyramid Island.
Accessed by a picturesque wooden footbridge, this little island is worth walking out on, especially for the views across to the other shore with Pyramid Mountain’s hulk looming over the lake.
The last destination is the beaches on the the south end of the lake, which you’d access by heading left when the road forks as you approach the lake.
We were here on a very drizzly morning, and despite the drizzle loved the view of the lake and surrounding mountains from here.
Downtown Jasper
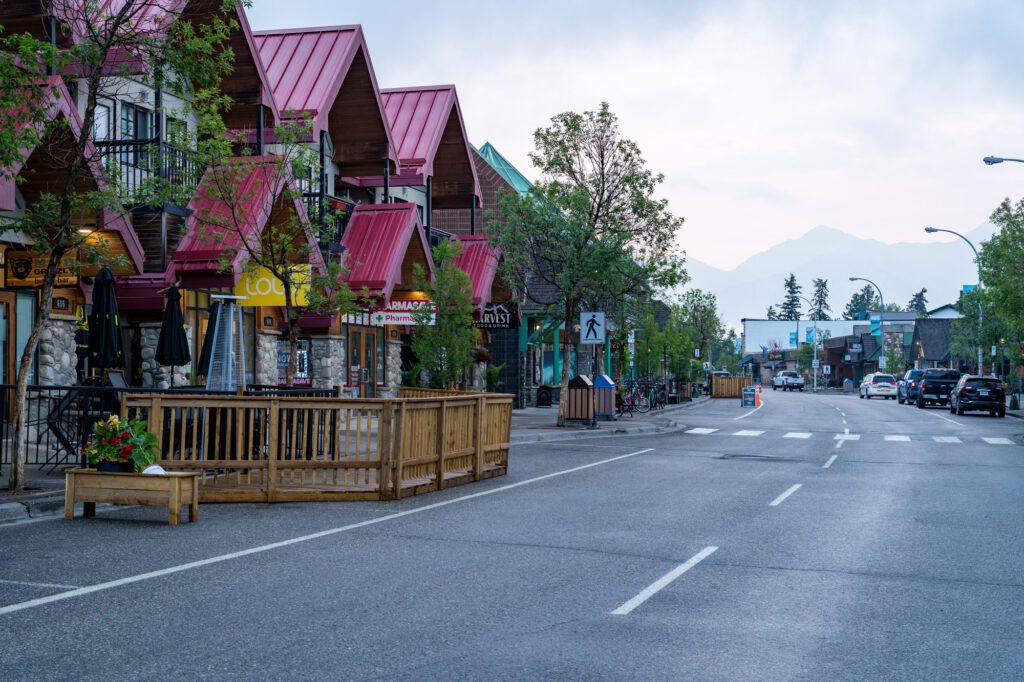
We don’t have too much to say about exploring Downtown Jasper since we spent most of our time cooking at home while we were in town (the Jasper farmers market is fun, and we found it interesting that most of the produce seems to come from British Columbia).
However, there were a few places that stood out to us in Jasper.
First is the duo, owned by the same group, of Neighbourhood Food and Drink (for wine and small bites) and Sunhouse (for coffee and brunch with an Australian flair).
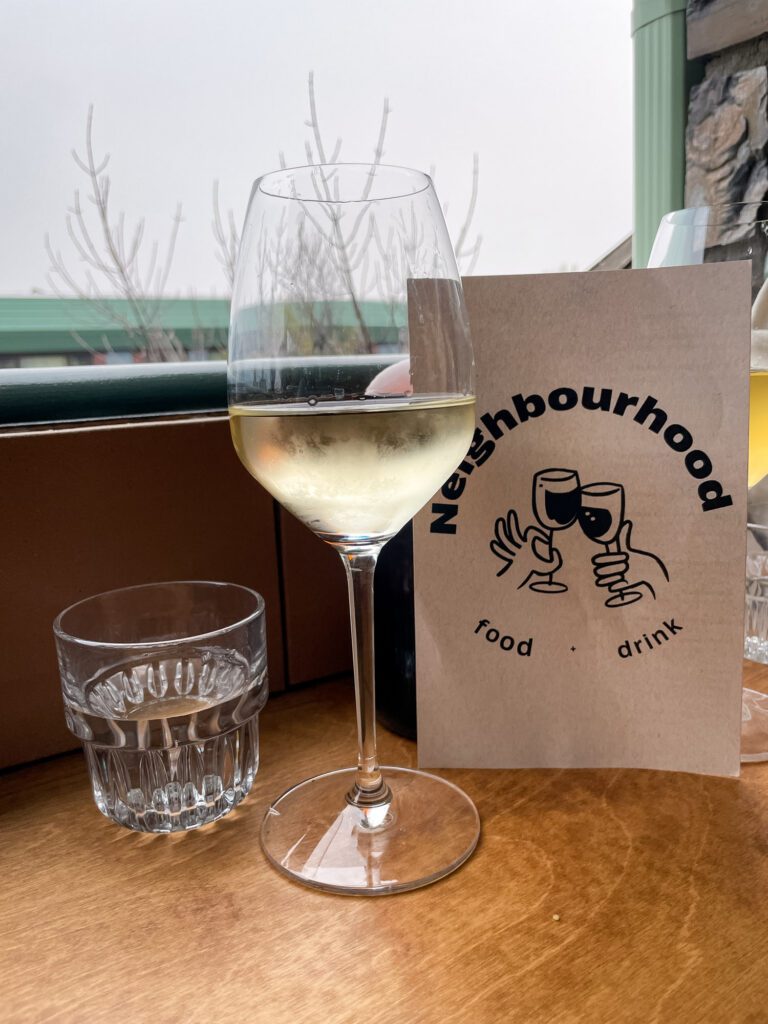
We got great coffee at Sunhouse on a smoky morning, and had a blast chatting with the barista.
We then had a similar experience at Neighbourhood a few nights later, which is a natural wine focused bar where we discovered Daydreamer wines, a favorite stop of ours in the Okanagan Valley.
Jasper Brewing Company and the Raven Bistro were also recommended to us by various people we encountered.
Day 7: Icefields Parkway (Round 2) & Lake Louise at Sunset
This day is about hitting the stops along the Icefields Parkway – including our favorite hike along the Icefields Parkway – that you missed on the way up a few days ago en route to Lake Louise, where you’ll head for sunset.
Your first stop is the border of Jasper National Park and Banff National Park, which is a little over an hour from Jasper.
If you skipped any of the Icefields Parkway stops that we recommended on the way up to Jasper, like Athabasca Falls or Sunwapta Falls, now is the time to do them!
Wilcox Pass
We’ve saved the best for last, we think, because Wilcox Pass is our favorite hike along the Icefields Parkway.
It’s a 5.8 mile hike with 1,700 feet of elevation gain, and the only hard part is the last mile or so, which is a steep rocky ascent to the Wilcox viewpoint.
After the first mile or so, the views on this hike are bangers all the way through, starting with the red Parks Canada chairs, morphing into stunning views of the valley you’re hiking through, and ending with a nice view out over the Icefields Parkway and the glaciers beyond.
The name is a bit of a misnomer, because you’re going to reach the sign for Wilcox Pass, look around, and feel underwhelmed. Fear not! Follow the trail left for another mile or so as it climbs to the final viewpoint, which is well worth the effort it takes to get there.
Not only are the views excellent, we also saw multiple groups of bighorn sheep on this trail, along with a huge family of mountain goats (with a bunch of babies) along the way.
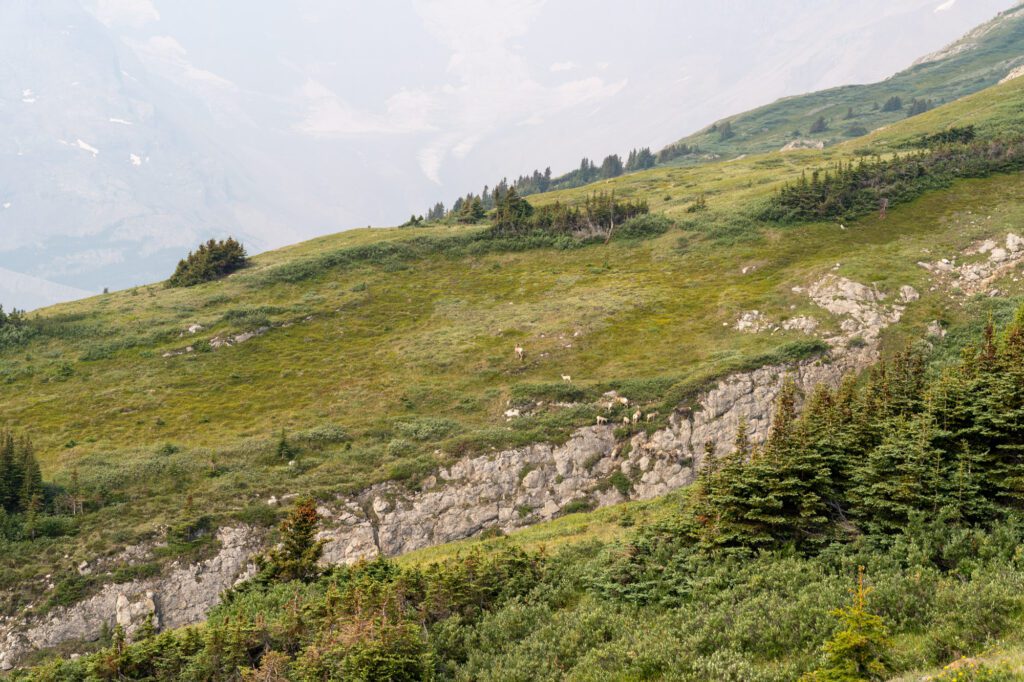
Remember to give them plenty of space – just because they’re herbivores doesn’t mean they’re not dangerous, especially when their babies are involved.
There is a pit toilet at the trailhead, which is just off of the Icefields Parkway.
Parker Ridge is another good hike that is about 10 minutes further south on the Icefields Parkway.
It’s slightly easier (but slightly less spectacular), and would be a good option if 6 miles seems too aggressive for your tastes.
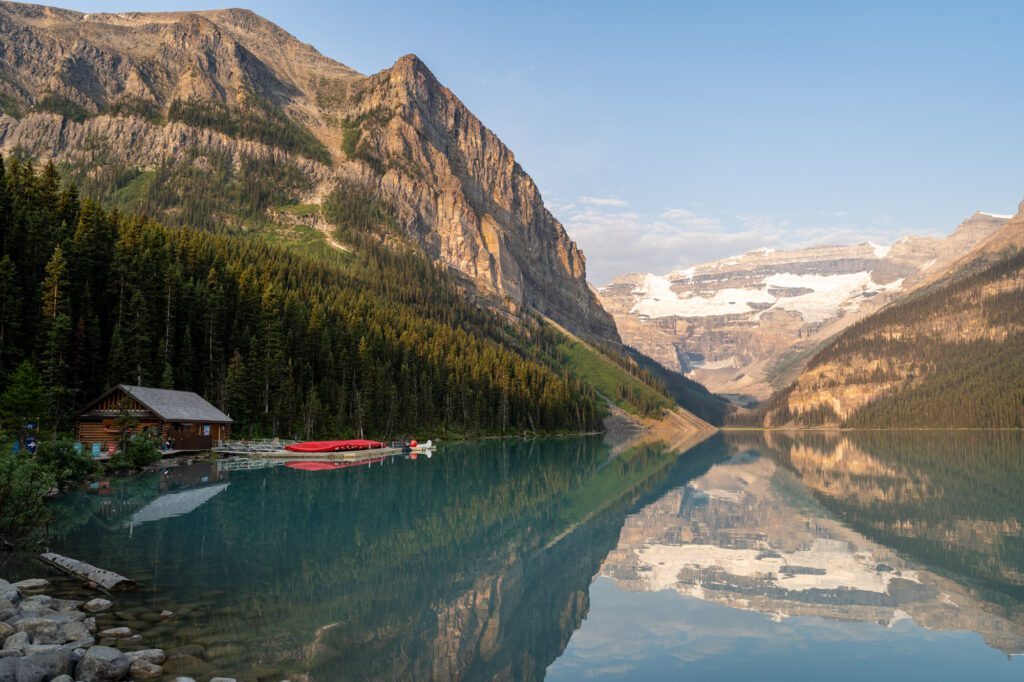
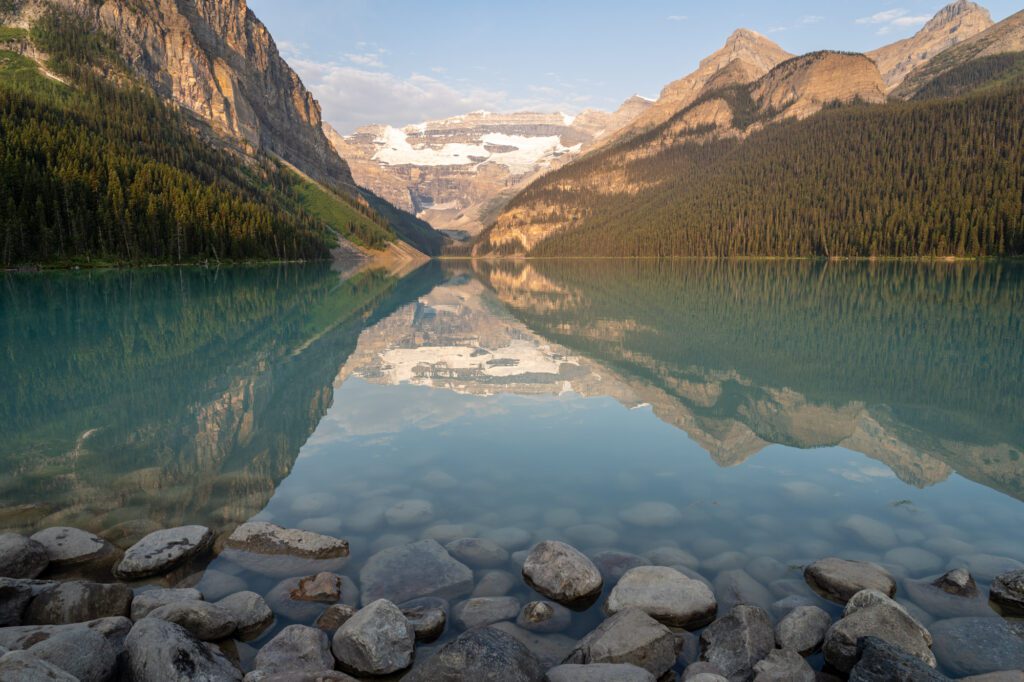
Lake Louise
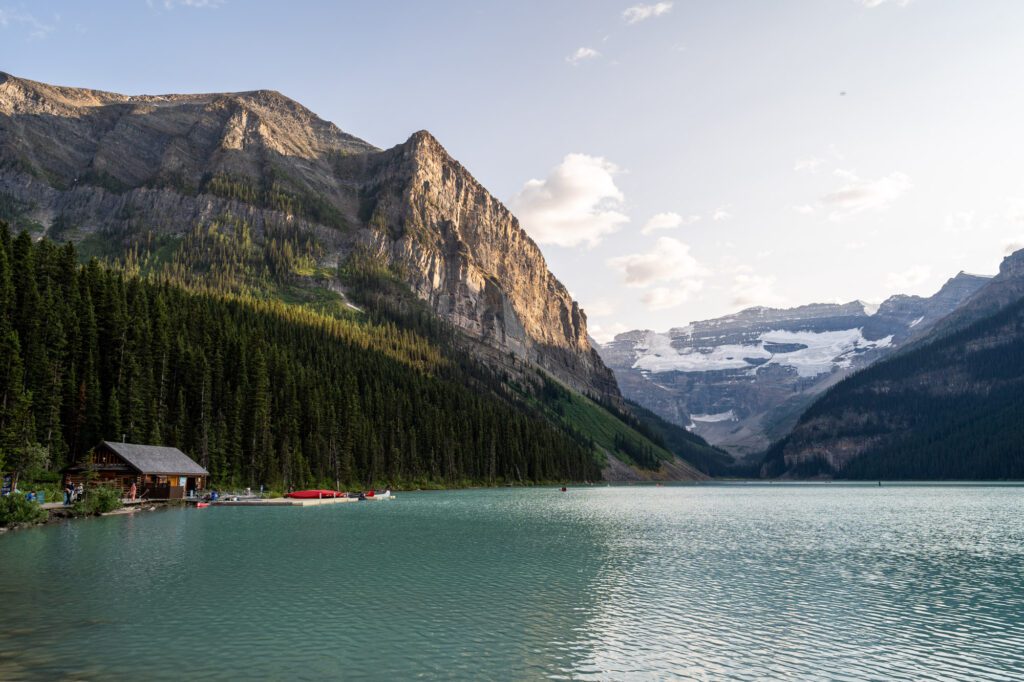
Finish your day with a sunset at Lake Louise.
Now, we think Lake Louise is worth seeing twice – in the early morning (before a hike), and in the late evening. The light does different things at each time of day, and it’s well worth seeing both.
Check into your hotel or campground, drop your stuff, and head out to the lake. Make sure to arrive after 7pm. Why after 7pm? Parking at Lake Louise, which normally costs $21 (no matter how long you’re parked there), is free after 7pm.
Day 8: Lake Louise & Hiking Nearby
For the two days you’ll spend near Lake Louise, split your time between Lake Louise and Moraine Lake.
This is going to be, by far, the most complicated piece of your trip because of the logistics involved in getting to the two most popular spots in Banff National Park, but it’s 100% worth it.
While some people opt to do both lakes on the same day, we’d strongly recommend that, if you’re interested in hiking, you do them on separate days because some of our favorite hikes leave from both lakes, and it would be impossible to do them on the same day.
This does mean you’ll need two days of shuttle reservations (more on that in a second), but we think it’s more than worth it.
On your first full day in the area, tackle Lake Louise, which is one of the most popular places in all of Canada and is home to some of our favorite hikes in Banff.
Getting to Lake Louise
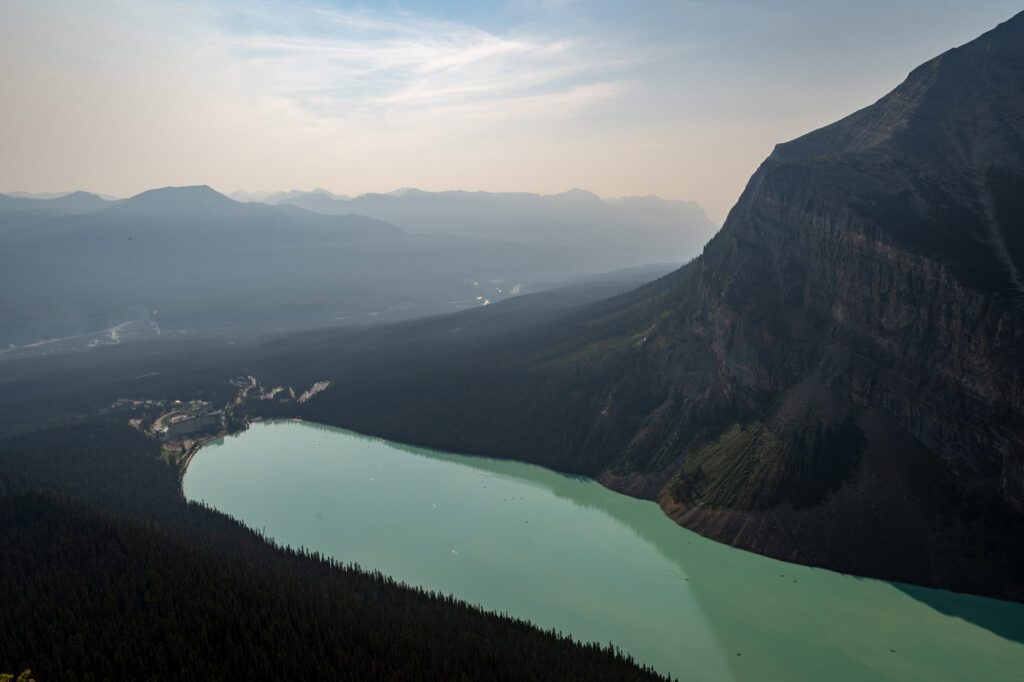
Of the two lakes here, Lake Louise is slightly easier to get to. But only slightly.
As of 2023, you can still drive to the parking lot at Lake Louise, while the parking lot at Moraine Lake is only accessible via shuttle or bus (more on that in the section on Moraine Lake).
You have three options when it comes to getting to Lake Louise: drive yourself and arrive super early, or take the shuttle or bus to the lake.
Each of the three options has its own pros and cons, which we’ll go through here.
Option 1: Driving Yourself to Lake Louise
The first option is to drive yourself, which gives you more flexibility and allows for an earlier start on the trail (unless you’re on the first shuttle). However, the cons arguably outweigh the pros here.
The first con is that you need to arrive super early, which is partially why we recommend staying nearby so that it’s a 10 minute drive, not an hour.
There are two big lots at Lake Louise, and by 7am or so on summer days, they are both full. You need to arrive by 7am at the latest to get a spot.
From our own personal experience, we were there at 6:15ish, and they were almost full by the time we had strapped on our hiking boots and headed to the trail.
The second con is that it costs $21 to park for the day, between 7am and 7pm. However, this might actually work out to be cheaper than the shuttle if you have a full car of people, so this is probably less of a con and more something to know going in.
Option 2: Taking the Parks Canada Shuttle
Your second option is taking the Parks Canada Shuttle, which starts and ends at Lake Louise Ski Resort, just across the highway from Lake Louise (here on Google Maps).
This is a good option if you don’t want to get up super early to deal with the nightmarish parking situation at the lake, or if you want to do both Lake Louise and Moraine Lake in the same day using the Connector shuttle that runs between Lake Louise and Moraine Lake.
However, there are two downsides to this option. First is less flexibility – you’re beholden to shuttles on the way there and back, and the tickets are very competitive, so you might not be able to snag an early morning seat unless you book months in advance…when you won’t know what the weather is going to look like that day.
The second is that it’s not super convenient if you’re staying in Banff or Canmore.
Keep in mind that this option does mean that you have to drive out to Lake Louise, which is 45-60 minutes from the town of Banff. If you’re staying in Banff, we have a better option next.
Shuttles run every 20 minutes from 6:30am to 7:30pm, and you should make advance reservations as soon as possible. More information here.
Roam Transit Bus 8x from Banff
The third option is to take Roam Transit bus 8x – the Lake Louise Express – from Banff High School in downtown Banff out to Lake Louise.
This is the best option if you’re coming from Banff because it means you don’t have to drive 45-60 minutes just to catch the Parks Canada shuttles.
There is an option here to connect with the Parks Canada Moraine Lake Shuttle, and you’ll need to buy the “Superpass” to do that (for the record, we recommend doing the two lakes on separate days).
This is the most convenient option if you’re coming from Banff, but it’s also the most expensive, costing $10 each way per adult (seniors are $8 each way, kids 17 and under are free).
Reservations should, again, be made as far in advance as you can. More information here.
Hiking Options Around Lake Louise
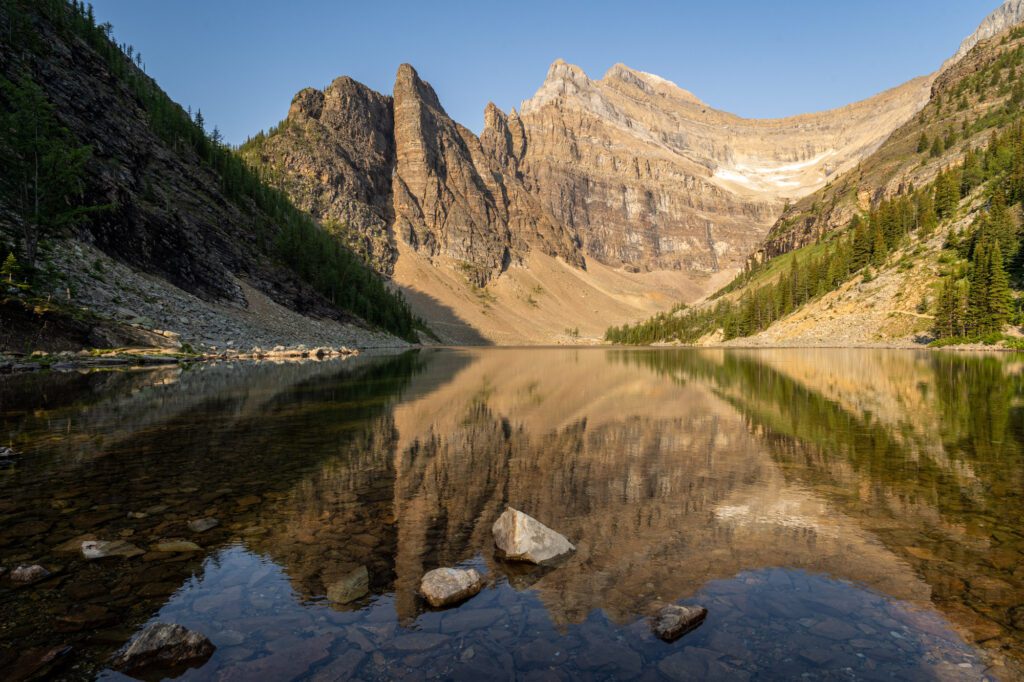
There are two main hiking routes from Lake Louise, and both are excellent, and both feature backcountry tea houses that this part of the world is famous for.
They are the Plain of Six Glaciers, which takes you out into the glacial valley at the far end of Lake Louise, and Lake Agnes and the Beehives, which takes you up to a ridge high above the lake.
We slightly prefer the Plain of Six Glaciers because it’s a more unique landscape, but that’s just us.
Here’s a brief description of each of those hikes (including two versions of the Beehives), along with a route that combines them into one long all-day affair, which is what we did on our latest trip.
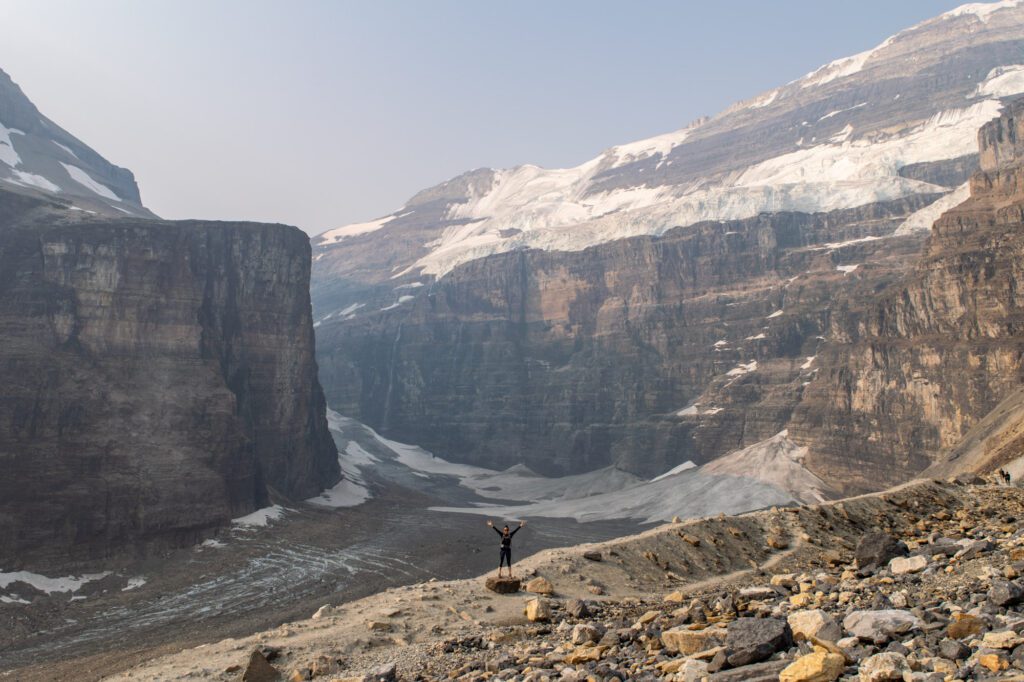
The Plain of Six Glaciers (9.1 miles, 1,929 feet elevation gain): Of the hikes at Lake Louise, this is our favorite (we’ve done it twice now, and it was breathtaking boh times).
It takes you out and back to a magnificent view of Abbot Pass and the glaciers up there, with a fun teahouse stop along the way. Great views all the way through! Read our trail guide: Hiking the Plain of Six Glaciers.
The Big Beehive Loop (6.7 miles, 2,552 feet elevation gain): A close second, this hike takes you up past picturesque Lake Agnes (and the teahouse of the same name) to the top of the Big Beehive, which has a commanding view out over Lake Louise and the Bow River Valley.
It’s a great hike, especially in the fall when the Larches along Lake Agnes turn bright gold.
The Little Beehive and Lake Agnes (5.7miles, 1,955 feet elevation gain): A stripped back version of the Big Beehive hike, this takes you up to the Little Beehive (which has a slightly worse view) and then ends at Lake Agnes Teahouse before returning back to the shore of Lake Louise.
It’s slightly easier, but we’d really urge you to try for the Big Beehive if you can because it really is much better.
Now, if you’re an experienced hiker, you’re mentally and physically prepared, and you absolutely MUST experience both, you can combine the two hikes into one big loop, which is what we did. Here is the Alltrails guide for that hike.
For what it’s worth, we use Alltrails+ to download maps and track distance and elevation and we clocked 12 miles and 3,500 feet of elevation gain.
It’s a tough hike, but it’s doable if you’re prepared with plenty of snacks, water, and a reasonable fitness level. It will take you all day, especially if (like us) you linger for a bit at each of the two teahouses to catch your breath.
If you are going to do the full loop, we’d advocate for two things.
First is skipping Little Beehive, because it’s not worth the effort given you’ve already done the Big Beehive.
Second is going clockwise, out to the Plain of Six Glaciers first (which is very exposed and is tough in the beating sun) then looping back to Lake Agnes and the Big Beehive.
Basically all of these hikes are going to take the better part of a day, and you’re going to want to spend the rest of it recovering and replenishing, because there’s another big day coming tomorrow!
Day 9: Moraine Lake & Hiking Nearby
Moraine Lake might just be the most popular lake on Instagram. And we’re not saying that’s necessarily a bad thing.
It’s pretty clear why that is, with the spectacular blue water of the lake with the Valley of the Ten Peaks rising above it.
To this day, out of the tens of thousands of photos I’ve captured around the world, the picture above is one of my favorite pictures that I’ve ever taken.
Experiencing the beauty of Moraine Lake is absolutely one of the quintessential Canadian Rockies experiences that you definitely shouldn’t miss, but over the past few years it has become more complicated as the park has done its best to grapple with overwhelming visitor numbers.
They’ve completely closed the road to Moraine Lake to passenger vehicles year round, and introduced a reservation-based shuttle system in an effort to mitigate some of the negative impacts of thousands of visitors per day.
Don’t worry, we have a whole section on how to navigate those systems to get your tickets in this section.
You might be tempted to visit Moraine Lake on the same day that you visit Lake Louise, but if you’re an avid hiker, we’d recommend doing them on separate days, because each lake has a couple of the best hikes in Banff that leave from its shore.
For us, a perfect day at Moraine Lake starts with the famous rockpile viewpoint, followed by a stroll along the lakeshore, and ending with one of the many hikes nearby.
Including the shuttle rides to and from the lake, it’s really an all-day affair.
Getting to Moraine Lake
The first thing we need to cover here is getting to Moraine Lake, which has changed over the past few years as record traffic numbers overwhelmed the infrastructure at the most popular lake on Instagram and necessitated some limitations on visitation.
As of a few years ago, Moraine Lake Road – the only road into the lake – is closed to private vehicles.
That means that the only way to access Moraine Lake is by shuttle or bus, and there are both public transportation options and private options. It’s also worth noting that the lake is only accessible by vehicle from May to October.
We’ll talk about both public and private offerings, but we’re going to focus more on the public transportation options.
The first option is the Parks Canada Shuttle. This option leaves from Lake Louise Ski Resort, which is just across the highway from Lake Louise Village.
That does mean that, if you’re coming from Banff or Canmore, you will need to drive about an hour to catch the shuttle (the next option might be better, depending on what you’re looking for).
This option connects you to the Lake Louise Lakeshore, Moraine Lake (via a connector shuttle that leaves from Lake Louise lakeshore), and the Lake Louise Campground.
It runs frequently – every 20 minutes between 6:30am and 7:30pm – but it still fills up in the summer.
Book well in advance. More information here.
The second option is combining the Roam Transit Lake Louise route (route 8x) with the Moraine Lake Connector shuttle (operated by Parks Canada).
This is a great option if you’re staying in Banff, because it means you don’t have to make the 45-60 minute drive out to Lake Louise Ski Resort to connect with the Parks Canada Shuttle.
Instead, you take the 8x from downtown Banff to the shore of Lake Louise, and then hop on the Parks Canada connector that takes you to Moraine Lake.
This requires you to purchase the “Roam Superpass” when you book your ticket, which gives you access to the connector shuttle. More information here.
The third option is the Moraine Lake Express through Roam Transit (route 10).
The most important thing to know is that this option is only available in the fall, September through mid-October.
This route leaves from the town of Banff (in front of Banff High School) and makes a beeline to Moraine Lake, which makes it a really nice option if you’re staying in Banff and don’t want to drive out to Lake Louise. More information here.
All three options are very competitive, and you should book your tickets well in advance, especially if you want the coveted early morning slots.
Keep in mind that even if you want to just use the connector to Moraine Lake, you need to check in at Lake Louise Ski Resort and take the shuttle from there to Lake Louise.
There are two private transportation options we want to highlight for different reasons.
The first is the Sunrise Shuttle, which is the only option for photographers who want to see Moraine Lake at sunrise (aside from spending $$$ to stay at Moraine Lake Lodge).
It takes you from Banff to the lake, arriving around 45 minutes before sunrise, where you’ll stay for two hours before being whisked back to Banff.
It’s pricey, and we wish there was an option to stay at the lake to get an early start on a hike, but it’s the only way to have the lake to yourself at sunrise.
The second is the open top buses operated by Wow Banff. Their route goes from Lake Louise Ski Resort, to Lake Louise, to Moraine Lake.
Dogs are only allowed on the upper deck, and we seriously considered doing this to get to Moraine Lake with our dog, Lupine.
The Rockpile Viewpoint and Lakeshore
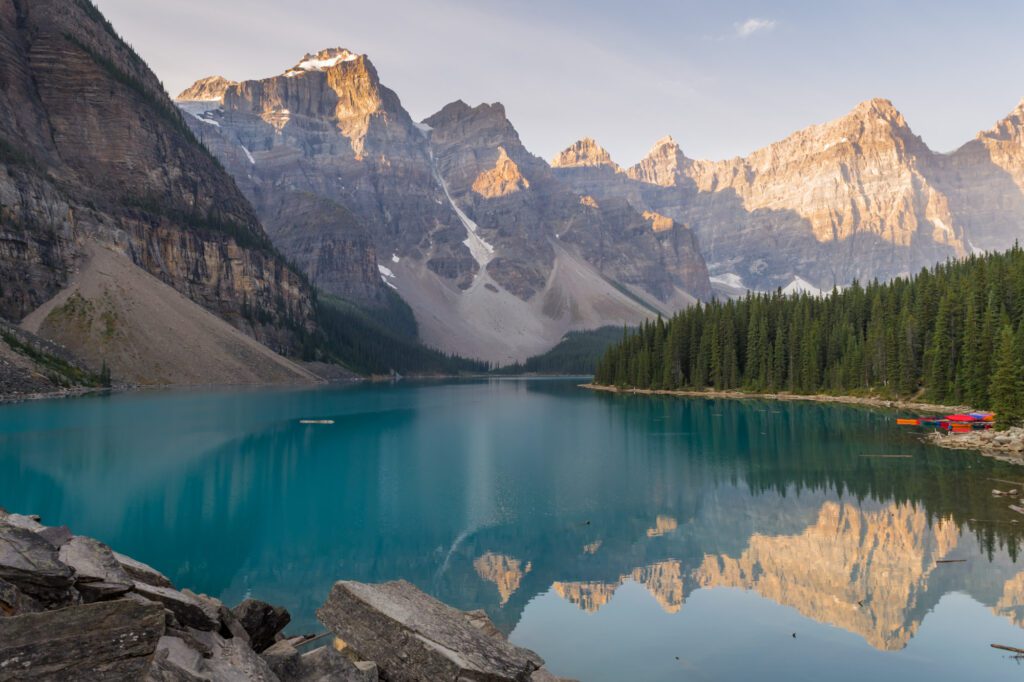
Your first stop off of the shuttle should be the famous rockpile viewpoint, which is a short walk off to your left. From here, you’ll have an excellent view of the lake, backed by the mesmerizing Valley of the Ten Peaks.
Early in the morning, the water is a bright shade of blue, and as the sun rises and interacts with the fine rock particles in the water, it becomes a unique shade of turquoise.
Both are beautiful in their own right, and if you’re on an early shuttle you might have the opportunity to see both versions.
After the rockpile, we would also recommend strolling the lakeshore for some more excellent views.
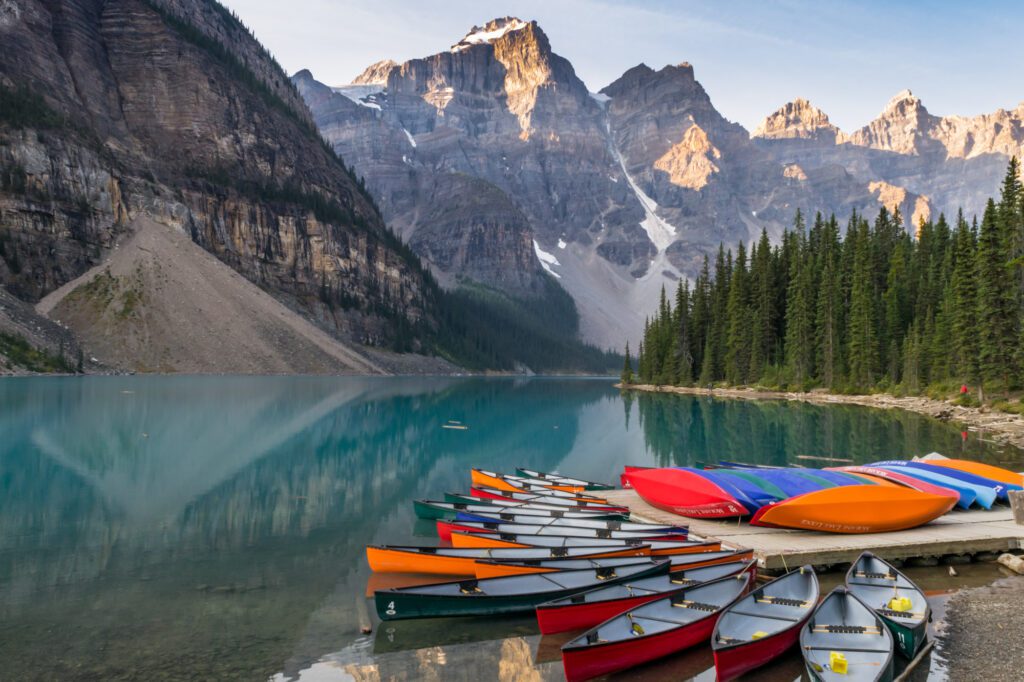
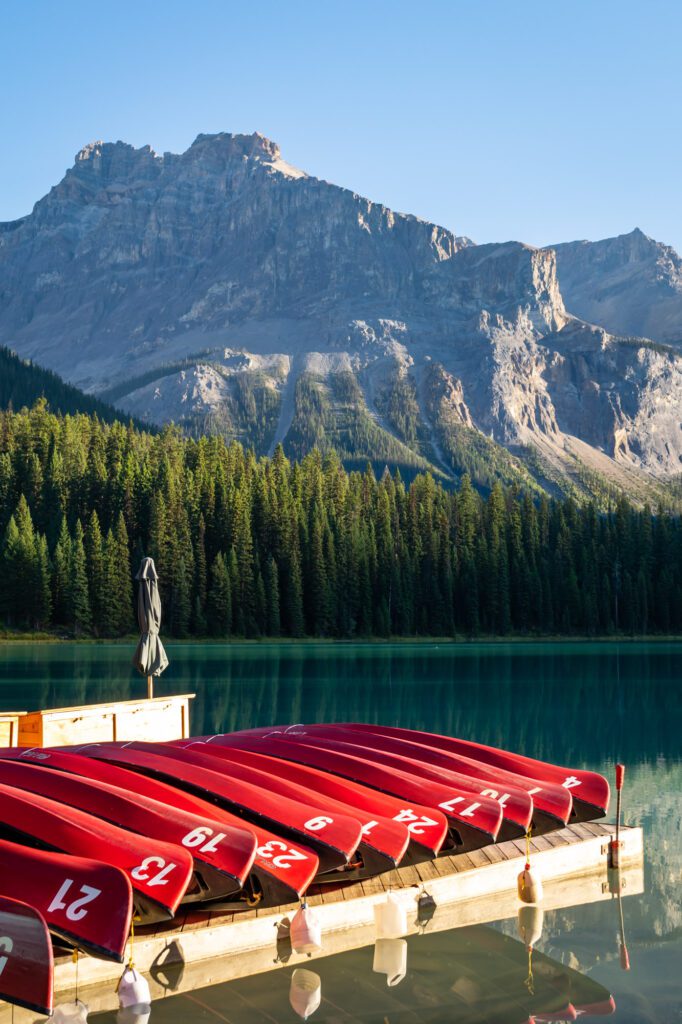
Head back to the parking lot and walk the other way, passing the Moraine Lake Lodge and canoe rentals.
You could walk all the way to the end of the lake, but we’d probably go half way or so and turn back, because you’ve got a hike ahead of you!
Choose Your Moraine Lake Hiking Adventure
After poking around the lakeshore and taking some photos, it’s time to embark on your daily hike. As usual, we have a few options for you to choose from based on your own comfort and fitness levels.
However, we should say that we highly recommend the hike to Sentinel Pass.
It is our favorite hike in the park, though it’s not an easy one. The views out over Larch Valley and back towards the Valley of Ten Peaks are nothing short of spectacular.
Here are the three hikes, in order of difficulty (easier to harder).
Consolation Lakes (4.6 miles, 1,000 feet elevation gain): This hike continues past the rockpile to a string of two lakes. It’s the easiest of the three, and is a very gradual grade.
Eiffel Lake (7.6 miles, 2,000 feet elevation gain): Another alpine lake, surprise! This hike is longer with more elevation gain, but it’s still in the moderate category.
The first mile and a half climb the same switchbacks as Sentinel Pass, which aren’t easy, but then it’s a mostly level walk out to Eiffel Lake, another turquoise lake with a tiny fraction of the crowds at Moraine.
Sentinel Pass and Larch Valley (7 miles, 2,600 feet elevation gain): The switchbacks at the beginning and end of this hike are the hardest parts, with a nice stroll through beautiful Larch Valley in the middle as a break.
The views from Sentinel Pass back over Larch Valley and Minnestimma Lake are breathtaking, as is the final ascent to the pass.
Day 10: Emerald Lake, Takakkaw Falls, & Drive Back to Calgary
On your last day, spend the morning skimming the surface of Yoho National Park, which is immediately west of Lake Louise, and then finish your trip by driving back to Calgary, tears streaming down your face because you can’t believe that every day isn’t filled with rocky peaks, alpine lakes, and 10+ mile hikes (what, just us?).
For logistical purposes, we’d go out to Emerald Lake – the furthest point from Calgary – and stop at Takakkaw Falls as you head back towards Calgary.
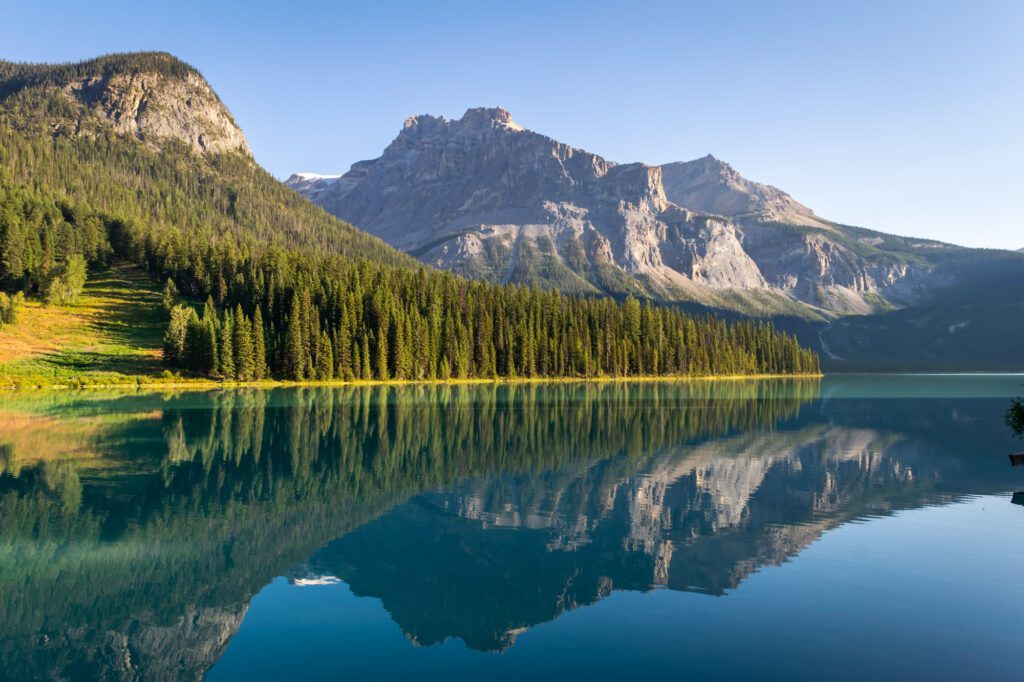
Emerald Lake
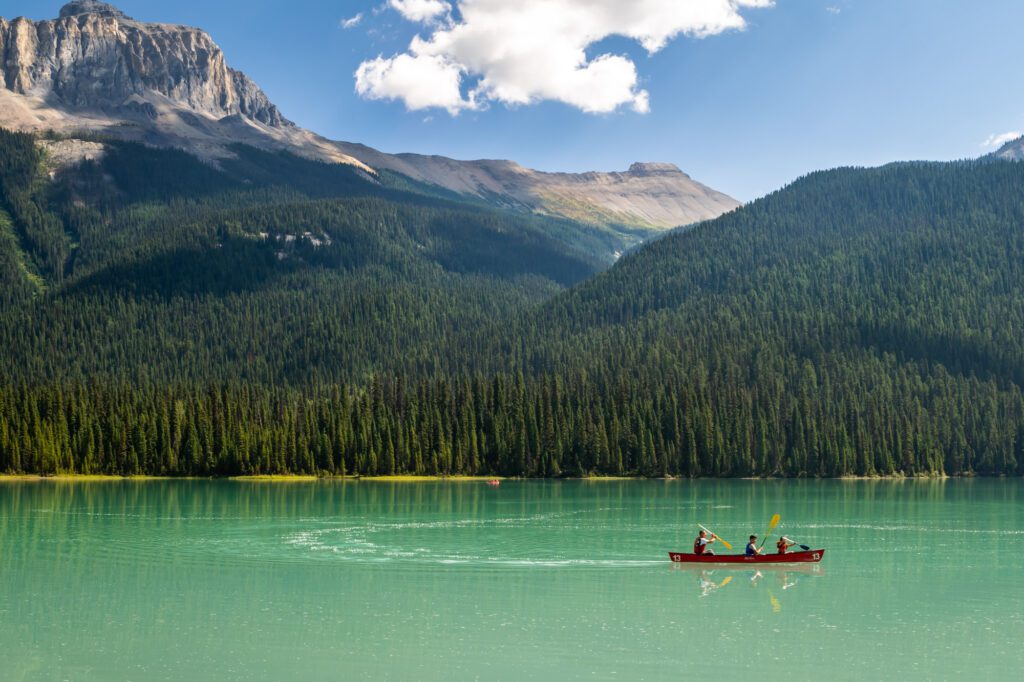
Moraine Lake is the Instagram darling, but Emerald Lake isn’t far behind. And, again, it’s easy to see why.
Emerald Lake, as you might imagine based on the name, skews more green than blue when the sun hits the water and interacts with all that glacier dust floating in it.
It’s a very popular spot, and tour buses start rolling in at 9am or so. We’d recommend getting out there as early as you can (we were there at sunrise, which was magical).
If you have the time, there are two things worth considering here.
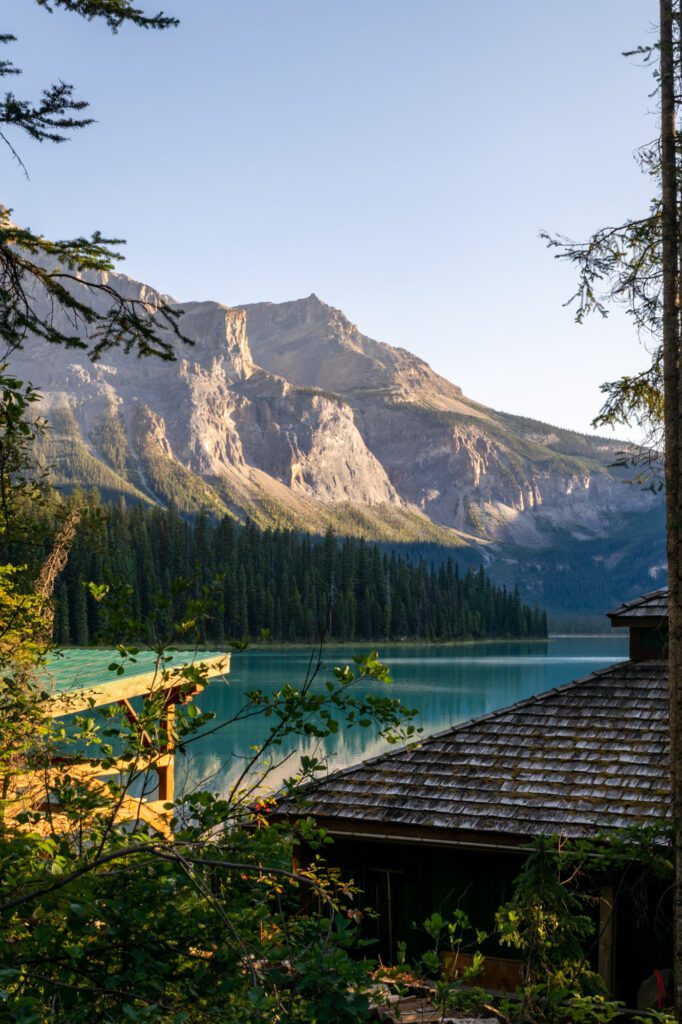
First is a walk along the lakeshore, particularly on the left side of the lake (if you’re coming from the parking lot). There’s a loop all the way to the other side of the lake, and the views from the far side back towards Emerald Lake Lodge are stunning.
Second is renting a canoe and exploring the lake from a different vantage point. They’re not particularly cheap, but they ARE cheaper than Lake Louise or Moraine Lake.
There are also some hikes here, but if you want a good hike, we’d save it for your next stop.
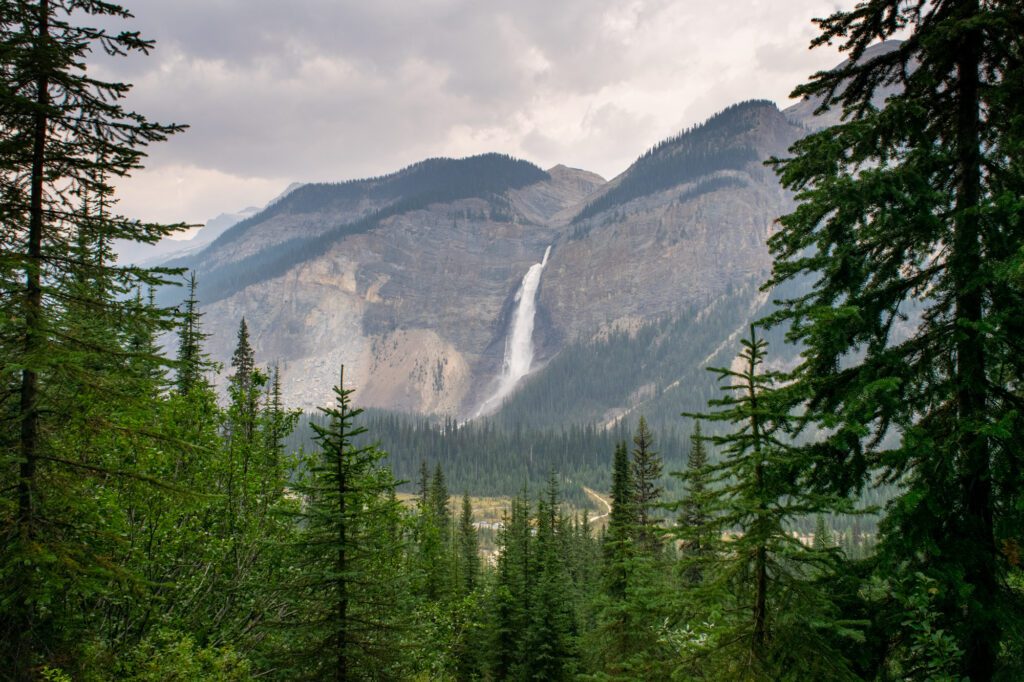
Takakkaw Falls
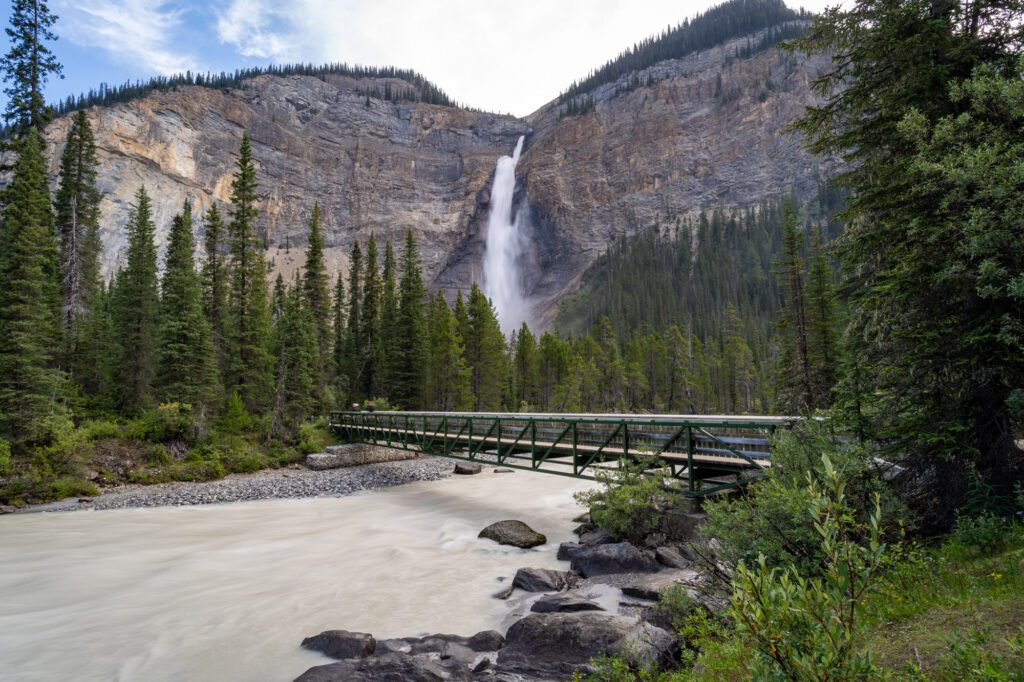
Your second stop in Yoho National Park is Takakkaw Falls, which is one of the tallest waterfalls in Canada and is well worth the drive on the narrow road to reach. It’s a short one mile round trip walk from the parking lot to the base of the falls.
If you’ve got the time for a hike (we have this in the “more time” section below), there are two here that are worth your time.
The first is the hike to Laughing Falls, which involves two more waterfalls and a mostly flat hike out into the Little Yoho Valley.
If you have the energy, you can continue on to Twin Falls, which is a full day excursion, but takes you deep into the Little Yoho Valley out to the Twin Falls Chalet and the waterfall of the same name.
The second hike to consider is the Iceline Trail loop, which is the one we’d choose with unlimited time (we’ve done it, and it’s amazing).
This one aggressively climbs to get above the treeline up on the ridge, where you’ll have great views out over the valley and, in our opinion, one of the best views of Takakkaw Falls from across the valley.
Instead of doing the out and back, loop down past Celeste Lake and Laughing Falls to vary the terrain. It’s a long hike, and spends a big chunk of time above the treeline, so watch for thunderstorms and get an early start.
Drive Back to Calgary
The drive from Yoho back to Calgary will take you about 2.5 hours, and we’d suggest giving yourself plenty of time to get back to the airport to catch your flight.
What to Add With More Time (11-14 Days)?
If you have more time in the Canadian Rockies, congratulations! There is PLENTY to do and see to fill two weeks (a lifetime, really), so you will never feel like you’re running out of things to do if you have two weeks or more.
Here are some things we love, and think are worth adding to your itinerary with extra time.
More Hikes! (1-2 Days)
There are plenty of other hikes in Banff and Jasper to add to your itinerary, and we’d recommend adding an extra day for each long hike that you’re interested in.
One option is to add another of the “choose your own adventure” hikes in the itinerary above. For example, if you only did the Big Beehive at Lake Louise, you could add a day and do the Plain of Six Glaciers too.
The other option is to refer to our guide to the best hikes in Banff and choose from there. Here are a few that aren’t included in the main itinerary above, but that we think are worth your time.
Bald Hills (Jasper): This hike leaves from the shores of Maligne Lake and takes you up to the top of a ridge with great views. Lots of wildlife possibilities, too – we saw a mama and baby moose in the parking lot early in the morning before our hike.
It was incredibly windy at the top of the mountain and, as the name suggests, there’s not a whole lot of tree cover up there to protect you.
Paradise Valley and Lake Annette (Lake Louise): We actually didn’t get to do this hike because it’s on Moraine Lake Road and requires the shuttle (no dogs allowed!), but it was high on our list. You can do it as a shorter out and back hike, or you can do it as a through hike to Moraine Lake up and over Sentinel Pass, which would be one (long) epic day.
Healy Pass (Banff): Of all the hikes we did that were not at Lake Louise or Moraine Lake, this was our favorite.
It’s also the least crowded, and the gigantic parking lot means that parking isn’t really an issue either.
It’s relatively long, but the elevation gain is very gradual, and we would put this in the moderate category (bring plenty of snacks and water though, because it’s a long walk).
The first three miles or so are in the trees, but once you burst out of the treeline and are met with sweeping views from Healy Pass, you’ll understand why we enjoyed this hike so much.
We will say that this is a must-do in the early summer (early to mid-July) for wildflowers, and in the fall (mid-October, but it depends on the year) for the golden larches.
Yoho National Park (1 Day)
Yoho National Park sits on the eastern border of Banff National Park, just a few minutes west of Lake Louise.
However, despite its proximity, relatively few people make it to Yoho, and we think that’s a shame.
It’s not like it’s a hidden gem – it’s very much on the beaten path these days with Emerald Lake’s popularity on Instagram – but it’s far less hectic than its neighbor, Banff National Park.
Now, we’ve included a half day or so in Yoho in the itinerary above before driving back to Calgary, but it definitely deserves a full day to itself, if not more.
There are several world class hikes – namely, the Iceline Trail (we’d do it as a loop – more on that in a second) – and plenty of other attractions to occupy an extra day.
The Iceline Trail: If you’re up for a big hike, this is the one you should do. It has two things going for it.
One, you get up above the treeline into the rocky alpine landscape high above Takakkaw Falls.
Two, you get what is probably the best view of Takakkaw from the ridgeline looking across the valley.
The best way to do this – and we wish we had known this before our hike – is as a loop that goes up the Iceline Trail switchbacks and comes back down via Laughing Falls.
Twin Falls & Laughing Falls: This is an easier hike, heading out from Takakkaw Falls to the Little Yoho Valley, passing three waterfalls along the way.
The full lollipop hike is nearly 10 miles and 2,500 feet of elevation gain, but the shorter out-and-back hike to Laughing Falls gets you two of the waterfalls at a much lower effort. More information on the longer hike here.
Wapta Falls: This is in a different part of the park, a few miles west along the Trans-Canada Highway from the turn offs to Takkakaw and Emerald Lake.
It’s an impressive waterfall, though the hike isn’t particularly beautiful.
It’s worth a stop if you’re heading west to Glacier (or you’re driving back to Vancouver to finish a Vancouver to Banff road trip), but probably not worth the detour for most people.
Lake O’Hara (1-2 Days)
You caught us! Technically, Lake O’Hara is in Yoho National Park, but we think it deserves its own line item here because it is both spectacular and hard to access. It’s a paradise of alpine lakes and hanging valleys.
We didn’t get to do it this last trip because the shuttle doesn’t allow dogs (which we totally understand), and Matt is currently contemplating going back on his own JUST to go to Lake O’Hara for a few nights (don’t tell Alysha or Lupine).
Basically, the only ways to access Lake O’Hara – which is a hub for some great hikes and also a gorgeous lake itself – are by shuttle or by walking a long forest road (11km each way).
You can learn about how to secure a shuttle spot here, including when the reservations open, how to get one, and everything else you might want to know.
In terms of staying overnight, there is a campground at the lake, along with a couple of lodges. All of the options are very, very competitive, and if you want to stay overnight out there you’ll have to book early. More information here.
Glacier National Park of Canada (2 Days)
Though it is a little far from Banff and Jasper, we think Glacier National Park (of Canada) is worth the slight detour. If you’re a mountain lover like us, it offers some of the best high alpine hiking in Canada with a TINY fraction of the crowds that you’ll find in Banff and Jasper.
The hiking is the main draw here, and two days and two nights is enough to get in a couple of great hikes.
We’d do Abbott Ridge (we met a search and rescue person at Glacier who said this is her favorite hike in the park, but we had to skip it) and either the Great Glacier Trail (shorter and easier) or Asulkan Valley (longer trek with more Grizzly bears) on your second day.
As you might expect, the best way to experience Glacier National Park is to camp, because there just aren’t very many places to stay near the park.
Stay at Illecillewaet Campground, if you can, which is also the trailhead for most of the best hikes in the park.
However, we originally booked a room at Heather Mountain Lodge, which is the closest lodging option to the park, before we realized they didn’t have a kitchen (which does not work for Matt, who has Celiac Disease and needs to be able to cook) and we had to cancel.
It’s pricey, but the proximity to the park and the sheer beauty of the cabins are worth it, we think.
What to Do With Less Time (7-9 Days)
With less time in the Canadian Rockies, there are a few changes you can make to the itinerary above to maximize your time.
The first thing we’d say is that you should not cut any time in Lake Louise. Don’t try to do Lake Louise and Moraine Lake in a single day – keep those two days as written above.
The two places you can and should cut time are going to be around Banff, which we think you can limit to two days (including the day you arrive) and the Icefields Parkway, which you can spend less time on than the 1.5 days we recommend above.
To make it work in eight days, we’d drive back to Lake Louise from Jasper on the second full day, so you’re only spending two nights in Jasper.
Oh, and you won’t be able to fit in Yoho, we think, so save it for next time.
Here’s what an eight day trip might look like.
- Day 1: Arrive in Calgary (Sleep in Banff)
- Day 2: Banff
- Day 3: Drive Banff to Jasper (Sleep in Jasper)
- Day 4: Jasper National Park
- Day 5: Jasper & Drive to Lake Louise
- Day 6: Lake Louise
- Day 7: Moraine Lake
- Day 8: Drive Back to Calgary
Hi Matt and Alysha thank you so very much for publishing this Canadian Rockies Tour Guide it is so far the most informative article I’ve ever read . It is very detailed and will surely guide us if ever we will be given a chance to travel . More power to you and GOD be less
You’re so welcome! Hopefully you’ll get to explore the Canadian Rockies at some point soon – it’s an incredible place and we can’t wait to go back! Cheers!
You’re so welcome! Hope you get to make it to the Canadian Rockies at some point in the future 🙂
Hi there, thanks for this brilliant itinerary. I am looking to do something like this but with adding Vancouver on. How much time do you think I would need for this and is there a way you would recommend doing this sort of trip where you fly in/out of Vancouver/Calgary and leave from the other? Thanks
Hey Emma! I’d probably say that you need 10 days or more for that trip, and it’ll probably be pretty rushed. 14+ days would be better. And I would DEFINITELY fly in/out of Vancouver and Calgary to avoid having a long drive to get back to the airport. One way is the way to do it!
Love your blog! You explain like a teacher, lol. (Going to Banff in a couple of weeks.)
That is not the first time someone has likened my (Matt’s) style to a teacher. Breaking things down and explaining them in an understandable way is important for both a teacher, and what we do! Hope you enjoy(ed) Banff!