Everything You Need to Know to Hike the Enchantments
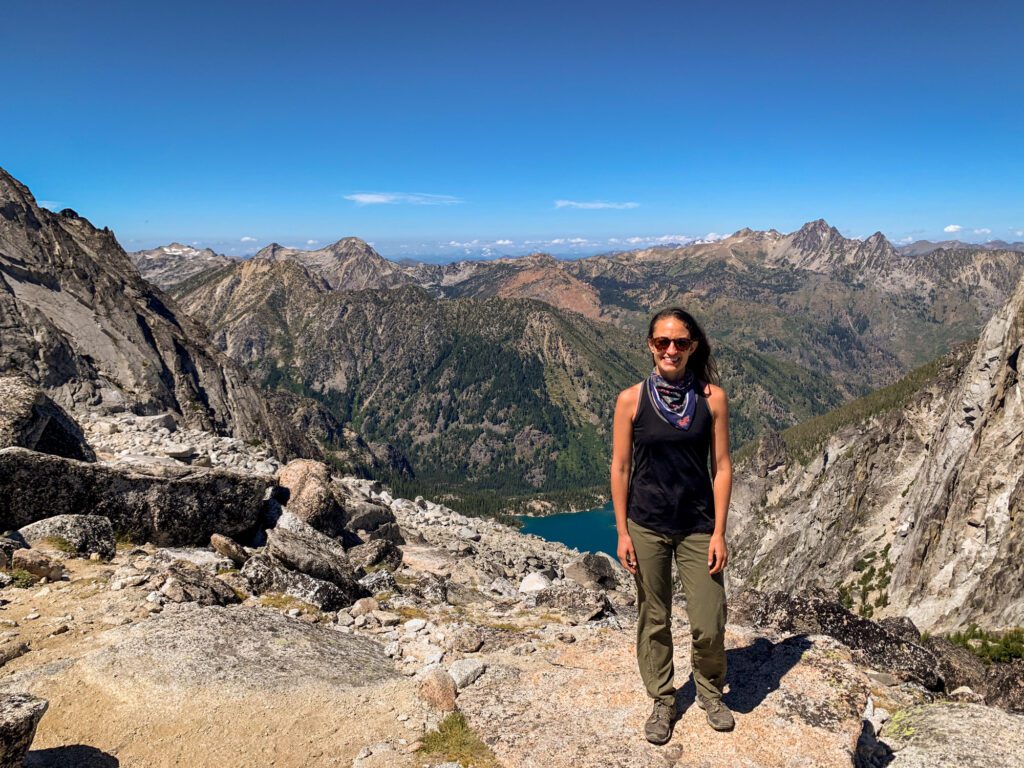
As spectacular as it is popular, a trip up to the Enchantments in the Alpine Lakes Wilderness is on nearly every Pacific Northwest adventurer’s bucket list.
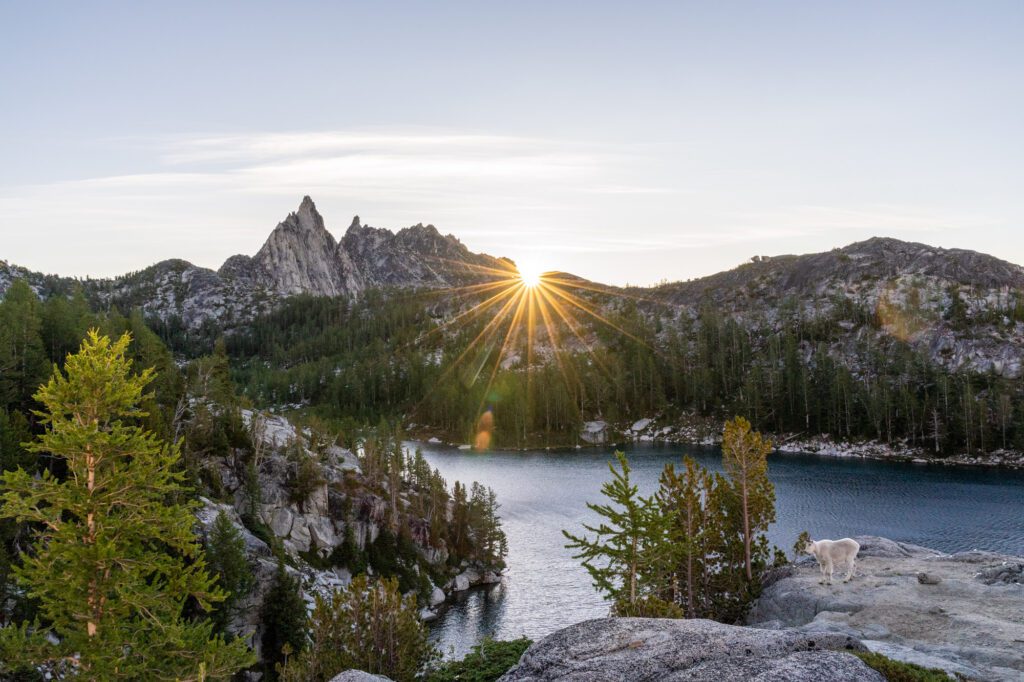
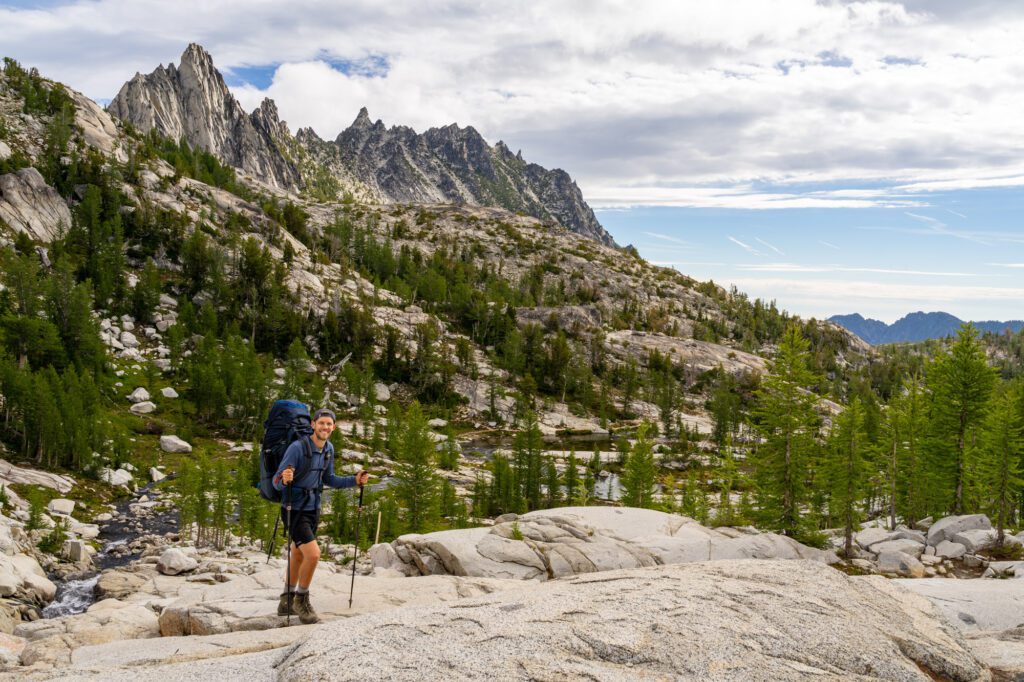
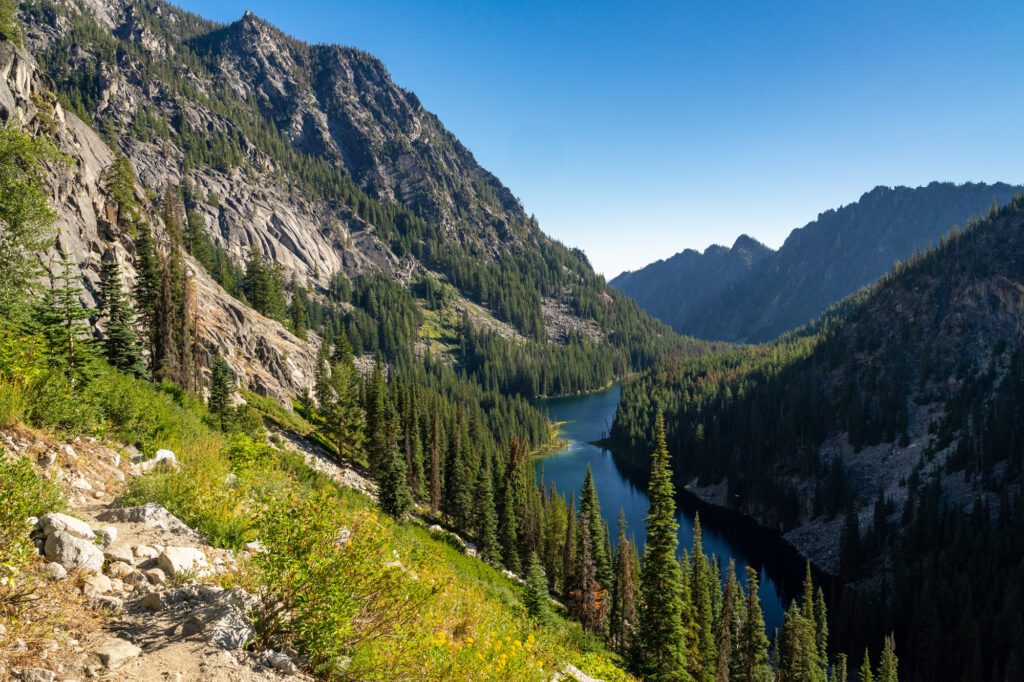
It’s one of the most incredible slices of alpine paradise in the country – easily earning a spot in the top five on our list of the best Washington State hikes – with a never ending sea of granite interspersed with alpine lakes, larches that light up in the fall, and tons of resident mountain goats (remember, they’re wild animals and you need to keep your distance).
Given the popularity of this area, the overnight permits for the Enchantments are extremely limited, and the spring lottery that decides the lucky few who get one is an annual tradition for many across the country.
Lucky for us, we managed to get permits a few years ago for a hike later that same week, and we packed up the minivan (Homer the Honda Odyssey, RIP) and booked it out to Leavenworth to take advantage of our luck.
It’s hard to even cobble together a set of words that do the sheer natural beauty that we experienced on our backpacking trip justice, so we’re going to get straight into the Enchantments trail guide that you’re here for.
In this guide, we’re going to do our best to cover everything you need to know to safely hike the Enchantments trail.
We’ll start with the logistics, like what route to take, day hiking vs. overnight hiking, which direction to hike, and how to handle the parking situation.
We’ll also talk about securing an overnight permit in the EXTREMELY competitive lottery that happens each spring, and then go through a detailed trail report so you know exactly what to expect on the trail.
By the end of the guide, our intention is that you have all the information you need to plan an incredible adventure through the Enchantments, which we’d say lives up to the hype (though the crowds and associated logistics can be a bit of a bummer).
Sound good to you? Let’s get into it.
Disclaimer: Some of the links in this post, like hotel links, are affiliate links, meaning at no additional cost to you, we make a little bit of money if you click through and book. That being said, we would never recommend something to you that we don’t stand behind 100%.
Hiking the Enchantments: The Trail Details
- Length: 19 miles
- Elevation Gain: 4,000 ft. gained, 6,000 feet lost
- Season: July – October
- Trail Type: Thru Hike (One Way)
- Difficulty: Very Hard
- Trailhead Location: Stuart / Enchantments Trailhead (but leave a car at the Snow Lakes Trailhead)
- Dog Friendly? No
- Pass Required: Northwest Forest Pass OR America the Beautiful Pass
How Difficult is This Hike?
We’re not going to lie – this hike is HARD.
Especially considering the only two ways you can do this hike are by backpacking, carrying an extra 20-30 pounds on your back, or by doing it all in one day. Each of those options offers its own challenges.
And it’s not just the ascent that’s tough. The ascent, assuming you’re following our advice and starting at the Colchuck Lake trailhead and hiking through to the Snow Lakes Trailhead, is mindblowing.
Especially the 1,500 foot climb up Aasgard Pass in just under a mile.
The descent also had our legs feeling like jelly by the time we got back to the car. It turns out that 6,000 feet of walking downhill is no joke, even if it is spread out over 10 miles or so.
Whichever way you slice it, you need to be prepared for a really, really difficult hike.
Do not underestimate it – you need plenty of water (including a water filter so you can refill and cook meals), plenty of food (we’d bring backpacking meals even if you’re day hiking it), and lots of sun protection for the hot summer days.
The Route for This Hike
Let’s talk about what this hike looks like at a high level before we dive into the details in subsequent sections below.
This is a one way hike between the Stuart Lake Trailhead and the Snow Lakes Trailhead, both of which are just outside of Leavenworth, Washington.
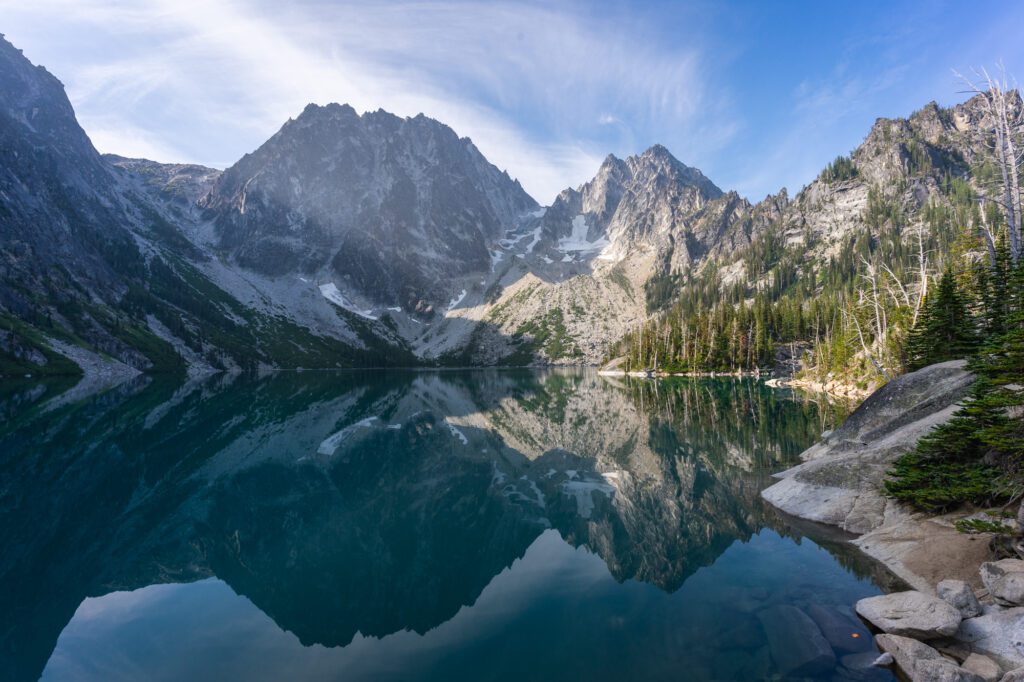
Along the way, you’ll hike along the shores of gorgeous Colchuck Lake, make a rocky ascent that climbs nearly 2,000 feet in less than a mile, and descend through a sea of granite past a string of seemingly never ending alpine lakes.
In this section, let’s talk about which way to hike, and the options for doing this as an overnight hike and a day hike (which is both possible and brutal).
Which Direction Should You Hike in?
We have a strong perspective on this one, particularly if you’re backpacking.
We strongly believe that you want to hike this trail from the Stuart Lake Trailhead, ending at the Snow Lakes Trailhead.
The reason is, basically, Aasgard Pass. To get through the Enchantments, you need to cross Aasgard Pass, which climbs roughly 1,500 feet in less than a mile. Even if that was the entire hike, it would pretty safely be at the top of the list of the toughest hikes we’ve ever done.
You DO NOT want to be going down Aasgard Pass, especially if you’re carrying a 30 pound backpack. It’s steep, there’s no official trail, it’s rocky, and we’d call it relatively dangerous on the way down.
To make sure you ascend Aasgard Pass, start at the Stuart Lake Trailhead, hike up and around Colchuck Lake, and tackle Aasgard Pass.
Oh, and the Stuart Lake Trailhead is a solid 2,000 feet higher than Snow Lakes, so you’ll be walking downhill for most of the hike if you take our advice.
Where to Park Your Car
Given that information about hiking point-to-point from the Stuart Lake Trailhead to the Snow Lakes Trailhead, the next question is how to handle the car situation.
There are essentially two legitimate options (the third being hitchhiking, which isn’t something you’re going to want to do at the end of a 20 mile hike).
The first is to have two cars, and park one at either end of the trail. This, obviously, requires two drivers and two cars to pull off. You’d drive to the Snow Lakes Trailhead, drop one car, pile into the second car, and drive up to the Stuart Lake Trailhead, where you’ll start your hike.
On the back end, you’ll all pile back into the car that you left at the Snow Lakes Trailhead and drive up to the Stuart Lakes Trailhead to grab the other car, then head out.
The second option is the Loop Connector Shuttle. This is a paid service that picks you up from the Snow Lakes Trailhead and drives you to the Stuart Lake Trailhead to start your hike.
This means that you’ll leave your car at the Snow Lakes Trailhead, which will be waiting for you when you finish the hike.
It costs $24 a person, runs only on Friday, Saturday and Sunday during the summer with three pickups at 4am, 5am, and 6am, and you’ll need to reserve in advance.
The Loop Connector Shuttle is the best way to do this one way hike without a second car.
Doing This as a Day Hike vs. an Overnight Hike
Because overnight permits are wildly competitive for the Enchantments Zone, the majority of people you see on the trail will actually be doing the Enchantments as a day hike. Which is wild to us.
Is it doable? Absolutely, but only for hikers who are in excellent shape.
You will be on the trail for 12+ hours, climbing roughly 4,500 feet and descending 6,000 feet (ish). It’s a brutal hike even spread over two or three days, so if you do it all in one day, prepare to be decimated by the end.
The biggest problem with doing the Enchantments as a day hike is that you’ll spend the entire hike worrying about making it back to your car before dark. Which means you won’t be able to fully immerse yourself in the spectacular landscape you’re walking through.
If you can, we’d strongly recommend doing this hike as an overnight (more on how to structure that in the sections below).
If day hiking is your only option, definitely get an early start – we’re talking 5am or 6am. In a perfect world, you want to make it so that you’re hiking in the dark at the beginning, when you’re relatively fresh, and ending while it’s still light out.
Hiking miles 17-20 – which is a steep descent – when it’s dark out is asking for an accident.
Getting to the Trailhead(s)
As we’ve already talked about, you’ll be thru hiking this trail from the Stuart Lake Trailhead to the Snow Lakes Trailhead, which means that there are two trailheads to talk about here.
The first thing we want to reiterate is that you need to get to both these trailheads by roughly 6:30am to have a chance at securing parking in the lot itself (verses on the road).
And it’s approximately a 10-15 minute drive between trailheads.
It’s going to be an early morning (you should plan on starting even earlier if you’re thru hiking anyway to maximize daylight) but it’s well worth it.
We also covered “where to park your car” in the section above, so by now you already know that, no matter what, your day is going to start at the trailhead for Snow Lakes, where you’ll need to drop off your car.
The Snow Lakes Trailhead is right off of Icicle Road, about five miles outside of Leavenworth (to the south).
There is parking for 30-40 cars in the parking lot, though it is almost always full because nearly everyone – thru hikers and backpackers – leaves a car here.
We’ve seen cars lining the road here, which seems to be a pretty regular occurrence.
From there, you’ll either hop in the second car or catch the connector shuttle to head up to the Stuart Lake Trailhead.
You’ll head four miles west (left, if you’re leaving the first trailhead) on Icicle Road, and then tackle a 3.5 mile bumpy dirt road (our old Honda Odyssey handled it fine, mostly) that drops you off at the trailhead.
This is another trailhead that gets insanely busy, because it services both the Enchantments and the very popular Colchuck Lake Trail.
The congestion here is real, and we’d like to reiterate that you should plan on getting here no later than 6:30am if you want a spot.
There are designated spots for overnight hikers, and you’ll need to have the parking pass printed to display on your dashboard to park there.
There are multiple bathrooms at each trailhead, though given the number of people here, you’ll likely have to wait anyway.
How to Get Overnight Permits for the Enchantments
Overnight permits are required to camp in the Enchantments between May 15 and October 15, which just so happens to coincide with the most pleasant time to be in the Enchantments (generally July, August, and September).
These permits are allocated through a lottery, which is honestly the most equitable way to do it after experiencing the Canadian National Parks campground system recently, which is also a lottery and is FAR less stressful than trying to get on Recreation.gov at exactly 7am to secure a campsite at any of the national parks in the US.
This is going to be the biggest deciding factor when it comes to choosing whether you do a day hike or an overnight hike.
Every year, it seems like the number of people who apply for an overnight permit in the Core Enchantment Zone goes up, while the number or people who actually get permits stays roughly the same.
For reference, in 2022 there were 36,827 applications, and just 2,528 permits were issued. That means just 6.9% of applicants get a permit.
Overnight permits for the Enchantments are allocated through a lottery on Recreation.gov.
There are three opportunities to secure a permit (we’ll go through them in more detail in a second, including dates for the most recent season):
#1: The main lottery. This is the way that most permits get issued. You submit an application with your group size, requested dates, and which permit you want, and then you wait.
Eventually, the lottery happens and you get notified whether or not you were one of the lucky few.
The post-lottery period. After the lottery and the post-lottery acceptance period, any remaining permits are dumped into Recreation.gov, where you can reserve them on a first-come, first-served basis starting at a certain time (in 2026, this will be April 1 at 7am PST).
Not all available permits are issued during the lottery, but there’s a good chance weekends during July and August will be mostly gone. However, if you can swing a midweek trip, this might be an option!
Walk-up permits. On the day of, you can get a walk-up permit by showing up at the ranger station by 8:30am, when one permit for each zone is given out by drawing.
There are often many, many more people than there are permits available, so do not treat this as a given.
No need to camp out at the ranger station – everyone who is there on time will get a chance to participate in the drawing.
2026 Enchantments Lottery Information
Here are the 2026 lottery dates. They will likely change slightly in future years (check here for the most up to date information), but this gives you an idea of the timing to be ready for.
- Lottery Start (applications are open): February 15, 7am PST
- Lottery End (applications must be submitted): March 1, 11:59pm PST
- Lottery Held / Permits Allocated: March 17
- Accept / Reject Permits by: March 31, 11:59pm PST
- Remaining Permits Dropped on Recreation.gov: April 1, 7am PST
You will need a Recreation.gov account in order to submit an application.
You’ll submit your application (which includes entry date, group size, group leader, alternate group leader, and permit zone), pay a $6 application fee, and hit submit.
Then, the waiting game begins.
Once the lottery has been completed and results are available (March 14 in 2024), you’ll log back in to your Recreation.gov account and, if you got one, decide on how many nights you want and pay the permit fee of $5 per person, per night.
One last thing on improving your chances of getting a permit.
According to the Forest Service, the most popular month is August, and the most popular days to start (which is what you’ll put on your application) are Friday, Thursday, and Saturday.
Choosing a month other than August (we’d do September!) and a day other than those three mentioned above will give you better chances of getting a permit.
What Permit Zone Should You Choose?
In order to submit your lottery application, you’ll need to know what permit zone you want.
Basically, this slice of the Alpine Lakes Wilderness is broken up into five different zones, and your permit gives you the right to set up camp in whatever zone you get.
There is some debate to be had about strategy here – whether you should apply for the less competitive Colchuck or Snow zones, or go for the gold and apply for the Core Enchantment Zone, which is by far the most competitive.
You can see the results by zone here – clearly some are more competitive than others.
If you want to get up into the Enchantments and do the hike as we’ve described it, you’re going to want to apply for a Core Enchantments Zone permit, which gives you the ability to camp in the Enchantments themselves AND in any of the other zones.
That’s the permit we had, and we spent the first night in the Enchantments Core Zone, and the second night at Snow Lakes to make our descent back to the trailhead more manageable.
The second best option – and it’s far less preferable, we think – would be to get a Colchuck Zone permit, set up camp on the shores of Colchuck Lake, and do a day hike up into the Enchantments from there.
That does mean that you have to go up and down Aasgard Pass in the same day, and you won’t be able to hike the entire trail (particularly the part that descends to Snow Lakes).
However, the best part of the trail is in the Enchantments Basin, and hiking down to Snow Lakes doesn’t really mean you’re missing a whole lot.
How Many Nights to Spend on the Trail
We think the right amount of time to spend in the backcountry is somewhere between two and four nights, depending on how much time you have and how many miles a day you’re up for.
Not to mention, of course, how many nights you can get permits for.
Ideally, if you’re forcing us to choose, we’d say four days / three nights is the ideal amount of time needed to tackle the Enchantments, especially after doing it with one fewer night ourselves.
We did it in three days / two nights, and it was a very tough hike.
If you do it with two nights of camping, you essentially have to get all the way up past Aasgard Pass into the Enchantments on your first night, and then to either Lake Viviane or Upper Snow Lakes on the second night to set yourself up for the long descent back down ot the trailhead.
While we got to spend sunrises and sunsets with our jaws on the floor, we had to move fairly quickly during the day to make sure we made it to our next camping destination.
A third night means you have a little more time to marvel at the sheer wonder of the Alpine Lakes Wilderness, and you don’t have to move quite as fast.
Plus, time for side trips to Little Annapurna and Prusik Peak, which we ended up having to skip.
More time is obviously even better, but three nights is about the upper limit for the number of consecutive nights in the backcountry for us these days.
Where to Camp Along the Trail
There are a nearly infinite number of backcountry campsites available up in the Enchantments, and they’re basically first-come, first-served in terms of individual campsites.
In this section, let’s talk about where to camp.
Our number one piece of advice here is to spend the maximum amount of time possible in the Core Enchantments Zone, which is by far our favorite slice of this alpine paradise.
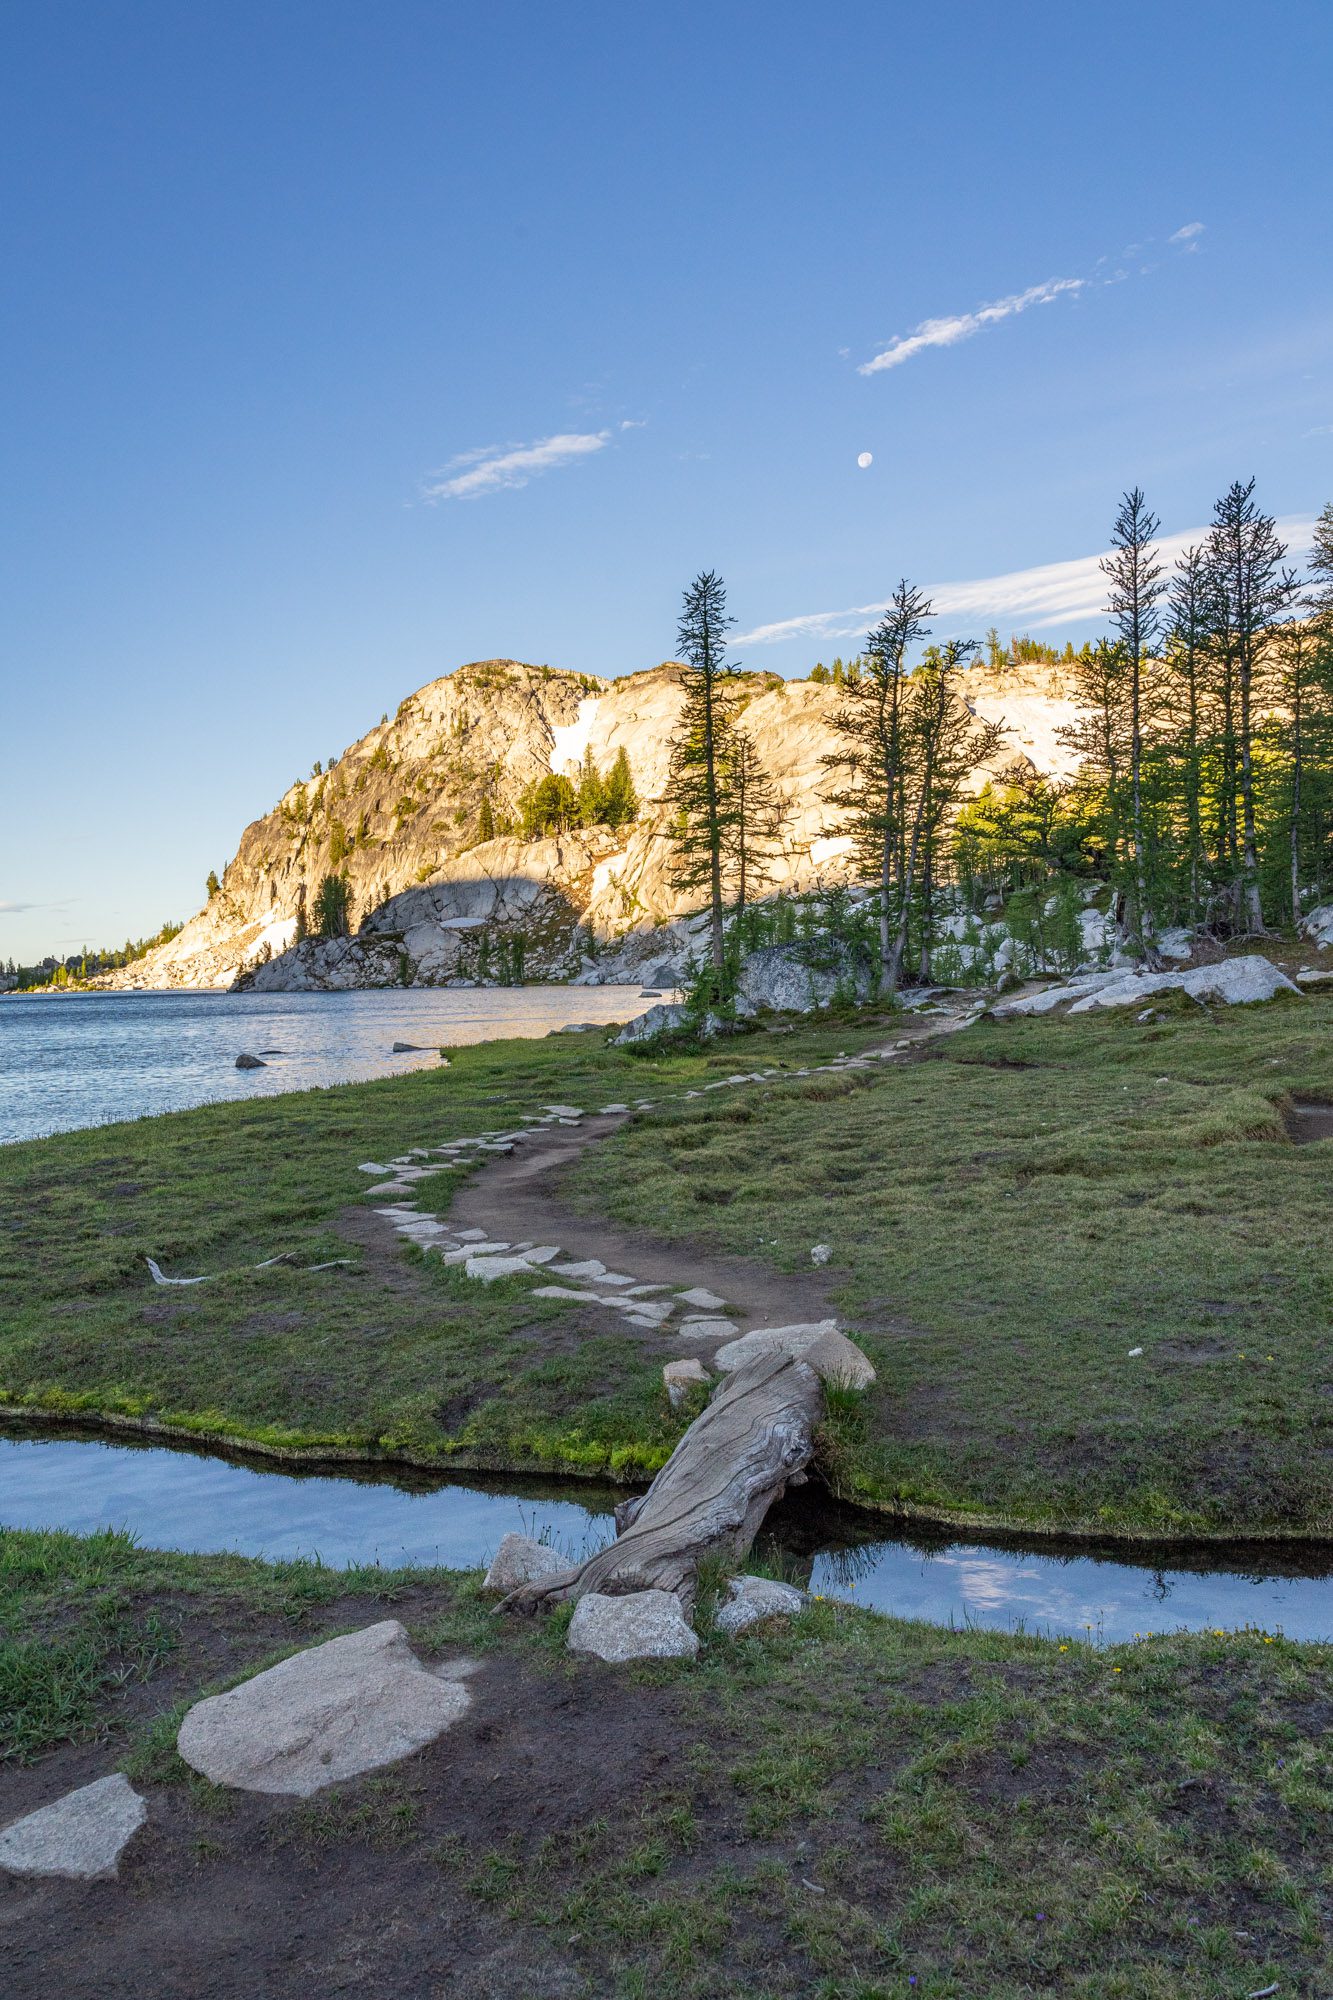
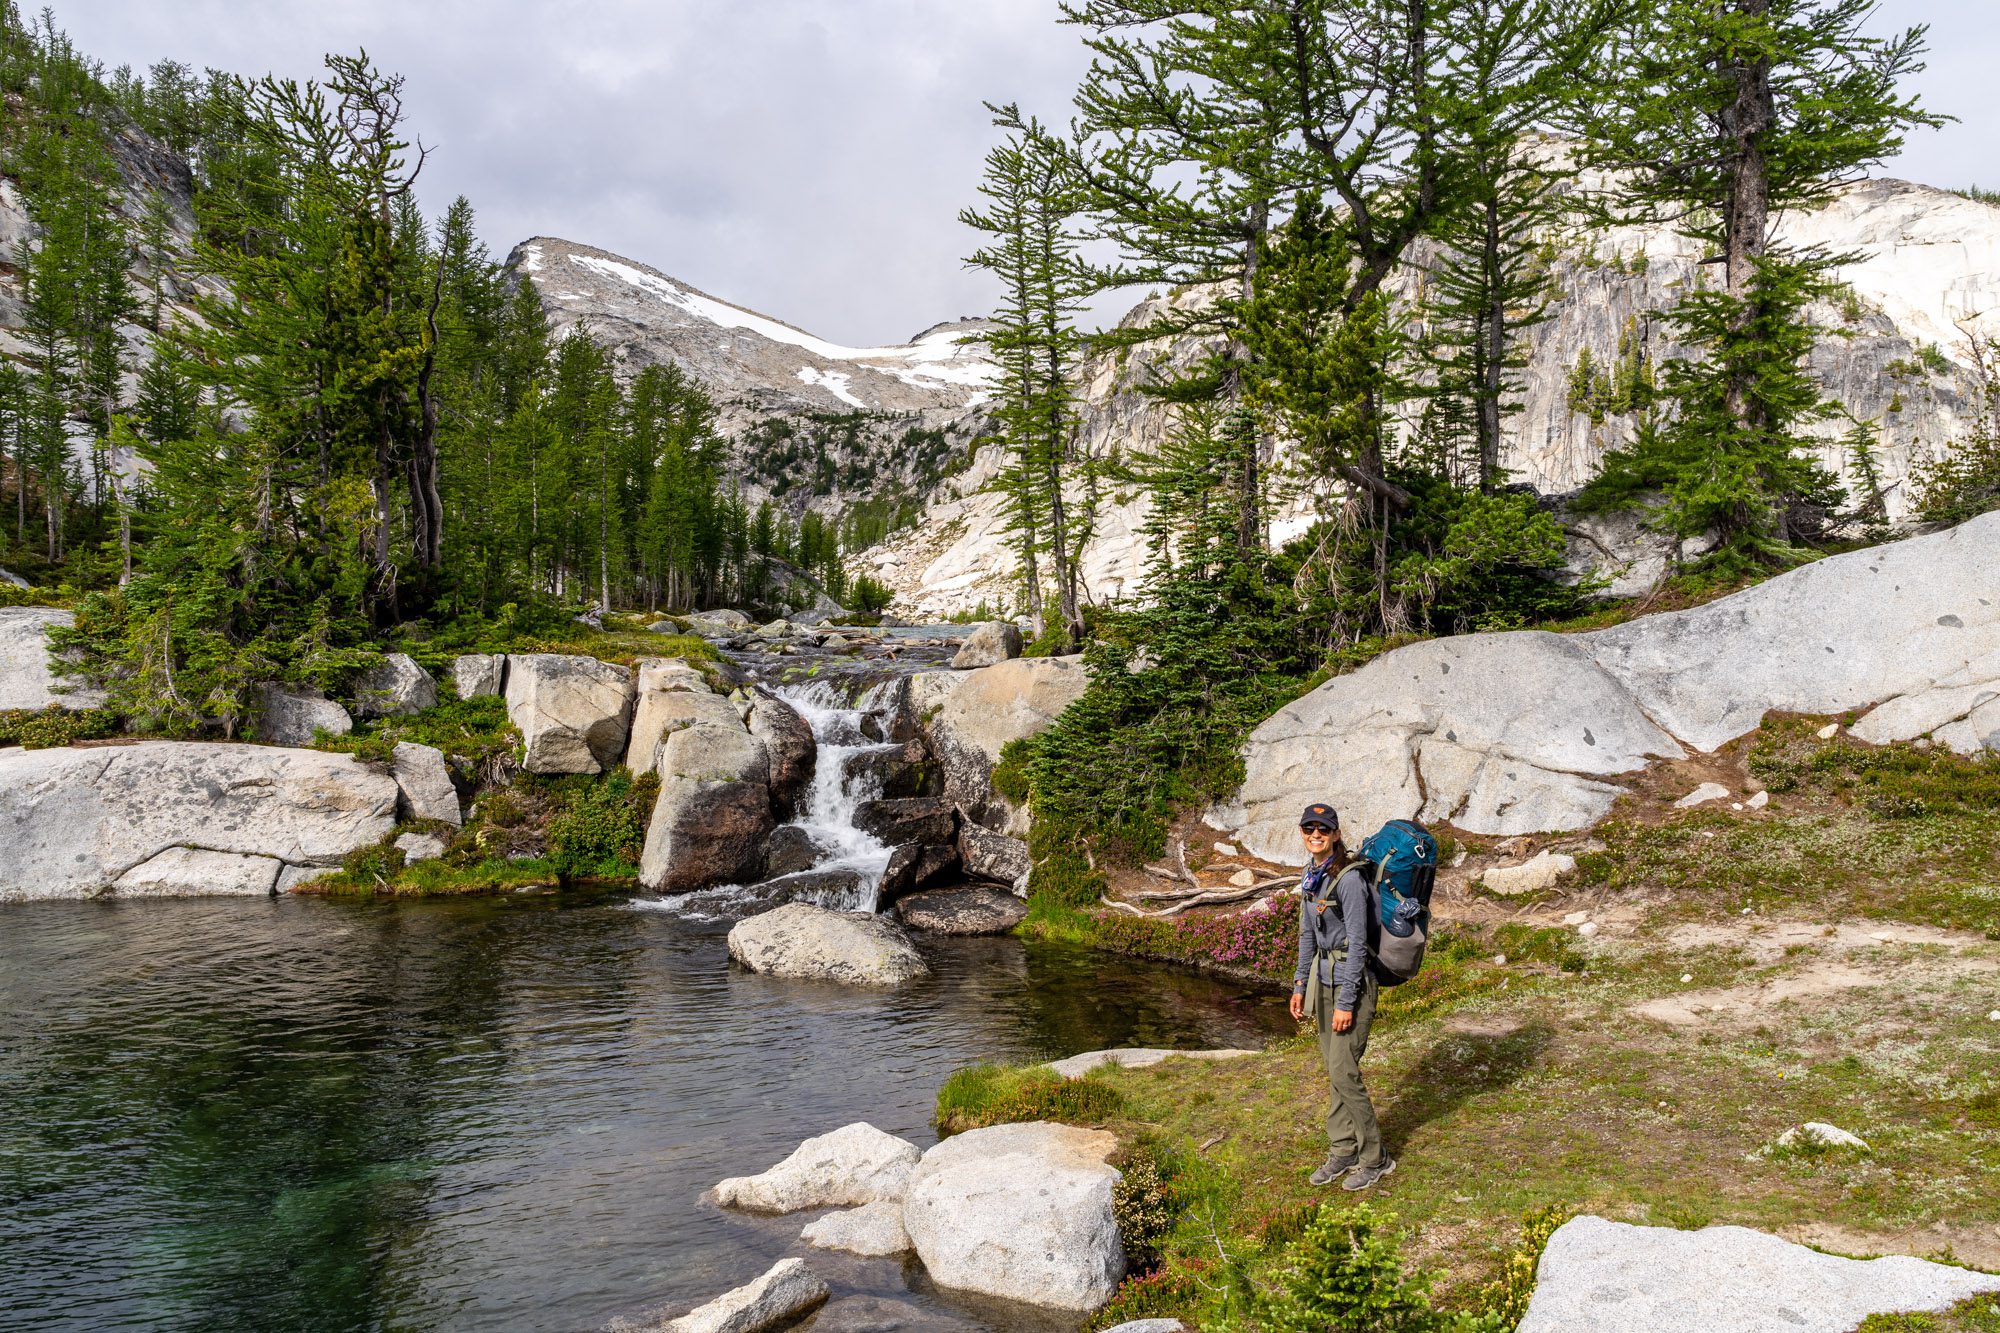
Particularly the stretch between Perfection Lake and Lake Viviane, which is downright magical.
To do that, we’d recommend getting up into the Enchantments on your first night, which means hiking up past Colchuck Lake and climbing Aasgard Pass on that first day. We’d recommend doing this no matter how many nights you have on the trail, really.
Our second piece of advice is to set up camp within a short walk of one of the privies (backcountry toilets). There are a bunch, including around Colchuck, in the Core Enchantments Zone, and near Snow Lakes.
Now, let’s look at a few common scenarios – two nights, three nights, and four nights – and how we’d set them up in terms of where to camp.
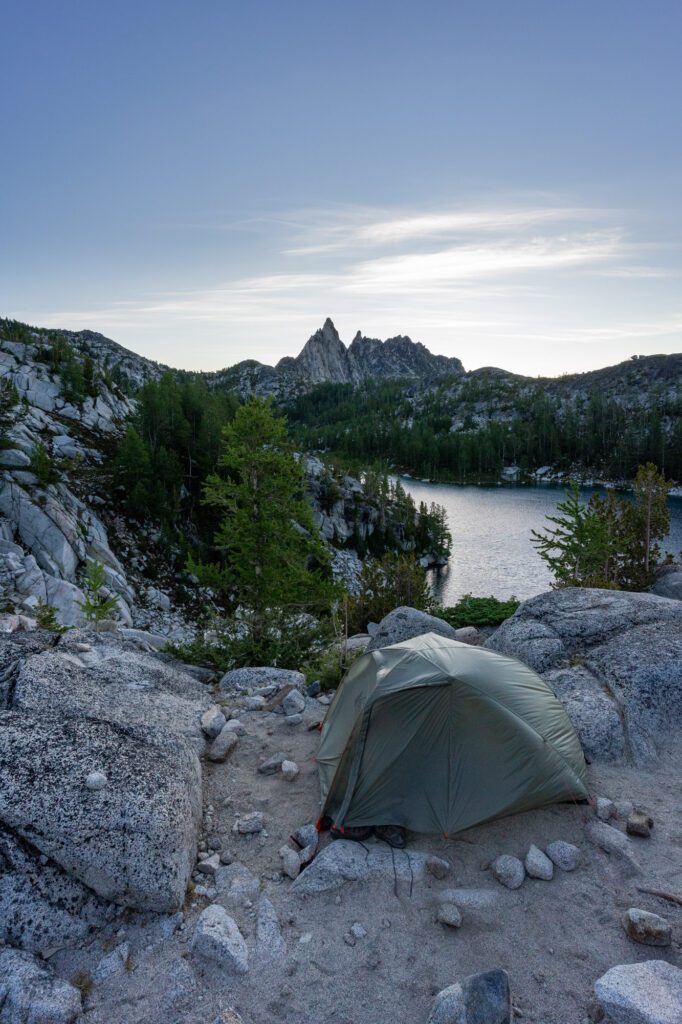
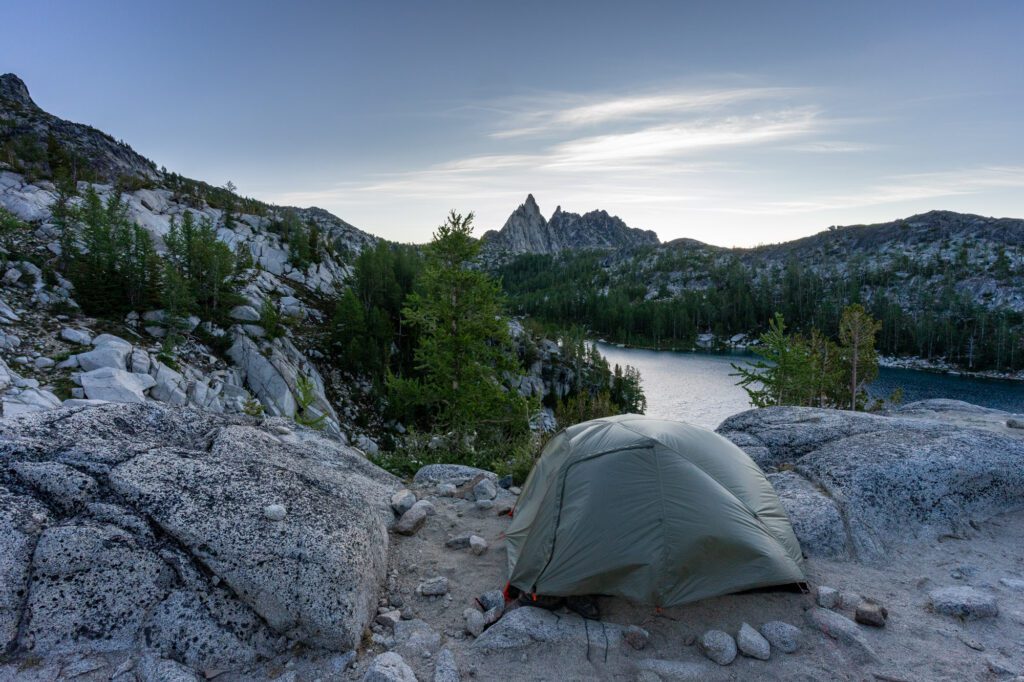
Two nights: Do the climb up past Colchuck and Aasgard Pass and spend your first night near Perfection Lake and Inspiration Lake (which are next to each other).
Spend your second day doing a side trip to either Prusik or Little Annapurna before packing up and heading down to spend the night either at Lake Viviane or Upper Snow Lakes.
The next morning, wake up and make the final descent.
Three nights: Follow the same itinerary as the two night version, but spend your middle night at the same campsite as the first and use your extra day to do both side trips and do some more exploring of the Core Enchantment Zone.
You could also use the extra night to camp at Colchuck, but like we said above, we’d prefer to get up into the Enchantments ASAP.
Four nights: This is where we’d add a night at Colchuck so you can catch sunrise / sunset there. Camp at Colchuck on the first night, Perfection/Inspiration Lake for nights two and three (and do day hikes to Prusik, Little Annapurna, and Lake Viviane), and the last night at Upper Snow Lake before heading down from there.
Hiking the Enchantments in Washington: A Complete Trail Guide
Now that we’ve covered the logistics you need to know before you head to the trailhead, we’re going to use this next section to talk about the trail itself.
We’ll give you a little bit of a play-by-play of our experience on this hike – including our favorite spots along the way – so that you know what to expect once you’re out there.
To make it easier to digest, we’re going to break this hike into five parts. They are:
- Stuart Lake Trailhead to Colchuck Lake
- Climbing Aasgard Pass
- Aasgard Pass to Perfection Lake and Inspiration Lake
- Perfection and Inspiration Lake to Lake Viviane
- Lake Viviane to Upper Snow Lake
- Snow Lakes to the Snow Lakes Trailhead
In the sections below, you’ll find a trail description of each part, along with the distance covered and elevation gained in each section to help you understand what the hike looks like when you’re actually out there.
Keep in mind that, with this trail, you’re doing the vast majority of the climbing in the first two sections, between the trailhead and the top of Aasgard Pass.
From the top of Aasgard Pass, it’s largely downhill, which doesn’t necessarily mean it’s easy.
Stuart Lake Trailhead to Colchuck Lake and the Base of Aasgard Pass
Length: 4.7 miles // Elevation Gained: 2,600 feet
This first stretch of trail covers the same ground as the Colchuck Lake Trail, taking you from the trailhead all the way to the southern end of Colchuck Lake, which leaves you at the base of Aasgard Pass.
For more specifics on that section, you can head over to the guide we linked to read about it. Essentially, here’s what you need to know.
The climb gets progressively harder as you get closer to Colchuck Lake. You’ll start off on the Stuart Lake Trail on a relatively easy grade through the forest.
You’ll cross a robust wooden bridge over the creek, and immediately the trail starts to climb more aggressively.
A little over a half mile later you’ll reach the trail junction where you’ll jump onto the Colchuck Lake Trail, which takes you up to the lake.
You’ll cross back over the creek into a much rockier landscape and the climb REALLY starts in earnest, climbing 1,500 feet in a mile and a half with a mix of switchbacks and rocky steps (and sometimes both).
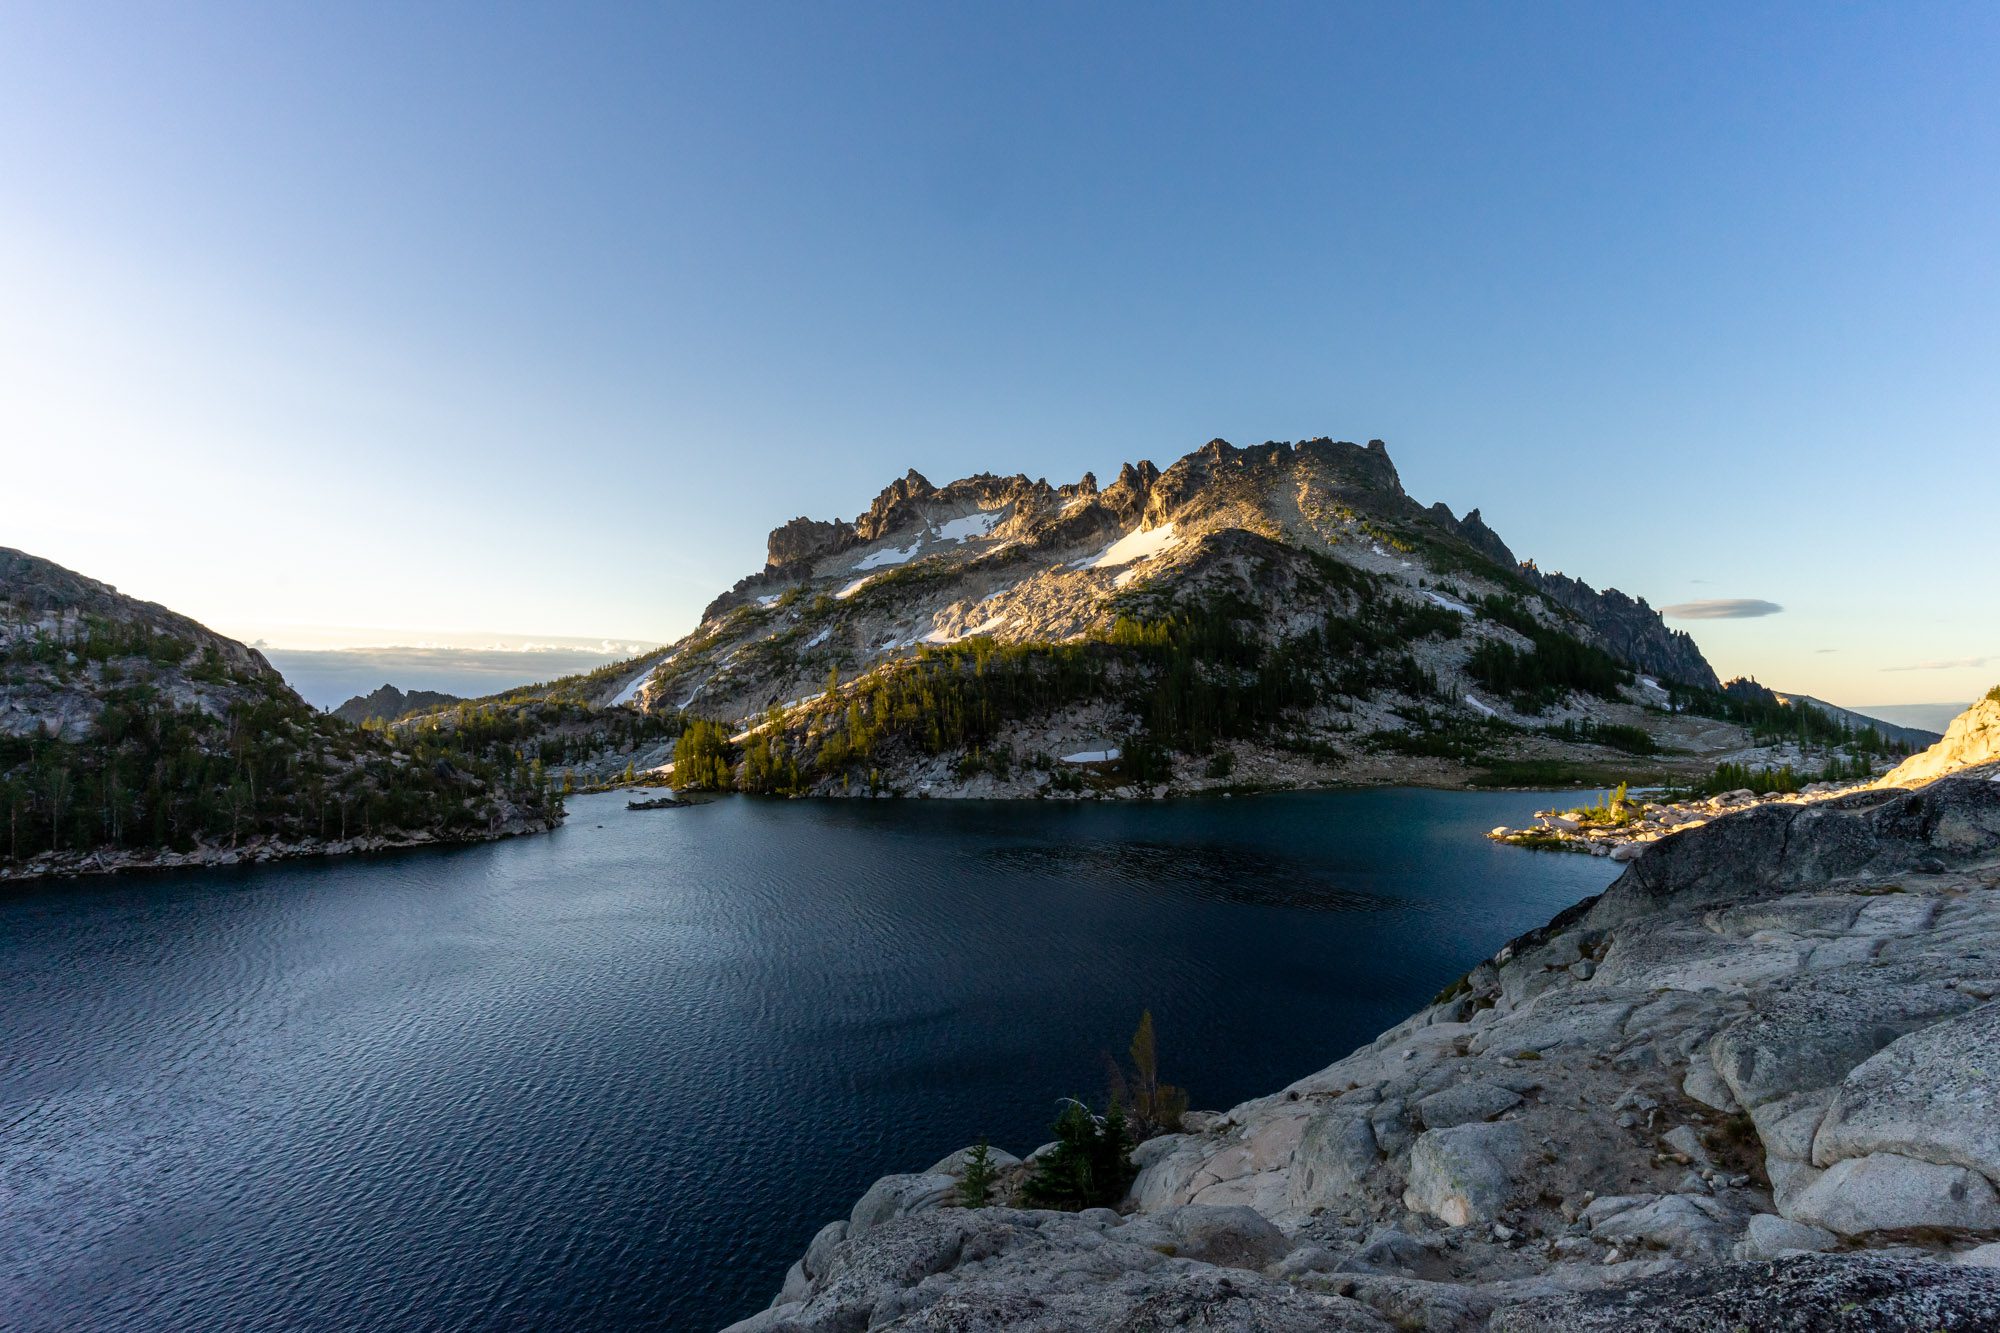
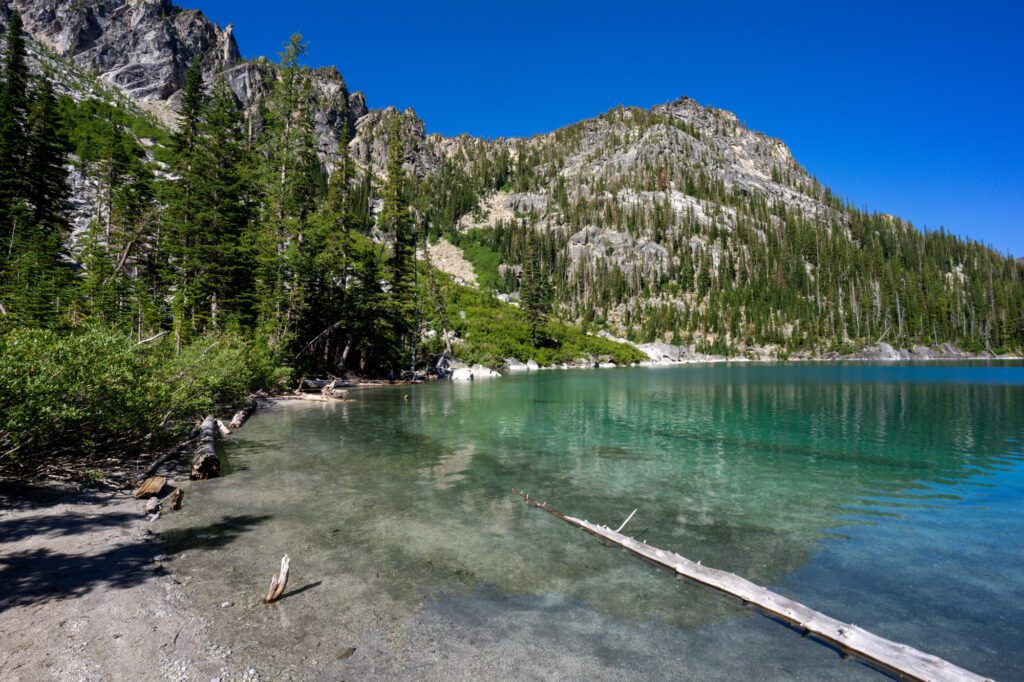
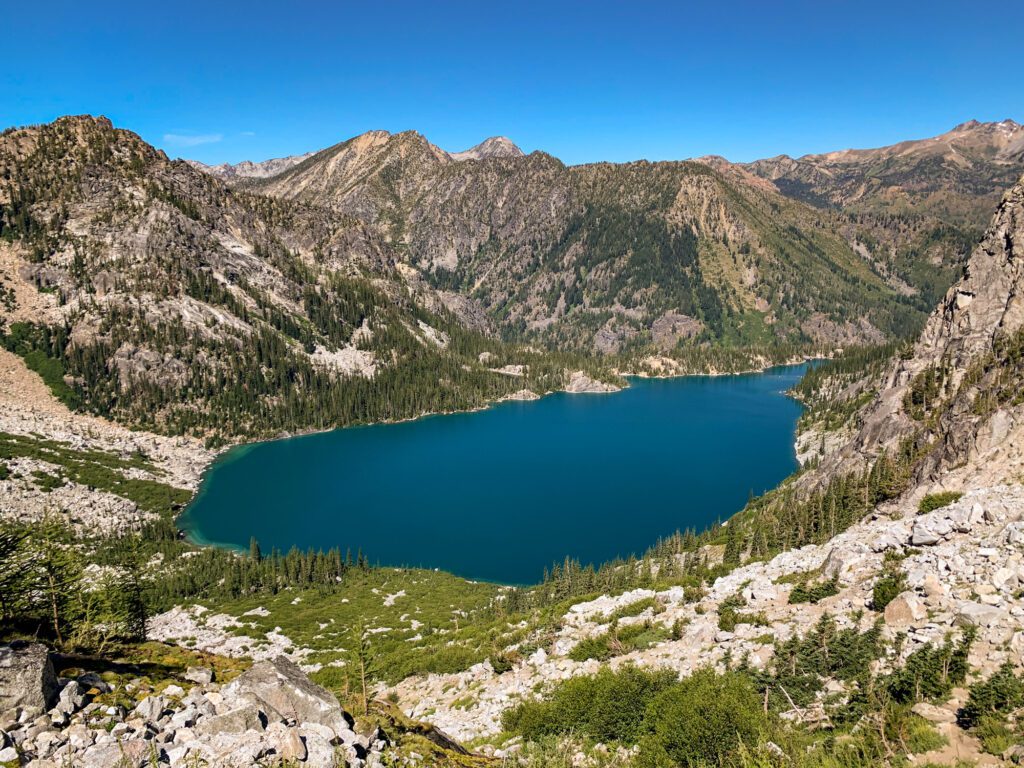
The climbing is all worth it when you hit the north end of Colchuck Lake and get your first glimpse of that crystal clear blue (or turquoise, depending on if the sun has crested the peaks that surround the lake yet) water.
The trail meanders along the western side of the lake, climbing and falling gently over the course of just under a mile to reach the southern tip of the lake.
There are two privies around Colchuck Lake (one at the north end, one about halfway around the lake) if you need to go to the bathroom.
At the southern tip of the lake, you’ll cross a boulder field, which brings you to the base of Aasgard Pass, where you’ll do the second half of your climbing to get up into the Enchantments.
Climbing Aasgard Pass
Length: 0.8 miles // Elevation Gained: 2,000 feet
You’ve covered the majority of your climb on the way up to Colchuck Lake, but this stretch of trail represents the other (slightly less than) half of the climb.
We have good news and bad news about this section.
On the good news side, remember that the Enchantments are waiting for you at the top of this short three quarters of a mile.
On the not-so-good news side, if you took this section as its own hike, it would pretty easily be the hardest hike we’ve ever done.
There’s no real trail – it’s essentially a scramble from beginning to end that involves some minor route finding along the way.
We found success by keeping left until we were near the top, and then crossing the little creek where you’ll find a somewhat established trail to finish the climb.
As you’re climbing, it’s somewhat demoralizing to see mountain goats leaping from rock to rock like it’s nothing. Which we saw here. Twice.
It’s worth teaming up with other hikers on the trail to navigate this stretch.
We know that you’re likely going to have your head down to focus on your footing – as you definitely should – but it’s worth taking a second to catch your breath every once in a while and turn around to marvel at the beauty of the Colchuck Lake basin from above.
Once you’re at the top, congratulations are in order! You’ve done the hardest stretch of trail we’ve ever done (or, frankly, heard about), you’ve reached the highest point of the hike, and it’s all downhill from here!
Plus, the views are downright spectacular looking back at Colchuck Lake.
Aasgard Pass to Perfection Lake and Inspiration Lake
Length: 1.6 miles // Elevation Lost: 300 feet
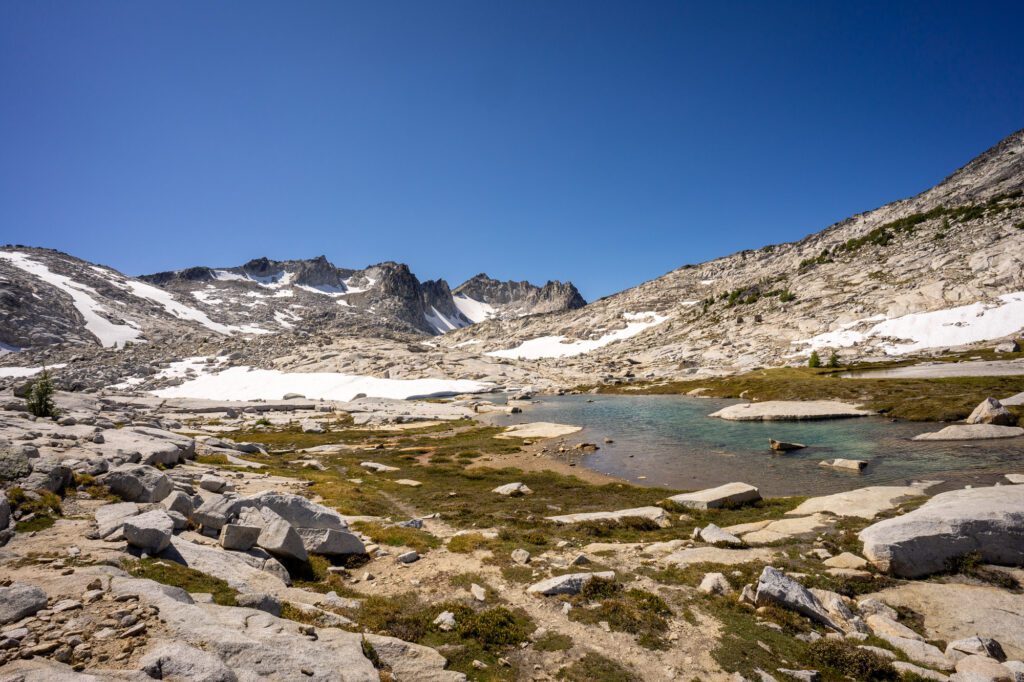
As soon as you’re at the top of Aasgard Pass, you’ll find yourself looking down at the sea of granite and crystal-clear alpine lakes that this area is famous for.
Isolation Lake and Tranquil Lake are right there, and are a good place to take your pack off, filter some water, and replenish your reserves with a snack (or a full meal).
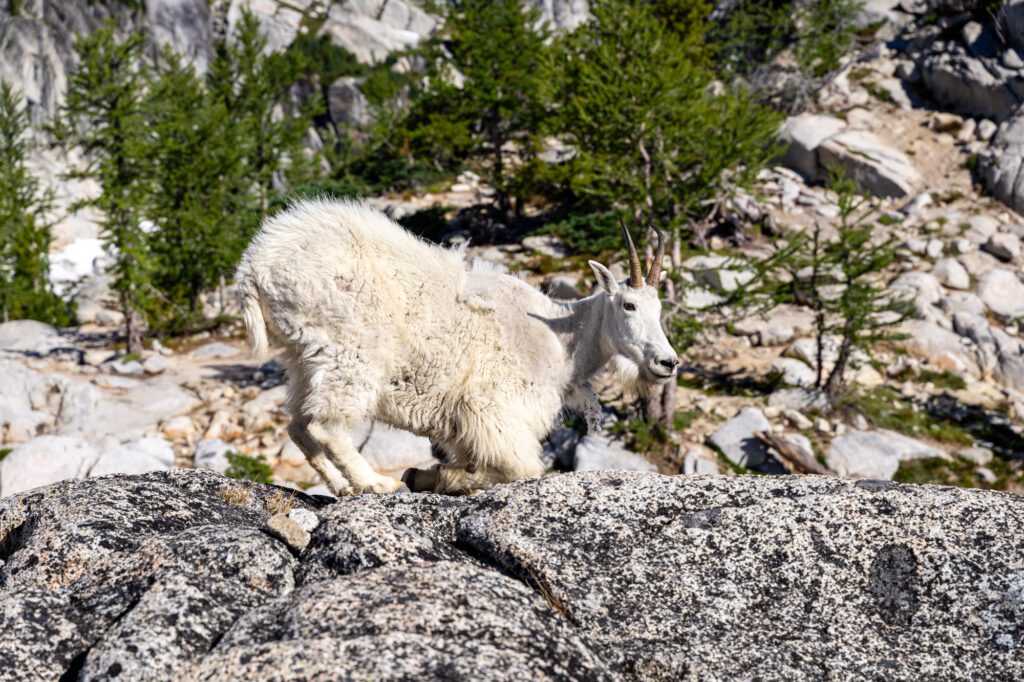
This is an excellent place to see mountain goats. Remember, they’re wild animals, and you need to keep your distance.
There’s also a privy here. It’s on Tranquil Lake.
PS: From here on out, we’re talking in terms of elevation lost, because you’ll be walking downhill.
From the top of the pass, it’s a slight downhill walk to Inspiration and Perfection Lakes, the latter of which is our favorite lake in the Enchantments.
This is a great place to set up camp for the night if you’re backpacking, particularly on the ridge above Perfection Lake (off to the right when the trail turns left to skirt between the two lakes).
There’s another privy here at the northeast corner of Inspiration Lake (it’s pretty well signed).
Optional side trip to Little Annapurna: Depending on how you’re feeling at this point in your hike, you may or may not be up for a side trip to the top of Little Annapurna, the tallest peak that you can see off to the right.
The trail splits off to the right at the campsites at Snow Creek, and takes you up to one of the best views in the state (world?).
It adds 1.5 miles and 900 feet of climbing to the journey, and is probably best for overnight hikers as a side trip. We skipped it, but we kind of wish we hadn’t.
Perfection and Inspiration Lake to Lake Viviane
Length: 2.1 miles // Elevation Lost: 300 feet
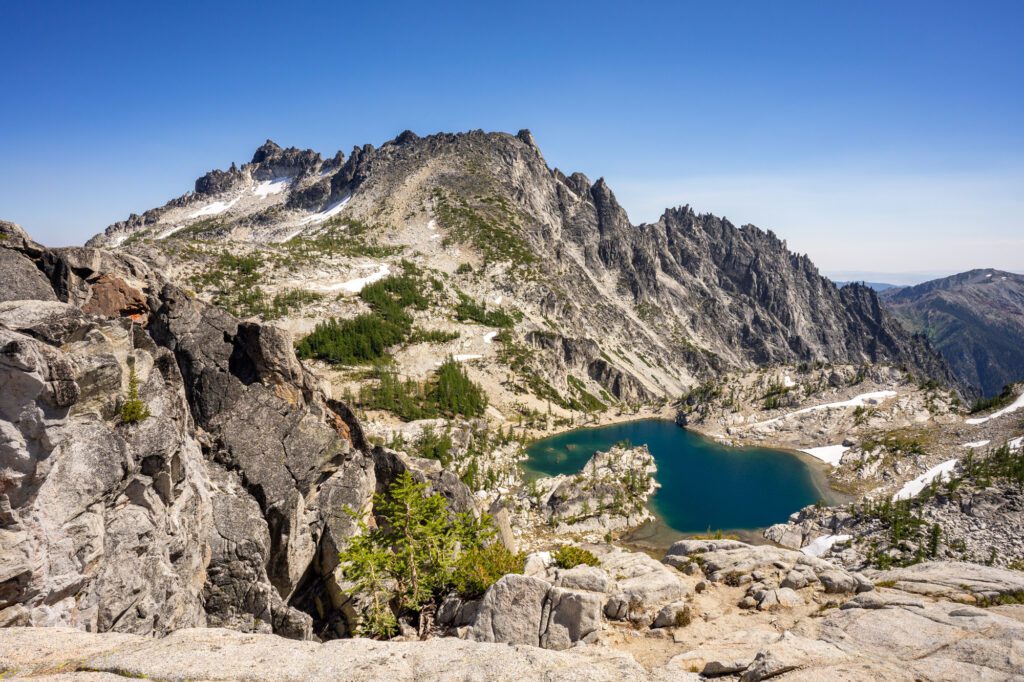
The stretch from the northern end of Perfection Lake to Lake Viviane represents the final piece of the Enchantments you’ll hike, at least in terms of the granite and alpine lakes.
From Lake Viviane, the trail drops aggressively and you get back into the more forested ecosystem you started with, so savor this part!
Leave Perfection Lake and head to the shore of Leprechaun Lake, your second-to-last lake in this section. Right as you leave Perfection Lake, there’s a great view back towards Little Annapurna.
This is a nice gentle section until just before you arrive at Lake Viviane, when the trail gets narrow and steep for a short bit, which makes it hard to navigate with a backpack on.
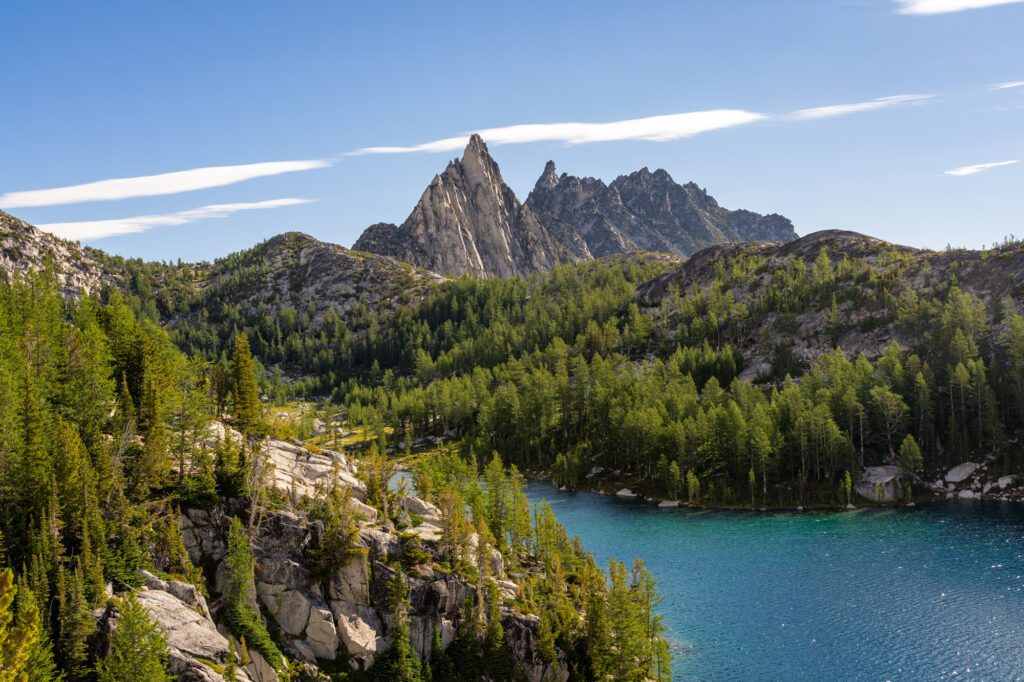
The shore of Lake Viviane offers a nice reflection of Prusik Peak, another great photo opp!
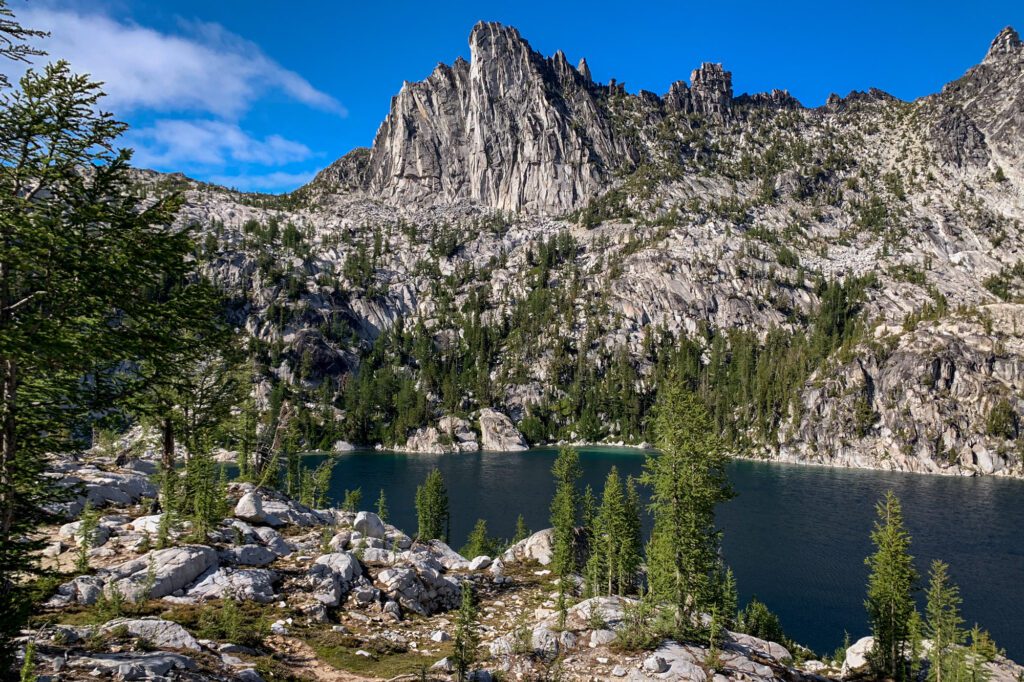
Optional side trip to Prusik Pass: Prusik Peak is the pointy peak off to the left as you’re walking down to Viviane, and it’s probably the most well known of the peaks in the Enchantments Basin thanks to its distinctive shape.
This detour takes you up to the top of Prusik Pass (not quite to the peak) and adds 0.6 miles and about 300 feet of climbing to your trip, and is a much more achievable side trip for day hikers (and overnight hikers).
Lake Viviane to Upper Snow Lake
Length: 2.3 miles // Elevation Lost: 1,400 feet
The next two sections here are kind of similar to the first two sections (Colchuck and Aasgard), except you’re descending, not climbing. These next two sections cover the vast majority of the descent.
It’s worth saying that, yes, climbing is hard, but so is descending, especially with a heavy backpack.
This section of trail leaves Lake Viviane and almost immediately starts to descend. It’s a combination of straight downhill, tight switchbacks, and bigger drops that require some scrambling. Keep an eye on your footing, and follow the rock piles.
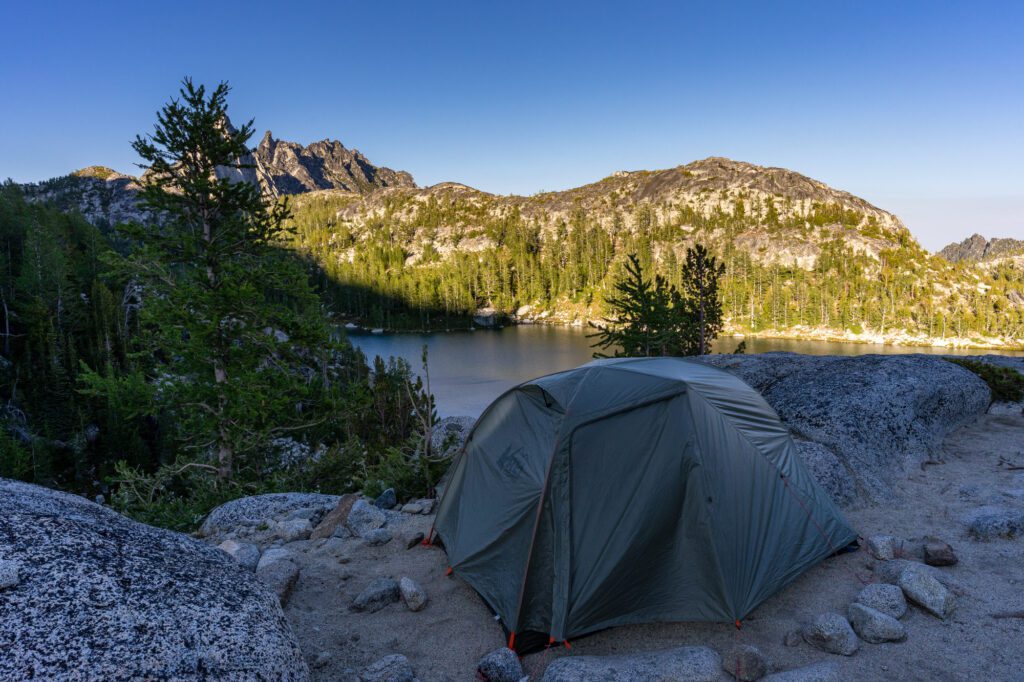
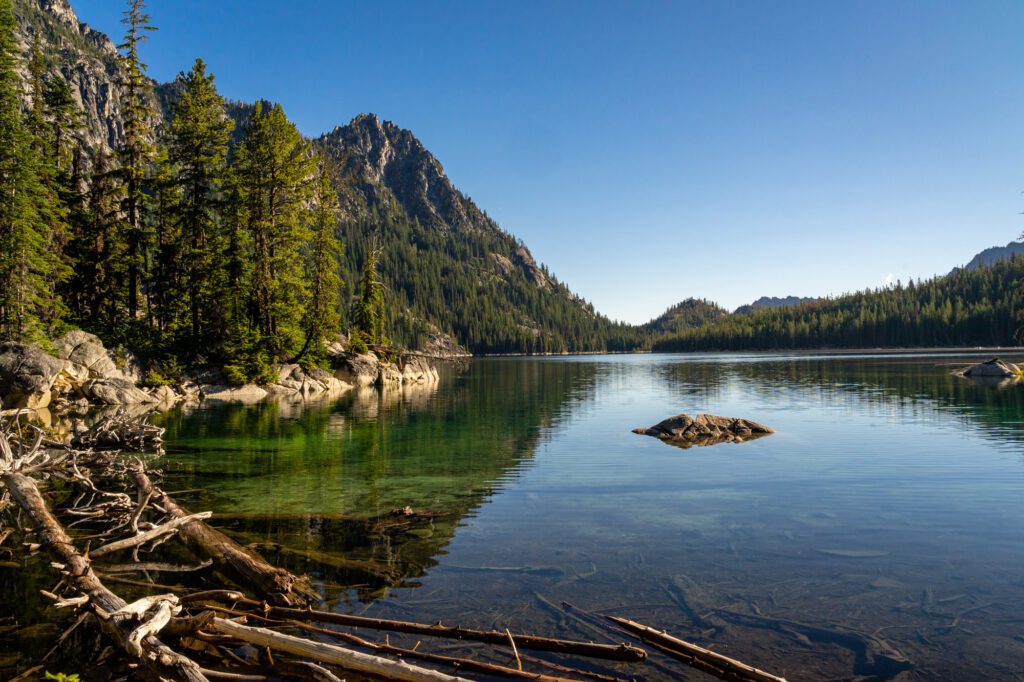
This section ends at the western edge of Upper Snow Lake, which is another great place to set up camp (as is the spit between Upper and Lower Snow Lake) to rest up before doing the final descent the next day.
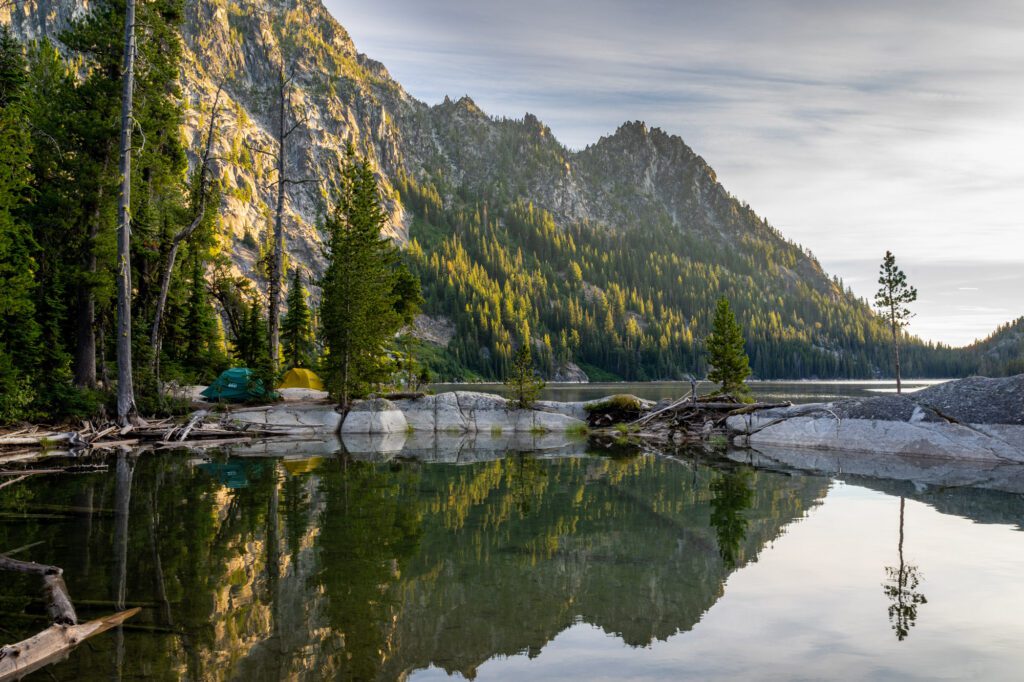
There’s a privy up the hill to the right, and there are plenty of sites to be had (we spent our second night on the trail here). Plus, plenty of water to filter (though we’d head to Snow Creek above Upper Snow Lake – at the western end – for better water).
Snow Lakes to the Snow Lakes Trailhead
Length: 7.5 miles // Elevation Lost: 4,000 feet
This, my friends, is a very, very hard stretch of trail where you’ll lose 4,000 feet of elevation over the course of 7.5 miles, which is no joke even for the spryest of spry youngin’s.
To be completely honest, we don’t even really have much detail to talk about here because we had our heads down, putting one foot in front of the other.
We will say that it’s a pretty steady, albeit steep, downhill the whole way through with two sets of switchbacks. One at almost exactly half way down, and one just before you get to the trailhead.
Make sure to fill up water at Snow Lakes – you don’t get back to creek level until about half way through (those switchbacks bring you down to the creek), and after that you’re following the creek for the rest of the way, which means plenty of water to be had.
Where to Stay near the Trailheads
If you want to avoid a long drive to or from the trailhead on the same day as hiking, then we have some good news for you.
Unlike many remote trailheads around Washington, there are plenty of options in terms of where to spend the night near this particular trailhead.
As we mentioned above, the trailheads are just outside of Leavenworth, Washington, a charming Bavarian-themed town in the eastern foothills of the Cascades.
It’s a lovely little place to spend a day or two either before or after your hike (we’d personally go with after), and there are places to stay that fit a range of budgets nearby.
We’ve personally camped at Eightmile Campground, which is along Icicle Road (the road that both trailheads are off of). You’ll want to reserve that one as far in advance as you can, because it’s a popular spot.
There’s also Bridge Creek Campground, which is a tiny campground with six first-come, first-served sites and a group site.
If you want to stay in Leavenworth, we also have a personal recommendation there! We like LOGE, who have two locations in Leavenworth.
Their Riverside Cabins are the ones we’ve personally stayed in and enjoyed. They are a set of cabins set along the Wenatchee River just outside of town (5-7 minutes on foot to the heart of Leavenworth), and they are spacious, comfortable, have parking out front, and have a nice set of shared outdoor spaces, including a barbecue.
We have friends who have stayed at the LOGE Downtown, which is more of a hotel/hostel hybrid, and they also enjoyed their stay. It’s right in the middle of all the action, and rooms veer more towards what you’d expect from a hotel.
The other recommendation we have is Sleeping Lady Mountain Resort, which is right on Icicle Road (5 minute drive to Snow Lakes) and features a range of room styles, including loft rooms and cabins with kitchenettes, that will work for a variety of group sizes.
In addition to the great location near the trailhead, the property is lovely, too, and it’s on our list for a future trip to Leavenworth.
Passes and Permits You Need
This hike – more importantly, the trailhead – is on National Forest land. You’ll need a Northwest Forest Pass to display in your car to park at the trailhead, which you can get in advance at REI (either a day pass for $5, or an annual pass for $30).
You might be able to purchase a day pass at the trailhead for $5 cash, but we’ve also seen plenty of times where the envelopes are all gone, especially on summer weekends.
We’d plan on securing a pass in advance given the popularity of this hike.
An America the Beautiful Pass also works, because it covers all federal recreation land (including national forests). If you’re planning on visiting three or more national parks in the next 12 months, the America the Beautiful Pass is the way to go (it pays out at 3+ parks).
Don’t try to park without a pass – you will almost certainly get a ticket, since this is one of the most patrolled trailheads in the state thanks to its popularity.
The Best Time to Hike the Enchantments
This is best done in the summer and fall, roughly July to mid-October, when the trail and roads to the trailhead are clear of snow. It is doable in the spring as a snowshoeing adventure, but we much prefer the summer version.
For a week or two in the early fall (usually in October), the Alpine Lakes Wilderness turns into one of the best places to see fall color in Washington State.
The larches lining the lakes light up with a brilliant bright yellow color that is as spectacular as it is fleeting.
While the fall color is gorgeous, the weather is also likely to be unpredictable, so be prepared to be cold, wet, or both if you do hike the Enchantments trail during that time frame.
Are Dogs Allowed?
No, dogs are not allowed in the Enchantments to protect the fragile ecosystem. Period. The end.
Things to Know Before You Hike
Here are a few things to know before you hit the trail.
Mountain goats like your pee. No, they don’t want to be friends with you – they’re wild animals and you need to give them plenty of space – they want the salt in your pee.
Try to pee in either a privy, or on rocks – if you pee on vegetation, the goats will pull it up (bad for the ecosystem) to get that sweet salty goodness.
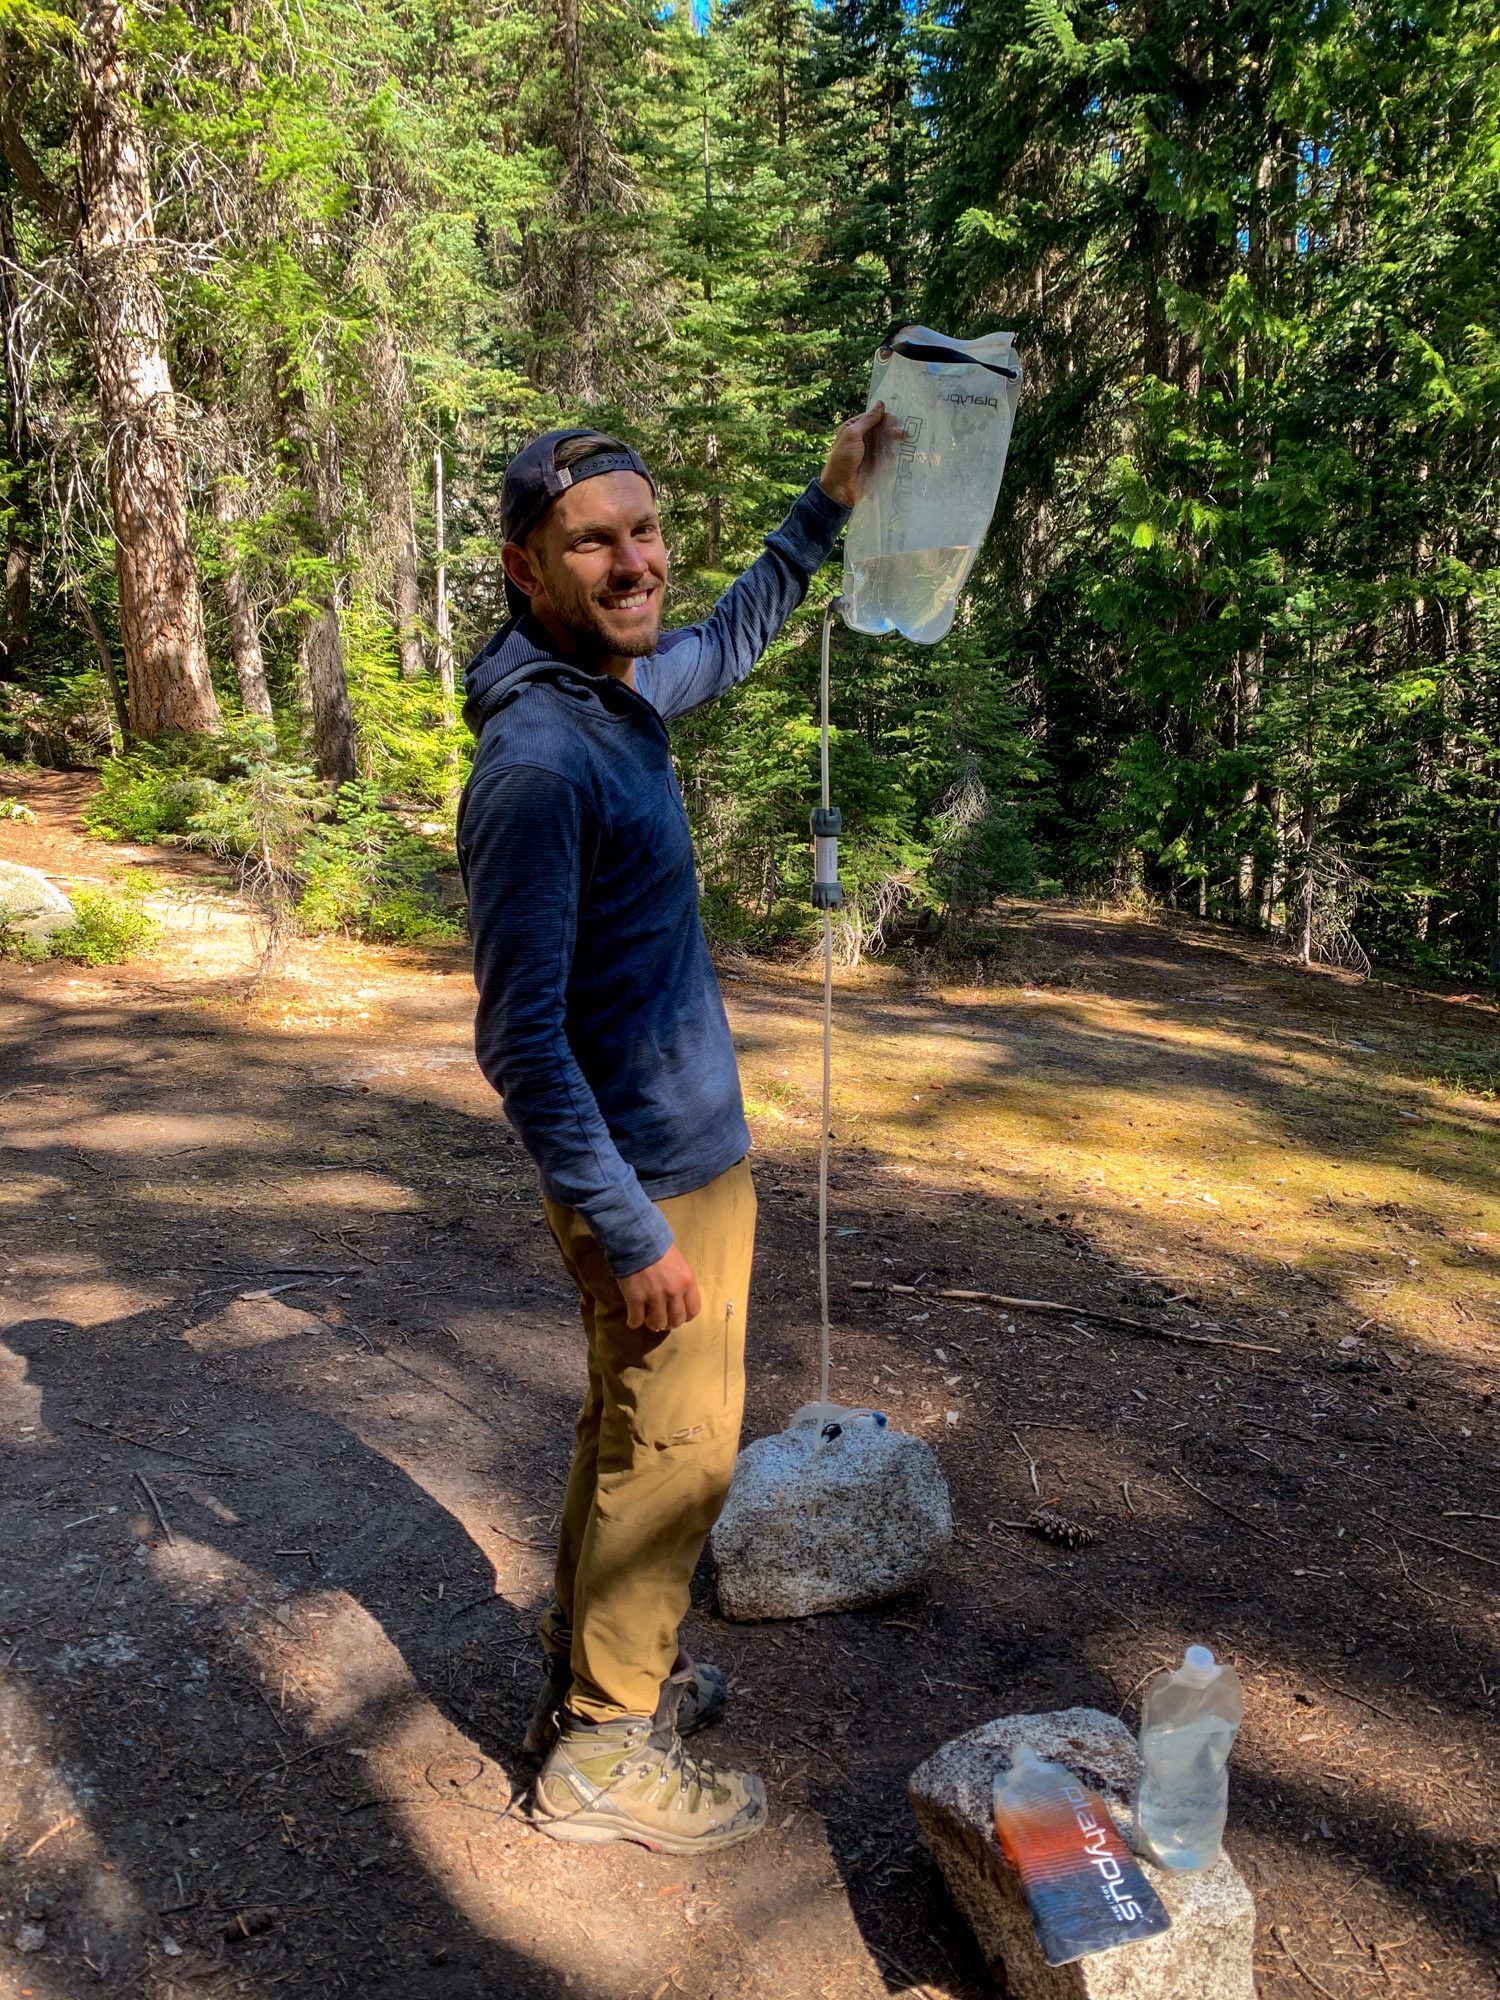
You really need water filtration. Obviously you need a way to filter water if you’re spending a couple of nights backpacking, but even if you’re day hiking, you really should have a way to filter water on the trail because you’re going to need more than you want to carry up Aasgard Pass.
We love our Platypus GravityWorks filter, and use it on every backpacking trip.
You just fill up the “dirty” reservoir from a source of running water, and hook it up to the clean reservoir (placed below the dirty one) and let gravity do its thing.
…And probably a way to boil water for food. Again, obvious for backpackers, but we’d also recommend a way to boil water for day hikers.
Unless you’re carrying seven sandwiches and a bunch of snacks in your daypack, which is doable, but not particularly pleasant.
You’re going to want something approximating a meal, which is going to require boiling water.
We swear by our Jetboil, which is (relatively) compact, fuel efficient, and FAST. Remember a fuel canister!
Also, we’ve tried our fair share of backpacking meals, and the best we’ve ever had are Backpacker’s Pantry Pad Thai (which we first had overlooking Perfection Lake at sunset on this hike) and Good-to-Go Thai Curry.