The Amazing Enchanted Valley Trail in Olympic National Park
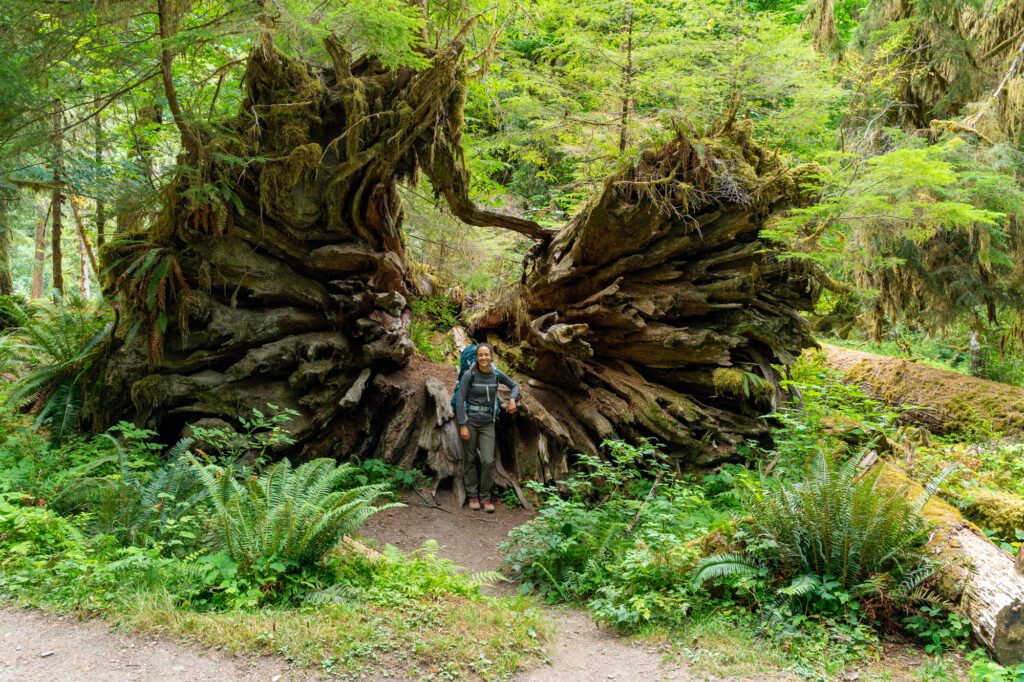
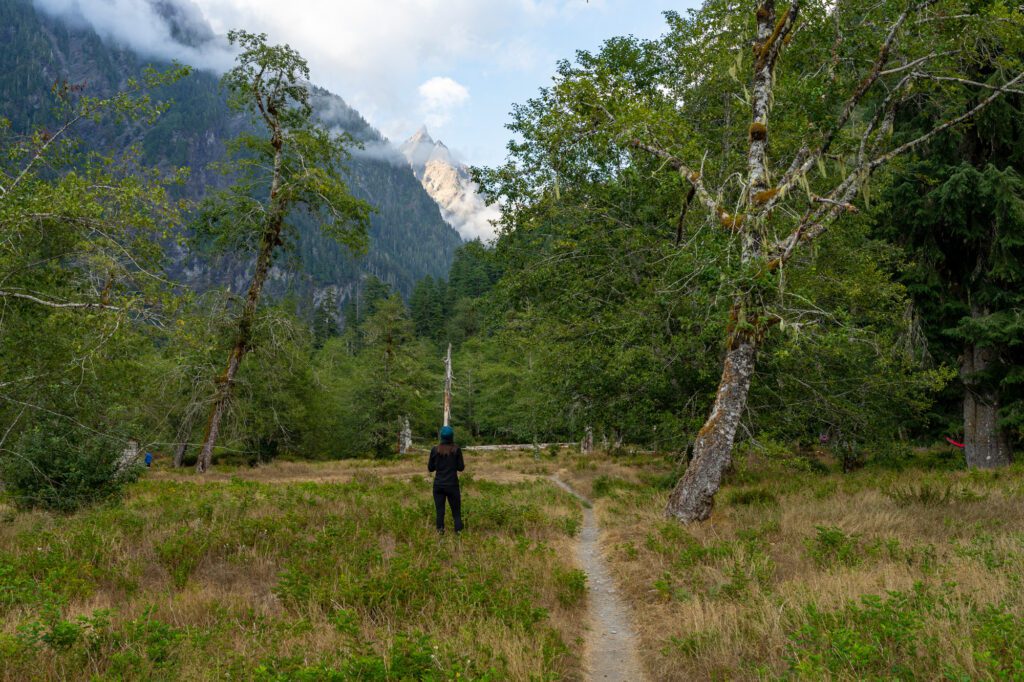
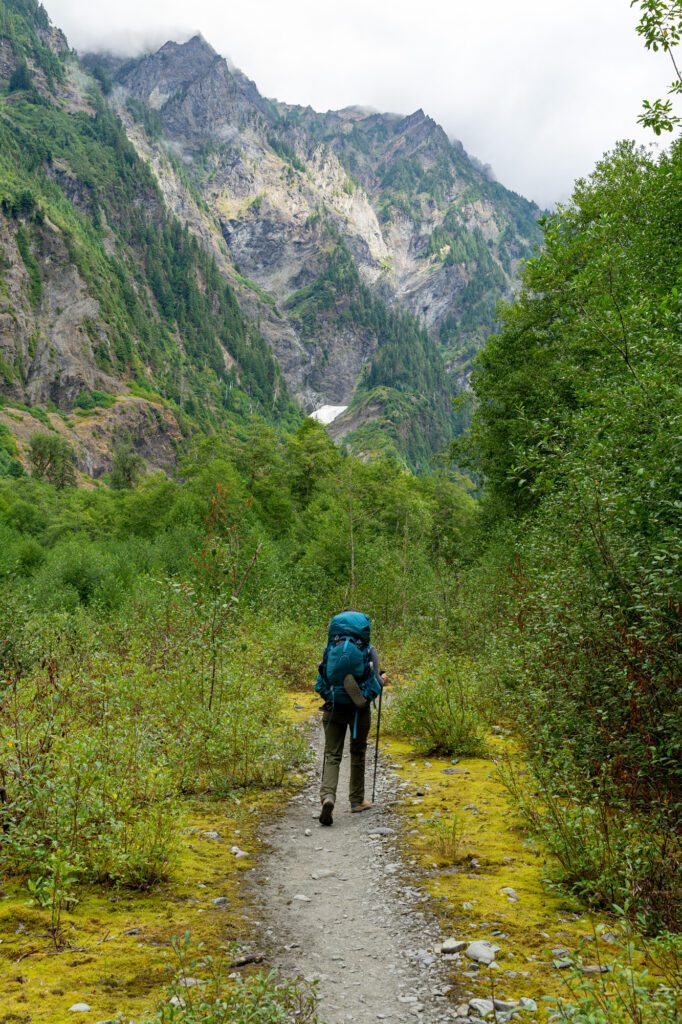
Lush, fern-filled rainforest gives way to a fertile green valley with a river winding through it, surrounded by tall, rocky peaks with waterfalls running from their tops to the valley floor hundreds of feet below.
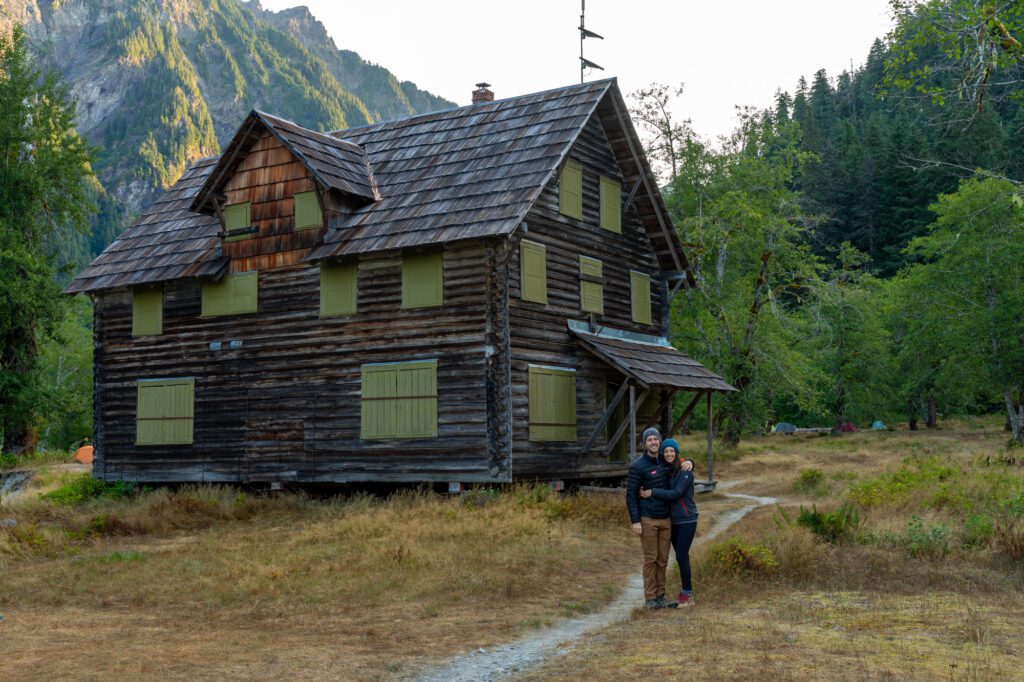
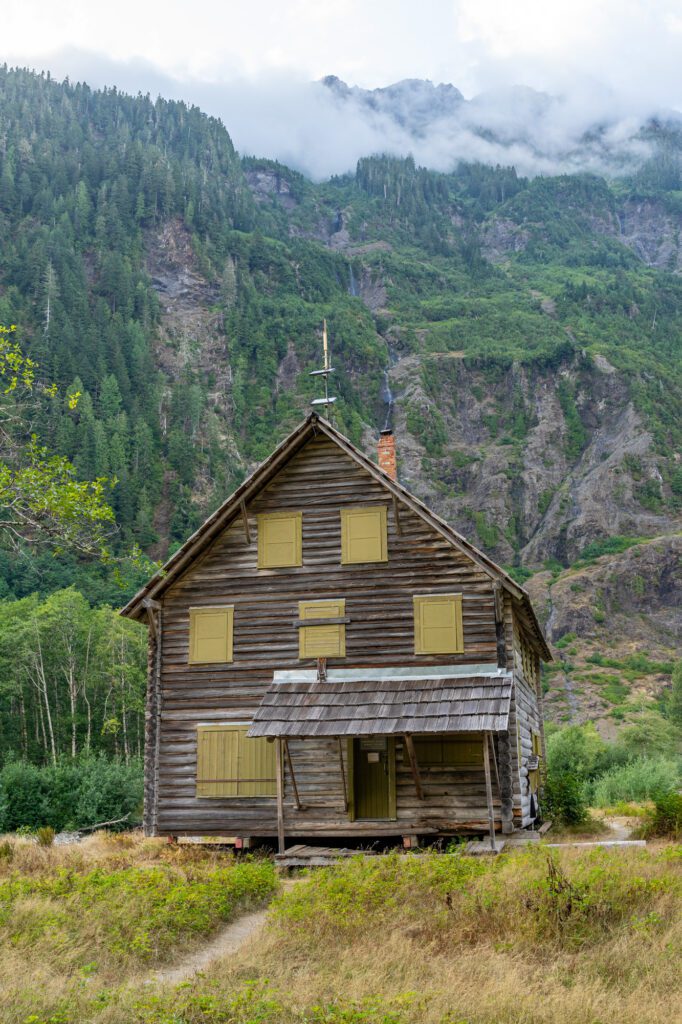
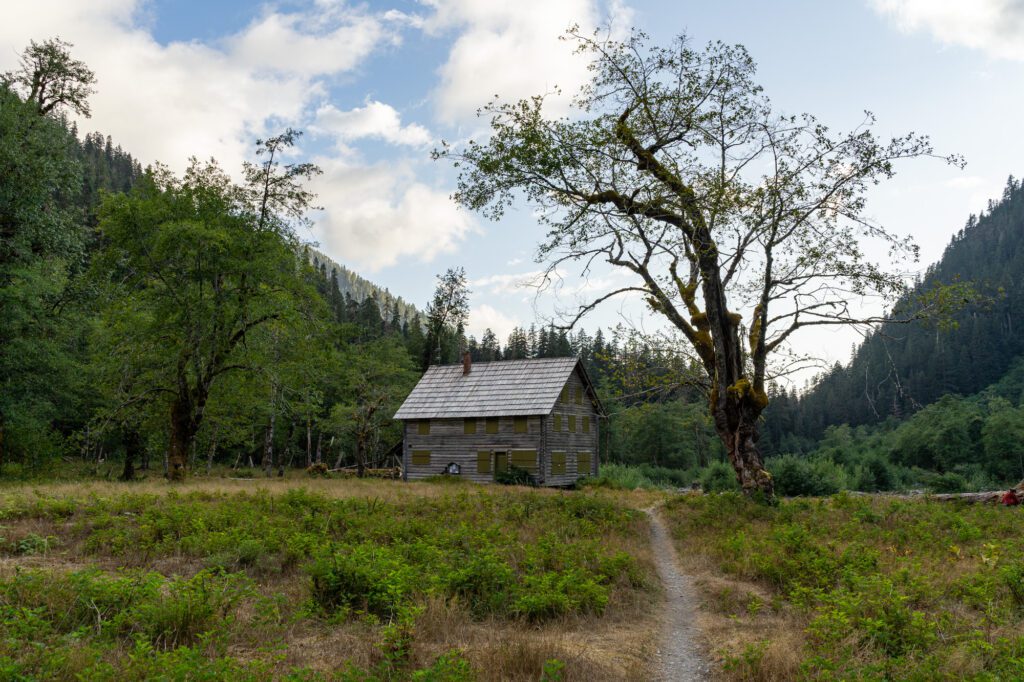
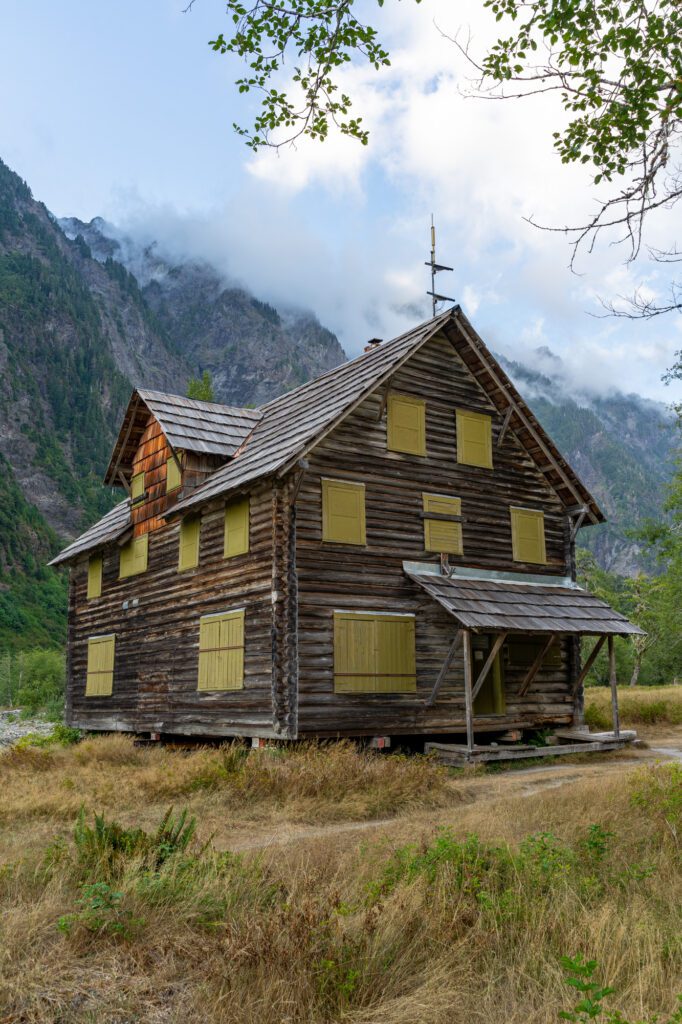
Plus, a rustic chalet built almost a century ago (in the early 1930’s) that is extremely photogenic.
Where can you find this slice of paradise, you ask? It’s the Enchanted Valley, and it’s one of our favorite hikes in Olympic National Park.
You’ll have to hike at least 27 miles round trip along the East Fork of the Quinault River to experience it for yourself.
If you’re looking to get deep into the backcountry in Olympic National Park, but aren’t up for mountain passes with several thousand feet of elevation gain, then the Enchanted Valley might be right up your alley.
You should know upfront that this hike definitely requires AT LEAST one night (more on that in the detailed guide below). It’s too far for a day hike.
If you’ve only got part of a day, hike either as far as Pony Bridge to check out the roaring Quinault River running through a fern-lined gorge, or continue out to Fire Creek Bridge, which takes you deeper into the rainforest (the stretch of trail between Pony Bridge and Fire Creek was our favorite part of the hike, for what it’s worth).
In the guide below, we’ll go through everything you need to know to hike the Enchanted Valley trail safely, and have a great trip into the Olympic wilderness.
We’ll cover how to get backcountry permits, getting to the trailhead and the parking situation, what to bring (like a bear canister, which is required), and give you a play-by-play overview of hiking the trail.
By the end, you’ll have all the information you need to not only secure permits, but also to hit the trail this summer / fall.
Sound good to you? Let’s get into it.
Disclaimer: Some of the links in this post, like hotel links, are affiliate links, meaning at no additional cost to you, we make a little bit of money if you click through and book. That being said, we would never recommend something to you that we don’t stand behind 100%.
Hiking into the Enchanted Valley: Trail Details
Before we get into the detailed guide to the hike out to the Enchanted Valley in Olympic National Park, here is a quick overview of the trail.
Note: I am NOT including the hike past the valley up to Anderson Glacier, which is worth an extra day to tackle, and adds 10 miles and 2,500 feet of elevation gain to the hike.
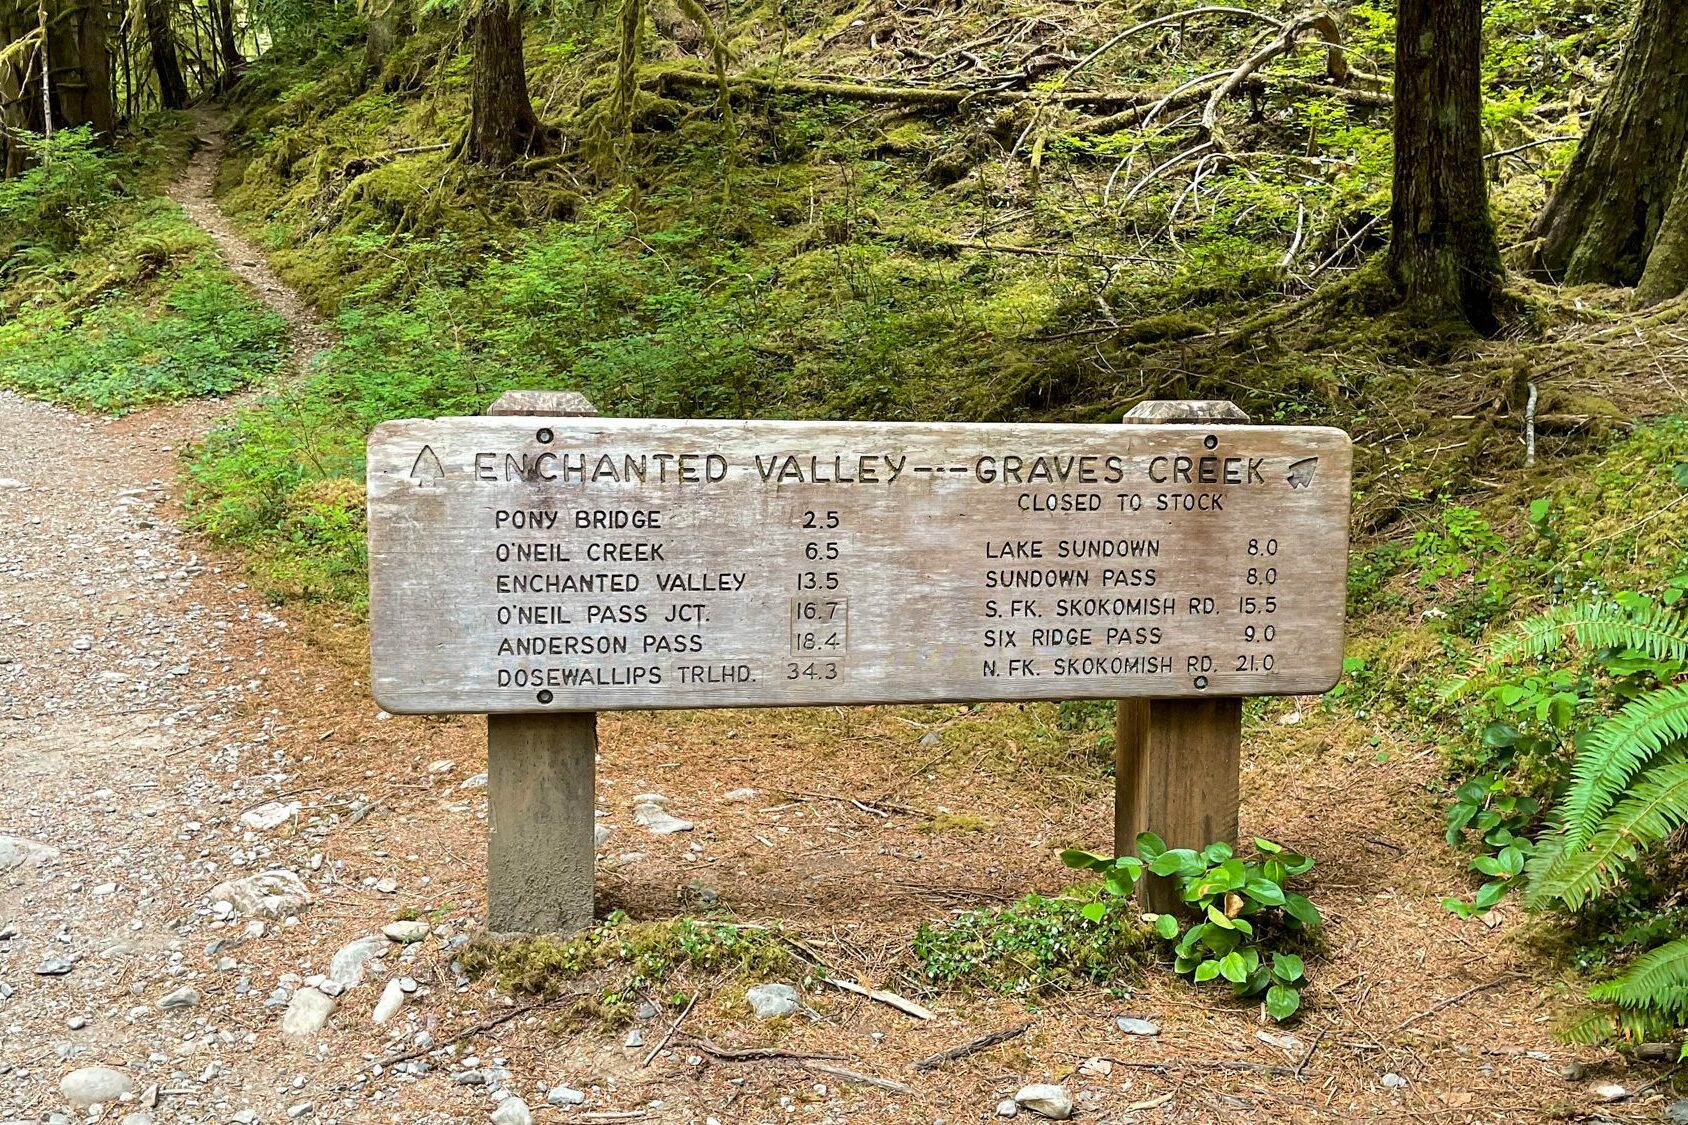
- Distance: 27 miles (ish)
- Elevation Gain: 3,700 feet (ish)
- Trail Type: Out and Back
- Trailhead Location: Graves Creek Trailhead
- Highlights: A magical, gradual climb through a ferny forest with moss-covered trees and a rushing river to keep you busy before emerging into a lush green valley, where you’ll find the (nearly) century-old Enchanted Valley chalet.
- Starting Altitude: 700 feet
- Highest Altitude Reached: 1,700 feet
The Best Time to Hike to the Enchanted Valley
Summer is your best bet for consistently warm, dry weather. In the Pacific Northwest, that basically means July and August.
We hiked this trail in mid-August, and it actually rained on us on our first day of hiking.
But it was the kind of rain that was more like a mist, and wasn’t even enough to make Alysha (a born and bred Californian with little tolerance for rain) put on a rain jacket.
The fact that this hike is at a lower elevation than most of the other great hikes in Washington means that you’re going to be able to access it earlier AND later in the season.
In May, June, and October, the trail is still accessible, but weather is going to be cooler, grayer, wetter, and more unpredictable. You’re very likely to encounter rain, so bring good rain gear with you.
It’s unlikely that you’ll experience snow in the Enchanted Valley, but you probably will if you venture up towards Anderson Glacier and the higher elevation parts of the trail past the valley.
If you’re wanting to do the hike up to the glacier, plan on going later in the season.
How Many Nights to Spend on the Enchanted Valley Trail
Obviously, the number of nights is going to depend on a lot of outside factors, like vacation time for example.
At a high level, we’d recommend either two or three nights on the trail.
To get out to the Enchanted Valley and back, it’s 27 miles total. It’s certainly not the hardest hike in the world, but I also don’t think it should be classified as “easy.”
We hiked the 13.5 miles out from the valley on our last day, which is mostly downhill, and by the end of the trail we were absolutely exhausted.
With only two nights, you’re going to end up hiking the entire 13.5 miles to or from the valley in one go.
If you’re trying to decide whether to hike all the way through on the way in or out, we’d definitely recommend doing it on the way out, which is largely downhill.
It’s worth noting that this trail is too long for a day hike. You should plan on spending at least one night out in the backcountry.
Here are some recommendations on how to spend one, two, and three nights on the trail.
With 2 days / 1 night: If you only have one night to spend on this trip, it’s doable but not ideal.
We’d recommend hiking nine miles into Pyrites Creek to camp for the night, then tackling the hike to the Enchanted Valley early the next morning.
You can probably leave your camp set up at Pyrites to save weight for that portion of the hike) before packing up and heading back out to the trailhead.
In total, the second day is going to be about 15 miles, give or take a half mile.
With 3 days / 2 nights: We’d say that this is an ideal amount of time to spend on this hike if you don’t want to continue past the Enchanted Valley up to Anderson Glacier (which adds 10 miles and 2,500 feet of climbing).
Our recommendation would be to spend your first night at Pyrites Creek, your second night in the Enchanted Valley, and hike all the way out on the third day (which is what we did).
We’d opt for Pyrites Creek over O’Neil Creek, which we’ll talk about below.
With 4 days / 3 nights: If you have an extra day, plan on spending an extra night in the Enchanted Valley and adding on the hike up to Anderson Glacier as a day hike on either the second or third day.
Hike into Pyrites Creek to spend the first night, get up early and hike the three miles into the Enchanted Valley on the second day, spend two nights in the Enchanted Valley (doing the day hike on one of the days), and then hike all the way out on the last day.
You could also skip the Anderson Glacier piece and make the hike out easier by hiking down to Pyrites or O’Neil Creek to spend the third night.
The Campgrounds Along the Enchanted Valley Trail
There are four campgrounds between the Graves Creek Trailhead and the Enchanted Valley, and when you make your permit reservation (more on that in a second) you’ll need to select which camps you’re going to spend the night at.
Pony Bridge Camp
Roughly two miles in, this is a nice campground along the Quinault River where you’ll find a beautiful gorge with fern-lined walls. Sites are across the bridge and up the hill.
There’s also a relatively new privy here, which is always a plus.
The downside is that it’s so close to the trailhead that it’s almost not worth staying here for the night.
O’Neil Creek Camp
This is where we spent the first night on our two night trip, and it’s roughly halfway between the trailhead and the Enchanted Valley, which is why we chose it.
There are several sites along the river, and a couple on the side of the trail away from the river.
It was PACKED when we were there – we could barely find a site on a Monday evening when we showed up, which was a little unexpected.
It’s not the nicest site in the world, and we’d actually recommend pushing on to Pyrites Creek for the night if you can (which is another three miles up the trail).
O’Neil Creek does have a privy, which is a bonus. Easy water access too, since most of the sites are right along the river.
Pyrites Creek Camp
We think Pyrites Creek is the nicer option over O’Neil Creek if you have the choice.
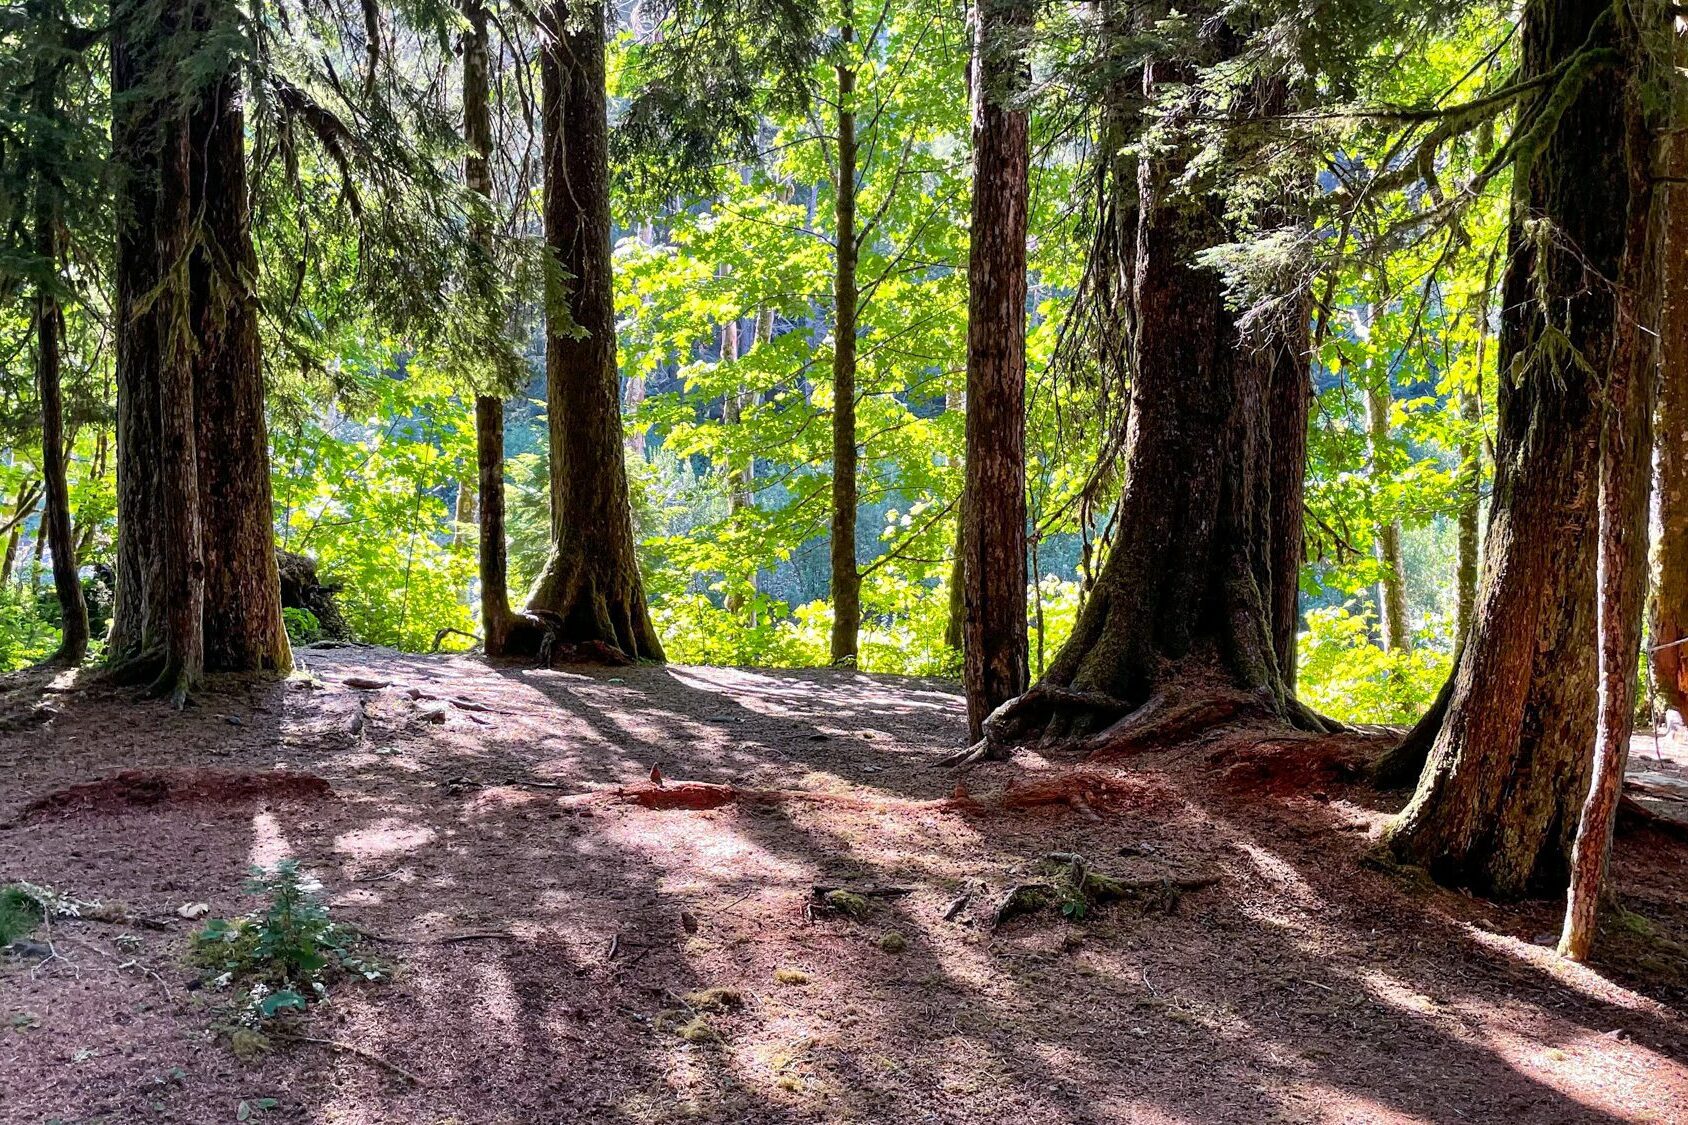
The sites at Pyrites – which are on either side of the bridge over the creek – are tucked into the trees above the river.
Some are right along the trail, but the ones on the east side (far side) are down the path a ways and are more secluded.
The downside is that there’s no privy, so you’ll have to do your business in the woods and bring the necessary supplies to do so.
The Enchanted Valley
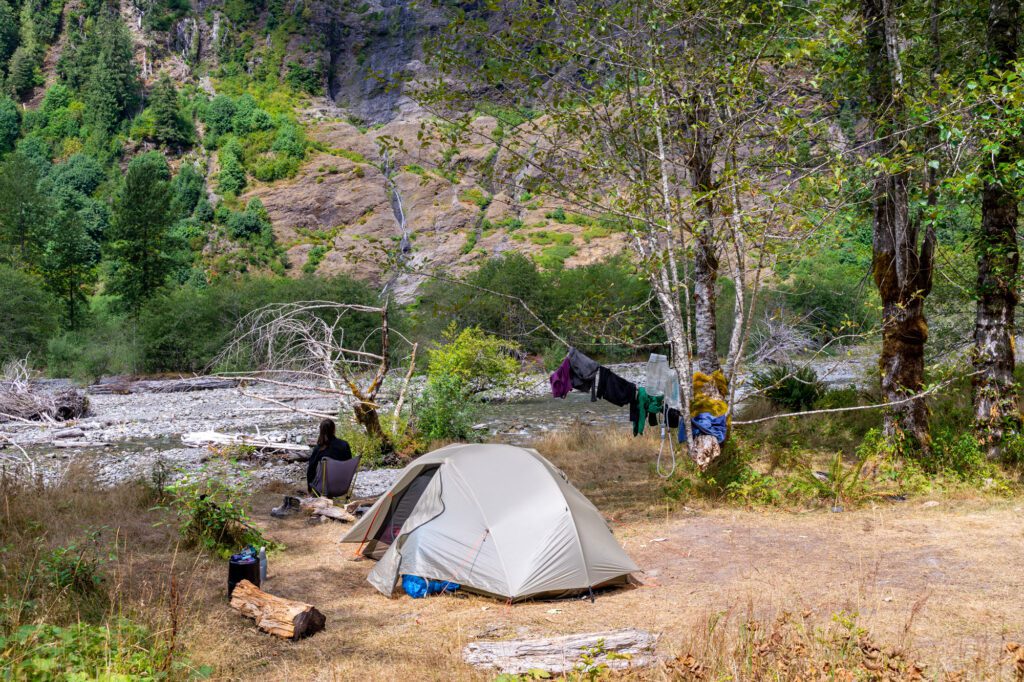
We highly recommend you do your best to spend a night in the valley itself. It’s magical. Enchanting, some might say.
The high valley walls on your left, with their numerous waterfalls and patches of greenery, the rocky mountain peaks at the far end of the valley, and the Quinault River running through the middle of it all make this a very pleasant place to spend the night.
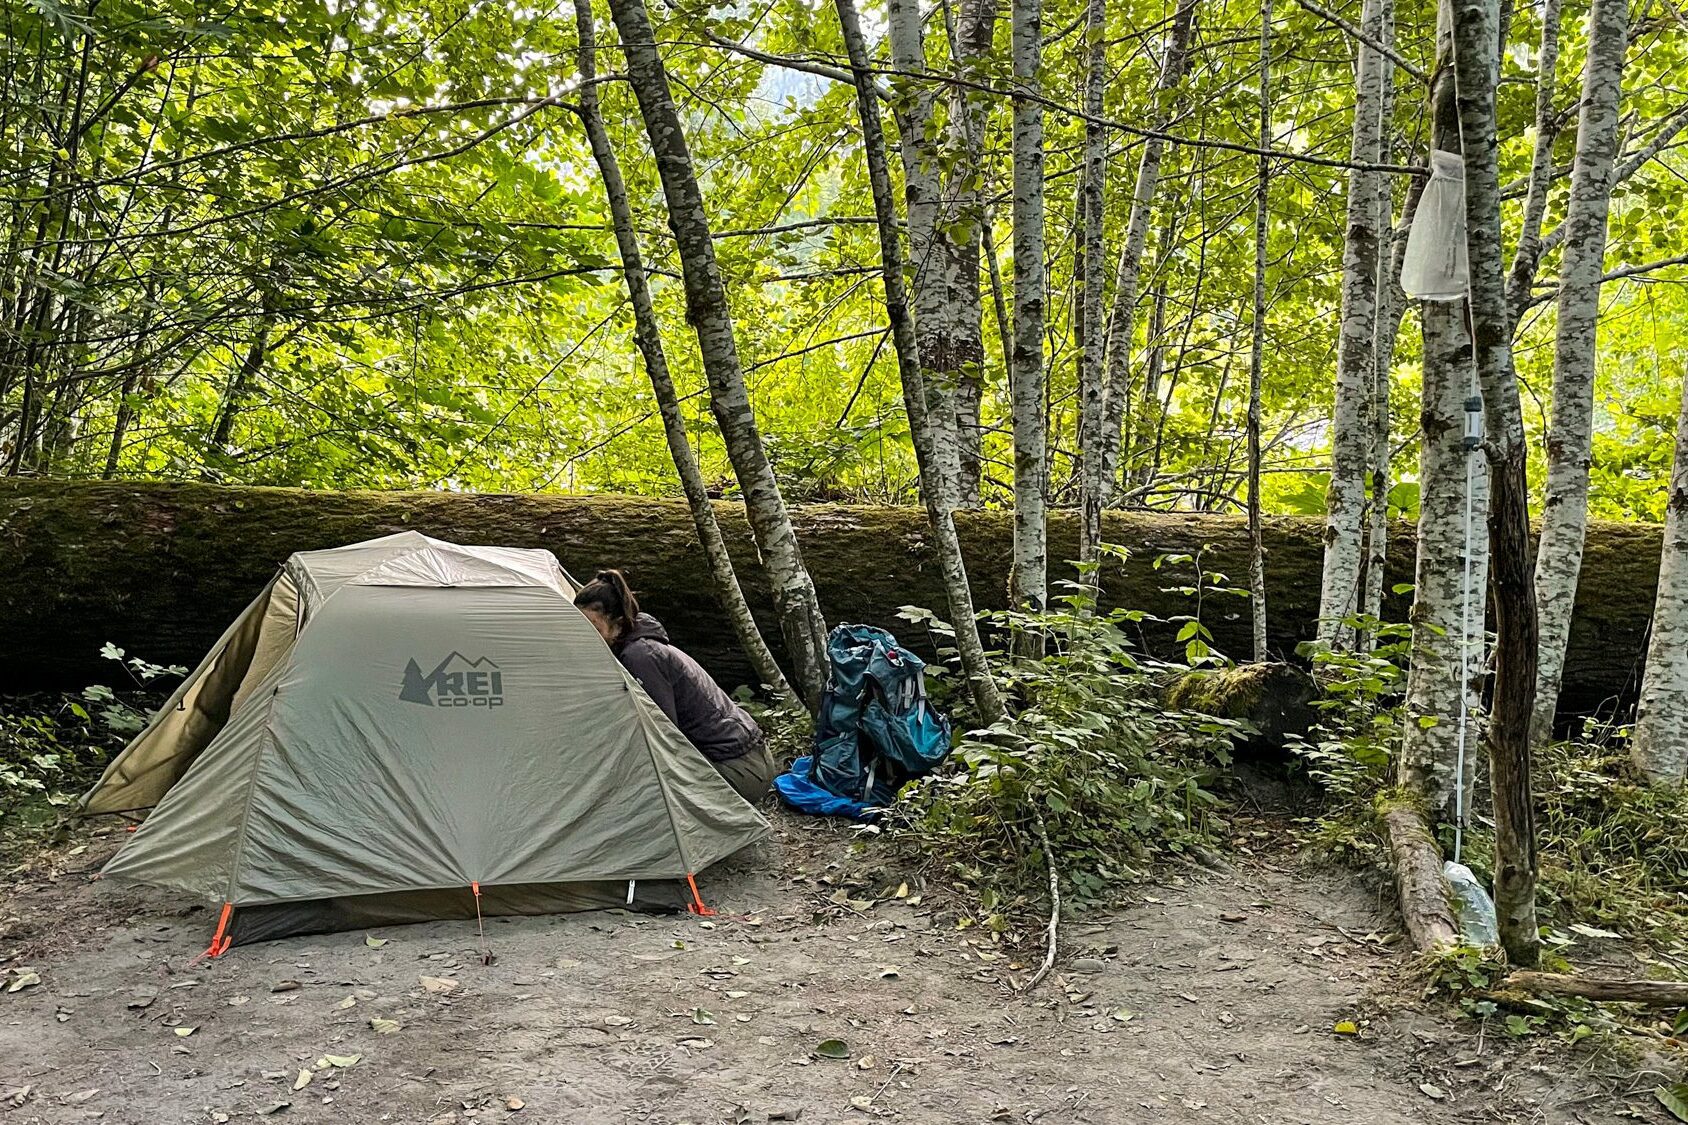
We did some poking around, and our favorite sites are past the Enchanted Valley chalet along the “ridge” above the river (to the left of the chalet and main trail) and the sites in the dense forest past the chalet and to the right.
There are not one, but TWO privies here, and bear wire if you don’t have a bear canister. But you should have a bear canister, so…
Securing a Backcountry Permit for Your Trip
Backcountry permits are required to spend the night in the wilderness in Olympic National Park.
Unlike some other backpacking permits in Washington (looking at you, Enchantments), the Enchanted Valley is a relatively easy place to get a wilderness permit.
The quotas are relatively high, which means two things.
One, like I already mentioned, you’ll likely be able to get a permit if you want one.
Two, as a direct result of the ease of getting a permit, there are going to be many other people sharing the backcountry with you.
I’m sitting here the day after being out in the Enchanted Valley and am seeing PLENTY of availability for every other night in August and September. Like, 70-90 spots per night, even on Labor Day weekend.
Plan on booking in advance, but it probably doesn’t have to be exactly six months in advance within five seconds of the permit window opening. Which is how some permits/campgrounds are, and it drives me insane.
Backcountry permits cost $8 per person, per night, plus a non-refundable $6 reservation fee. As long as you cancel more than 7 days out, you get everything but the $6 reservation fee back.
Everything you need to know – like when permits go on sale and how to book them – can be found on the NPS site here.
Here are some useful specifics for the Enchanted Valley.
You will need to know what your route looks like – how many days and what campsites you want – to make your reservation, which we covered above):
- Go to Recreation.gov and find the page for Olympic National Park Wilderness Permits (psst! It’s here).
- Scroll down to the “Available Permits” section and hit “Check Availability”.
- Select “overnight” for permit type, enter your desired entry date and group size, and then select the button labeled “Quinault” to see availability.
- Up pops an availability calendar! Scroll down to near the bottom to find Pony Bridge, O’Neil Creek, Pyrites Creek, and the Enchanted Valley. It shows you how many spots are available per night at each campground along the trail.
- Select the night / campground combination you want for your first night, and the calendar magically updates to show you the next few nights. Repeat the process for your other nights.
- Once you’ve got all your nights selected – you’ll see a handy checkmark for each night you’ve got selected – hit “Book Now”.
- Log in, pay for the permits, and you’re done! You should get an email confirmation, and you can access your permits through your Recreation.gov account.
The other thing you need to know is that your permit will be issued electronically and you’ll need to print it out and bring it with you.
About a week before your trip start date, you’ll get an email saying your permit has been issued. You’ll need to login to your Recreation.gov account and print out your permit.
Once printed, no changes are permitted. Double check all the information – group size, dates, campsites – are correct before printing!
Getting to the Graves Creek Trailhead
The Graves Creek Trailhead (which is where the hike begins) is northeast of Lake Quinault at the southeastern edge of Olympic National Park in the heart of Olympic National Forest.
You should know that the last 12 miles or so are along a gravel road that is pretty well maintained and is passable by passenger vehicles.
We drove our Honda Odyssey the entire way without issue, which probably means you’ll be fine too.
It can get flooded and washed out during periods of heavy rain, though. So keep an eye on the forecast.
If you’re coming from Seattle, you’ll take I-5 South to Olympia, where you’ll cut over on Highway 8 West towards Hoquiam.
From there, head north on Highway 101 towards Forks. Turn right on South Shore Road, which skirts the southern edge of Lake Quinault, and follow it until the end.
The last 12 miles or so will be a well-maintained dirt road, which I mentioned above is passable by most vehicles.
If you’re coming from the Portland area, take I-5 North towards Olympia, and take Highway 12 to cut over to meet up with Highway 8.
Then, follow the directions above – take Highway 8 out to where it meets up with 101, hop on 101 North, turn right onto South Shore Road, and follow it to the trailhead.
Parking at the Graves Creek Trailhead
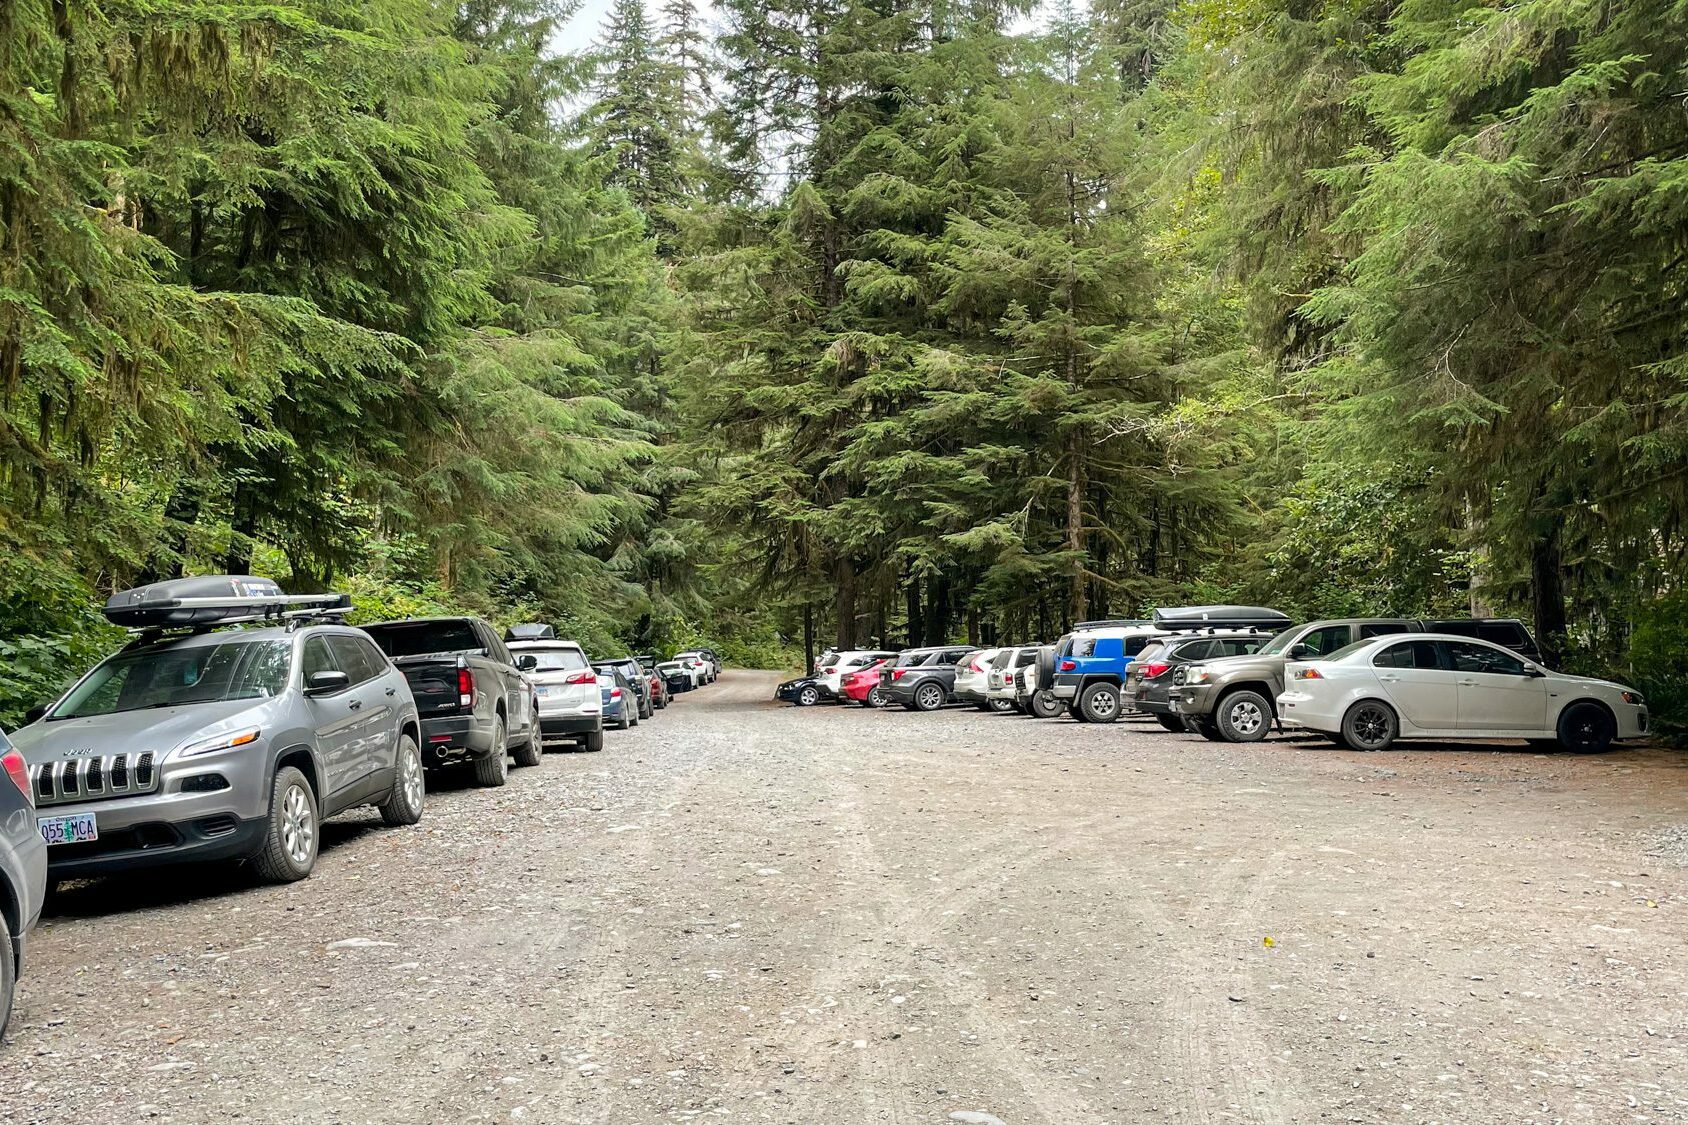
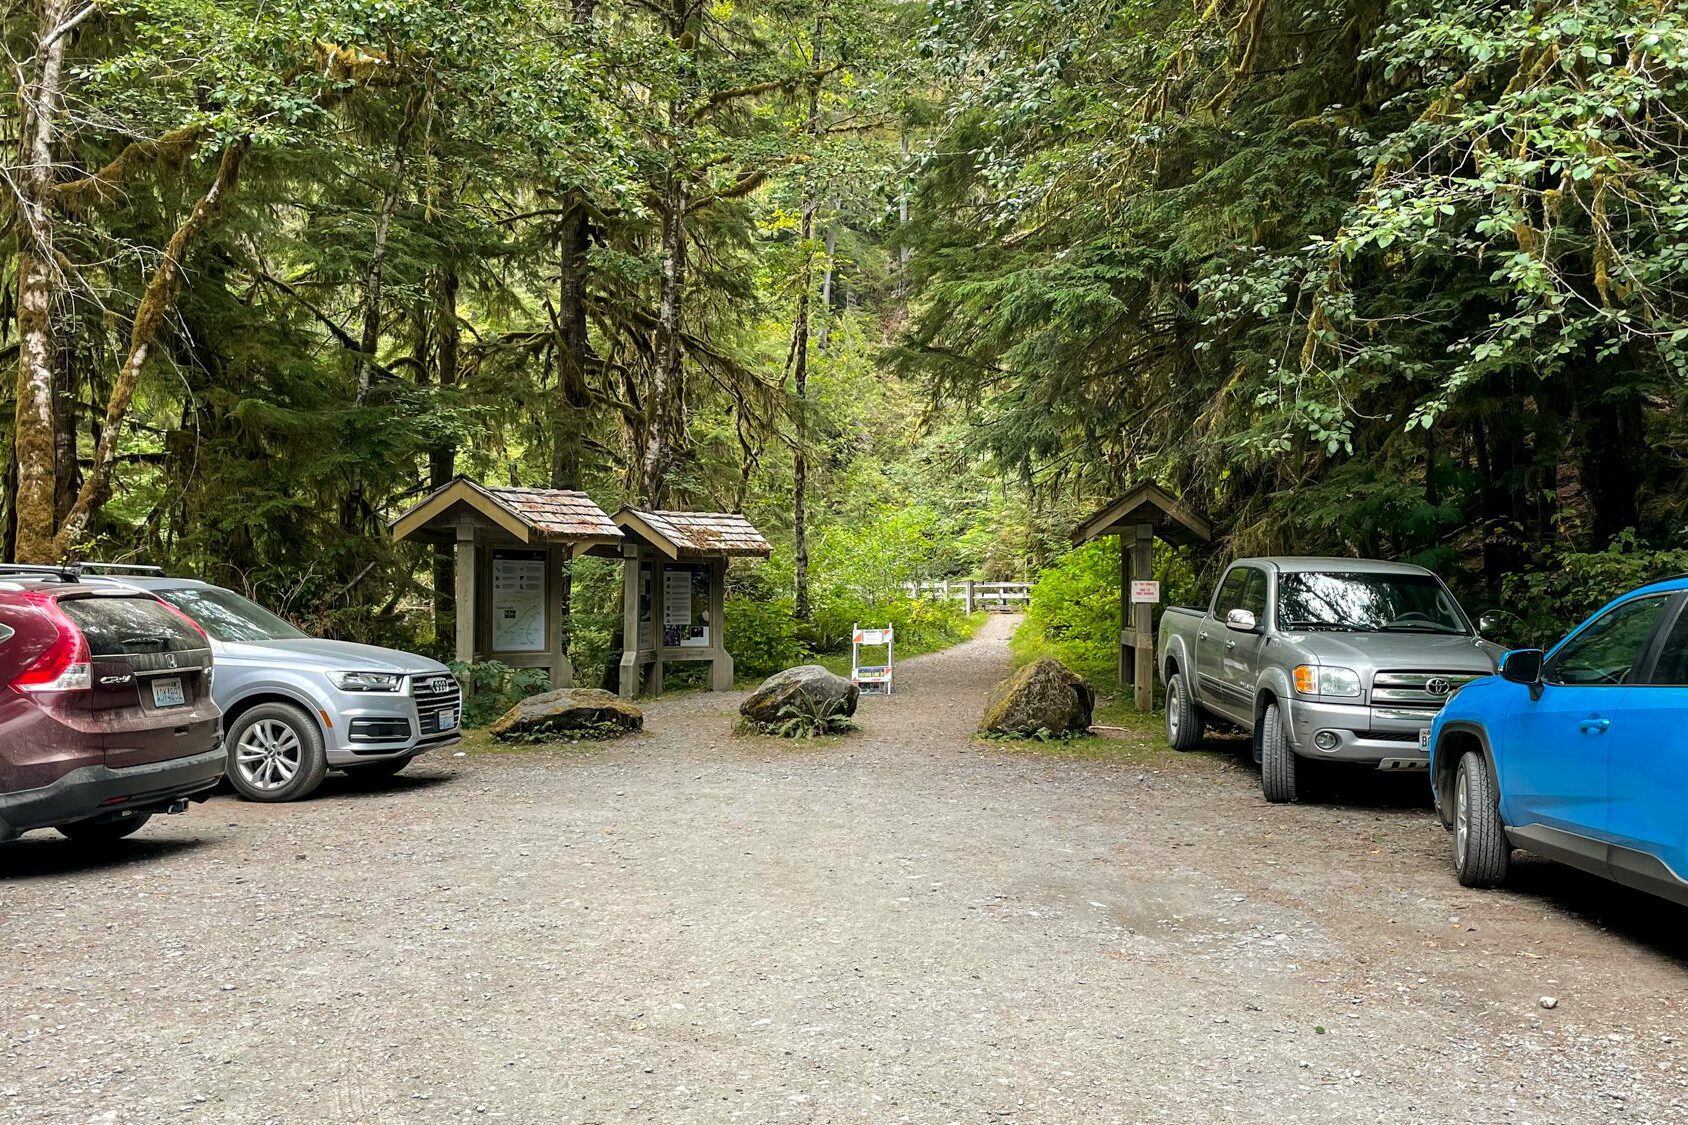
The parking situation at the trailhead was surprisingly difficult.
We showed up on a Monday afternoon, and the parking lot was completely packed!
Not to worry though, the road is wide enough that you can park on either side of it outside of the parking lot.
We managed to get a spot a few hundred feet down the road, but saw cars parked a good quarter-mile out, which tells me that it’s pretty full on the weekends.
We’d recommend parking facing away from the trailhead so that you don’t have to attempt a 20 point turn after hiking nearly 30 miles.
Make sure to display the parking permit that comes with your backcountry permit on your dashboard!
Tips for Hiking to the Enchanted Valley in Olympic National Park
Here are some quick tips you’ll need to know for your trip.
Expect Crowds: I already mentioned this before, but you’ll need to be prepared to share the wilderness with up to 200 of your new closest friends.
If you’re looking for solitude in the backcountry, this ain’t it. Particularly on summer weekends, when the valley is full of backpackers.
If you’re looking to avoid crowds, go midweek or early/late in the season, when they’ll be thinner.
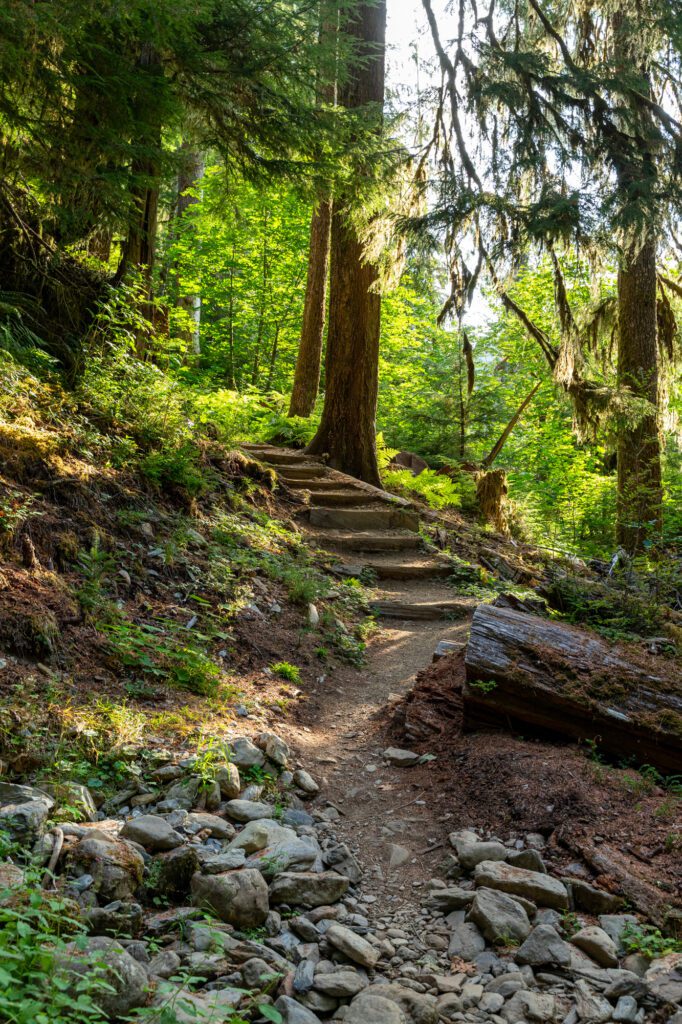
Be Aware of Trail Conditions: Overall, this trail is in fantastic condition. There are sturdy footbridges built over the multiple creek crossings you’ll need to make, and it’s a largely level and well-maintained journey.
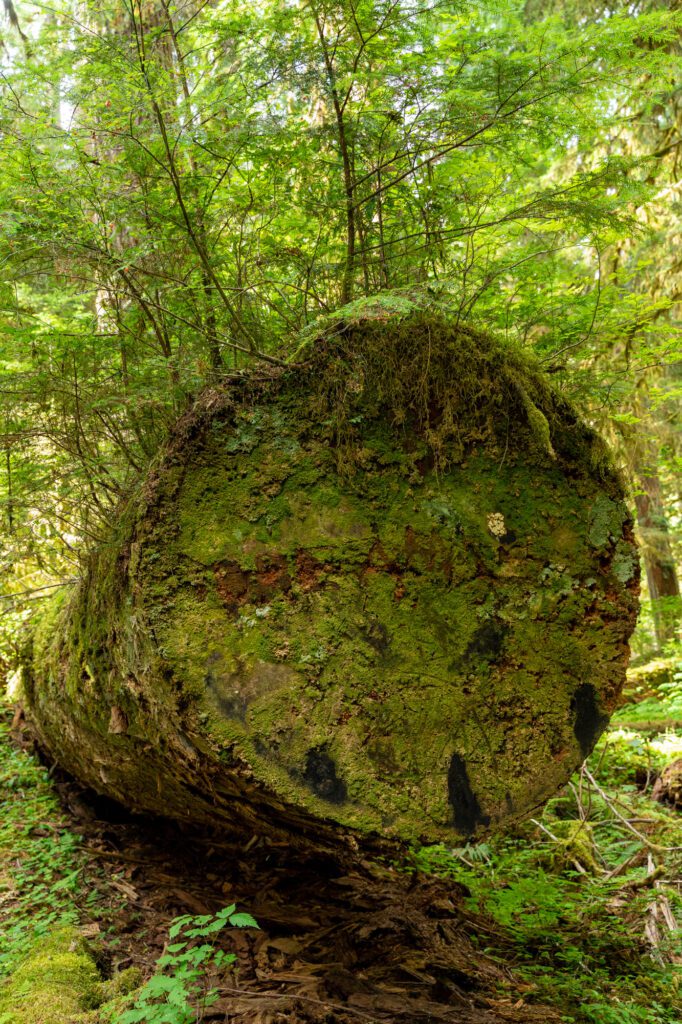
However, the one thing to note is the number of fallen trees. When we were hiking, there were at least ten downed trees across the trail.
All were easy to navigate around or climb over, and clearly there was work being done to remove them.
It also can be quite muddy after rain, so be prepared to slog through some mud at times.
Prepare for Black Bears: This whole area, which is prime berry territory, is basically heaven-on-earth for our furry bear friends.
Almost every trail report I read mentioned seeing bears, and sure enough, on our night in the Enchanted Valley, guess who came ambling up the trail passing 50 feet from our camp? A very furry, very cute, fairly large black bear.
You’ll need to give any bears you encounter plenty of space. Make noise, and most of the time they’ll scamper off. They’re just here for the berries, and want nothing to do with you.
Unless, of course, you have food that smells good, which brings me to my next point.
You need a bear canister on this trail to store your food. There is bear wire at the campsites, but I’d still opt for a bear canister (we have an older version of this one, and like it).

You can rent a bear canister at the Wilderness Information Center (WIC) – more info on that here.
Store everything that maybe smells even a little bit – toothpaste, sunscreen, etc in addition to your food – inside that canister at all times when you’re not actively using them.
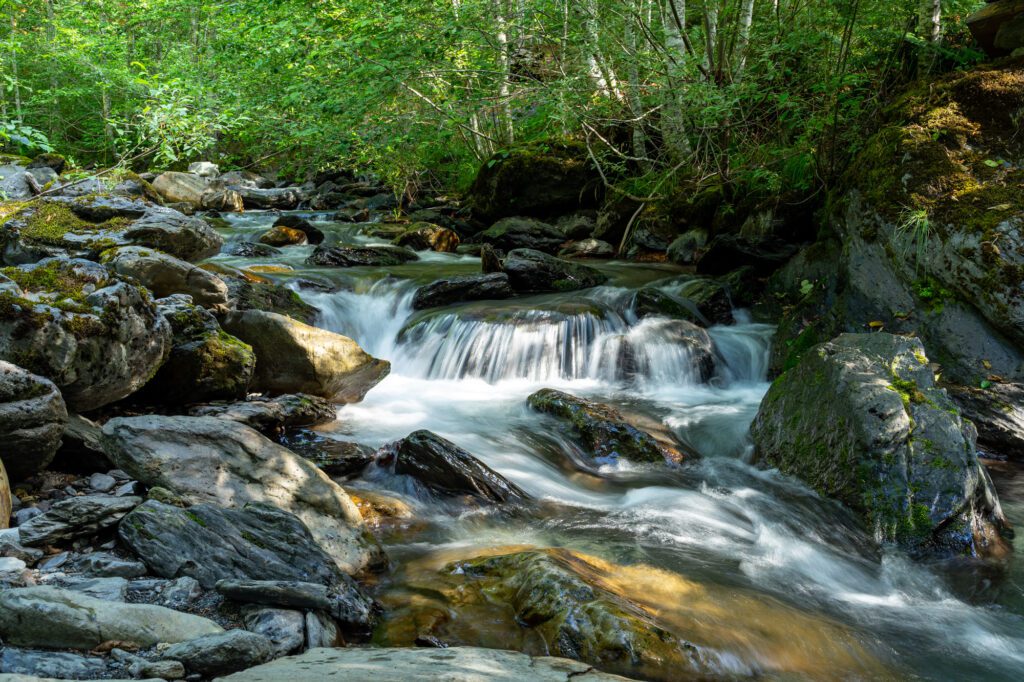
Water is Plentiful, But it Needs to Be Filtered: Since this trail largely follows the East Fork of the Quinault River, water access is plentiful.
Make sure to grab it from moving water sources (luckily the river is moving plenty fast to be safe) and treat it or filter it before drinking.
We use the Platypus Gravity Filter, which is a brilliant invention.
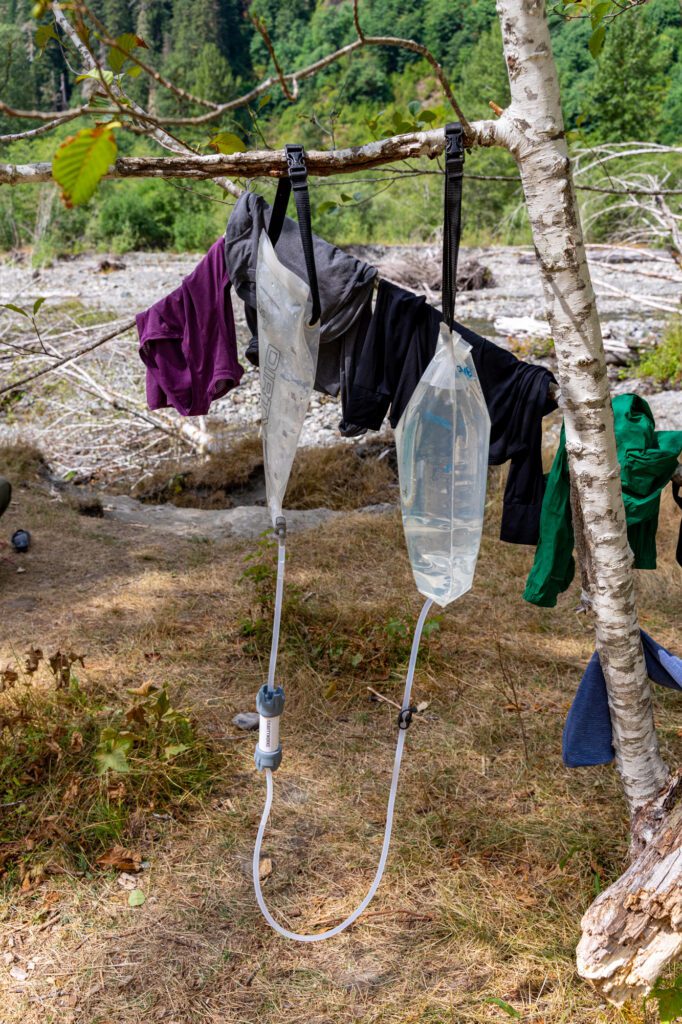
You just fill the “dirty” reservoir, attach it to the filter, place the “clean” reservoir below it (we usually hang one end from a tree, and place the other end on the ground), and let gravity do its thing. Magic!
The Enchanted Valley Trail: A Complete Hiking Guide
Now that we’ve got all the logistics and trail tips out of the way, on to the detailed trail guide.
Below, we’ll give you a play-by-play (ish) of what hiking this trail is like. Which brings me to an important point.
The trail to the Enchanted Valley is not “difficult” in the sense that you’re not gaining a ton of elevation, but it is pretty long at 13.5 miles.
And the scenery, while incredibly gorgeous, doesn’t really change all that much along the way until you’re in the valley itself. It’s both beautiful and monotonous, all at the same time.
As a result, there’s a lot of points in this trail guide where I’m going to say something to the effect of “the trail continues the gradual climb through the dense forest.” Which is my way of telling you that it’s business as usual.
To make it more digestible, we’re going to break it up into four sections that are conveniently aligned with the different campsites along the way.
- Trailhead to Pony Bridge
- Pony Bridge to O’Neil Creek
- O’Neil Creek to Pyrites Creek
- Pyrites Creek to Enchanted Valley
Graves Creek Trailhead to Pony Bridge
Distance: 2.5 miles // Elevation Gain: 350 feet
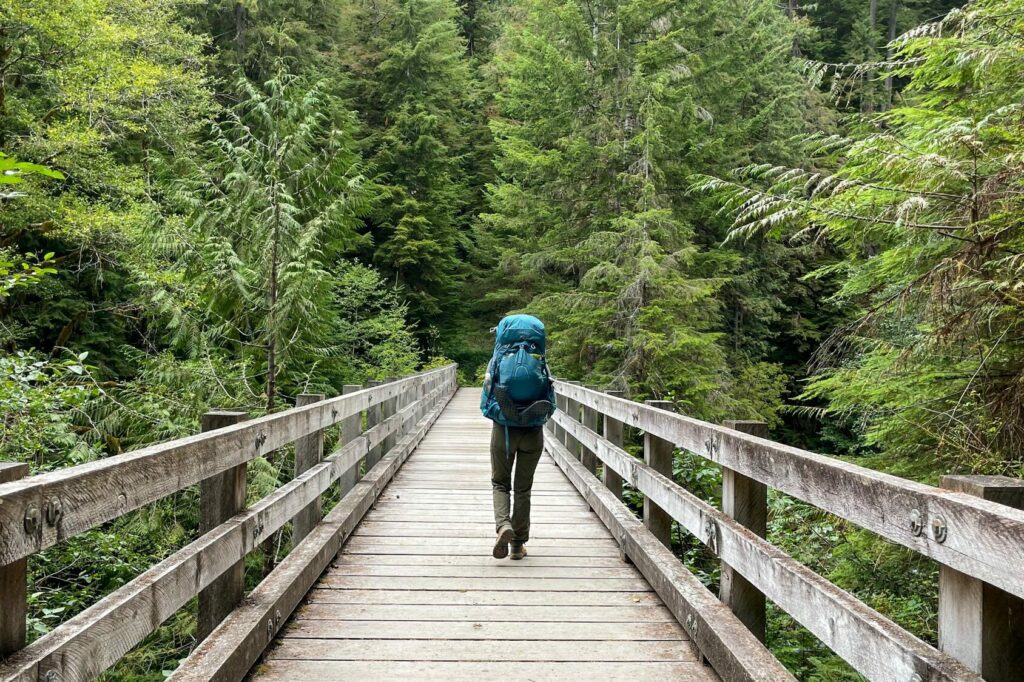
From the trailhead, you’ll immediately cross two (photogenic) bridges over the creek.
Then, you’ll start the hardest part of the hike. This first section climbs 500 feet or so in just under two miles.
As you reach the crest of the hill, you’ll start a descent that descends 300 feet.
This is the most brutal part of the hike on the return journey, especially if you do the entire 13.5 miles in one go.
As you start the descent towards Pony Bridge, which sits at the 2.5 mile mark, you’ll start to hear the rushing water of the Quinault River, which you’ll follow all the way from Pony Bridge to the Enchanted Valley.
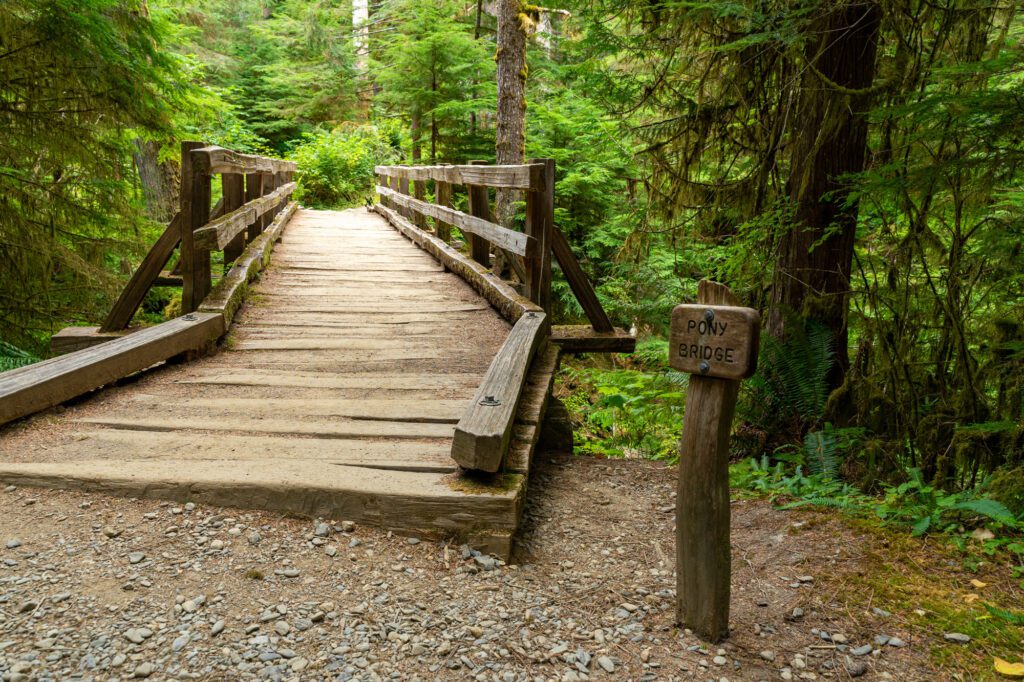
Pony Bridge is a lovely little area and campground. The sites are on the far end of the trees, tucked away atop a little bluff over the river below.
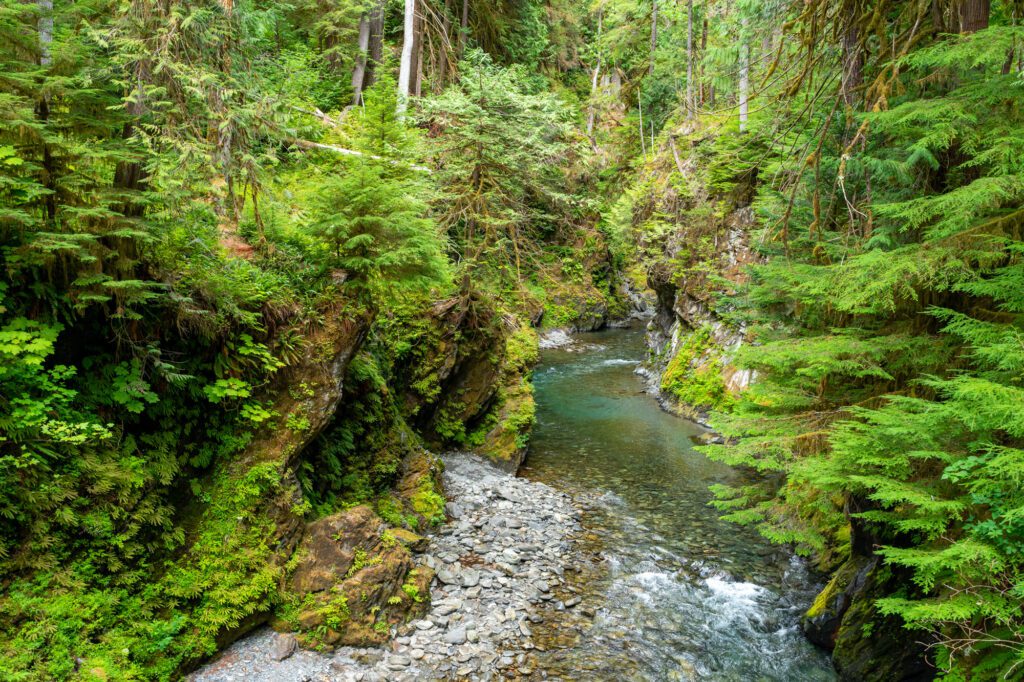
The gorge here is beautiful, with its fern-lined walls and the blue-hued waters of the river. There’s a privy right before you cross Pony Bridge if you need to use the bathroom.
Pony Bridge to O’Neil Creek
Distance: 4 miles // Elevation Gain: 400 feet
From Pony Bridge, the trail immediately starts the gradual, moderate climb that you’ll be well-accustomed to by the time you reach the Enchanted Valley.
Right away, you’ll tackle a couple of quick switchbacks to get up to a little ridge, which you’ll follow for a bit before descending down to river level.
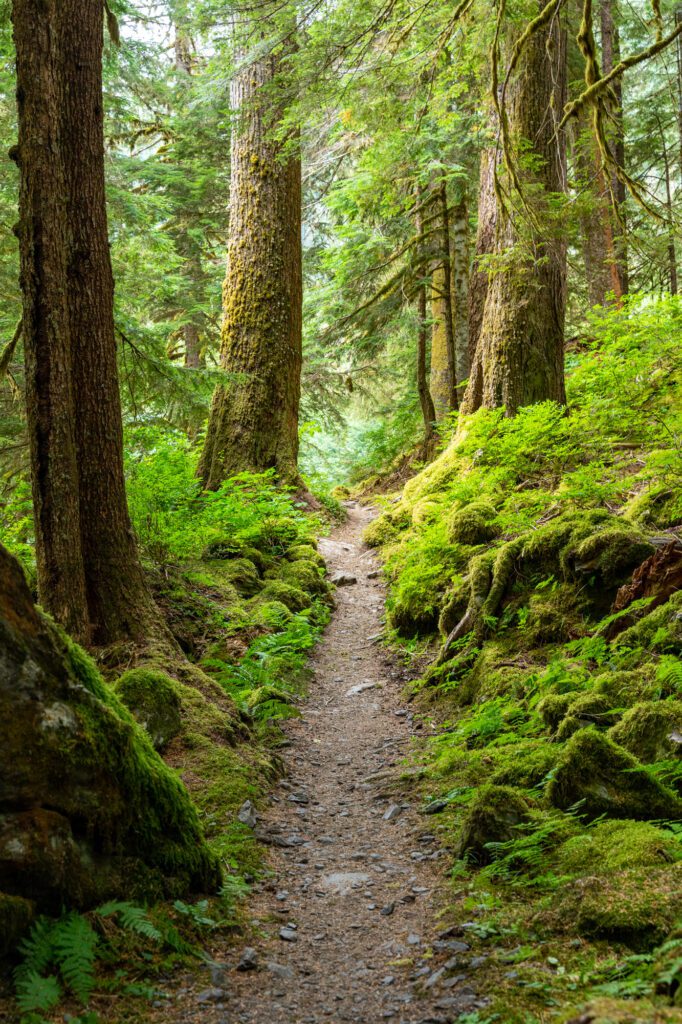
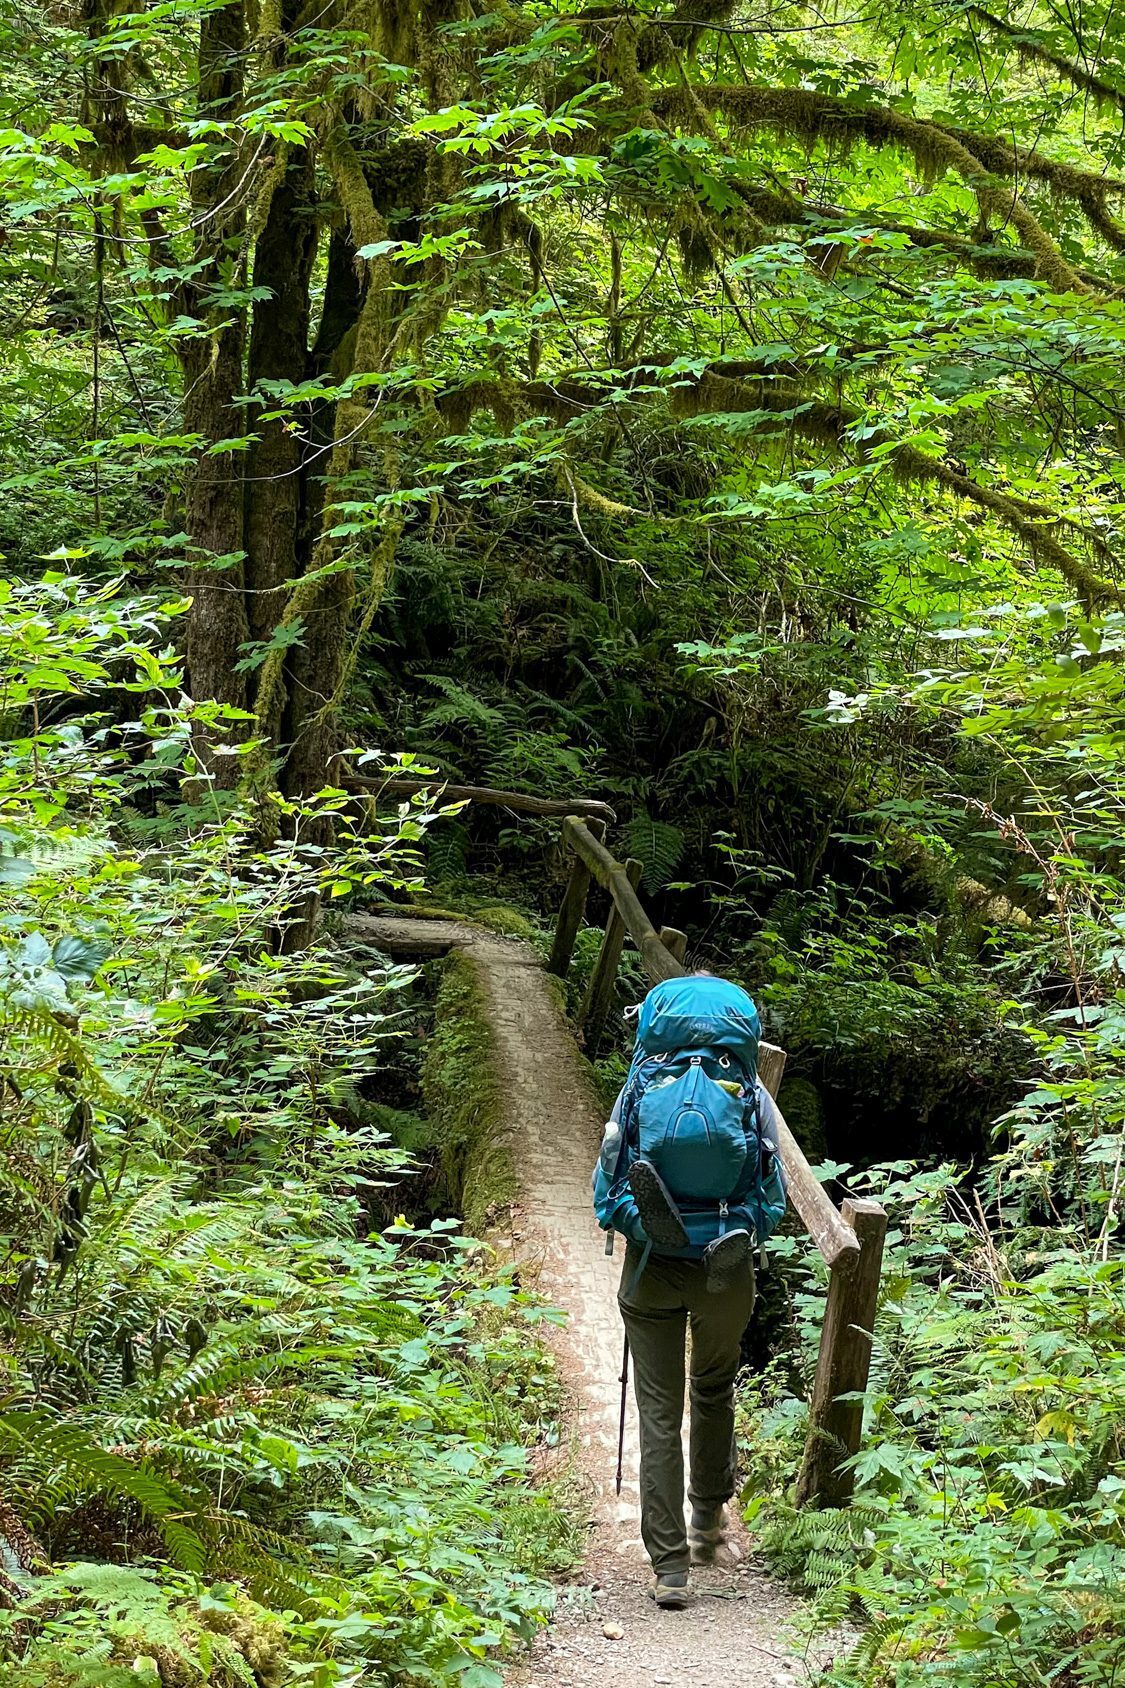
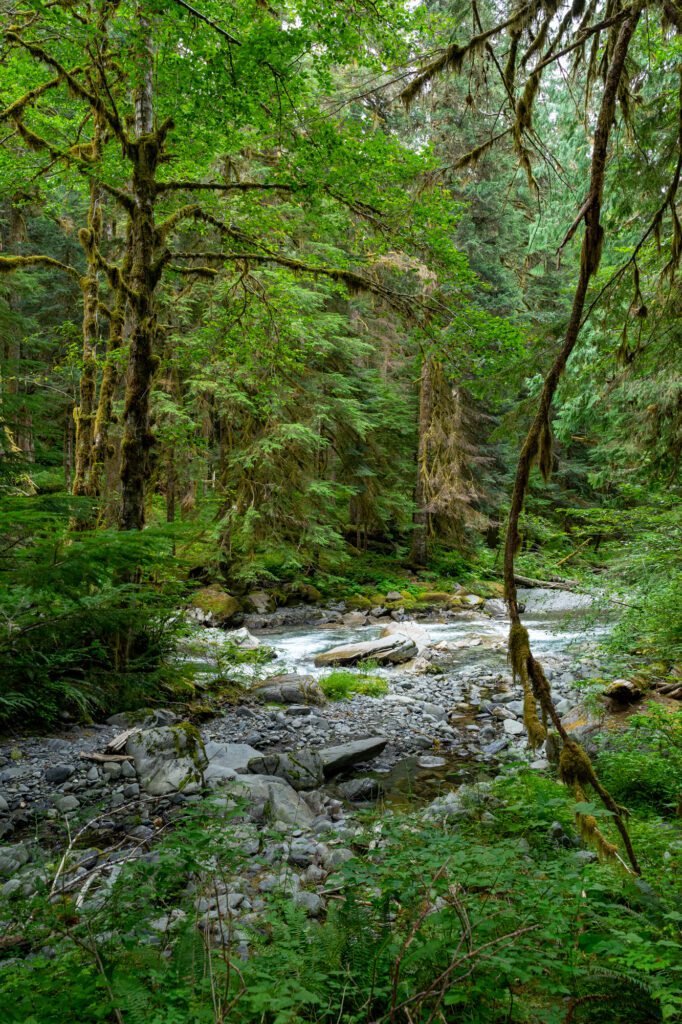
This stretch was our favorite part of the hike in terms of scenery. At one point, Alysha said “Whoa, it must rain A LOT here.”
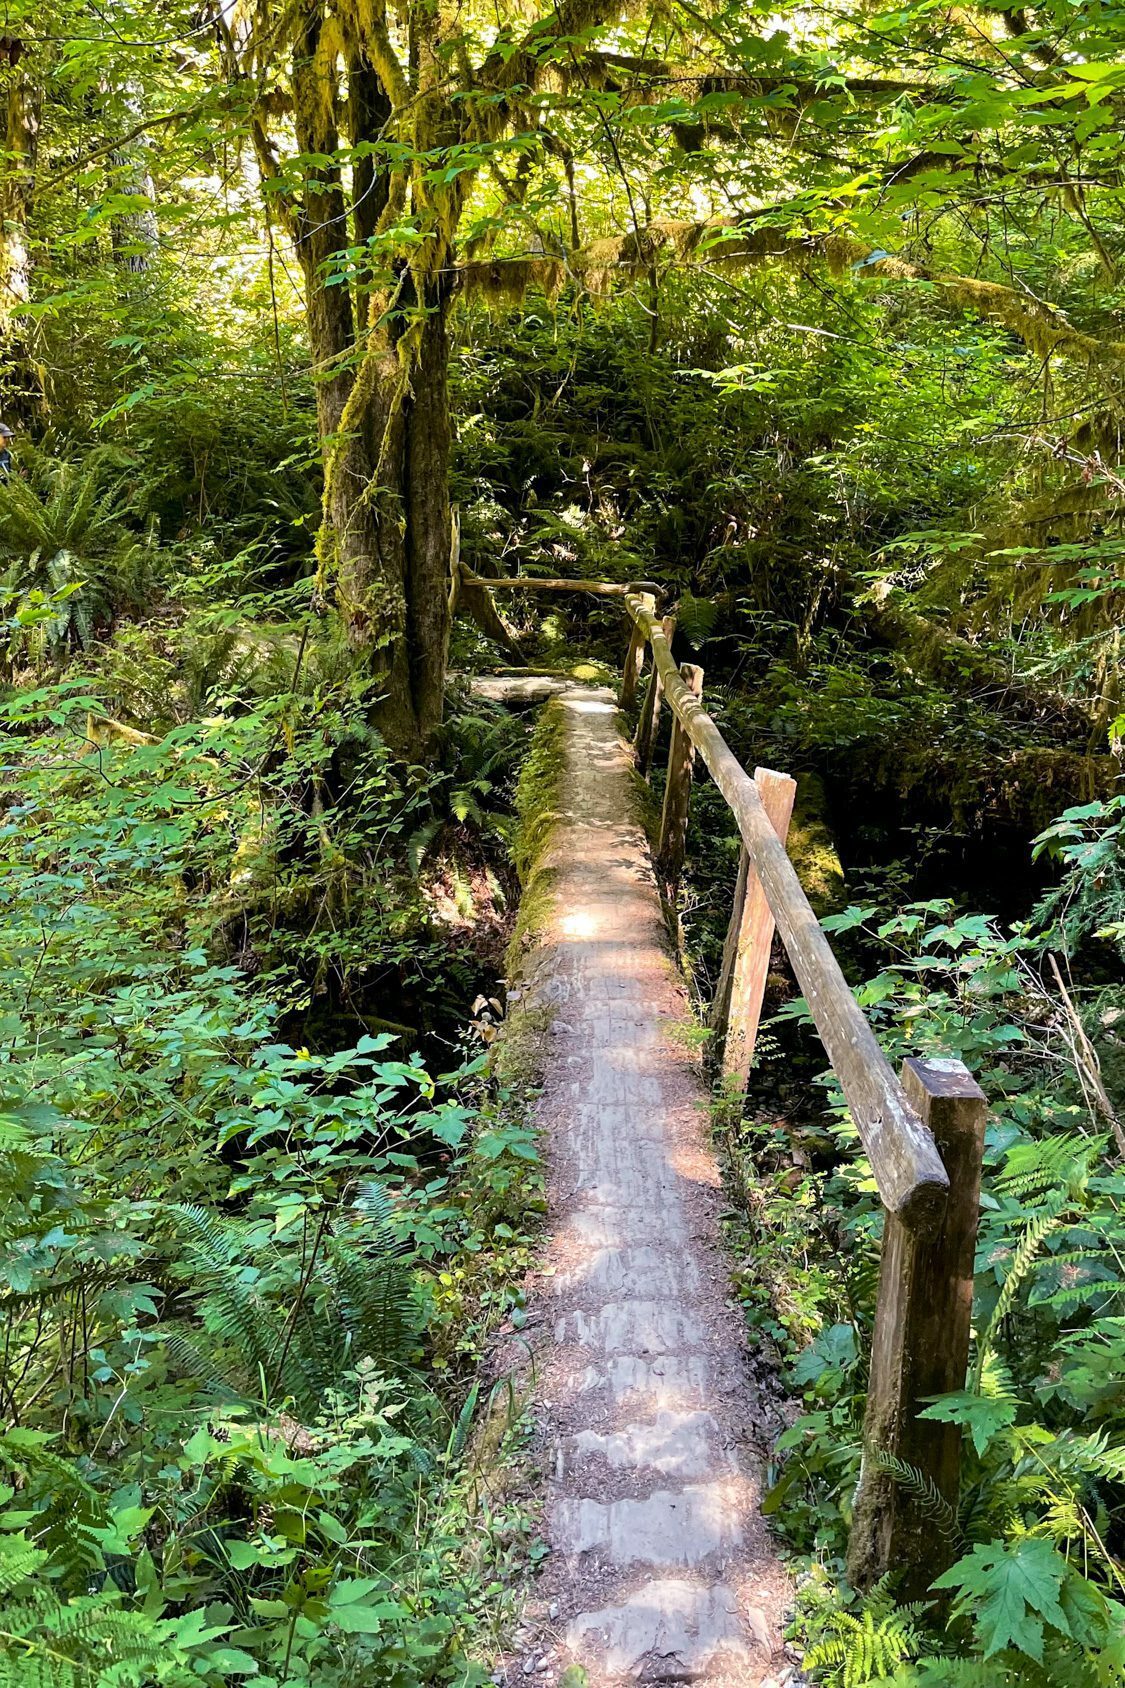
The evidence for that assertion?
This stretch of trail is covered in ferns as far as the eye can see, and you’ll pass under numerous moss-covered trees that make you feel as though you’re walking through something out of a Neverending Story or some young adult fantastical novel.

Welcome to the rainforest!
Eventually, the trail is at the same level as the river, and there are plenty of spots to pull over and filter water, if you need it.
It’s a gentle climb all the way up to O’Neil Creek Campground, which is well-signed and is a 0.2 mile downhill walk from the junction in the trail.

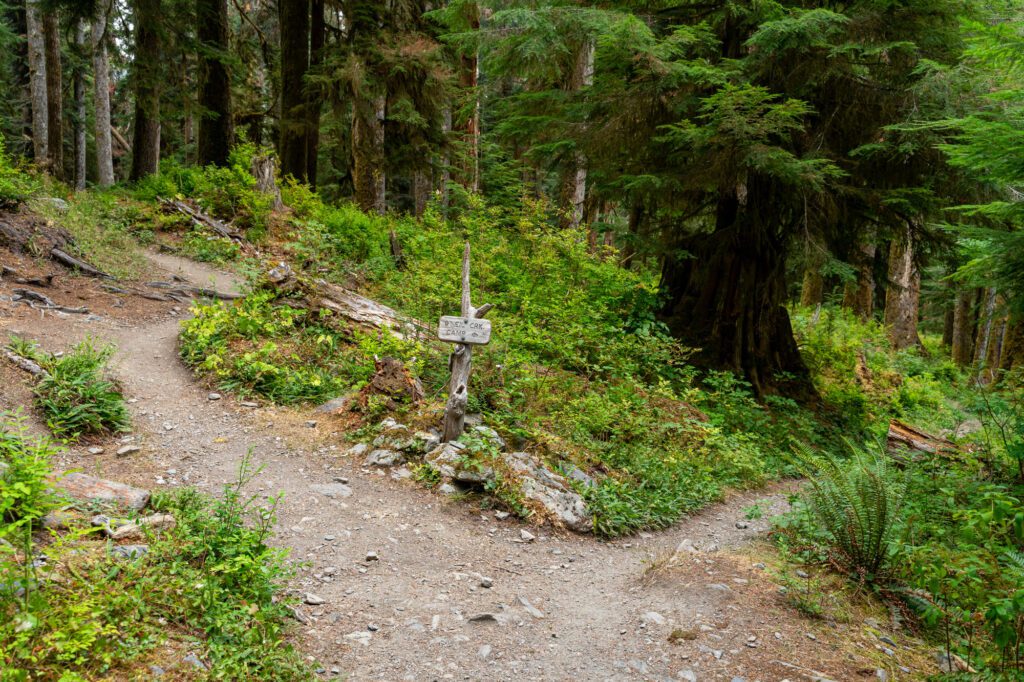
A note on Fire Creek: At one point, you’ll cross Fire Creek via a pretty little footbridge. If you’re like us and the three groups we watched do the exact same thing, your instincts will tell you to continue straight up the hill after you come off the bridge. But that would be the wrong way, as we found out and then let those other three groups know. The trail heads down and to the right along the creek bed, and then veers left.
O’Neil Creek to Pyrites Creek
Distance: 3 miles // Elevation Gain: 300 feet
To be honest, I don’t have anything terribly insightful to say about this stretch of trail.
I warned you – this section is very much “business as usual,” with rolling hills climbing steadily through the forest.
You’ll be a little higher than the river here, so there’s not a whole lot of spots to grab water if you need it.
You will cross two creeks – No Name Creek and Pyrites Creek – which are good spots to filter water.
Pyrites Creek to the Enchanted Valley
Distance: 3.4 miles // Elevation Gain: 500 feet
This last stretch of trail starts very similarly to the rest of the trail.
At about two miles into the three mile journey from Pyrites Creek to the Enchanted Valley, you’ll pass through a gate that is a pain in the butt to open and close (it’s basically just two wooden planks stuck horizontally into vertical wooden posts).
About a half-mile later, you’ll cross the Quinault River for the second – and last – time. It’s a narrow footbridge that takes you out over the river.

You’ll be about 20-30 feet above the river on a narrow bridge with a hand railing on just one side. We didn’t like it one bit.
Immediately after crossing that bridge, you’ll round a bend in the trail, pass through a particularly rainforest-y section of trail, and BOOM! There’s the chalet dead ahead.
Continue along to the Enchanted Valley chalet, and then head past it to find the best campsites in the Enchanted Valley.
We recommend either continuing past the chalet and to the left to the little “bluffs” (for lack of a better word) above the river, or past the chalet and to the right into the dense forest to set up camp in the trees.
We chose a site along the river because it was cool and cloudy, so we wanted all the sun we could get. On a warm summer day, I can see why you might want the tree cover.
