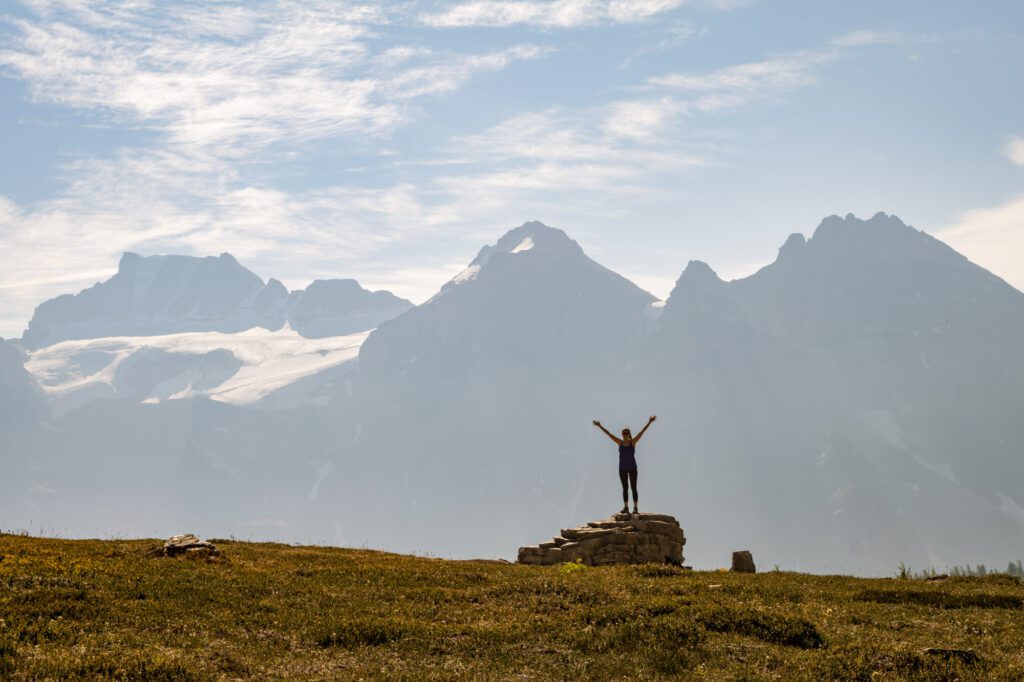
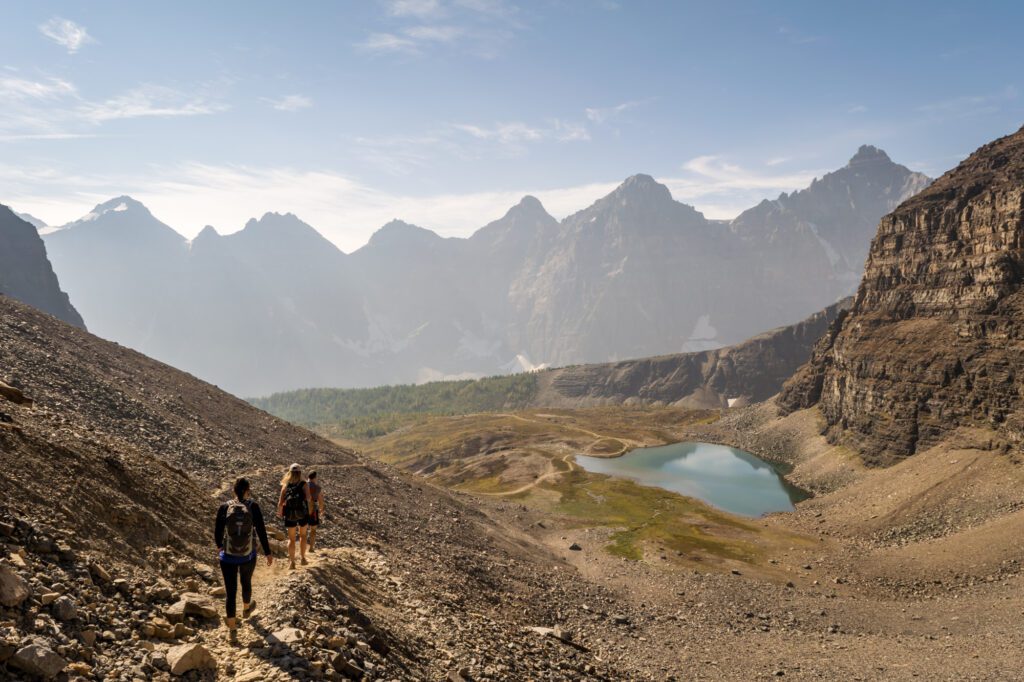
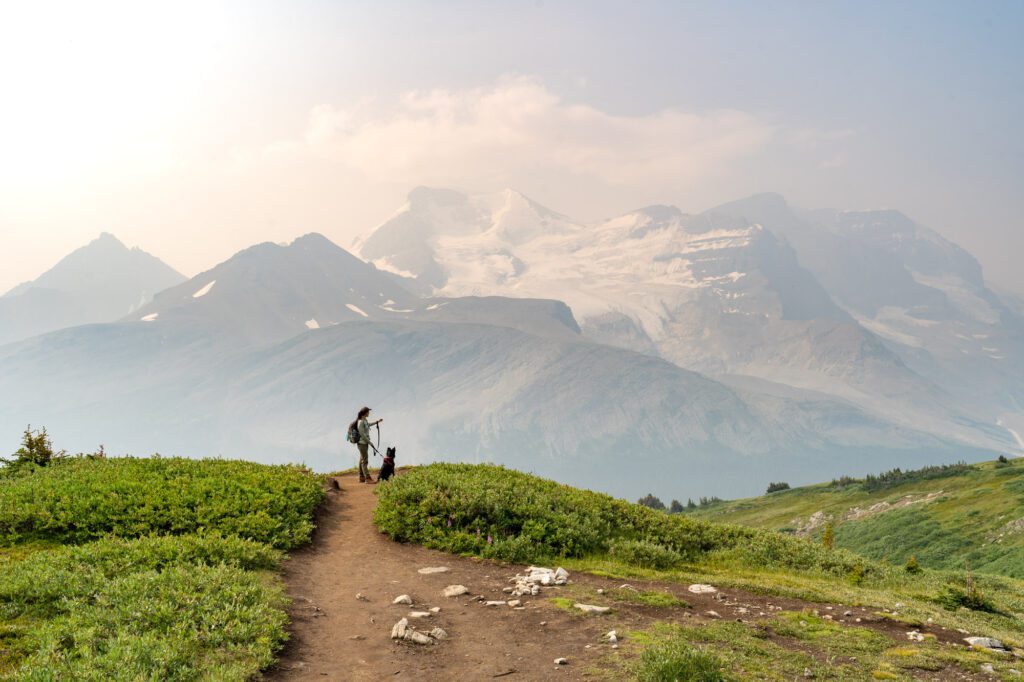
16 Amazing Hikes in Banff National Park (Our Favorites)
If this is your first time on this site, welcome! The very first thing you should know about us is that we’re very much mountain people.
Which means that Banff, Jasper, and the rest of the Canadian Rockies are essentially paradise for us with all of the towering rocky peaks, stunning turquoise alpine lakes, and sweeping views from various hiking trails.
Before we dive into the guide below, allow us a brief tangent on what Banff represents for us and our lives.
We’ve now made multiple trips to Banff over the past several years, and our first trip was very much a milestone in our travel “careers.” Growing up, Matt was NOT a hiker. At all. He grew up playing soccer and living in the suburbs, while Alysha grew up with a backpacking pack strapped to her back.
A year before our trip to Banff we went to Chile to hike the “W” in Torres del Paine National Park (a bold choice for a first international trip together), which is where Matt became a hiker.
Unbeknownst to us at the time, that first trip to Banff, which was full of 10+ mile days, amazing sunrises and sunsets, and fun wildlife encounters, cemented Matt’s love of hiking and the outdoors.
It set us on a path that eventually led to us living in a minivan for two years (Homer the Honda Odyssey – RIP) hitting all of the national parks in the western United States, quitting our corporate jobs, and jumping into creating this site full time.
Anyway, enough about us!
You’re here to discover the best hikes for your trip to Banff, and we’re here to use our experiences on the trails to help you figure out which hikes make the most sense for you, your hiking experience, and your fitness level.
In this guide, we’re going to take you through everything you need to know about hiking in and around Banff.
We’ll start with some logistics, like the best time to go and some things to keep in mind before you hit the trail.
Then we’ll jump into the 16 best hikes in Banff National Park to add to your Canadian Rockies itinerary, most of which we’ve personally done and enjoyed over multiple trips to Banff in the past few years.
By the end, we hope you’ll have discovered a few hikes to add to your list and have the information you need to hit the trail confidently and safely.
Sound good to you? Let’s get into it.
Disclaimer: Some of the links in this post, like hotel links, are affiliate links, meaning at no additional cost to you, we make a little bit of money if you click through and book. That being said, we would never recommend something to you that we don’t stand behind 100%.
The 16 Best Hikes in Banff National Park: A Complete Guide
And now, onto the hikes that we think are worth your time.
Is this a list of every single possible amazing hike to do in Banff? Nope. Definitely not. To explore every hiking trail in Banff would take years of daily hiking.
What this list will give you is a place to start planning some great hikes, with links to longer, more in-depth trail guides with everything you need to know before you hit the trail so you can get out there safely and confidently.
As we make more trips back to the Canadian Rockies – and we do plan to make more trips, because it’s one of our favorite places on earth – we’ll add more hikes (or add our experience on hikes we’ve included that we haven’t personally done yet) over time.
In terms of organization, we’re going to organize this list by region, which makes the most sense to us.
The regions we’ve made up for this guide are:
- Lake Louise
- Moraine Lake
- Around Banff
- Icefields Parkway
Another thing to note here is that there are five hikes that were on our list for our latest trip, but we didn’t quite get to for one reason or another (mostly because we had a dog and couldn’t make it out to Moraine Lake because bringing dogs on the shuttle is complicated).
We’ve included them, along with a brief description and an asterisk in the title to let you know which hikes we’ve personally done, and which we haven’t gotten to yet.
We figured we’d include them because they might fit the trail parameters you’re looking for.
P.S. We’re American, as are the majority of our readers, so we talk in feet and miles in the guide below.
We’ve tried adding both measurements to our guides before, and it ends up getting very cluttered and confusing, so we have decided to stick with miles and feet, especially since that’s what we know best.
It’s pretty simple to convert it to kilometers and meters using an online calculator, if you need to.
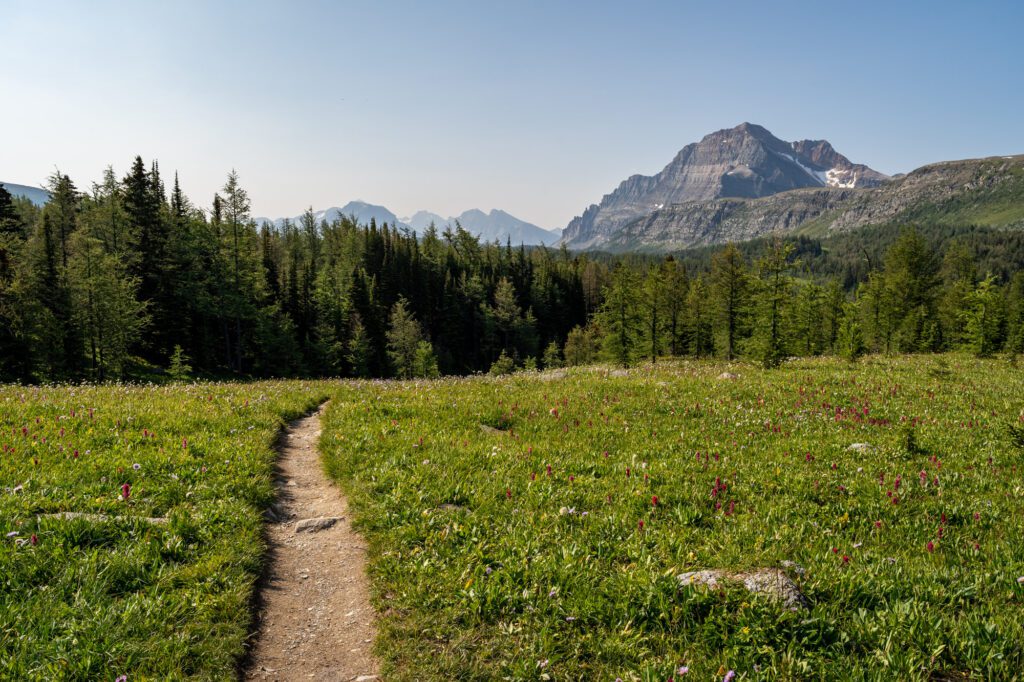
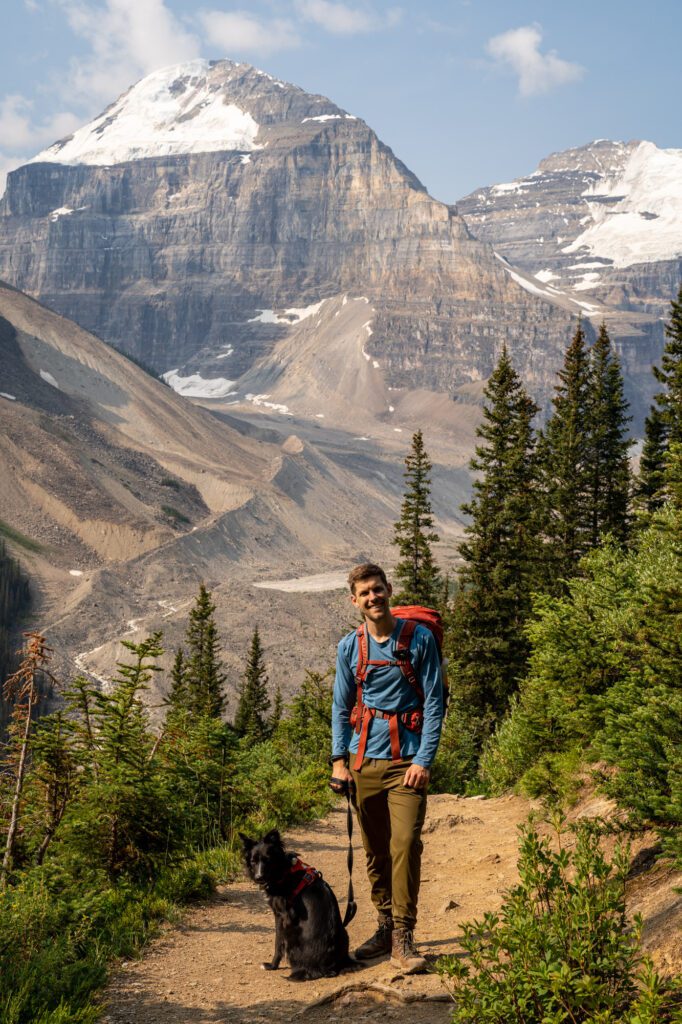
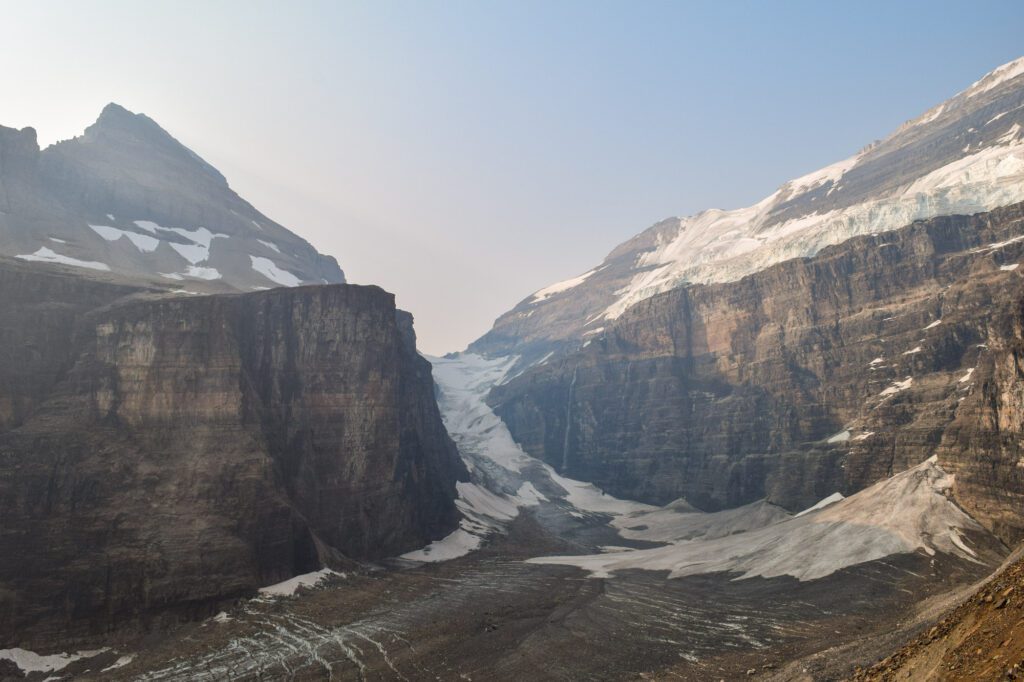
The Plain of Six Glaciers Trail (Lake Louise)
- Length: 9.1 miles
- Elevation Gain: 1,929 ft.
- Trail Type: Out and Back
- Difficulty: Moderate
- Dog Friendly? Yes
- Trailhead Location
There are two classic hikes in the Lake Louise area – the Plain of Six Glaciers trail and Lake Agnes and the Beehives (along with some variants, which we’ll cover below) and we’ve done both of them multiple times now.
On the way down on our last adventure, where we hit both of them in one big loop (again, see below for more on that particular version), I asked Alysha the ever-important question.
“If you only had time for one of these hikes, which one is it?”
For both of us, it’s the Plain of Six Glaciers (though both hikes are great in their own way).
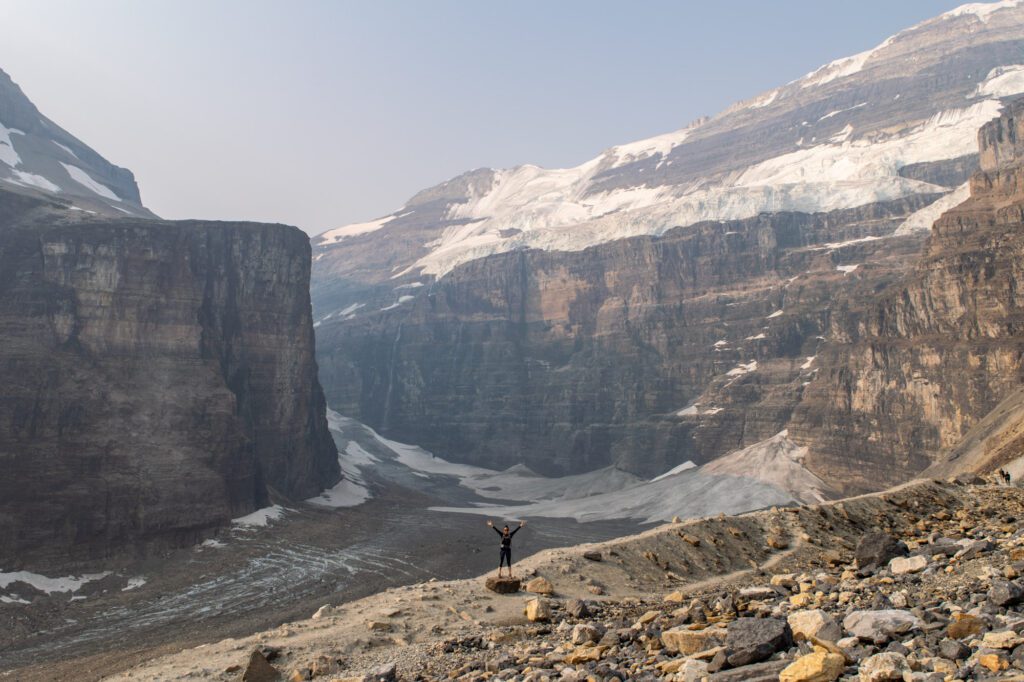
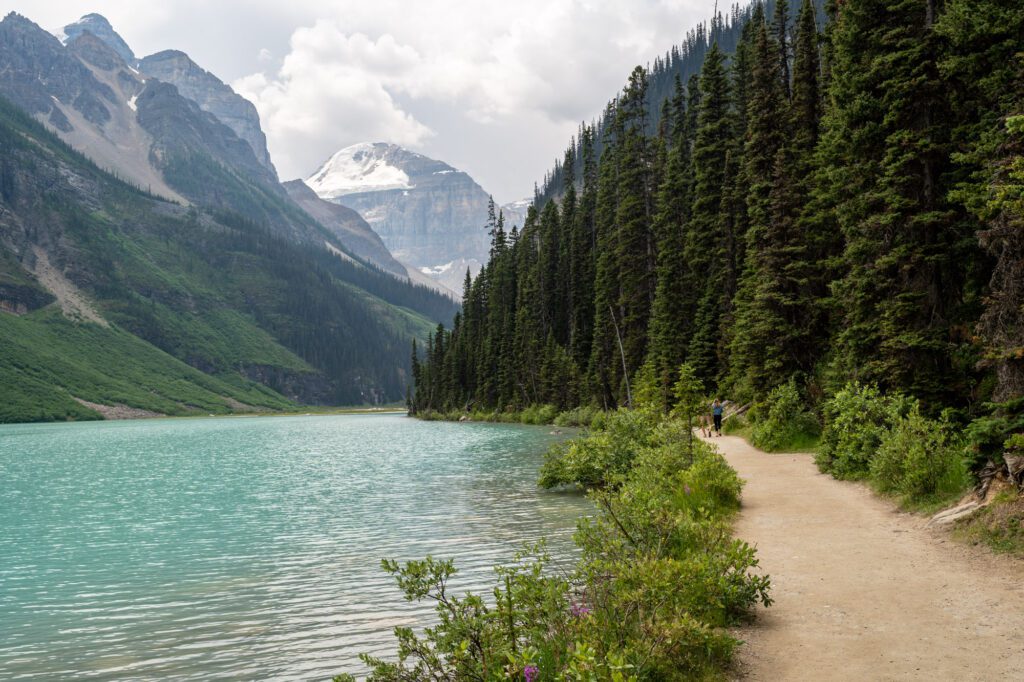
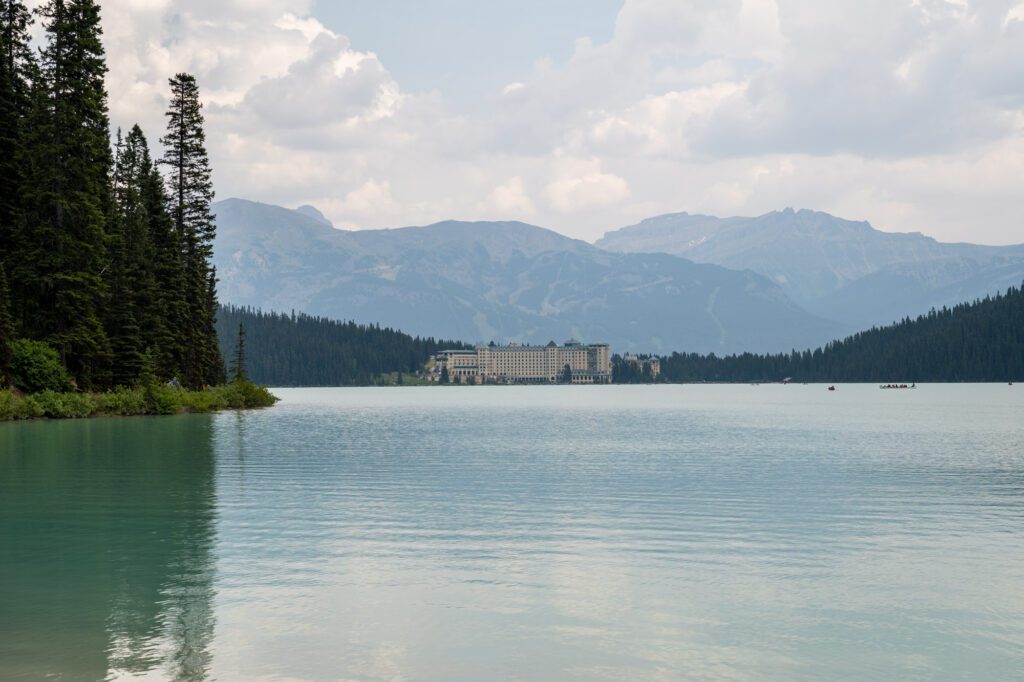
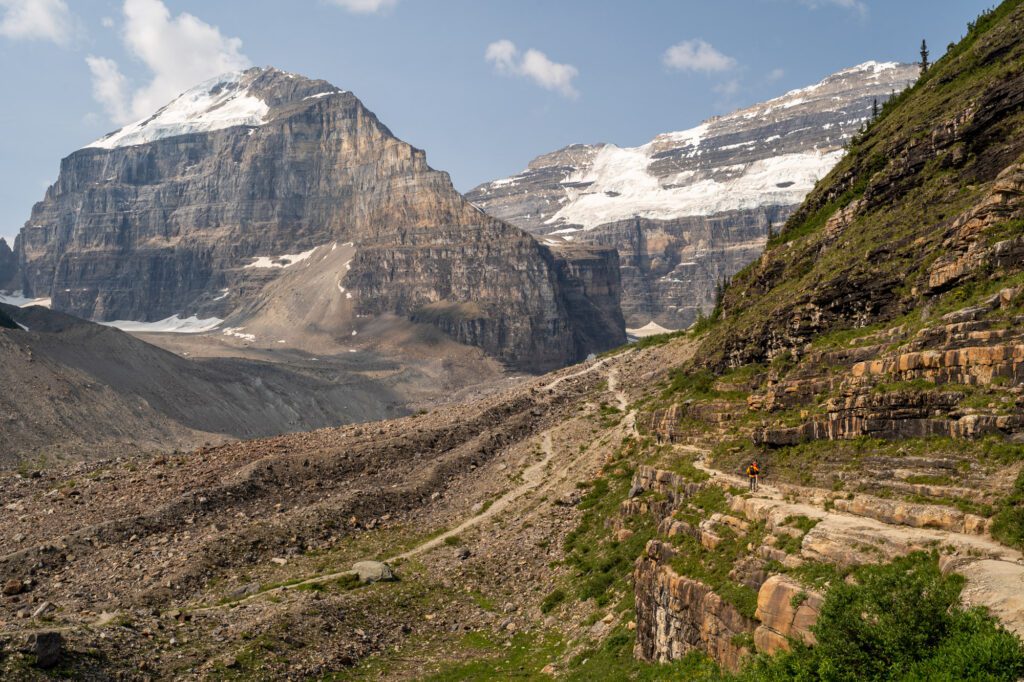
It’s a more unique hike compared to what we’re used to, with a nice stroll around Lake Louise, excellent views of Mount Lefroy (that’s the big one on the left) and one of the glaciers, a backcountry teahouse, and an up-close-and-personal encounter with the glacier at the end.
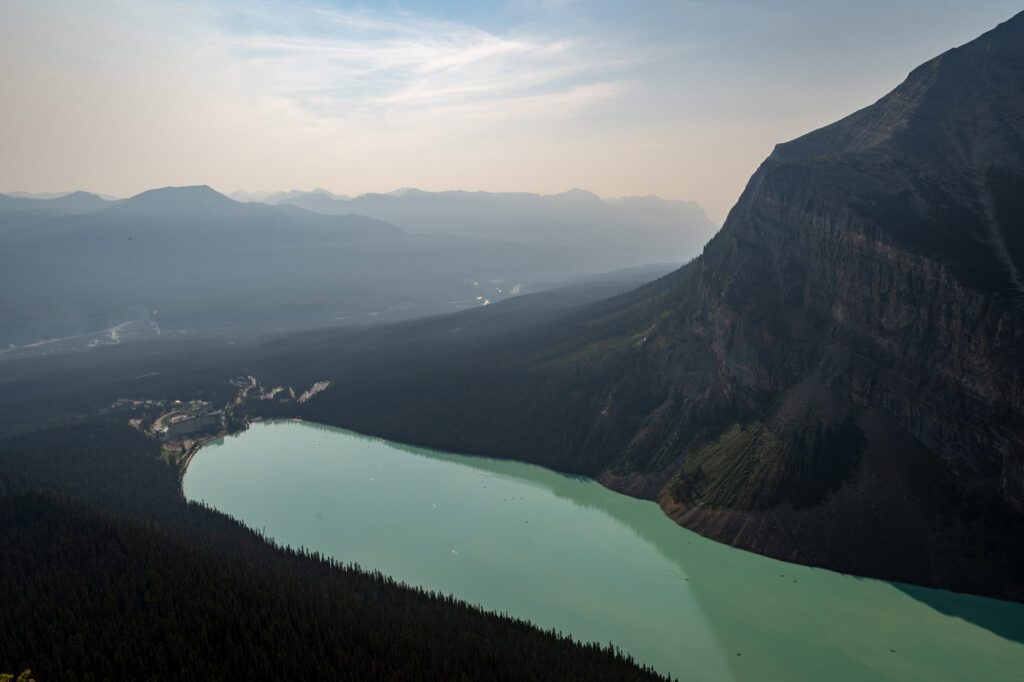
The hike begins from the shores of Lake Louise, which can be a bit of a nightmare to get to.
You have two options, essentially: drive yourself and get there before 7am (even earlier on some peak summer weekends), or take the shuttle from Banff (via ROAM Transit) or Lake Louise (via Parks Canada). Parking also costs $21 between May and October, which is something to consider.
Once you’ve figured out getting there, you’ve kind of done the hard part!
The hike is tough, but it’s doable as long as you’re prepared with plenty of water, sun protection (this hike is exposed, with very little shade along the last half of the trail), and snacks.
The hike starts (and ends) with a mellow 1.5 mile walk along the northern shore of Lake Louise that is essentially flat. Head around the lake and enjoy some nice views of Fairview Mountain as you go.
At the far end of the lake, the trail enters the forest and starts climbing relatively gently at first, then starts to get more intense at the 2 mile mark.
You’ll exit the treeline and immediately notice the changing landscape, as you trade trees for rocks. This is where the sun can start to feel intense because there’s no shade to be had for long stretches.
It’s also the part of the hike where the views start to get good, both back towards Lake Louise and up towards the glaciers.
There’s one stretch where it’s a narrow climb along a ridge, so watch your footing and yield to oncoming hikers (although they should really yield to you if you’re heading uphill).
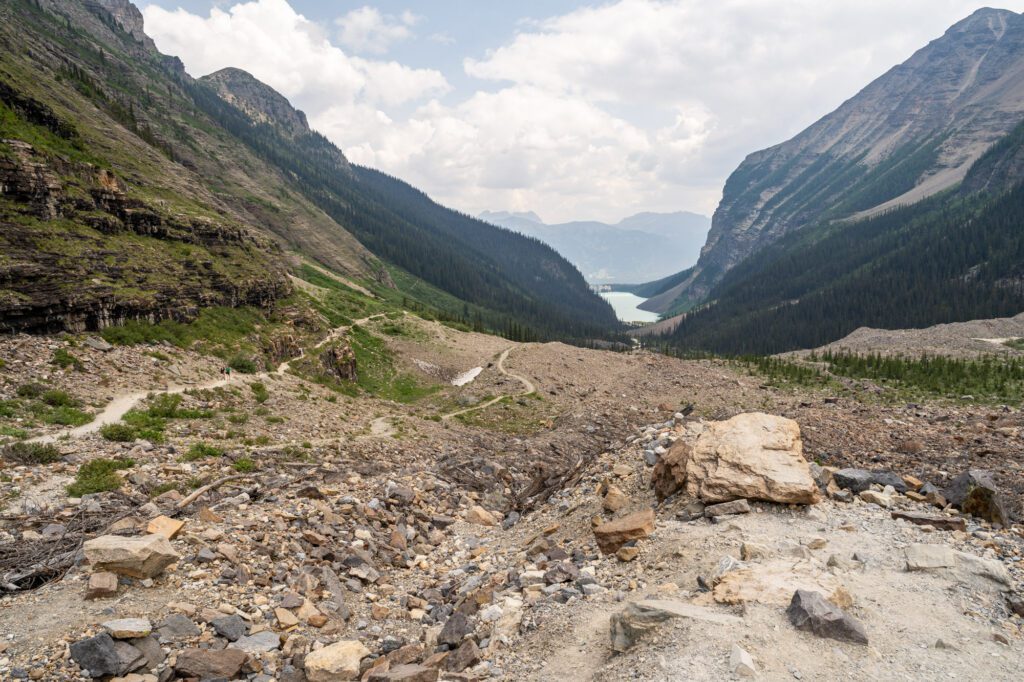
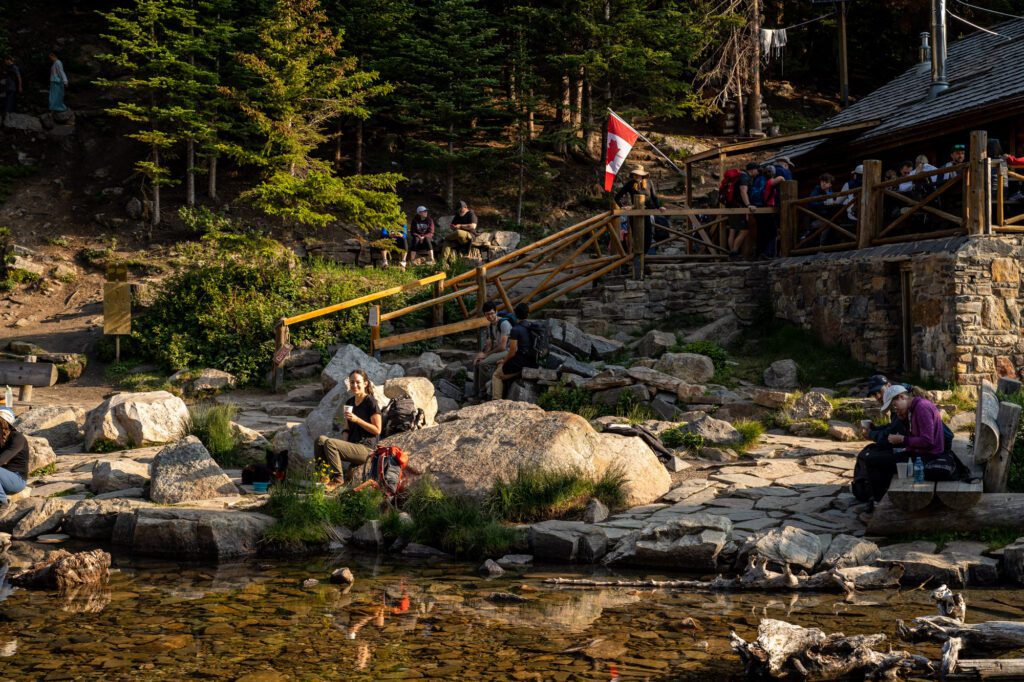
You’ll know you’re nearing the teahouse, which sits at the 3.8 mile mark, when you climb up a small, rocky ridge and hit a set of switchbacks.
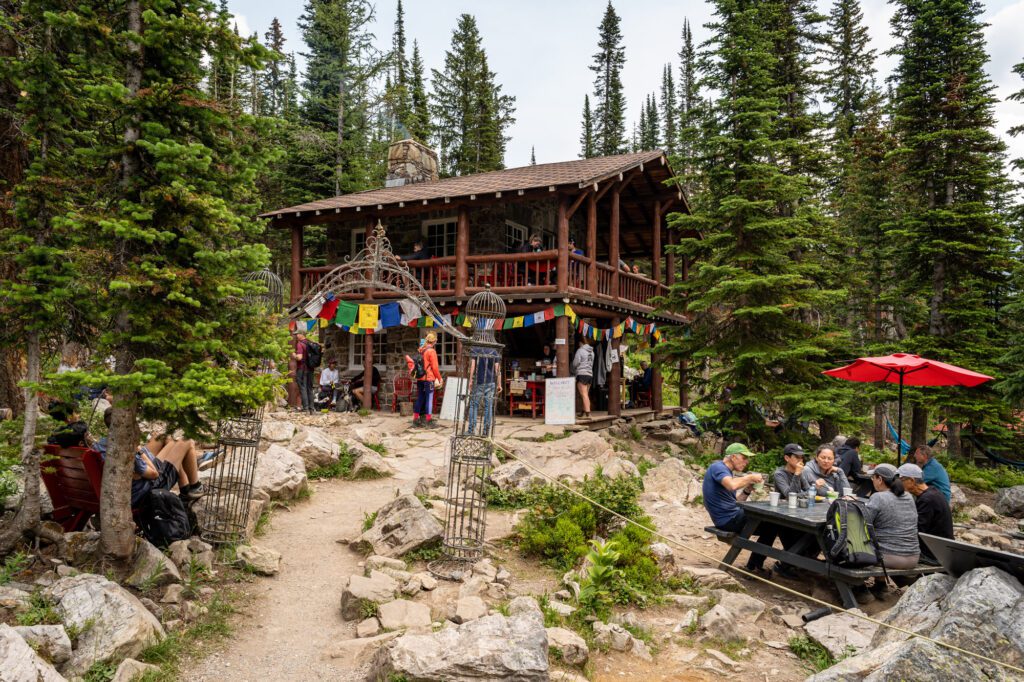
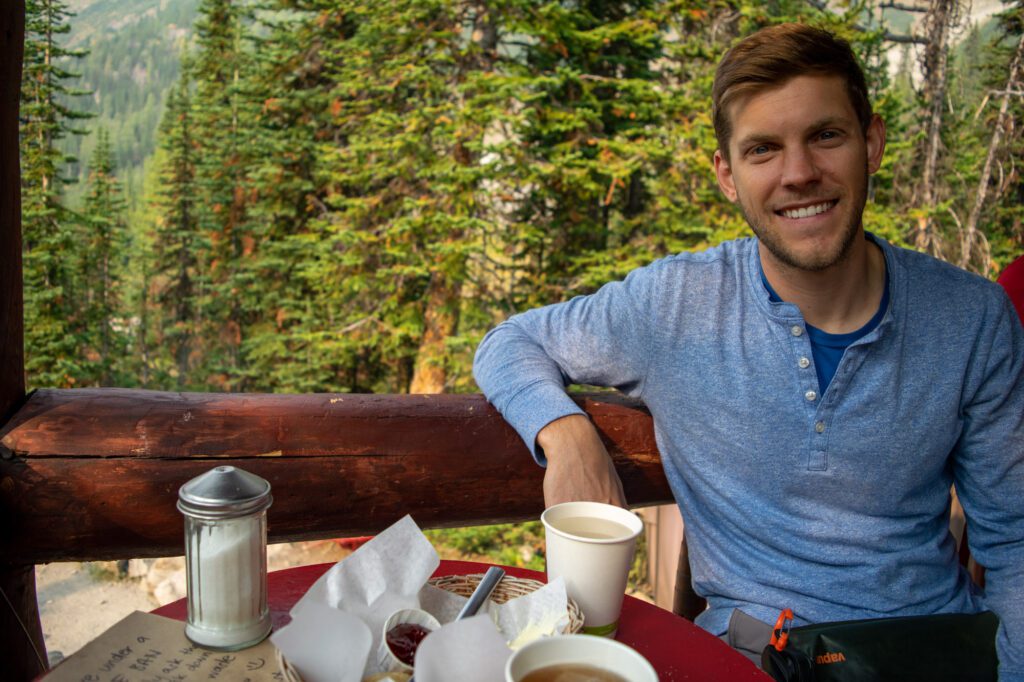
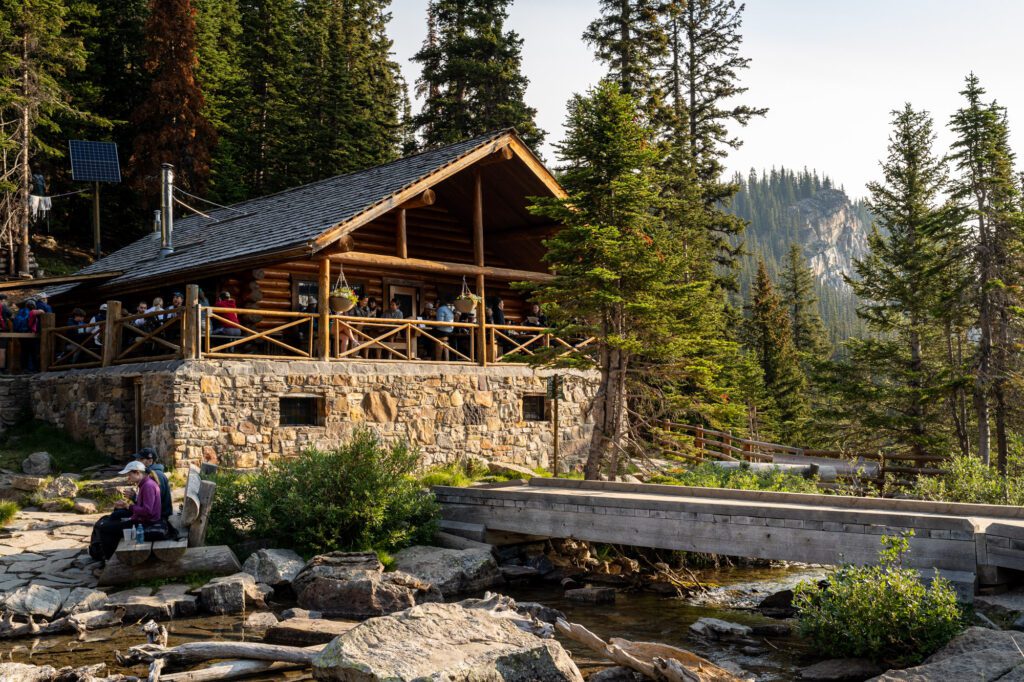
The teahouse is one of our favorite parts about hiking near Lake Louise, and it’s worth stopping for a cup of tea and a handmade snack (they get one shipment of food at the beginning of the season delivered by helicopter, and staff hike up the same way you did to stay up there for five days at a time). Cream of Earl Grey is our favorite tea here.
After a rest and a snack/caffeine boost, finish the climb to the viewpoint with a 0.8 mile climb that gains 500 feet of elevation.
It’s rocky, and it’s not easy, but the views at the end are nothing short of spectacular.
Good to know: there are bathrooms with pit toilets at the teahouse.
Read More: Hiking the Plain of Six Glaciers in Banff National Park (EVERYTHING You Need to Know)
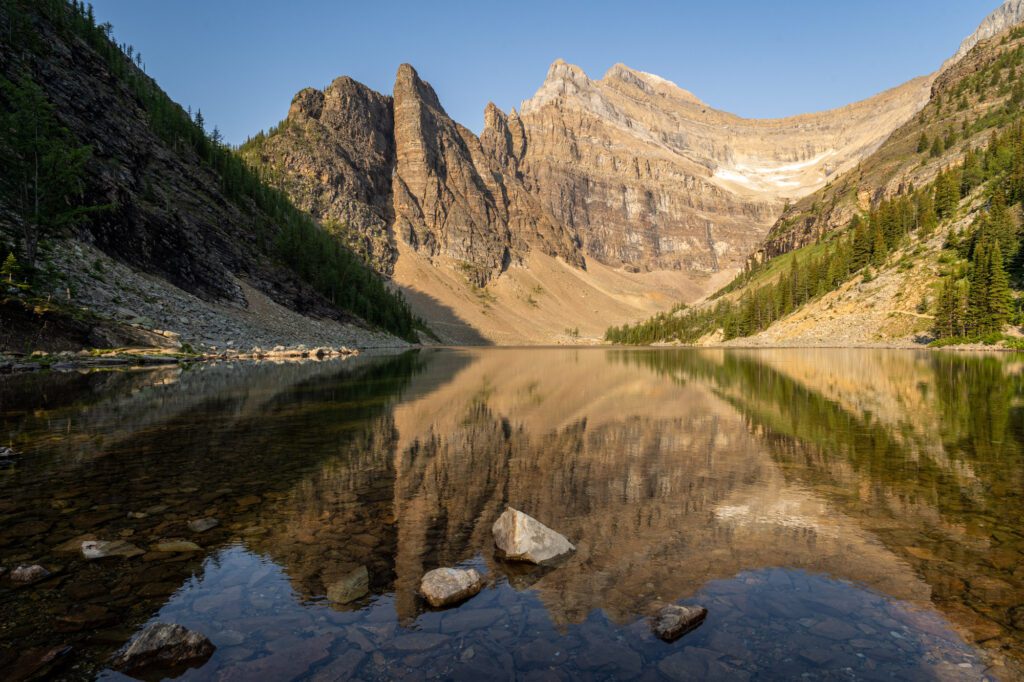
The Lake Agnes Tea House and Little Beehive Trail (Lake Louise)
- Length: 4.6 miles
- Elevation Gain: 1,427 ft.
- Trail Type: Out and Back
- Difficulty: Moderate
- Dog Friendly? Yes
- Trailhead Location
This hike is the easiest of the hikes at Lake Louise (not including the lakeshore walk), and as a result it is very, very busy throughout the summer and early fall.
All of the things we said above about getting to Lake Louise (driving yourself vs. shuttle) and parking nightmares (get there by 7am at the very latest and be prepared to pay $21 between May and October) are true here.
Figuring out how to get to the trailhead is arguably the hardest part of this hike.
If we’re being totally honest, it’s not a particularly interesting climb up to Lake Agnes from Lake Louise, but both Lake Agnes and the teahouse are very cool, and the view from Little Beehive is good (but not as good as the Big Beehive, which involves a lot more effort to reach).
The hike begins from the eastern end of Lake Louise, near the Fairmont, where you’ll head around the northern side of the lake (right if you’re facing the lake from the parking lot).
Shortly after setting off, you’ll see a sign for the Lake Agnes Trail, and the climb begins almost immediately.
It’s a forested set of switchbacks all the way up, with a few breaks in the trees for you to catch a quick glimpse of Lake Louise.
The trail is wide and relatively well maintained, so it’s fairly accessible for most hikers who are in decent shape as long as you’re willing to take breaks and have plenty of water and snacks.
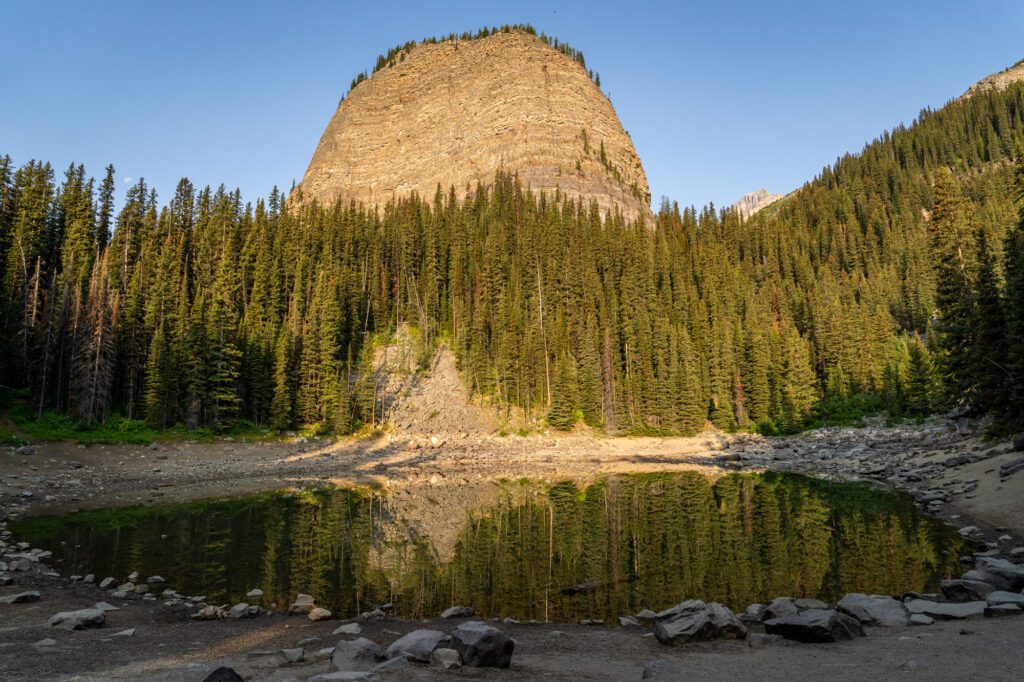
After about a mile and a half, you’ll arrive at Mirror Lake, which has a nice view of the Big Beehive looming behind it.
Then, after another half mile, you’ve made it to the shores of Lake Agnes and the teahouse.
You can either get tea now, or head out to Little Beehive for a view out over Lake Louise and the Bow River Valley, which adds a mile (round trip) and about 500 feet of climbing.
Heads up: this hike is very popular, and everyone wants a table at the teahouse.
Get an early start, if you can, or be prepared for a short wait for a table.
You can always get it to take away and enjoy your tea and snacks on the lakeshore, which is what we did last time.
Good to know: there are bathrooms with pit toilets just up the hill from the teahouse.
The Lake Agnes and Big Beehive Trail (Lake Louise)
- Length: 6.7 miles
- Elevation Gain: 2,552 ft.
- Trail Type: Loop
- Difficulty: Moderate
- Dog Friendly? Yes
- Trailhead Location
This is a slightly longer version of the hike above that follows the same route up to the Lake Agnes Teahouse.
However, after a stop at the teahouse, it continues along Lake Agnes to the far end, where you’ll tackle a steep set of switchbacks to get up to the high point in the hike; a trail junction.
Your reward for those brutal switchbacks? After a short descent, you’ll arrive at a pergola perched atop the Big Beehive with some of the best views in all of Banff.
Spread out in front of you is the blue-green water of Lake Louise, the Fairmont Chateau, and the Bow River Valley.
There are a couple of additions you can make to this hike to make it even better, if you have the extra energy.
The first one is to add on Devil’s Thumb, a quick 0.5 mile climb (with an extra 500 feet of elevation) from the Big Beehive Junction with even better views out over Lake Agnes.
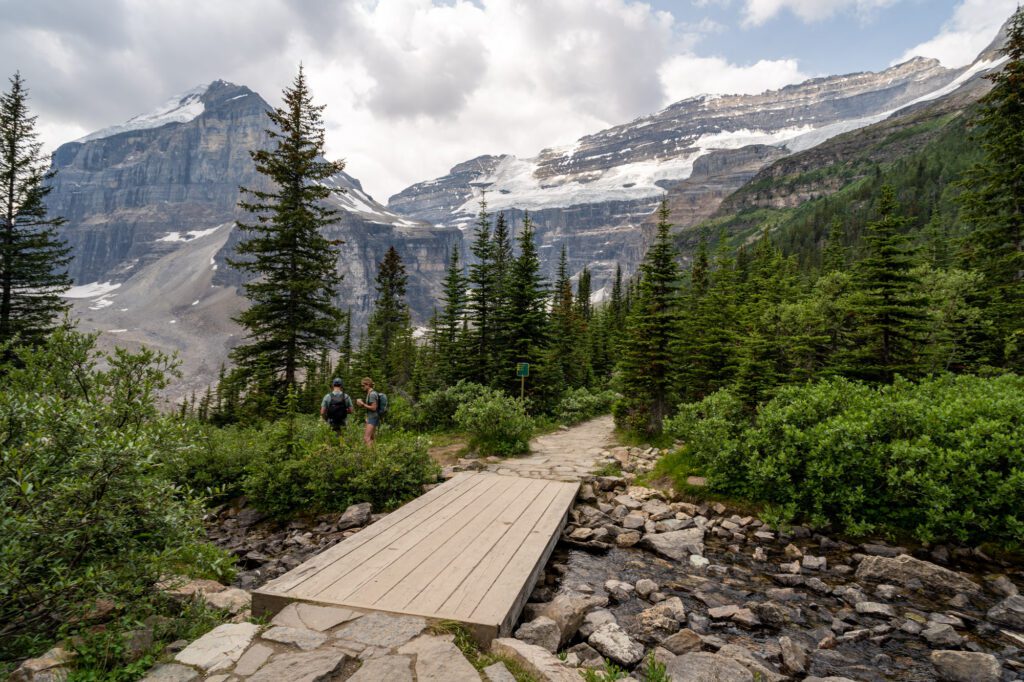
The second one is to make it a loop that heads down to the Highline Trail and connects with the Plain of Six Glaciers Trail.
We’d recommend this one because we did it as part of our hike that included both Agnes and the Plain of Six Glaciers.
It adds a bit of distance, but it’s all downhill and it has some incredible views of the glacier, and it ends with a mile long stroll along the shore of Lake Louise, which also offers some nice views.
To do that, head left at the junction to get out to the Big Beehive and follow the Big Beehive trail down the switchbacks, turning right when it hits the Highline Trail. Follow the Highline Trail for about a mile, and turn left onto the Plain of Six Glaciers Trail.
The Highline Trail, in particular, has some of the best views of the entire hike.
Read More: Hiking the Big Beehive Trail in Banff National Park (EVERYTHING You Need to Know)
The Plain of the Six Glaciers + The Beehives (Lake Louise)
- Length: 11.3 miles
- Elevation Gain: 3,336 ft.
- Trail Type: Loop
- Difficulty: Hard
- Dog Friendly? Yes
- Trailhead Location
On our first trip, we spent several nights out at Lake Louise, so it was easy to go up and down to the lake to get to the beginning of the Lake Agnes and Plain of Six Glaciers trails.
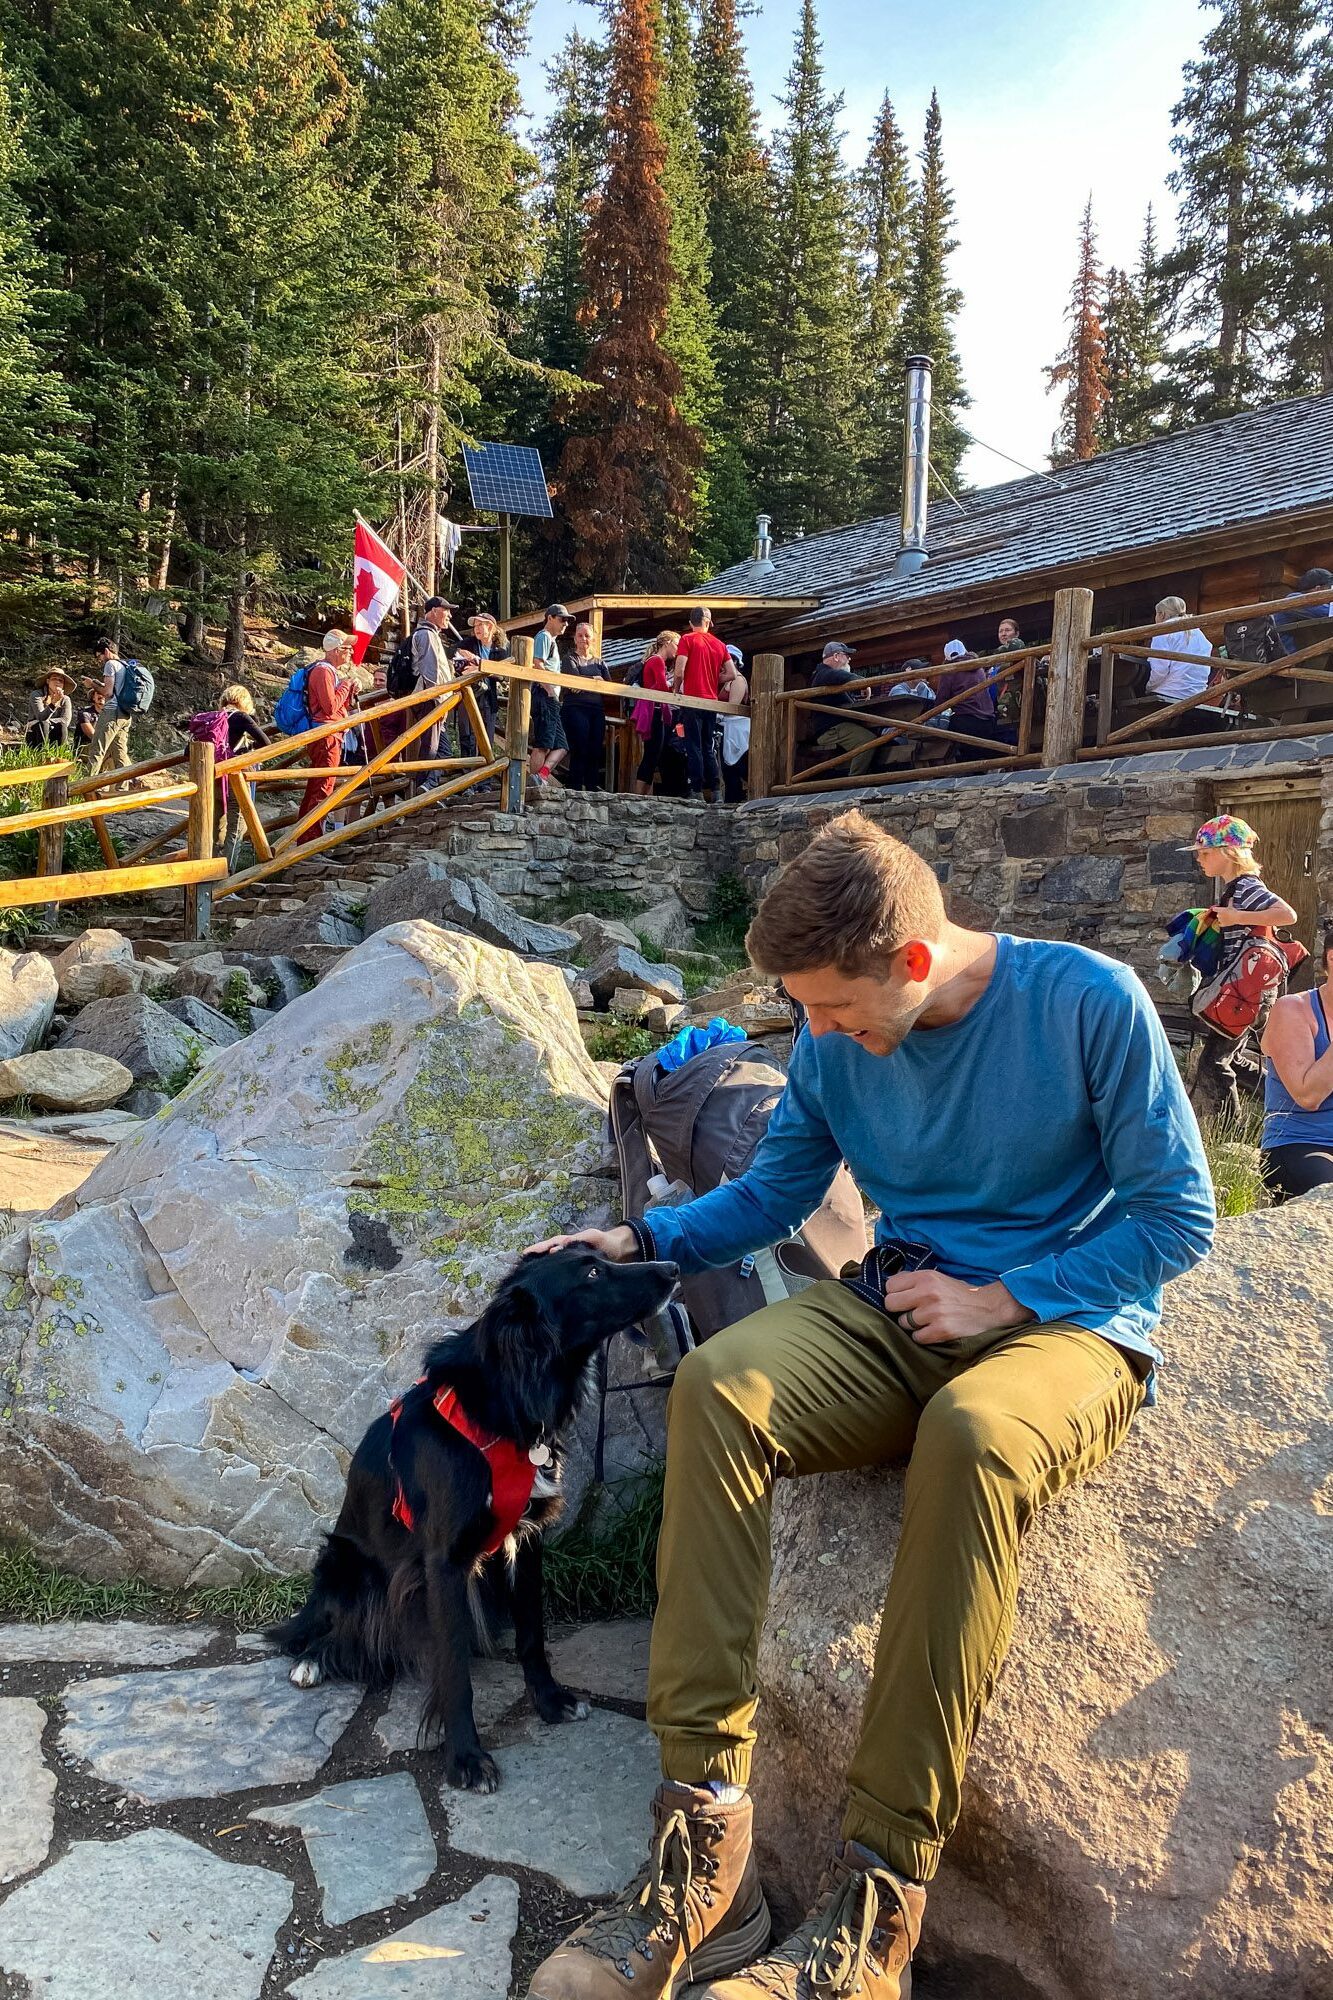
On our latest trip, we were not able to stay at Lake Louise (we learned that our dog Lupine doesn’t like to be in a tent, whoops!), but we still wanted to re-do both hikes.
However, we did not want to deal with the 45 minute drive from Banff AND the nightmare parking scenario (can’t take the shuttle with the dog), so we opted to do them all in one hike!
Which turned out to be an amazing day, with a glacier, two teahouses, several incredible views, and two happy humans and one happy pup.
The route we’d recommend is to go clockwise so that you’re doing the super exposed part of the hike early.
We went the opposite direction, and found the Plain of Six Glaciers portion at 11am to be a hot slog.
First, head up to the Plain of the Six Glaciers – all the way to the lookout at the base of the glacier – then head back down to the teahouse for a cup of tea with a view (cream of earl grey is the move here).
From there, head back down the trail and cut over at the Highline Trail, which is a fairly gradual climb.
Turn left onto the Big Beehive Trail – which is NOT a gradual climb, and is pretty aggressive – to get up to the top of the Big Beehive, then continue along the trail down to Lake Agnes and the teahouse before continuing back down to the shore of Lake Louise.
One tip: if you’re doing the entire loop, we’d 100% recommend skipping the Little Beehive. Big Beehive is a better view, and we don’t think it’s worth the extra effort on an already long day.
This is not an easy hike – it took us just over five hours of active hiking (plus more than an hour spent taking photos and enjoying the two teahouses).
We clocked 12 miles and almost 3,500 feet of elevation gain. Pack plenty of water, food, and sun protection, and you’ll want to wear sturdy footwear.
Everything we said about parking at Lake Louise for the hikes above applies here as well. Take the shuttle if you can, or plan on arriving NO LATER than 7am to ensure you get a spot (in the summer, anyway).
The Larch Valley and Sentinel Pass Trail (Moraine Lake)
- Length: 6.9 miles
- Elevation Gain: 2,621 feet
- Trail Type: Out & Back
- Difficulty: Hard
- Dog Friendly? Yes
- Trailhead Location
This, in our humble opinions, is the single best hike we’ve done in the Canadian Rockies. Once you’ve done the majority of the climb via the switchbacks up from Moraine Lake, the views are just nonstop bangers for the next several miles.
In 2023 and beyond, there’s only one problem: it’s a pain to get to the Moraine Lake parking lot because the road is now closed to private vehicles year round.
That means you need to take a shuttle to get there, and you need to reserve in advance here.
The only issue is that the first shuttles arrive well after sunrise in the summer, and the sunrise shuttle (which costs an arm and a leg) doesn’t have a good option for hikers (it only gives you two hours at the lake).
On one hand, we totally get it – this is quite literally one of the most popular spots in all of Canada, and the parking situation was a nightmare when we were here in almost a decade ago for the first time (literally arrive by 5am or don’t get a spot).
On the other hand, it’s not an ideal situation for hikers. Hopefully that gets ironed out in the future!
Pro tip: If you have a dog with you, use Wow Banff, which allows dogs on the open top section of their double decker buses.
Anyway, your first stop should be the rockpile at the north end of the lake, which is the best photo spot (it’s the one you’ve seen a million pictures of, at this point).
From there, head around the lake and find signs for the Larch Valley Trail, which heads up and to the right.
The first 1.5 miles involve a forested slog, climbing switchbacks to gain about 1,000 feet of elevation to get up into the valley.
As you exit the treeline, you’ll see why I used the term “nonstop bangers.”
In every direction, there’s either a set of picturesque peaks, a lake, steep and rocky valley walls, or something else to captivate you as you climb.
The trail flattens out through the valley, and after another 1.2 miles of gradual ascent you’ll reach Minnestimma Lakes, which is at the base of Sentinel Pass.
From there, you can see the trail snaking its way up to the pass. And it’s a slog.
It’s rocky, steep, and completely exposed with no shade (bring sunscreen, a hat, and layers!).
You need plenty of water and snacks, because this section of trail climbs 600 feet in the direct sun to reach the pass, which sits at 8,500 feet above sea level (which is pretty high for sea-level-dwellers like us).
I know 600 feet in 0.7 miles or so doesn’t seem like much, but at 8,000 feet in full sun, it is brutal.
But the views from the top, which look back out over Larch Valley, backed by the Ten Peaks (of the Valley of Ten Peaks, which is where Lake Moraine lives).
There are also some nice views in the other direction over the pass down into Paradise Valley.
Check here for any trail updates as you get close to your trip.
This hike passes through grizzly territory, and there were hiking restrictions when we did it (hiking in groups of four or more, which means waiting at the trailhead and making some new friends!).
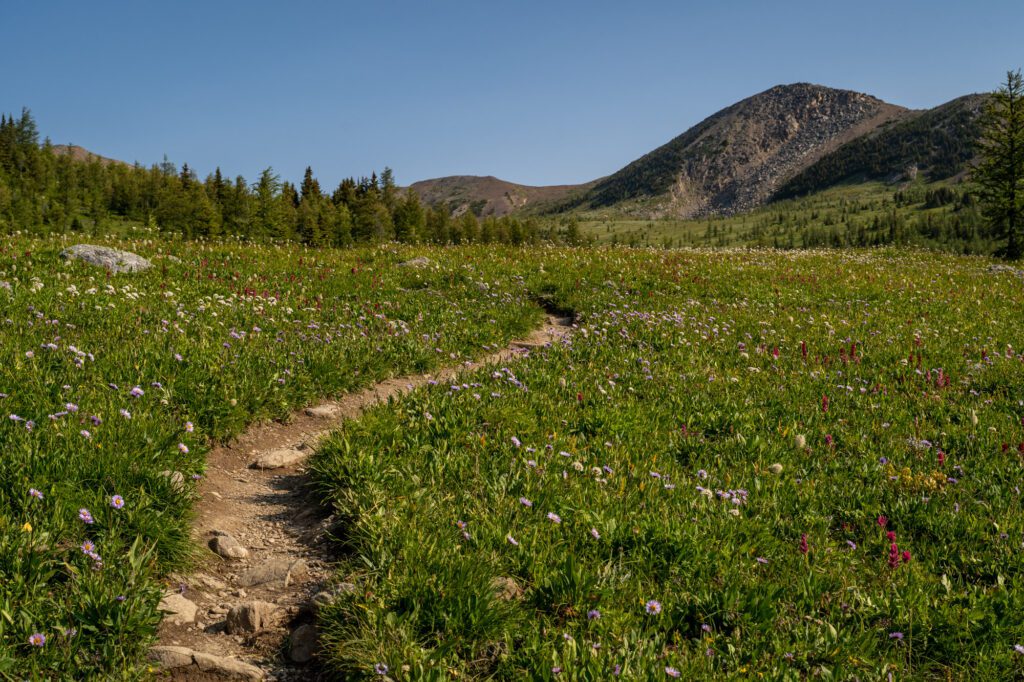
Side note: it’s called Larch Valley for a reason. If you’re looking for fall color in Banff, look no further!
The Consolation Lakes Trail (Moraine Lake)*
- Length: 4.6 miles
- Elevation Gain: 1,059 ft.
- Trail Type: Out and Back
- Difficulty: Hard
- Dog Friendly? Yes
- Trailhead Location
We had this hike on our list because it takes you on a relatively short, easy trail to a lake that is nearly as picturesque as Moraine Lake (which is where the hike leaves from).
However, that two mile trail thins out the crowds, and you’ll end up finding more solitude along the lakeshore than you will at Moraine, which is always a zoo.
You’ll begin by stopping at the rockpile on Moraine Lake’s northeastern shore, which is where all of the pictures are taken from, and then continue northeast, leaving the crowded shore behind.
1.8 miles into the hike you’ll arrive at the first of the two Consolation Lakes, and another half mile or so brings you around to the second lake.
Overall, it’s somewhere between an easy and moderate hike with a couple of alpine lakes waiting for you (with a fraction of the crowds of Moraine Lake and Lake Louise).
Like the other hikes that leave from Moraine Lake, the most complicated part of this trail is going to be securing a ride to and from the trailhead through either the Parks Canada Shuttle or Roam Transit (September / October only).
The Paradise Valley + Lake Annette Trail (Moraine Lake)*
- Length: 7.1 miles
- Elevation Gain: 1,286 ft.
- Trail Type: Out and Back
- Difficulty: Moderate
- Dog Friendly? Yes
- Trailhead Location
This hike covers a stretch of land between Lake Louise and Moraine Lake aptly named Paradise Valley.
You’ll gradually climb up to Lake Annette, where the trail gets noticeably more steep and rocky as you ascend to the ridge, where you’ll have incredible views out over the valley as you traverse the ridge.
The most complicated piece of this hike is going to be making sure the shuttle driver drops you off at the right place.
The trailhead is along Moraine Lake road, but it’s not at Moraine Lake.
You’ll have to ask the shuttle driver to drop you off at the Paradise Creek trailhead, and then flag a shuttle driver down on the way back (though you should know that the shuttles are likely to be full coming that direction).
The alternative to taking the shuttle is parking at Fairview Picnic Area (here on Google Maps) and adding 1.5 miles in each direction (so three miles total).
In terms of route options, you can either hike this as an out-and-back from the trailhead you start at, or you can hike up and over Sentinel Pass (which, coming from the other direction, is one of our favorite hikes) through to Moraine Lake and take the shuttle home from there.
That latter route is longer and harder (12+ miles and 3,700 feet of elevation gain) but it combines Paradise Valley and Larch Valley/Sentinel Pass into one epic day, and you can catch the shuttle back from Moraine Lake without trying to flag it down on the road.
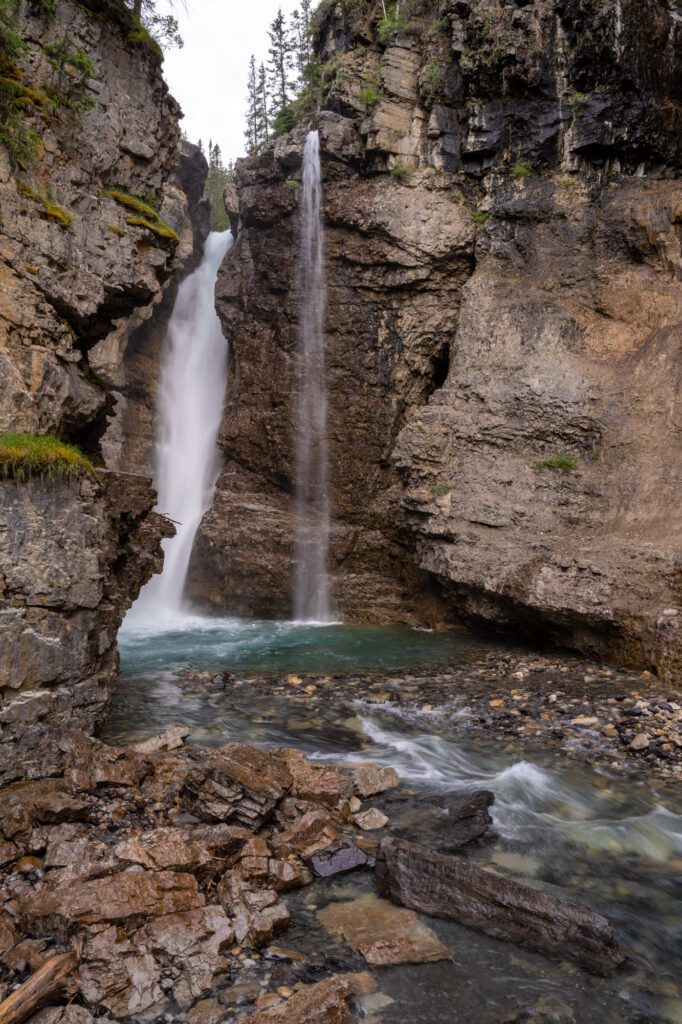
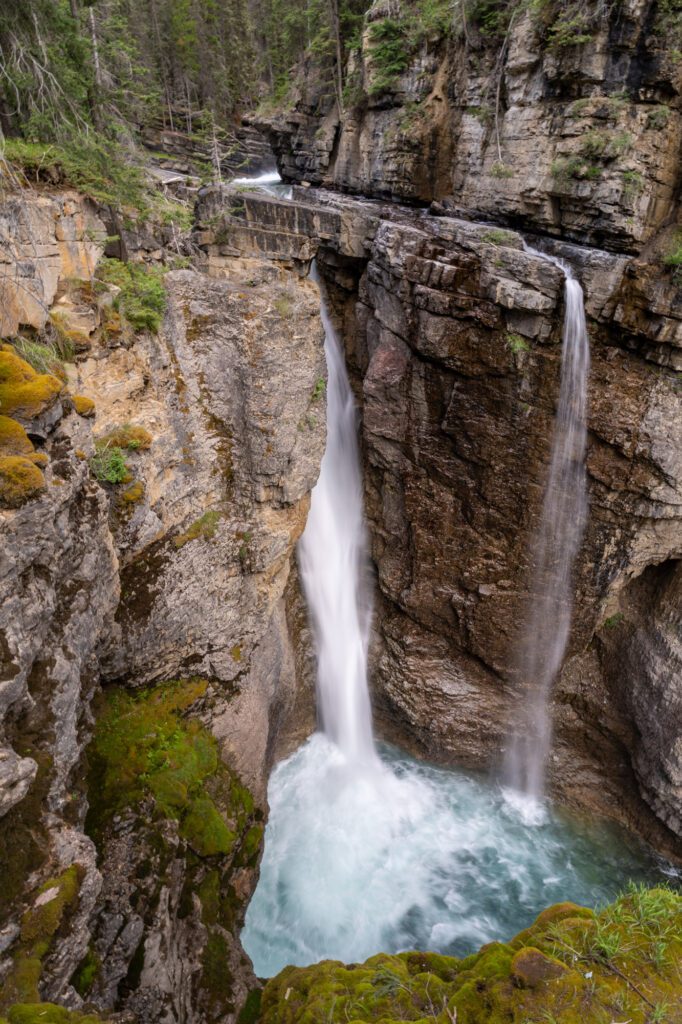
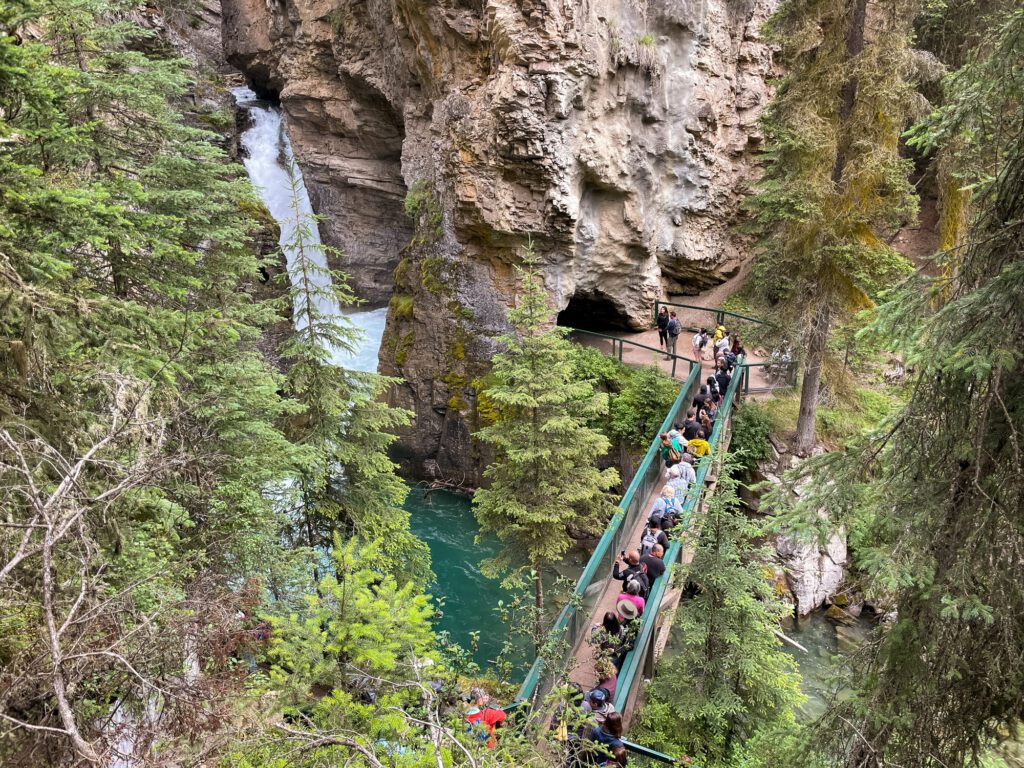
Johnston Canyon – Upper and Lower Falls (Bow Valley Parkway)

- Length: 3.3 miles
- Elevation Gain: 862 ft.
- Trail Type: Out and Back
- Difficulty: Easy
- Dog Friendly? Yes
- Trailhead Location
Johnston Canyon is probably the best easy hike near Banff, especially considering how unique it is in comparison to some of the other easier hikes in the area.
Rather than taking you through meadows and switchbacks to an alpine lake or mountain pass, this hike involves traversing a manmade boardwalk (is it a boardwalk?) through a tall, narrow canyon to two waterfalls.
The first thing to know about the Johnston Canyon hike is that it is very, very popular. It’s very accessible, so the crowds flock here.
We arrived in the parking lot at 7:30am on a weekday morning and got one of the closest spots in the main lot.
At the end of our hike, the lot was full, there was a big line of cars waiting, and there was a shouting match between two people waiting for our spot.
Get here early – before 8am, the earlier the better – for two reasons.
First, although there is a lot of parking here (~350 spots between the two lots P1 and P2), they fill up early and stay busy basically throughout the entire day.
It’s a short hike, so there is turnover, but you could still find yourself waiting here for 30-40 minutes at peak times (10am to 4pm, ish).
Second, having done the narrow canyon at 7:40am or so, and at 11:30am or so, it’s SIGNIFICANTLY more pleasant without throngs of people that are here between 10am and 4pm. It was borderline unenjoyable.
Plus, there was a HUGE line waiting to see the lower falls up close. Here’s a picture:
Still, it’s a very cool hike as long as you plan for it. The effort to reward ratio is high, and although there is some climbing between the lower and upper falls, both are relatively accessible in the grand scheme of hikes in and around Banff.
Pro-tip: There is a ROAM Transit bus (route #9) that goes from Banff out to Johnston Canyon.
The upside is that you can completely sidestep the parking nightmare, the downside is that it doesn’t leave super early, so you’ll be getting there when all the crowds are arriving.
The Ink Pots via Johnston Canyon (Bow Valley Parkway)
- Length: 7 miles
- Elevation Gain: 1,889 ft.
- Trail Type: Out and Back
- Difficulty: Moderate
- Dog Friendly? Yes
- Trailhead Location
We would say something like 75% of hikers in Johnston Canyon go to the two waterfalls, then turn around and call it a day.
But if you continue another two miles past the Upper Falls, you’ll be treated to two things: a beautiful valley with stunning rocky peaks in all directions, and the colorful Ink Pots.
The Ink Pots are basically just cold springs (versus the more popular hot springs).
If you look closely at the base of the pools (they’re clear), you’ll see some whirlpools of sand and water, which is the water coming up from below.
They’re all slightly different shades of green and blue, and there are several pools to be had.
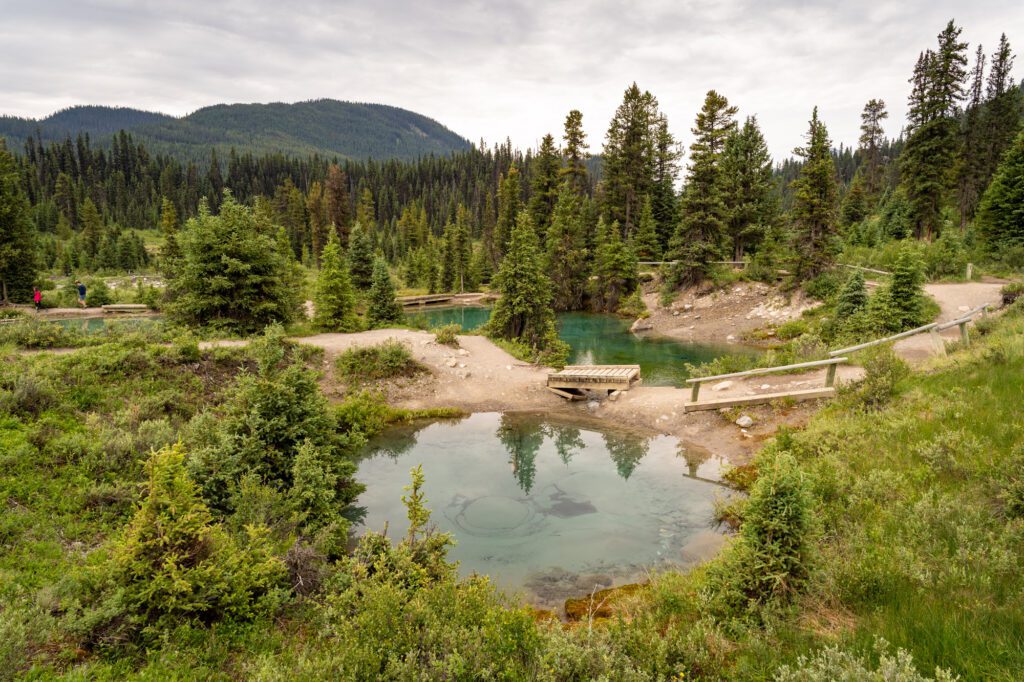
They’re also fairly still, so you have the opportunity to get some nice reflections of the trees and peaks in them.
The one thing (okay, two things) we’d say about this trail is that the portion between the upper falls and Ink Pots is both boring, with wooded switchbacks the entire way, and also involves a descent to get down into the valley…which means you have to climb back uphill to get out.
Nobody likes an uphill portion on the way back (at least not if you live in the Pacific Northwest, where most hikes are straight up then straight back down).
As we were finishing the descent back to the parking lot from the Ink Pots, we had a quick conversation that started with me (Matt here!) asking Alysha “do you think the Ink Pots are worth the extra effort?”
Our conclusion was that, for people with the time and energy to make it up to the Ink Pots, it probably is worth the extra effort.
Not just because of the Ink Pots, but because the valley that they’re tucked into is stunning.
Everything we said about Johnston Canyon above about crowds and needing to arrive early applies here as well.
Get here by 7:30am (if you’re here in the summer) to have the canyon and Ink Pots virtually to yourself.
Read More: Hiking the Johnston Canyon + Ink pots Trail (Everything You Need to Know)
Tunnel Mountain (Around Banff)

- Length: 2.7 miles
- Elevation Gain: 879 ft.
- Trail Type: Out and Back
- Difficulty: Moderate
- Dog Friendly? Yes
- Trailhead Location
We stayed on Tunnel Mountain while we were in Banff, so it only made sense to make it up to the peak of Tunnel Mountain at least once.
There are two trailheads for this hike – one smaller lot (8-10 cars) along Tunnel Mountain Drive, and a larger lot just outside of town on St. Julien Road.
Parking at the upper lot shaves off a bit of climbing, but it’s very limited in terms of parking.
If you’re staying in Banff, it’s probably a relatively easy walk from where you’re staying.
The draw of this trail is twofold.
First, it’s relatively easy, and is by far the most accessible summit in Banff (Sulphur Mountain is spectacular, but it’s 2,500 feet of climbing straight up and down or a $65 gondola ride).
Second, you get views both towards Banff, and the other direction towards Canmore and Mount Rundle.
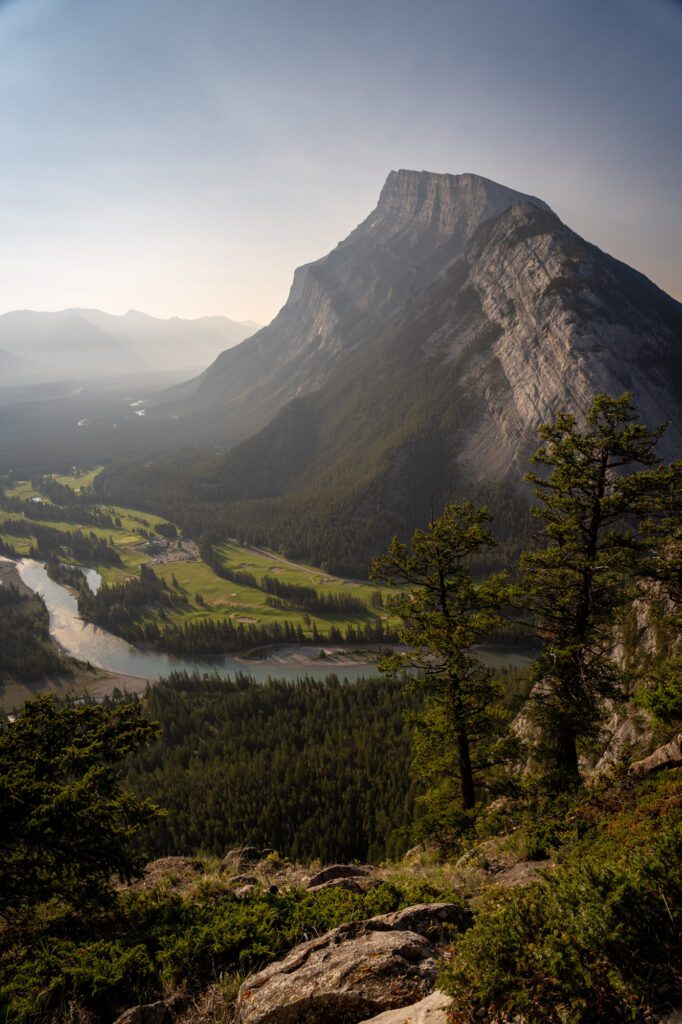
There’s not a whole lot to say about the trail itself.
It starts with a set of switchbacks climbing through the forest, and about halfway up the terrain turns rocky and you turn towards the summit, climbing the entire way.
There are various viewpoints near the top – some facing west, some facing east – which means that this is a good hike at just about any time of the day (though you’re likely to be facing the sun in one direction, depending on when you’re up here).
Because of its accessibility and the fact that it’s basically in town, this is a popular hike. Don’t expect too much solitude up there.
The Healy Pass Trail (Around Banff – Sunshine Meadows)
- Length: 11.1 miles
- Elevation Gain: 2,814 ft.
- Trail Type: Out and Back
- Difficulty: Moderate
- Dog Friendly? Yes
- Trailhead Location
First of all, don’t let the distance on this hike scare you off – on our way back down from Healy Pass, we remarked that this hike probably belongs firmly in the moderate category.
At no point during this hike did either of us say anything along the lines of “this hike is hard!”
Instead, it’s a very long, gradual ascent through the forest up to Healy Pass. There is a significant portion of this hike (the first four miles, give or take) that are a little monotonous, but the reward atop Healy Pass is worth it, we think.
From the top of Healy Pass (really, for the last mile or so of the hike once you emerge from the forest), you’ll be treated to a spectacular view of the towering silhouette of the Monarch, a 9,500 foot tall peak that is not visible from the base of the hike.
There is actually one very important benefit of the length of this hike; it means that this trail is significantly less trafficked than most of the similar hikes in the area (particularly those around Lake Louise and Moraine Lake).
Combine that with the fact that this hike leaves from the massive parking lot at Sunshine Meadows Gondola (which means no nightmarish parking scenarios), and you’ve got about as relaxing an alpine experience as you’re going to get in a national park as popular as Banff.
One last thing on this hike – there are two distinct “best times” to hike it.
The first is going to be the early summer (mid-July, ish), when the wildflowers are in full bloom.
This happens to be when we hiked this trail, and the wildflower show got better and better the closer we got to the pass.
The second is going to be that one week during the fall (it changes each year, but somewhere around mid-October is a good bet) when the larches that line the meadows up at Healy Pass turn a brilliant shade of gold.
We’d say that if you happen to be in Banff during either of those two periods – mid-July or mid-October – this hike is a must-do. Check trail reviews to see what recent hikers are saying about the flowers / larches.
Read More: Hiking the Healy Pass Trail (Everything You Need to Know)
C-Level Cirque (Around Banff – Lake Minnewanka)*
- Length: 5.8 miles
- Elevation Gain: 2,490 ft.
- Trail Type: Out and Back
- Difficulty: Hard
- Dog Friendly? Yes
- Trailhead Location
This is a good option if you’re looking for a hike near Banff that doesn’t require navigating shuttles or driving 45-60 minutes each way to reach.
It’s on the shore of Lake Minnewanka, about 15 minutes from downtown Banff (or Canmore).
The hike takes you up through the forest before breaking through the treeline and opening up to a rocky amphitheater.
From there, it’s a relatively simple scramble across a rockfield up to great views out over the lake and surrounding mountains.
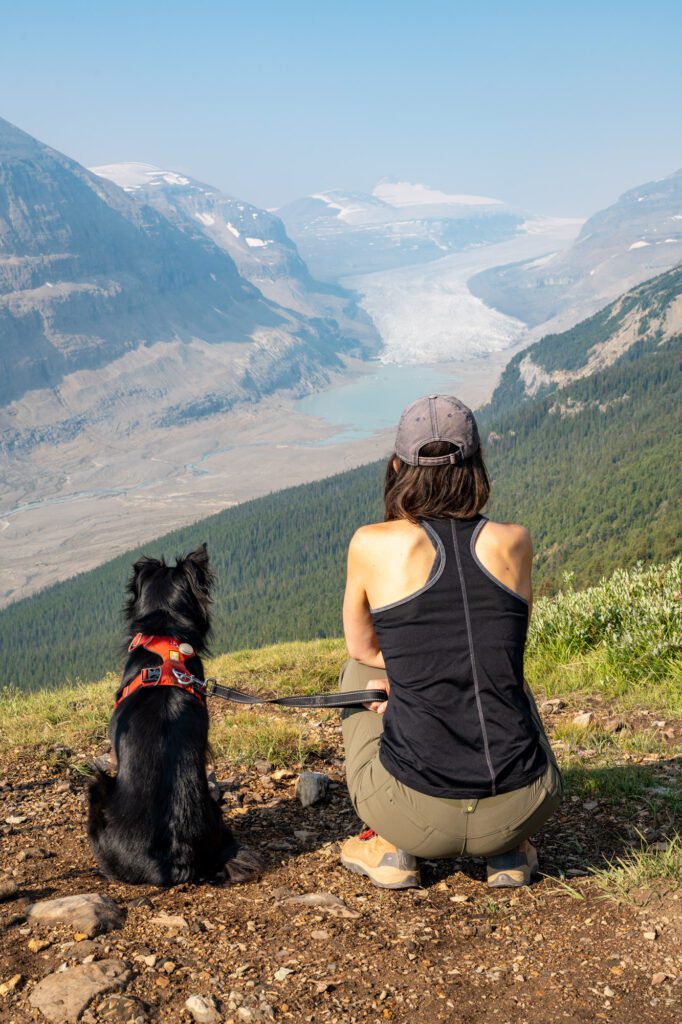
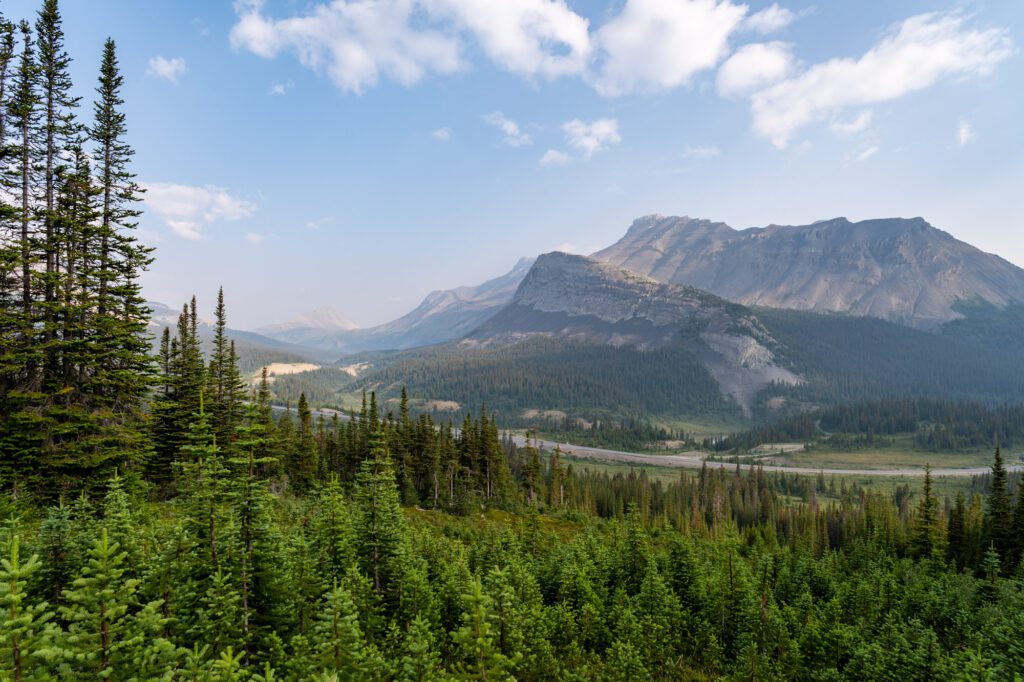
Wilcox Pass (Icefields Parkway)
- Length: 5.8 miles
- Elevation Gain: 1,712 ft.
- Trail Type: Out and Back
- Difficulty: Moderate
- Dog Friendly? Yes
- Trailhead Location
If you only have time for one hike on your drive of the Icefields Parkway, we think it should be Wilcox Pass.
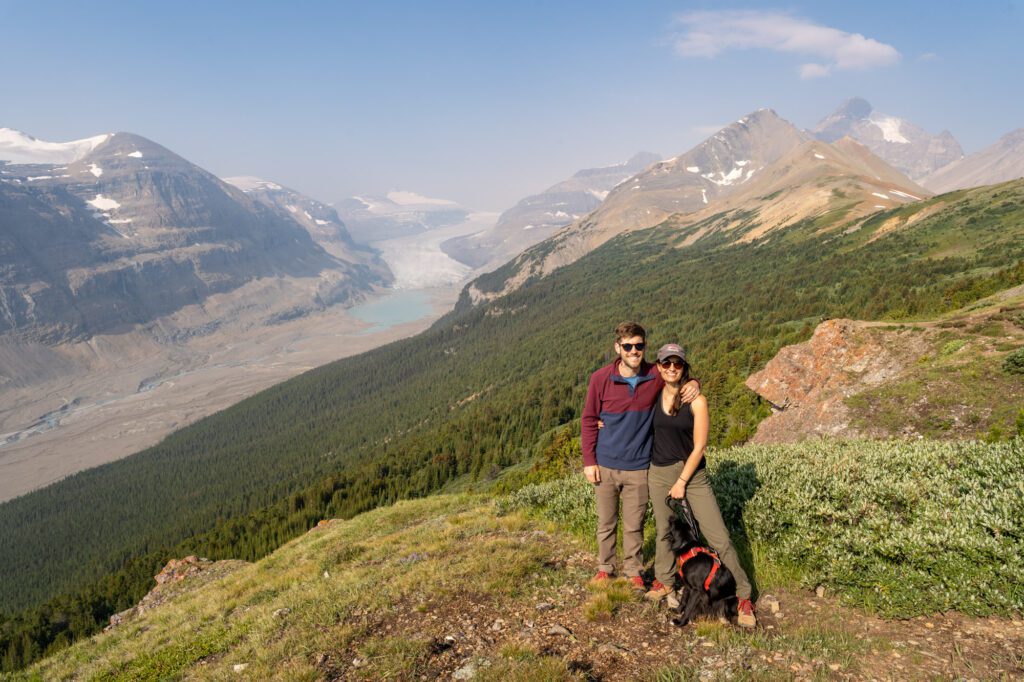
And even though this hike is TECHNICALLY in Jasper National Park (it’s just over the boundary), we’re including it here because it was our favorite of the three we did on the drive from Banff to Jasper.
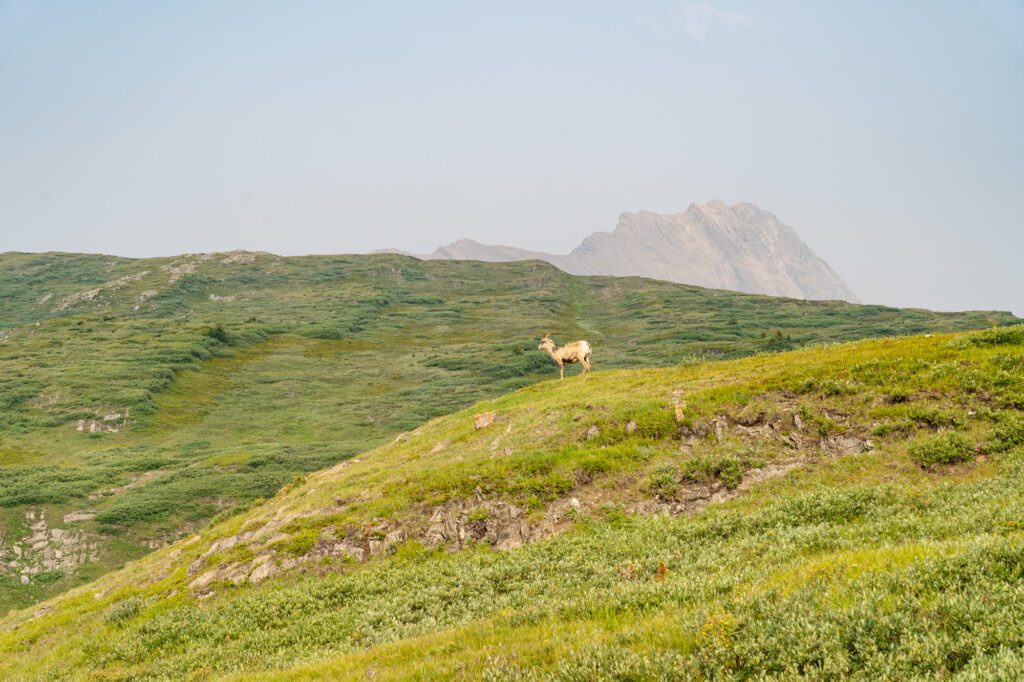
It has everything we’re looking for in a hike near Banff – a good workout, showstopping views (including glaciers, in this case!), and a good shot at seeing wildlife (we saw multiple groups of bighorn sheep and a huge family of mountain goats with a bunch of babies).
And, as you can see from our pictures, we did this hike on a day where wildfire smoke made it so that visibility was not great, and we STILL enjoyed it.
The trailhead is right off of Highway 93 a few minutes before the Columbia Icefields Center and Glacier View Lodge.
Unlike some other Banff hikes, like Healy Pass and Helen Lake, which feature long stretches in the forest without many views to speak of, the views here start early and continue through the entire duration of the hike.
The first half mile or so is a forested climb to get up on the ridge, and from there it’s a gentle climb up to Wilcox Pass, with great views out across the valley towards the glaciers.
Once you’re at Wilcox Pass, the trail continues left (it takes you to a great viewpoint, so you should do it!) and gets rocky and somewhat difficult, and there are a few tough sections that you’ll have to climb before you get to the Wilcox Viewpoint, which is a commanding view out over the Icefields Parkway where you can see multiple glaciers and rocky peaks.

As we mentioned above, we saw a couple of different kinds of wildlife on our hike.
First were the groups of bighorn sheep munching away on grass – they were far up the rocky slopes on our ascent, and had made their way closer to the trail when we came down.
Then, further on in our descent, we experienced a stampede of mountain goats as they came barreling down the hillside, crossed the trail, and ambled across the creek onto the hillside across the gully surprisingly quickly.
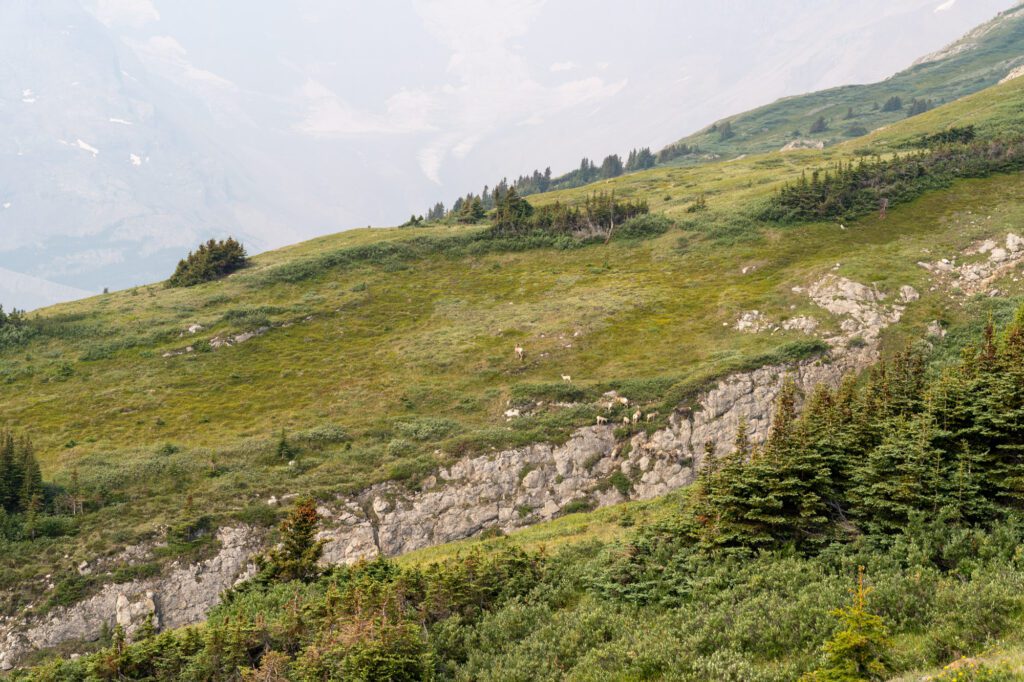
We were a good distance away, but it was fun to see.
Remember to give wildlife plenty of space. If you’re causing them to move or change their behavior, you’re too close (which is what happened with the mountain goats, we’re guessing).
Read More: How to Hike to Incredible Glacier Views on the Wilcox Pass Trail
Parker Ridge (Icefields Parkway)
- Length: 4 miles
- Elevation Gain: 1,108 ft.
- Trail Type: Out and Back
- Difficulty: Moderate
- Dog Friendly? Yes
- Trailhead Location
Parker Ridge is another hike along the Icefields Parkway, though of the three we have featured here (Wilcox Pass, Parker Ridge, Helen Lake), it was our least favorite.
It’s a pretty simple hike, and is a good stop along the Icefields Parkway to get out and stretch your legs a bit.
The hike starts from a medium-sized parking lot just before you cross over into Jasper National Park, and the trail forms a “Y.”
The first portion of this hike involves climbing a set of switchbacks that take you from the floor of the valley up to the ridge, which brings you to the trail junction.
This section of trail climbs 800 feet in roughly a mile, which is no joke (but also isn’t terribly hard).
We’d head right first, which continues to climb up to the high point in the hike, where you’ll have an excellent 360-degree view out over the surrounding valley.
This section of the hike is rocky, though the alpine landscape was dusted with a covering of wildflowers when we were there in early July.
Once you’ve taken in the views, head back down the way you came and follow the trail to the left this time (right if you’re heading down from the high point), which takes you out along the ridge where you’ll have views back down the valley to the Saskatchewan Glacier and the lake that now sits at its base.
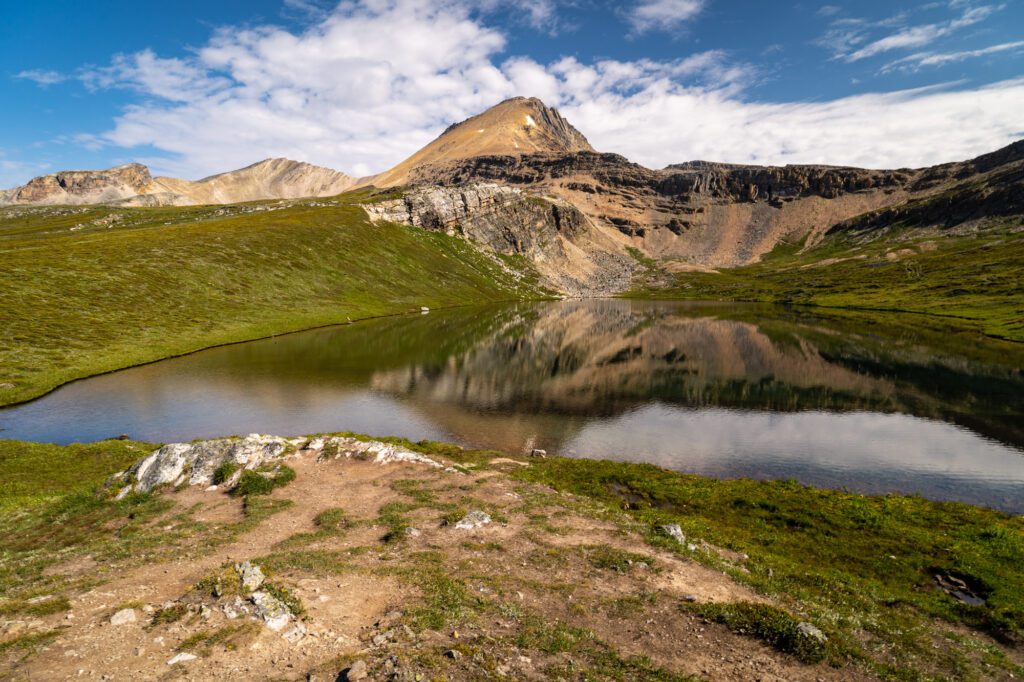
The Helen Lake Trail (Icefields Parkway)
- Length: 7.2 miles
- Elevation Gain: 1,768 feet
- Trail Type: Out and Back
- Difficulty: Moderate
- Dog Friendly? Yes
- Trailhead Location
Unlike the Healy Pass Trail, which seemed easier than we thought it was going to be because it was such a steady climb, the Helen Lake Trail along the Icefields Parkway felt quite a bit harder than we thought it would be.
Now, the first thing we want to say about this hike is that it is 100% worth the stop, and is one of our favorite stops on any drive from Banff to Jasper.
The thing that makes this hike feel harder than the stats look is that it fluctuates between steep uphill slogs and mostly level (sometimes even downhill) walks in the woods or meadows. And when we say steep, we do mean STEEP.
Luckily, the total elevation gain isn’t too bad, but it is concentrated in three to four sections of trail, while the rest of the hike is relatively flat.
The hike starts from a trailhead (with a single pit toilet) right off of the Icefields Parkway, across from one of the many viewpoints over Bow Lake. There is enough parking for about 20-25 cars, and at 7:15am we were one of the first cars in the lot.
A word of advice: get an early start.
It’s a long drive from Banff or Canmore, but we think getting up an extra 30-60 minutes early pays off, because we got on the trail at 7:30 or so, and were alone by the time we got to the lake. We passed 3-4 groups on the way up.
On the way down, it was a steady stream of people making their way up to the lake, which is why we’d rather sacrifice the extra 30 minutes of sleep for some solitude at the lake.
For the first few miles, the trail alternates between a steep climb and a mellow walk in the woods with a few nice views over Bow Lake.
Right around the two mile mark, the trail turns left and breaks through the treeline into a spectacular set of meadows, full of wildflowers and marmots (two of our favorite things).
You’ll climb steadily across the hillside, and reach Helen Lake about a mile and change later. Jaw dropping views of the surrounding peaks and valleys await you the entire way.
From the near end of Helen Lake, the views are great (especially if you’re there early to get a reflection of Cirque Peak in the glassy surface of the lake), but we’d definitely recommend making your way partially up the switchbacks on the other side of the lake for a similarly excellent view.

If you have gas in the tank, you can continue up to Cirque Peak (10 miles, 3,600 feet of elevation gain total) for excellent views of the surrounding landscape, including Bow Lake.
We had our pup with us, and the climb to Cirque Peak involves a steep scramble across loose scree, which is not particularly dog-friendly.
If you’re not up for the scramble but want to continue on, you can climb Dolomite Pass and head right, which takes you down to another lake – Katherine Lake – that we didn’t know about until a pair of hikers on our way down told us about it, and we kind of wish we’d done it.
It’s an extra three miles and 1,000 feet of elevation gain to get there, most of it coming in those switchbacks you can see on the other side of Helen Lake.
Read More: Hiking to a Beautiful Alpine Lake on the Helen Lake Trail: A Complete Trail Guide
Bow Glacier Falls (Icefields Parkway)*
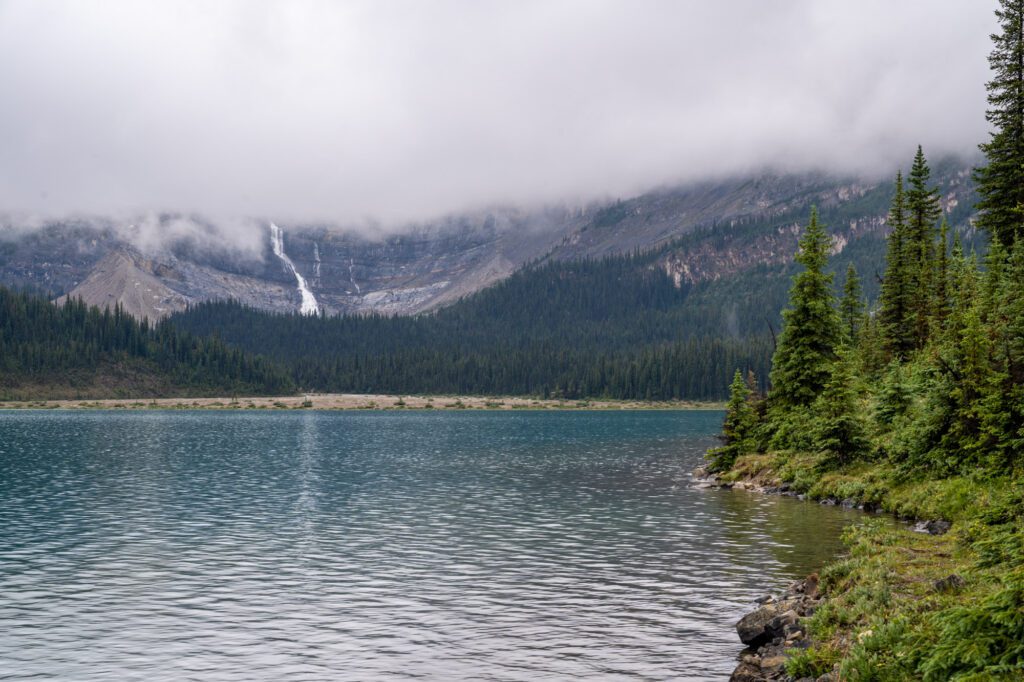
- Length: 5.5 miles
- Elevation Gain: 925 ft.
- Trail Type: Out and Back
- Difficulty: Moderate
- Dog Friendly? Yes
- Trailhead Location
If you’re looking for a straightforward hike along the shore of Bow Lake to a couple of nice waterfalls to stretch your legs on your Icefields Parkway drive, this is a good option.
We went most of the way around the lake, and enjoyed leaving the crowds and tour buses behind the further we went (though we didn’t go all the way to the falls).
Bow Glacier Falls is visible from the far side of the lake, and even if you don’t want to go out to the waterfall, it’s worth walking a little ways along the trail to get away from the crowds that congregate on the shore near the lodge.
The first two miles of this hike are basically flat, hugging the lakeshore for most of the way, and then at the end there’s a quick climb up to the base of the falls.
Our Favorite Banff Hikes, Mapped
The Best Time to Visit Banff
Like most mountainous regions on the northern end of North America, the best time to visit Banff for hiking is the short window between summer and the middle of fall when days are long, the sun is out, and hiking trails in Banff are clear of snow.
Most years, this brief window falls between early July and mid-October, but it depends on the snowpack and spring weather.
For example, when we were in Banff last, it had been a mild winter and hot spring, so everything was ready to go about a month earlier than the previous few years.
July and August are the most consistent in terms of weather and trail access, but they also come with one major downside: they’re the most popular – and therefore most expensive – time to visit.
September is a great month to be in Banff, because the mix of travelers shifts a little bit as kids go back to school.
You’ll get fewer families, but it’s still going to be busy in Banff during this time. Weather is slightly less predictable in September (and October).
On our first ever trip to Banff, we got both hot, sunny days and a wild snowstorm in the same 10 day period in mid-September.
The first half of October is both less busy, and less predictable when it comes to weather.
It is, however, usually the time when the golden larches line the mountainsides in Banff, which is a lovely time to visit for that burst of fall color before the Rockies settle into winter.
If you’re coming to Banff for hiking, we would not recommend planning a trip between the months of November and May (honestly, probably even June).
There is one consideration for visiting in the summer and fall that has become all too familiar for residents of the western United States and Canada over the past few years, and that’s smoke from nearby wildfires.
During both of our most recent trips, we had significant parts of our trips where wildfire smoke was thick in Banff and Jasper.
It’s a reality of life on a planet whose climate is changing at an alarming pace, and there’s really nothing you can do to work around it if you have a limited time in the Canadian Rockies.
We like using IQAIr to track air quality, and they have a somewhat accurate (as accurate as something like this could be) forecast feature that helped us plan around particularly bad air quality days.
Just remember that things can change on a dime, even within a few hours, based on wind and precipitation.
For example, we hiked Wilcox Pass in the morning and got a lot of smoke obstructing some of the views. Then, we checked a webcam later that day when we had gotten back home, and it was completely clear.
Getting to Trailheads in Banff: Driving vs. Shuttles
We think it’s worth talking about getting to and from trailheads in Banff, because it is DEFINITELY something you’re going to want to think about as you plan your trip.
Parking at just about every trailhead in Banff is somewhere between annoying and nightmarish.
Lucky for you, Banff has a surprisingly good network of buses and shuttles that will take you to many popular trailheads, including those at Lake Louise, Moraine Lake, and Johnston Canyon.
There are obvious tradeoffs between driving yourself and taking public transportation.
Oftentimes driving yourself allows you to get an earlier start on the trail, which we’d strongly recommend in Banff since nearly every popular trail is packed from about 10am to 3pm.
Public transportation means less parking headaches, but also less flexibility.
Either way, it’s nice to have the option to take public transportation to some of your hikes!
First, let’s talk about the hikes around Lake Louise. If you’re not willing to arrive at the Lake Louise parking lot by 6:30am (or you don’t want to pay $21 to park for the day during the shuttle operational season, from 7 am – 7 pm), take the shuttle or bus.
There are two options here.
- The Parks Canada shuttle leaves from Lake Louise Ski Resort (here on Google Maps), and goes to Lake Louise and Moraine Lake (with a handy little connector shuttle). Reserve well in advance, if you can. More information here.
- The Roam Transit bus, route 8, is a good option that goes from the town of Banff out to Lake Louise, saving you the 45ish minute drive from town to the Lake Louise Ski Area. Again, it’s very popular, so book in advance. More information here.
Moraine Lake got so popular that they had to close the road to private vehicles year round, and your only option for accessing the lake in July and August is the Parks Canada Shuttle.
In September and October, there’s also a bus that runs directly from Banff through Roam Transit, the Moraine Lake Express (Route 10).
In addition to those two, which are by far the most popular trailheads, there are Roam Transit routes that will take you to the trailhead for Johnston Canyon and Lake Minnewanka. See all of their routes here.
Other Things to Know Before You Go
Here are some other important things to know before you hit the trail.
You need a Parks Canada Pass while you’re in the park. You have two options – buy a pass for the number of days you need it for, or buy a Discovery Pass, which gives you access to all national parks in Canada for a full year.
At a high level, the math on the Discovery Pass works out if you’re spending 7 days or more in the parks, though there are some permutations around family passes that might make the math change in your particular instance.
You can buy both versions at the park entrance stations, or online in advance.
You’re at elevation, even at the beginning of a hike. This is the Rocky Mountains, after all.
Banff sits at 4,500 feet above sea level, and many of the best hikes start at 5,000 feet or above, climbing another few thousand feet from there.
There are two things to keep in mind here.
First, you need to stay hydrated and wear sun protection on all of your hikes.
Second, if you have any flexibility and you’re coming from sea level (like us), try to save the harder hikes for later in your trip when you’re more acclimated to the elevation.
For example, we did Johnston Canyon and the Ink Pots on our first day, and tackled harder hikes on subsequent days.
Hikes here feature lots of up/down and rocky trails. Again, it’s the Rocky Mountains! You definitely want to come prepared for uneven surfaces and slippery rocks, which means sturdy hiking boots.
Alysha has hiked hundreds of miles around North America in her Columbia Newton Ridge boots, which might be the best intro pair of hiking boots out there.
We’d also suggest trekking poles to save your knees on the steep downhill portions (we used to poke fun at trekking poles, now you won’t find us on the trail without them #thisis30).
Layers layers layers! You want to be prepared for three seasons in a day when you’re in Banff, and that means that layers are your best friend.
Our go-to layering pieces are a long sleeve t-shirt (for sun protection), a lightweight fleece (we love the Trail Mix pullover from Outdoor Research), and a lightweight puffy jacket (we both love our Patagonia NanoPuff jackets, which we’ve had for years and years now and are still going strong).
You’re in bear country. Both black and grizzly bears live in Banff National Park, and we saw both (though never up close on a hiking trail, thankfully).
Our biggest tip is to make plenty of noise on the trail – Matt is known for freestyle singing as we hike – so that you avoid any surprise encounters.
You’ll also want to have bear spray, which you can get in town if you’re flying in (you can’t bring bear spray on a plane).
You should check with your hotel or lodge because many of the best places to stay in Banff will lend it to you.
Expect afternoon thunderstorms in the summer. As if you needed another reason to get an early start, we got thunderstorms nearly every single day sometime between noon and 4pm.
If you do a hike above the treeline, you’ll want to be on your way down by the time they roll in.
Trail Closures are fairly common in Banff. Mostly because of bear activity or weather. Check here for current conditions.