Hiking the Maple Pass Trail: A Complete Guide
Let’s start this guide with a lukewarm take: the Maple Pass trail is our favorite hike in the state (and potentially the entire Pacific Northwest). We’re here to bring our experiences on the trail to help you plan an incredible day out in the wilderness of the North Cascades.
We love this hike, and have done it multiple times over the past few years because it never disappoints.
Between the marmot squeaks following you as you make the climb up to the pass, the views out over the Cascades and beyond from the top, and the wildflowers or larches present in the early summer or fall, this hike has everything we love about hiking in the mountains of the Pacific Northwest.
In fact, if you’ve read our guide to the best hikes in Washington State, you know that we firmly believe that this hike is the best hike in the state, especially when you consider the relative effort.
In this guide, you’ll find a complete trail guide that will answer all of the questions (we think, anyway) you might have about hiking the Maple Pass Loop trail (technically, it’s the Heather-Maple Pass Trail because you hit both passes).
We’ll start with some logistics, like what the parking situation looks like at the trailhead, what direction to hike in, and what parking pass you need, before we get into a trail description that’s based on our multiple trips out on this trail.
By the end, our intention is that you’ll have everything you need to know to hit the trail safely and have an amazing day out on this drop dead gorgeous trail in the North Cascades.
Sound good to you? Let’s get into it.
Disclaimer: Some of the links in this post, like hotel links, are affiliate links, meaning at no additional cost to you, we make a little bit of money if you click through and book. That being said, we would never recommend something to you that we don’t stand behind 100%.
Maple Pass: Trail Details
- Length: 7.6 miles
- Elevation Gain: 2,100 feet
- Trail Type: Loop
- Difficulty: Difficult
- Pass Required? Northwest Forest Pass OR America the Beautiful Pass
- Dog-Friendly? Technically, part of it is dog-friendly, but the best part of the hike is on National Park land and is not. So leave the pups at home for this one.
- Trailhead Location: Rainy Pass Trailhead
How Difficult is the Maple Pass Loop Trail?
This is one of the most popular hikes in the state, particularly for that short 10-14 days in the fall when the oranges and reds of the underbrush seemingly light the hillsides on fire, and the golden larches pop off of the proverbial page.
However, this is not an easy hike by any means. You’re covering 7.6 miles and doing a significant amount of climbing along the way.
We’d put the Heather-Maple Pass Loop in the “difficult” category, but it’s definitely on the easier side of difficult in this neck of the woods, where it’s not uncommon to see hikes that are 8-10 miles with 3,000 feet of elevation gain.
You need to be prepared for any and all weather conditions, including rain, snow and ice on the trail, and heat. Bring sun protection, snacks, and plenty of water in the summer, and dress in layers.
We like a sweat-wicking long sleeve shirt (not cotton!), a lightweight fleece, and a puffy jacket (along with a rain jacket in our pack, just in case).
For an easier hike that also features larches and a great alpine lake, head a few miles up the road to the Blue Lake Trail, another one of our favorite hikes in North Cascades National Park (and a hike that’s near the top of our list of easy hikes in Washington – great bang for your buck!).
Getting to the Rainy Pass Trailhead
This hike leaves from the Rainy Pass Trailhead / Picnic Area right off of Highway 20 (aka North Cascades Highway).
As we’ve mentioned in other places, like our North Cascades itinerary or our Washington road trip itinerary, this trail is on the eastern edge of the park, which means it’s pretty far from just about every campground or place to stay on the western side of the park.
Plan to spend 40 minutes on the road if you’re coming from Colonial Creek Campground, and just under an hour if you’re coming from Newhalem Campground.
Parking at the Rainy Pass Trailhead
The parking lot for this hike is actually a big parking area with spaces for RVs and trailers, though because of the hike’s popularity, it is often full by 10am, if not earlier on busy summer weekends.
Between the crowds in the parking lot and on the trail, our biggest piece of advice for this hike is to wake up early and arrive at the trailhead no later than 8am, which is what we’ve done both times.
In both instances, we saw not one single person on the trail until we got up to Maple Pass and met people coming up the other direction.
If the parking lot is full, you’re technically allowed to park on the side of the highway, but it will add a significant chunk to your hike. Make sure to pay attention to any and all “no parking” signs.
There are toilets at the trailhead.
Despite the fact that it’s listed as a hike inside North Cascades National Park, the trailhead is technically just outside the eastern boundary of the park, which means the pass you need is a Northwest Forest Pass.
You can either bring $5 cash and pay using a day pass envelope at the trailhead, or buy an annual pass in advance ($30).
Be aware that the day pass envelopes are sometimes unavailable at the trailhead, which is why we usually recommend buying in advance (you can also buy day passes in advance, if you don’t want an annual pass).
An America the Beautiful Pass (aka a National Parks Pass) also covers you here, since it covers all national recreation land, including national forests.
The Best Time to Hike the Heather – Maple Pass Loop
This is, perhaps, the most important section of all for a couple of different reasons.
We get a TON of questions about when to plan a trip to Washington State, and we’ve come to learn that our idea of summer (as residents of the Pacific Northwest, plus Matt’s experience growing up here) is VERY different from the ideas of people who live elsewhere.
Even friends who have relocated to the Northwest more recently still fall into the trap of expecting to go to Rainier or the North Cascades in June and being able to hike higher elevation trails without snow or ice.
The best time to hike the Heather-Maple Pass Loop (and other high elevation hikes in the North Cascades) is going to be late-July through mid-October.
That’s when you’re most likely to find roads open (North Cascades Highway / Highway 20 closes from November to April each year – you can check the status of the road here), trails free of snow, and long, warm days that are perfect for hiking.
Yes, you counted right. That’s only three months! This far north you’ll find a painfully short three month hiking season for the higher elevation trails.
However, each month brings a slightly different look and feel to the trail, which we think is a cool aspect of this part of the world.
Late July through August gives you the best chances at nice weather, and the earlier side of that time frame brings all sorts of wildflowers to the slopes along this trail.
However, it’s also the busiest time of year, and the park is full of families with kids making the most of their school’s summer break.
September is our favorite time to hike in the Pacific Northwest, and it brings slightly cooler temperatures and shorter days, but far less people out and about on the trails.
October is another very popular time to hike this trail for one specific reason: the golden larches that light up the hillsides for one spectacular week in October.
Which week will it be? Nobody knows until it happens! However, it’s generally sometime in the first two weeks of October.
The weather in October will be cooler – you might even see snow and freezing temperatures – but provided you have the right equipment, the larches are worth braving the more unpredictable weather.
By the end of October, the three months of prime hiking season is over, and snow returns to the trail, putting it into hibernation until the next summer when it happens all over again.
Should You Hike Clockwise or Counterclockwise?
One thing we wanted to touch on before we get into the trail guide itself is which direction to hike this loop in.
There’s no “wrong” direction, per se, but there certainly are pros and cons to each option.
For what it’s worth, we’ve done this hike counter-clockwise every time, and that’s the way we’d recommend going (and the way we’ll continue going in the future).
By doing the hike counterclockwise, you’re going to get a more gradual ascent up to the ridgeline, which you’ll follow until you reach the highest point on the hike at Maple Pass.
From there, it’s a steep descent straight down a set of switchbacks back to the bottom of the hike.
By hiking clockwise, your hike starts with an unrelenting climb up those switchbacks, climbing the entire 2,200 feet of elevation gain over 2.3 miles or so.
Then, once you’re up at Maple Pass, it’s a long, gradual descent back down to the trailhead.
That’s a BRUTAL climb, but if you have bad knees, it’s probably better to go up that section than down.
Ultimately, it comes down to your personal preferences, and there’s no wrong answer.
If you’d rather enjoy a more gradual ascent, with the best views at Maple Pass in front of you as you hit the descent, go counterclockwise.
If you have bad knees or prefer to get the bulk of the climbing done early before coasting back downhill, enjoying the views that unfold along the way, go clockwise.
The Maple Pass Trail: A Complete Hiking Guide
In this section, we’re going to go through the hike from beginning to end so that you know what to expect when you hit the trail.
For each section, we’ll give you the (rough) distance and elevation gained in that portion of the hike, along with a relatively short description of the terrain, calling out anything that we think might be useful to know (e.g. there’s a steep section with some scrambling, there’s a toilet, etc).
It’s worth noting that we’re going to cover this hike in the counterclockwise direction, with the more gradual ascent and the short, steep descent at the end.
That’s how we’ve done it (multiple times), and how we’d recommend doing it for most people.
From the Trailhead to Lake Ann
Distance: 1.8 miles // Elevation Gain: 600 feet
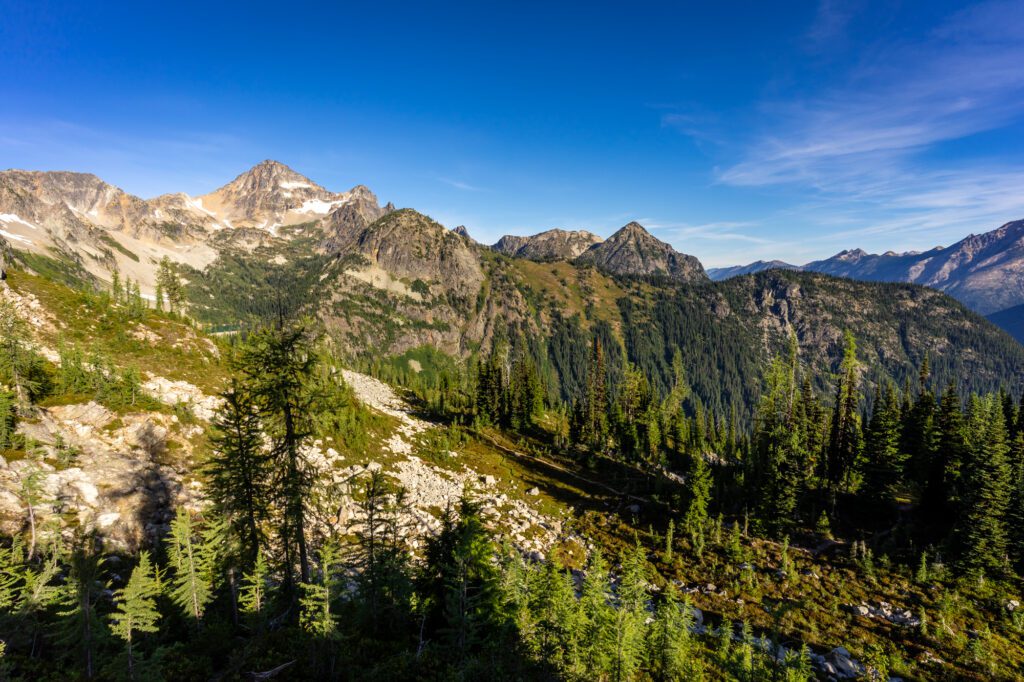
As soon as you set off from the trailhead, you’ll start a gradual climb that essentially continues all the way through the hike to Maple Pass, the highest point on the trail, at roughly the same rate.
The majority of this first section is forested, and there aren’t really any views to be had yet. It’s a good place to put your head down and push to Lake Ann.
There are a couple of sections where the trail emerges from the forest, looking out over a meadow or boulder field where you’ll hear (and, if you’re lucky, see) the marmots that call this landscape home.
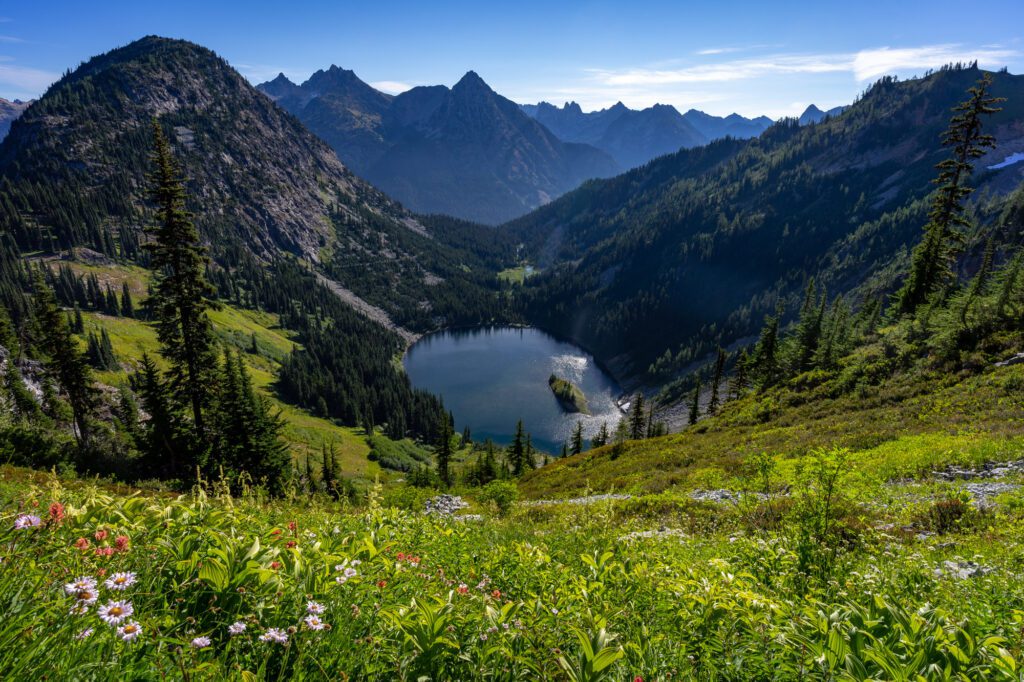
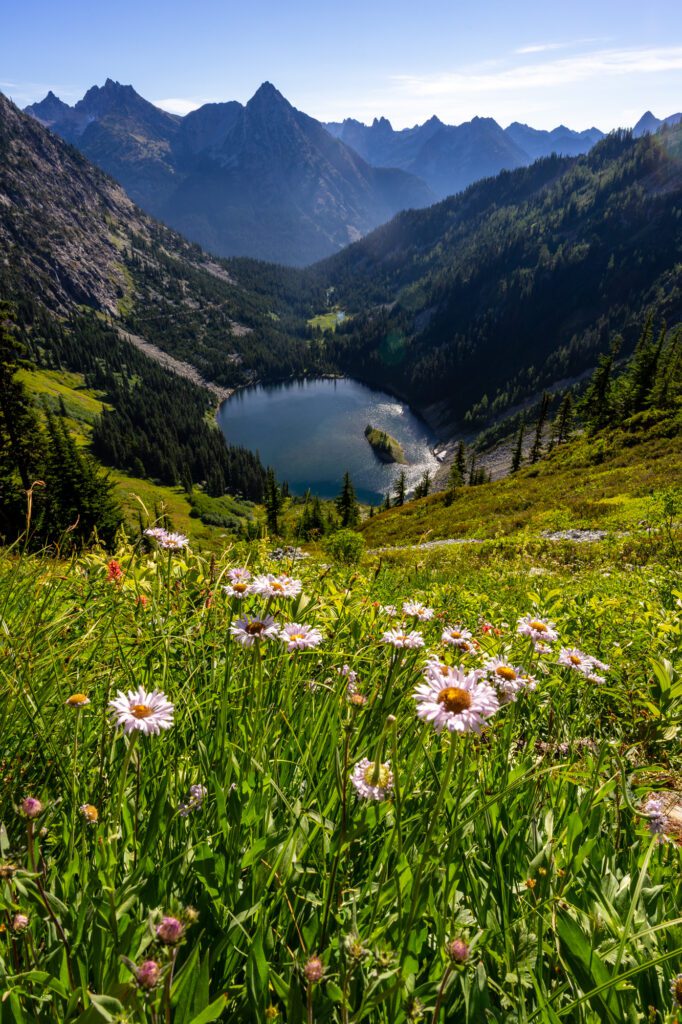
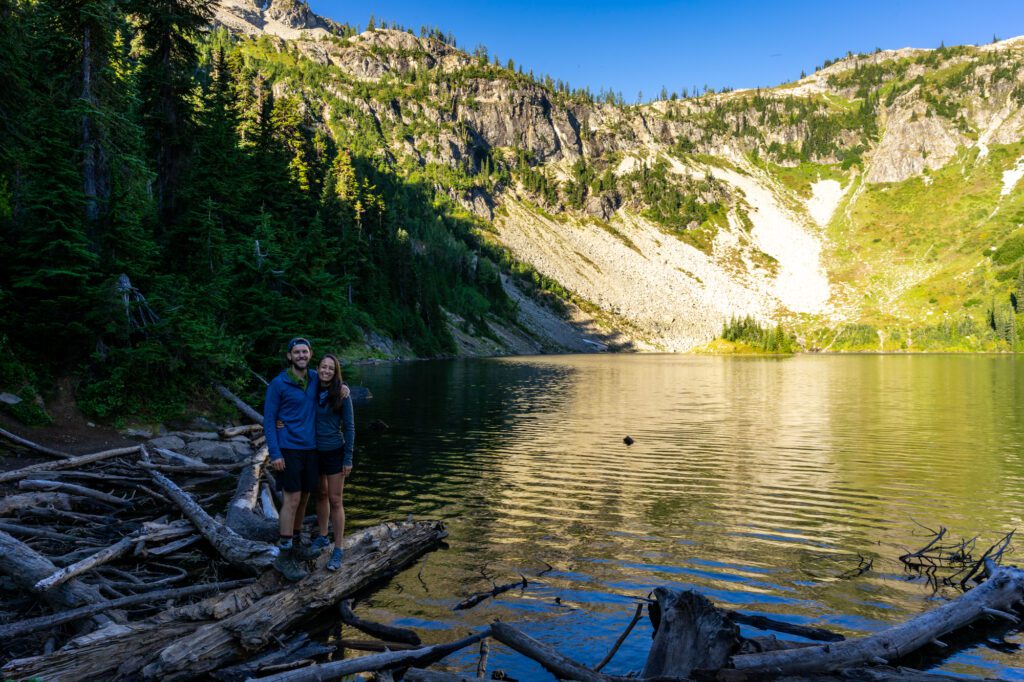
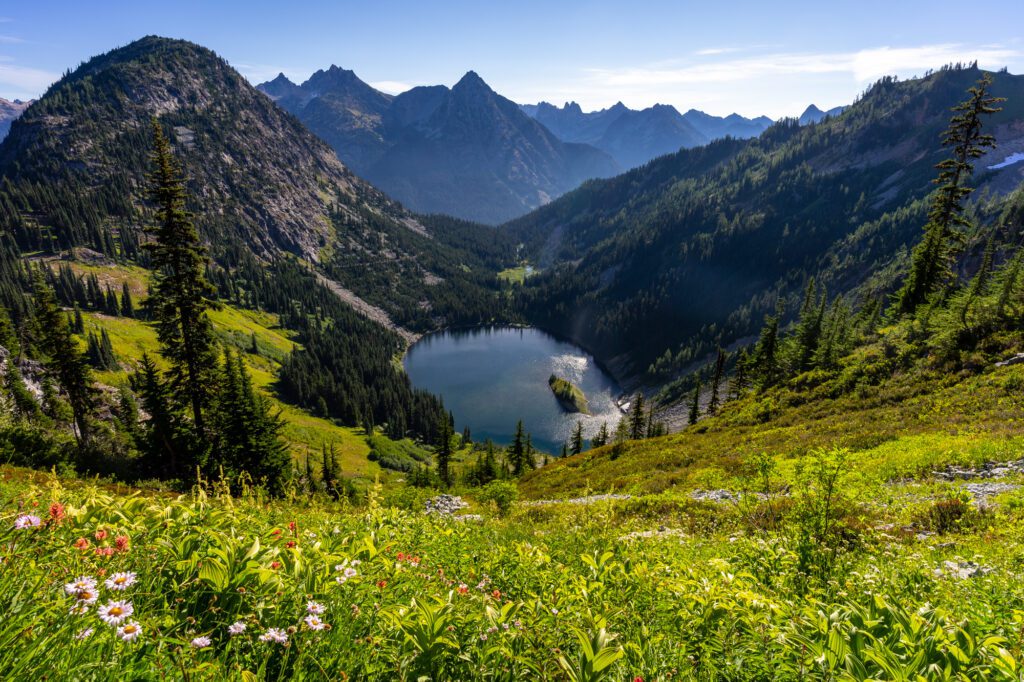
At 1.2 miles into the hike, you’ll hit the junction to Lake Ann. We think you should do it because it’s mostly flat, adds 1.2 miles round trip, and you get right down to the shore of a beautiful alpine lake.
Plus, you get to see the trail you’re about to tackle from below, which will give you a sense of scale and appreciation when you hit the top.
From the junction, it’s 0.6 miles out to the lake.
Lake Ann to Heather Pass
Distance: 1.7 miles // Elevation Gain: 650 feet
This section starts by returning to the Maple Pass Trail from the shore of Lake Ann on the same spur trail you used to get to the lake, a distance of 0.6 miles.
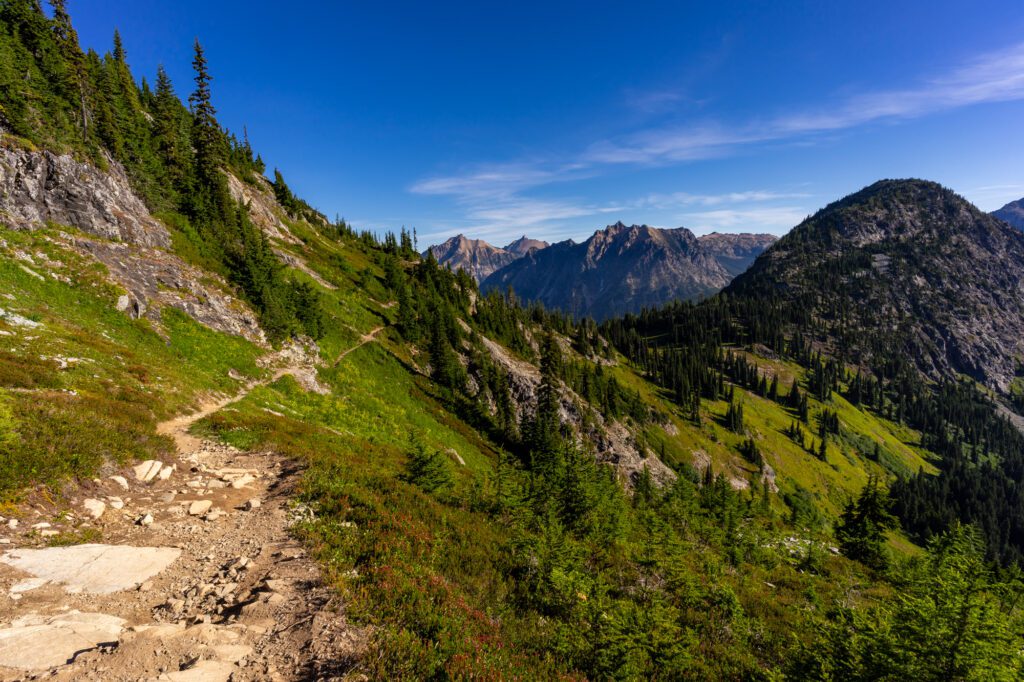
Then, you’ll turn left and continue the gradual climb up to Heather Pass, the first of two passes you’ll have the privilege of standing atop on this trail.
It’s only about a mile up to Heather Pass, and the trail alternates between a steady, rocky grade and sets of switchbacks.
About halfway up to the pass is where the views start to open up, and the good news is that they really only get better from here.
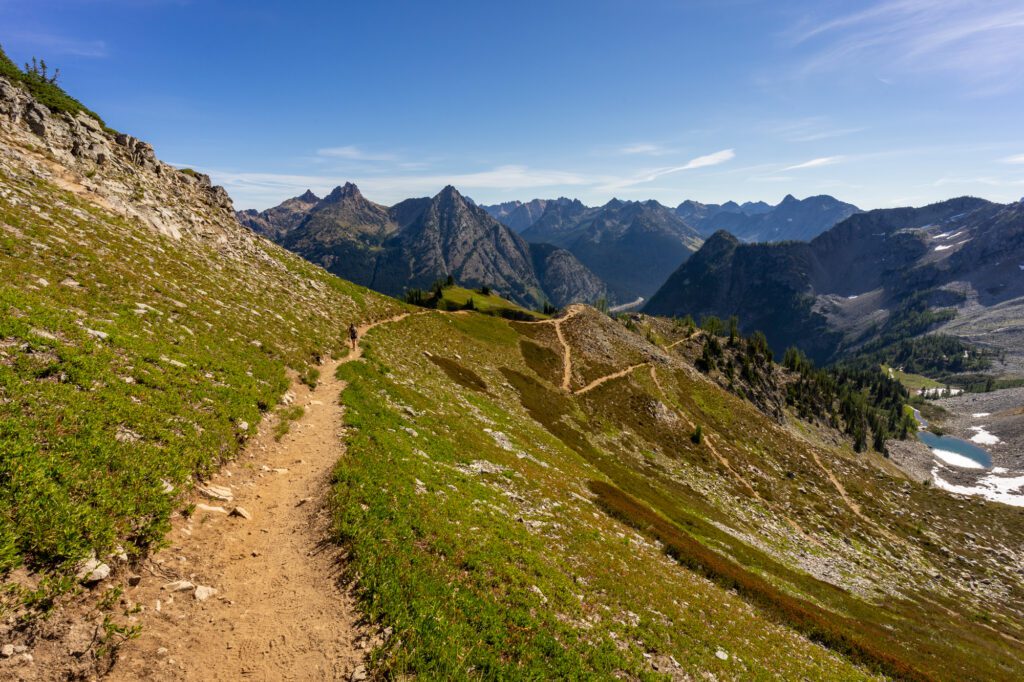
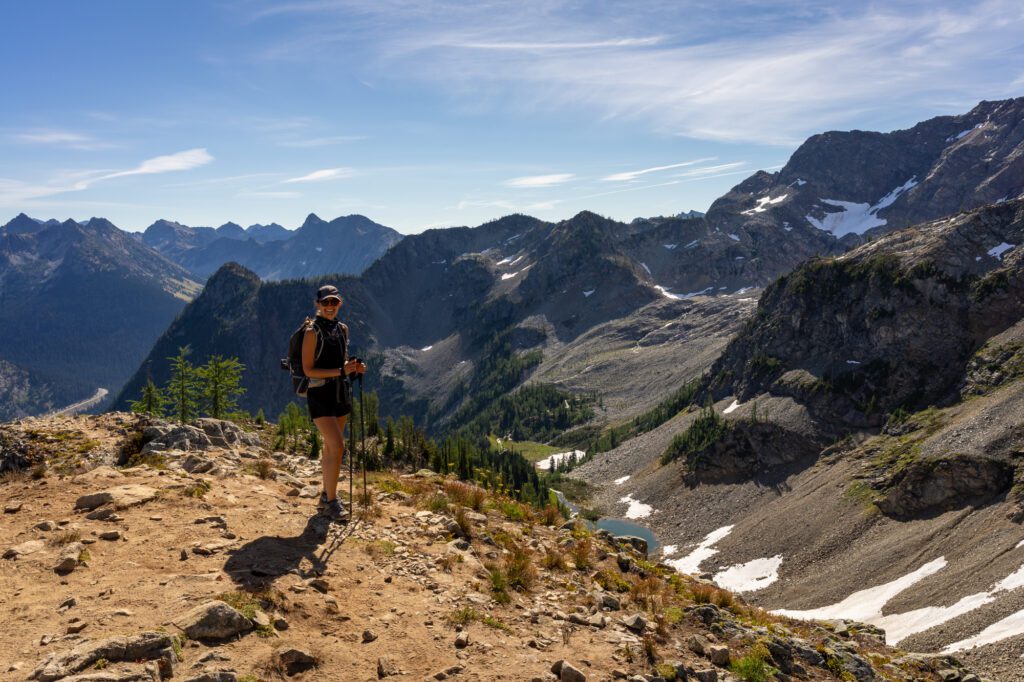
The Final Push to Maple Pass
Distance: 1.4 miles // Elevation Gain: 850 feet
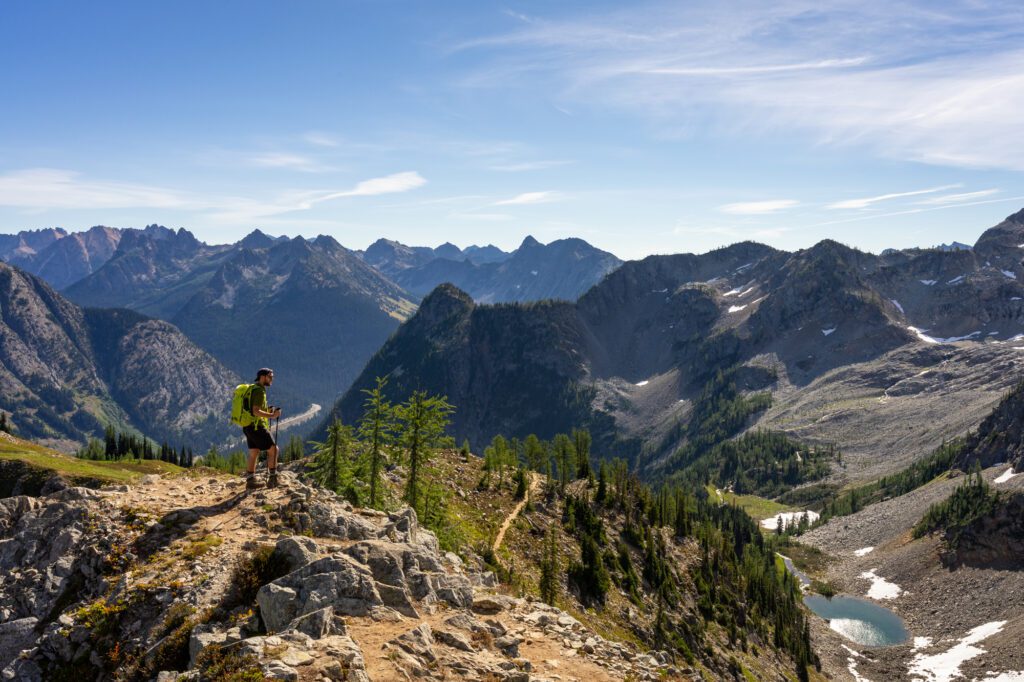
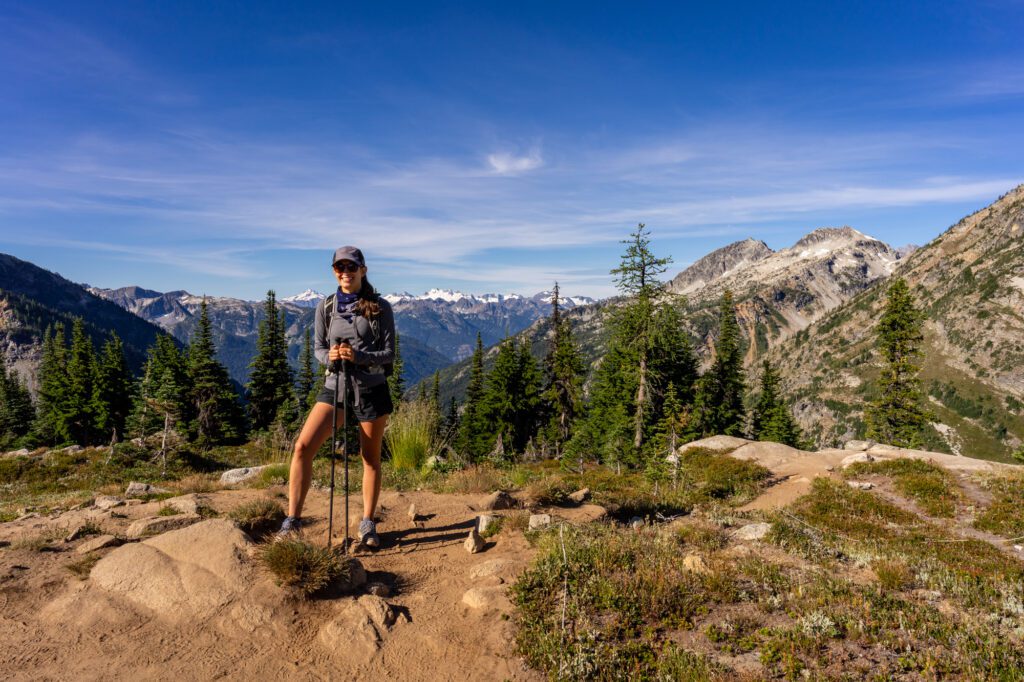
Once you’ve made it to Heather Pass, the trail turns left and continues along the ridgeline, where you’ll have excellent views out over Lake Ann and the Cascades in the distance.
If you’re here in the early summer (late July and early August) and you’re lucky, this section will feature a plethora of wildflowers growing on the hillside above Lake Ann.
If you’re not, you’ll have to settle for the sweeping views, I guess.
This middle section is our favorite part of the hike. Not only do you get some nice views to the east back over Lake Ann, but there are some good views looking west as you approach Maple Pass.
Right before you get to Maple Pass, you’ll see signage informing you that you’re now entering North Cascades National Park, which is why it doesn’t make sense to bring dogs on this hike (they’re allowed in the national forest, but not in the national park).
The Steep Descent Back to the Trailhead
Distance: 2.7 miles // Elevation Loss: 2,100 feet
Now that all of the climbing is out of the way, and you’ve taken a few minutes at Maple Pass to enjoy the view, a snack, and some water, it’s time for an equally difficult descent back to the parking lot.
The first part of the descent is actually very pleasant.
The trail begins to lose elevation with a set of wide, sweeping switchbacks that have you looking east at the jagged mountain peaks of the Cascade Range. There are some truly spectacular views along this stretch.

But all of that comes to an end when you get to the treeline, and the switchbacks become significantly tighter and steeper, and the views basically disappear (except for the occasional obstructed view of Rainy Lake down to your right).
Lucky for you, it’s a relatively short descent, but your legs are going to be burning by the time you hit the bottom. Hiking poles are going to be your friend for this section.
It’s worth noting that the final 0.6 miles of this section is along a paved trail back to the parking lot (the Rainy Lake trail).
Which means the vast majority of the descent happens over 2 miles, and loses 1,000 feet of elevation per mile (which is A LOT).