How to Hike the Tama Lakes Track in Tongariro National Park
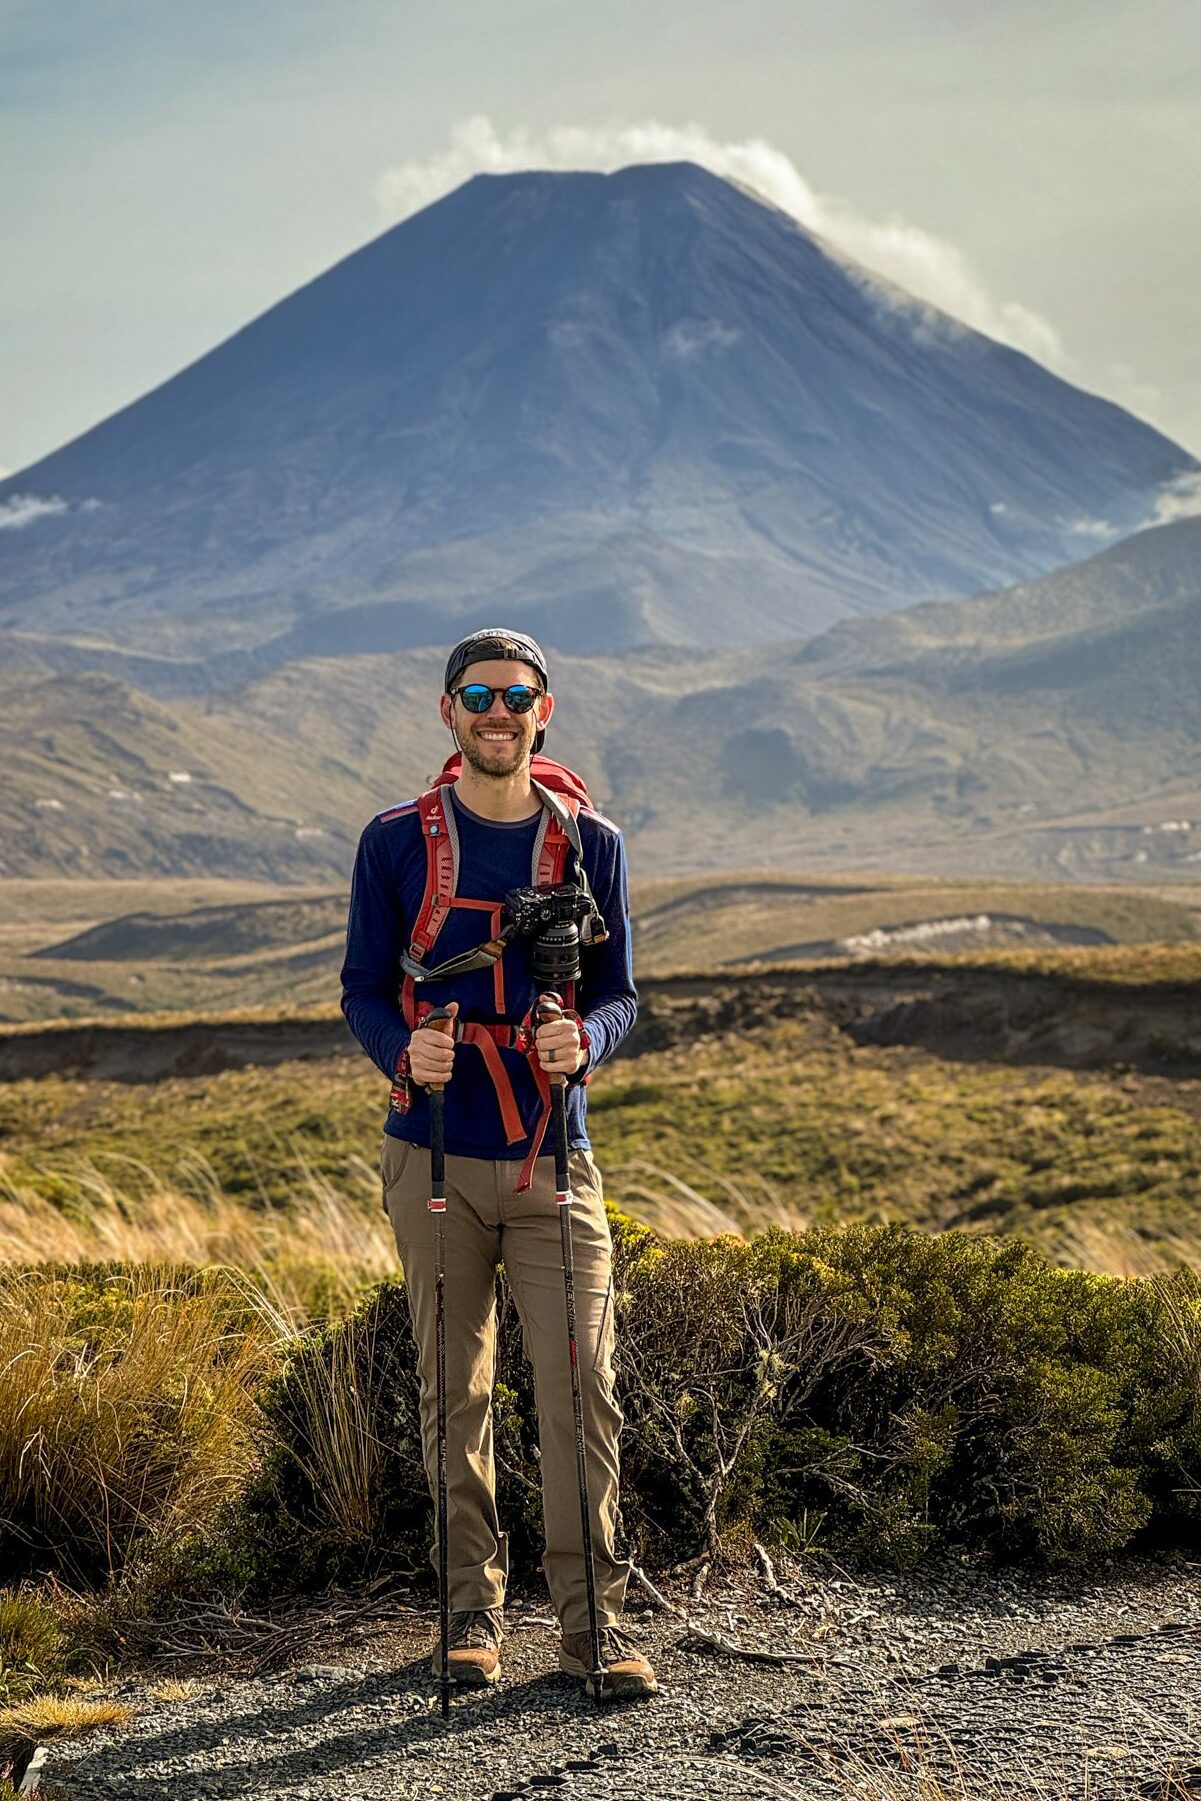
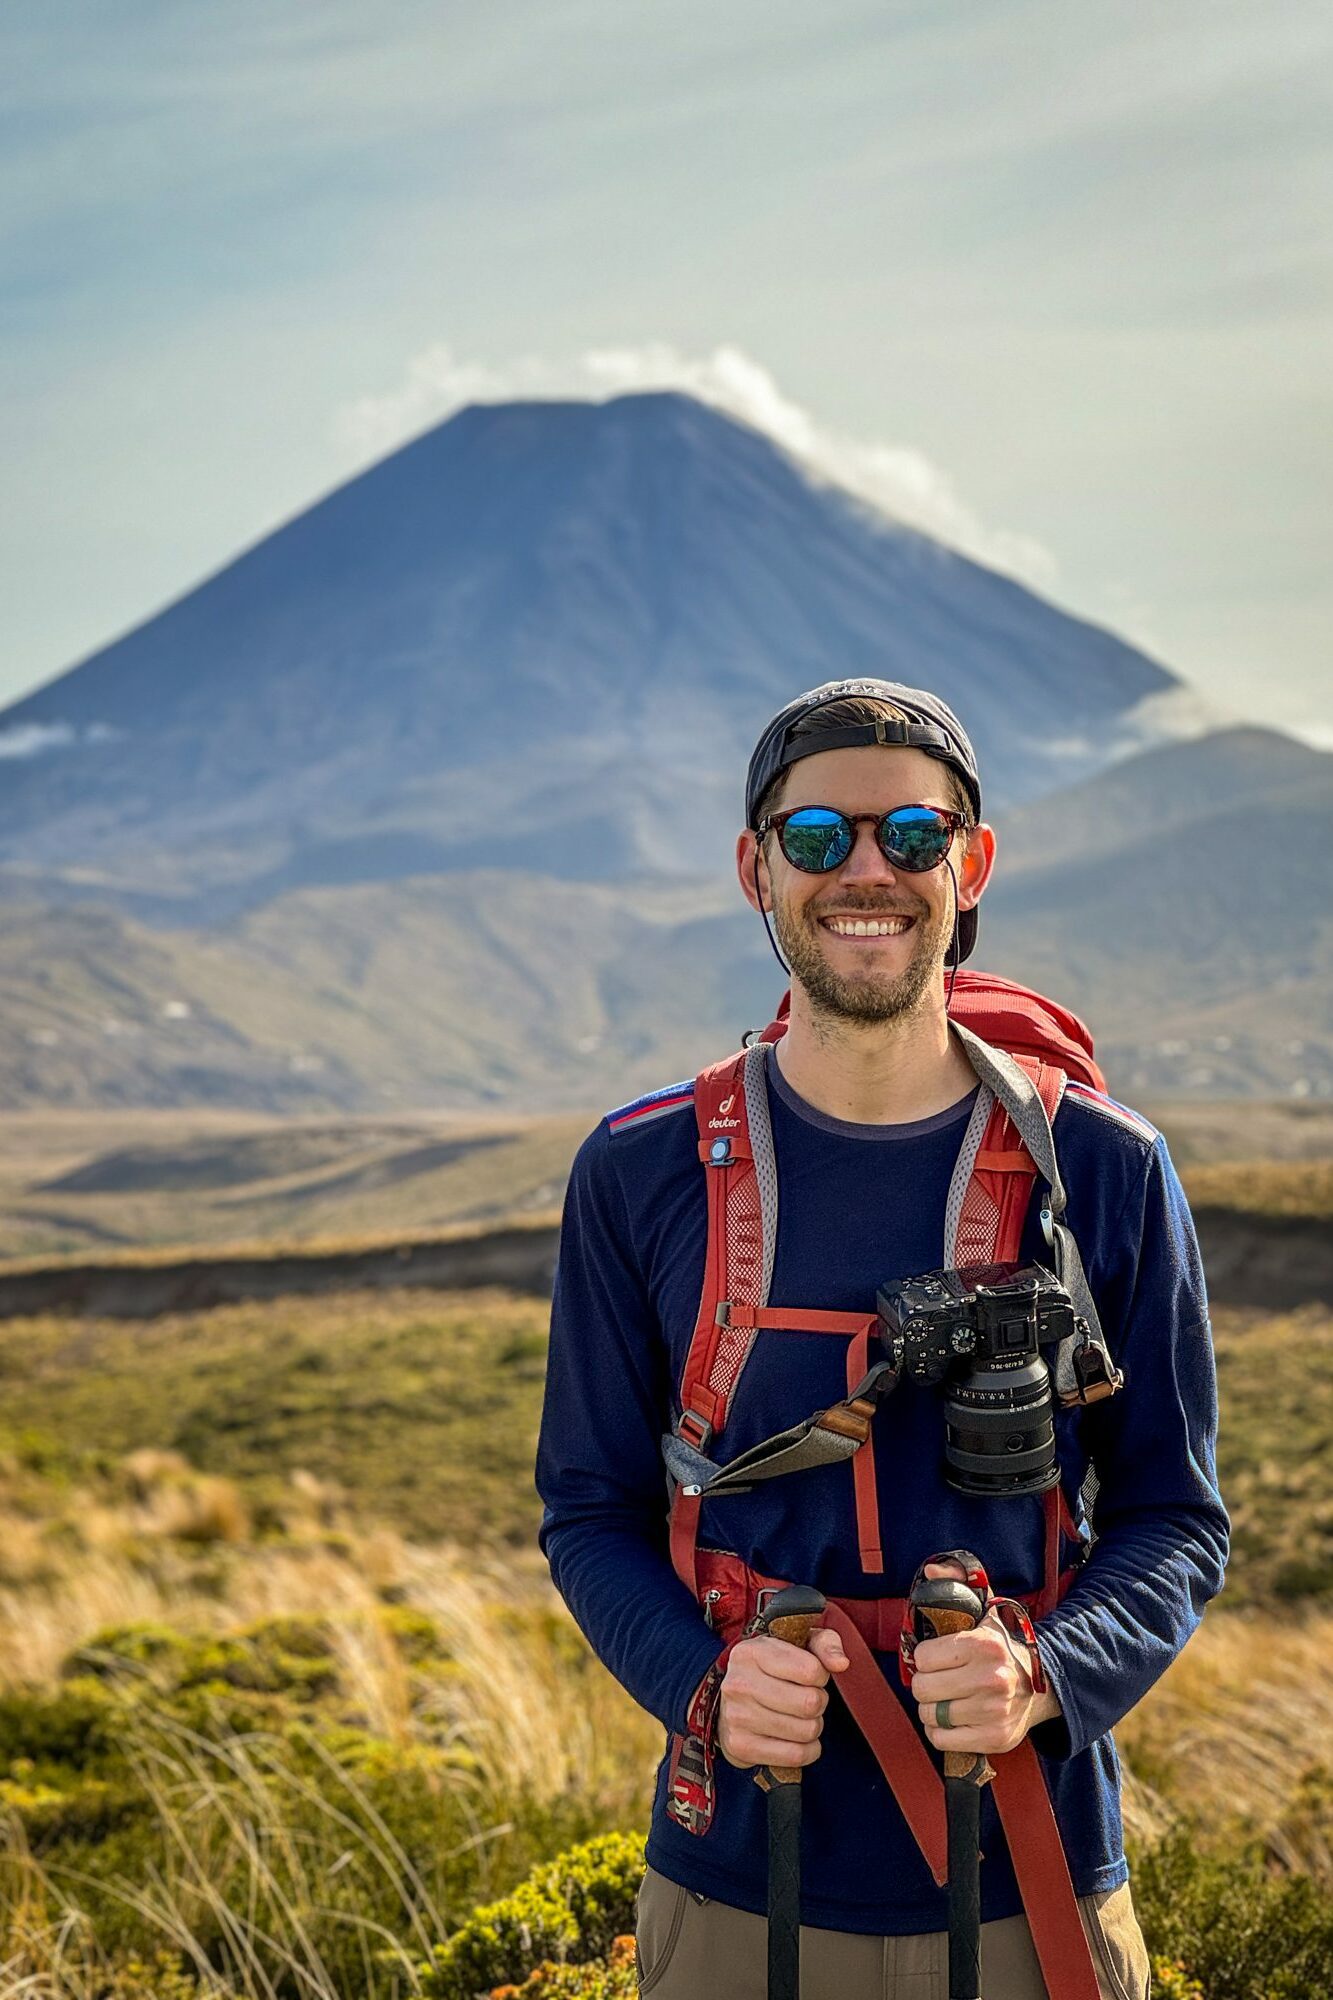
Is there a better way to spend a morning than hiking past a gorgeous waterfall and climbing through the brush with views of not one, but two active volcanoes? The Tama Lakes track takes you through a beautiful, desolate landscape where you’ll have simultaneous views of Mount Ngāuruhoe, the inspiration for Mount Doom in the Lord of the Rings films that Peter Jackson made, and Mount Ruapehu basically the entire way through.
For what it’s worth, we absolutely loved this hike. We did it the day before the more popular Tongariro Alpine Crossing (a must-do for avid hikers on your North Island itinerary, we think), and we think it’s a really solid alternative to hiking the Crossing, which is a much more difficult hike that requires a lot of advance planning (including a $50 shuttle to complete the point-to-point hike).
If you don’t have the time, fitness level, or appetite to spend $50 NZD a person on the shuttle, we’d point you towards the Tama Lakes Track!
In this guide, we’re going to do our best to give you a comprehensive guide to hiking the Tama Lakes track in Tongariro National Park. We’ll cover the important trail details, including the route and start and end points of the hike, along with important logistics and things to know before you hike.
Our intention here is that, by the end of this guide, you’ll have all the information you need to be prepared to tackle the Tama Lakes track in Taranaki National Park safely and confidently.

Disclaimer: Some of the links in this post, like hotel links, are affiliate links, meaning at no additional cost to you, we make a little bit of money if you click through and book. That being said, we would never recommend something to you that we don’t stand behind 100%.
Hiking the Tama Lakes Track: Trail Details
- Length: 16.9 km / 10.5 miles
- Elevation Gain: 518 meters / 1,700 feet
- Trail Type: Lollipop (reverse)
- Difficulty: Moderate / Hard
- Trailhead Location: Taranaki Falls Lower Track
- Dog Friendly? No
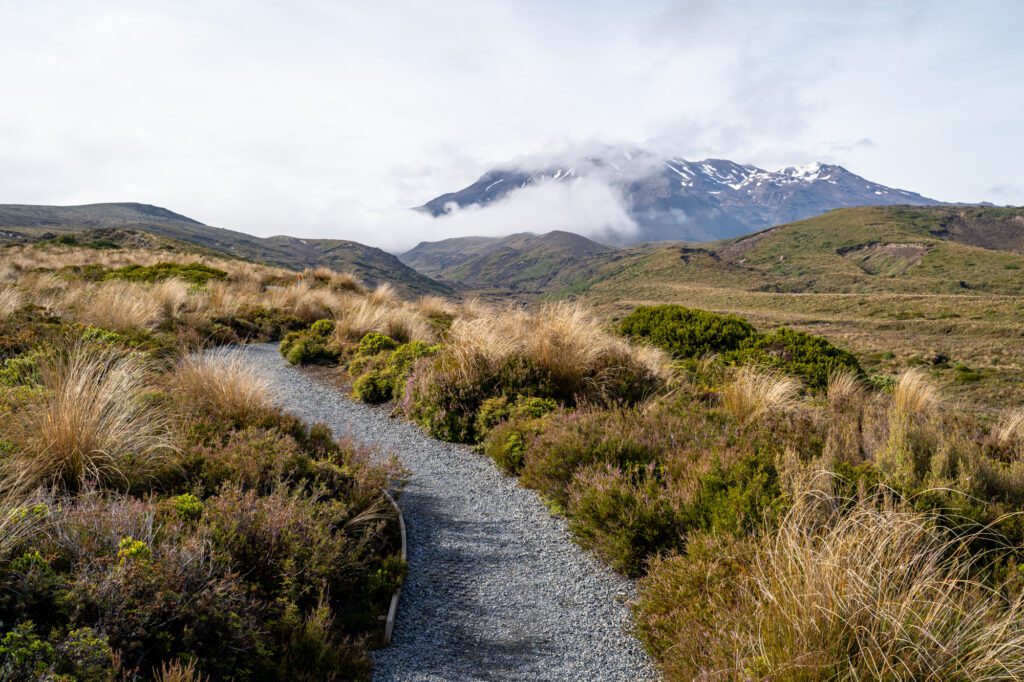
The Route for the Tama Lakes Track
The route for this hike is essentially a reverse lollipop, starting with one part of a loop that begins at the trailhead and ends at Taranaki Falls, where you’ll jump on a spur trail that takes you out to Lower Tama Lake.
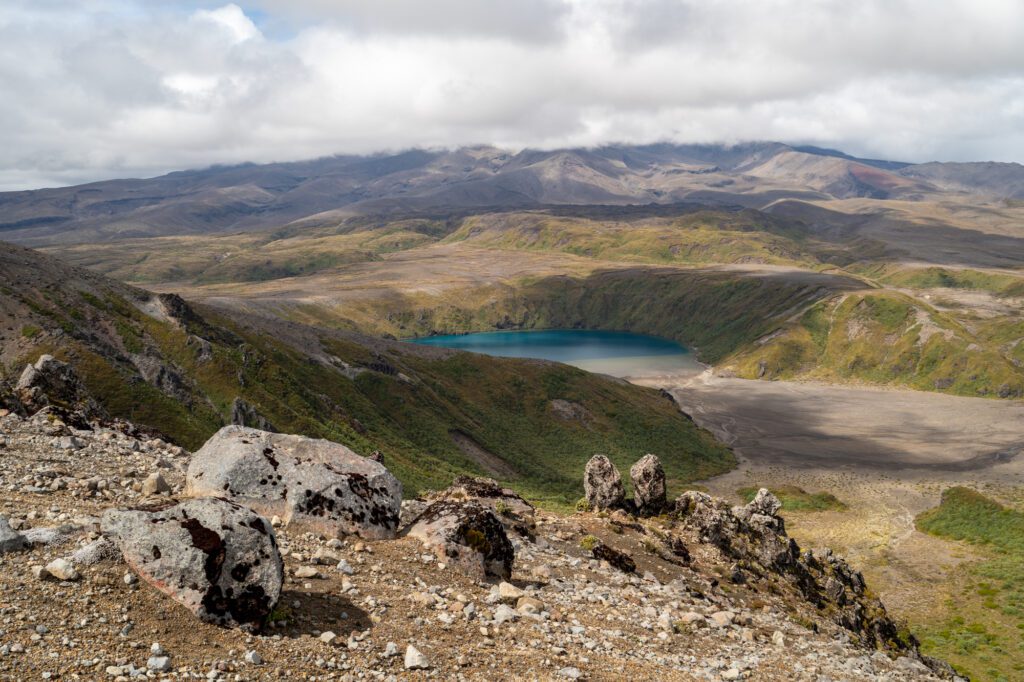
From Lower Tama Lake, it’s a short but intense climb up to a ridge, where you’ll have magnificent views out over both Lower and Upper Tama Lake and, if you’re lucky, both volcanoes.
Now, we did this hike by tackling the loop portion clockwise, which takes you on a steady climb through a forest for the first portion before it opens up and brings you to Taranaki Falls.
Do yourself a favor and hike the loop portion clockwise like we did, because it means you approach Taranaki Falls from below. If you go the other direction, you basically wouldn’t see the waterfall at all until your way down, when you’ll be tired and ready to take your boots off.
Better to see Taranaki Falls, which is beautiful in its own right, while you’re still bright-eyed and bushy-tailed.
Doing it this way means you start the hike on the Lower Taranaki Falls track, which is a short walk from the parking lot (it’s here on Google Maps).
Another pro-tip here: If you have the ability and gas in the tank, don’t stop at the viewpoint for Lower Tama Lakes, because the views from atop the ridge you climb for a glimpse of Upper Tama Lake are absolutely spectacular in all directions. And the views are well worth the price of admission.
Getting to the Trailhead for Tama Lakes (and Parking)
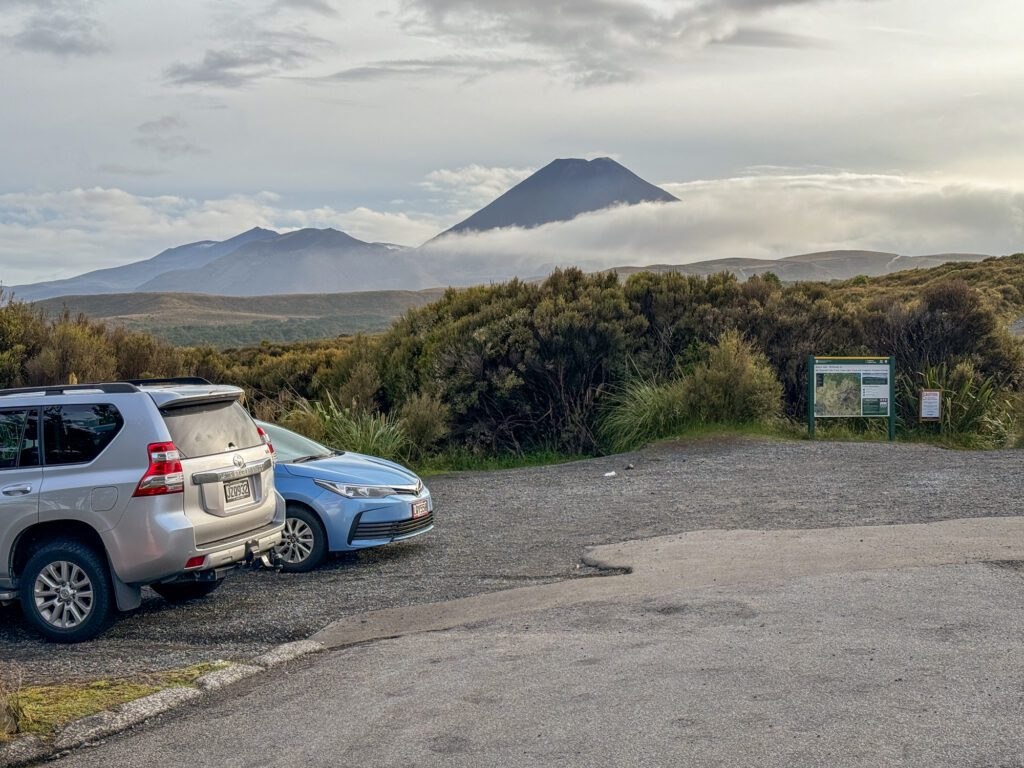
This hike leaves from a tiny parking lot in Whakapapa Village, which has room for roughly 10-12 cars and campervans. It shares a lot with the hike to Taranaki Falls, which is a popular shorter hike in the park.
We arrived at 7:30am and were the third car in the lot. You definitely want to get an early start on this one, both for the parking situation, but also because if you get out early, you’ll have the incredible landscapes out there mostly to yourself.
The lot was mostly full by the time we had put on our gear and headed out just before 8am on a summer weekend morning.
We saw about five day hikers between the parking lot and Lower Tama Lake, and ran into some backpackers doing the Tongariro Circuit while we were up on the ridge. It was a magical morning, and was a stark contrast to the next day when we did the Crossing, which is a little bit of a madhouse.
If you arrive a little later and there is no parking in that lot, the best place to park is in the spots along Highway 48 (here on Google Maps), which has plenty of parking spots and a small lot.
Things to Know Before You Hike to Tama Lakes
Here are a few things we think you should know before you tackle this hike.
There is no shade on this trail. Except for the first kilometer or so (going clockwise), which is somewhat forested. Once you get past that initial section, it’s fully exposed. Remember that the sun is particularly intense in New Zealand, so you’re going to want to apply and reapply sunscreen on this hike. We tend to like hiking in long sleeves and long pants to cover up, even when it’s really hot out. Also, sunglasses – especially polarized ones – will be your friend here.
You need plenty of water, because there is no potable water on this trail. Given the exposure and the distance covered here, you need to bring about 2L of water per person. Yes, that sounds like a lot. Yes, on a hot summer day, you will drink it.
Be prepared to get wet. As you can see from our pictures, we had great weather on the trail as we made our way up to Upper Tama Lake. But on the way down, the clouds and fog rolled in and, at one point, it was raining sideways. And it was raining HARD. We were soaked from head to toe by the time we reached our car, even though we had rain gear. The point is that weather can change quickly, and you want to be prepared for multiple seasons in the same day.
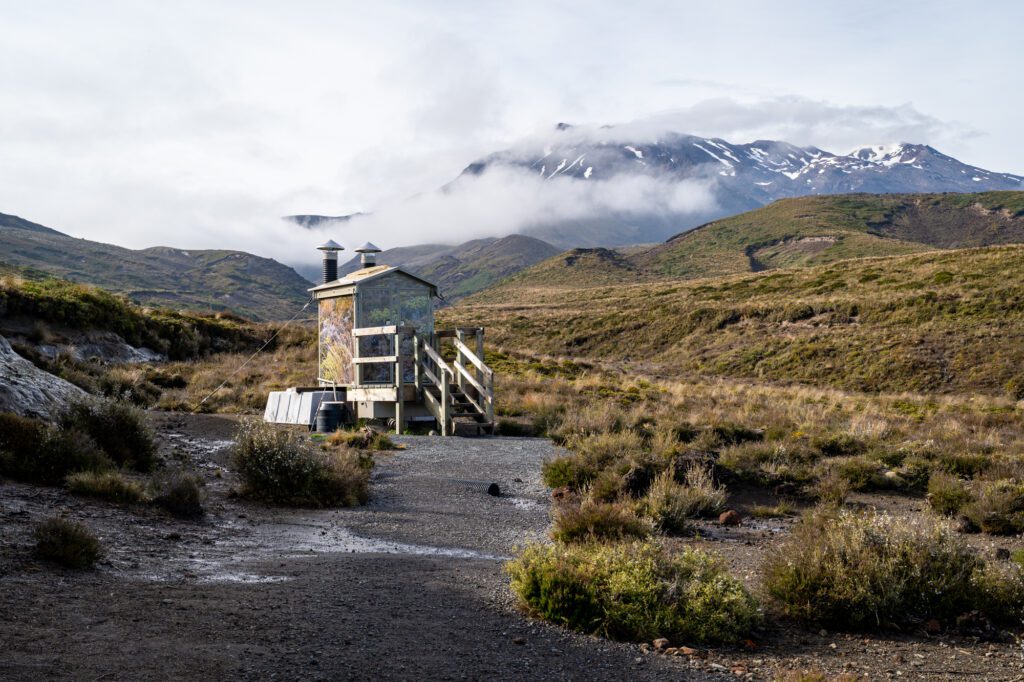
There are toilets along the trail. You have drop toilets above Taranaki Falls and at the junction with the Tongariro Circuit just below Lower Tama Lake (though you should be prepared with your own toilet paper).
The Tama Lakes Track: A Complete Trail Guide
In this section, we’re going to go through the hike from beginning to end so that you know what to expect when you hit the trail.
For each section, we’ll give you the (rough) distance and elevation gained in that portion of the hike, along with a relatively short description of the terrain, calling out anything that we think might be useful to know (e.g. there’s a steep section with some scrambling, there’s a toilet, etc).
The Initial Ascent to Taranaki Falls

Distance: 2.9km (1.8 miles) // Elevation Gain: 335 meters (1,100 feet)
It’s worth a reminder at the top here that, since we’re recommending the route that takes the lower route to Taranaki Falls on the way up, you’ll begin from the Taranaki Falls Lower Track and start on the Taranaki Falls Walking Track.
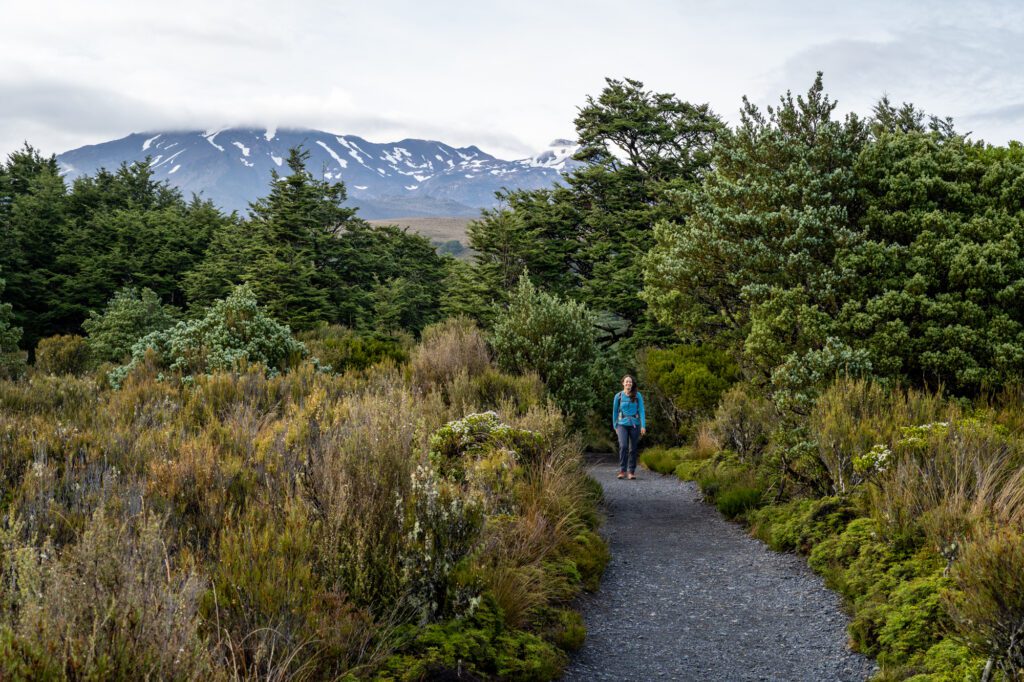
This section of trail is the only portion of the hike that has any tree cover. You’ll start along a well-groomed trail looking directly at Mount Ngāuruhoe and after a short distance, you’ll enter the forest. It’s an up-and-down affair (mostly up) as you climb, with a few sections of steep steps.
If you’re lucky (like we were, at least for this brief moment), you’ll be hiking on a clear day and have views of Mount Ruapehu over your right shoulder, along with a distant view of the Tongariro Chateau.
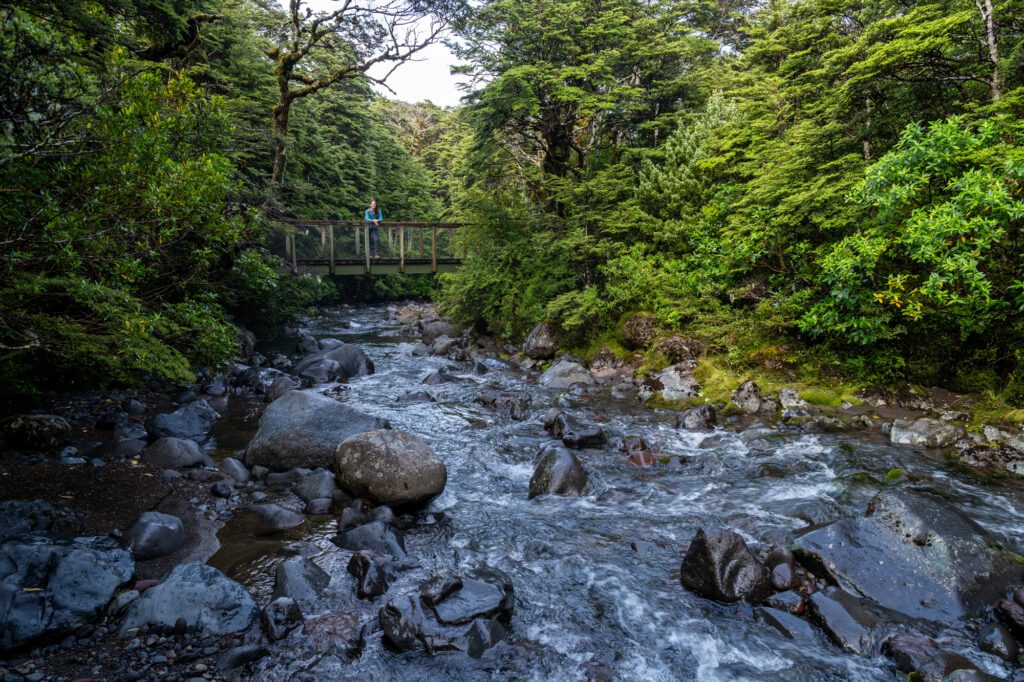
Eventually, the trail brings you to a fork marked by a wooden footbridge over Wairere Stream. You DO NOT want to cross the stream here (though we stopped to take a picture of the picturesque bridge and creek), and you’ll continue along the Lower Taranaki Falls Track to the right.
The trail continues along the stream, and when you cross over it you’ll know you’re within a few hundred meters of Taranaki Falls, which marks the end of this section.
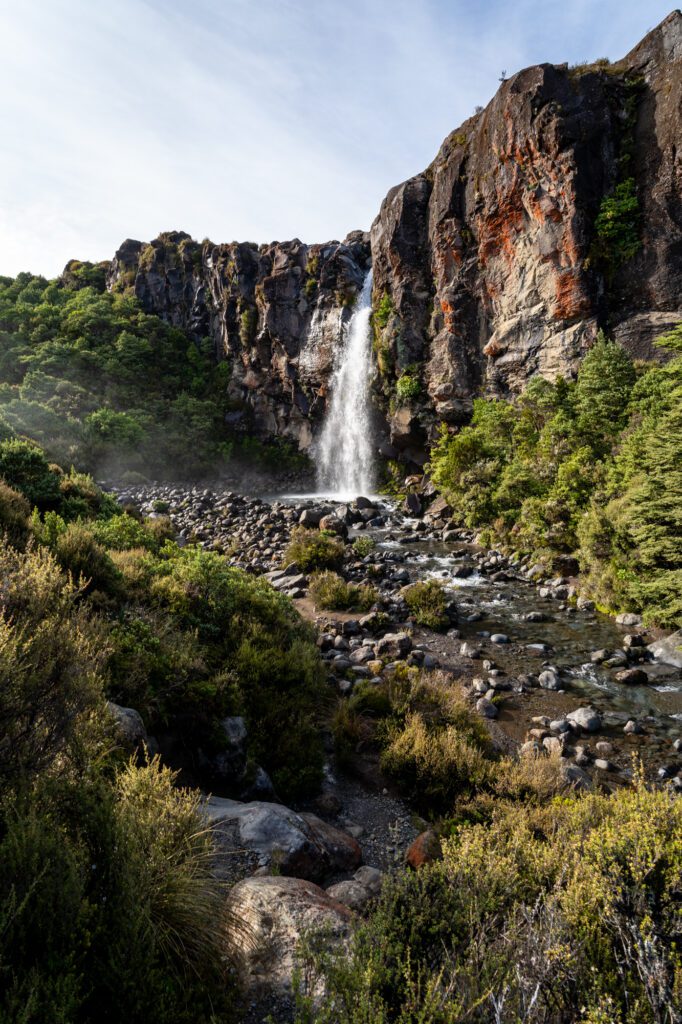
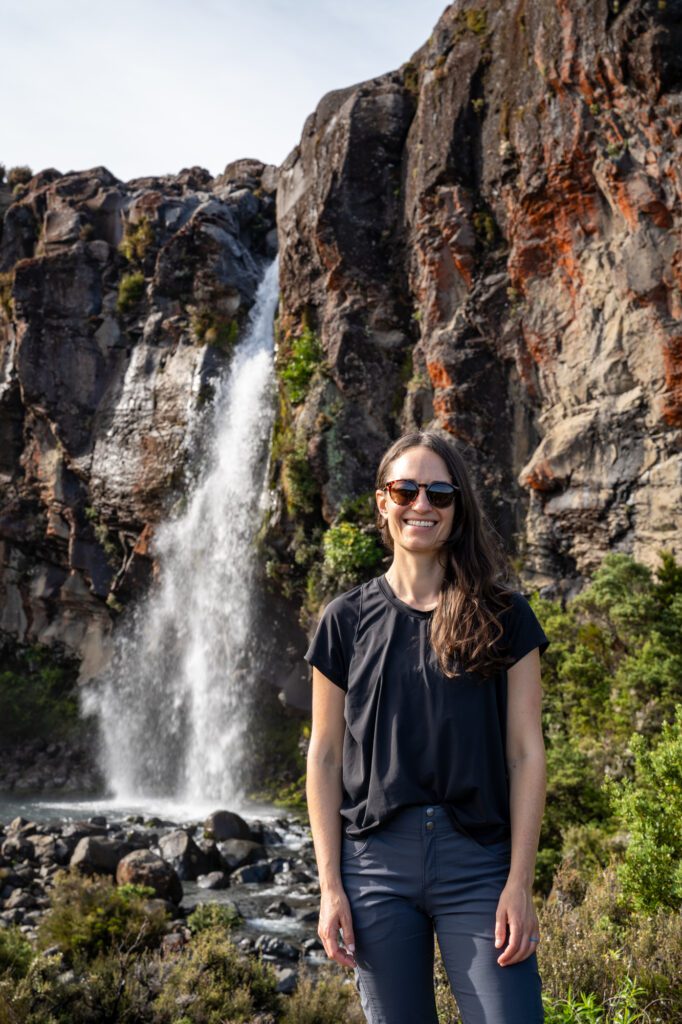
Taranaki Falls is a really nice appetizer to the views that await you as soon as you meet the upper trail at the beginning of the next section.
It’s 20 meters (65 feet) high – we’re from Oregon, land of the waterfalls, and though it’s not the tallest we’ve seen, it’s still impressive – and it tumbles over the ledge formed by lava flows into Wairere stream below, which is what you’ve been following for the past few kilometers.
The coolest part to us was the multi-colored rocks encircling the falls.
After you’ve had your fill of pictures, continue along the trail and tackle the 100 or so steps to bring you to the end of the initial lollipop, where you’ll find a set of toilets and the spur trail that will take you up to Tama Lakes.
The Gradual Climb to Lower Tama Lake
Distance: 4.4km (2.7 miles) // Elevation Gain: 65 meters (200 feet)
From the end of the Taranaki Falls Track, you’ll hop on the Tama Lakes Track for the remainder of the hike.
This section runs from the beginning of the Tama Lakes Track up to the viewpoint for the lower lake. It’s, by far, the easiest section of the hike, climbing roughly 65 meters (200 feet) over 4.4 km (2.7 miles).
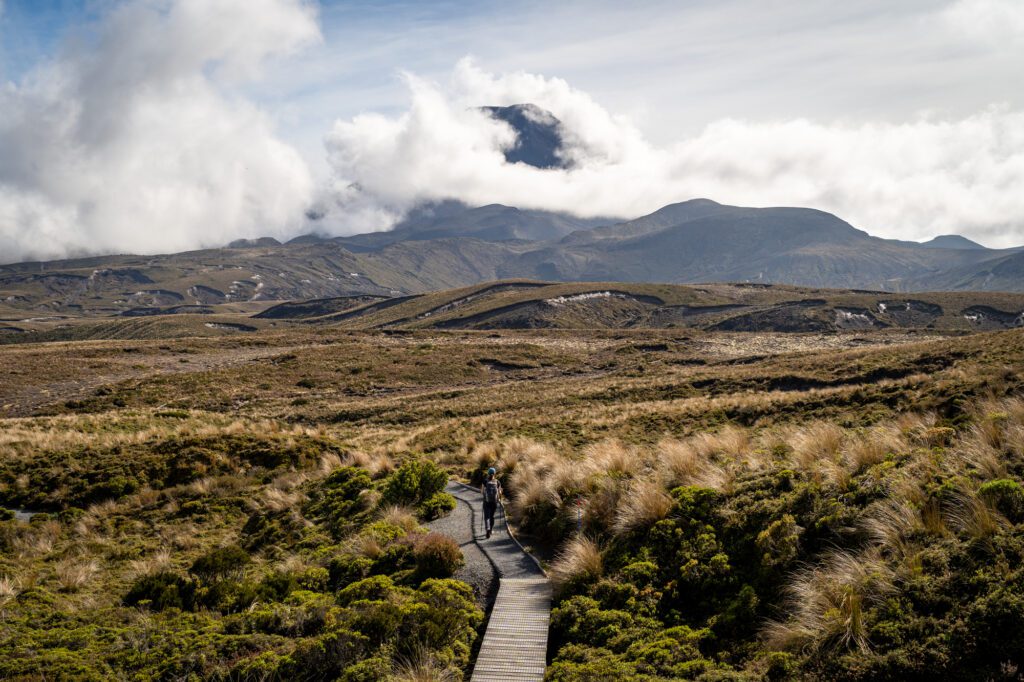
The first couple of kilometers or so of this section might be our favorite part of this hike. It climbs relatively gently through tussock fields, up and over ridges, and along streams. And the entire time, you have views of both volcanoes.
You’ll start climbing directly towards Mount Ruapehu – the biggest of the park’s three volcanoes, and then the trail bends left, climbs to the top of a ridge, and all of a sudden you’re looking across the valley at Mount Ngāuruhoe.
We had excellent, mostly clear weather for this stretch of the trail (the same cannot be said for the way back on this stretch, when it was raining sideways), and were basically dragging our jaws across the ground for this entire stretch.
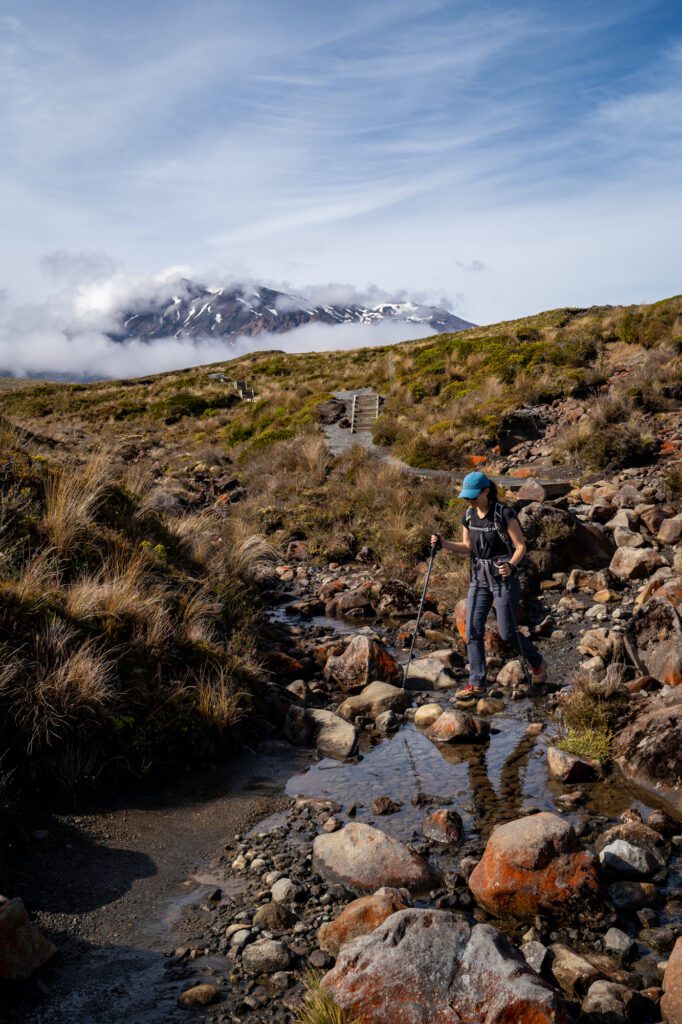
At the 6.4km (almost exactly 4 miles) mark, you’ll come to a trail junction with the Whakapapa – Waihohonu track, where you’ll keep left (right takes you to the Waihohonu Hut, one of the stops on the Tongariro Northern Circuit). There are toilets here if you need to use them.
We met several people backpacking the Tongariro Northern Circuit, which shares the same track for most of this section, along this stretch of trail. Many of them were heading up to the Tama Saddle, leaving their packs at the junction to avoid carrying them any further than absolutely necessary.
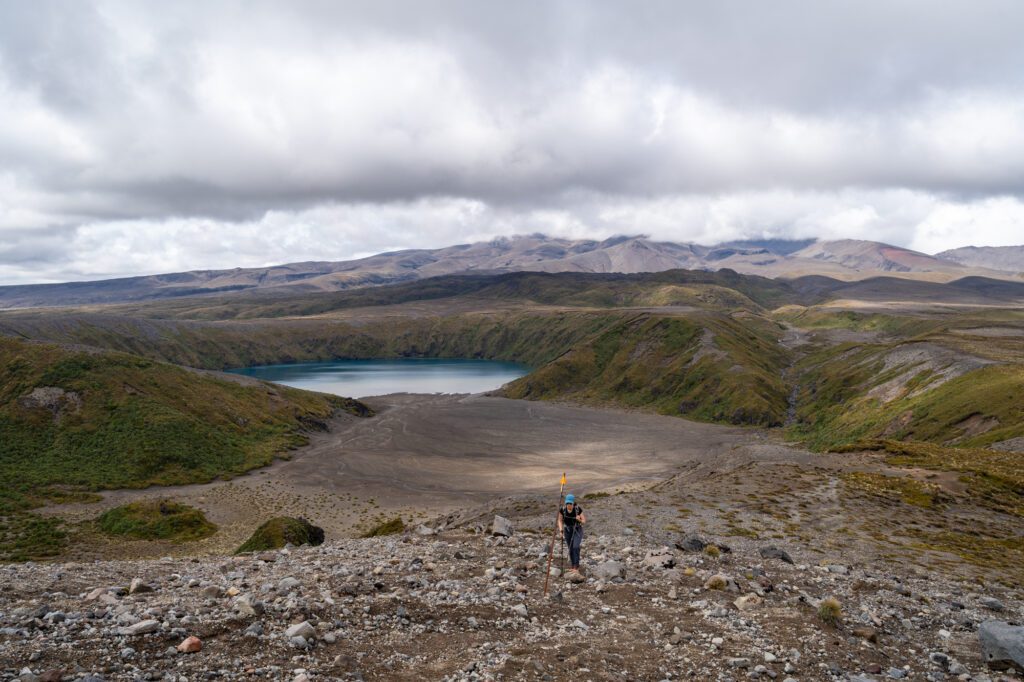
After a short walk along a boardwalk, you’ll arrive at the viewpoint for Lower Tama Lake, which concludes the middle section of this hike. This is a great place to stop for a snack and a drink before you tackle the final ascent, which is by far the hardest part of the hike.
For what it’s worth, we saw a lot of people turning around at this viewpoint and while we understand the avoidance of the steep, rocky climb up to the saddle, we absolutely think it’s worth it.
And we say that as people who couldn’t actually see the volcano from the saddle due to fog. On a clear day, it must be incredible.
The Final Ascent to the Top of the Ridge and the Tama Saddle
Distance: 1.3 km (0.8 miles) // Elevation Gain: 120 meters (400 feet)
As soon as you start this climb, you’ll immediately enter the barren alpine environment that made this an ideal place to film pieces of the Mordor sections of Peter Jackson’s Lord of the Rings movies.
As we’ve already mentioned, this is by far the hardest section of the hike both because of the climbing (generally, we put anything that climbs more than 500 feet per mile in the “hard” category, and this is right in that category) and also because there’s not really a defined trail.
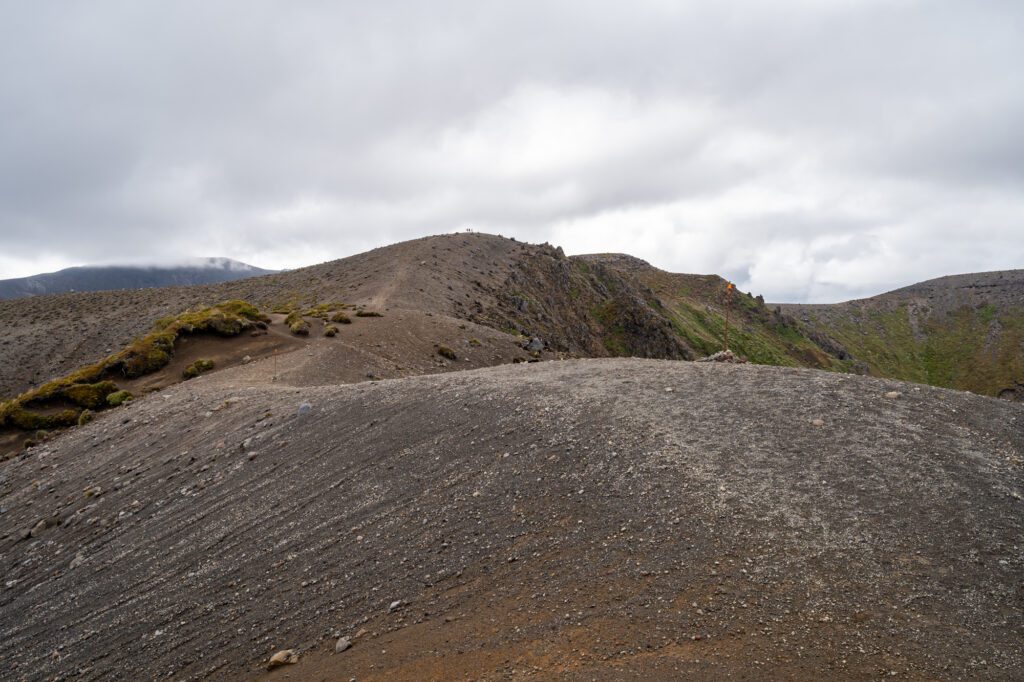
You’ll definitely find trails that other hikers have made, but you’ll be somewhat blazing your own trail here. There are a set of orange-tipped posts that mark the general route you’ll need to follow to get to the saddle, but how you get between them you’ll have to do some light route-finding.
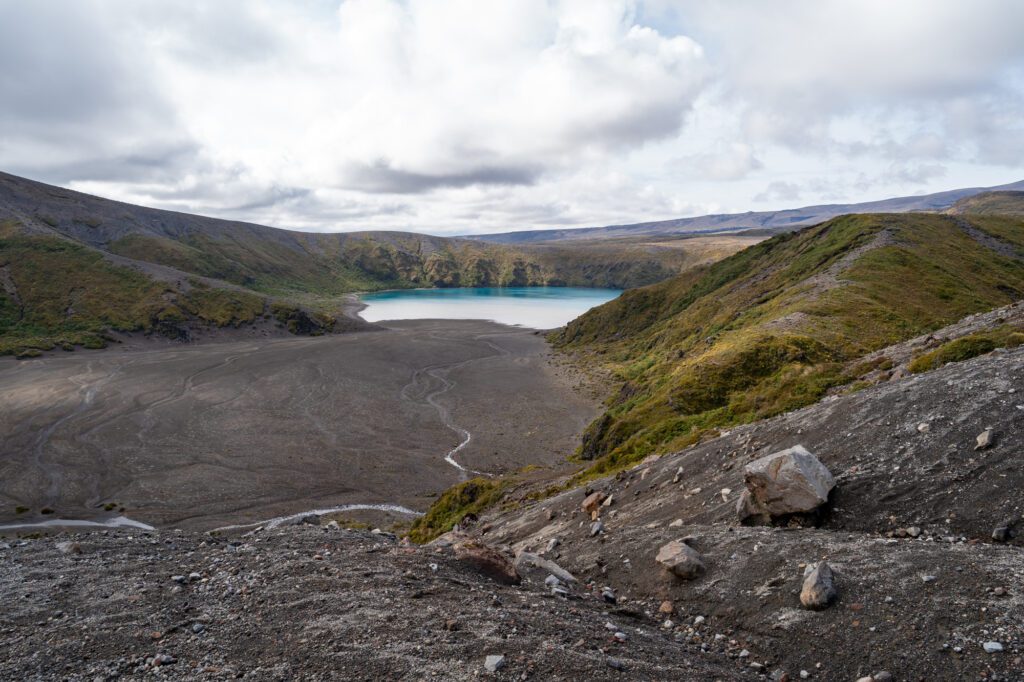
The trail continues along the ridge up to a flat piece that overlooks the upper lake, with Mount Ngāuruhoe looming in the background (which we didn’t get to see).
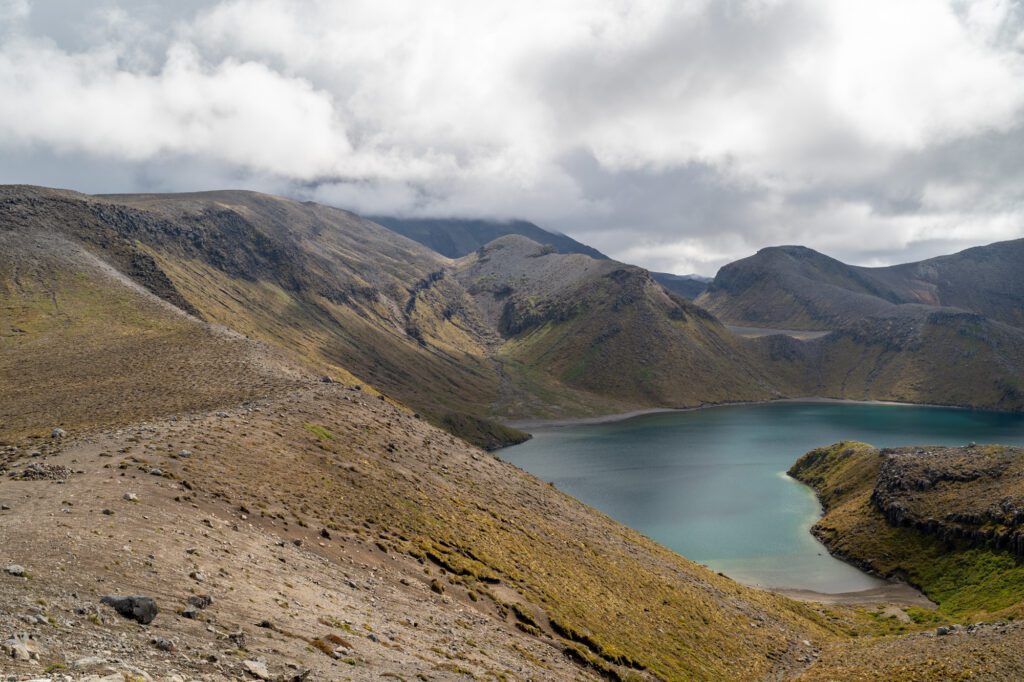
In the other direction, you have a sweeping view out over the basin, including Lower Tama Lake and the peak of Mount Ruapehu in the distance (if it’s not cloudy).
It’s worth noting that, over the course of this climb, the weather turned from almost entirely clear and sunny to foggy and, eventually, raining sideways. In this alpine environment, it’s important to be prepared for all seasons – particularly rain, wind, and cold – as we learned.
Although, despite being outfitted in waterproof clothing from head to toe, we still ended up soaked to the bone by the time we got to the car. Sometimes, being prepared doesn’t save you from getting soaked.
It’s worth keeping an eye on the weather forecast when you set out for the day (we’re honestly not sure what service to use for that, every service said different things and none of them turned out to be correct, in our experience).
You’ll particularly want to keep an eye out for thunderstorms – you DO NOT want to be on that exposed saddle in a thunderstorm.
On the way back, you’ll follow the Tama Lakes track back the way you came all the way to the Taranaki Falls Track.
For some slightly different scenery from the Lower Track, we’d take the Upper Track, which brings you back to the parking lot near the Skotel Lodge (the main, small parking lot for this hike).