
Our Favorite Things to Do in Olympic National Park
Olympic National Park is one of the most diverse national parks in the country, and that’s what makes it unique among its peers.
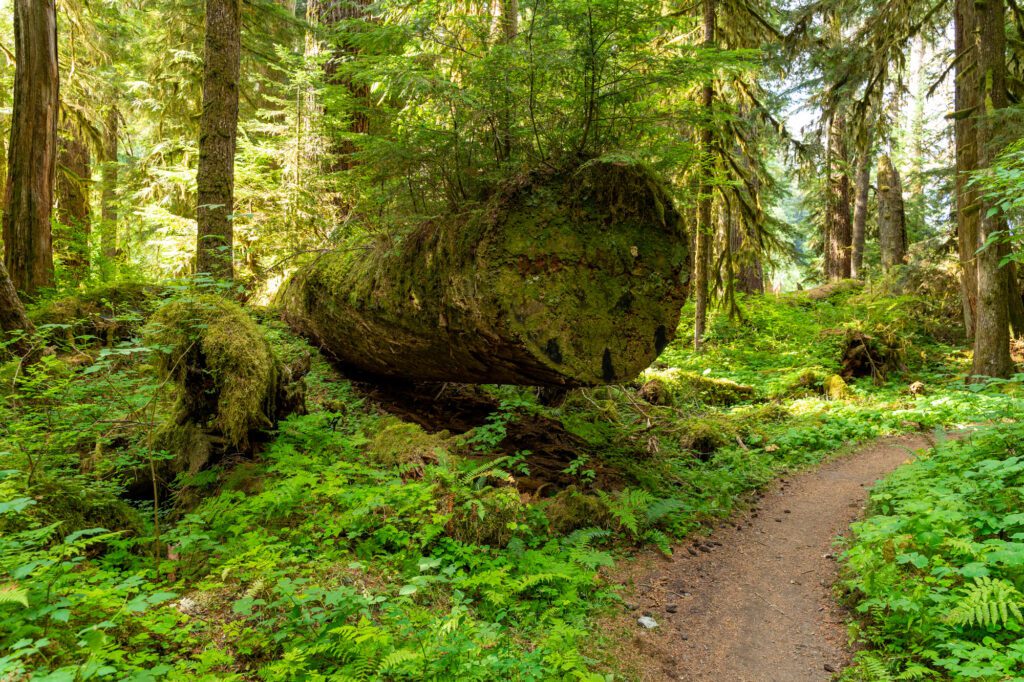
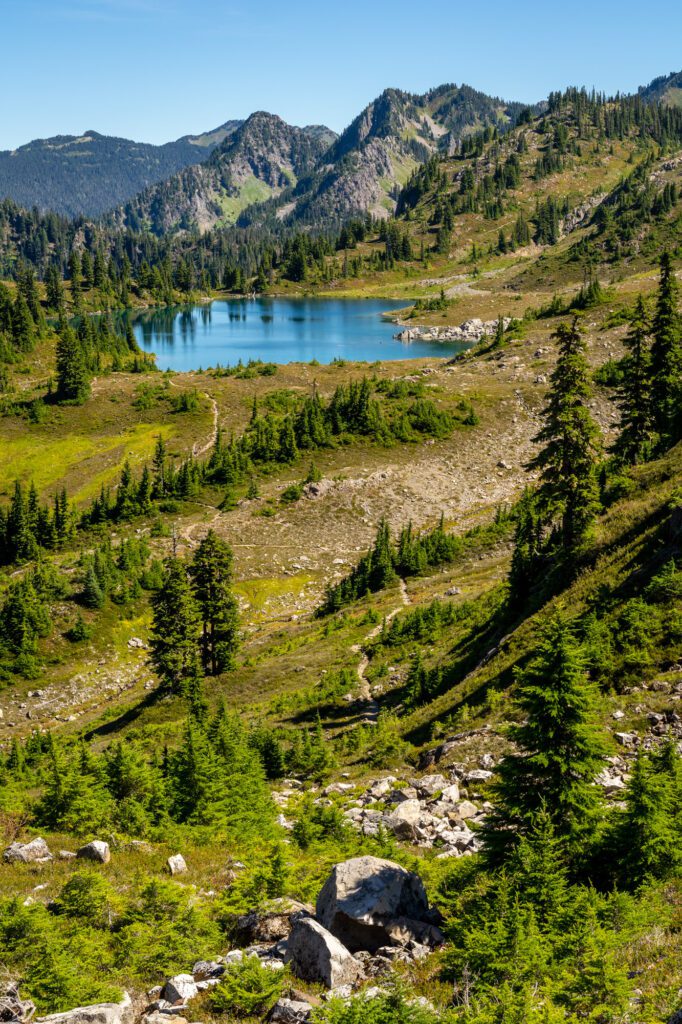
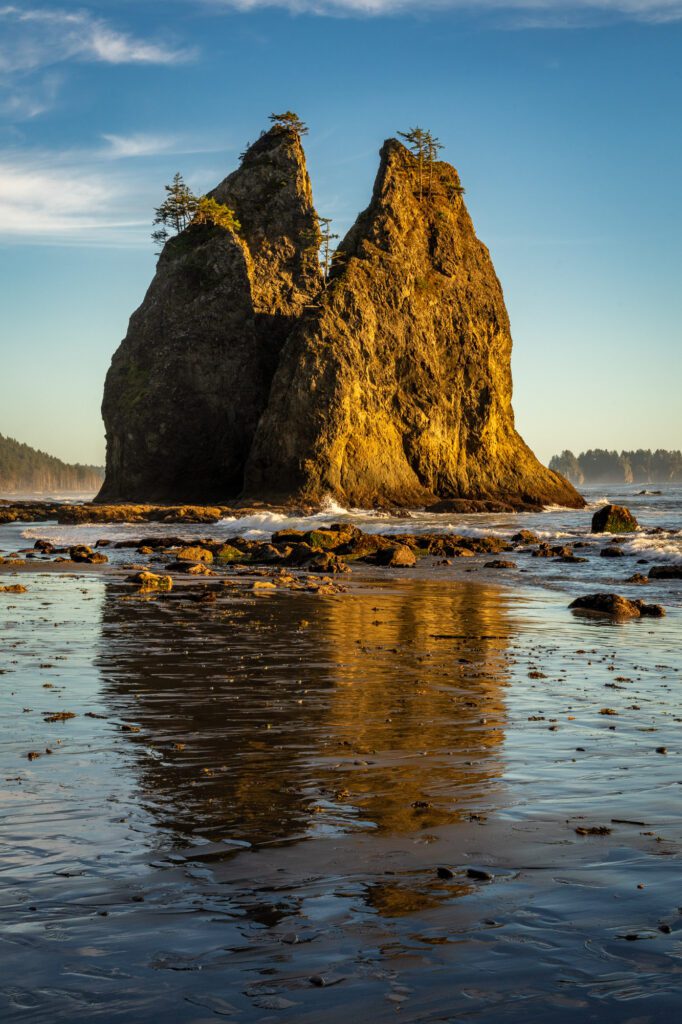
Within its sprawling boundaries, you’ll find a cornucopia of different landscapes – from beaches, to snow capped peaks, to temperate rainforests – that will have your jaw on the floor, marveling at the sheer amount of natural beauty packed into the park.
Look, a lot of national parks are about seeing one type of landscape within the boundaries of the park. For example, look at Mount Rainier, Arches, or Crater Lake.
The thing that makes this park special is that you get at least three different ecosystems within Olympic’s boundaries: coastal, alpine, and temperate rainforest.
Over the past few years, we’ve visited Olympic National park multiple times, including a couple of backpacking trips to experience the park’s backcountry.
Each time, we’ve walked away impressed at the diversity of the park.
We’re here to use our experiences exploring the park to give you the information you need to plan your own Olympic adventure.
In this guide, we’re going to cover all of our favorite things to do in Olympic National Park based on our numerous summer days spent exploring, complete with all the details you’ll need to make your trip up to the Olympic Peninsula an amazing one.
Sound good to you? Let’s get into it.
Disclaimer: Some of the links in this post, like hotel links, are affiliate links, meaning at no additional cost to you, we make a little bit of money if you click through and book. That being said, we would never recommend something to you that we don’t stand behind 100%.
The Geography of Olympic National Park
Before we get to our favorite things to do in the park, we need to take a step back and talk about the geography of the Olympic Peninsula because it has big implications for planning your trip that you should think about sooner rather than later.
Olympic National Park is massive, spanning 1,400 square miles along the western border of Washington State.
Taken alone, that vastness would make planning a trip complicated, but combined with the fact that those 1,400 square miles are not necessarily connected in an intuitive way or easily accessible, you’ll want to be strategic about grouping things together to avoid spending the majority of your trip driving between places.
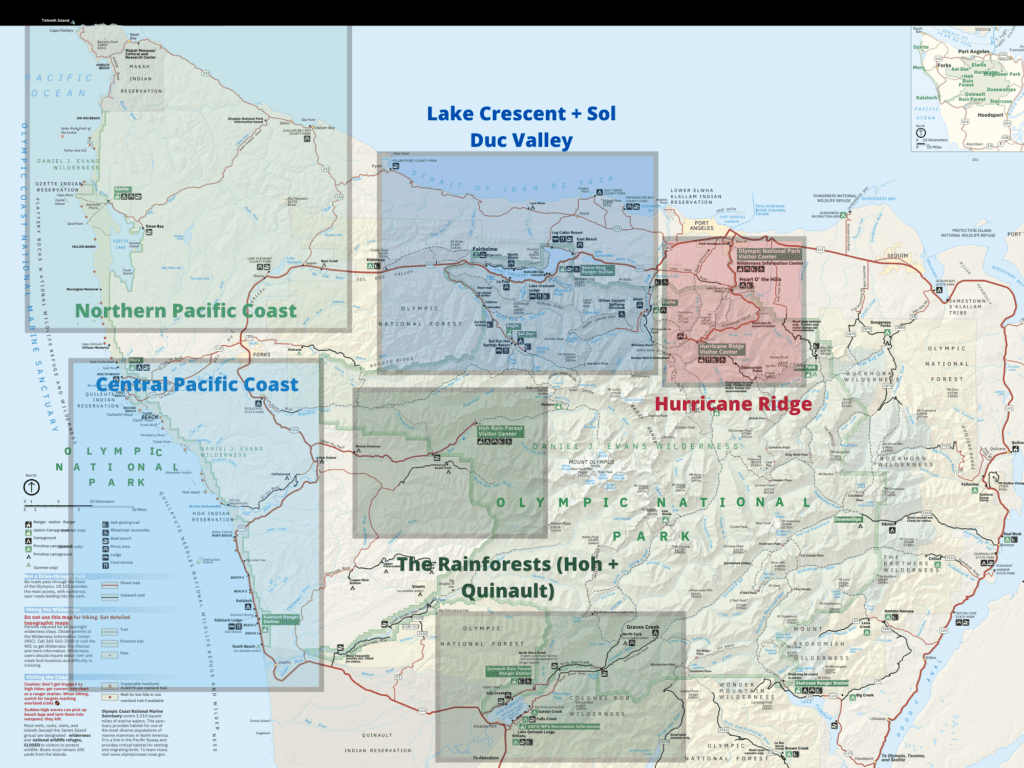
We like to break the park into five distinct regions, which makes it easier to digest. Those five regions are:
- Hurricane Ridge
- Lake Crescent (and the Sol Duc Valley)
- The Northern Pacific Coast (near Neah Bay)
- The Central Pacific Coast (La Push & Kalaloch)
- The Rainforests (Hoh & Quinault)
Here’s a map to help you visualize how those pieces all fit together.
Because of the size and scope of Olympic National Park, we strongly recommend breaking your trip into two parts, staying in a different home base for each to minimize driving all over the peninsula.
There are two logical groupings based on geography.
First, we’d group the Pacific Coast and rainforests (Hoh and Quinault) together, which occupy the western half of the park.
The town of Forks – yes, that Forks, Twilight fans – makes an excellent home base for this section of the park.
Second, we’d group the area around Lake Crescent and Hurricane Ridge together, which are situated about 30-40 minutes away from Port Angeles at the northeastern edge of the park.
Port Angeles is a good home base for this part of the park. It’s the biggest city on the Olympic Peninsula, and has lots of nice amenities (restaurants, groceries, gas, hotels, etc), though it’s not the nicest city we’ve ever been to.
There are also plenty of great vacation rentals around Port Angeles that will give you a little more tranquility and nature vibes.
If you take one thing away from this section, make it this: you should break up your trip and stay in two separate places (Forks and Port Angeles) to make the most of your time on the Olympic Peninsula.
For more on the logistics of planning your trip, we’d head over to our Olympic National Park itinerary, where we spend a little more time talking about this stuff.
Exactly What to Do in Olympic National Park
Now that we’ve covered some of the logistics involved with a trip to Olympic National Park, we can get into the specifics of what to do and see while you’re in the park.
Obviously, there is going to be some variation in interests and appetite for hiking here, so we’ll try to give you some ideas for a variety of different styles.
Here’s how we’re going to organize this: Because of the vastness of the park, it makes sense to group things by region of the park (which we just covered in the geography section above).
We’re going to start at the northern edge of the park with Hurricane Ridge and work our way counterclockwise around the peninsula, moving over to the Sol Duc Valley, up and down along the Olympic Coast, and finally in the Hoh and Quinault Rainforests.
Then, we’ll compile all of the trailheads, waterfalls, viewpoints, and more in a handy Google Map at the bottom that will help you visualize where everything is situated.
Hit the Trail at Hurricane Ridge (Hurricane Ridge)
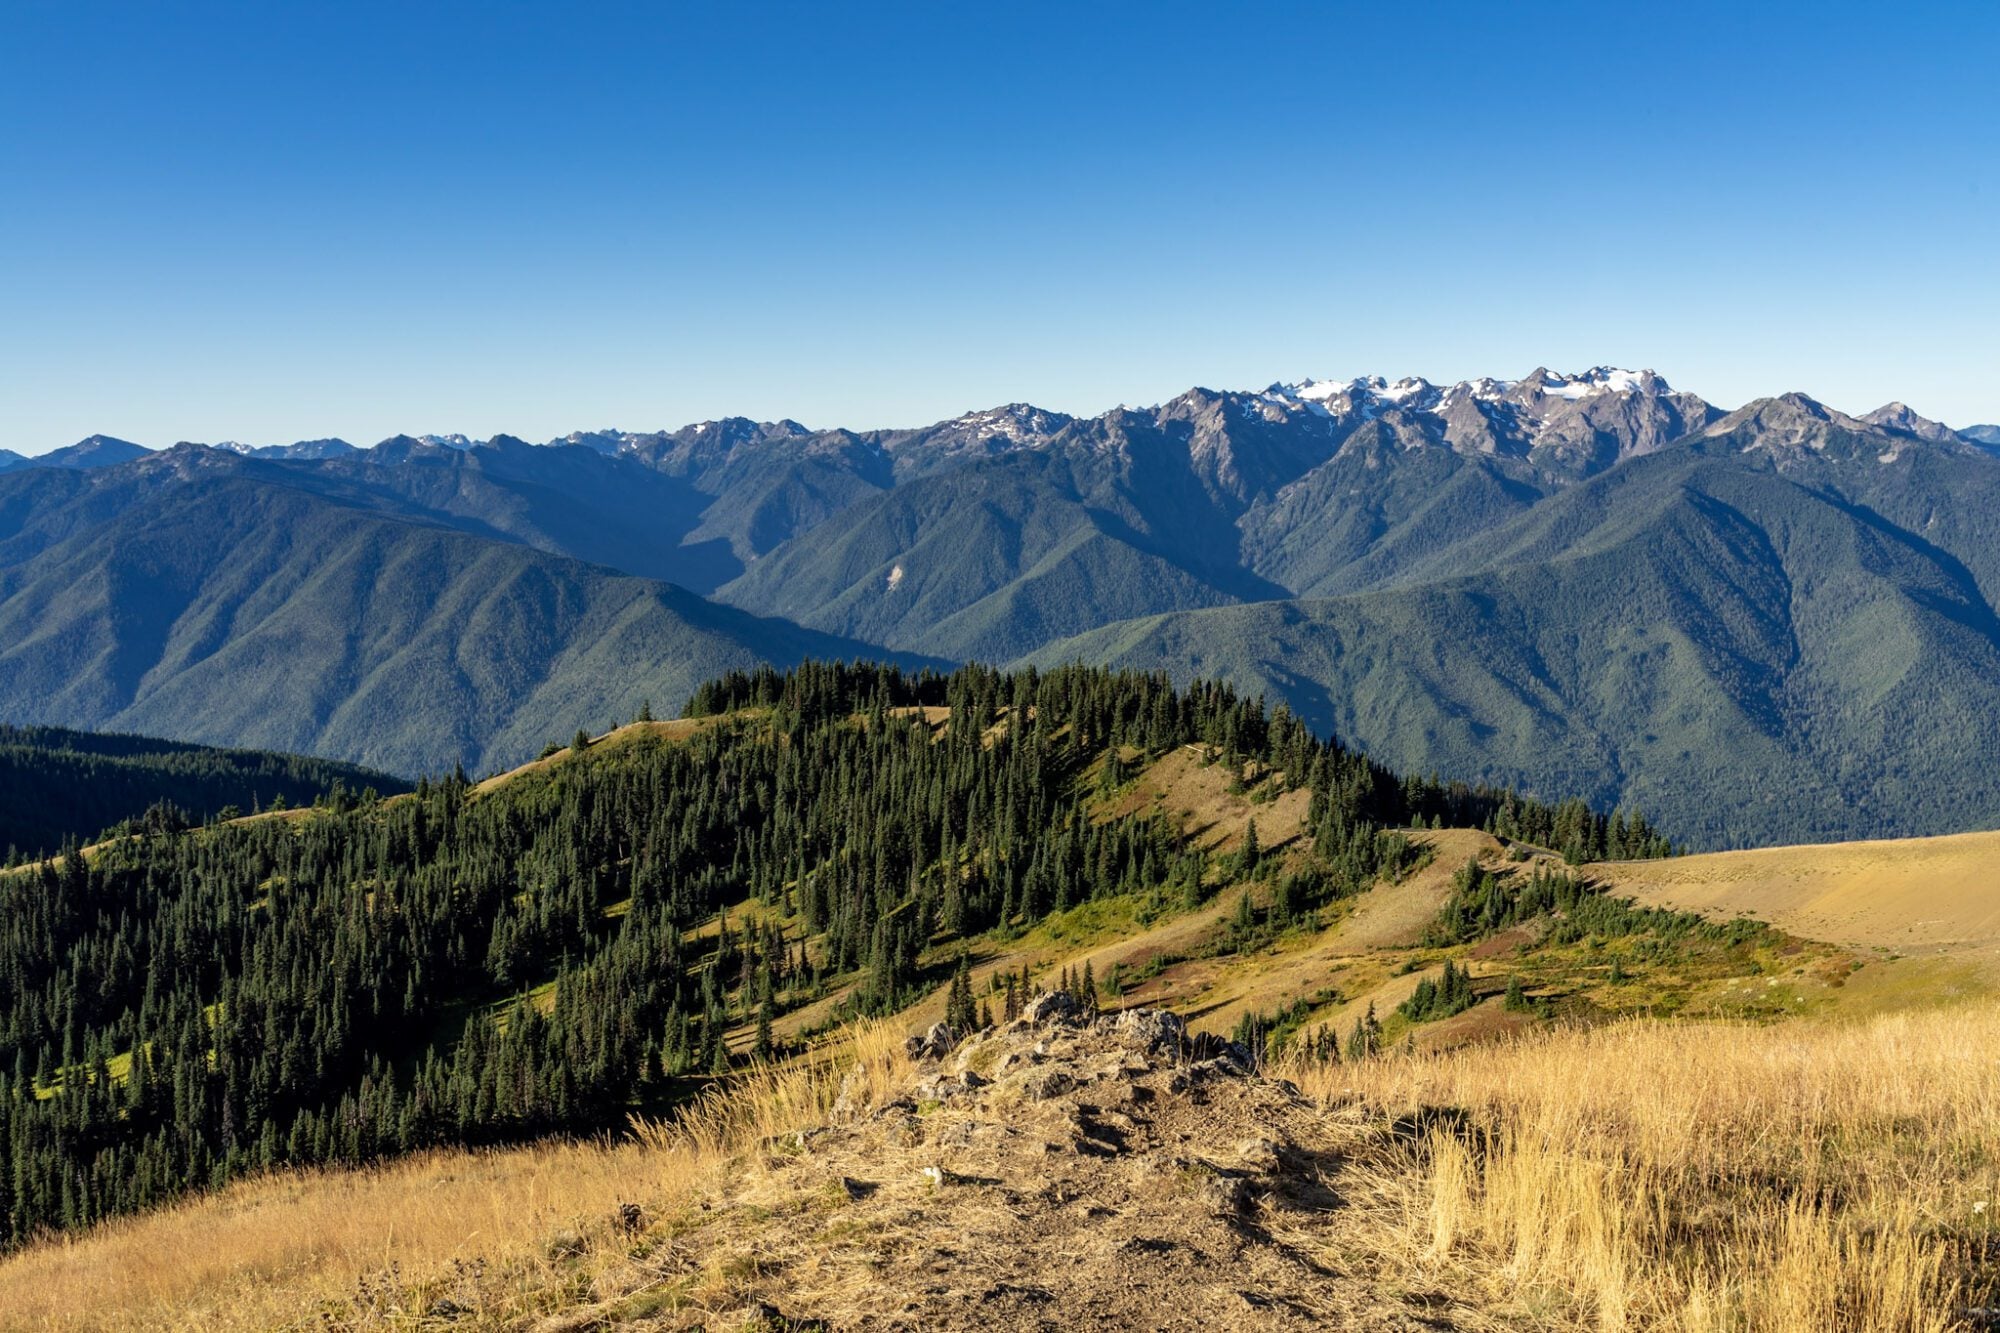
Olympic National Park is really nice for people who aren’t super into hiking because there are a bunch of relatively short, accessible (in terms of elevation profile and difficulty) hikes to beaches, waterfalls, and through the rainforest to keep you busy for a few days.
However, if you’re looking for a longer hike featuring wildflowers, alpine lakes, and sweeping vistas, head up to Hurricane Ridge.
Hurricane Ridge is just south of Port Angeles at the northeastern corner of the park, and it sits at about 5,200 feet above sea level. Since most of the park is at or around sea level, you need to do some climbing to get there.
From Port Angeles, it’s an 18 mile drive that climbs 5,000+ feet, which means it can be slow going (especially if you’re stuck behind a truck or slow-moving car).
If you’re not stoked about driving that, there’s a handy shuttle during the summer from Port Angeles that runs up to Hurricane Ridge that is “almost never” full (I asked a ranger how many people use the shuttle).
It stops at the Lake Angeles Trailhead (aka the Entrance Station) and the main parking lot. More information here.
However, you should know that it DOES NOT stop at the Hurricane Hill trailhead, which means you’d have to walk an extra 1.5 miles each way to get there.
There are three hikes up at Hurricane Ridge that we want to highlight, and they give you a nice spread of different views and difficulty levels (and they all make our list of the best hikes in Olympic National Park).
Hurricane Hill (3.5 miles / 750 feet elevation gain): This is the best bang-for-your-buck up at Hurricane Ridge.
From the trailhead, you’ll follow a relatively short and easy paved path up to a viewpoint with a 360 degree view out over the Olympic Peninsula.
North, you have the Strait of Juan de Fuca, Vancouver Island, and Mount Baker (on a clear day). South, you have the snowcapped peaks of the Olympic Range.
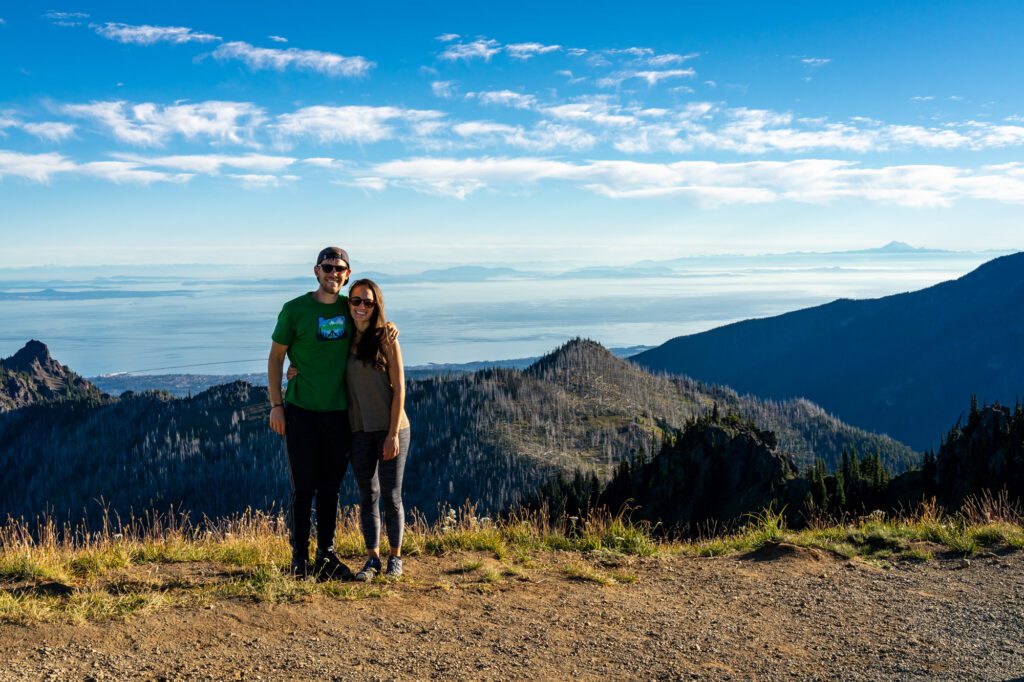

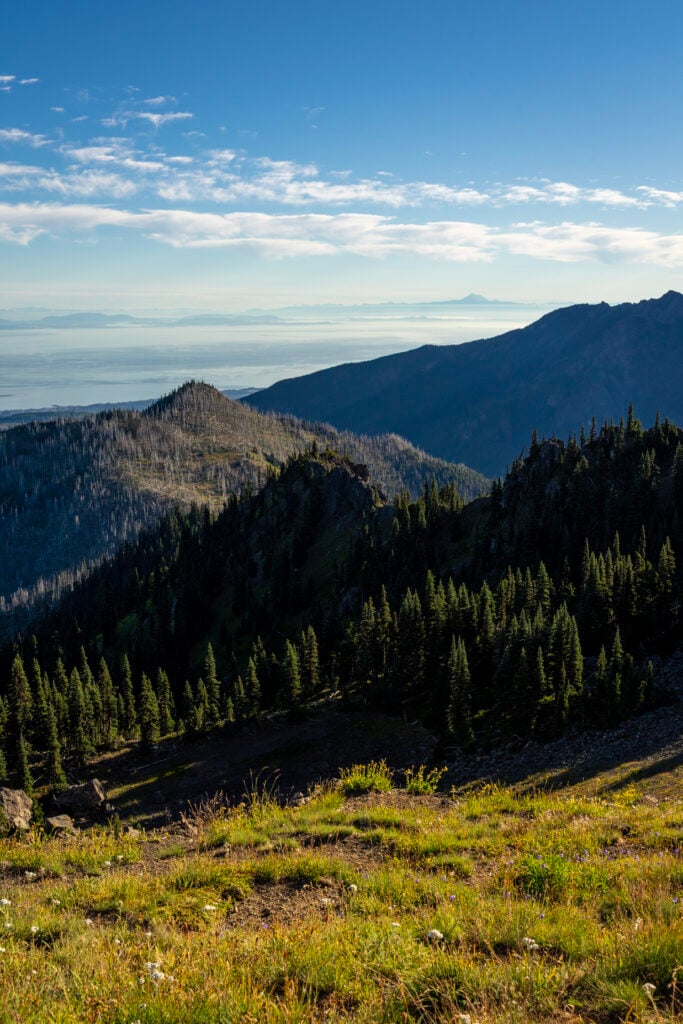
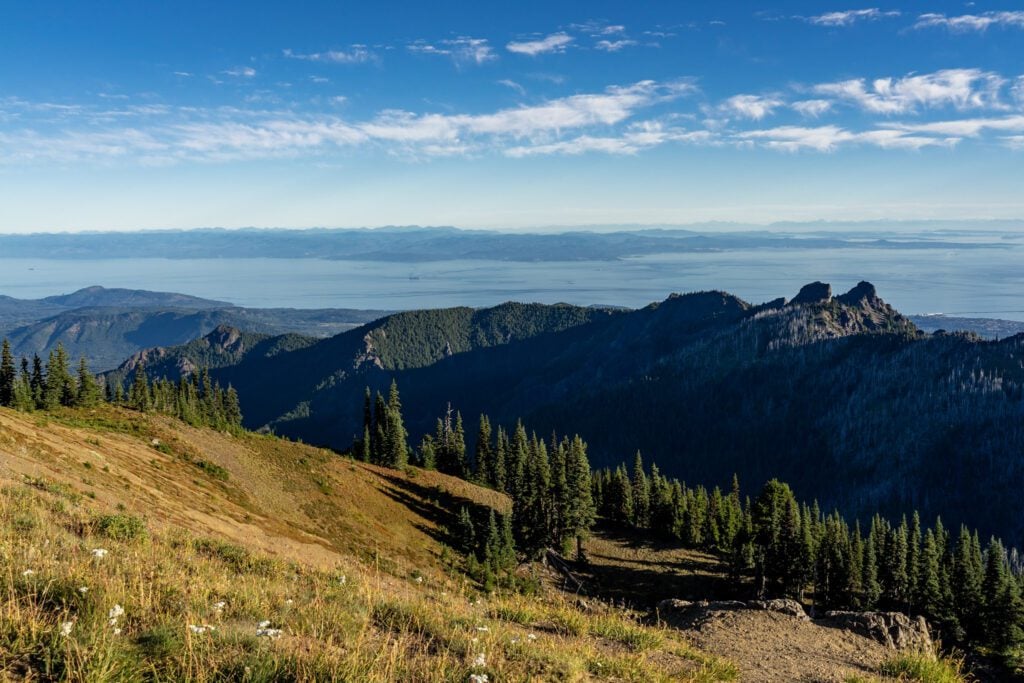
It’s a really nice view, and the hike to get up there isn’t particularly difficult.
However, that combination means it’s clearly the most popular hike at Hurricane Ridge, and it gets busy.
We’ve done this hike early in the morning (we left the trailhead at 7am) and we only saw a few people on the trail.
The earlier you can start, the better (and the parking lot does fill up quickly).
Klahhane Ridge (8.3 miles / 2,600 feet elevation gain): There are a few ways to do this hike, but the clear winner for us is the hike along Sunrise Ridge (which starts at the main parking lot at Hurricane Ridge), because a bunch of the best views on the trail are from the stretch of trail along that ridge.
If you do the version from the Switchback Trailhead, which is shorter but steeper, you completely miss out on those views.
The trail traverses Sunrise Ridge, cuts along the base of Mount Angeles, and then climbs up to the top of Klahhane Ridge where you have sweeping views out over the valley below (and all the way out to the Strait of Juan de Fuca on a clear day, which we didn’t get).
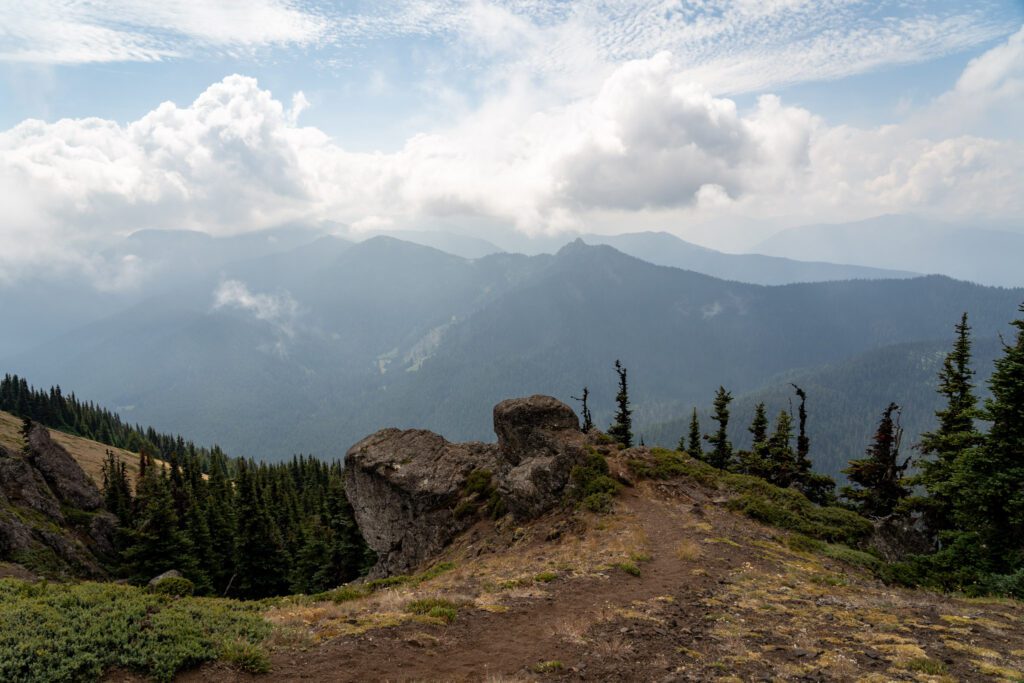
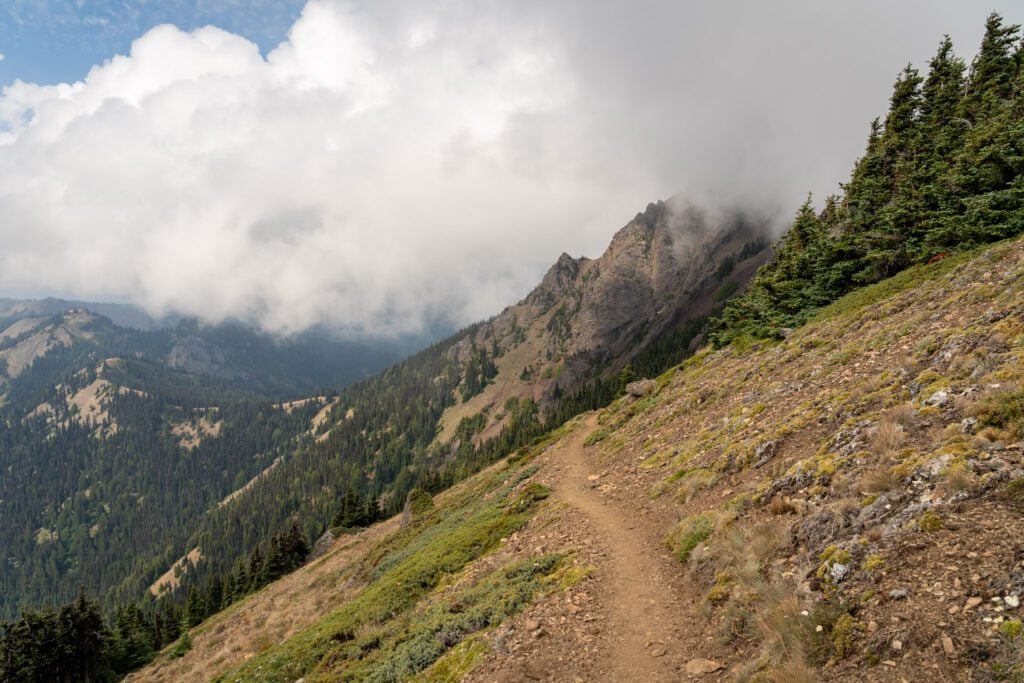
Pro-tip that we only realized as we were on the trail: you can do this hike as a one way hike that cuts the climbing in half by starting from the parking lot at Hurricane Ridge, doing the hike up to Klahhane Ridge, and then descending down to the Switchback Trailhead to catch the shuttle back up to the top to collect your car.
Read our Klahhane Ridge Trail Guide for more details on this hike, including different route options and our experiences on the trail.
Lake Angeles (7.5 miles / 2,500 feet elevation gain): First of all, this hike actually leaves from a trailhead down near the entrance station at the base of the road up to Hurricane Ridge (here on Google Maps).
However, we think it very much belongs in this section because the payoff for a steady, unrelenting climb is one of the nicest alpine lakes in this part of the park.
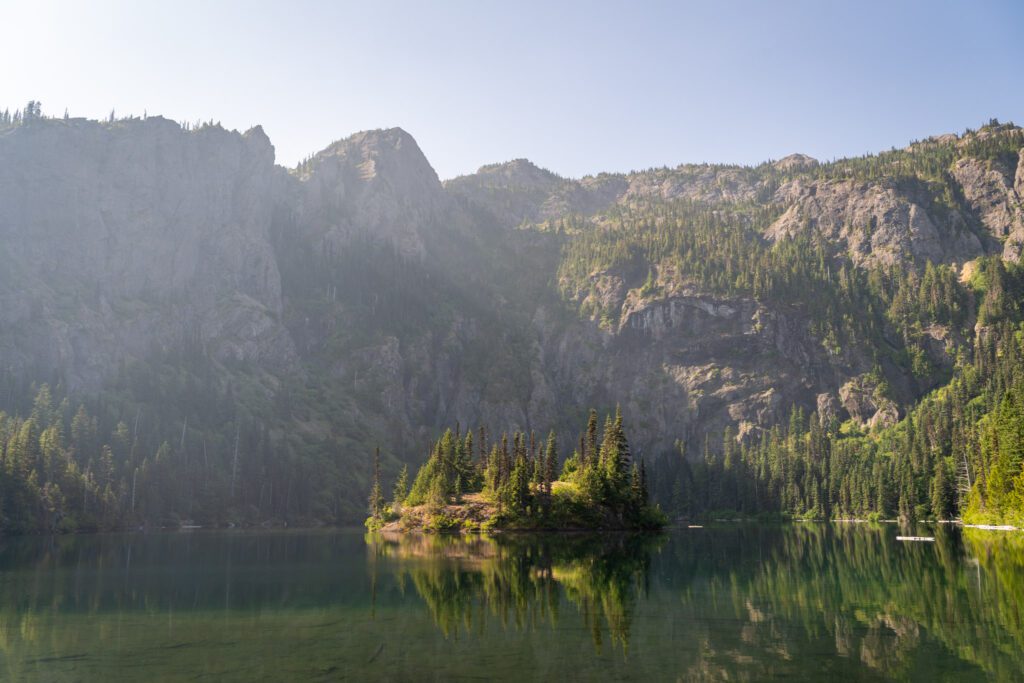
It’s a tough hike, but it’s much less crowded than the trails that leave from the main lot up at Hurricane Ridge, which is nice. Read our Lake Angeles Trail Guide for more details on this hike.
For a couple of other trails, including the trail that is highest on our to-do list for our next trip, check out the next section on driving Obstruction Point Road (which we’re apprehensive about).
Drive Out on Obstruction Point Road (Hurricane Ridge)
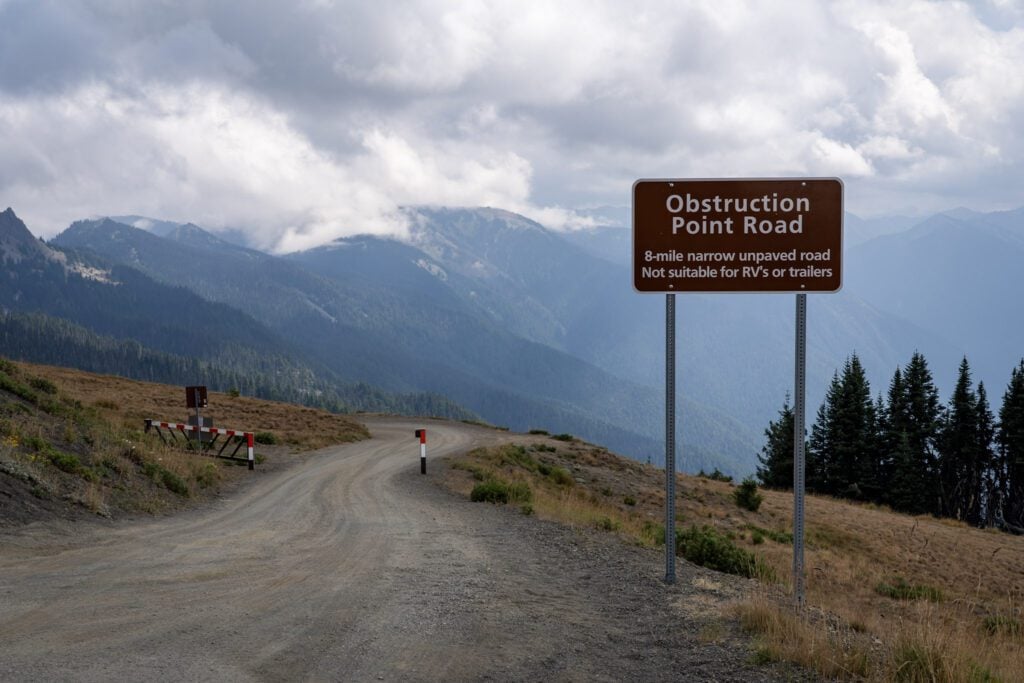
Obstruction Point Road is not for the faint of heart (or for RV’s). It’s a narrow, gravel road that often has a steep drop off on either side (sometimes both) that is only open during the summer time.
If you’re looking for some of the park’s best views of the Olympic Mountains, some of the park’s clearest alpine lakes, and a cornucopia of wildflowers in the early summer, this is the place to be!
And, let’s be honest, who is reading this guide and is NOT looking for those things?
I’ve seen multiple people call this “the scariest road in Washington” and I have to say, that statement feels like pure unadulterated hyperbole.
I would say that, if you’re used to driving some of the sketchy forest roads in the Pacific Northwest, this road really isn’t particularly gnarly.
The road is generally in good condition, so massive potholes and washouts aren’t really a concern here.
It’s definitely narrow and features a few blind corners, but if you’re used to driving some of those forest roads in the state, you’ll probably be fine as long as you take it slow and give plenty of time and space near those low-visibility spots.
Here’s a video of the drive (it’s sped up) so you can get a feel for what you’re getting into.
Anyway, by the end of that eight mile drive out to the Obstruction Point Trailhead, you’ll be ready to get out and stretch your legs.
There are a few hikes that leave from there – including Elk Mountain and Grand Lake – but it’s worth coming out here even if you’re not up for a long hike.
Make sure to check road conditions here before your trip to confirm that it’s open before you head out there.
There is one hike in particular (with multiple variants) that stands out to us, and that’s the hike to Grand Lake, which leaves from the trailhead at the end of the road.
Ideally, you do the full Grand Lake loop that takes you to Grand Lake and back through Badger Valley, which clocks in at 8.5 miles and 2,700 feet of elevation gain.
There’s a shorter, more direct trail, but it only saves you about a mile of distance and a few hundred feet of climbing.
Another good option that requires a lot less mileage is Elk Mountain (4.5 miles, 1,400 feet of elevation gain). Great views of the Olympics!
Go Chasing Waterfalls near Lake Crescent (Lake Crescent)
The area around Lake Crescent, including both the Sol Duc Valley and the Elwha River Valley, is full of old growth forests laden with ferns and mossy trees and rushing rivers flowing from the alpine areas high above.
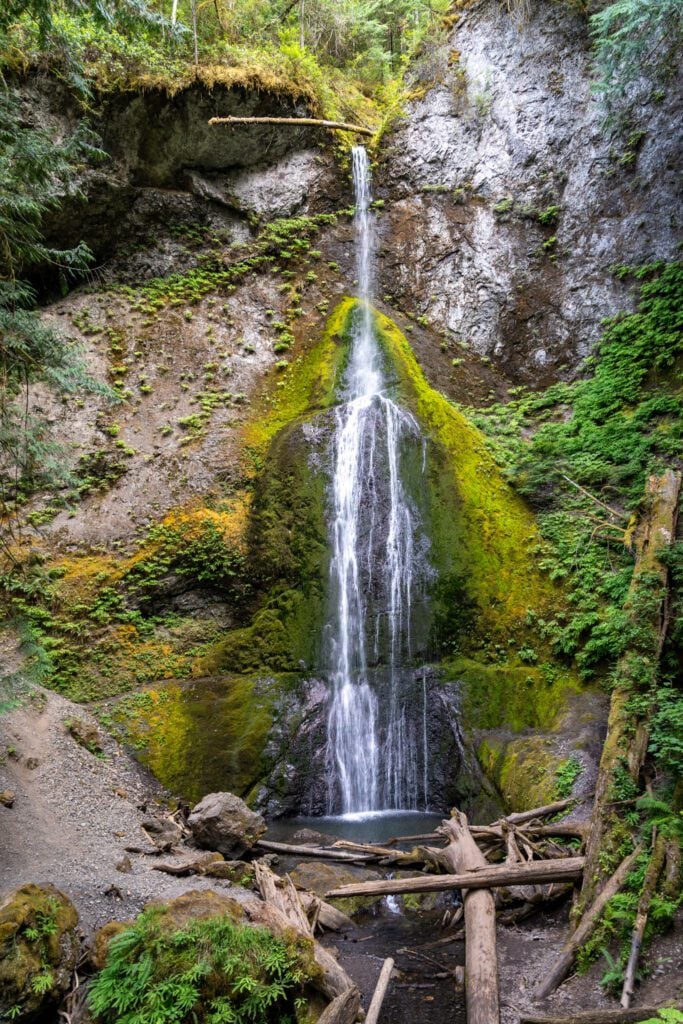
It’s also where you’ll find our three favorite waterfalls in the park, which make for a nice afternoon circuit after a morning of hiking some longer trails.
Marymere Falls: Probably the most famous of the three because of its proximity to the Lake Crescent Lodge, this is a great easy hiking option that is family-friendly, and fairly accessible for hikers of all fitness levels.
We’ve done it multiple times, and not only is the waterfall at the end very nice, but the hike through the old-growth forest is also beautiful.
Especially once you cross the creek and find yourself immersed in a forest that feels like it could be in an Indiana Jones movie.
Madison Falls: We were killing a little bit of time on this stretch of road and stopped by Madison Falls on a whim.
Turns out, it’s a really nice waterfall!
It’s the shortest hike of the three, and it’s at the start of the now-closed road out into the Elwha River Valley, which you can walk or bike out on for a longer journey.
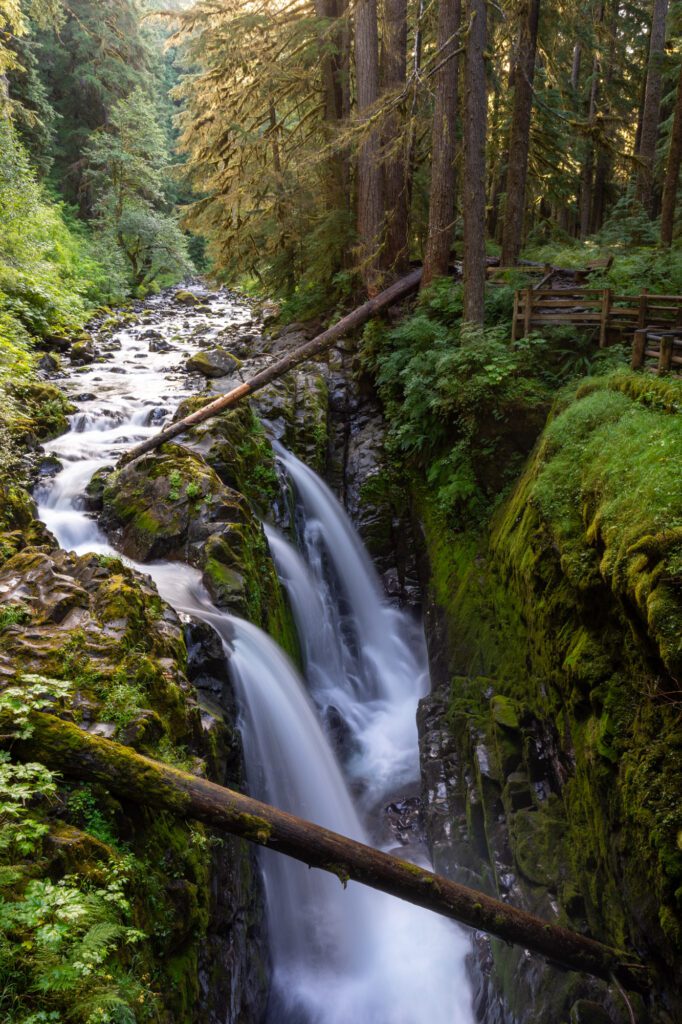
Sol Duc Falls: A nice walk through the old-growth forests here brings you to a waterfall that you view from a wooden footbridge perched above the ravine that the falls drops into.
It’s our favorite of the three here, and it’s a very nice ferny forested walk out to the falls. It’s a bit of a detour up Sol Duc Road, but we’d say it’s worth it.
You can extend your hike by following the Lovers Lane Trail, if you’re craving more walking through the beautiful forests in this slice of the park.
Make the Journey to the Northern Pacific Coast (Northern Pacific Coast)
Most people who visit Olympic National Park never make it up to the remote northwest corner of Washington State because, frankly, it’s a long way from most of the park’s highlights that might not be worth the squeeze if you only have a couple of days and it’s your first trip.
However, we’re here to tell you that if you happen to find yourself with an extra day and you’re looking for a place that is slightly off the beaten path (mostly because it’s FAR from everything else), the northwest corner of Washington State near Neah Bay is a good option.
There are four things we’d recommend in this section of the park; hike along Shi-Shi Beach to Point of Arches, Cape Flattery, Hobuck Beach, and the Makah Cultural & Research Center. We have a separate subsection for each below.
It’s worth noting that we’d also say that we wouldn’t bother making the drive out here unless you’re going to do Shi Shi Beach AND some of the other stuff.
Put another way, we probably wouldn’t drive out here for Cape Flattery and the Makah Cultural Research Center.
In terms of structuring your time out here, it’s important to note that it is a 90 minute drive from both Port Angeles and Forks.
However, that drive – especially the drive into Neah Bay – is as scenic as it gets because you’re driving along the Strait of Juan de Fuca, looking out across the water towards Vancouver Island. And we saw three bald eagles during the drive out there early in the morning.
We’d think of this as a day trip, and we’d plan on staying elsewhere and making the journey out here for the day.
If you’ve taken our advice and you’re splitting your time between Port Angeles and Forks, we like to do the Northern Pacific Coast as a stop on the day that you’re transitioning between the two.
If you’re looking to grab lunch, there are only a handful of places to eat in Neah Bay, but the place we’d go is BIGGINZ for fish and chips. When in Rome, right? FYI – it’s cash only.
It’s also worth stopping by Take Home Fish Company across the street for freshly caught smoked salmon that is quite literally smoked in front of you.
If you’re not sure what we’re talking about, read our guide to planning your Olympic National Park itinerary, which has our recommended strategy for breaking up the park into manageable chunks.
Hike Out to Shi Shi Beach
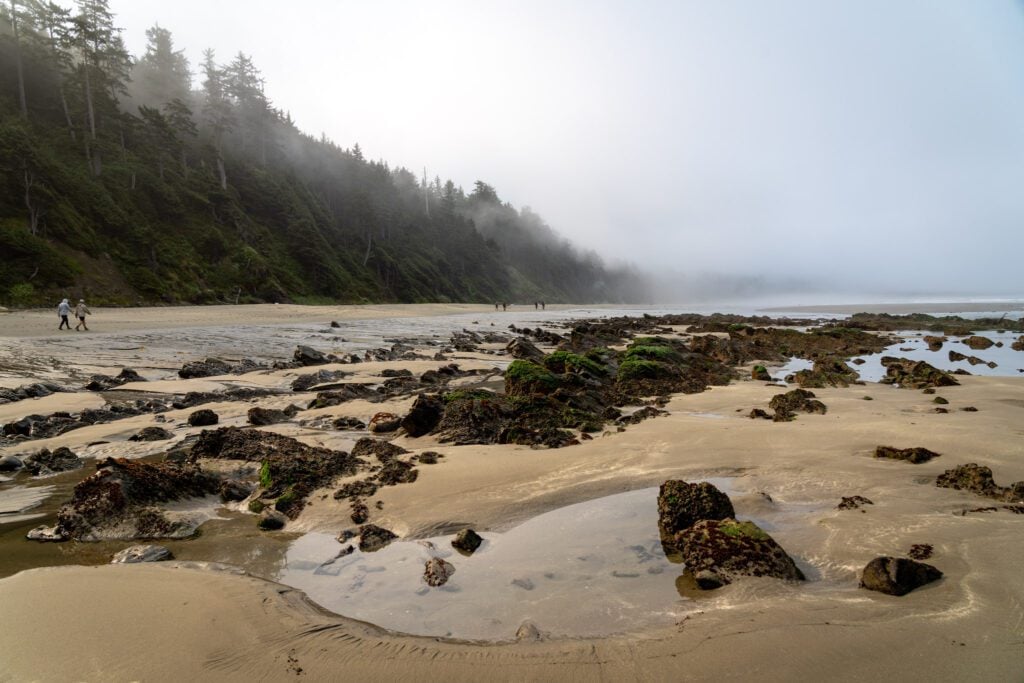
For us, Shi Shi Beach (pronounced “shy shy”) is the crown jewel of this northern stretch of coast.
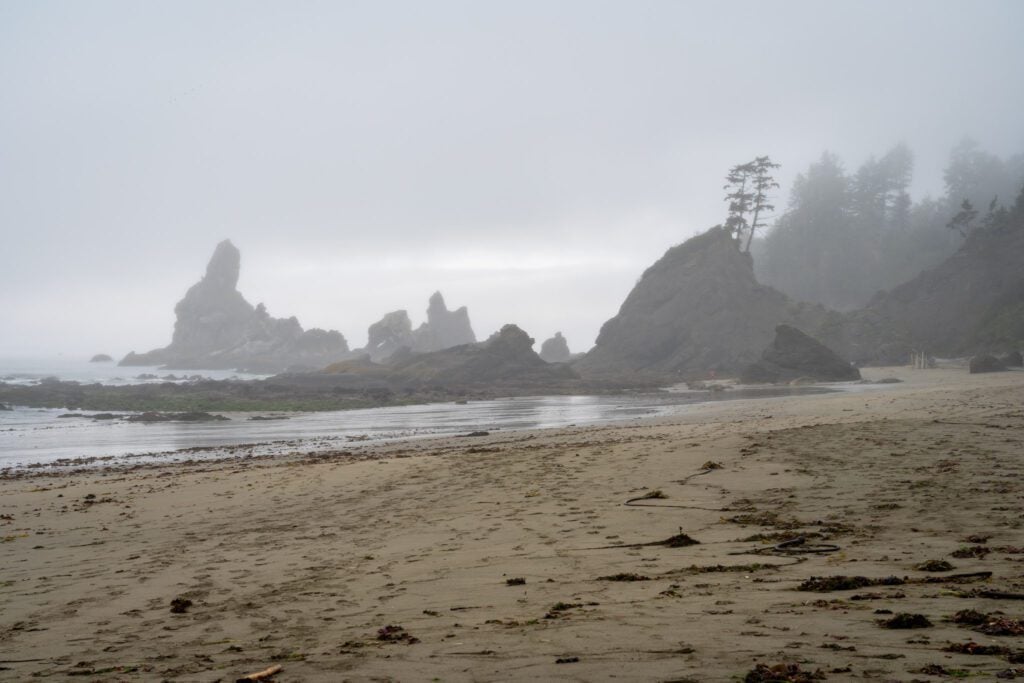
There are a lot of great beaches on the Olympic Peninsula – Second Beach and Ruby beach (both mentioned above) are two of our favorites – but there’s something magical about Shi Shi’s wide three mile stretch of sandy beach that is bookended by sea stacks on either end.
One of the reasons we like this beach is the fact that it’s a two mile hike in.
When combined with the distance from most of the main sights, that two mile hike really thins the crowds.
You’re certainly not going to be alone out here (we met a European couple who were flabbergasted at the number of people camping on the beach), but there are definitely fewer people per square foot than you find at the beaches that are a short walk from the parking lot.
You should know that the two mile hike from the trailhead to the beach gets you to the northern end, and Point of Arches (the famous sea stacks that you’ll see photos of all over) are at the southern end of the beach, which is about two and a half miles down the beach.
I don’t know how much hiking on a beach you’ve done, but it’s a lot harder than you think it is.
Lucky for you, there’s plenty of tidepools, jaw-dropping scenery, and birds to keep you company while you take a break on the beach.
We’d make sure to time this hike to low tide so that you have full access to the tidepools and the dramatic landscapes with all the sea stacks.
Check tides here and try to time your visit so that you’re hitting the beach within an hour or so of low tide.
Also worth noting that the majority of this hike is on land owned by the Makah Tribe, which means you’ll need a Makah Recreation Permit ($20, good for the calendar year).
If you’re coming in early, stop at the Makah Mini Mart in Neah Bay (here on Google Maps) as you pass through, which opens at 7am.
If not, there’s a stand on the road out to Shi Shi where you can pick one up. You’ll also need it for Cape Flattery.
We have an entire guide to hiking to Shi Shi Beach, which you should read for far more detail than we put here.
Hit the Northwest Corner of the USA at Cape Flattery
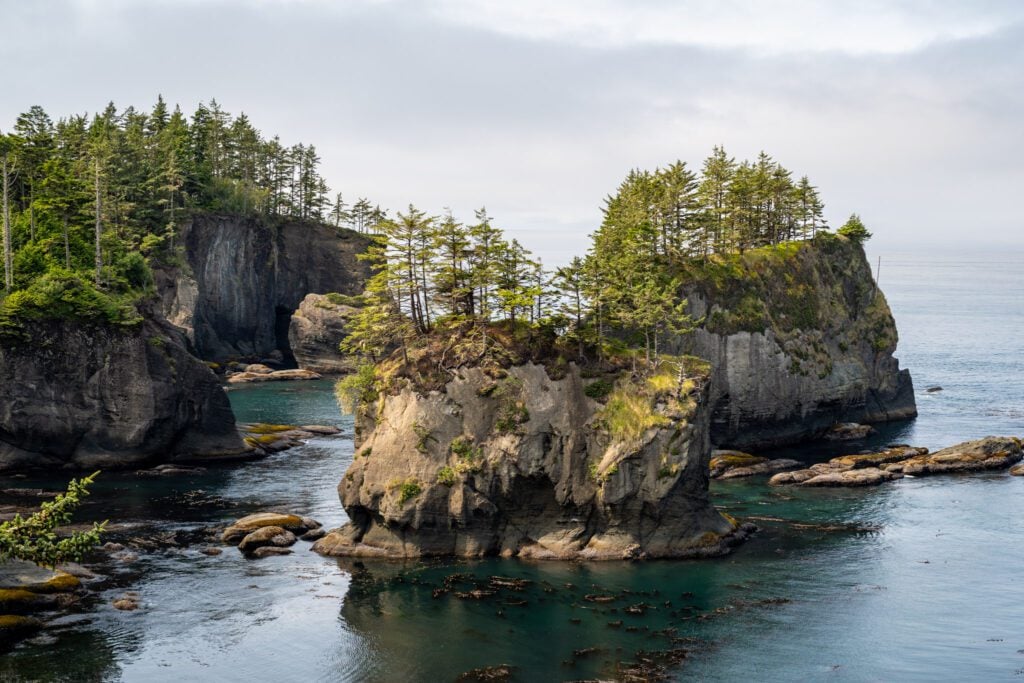
Cape Flattery barely qualifies as a “hike”, but it’s a nice walk through the woods down to a couple of viewpoints at the northwestern corner of the contiguous United States.
You drop down a bit from the parking area, which means you have to climb back up on the way back, but it’s pretty doable for most people without major mobility restrictions.
There are three main viewpoints, and the views here are spectacular. You’ve got beautiful tree-topped sea stacks just offshore, Tatoosh Island and the lighthouse, views out towards the Strait of Juan de Fuca and Vancouver Island, and tons of sea and bird life to see.
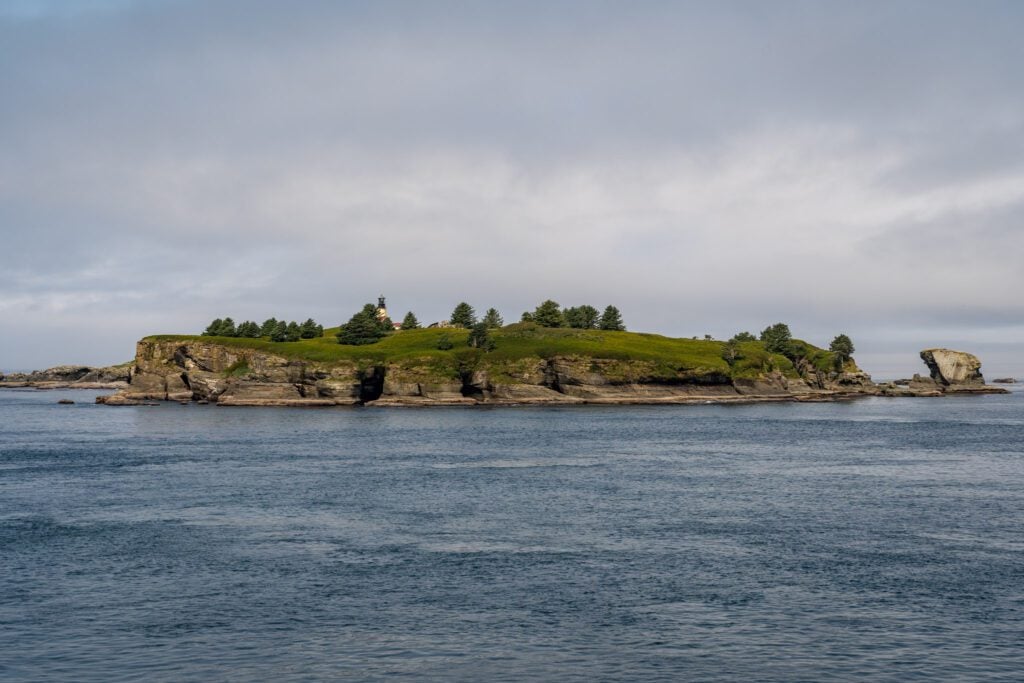
Please respect the signage that begs you not to go off trail while you’re out there.
This place clearly was not built for the amount of visitation it gets now, and it was pretty disheartening to see so many people just disregard signage to get their photo (not to mention the fact that a lot of people were doing things that were pretty unsafe).
More trail information here on the WTA, including recent reviews.
Learn at the Makah Cultural & Research Center
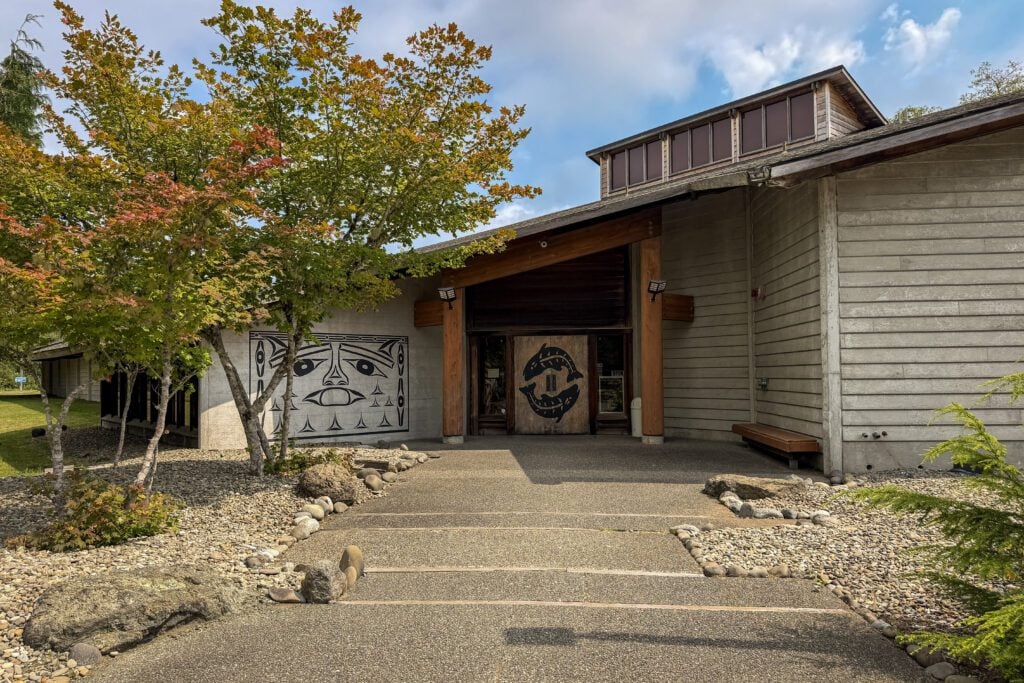
This museum in Neah Bay focuses on the Makah Tribe, who has been living in this remote corner of Washington State for millennia.
Frankly, this museum blew our expectations out of the water.
It was a nice history lesson, and they have a bunch of great artifacts that came from a really interesting archaeological project centered around Ozette.
At one point, Ozette was a major center of the Makah tribe before it moved to Neah Bay. Sometime in the 16th Century, the entire village was buried by a mudslide.
Which, it turns out, is a great way to preserve things and prevent them from decaying (kind of similar to the ash at Pompeii).
Four hundred years later, a big storm unearthed pieces of the village, and a big archaeological dig followed that unearthed an entire village with six wooden longhouses that had been preserved by mud for centuries. Pretty cool!
Anyway, you can find a bunch of them in this museum, along with information about the history of the Makah, their lifestyle, and more.
We were particularly intrigued by the way they used every material available to them for their tools and weapons (like shells, bones, teeth, and, of course, all of the different types of wood).
We really liked it, and think it’s worth the $10 per person entry cost.
Walk Along Rialto Beach to Hole in the Wall (Central Pacific Coast)
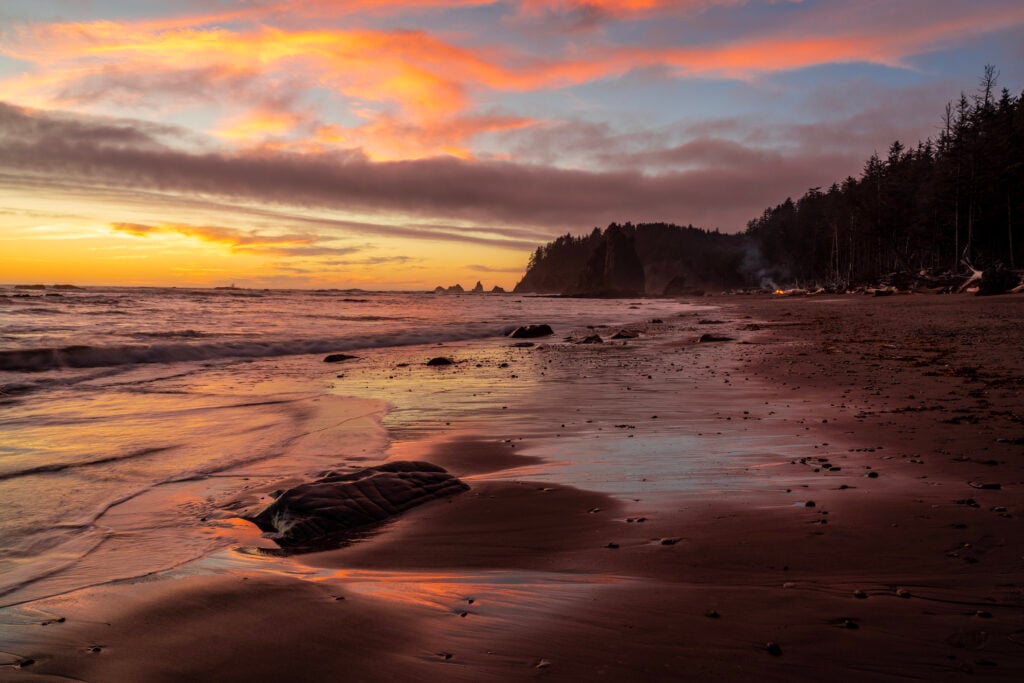
We did this beach hike just west of Forks at sunset on our first ever visit to Olympic National Park, and it was one of the highlights of our entire year (it was a year where we lived in a Honda Odyssey on a never-ending road trip on the west coast, so competition was fierce).
On that first trip, we got near-perfect weather. It was warm, sunny, and clear, with a few clouds that lit up in a brilliant shade of pink as the sun dipped below the horizon over the Pacific Ocean.
We’ve now been back out here twice, and on each of those two times it was misty and foggy at sunset, which was decidedly less magical.
Which just makes that first experience that much more special.
The hike starts from the parking lot for Rialto Beach, and from there you basically walk just under two miles up the beach until you reach Hole in the Wall.
This 3 mile out-and-back hike to Hole in the Wall, which is exactly what it sounds like, is an excellent late afternoon / early evening activity when the sun washes over the beach in a soft golden glow.
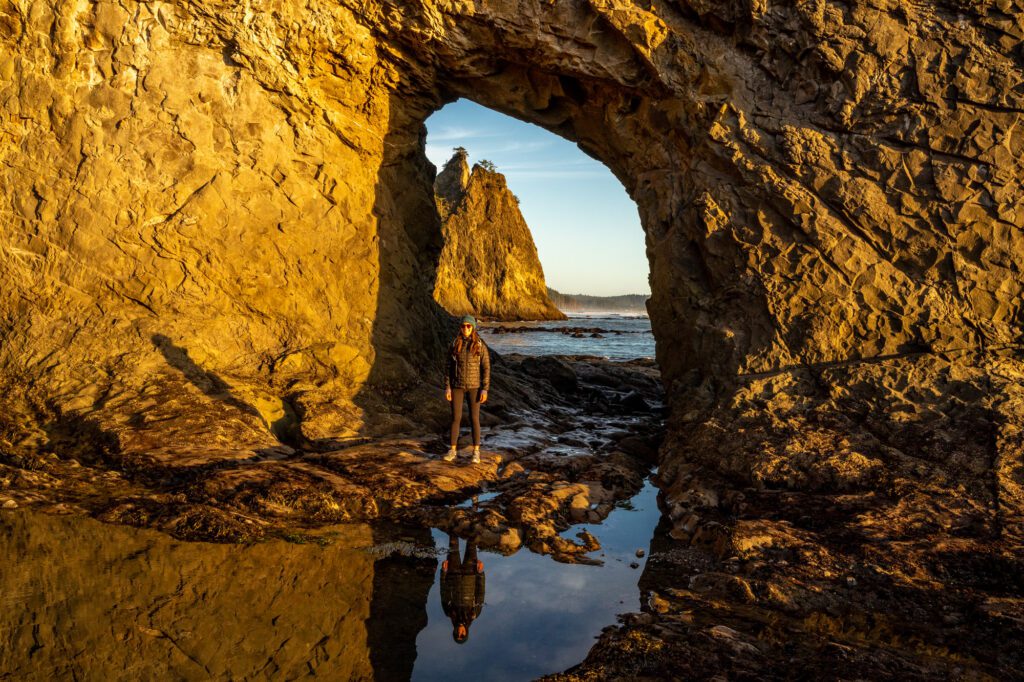
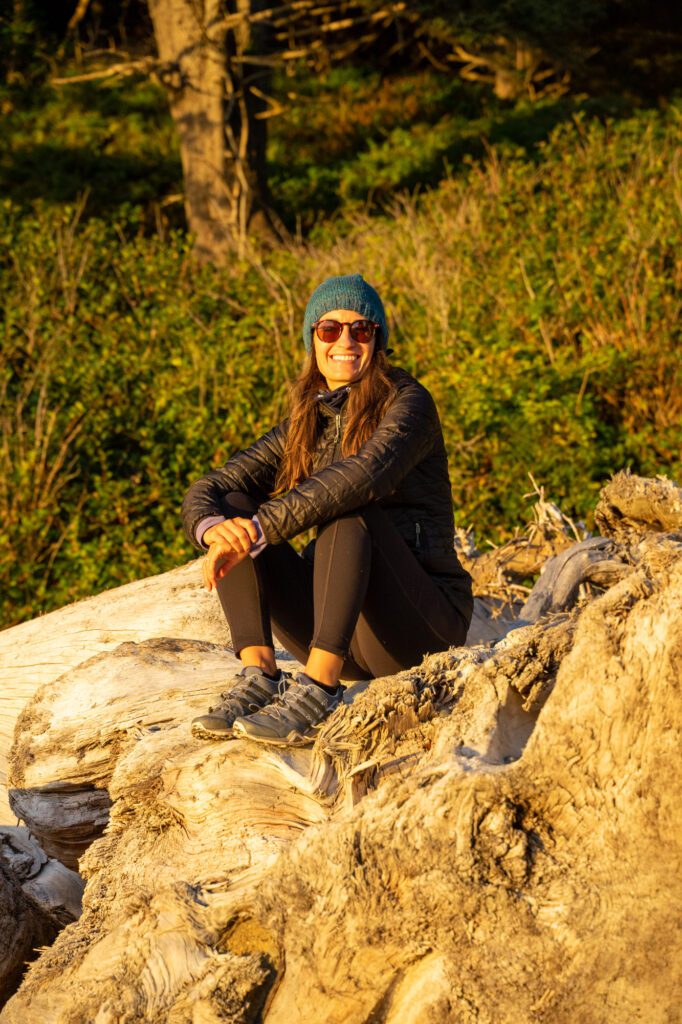
That is, if you get a clear evening, which as we already covered, isn’t so common in this part of the world, which is famous for the amount of rain it gets.
It’s not a tough hike in terms of elevation – it’s actually flat the entire way there and back – but you will be walking in sand, which means high top boots are going to be helpful to keep sand out of your shoes.
And hiking in sand is always approximately 1.5 times harder than any other surface, in our experience.
Keep an eye out for bald eagles in the trees up above the beach – we’ve seen many eagles perched up there waiting for their next meal.
This one is also best at low tide when you can access Hole-in-the-Wall, and you can check tides for Rialto Beach here.
An important note: As of 2026, parking at Rialto Beach requires a parking permit that allows parking on Quileute Tribal Lands.
However, it’s only for one of the parking lots – the gravel lot on the south end of the road.
If you park in the gravel lot, make sure you have a parking permit from the Lonesome Creek Store (here on Google Maps), because the QR codes don’t really work given the fact that there’s limited cell coverage.
Or just park in the main paved lot, which doesn’t require a permit (just a national parks pass).
Hit the La Push Beaches (Central Pacific Coast)
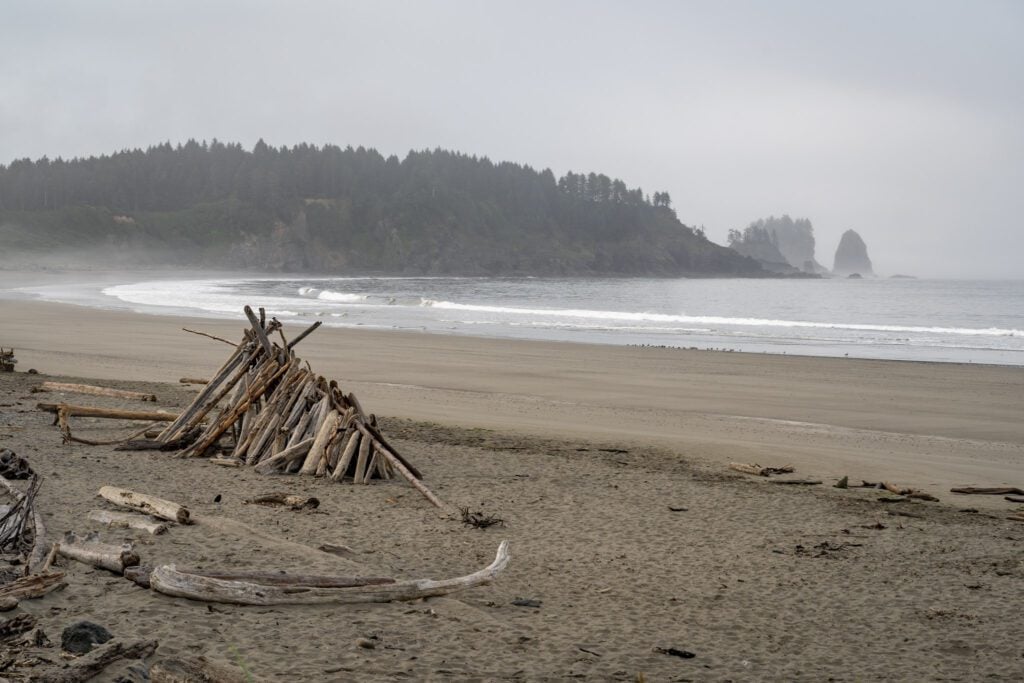
In any conversation about the best beaches on the Olympic Peninsula, the beaches in La Push (a tiny town just west of Forks) are almost certain to come up.
There are three beaches out here, creatively named First Beach, Second Beach, and – you guessed it! – Third Beach.
Until our latest trip out to Olympic Peninsula, we had never actually been to any of these beaches because every time we’d been out to the park, they had been closed for one reason or another.
Man, were we missing out or what?
These beaches (particularly Second and Third) have everything we love about the beaches in the northwest corner of Washington State, with towering sea stacks just offshore, abundant sea life that you can see at low tide, and piles of driftwood up and down the beach.
We were particularly enamored with the crazy amount of life that you’ll find on the rocks once the tide has washed away. Every rock is covered with thousands of tiny mollusks, sea snails, sea stars, and sea anemones.
Our biggest tip for visiting these beaches is to time it so that you’re arriving around low tide, which is when the tide pools and abundance of sea life (sea stars, anemones, snails, and more) are visible.
Check the tide charts here, and plan your visit around the low tide times for your dates.
In terms of our favorites and what you should prioritize, we’d say that Second Beach was pretty clearly our favorite, especially at low tide when you can get to all the tidepools at the base of the sea stacks.
It’s a relatively easy (though it can be muddy) 0.7 mile hike out to the beach (one way), which means it’s also fairly accessible.
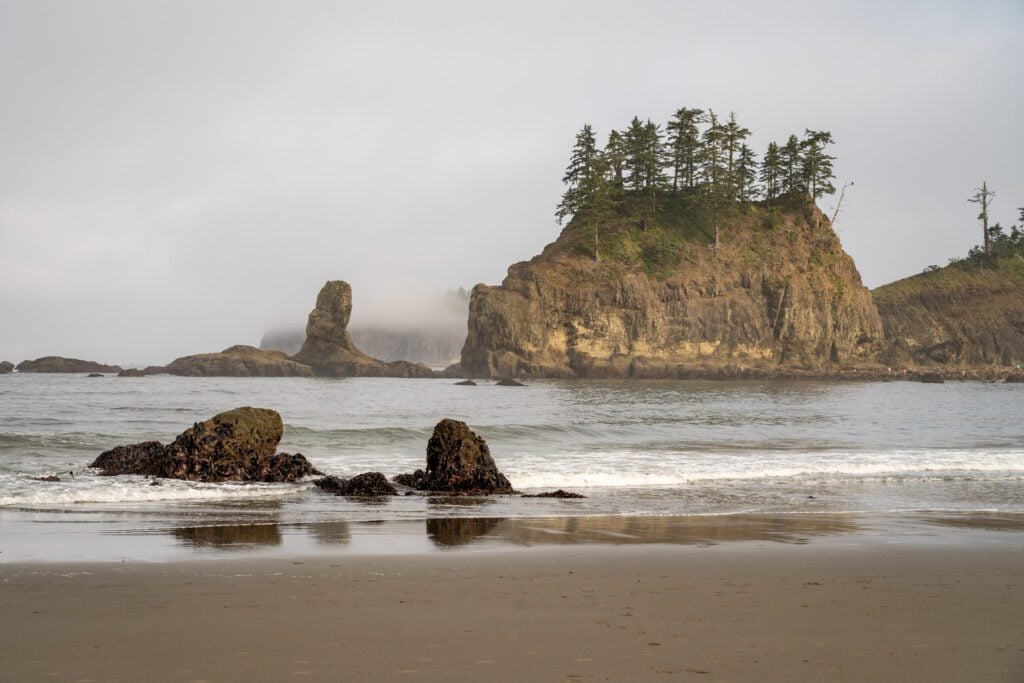
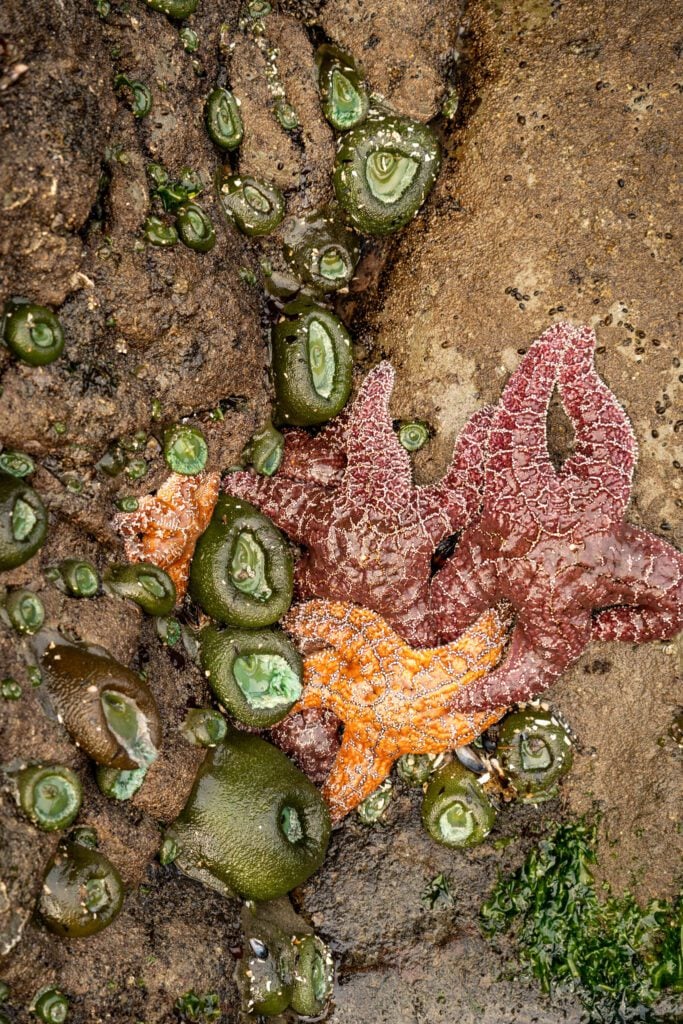
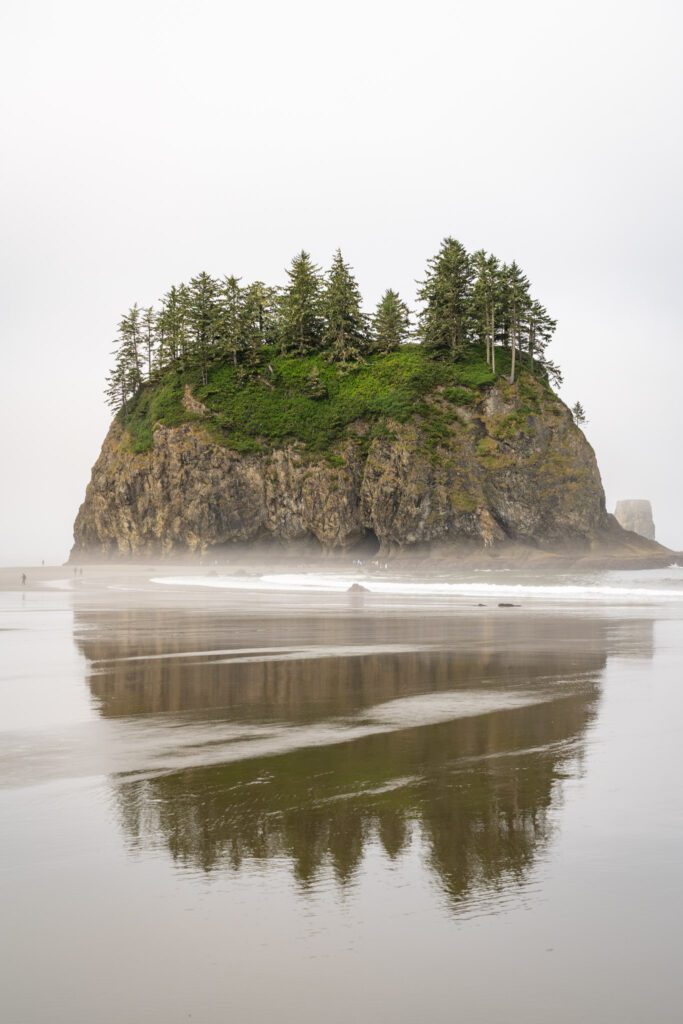
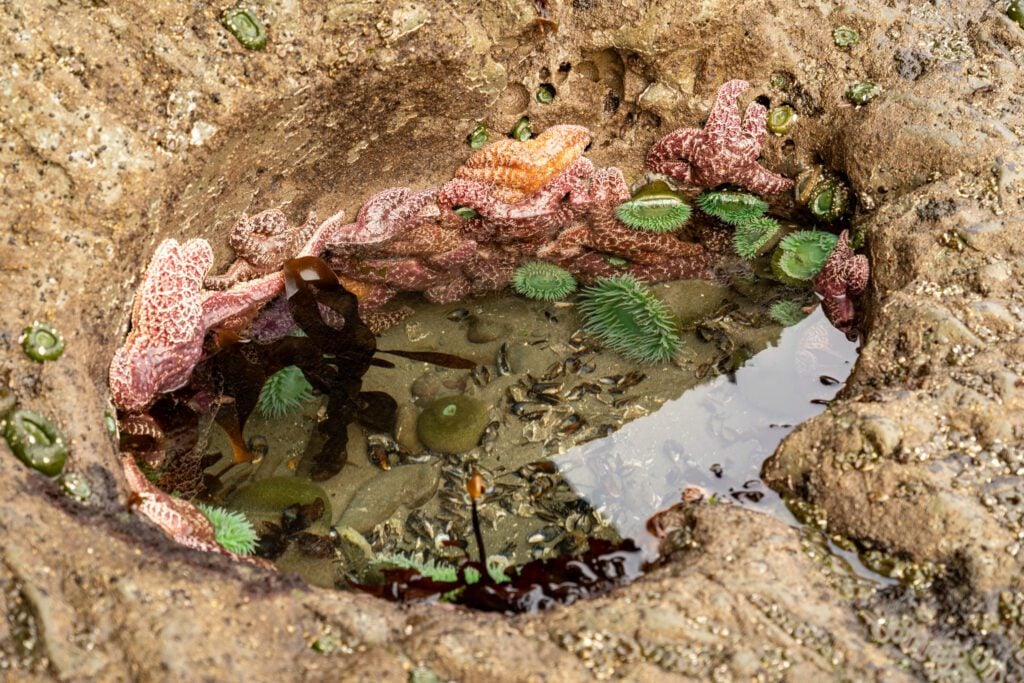
Next would be Third Beach, which has a similar vibe to Second Beach without the tidepooling (because there are not as many rocks and sea stacks just offshore).
It’s a slightly longer hike at 3 miles round trip, and the parking situation is a little more difficult due to the smaller lot (which has the benefit of limiting the number of people out on the trail).
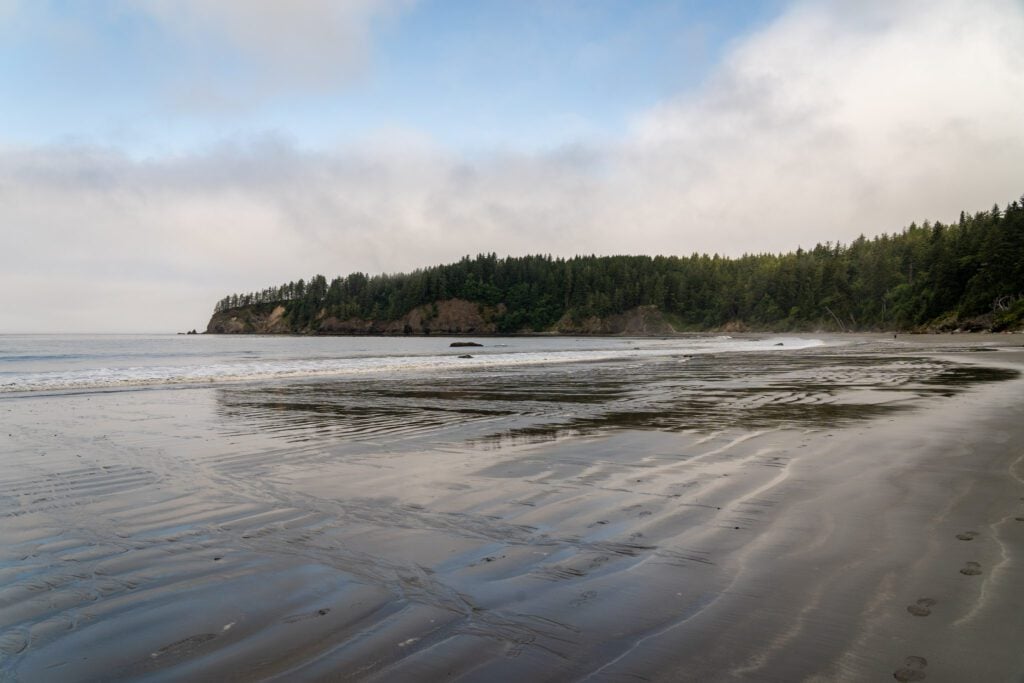
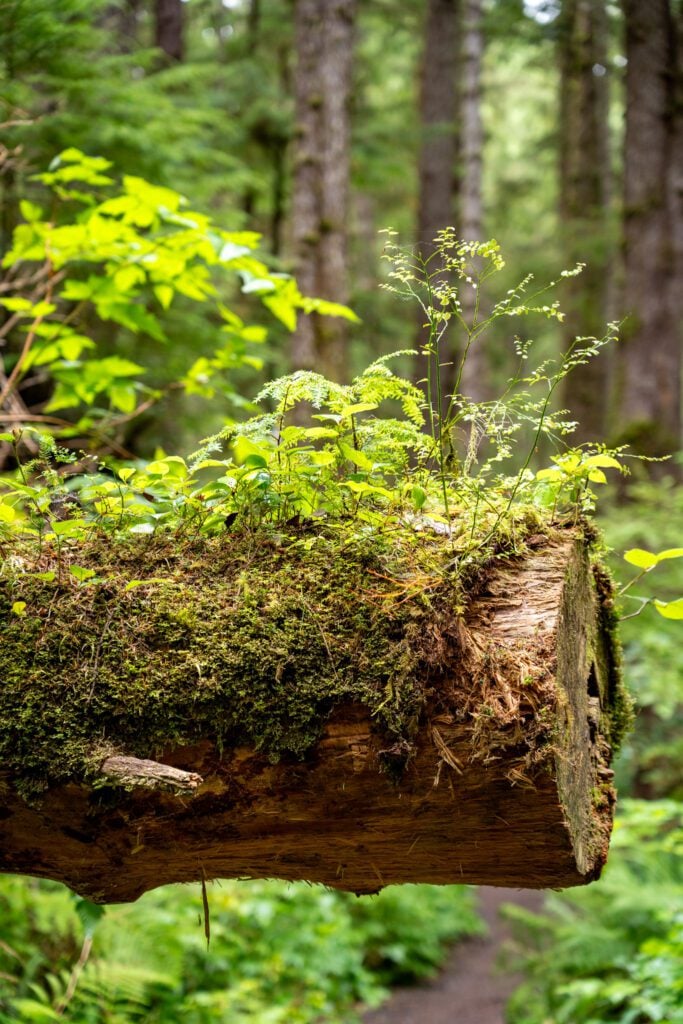
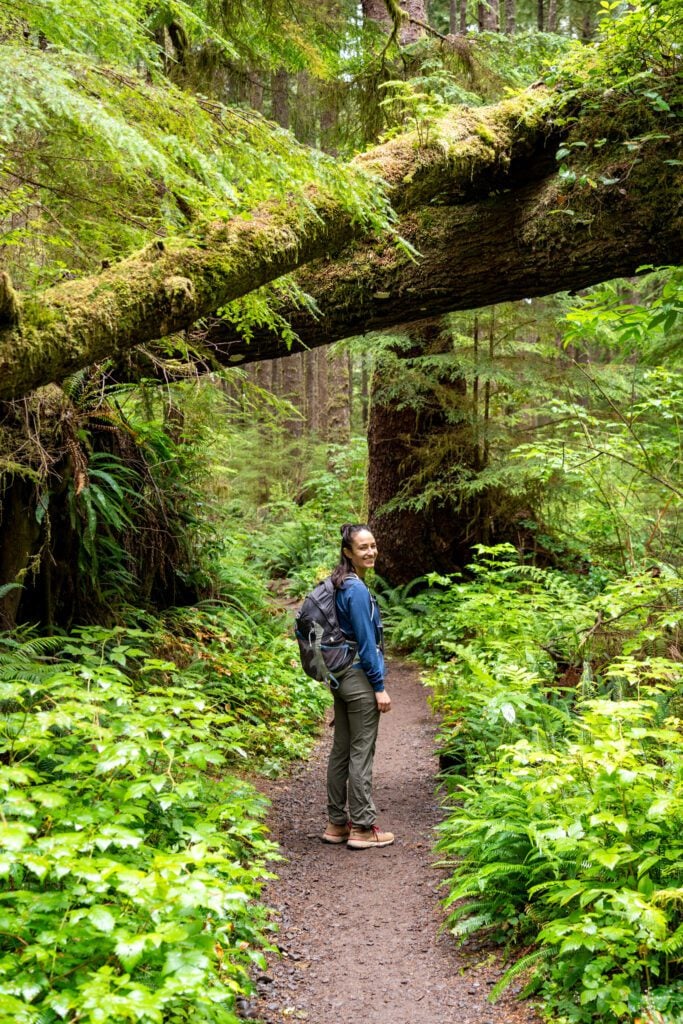
First Beach is also nice, and you can drive right up to the beach without a hike.
We have an entire separate section on camping on the beach below, because it’s one of the more unique opportunities in the park, and there are a bunch of good places to do it (including both Second and Third Beach).
An important note: As of 2026, parking at First and Second Beach requires a parking permit that allows parking on Quileute Tribal Lands.
There are handy signs at the lots with QR codes to pay, but there is zero cell coverage out in La Push, which makes those QR codes completely useless.
Instead, you’ll have to stop by the Lonesome Creek Store (here on Google Maps) to grab a physical parking permit in person.
As we were standing at the trailhead, we saw three different groups try to pull up the website on the QR code, fail because they had no service, and head on down the trail.
Explore the Hoh Rainforest (Rainforests)
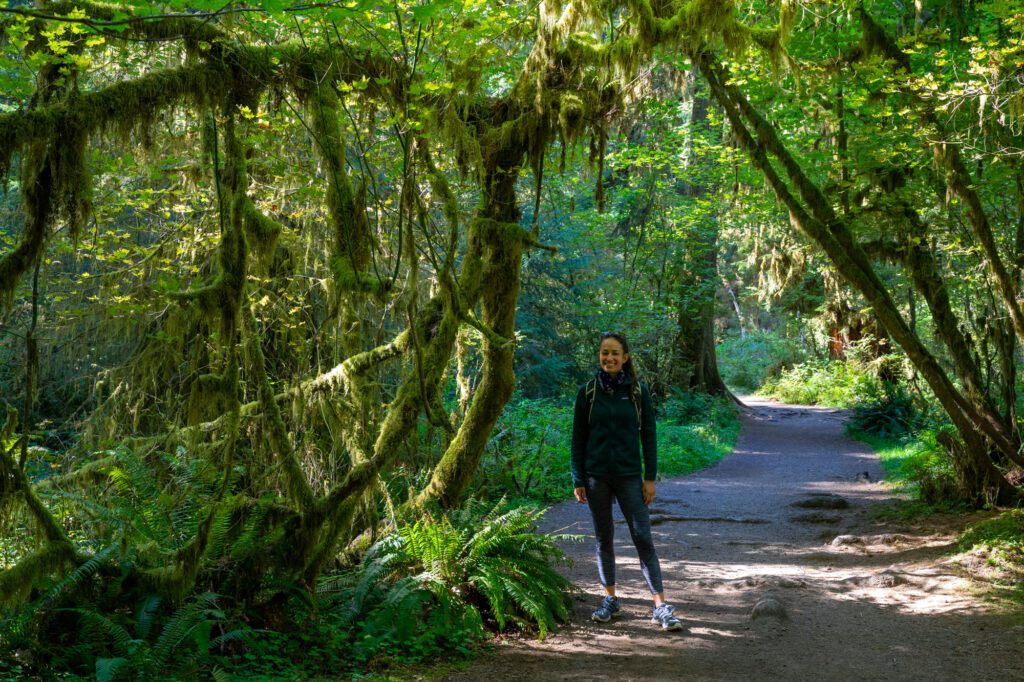
The amount of rain that this part of the world gets every year means that it’s a lush, green, wonderfully wet example of the coastal temperate rainforest.
This unique ecological feature is a staple of the Pacific Northwest coast, and the Hoh Rainforest in particular is one of the best examples in the world.
Which is probably why the Hoh Rainforest is, perhaps, the most popular area in the entire park.
Can we be honest with you for a second? The more time we’ve spent in Olympic National Park, the more we’ve realized that you’ll find incredibly beautiful examples of the coastal temperate rainforest in every corner of the peninsula.
At one point on our latest trip up to the Olympic Peninsula, I turned to Alysha in the Quinault Rainforest and said “is this actually better than the Hoh?”
It’s not that the Hoh Rainforest isn’t beautiful, because it certainly is.
It’s more the fact that it’s the most popular section of the park, and we’ve seen long lines at the entrance station that take two to three hours.
Is it worth it? Only you can answer that question (and you should probably see it at least once in your life).
So let’s talk about how to make the most of a visit to the Hoh Rainforest.
The parking lot is tiny relative to the amount of people who want to see it.
That means that, on summer mornings, they limit access to the parking area and stop people at the ranger station once the lot is full.
From then on, it’s one in, one out.
We ended up stuck in a line of cars for over an hour because we took our sweet time, so take our advice and get out to the Hoh Rainforest by 8:00 am at the latest to avoid it (earlier on weekends in the summer).
If you aren’t able to get here that early and you don’t want to wait in that entrance lineup, we’d point you to the Quinault Rainforest (at the southwest edge of the park) and the beach hikes out at La Push (Second and Third Beach) which have some exquisite examples of the rainforest that makes this corner of the world special.
Now, the Hoh Rainforest it’s not a rainforest in the tropical sense, like you might find in the Amazon. That’s hardly “temperate.”
Instead, as you enter the rainforest, you’ll find a diverse ecosystem full of every shade of green that exists in the world, from bright green ferns covering the forest floor, to deep green mosses and evergreen trees.
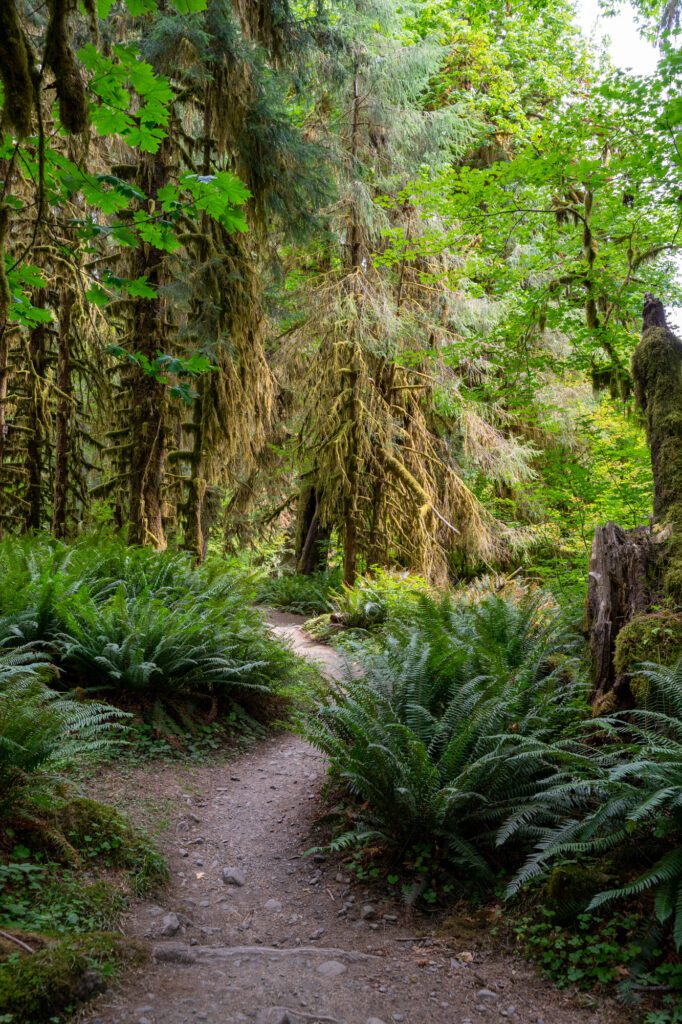
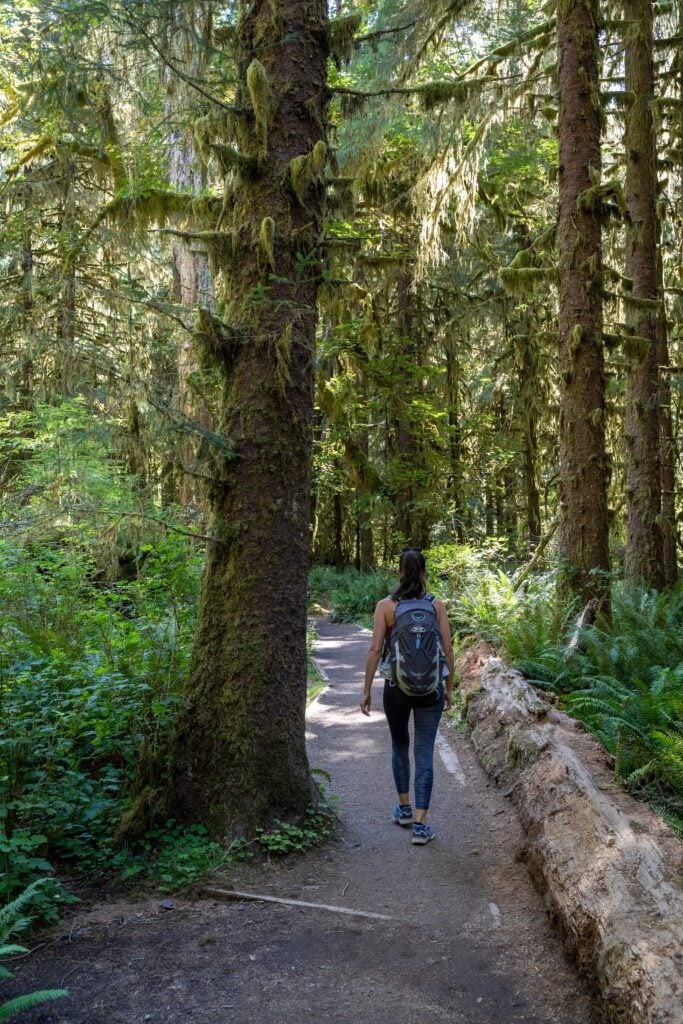
Plus a cornucopia of wildlife, namely the elusive Roosevelt Elk who sometimes make an appearance here (your chances are much better early in the morning).
Once you navigate the parking situation, there are a couple of short trails to tackle that serve as a great introduction to the rainforest – The Hall of Mosses and the Spruce Nature Trail.
Both are worth doing, and are accessible for hikers of all ages and experience levels.
The issue we have with the Hoh Rainforest is that those two short hikes we mentioned earlier are absolutely jam packed with people, which is not really how the rainforest is meant to be experienced, we think.
The good news is that there’s a nice, relatively easy hike that will take you out further than about 99% of people are willing to go, following the path of the Hoh River.
The Hoh River Trail actually goes all the way out to Five Mile Island at the base of Mount Olympus, following the river the entire way.
But for a shorter day hike option, hike out about two and a half miles to Mineral Creek Falls, where you’ll find a path that takes you out to the riverbank.
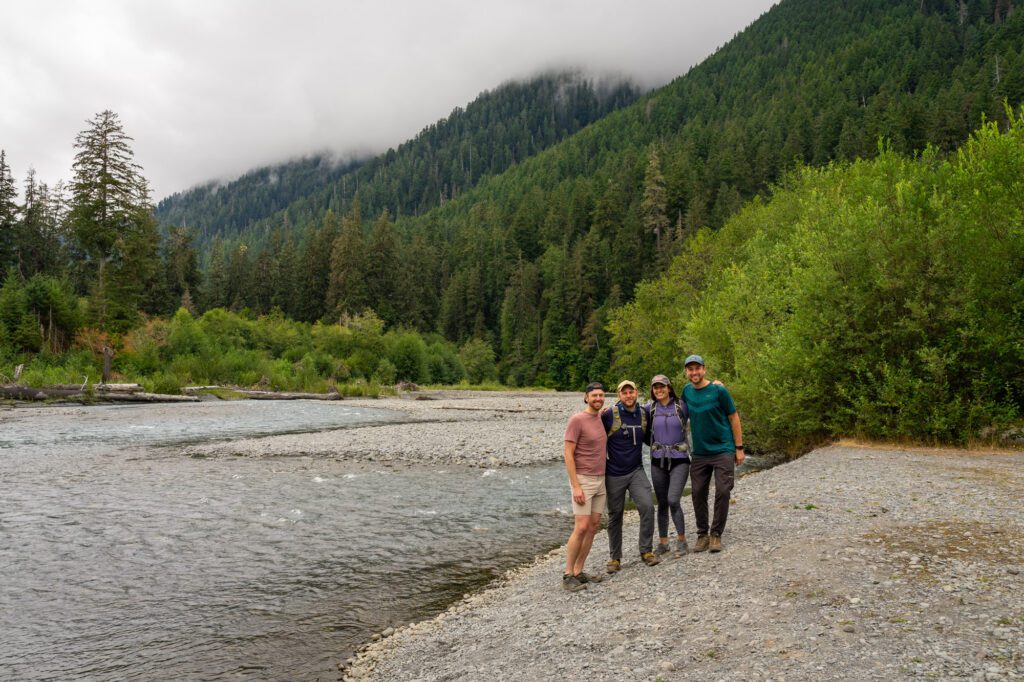
We did this hike with some friends a few years ago, and the only other people we saw on the trail were backpackers heading into or out from the backcountry.
It’s a huge contrast from the wild crowds you’ll find on the shorter trails nearby.
Admire the Sea Stacks and Driftwood at Ruby Beach (Central Pacific Coast)
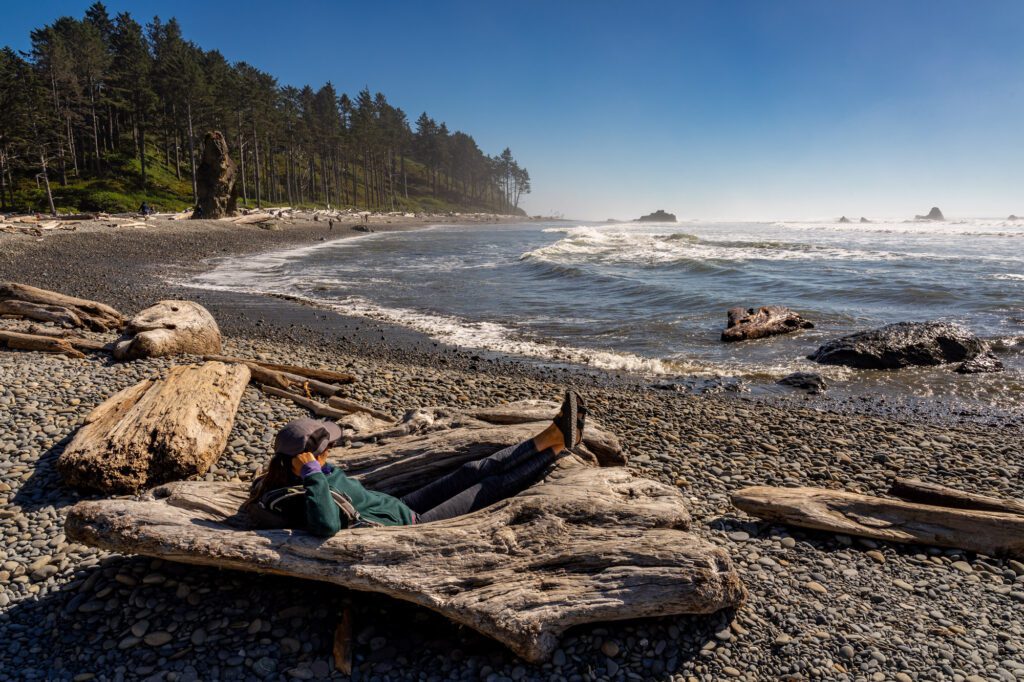
Ruby Beach is one of our favorite beaches in Olympic National Park, though judging by the crowds, a lot of people seem to agree with us.
It has two of the trademark aspects of beaches on the Pacific Coast in Washington State: driftwood and sea stacks.
The parking lot gets packed here, and this is a good spot to do early in the morning or late in the afternoon in an effort to avoid those crowds.
The location near the turn-off for the Hoh Rainforest does make this a nice thing to do on the day when you head out to the Hoh (or when you drive in/out along 101).
Part of the reason is the fact that it’s a very short walk from the parking lot, which means that the barrier to entry is nearly nonexistent.
We’re definitely not saying don’t go, we’re saying be aware that you’re not going to have a whole lot of solitude when you do.
Take a Long Walk Along Kalaloch Beach (Central Pacific Coast)
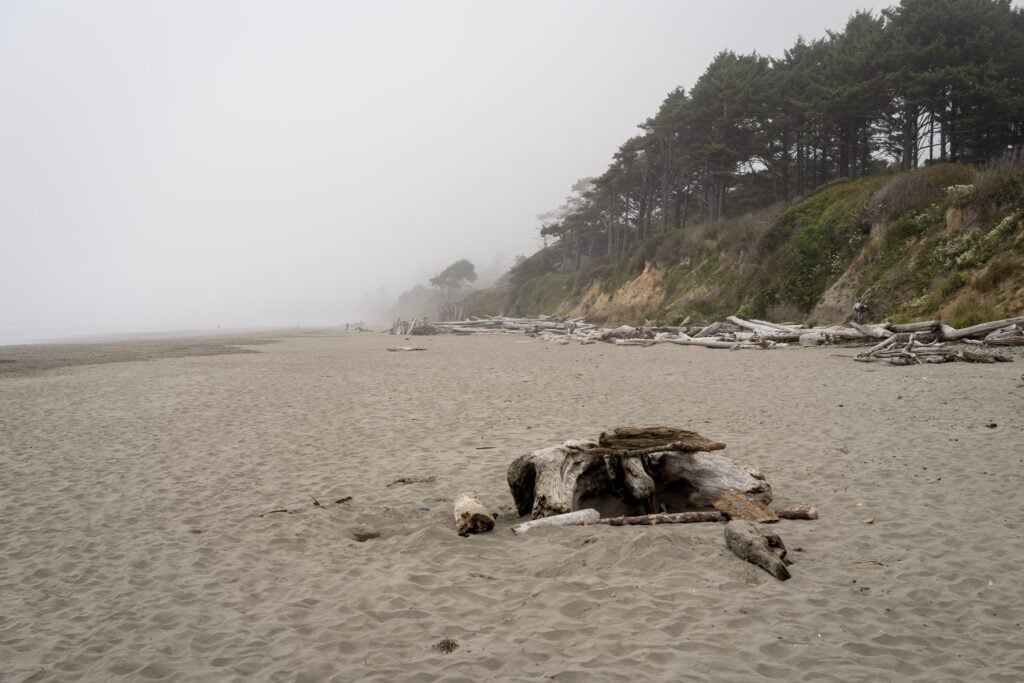
Kalaloch Beach (which is pronounced “clay-lock”) is on the southern end of the park, and it feels very different from many of the other beaches you’ll be hitting on your Olympic adventure.
The beaches on the northern Pacific coast, closer up towards Forks and Cape Flattery, are more rugged and protected, often broken up by points and sea stacks that are impassable even at the lowest of low tides.
The result is this magical little slice of coast that feels very wild yet contained, with sea stacks, tidepools, and dramatic landscapes along the beach.
Kalaloch Beach, on the other hand, is basically one long sandy beach that stretches for miles and miles.
Similar to the other beaches, it’s laden with all sorts of driftwood, but because it is so wide open and vast, it has less of a “wow” factor than many of the park’s other beaches.
They’ve split the beach into six separate sections, though they’re all connected and you could walk from one end of the beach to the other, if you really wanted to.
There is a historic national park lodge at Kalaloch – the Kalaloch Lodge – which has a series of lodge rooms and cabins that overlook the beach.
It’s a nice vibe, but if we’re being honest, the national park lodges are expensive for what you’re getting, and we generally would look to stay elsewhere.
The best place to park to get out to the beach and do some exploring is the day use area at Kalaloch Campground (here on Google Maps).
The most famous spot on Kalaloch Beach is the Tree of Life, a big Sitka Spruce that, at one point, was perched on a sandy bluff, but as erosion swept that bluff away, the tree’s roots remain, and it looks like it’s floating.
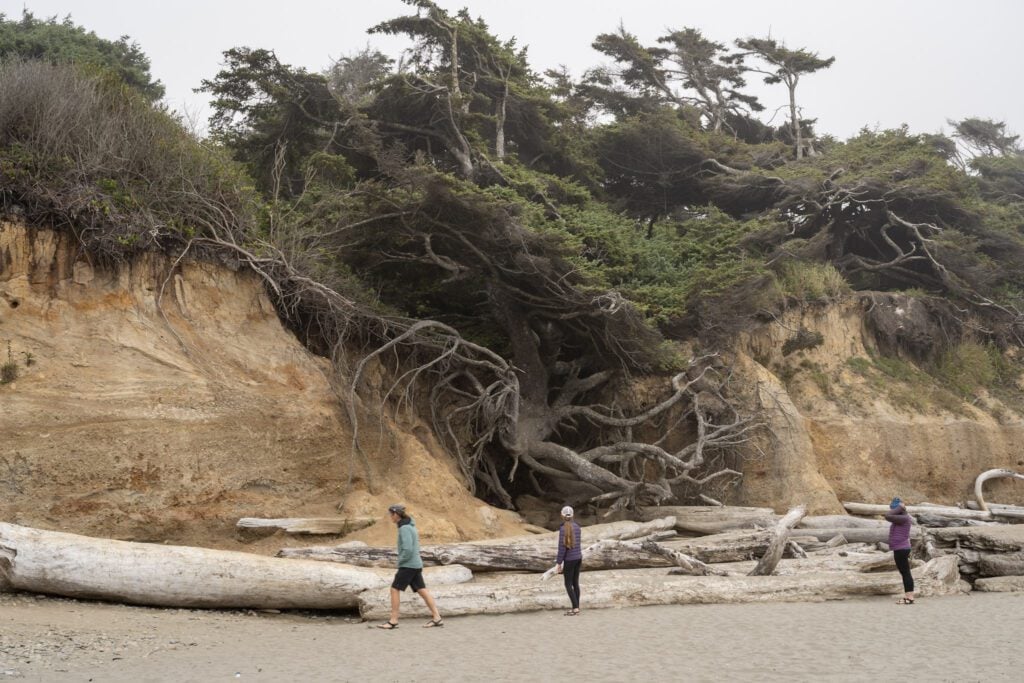
Unfortunately, that erosion hasn’t stopped, so the tree is starting to collapse in on itself as it sinks further and further into the gully. In a few years, it will have completely collapsed.
You should know that it’s an already fragile ecosystem that is made more fragile by the hundreds of people climbing into the root system every single day.
Don’t do that, even if others are, because it directly contributes to the death of the tree.
If you’re looking for the best tidepools on Kalaloch, you should head to Beach 4, which has a small parking area just off of 101 (here on Google Maps).
Explore the Quinault Rainforest & Lake Quinault (Rainforests)
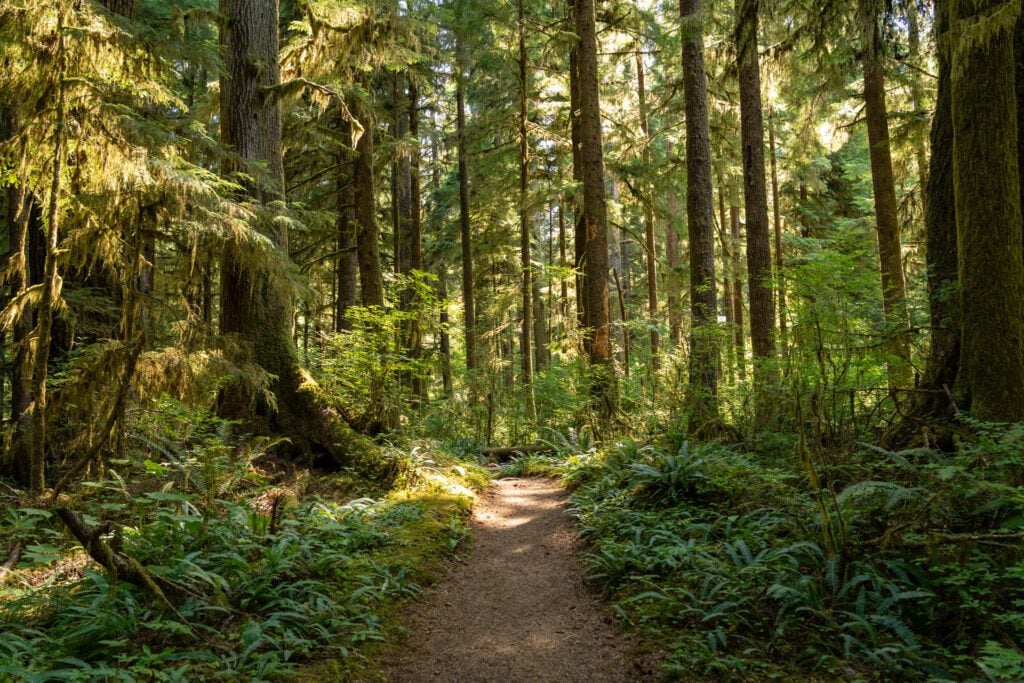
As we finished our hike through the Quinault Rainforest, I turned to Alysha and asked “would we recommend this over the Hoh Rainforest?”
The answer to that question, like most answers, is “it depends.”
The reason I asked that question at that particular time is that we were just finishing up the Quinault Rainforest Loop, a four mile easy hike through the rainforest, and we were struck by how similar it is (at points) to the more famous Hoh Rainforest.
It has all the ferny undergrowth, moss-covered trees, and shades of green that you’ll find in the coastal temperate rainforests up and down this stretch of coast.
The night before, we had read on the park website that wait times to access the Hoh Rainforest can be up to two to three hours (we personally have waited for about an hour after a late start with friends a few years ago), and while the Hoh Rainforest is, in fact, magical, that magic is definitely blunted by sitting in your car for several hours.
The other important factor? In the Quinault Rainforest, we saw a tiny fraction of the people we’ve seen in the Hoh Rainforest.
Technically, the Quinault Rainforest that you find on the southern shore of Lake Quinault is outside the boundary of Olympic National Park (which means pets are allowed on the trails here).
There is a nice network of trails, including a shorter rainforest loop and a walk to the world’s tallest Sitka Spruce, but the one we’d recommend is the four mile loop that we referenced above.
It has it all: a nice walk through the rainforest, a waterfall, and a walk along the shore of Lake Quinault to the historic Lake Quinault Lodge (which is approaching its 100 year anniversary).
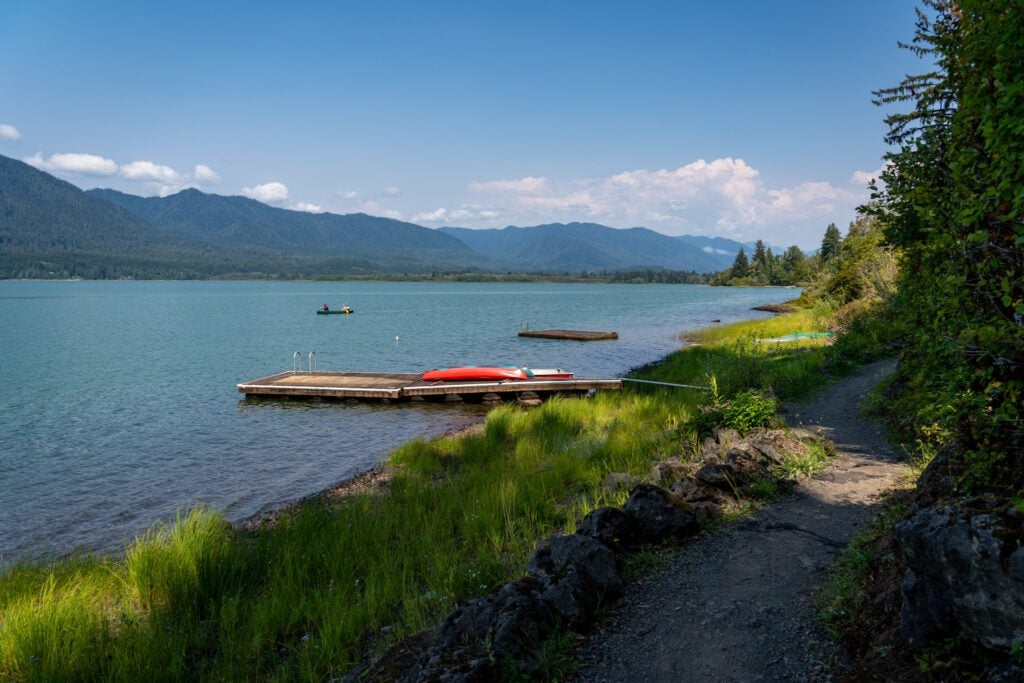
There’s even a stretch that looks suspiciously similar to the Hoh’s famous Hall of Mosses!
We’d do it clockwise, starting and ending at the lodge, which means you’ll do the least interesting (to us) stretch of the hike first, descend into the best slice of the rainforest, and then finish with a walk back along the lakeshore to the lodge.
If you’re looking to get out on the lake, you can rent kayaks and canoes from the lodge (though it’s expensive).
They also have an onsite bar and restaurant if a drink in the big adirondack chairs overlooking the lake is more your style.
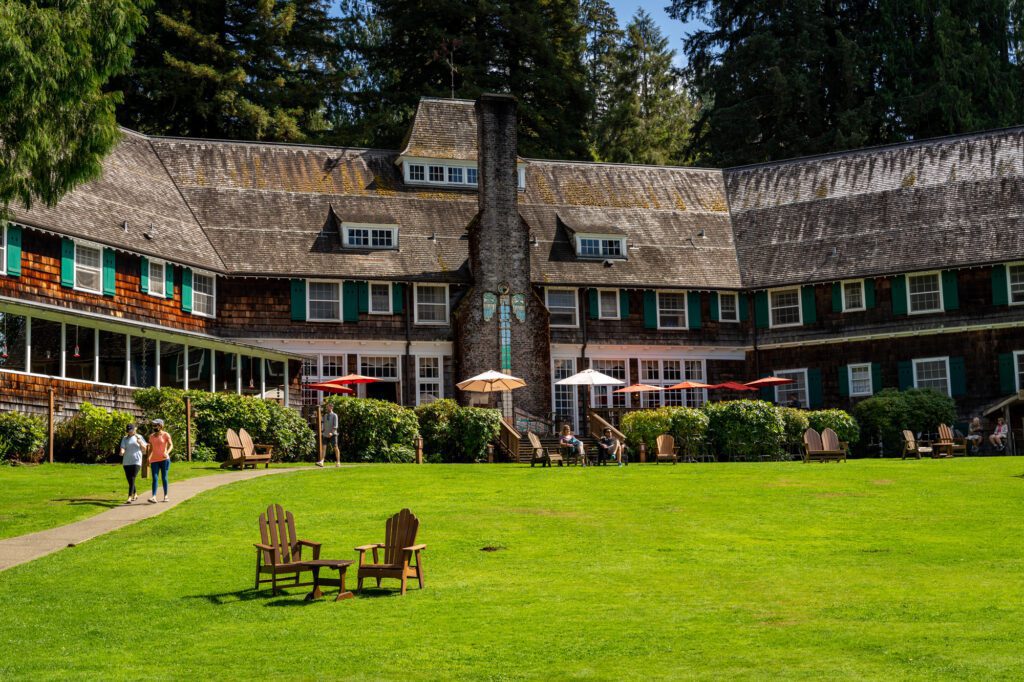
There are also a handful of campgrounds along the southern shore of the lake, which are on National Forest land and, given the location pretty far south, are far less competitive than the campgrounds inside the park’s boundaries.
On that hike, you’ll walk through Willaby Campground, which has some nice lakefront sites that looked lovely.
Spend a Night or Three in the Backcountry (Multiple)
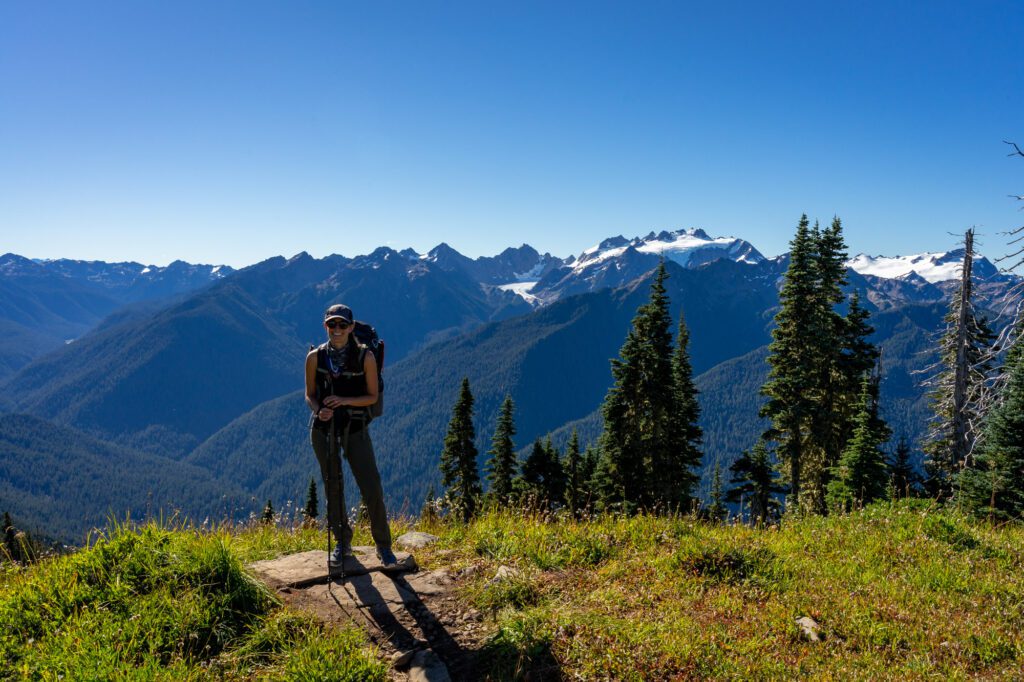
Over the past few years, we’ve had the privilege of tackling two amazing backpacking trails in Olympic National Park, and loved them both.
Keep in mind that you’ll need a bear canister for any overnight camping – including on the beach – in Olympic National Park.
We have this one, and highly recommend it. Other friends have one of the clear, screw top ones, and prefer using ours.
If you’re planning to do any overnight backpacking, make sure to stop at the ranger station in Port Angeles to get your backcountry permits, bear canisters (for rent if you need them), and information about the park.
If you’re 16 years old or older, it will cost you $8 per night (plus a nonrefundable service fee).
Any overnight stay in the wilderness will carry this fee, so make sure you get your wilderness permit ahead of time. You can also print them at home ahead of time.
More information on backpacking in the park here.
The High Divide / Seven Lakes Basin (Lake Crescent)
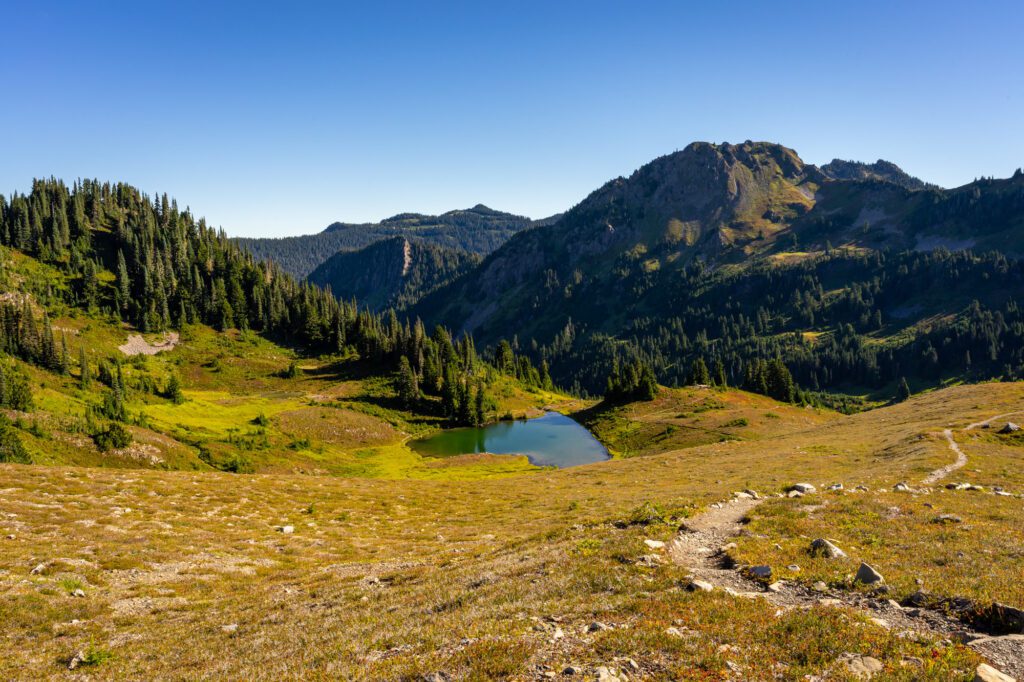
The High Divide Trail is one of the few backpacking trails that we’ve done where we got to the end and said “yeah, we’d do that again.”
For example, after hiking the Enchantments a few years ago, we were pretty sure we wouldn’t do it again in our lifetime (to be clear, it was incredible but hard to get a permit and a difficult hike!).
Now, that doesn’t mean this hike is an easy one – it’s a 19 mile loop with 4,000 feet of elevation gain, including a stretch along a narrow rocky ridge (the High Divide) – but the time spent in the Seven Lakes Basin is worth the price of admission.
It’s not called the Seven Lakes Basin for nothing – along the way, you’ll pass numerous different alpine lakes that are various shades of blue.
Our favorites were Heart Lake – which is on the east end of the High Divide – and Lunch Lake, which is up on the High Divide (and is a campsite that you should definitely try to spend a night at, if you can swing it).
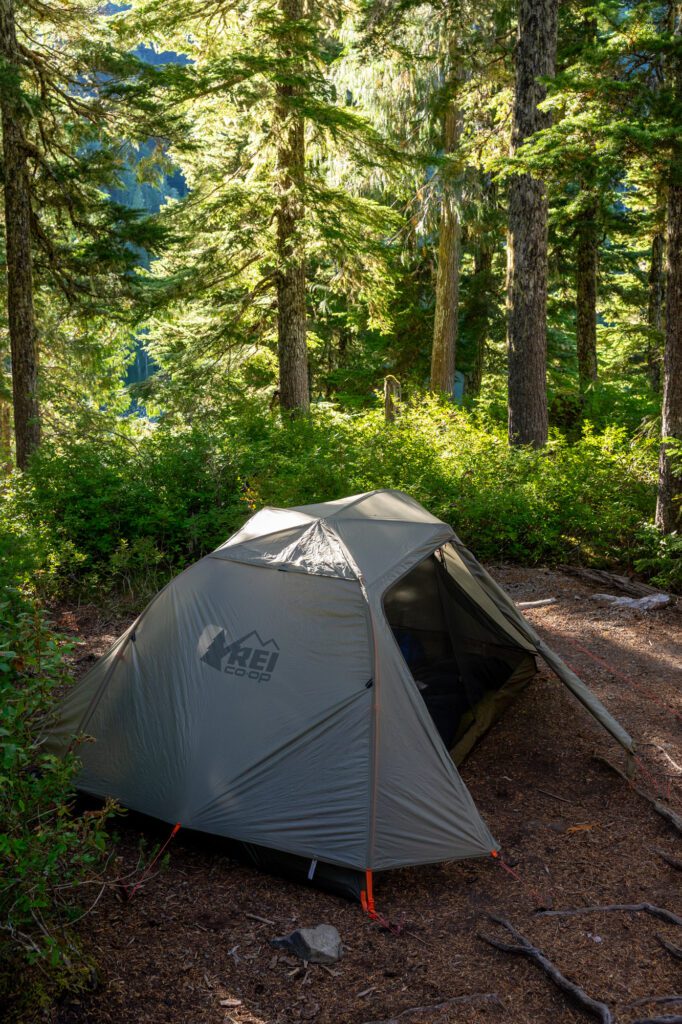
We have an entire separate guide dedicated to hiking the High Divide Trail that you should read if you’re remotely interested in this incredible backcountry adventure.
At the very least, you’ll need backcountry camping reservations and a backcountry permit (which you can get here), along with a bear canister.
The Enchanted Valley (Rainforests)
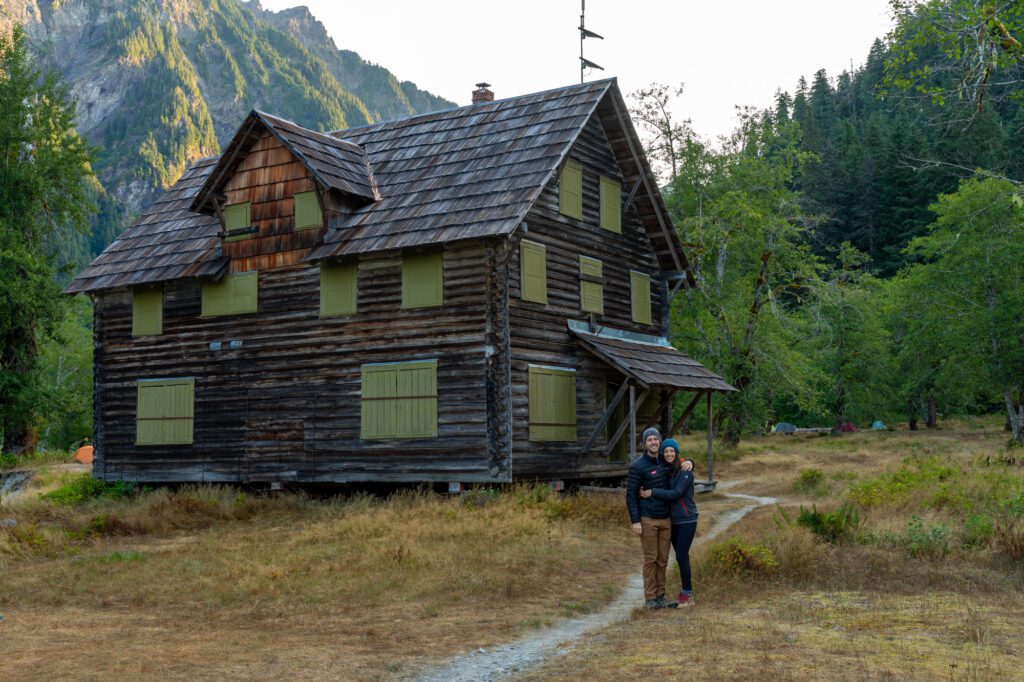
Another fantastic backpacking trail in Olympic National Park! The Enchanted Valley is a glacier-carved valley deep (ish) in the Olympic National Park backcountry.
The valley itself is gorgeous, and it’s worth spending a night or two soaking up the solitude out there. The hike is also great, following the East Fork of the Quinault River through the rainforest.
But the most famous part of the trail is the now-abandoned Enchanted Valley Chalet, which is a former park building that has since been closed, and now serves as a backdrop for pictures of people who make the journey out to the valley.
We did this trail the summer after the High Divide, and it’s hard to say which one we enjoyed more. This one is slightly easier, at 27 miles roundtrip (in and out, no loop here) and only a gradual 3,200 feet of elevation gain along the way.
You need a wilderness permit and a bear canister, just like any other backpacking trail in the park.
We did three days / two nights here, but would recommend an extra night if you can swing it because hiking the entire 13 miles in one go was a little much. Better to spend a night on the trail there and back to break up the long days.
Definitely make sure to spend a night in the valley itself, which is where you’ll find the picturesque chalet that’s in all the pictures (it’s not actually being used at the moment).
We loved this hike, though the valley isn’t so secluded these days (there are routinely 100 people camping in the valley on summer weekends).
We have an entire separate guide dedicated to backpacking the Enchanted Valley Trail that you should read if you’re interested in this backcountry adventure.
Camp on the Beach (Central & Northern Pacific Coast)
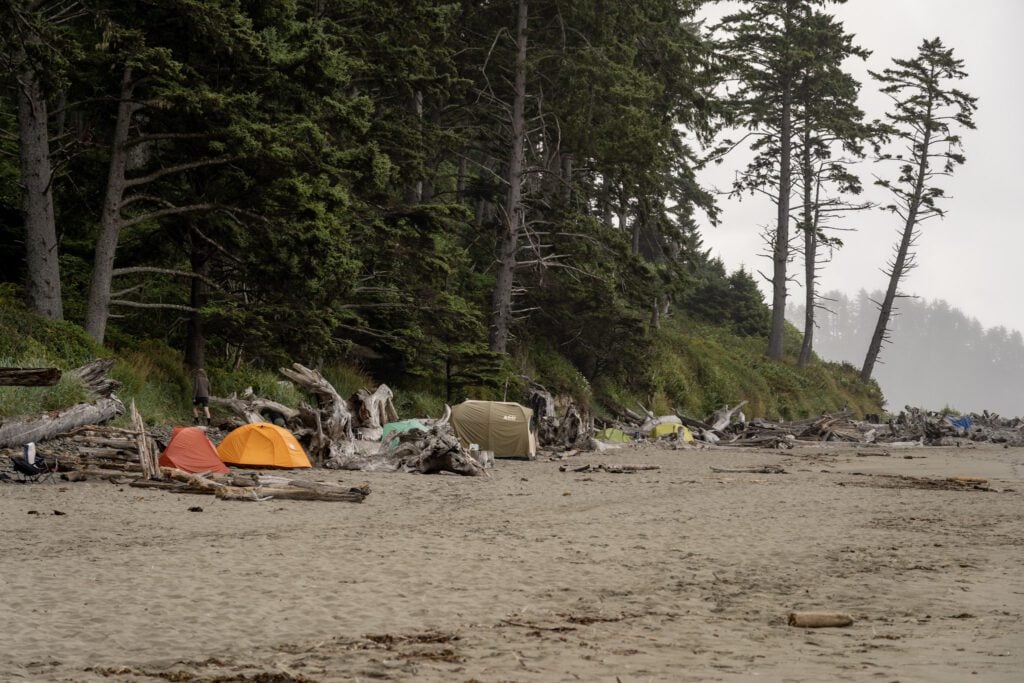
One of the unique things about Olympic National Park is that you can spend a night camping on the beach relatively easily.
Unlike places like the Lost Coast Trail in Northern California, which require a long hike to reach the beach, you can camp on the beach in Olympic National Park with limited hiking to reach the beach.
In some cases, you can just park at the parking lot for the beach, and you’re basically there (though that’s the least fun option, we think).
One thing to keep in mind here is that it rains A LOT in Olympic National Park. Even in the middle of summer.
We had permits to camp on the beach in August a few years ago, but decided to bail when we showed up and it was pouring sideways, which wouldn’t have been much fun at all.
If you’re looking to spend a night on the beach with limited hiking in, two good options are Second Beach and Rialto Beach near La Push.
Shi Shi Beach up on the northern coast near Neah Bay is also a great option, though the hike is a little longer (two miles each way).
For some good beach camping that is significantly less crowded, hike south past Third Beach and continue along the South Coast Route, which runs south all the way to the mouth of the Hoh River (just north of Ruby Beach).
There are countless campsites along the coast, and permits are generally easier to get because you have to go further than, say, Rialto.
Wilderness permits are required to camp on the beach, and you need to have a bear canister.
Some of the most popular places to camp are Rialto Beach (at the end of the beach towards Hole-in-the-Wall, where camping is allowed), Shi Shi Beach, and out near Lake Ozette.
Our Favorites Things to Do in Olympic National Park, Mapped
As promised, here is a map of all of the things to do – hikes, waterfalls, viewpoints, etc – mentioned in the guide above so that you can visualize what we’re talking about.
Planning a Trip to Olympic National Park?
We’d Love to Help!
We have a bunch of detailed guides to visiting the Olympic Peninsula that are all based on our own personal experience exploring the park.
- All of our Favorite Things to Do in Olympic National Park
- How to Plan a Perfect Olympic National Park Itinerary (3-4 Days)
- Where to Stay in Olympic National Park: A Complete Guide
- The Best Hikes in Olympic National Park: A Helpful Hiking Guide
- Hiking the Enchanted Valley Trail: A Perfect 2-3 Day Backpacking Trip in Olympic National Park

I am from the Midwestern and have traveled to WA four times but never had the chance to make it to Olympic National Park! I am finally visiting this year and am.so glad I came across this blog! This was so helpful and thorough! Thank you for posting this! I am even more excited after reading this and will be saving it to my favorites!
Thanks for the kind words, Sue! Olympic is amazing with its incredible diversity of landscapes, and you’re in for a treat when you visit. Cheers!