How to Plan an Unforgettable 2 Day Death Valley Itinerary
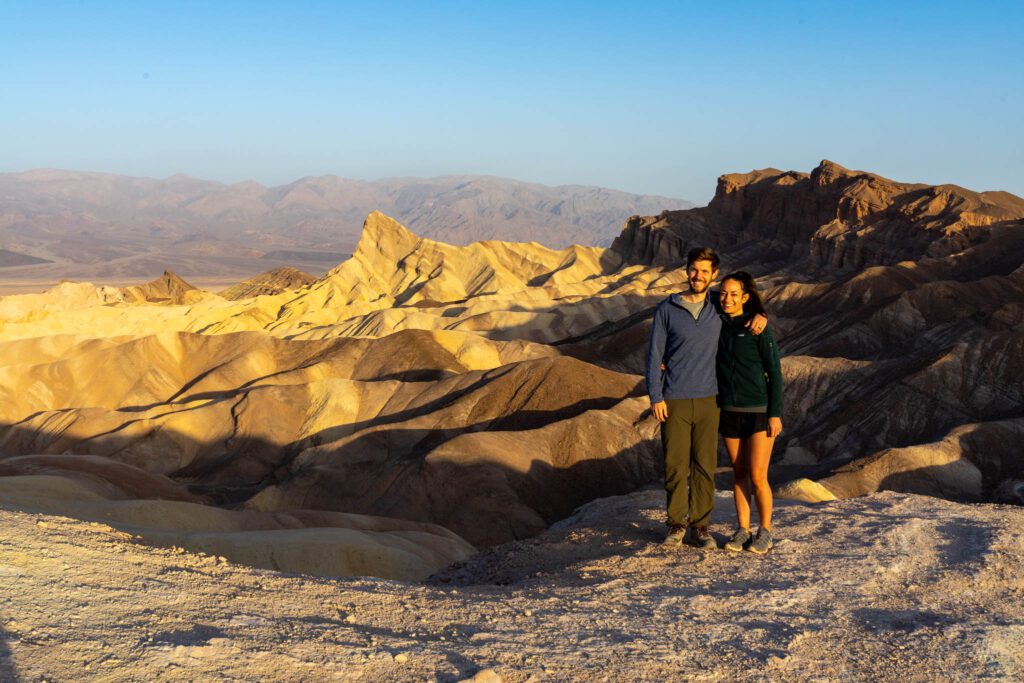
To be honest, we weren’t quite sure what to expect on our first trip to Death Valley National Park. Just about the only thing I knew was that parts of Star Wars were filmed here, notably some of the Tatooine scenes, which meant I was anticipating big expanses of desert and sand dunes as far as the eye can see.
Turns out there is so much more to Death Valley – incredible canyons, the lowest point in North America at Badwater Basin, epic sand dunes, and even a crater.
In this guide, we’re going to go through everything we think you need to know to plan an amazing Death Valley National Park itinerary. We’ll start with logistics – when to visit, how to get to Death Valley, etc.
Then we’ll move on to a detailed guide to spending 2 days in Death Valley National Park, followed by some ideas for what to do with a third day IF you have a high clearance vehicle that you feel comfortable taking off-road.
Sound good to you? Let’s get into it.
One note: Unfortunately, Homer, our Honda Odyssey that we’ve outfitted to be a campervan, doesn’t exactly qualify as a “high-clearance, 4WD” vehicle, which means large swaths of the park were essentially off-limits for us.
Have no fear, we covered the major things that we didn’t get to do, but absolutely wish we could have below in case you do have a suitable vehicle for tackling some of the less developed roads in Death Valley.
Disclaimer: Some of the links in this post, like hotel links, are affiliate links, meaning at no additional cost to you, we make a little bit of money if you click through and book. That being said, we would never recommend something to you that we don’t stand behind 100%.
How Many Days to Spend in Death Valley National Park
Originally, we were going to write this guide for 3 days in Death Valley, which is how many days we had planned on spending there.
But after doing that, and deciding to bail half way through our last day, we think the answer to the question of how many days to spend in Death Valley actually depends on what your vehicle situation looks like.
A majority of the roads in Death Valley are unpaved, and many are unsuitable for regular passenger vehicles. There’s still plenty to do without a high-clearance vehicle, but your options are certainly more limited.
If, like us, you have a 2WD, non-high-clearance vehicle (Homer, our Honda Odyssey, isn’t built for offroading!), then 2 days in Death Valley is probably plenty. We’ve written the itinerary below for that group.
If you happen to have a 4WD, high clearance vehicle, you’re in luck! There’s some cool stuff to see and do off the beaten path, which we’ve added in a separate section below.
We didn’t do these things, mostly due to the minivan situation, but that doesn’t mean you shouldn’t!
You should know that most rental car agreements prohibit you from taking them off of established roads, so even if you rent a high-clearance, 4WD vehicle, it might not be the best idea to take it on the gnarliest of roads that Death Valley has to offer.
If you’re craving exploring some of those off-the-beaten-path places, but don’t have the wheels for it, consider renting a jeep or taking a guided tour through Farabee’s.
The Best Time to Visit Death Valley National Park
We were in Death Valley in April, and by about noon we were absolutely melting in the 100+ degree heat.
I’m not sure who thinks visiting during the summer is a good idea, but we would advise against it unless 120+ degree temperatures are your idea of fun, or you’re a masochist (why not both?).
It’s still hot through the early fall in September, and it starts to cool down as you ease into October.
That’s when most of the campsites in the park start to open up, and it’ll be in the 70’s and 80’s during the day, and 50’s and 60’s at night. Perfect weather, in our opinion.
It gets chilly in the desert during the winter, and even snows at higher elevations.
In fact, in April, there was still a dusting of snow on top of Telescope Peak, which is at 11,000 feet of elevation. In general, it’ll be between 50 and 70, sometimes dropping into the 40’s at night.
It’s also the time of year where you’re most likely to get rain, which can lead to flash floods, particularly in the narrow canyons that are so fun to explore.
Watch the weather, and check in at the ranger station to make sure it’s safe to explore with rain in the forecast.
Spring is also a pleasant time to be in Death Valley National Park, especially before mid-May when it starts to warm up.
There will be the occasional hot stretches where it’s over 100 degrees, but for the most part it’s going to be 70’s and 80’s, and slightly cooler at night.
In years with a lot of rain, you might get to see a wildflower bloom.
We only saw a few patches of flowers and were wondering how they manage to grow in such an arid landscape, and I can only imagine how incredible it would be to see blankets of them covering the ground.
Getting to Death Valley
Death Valley is on the eastern border of California, which is adjacent to Nevada. In fact, if you leave the park through the east entrance, you basically enter Nevada as soon as you leave the park.
We drove all the way from San Francisco to Death Valley in a day, and it was brutal. It took over 8 hours, including stops. However, it’s doable.
We’d suggest stopping overnight to break up the drive, but recognize that you probably don’t have an extra day or two of vacation to devote to making your drive more pleasant.
From Las Vegas
Las Vegas is, by far, the most convenient airport to fly into to get to Death Valley. It takes just two hours to drive from Las Vegas to Death Valley, and you’ll arrive through the east entrance of the park.
If you’re flying in, plan on flying into McCarran International Airport, picking up your rental car, and heading east to Death Valley.
Take 95 North out of Vegas to Amargosa Valley, where you’ll head south on 127. At Death Valley Junction, pick up 190, which is the main thoroughfare through the park, which will take you all the way to the Furnace Creek Visitors Center.
From Los Angeles (or San Diego)
Getting to Death Valley from Los Angeles is the second most convenient way to do it, and it makes a nice weekend getaway from the hustle and bustle of LA.
It’s a 4.5 hour drive, depending on traffic. If you fly into LAX, plan on adding at least an hour to that number.
There are two ways to drive from Los Angeles to Death Valley – one that has you approach from the west via CA-14 N and US-395N, and one that has you approach from the east via I-15 N and CA-127 N.
There’s about a 20 mile difference in length, which is negligible, and it’s going to depend a lot on traffic and where in LA you’re coming from. Check Google Maps to see which route is going to be faster.
From San Diego, it’s between 45 and 60 minutes longer than from LA, but you’ll largely follow the same route.
One note: If you’re planning on doing anything on your first evening, the western approach takes you past Mosaic Canyon and Mesquite Sand Dunes, while the eastern approach takes you past Dante’s View and Zabriskie Point, which are two amazing sunset spots.
Where to Stay in Death Valley
Without a doubt, the most central place to stay in Death Valley is going to be around the Furnace Creek Visitors Center.
From there, you’re roughly equidistant between the Stovepipe Wells area, where you’ll find Mosaic Canyon and the Mesquite Sand Dunes, and Badwater Basin / Dante’s View.
There also happen to be a couple of great places to stay nearby.
Hotels in Death Valley
If camping isn’t your jam, or you’re visiting in the summer and aren’t in the mood for midnight temperatures over 100 degrees F, then consider one of the hotels in the park.
There aren’t that many options, so make sure to book as early as possible (more than 2-3 months out, if you can).
The nicest place to stay is the Oasis at Death Valley, which is just south of the Furnace Creek Visitors Center in a pretty unbeatable location for exploring the main sights of the park.
It has major resort vibes, and you’ll have a choice of standard hotel rooms or “casitas” with a little extra space. You’ll pay a premium for the location and amenities, but it’s better than most national park hotels, which are usually outdated and expensive, at least in our book.
The best value hotel – by value, we mean combination of affordability and location / amenities – is going to be the Ranch at Death Valley, which is also right near the Furnace Creek Visitors Center, but is significantly more affordable than the Oasis.
It’s not the nicest place in the world, but it’ll serve as a great base for exploring. Plus, as we were melting in the heat, we were super jealous of the nice green patio with misters that they have going on.
Other options include the Panamint Springs Resort, which is a no-frills spot at the western edge of the park, about 40 minutes west of Stovepipe Wells (~75 minutes from Furnace Creek) and the Hotel at Stovepipe Wells, which is, as you might imagine, at Stovepipe Wells. Neither are amazing, but they’ll do in a pinch.
Camping Near Furnace Creek in Death Valley National Park
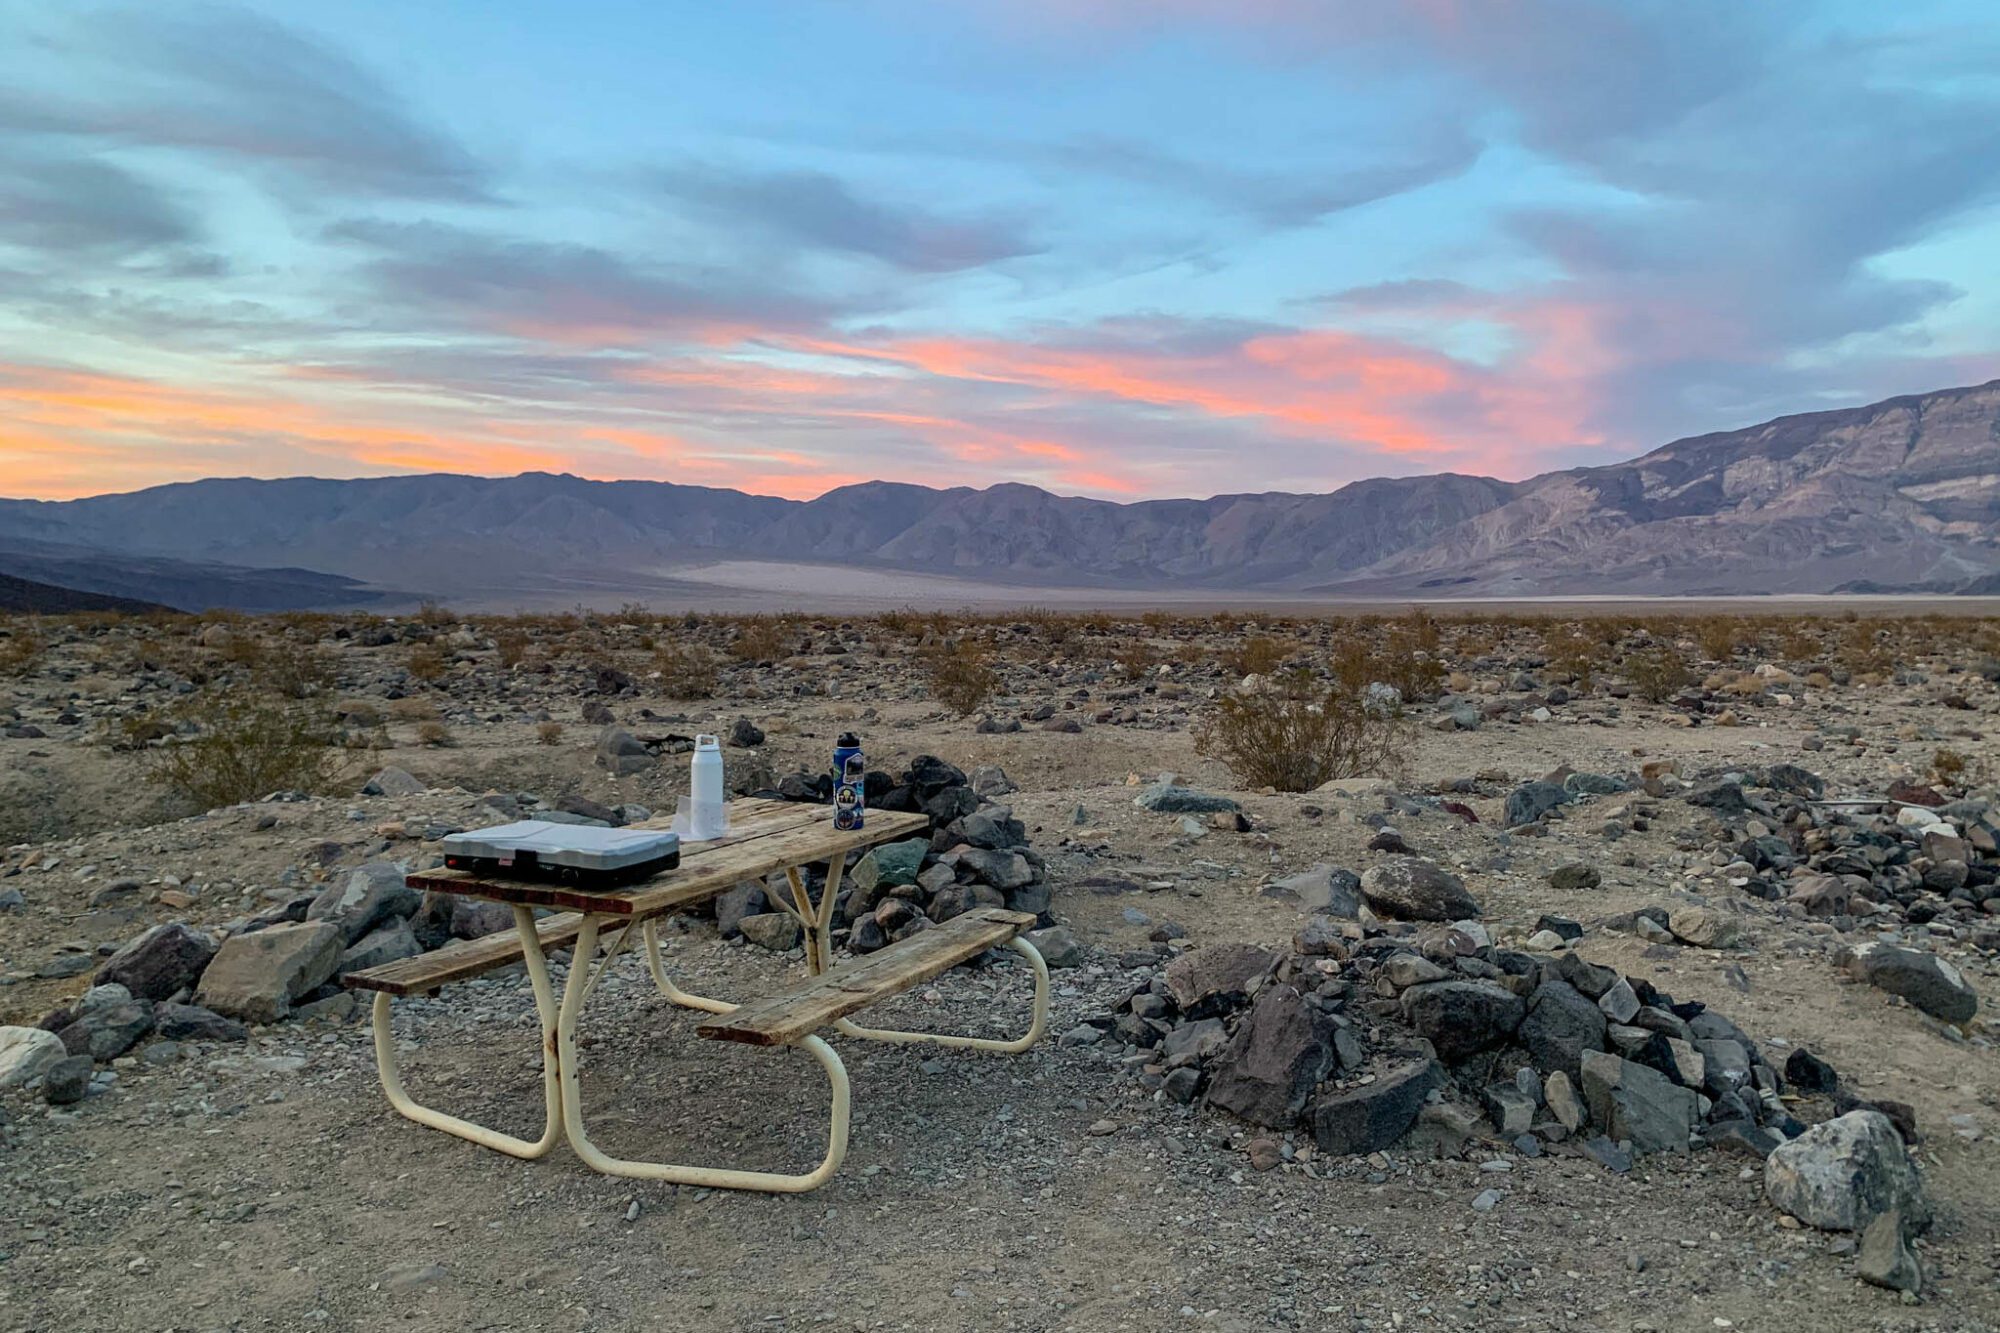
There are a ton of campsites in Death Valley, and all of them except for Furnace Creek Campground are first-come-first-served.
Furnace Creek Campground has 136 sites, and takes reservations between the months of October and April (roughly the 15th of each month).
This is where we stayed, and it’s a fairly nice campground. Potable water, flush toilets, sinks to do dishes – it has it all. It’s open all year, and becomes first-come-first-served over the summer.
The other two campgrounds in the area are Sunset Campground (270 sites!), which we mistook for overflow parking for the visitors center because it’s literally just a dirt parking lot with a few bathrooms – no tables or fire pits here, which means it’s better for RVs – and Texas Springs Campground (96 sites), which is up on the hill with a nice view over the valley below.
After the Furnace Creek area, your next best bet is going to be Stovepipe Wells Campground, which is first-come-first-served and has 190 sites, making it the second biggest campground in the park.
We stopped by to check it out, and it’s nothing special, but if you can’t snag a site near Furnace Creek, it’ll do just fine. You’ll just be a bit further from the bulk of the sites in the park.
There are a smattering of other campgrounds throughout the park, and some of them might be good if you’re planning to hike Telescope Peak or explore the more remote northern parts of the park.
Tips for Camping in Death Valley
There are some things to consider if you’re planning to camp in Death Valley.
First is the fact that the vast majority of the sites in the park are first-come-first-served. If you’re coming on a weekend, you’ll need to plan on securing your site as soon as possible.
As of the time of writing (April 2021), Texas Springs and Mesquite Spring fill up by 7pm on Friday night, and by 1pm on Saturday. Stovepipe Wells fills around the same time.
On the bright side, you’ll probably be able to find a site at Sunset Campground, it just won’t be such a pleasant camping experience.
The other thing to keep in mind is that a lot of the campgrounds are straight up closed during the hot summer months, so if you’re planning on visiting when the valley is at its hottest (first of all, don’t), you’ll need to make other plans.
Furnace Creek Campground is the only well-located spot to camp, and with such a limited number of campsites in the park over the summer, it can fill up – particularly over long holiday weekends.
Emigrant and Mesquite Spring are also open over the summer, but are not ideally located for exploring the park.
Find more information on camping in Death Valley here.
Tips for Visiting Death Valley National Park
Here are some tips that we picked up over the course of our trip that you may (or may not) find useful as you plan your trip to Death Valley.
- When they say Death Valley is hot, it’s not a joke. Temperatures are regularly above 100 degrees F in the warmer months (April to September), which means you need to be extra careful to stay hydrated and wear sun protection. Wear plenty of sunscreen, a sun hat, and drink at least a gallon a day. We were regularly dehydrated despite drinking as much water as we could.
- There is cold water at the Furnace Creek Visitors Center, which is a lifesaver! There is also water at most campgrounds, and at Stovepipe Wells, but it was basically warm.
- Stop at the rangers station to show your National Parks Pass (or pay the $30 entrance fee) and you’ll get an orange piece of paper that you can place on your dashboard – the passes warp in the heat, so they give you the paper to keep your pass intact.
- There are electronic kiosks at most entrances where you can pay the entrance fee. I think that’s the first time we’ve seen them at a national park, which is cool! There’s one at Furnace Creek, Stovepipe Wells, and along 190 on the way into Death Valley from the east entrance (from Vegas).
- There are only a couple of places to eat in Death Valley – mostly at Furnace Creek and Stovepipe Wells. You could also bring a cooler and pack a lunch to enjoy on the road, which is what we do.
- There’s essentially no cell service in the park, with the exception of very spotty service at the Furnace Creek Visitors Center. Plan on downloading an offline Google Map of the park, or grabbing a paper map before your trip.
- The official park map has handy markings that show which roads are paved, which are unpaved but suitable for regular passenger vehicles, and which roads require 4WD / high-clearance.
- Death Valley is a big park – over 5,000 square miles – which means you’ll be driving a lot. There are gas stations at both Furnace Creek and Stovepipe Wells, but it’s going to cost you an arm and a leg to fill your tank. Make sure to fill up your tank outside the park, which will save you upwards of $2 per gallon.
A Complete Guide to Planning an Amazing 2 Day Death Valley Itinerary
Below, you’ll find a fairly detailed guide to our take on how to plan an amazing 2 days in Death Valley.
Plus, below that, we have an additional section on what to do with 3 days in Death Valley, both with a high-clearance vehicle, and without, in case you find yourself with more time.
Note: We’re assuming you arrive in Death Valley the night before, and have two full days in Death Valley, leaving on the morning of the third day to head home, or onto your next stop (might we suggest Zion National Park or Yosemite?).
Day 1: Dante’s View, Zabriskie Point, Golden Canyon, and Badwater Basin
Experience the southern circuit of highlights on your first day in Death Valley, which will take you on a loop that starts with a spectacular view over Badwater Basin from 5,000 feet above, and ends with you on the floor of the basin at the lowest point in North America.
Unfortunately, you’re going to have to choose between the two best sunrise spots in the park – Dante’s View and Zabriskie Point.
We chose Dante’s View, because it makes the most sense from an itinerary perspective.
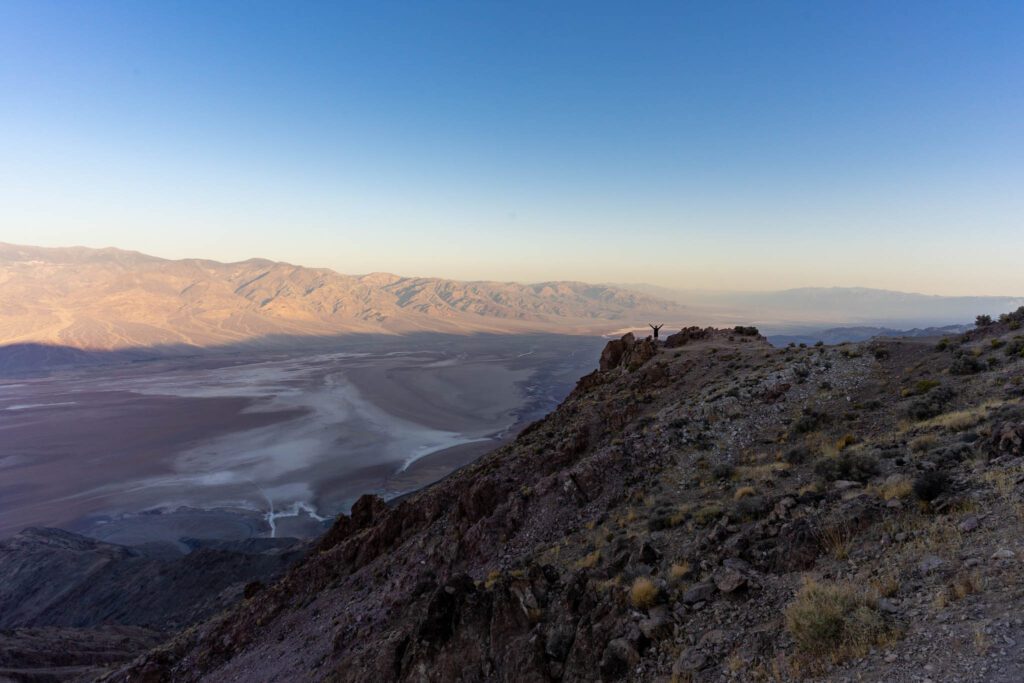
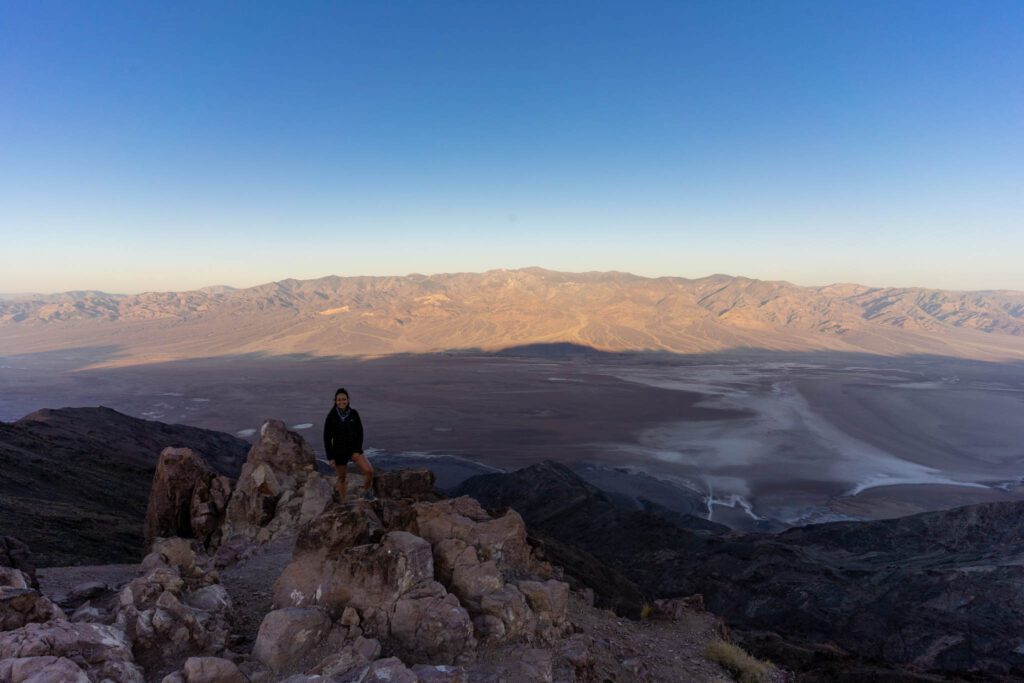
Sunrise at Dante’s View
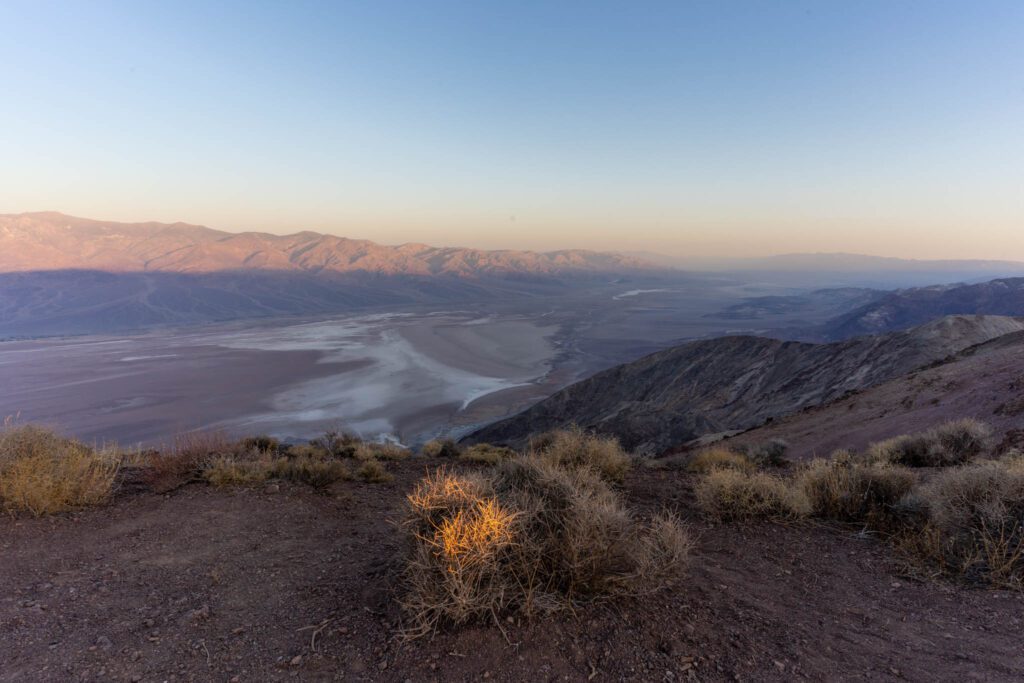
Dante’s View is a bit of a drive to get to, but we think it’s 100% worth it to get an incredible view over Badwater Basin and beyond. Star Wars nerds (like me) might recognize this as the Mos Eisley overlook from A New Hope.
At just a hair under 5,500 feet, this puts you a whopping 5,700 feet above Badwater Basin with spectacular views over the valley backed by Telescope Peak (which is at 11,000 feet) and the rest of the Panamint Range.
There’s a trail that follows the ridge to the north that leaves from the north end of the parking lot. It’s worth following for a bit to get a different view of the valley below – we went for about a quarter of a mile before heading back and moving on.
Oh, and there’s a bathroom at the trailhead (or rather just below it).
Twenty Mule Team Canyon
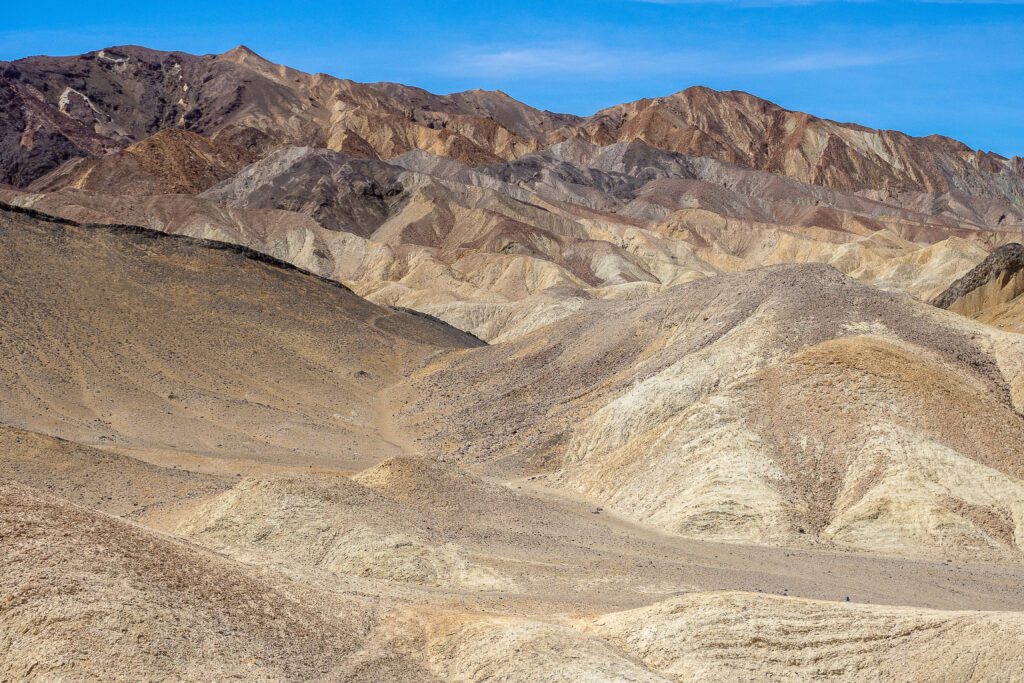
On the way from Dante’s View to Zabriskie Point is Twenty Mule Team Canyon, a road that was once used for transporting borax during mining operations.
It’s a 2.7 mile drive through the rolling golden hills, and there are a couple of spots where you can pull over and do a short hike to a vista point.
It’s unpaved, but we were totally fine in the minivan, so it’s suitable for most (if not all) passenger vehicles.
Zabriskie Point
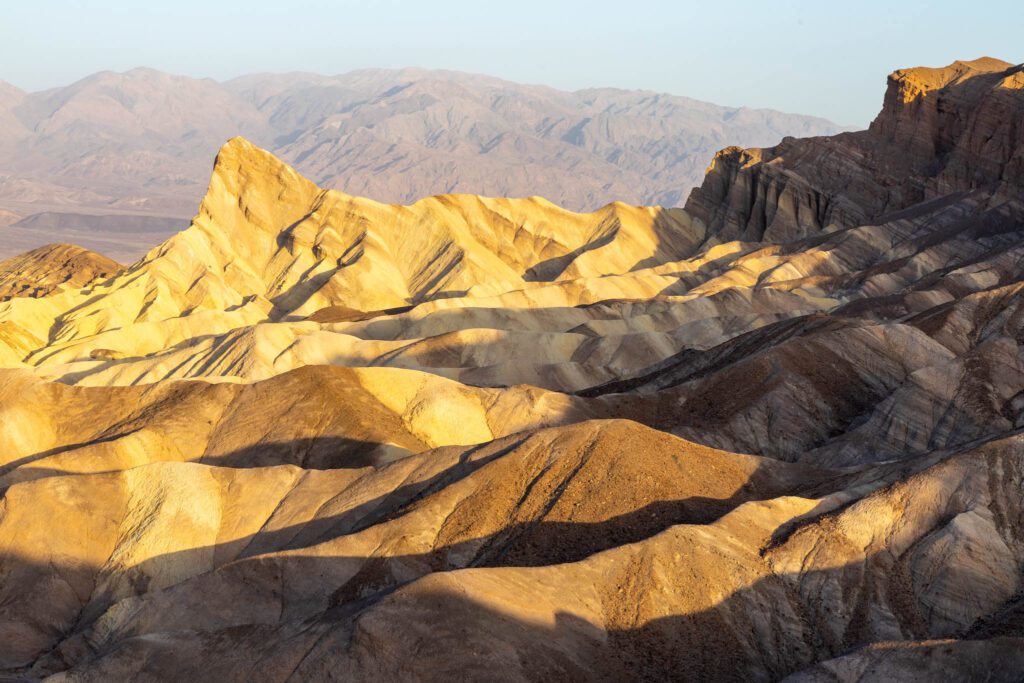
Zabriskie Point is the next stop on your list, and it’s one of the more spectacular vistas in the park. You’ll likely share the view with a bunch of people, so don’t go into it expecting solitude.
A short, paved walk from the parking lot takes you up to a platform with panoramic views.
To the south you’ll see the rolling golden hills of Twenty Mule Team Canyon, this time from above.
To the north is a view over Badwater Basin, with a pointy peak in the foreground and magnificent textures in the rocks that form picturesque waves.
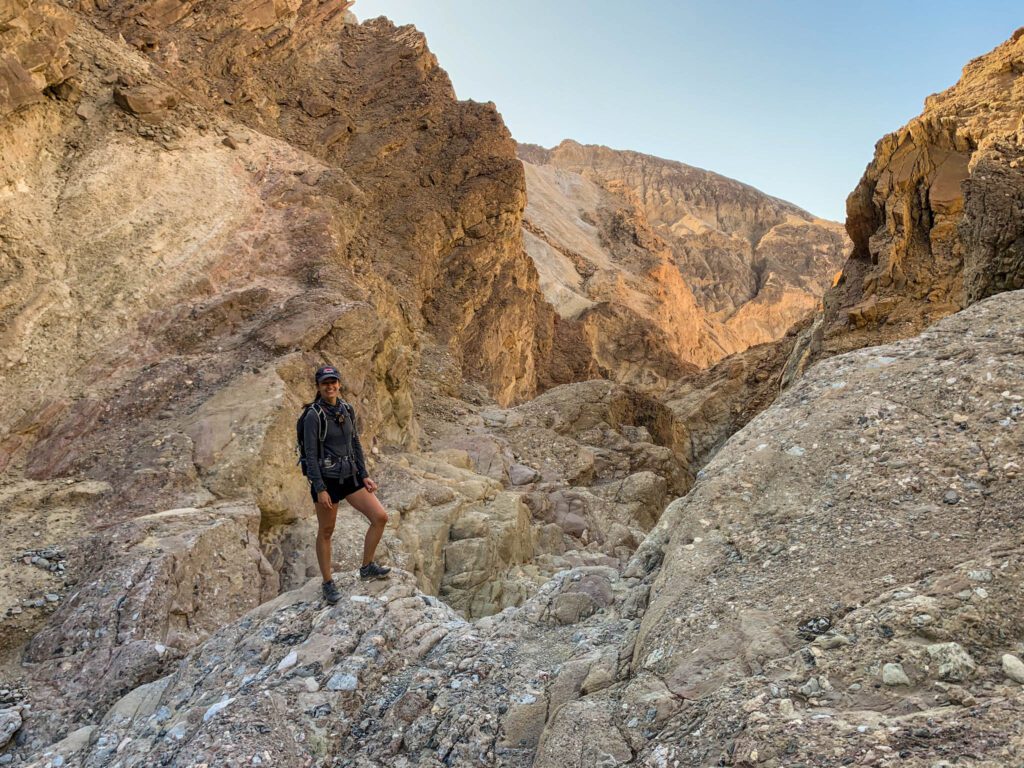
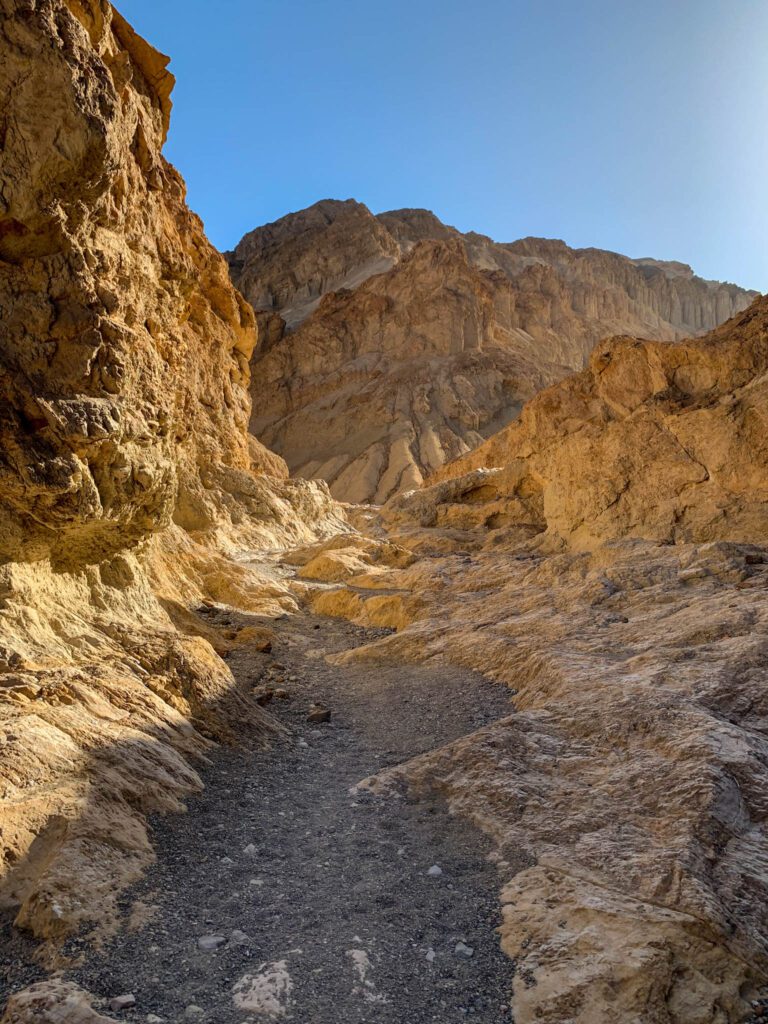
Hike Golden Canyon and Gower Gulch
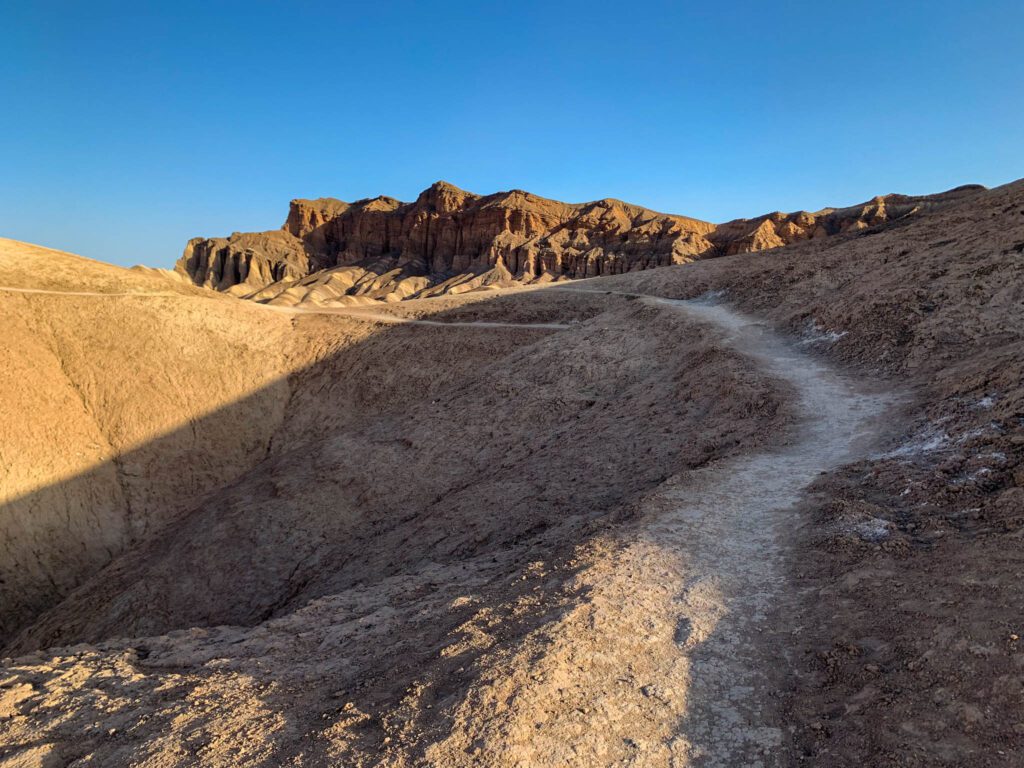
The Golden Canyon and Gower Gulch loop was our favorite hike in Death Valley. Usually, you would do this hike from the Golden Canyon Trailhead on Badwater Road, but you can also do it from Zabriskie Point, which is our recommendation.
The main route is a 6.5 mile loop that takes you from Zabriskie Point, down through Golden Canyon to the Golden Canyon Trailhead, and back up through Gower Gulch.
The first part of the Gower Gulch portion of the hike (coming from the bottom) was our favorite stretch, so it’s well worth doing the entire loop. Bring plenty of water – more than you think you need – because it’s super exposed.

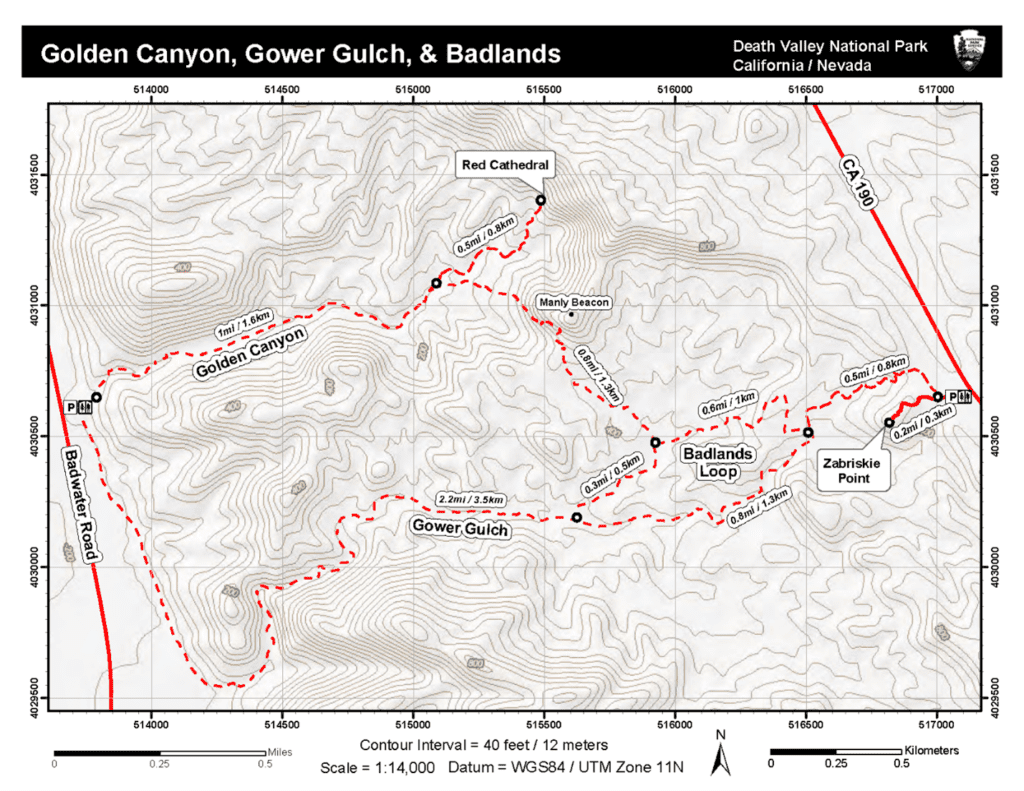
There are a couple of ways to alter this hike, depending on what you’re up for. I’m including the NPS Map here to help illustrate what I’m talking about.
Essentially, this hike is made up of two different figure eight loops. On the version of the hike I described above, you’re doing both loops in full. To shorten the hike, you’ll basically only do one of them.
- Add the 1 mile (roundtrip) offshoot to the Red Cathedral, an impressive rock formation just off the main trail.
- Complete the loop from the Golden Canyon Trailhead up through Gower Gulch, across the short 0.3 mile connector trail, and down the Golden Canyon trail, skipping the Badlands Loop entirely. This is a 4.3 mile hike, and is our second favorite way to do the hike.
- Complete only the Badlands Loop, which is 2.7 miles, and only includes the eastern part of the figure eight. We think you’re missing out here, so we’d opt for a different way of doing the hike.
Siesta!
After your hike, we’d recommend taking a break to beat the heat. From Zabriskie Point, you’re fairly close to the Furnace Creek Visitors Center, and likely your accommodations.
Take a break for lunch, either at one of the restaurants near Furnace Creek, in your room, or parked in the shade at the Visitors Center (no shame – that’s what we did multiple times!).
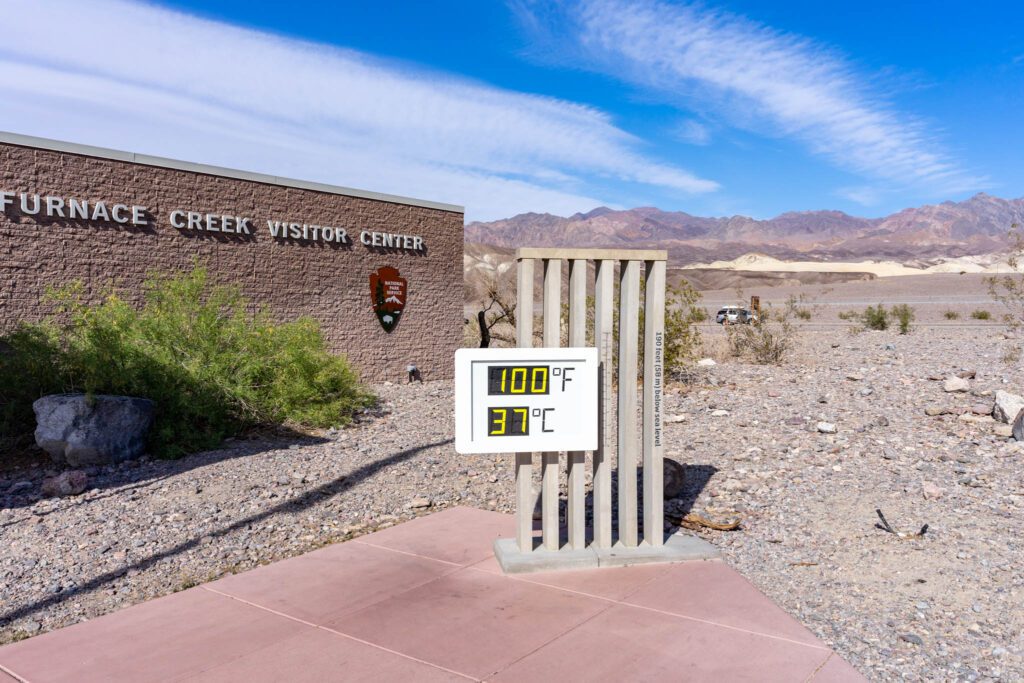
Check out the giant thermometer at the Visitors Center, which gives you the temperature reading.
A couple of hours before sunset, head out again for an adventure down Badwater Road.
Artist Drive & Artist’s Palette
Artist Drive is your first stop, located about ten miles down Badwater Road. It’s a nine mile one-way loop that climbs up into the hills and winds its way through canyons and vista points before putting you back out on Badwater Road.
There are a couple of places to park and get out of the car, and we think you should do just that. It’s only nine miles, but it took us about an hour to drive the entire circuit.
Artist Palette is about half way through, and there’s a turnoff the main road to the right with a relatively small parking lot.
There’s a nice view from the parking lot, but for the best view, leave the parking lot and climb up the hill to your left, which has a well-worn path that leads to an overlook where you’ll be able to see the colors of the Palette in all their glory.
The range of colors – greens, oranges, reds, and more – are a result of the metals that are found in the hills.
Over time, they’ve oxidized, creating a mish-mash of colors that make it one of Death Valley’s many unique features.
Note that if you have an RV, you can’t drive this road. There’s a 25 foot limit on all vehicles because the canyon is narrow and winding at points.
Natural Bridge
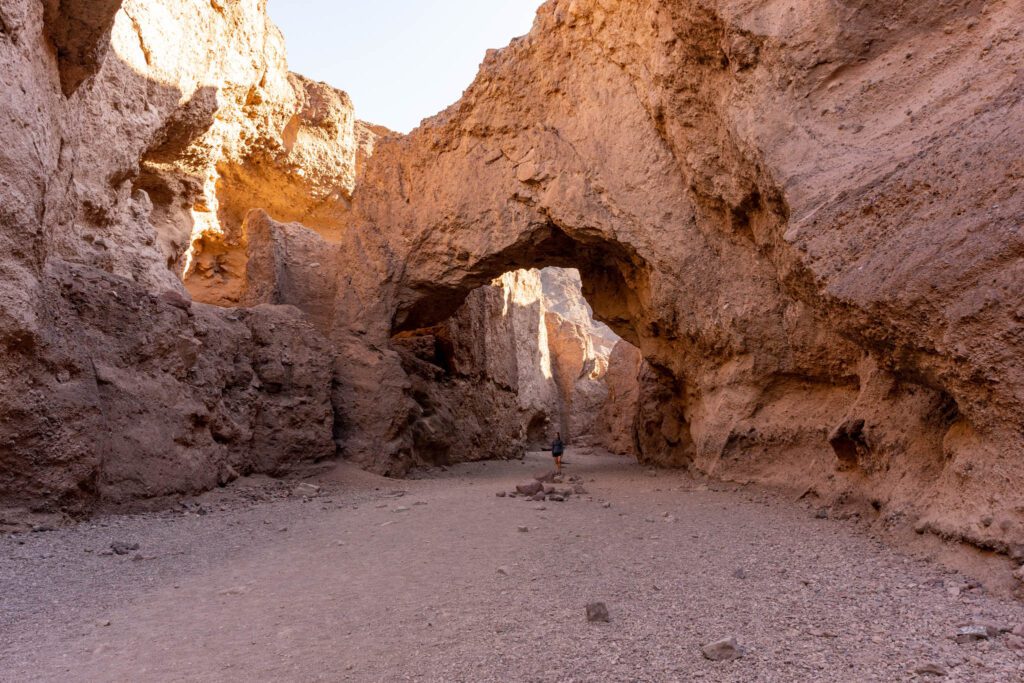
The loop you just finished spits you back out onto Badwater Road. Continue south until you reach the turnoff for Natural Bridge, which is fairly well marked.
The road here is gravel, but we did it just fine in our minivan, and it’s marked as suitable for all vehicles.
From the parking lot, it’s a very short hike up into the canyon, where there’s a… what’s the word I’m looking for… natural bridge? It’s about a half mile into the canyon, and it’s a relatively easy hike.
There’s a cool dry falls past the arch, just an extra few hundred feet up the trail that’s worth visiting.
Badwater Basin
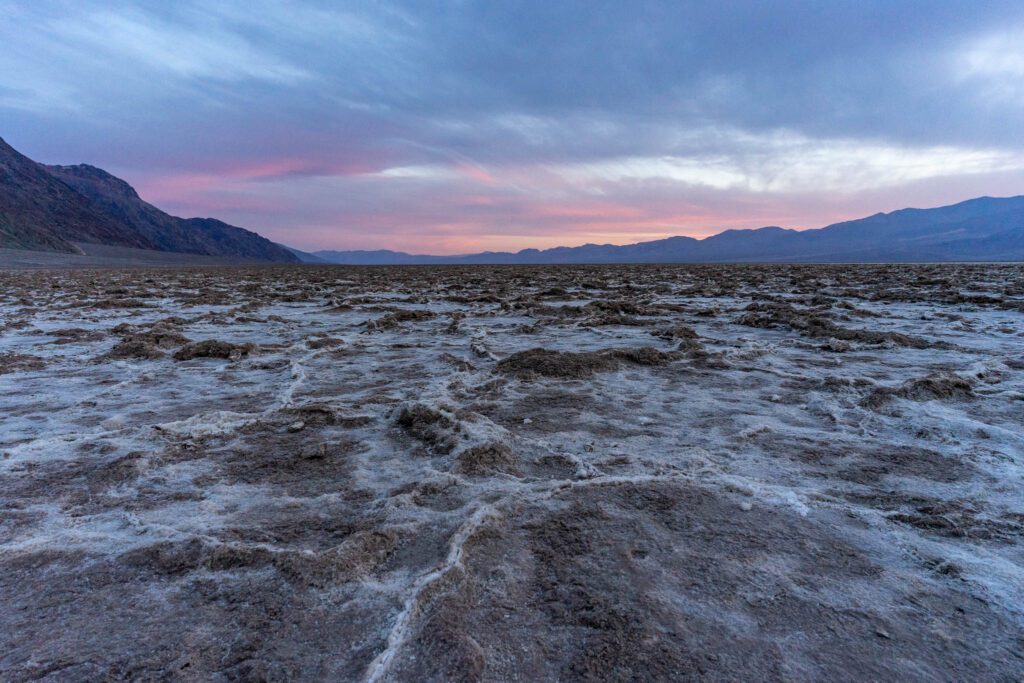
Remember when you started your day with Dante’s View, an epic viewpoint of the salt flats of Badwater Basin from more than 5,000 feet up?
Time to end your day by getting up close and personal with the epic Badwater Basin, the lowest point in North America at 282 feet below sea level. The salt flats here are one of the more unique parts of Death Valley.
I laughed at one of the informational signs that pointed out that most of white mineral covering the ground is sodium chloride, aka table salt.
It’s hard to imagine in the present day, but at one point, Lake Manly covered this basin.
Obviously, it has since evaporated in the heat. Since there’s no outlet for the lake, it accumulated a bunch of minerals (notably, salt) that were left behind when the lake disappeared.
There’s still a small, very salty pond near the parking lot – DO NOT VENTURE OFF THE BOARDWALK near the lake. It’s a very fragile ecosystem, and you could disturb it.
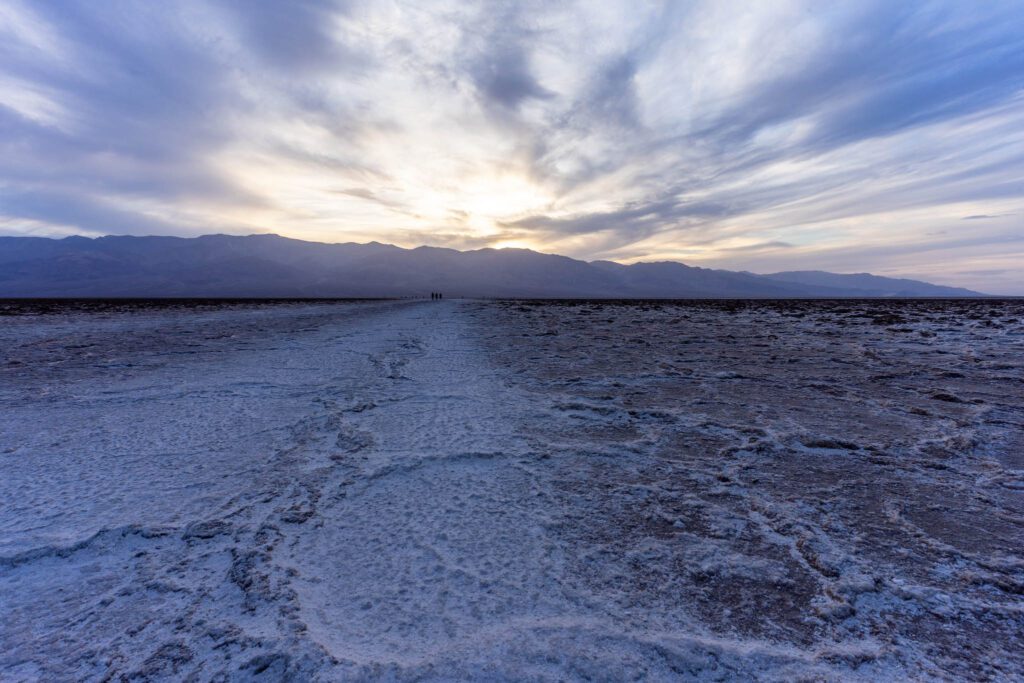
Walk out on the well-worn path across the basin for about a mile, where you’ll have the best view of the surrounding landscape. At your back, Dante’s View and the ridge that you hiked earlier.
In front of you is Telescope Peak, which towers over Dante’s view with a difference of over 11,000 feet – that’s more than two miles!
The salt flats reflect heat, which makes it SUPER hot in the summer months. The National Park Service does not recommend this walk after 10am in the summer.
Day 2: Mosaic Canyon, Ubehebe Crater, and Mesquite Flats Sand Dunes
Your second day in Death Valley involves a lot of driving, but it’s going to be worth it.
Start with our favorite slot canyon hike in the park, spend the middle of the day in your AC-oasis as you make your way to the Ubehebe Crater, and head to Mesquite Flats Sand Dunes for sunset.
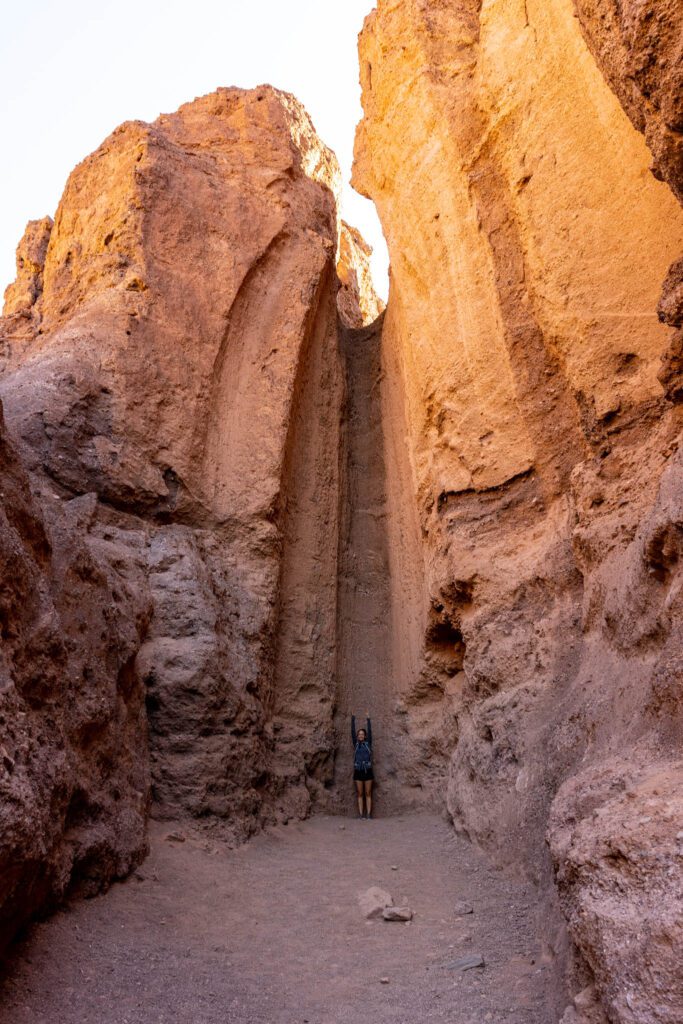
Mosaic Canyon
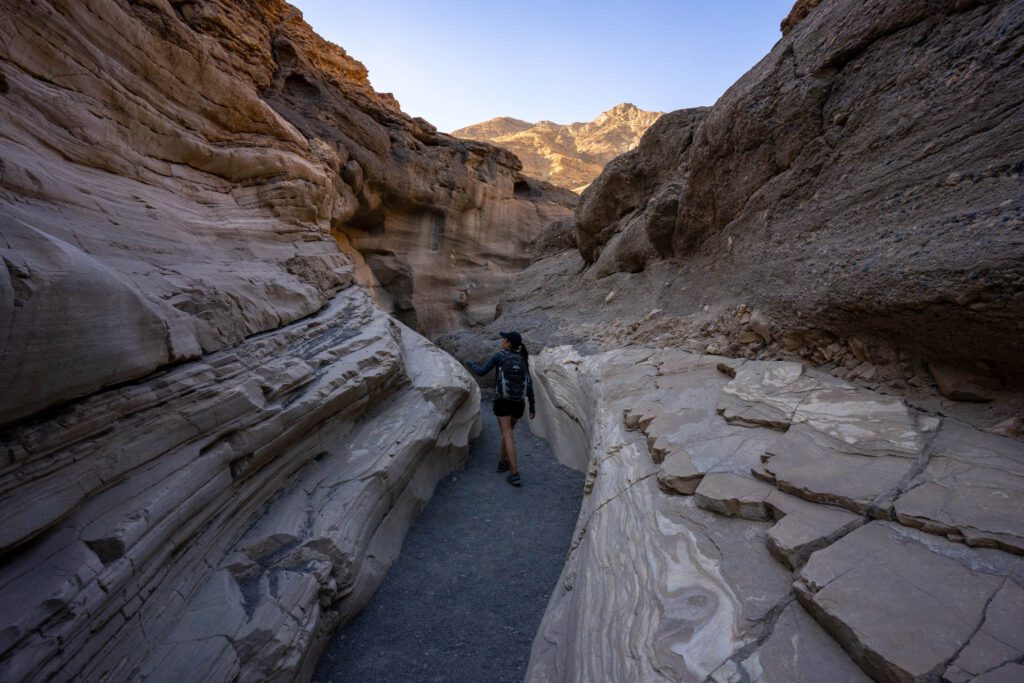
Early on your second day, head out to Mosaic Canyon, which is west of Stovepipe Wells, about an hour away from the Furnace Creek Visitor Center (if that’s where you’re staying).
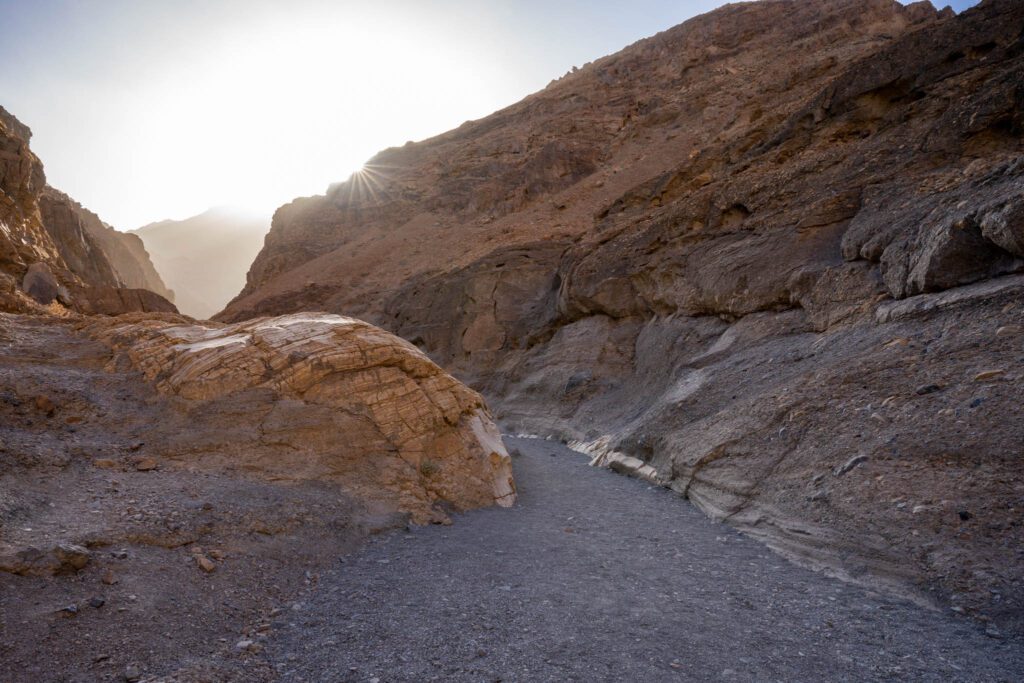
We say early because we did this first half of this hike before the sun rose above the canyon walls, and it was spectacular. On the way back down, the sun had risen above the walls and the harsh light was not nearly as enjoyable, not to mention the heat.
Get there as early as you can – before 8am if possible.
The road to the trailhead is dirt, but we were able to do it easily in the Honda Odyssey.
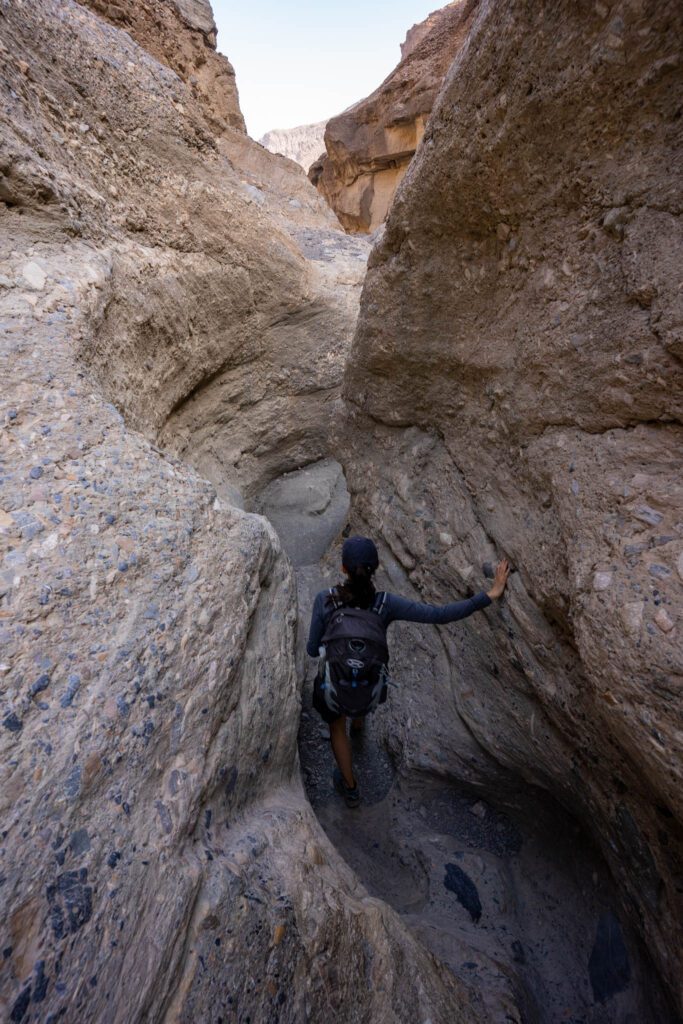
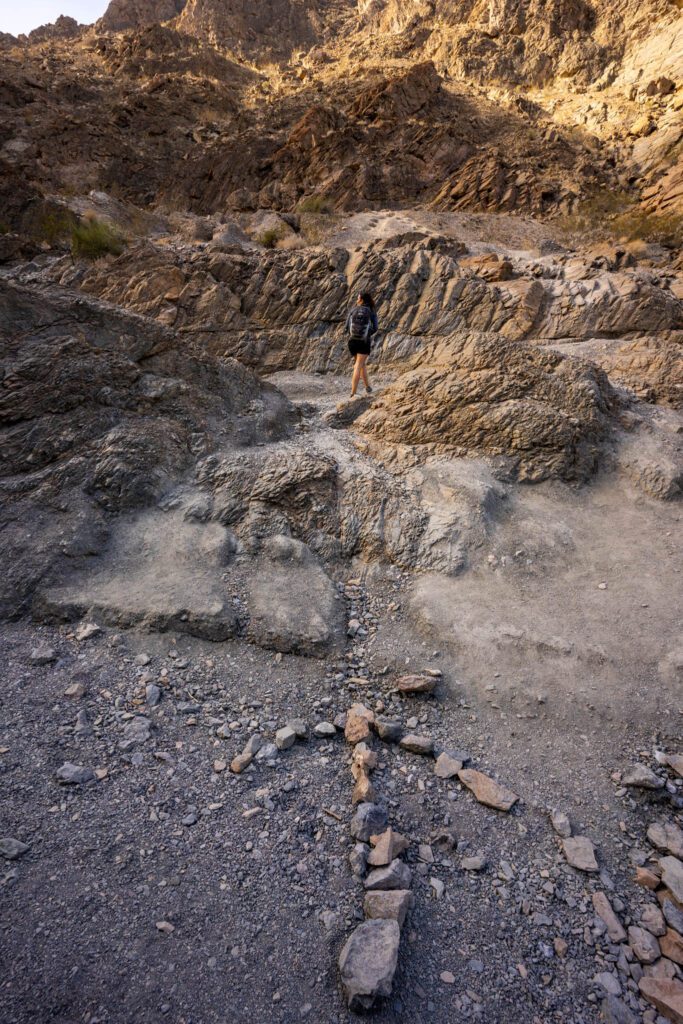
The best part of this hike is probably the first half mile or so, when the canyon is narrow and you’ll be up close and personal with the ever-changing textures of the walls.
It’s mesmerizing, and fascinating to think about how that even happened – how was there ever that much water here?
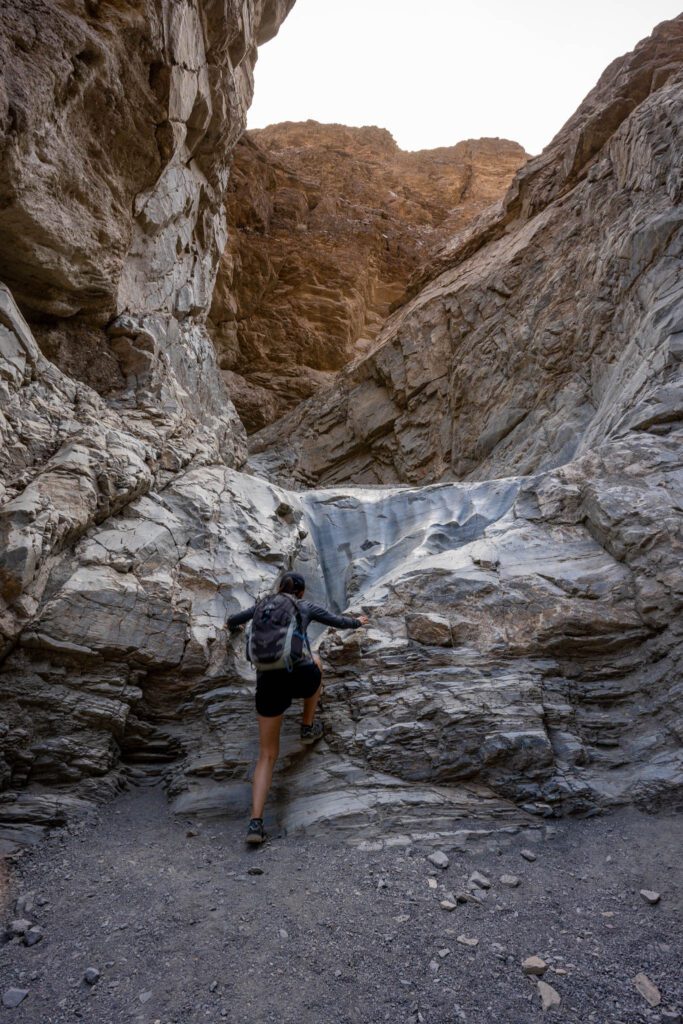
After that, the canyon oscillates between wide and narrow. There are several dry falls where you’ll need to do some scrambling, but nothing too intense.
Until you reach the towering dry falls at about a mile in. There’s a detour up the hill to the right, which was marked with an arrow made of rocks when we were there.
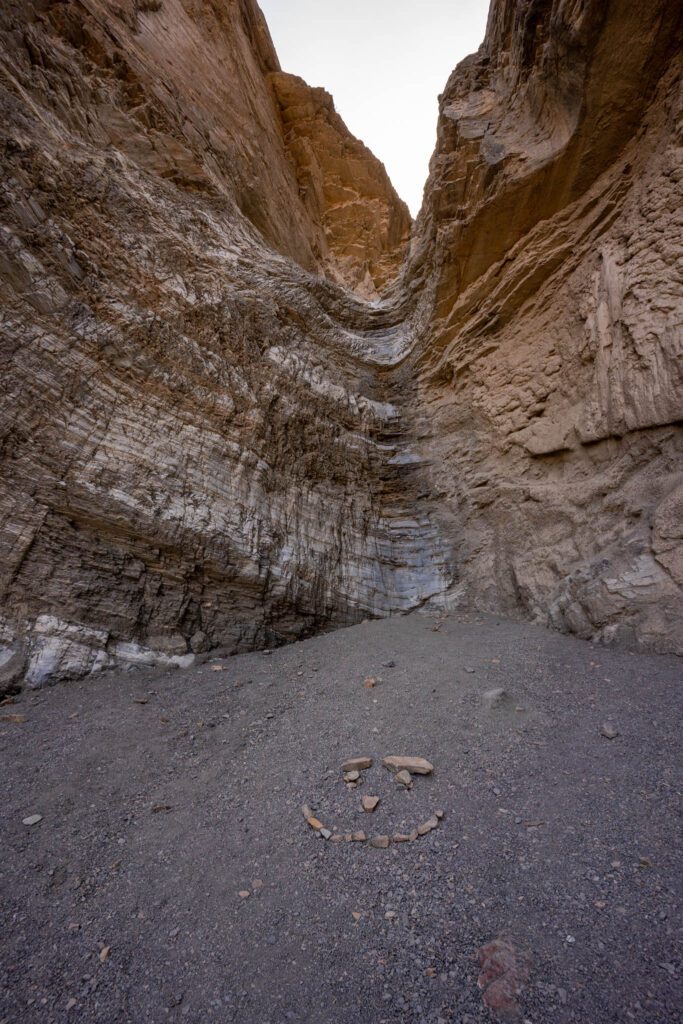
Continue through the canyon until you reach the end, which is another dry falls. This one is clearly marked with a STOP made of rocks in the sand (and a smiley face), and there’s no detour to get around it.
Ubehebe Crater
You might think about doing the Mesquite Sand Dunes now, considering you’re going to pass right by it, but we’d recommend waiting until sunset, which is a far better time to be out there, when the dramatic shadows bring out the texture of the sand, and the golden light illuminates the dunes in a deep orange color.
Instead, head up to the Ubehebe Crater, which is a bit of a drive (an hour, give or take ten minutes), but is worth the journey.
You’ll take Scotty’s Castle road most of the way up there, turning left onto Ubehebe Crater Road when it forks.
The crater, which is 600 feet deep and over a half mile across, is a sight to behold. You have a few different options in terms of what to do when you’re up here.
You could circumnavigate the crater, walking around the entirety of the rim, which is a relatively easy 2 mile loop that gains about 400 feet of elevation over the course of the hike.
You could also hike down to the crater floor, which is about a half mile round trip and loses (then gains) 500 feet over that short time, which is no joke. The climb back up is going to be a slog, so be prepared with plenty of sun protection and water.
You could also do the short hike to Little Hebe, which is a smaller crater right next to Ubehebe. The short hike is about a mile long, and gains minimal elevation so it’s mostly flat.
Or, you could do all three! Which is what we’d recommend. Start from the parking lot, descending to the Crater floor first, then come back out and start the full loop heading clockwise around the crater.
At about 7 o’clock (if you pretend the crater is a big clock, NOT ACTUALLY THE TIME), you’ll reach an offshoot that leads to Little Hebe Crater.
Do the short loop and continue back along the crater rim to the parking lot. It’s about two and a half miles with 700 feet of elevation gain, but the majority of that comes with the descent to the crater floor.
Note: If you have a high-clearance, 4WD car and you’re up for a bumpy drive, head out to Racetrack Playa, home of the sailing stones, which move across the ground in a mysterious way. It’s a long, bumpy journey that will take several hours, and it should not be attempted by people who don’t have a suitable vehicle.
Scotty’s Castle
Scotty’s Castle is worth the short detour on the way back from the crater. It’s a villa in the middle of the desert, built in the 1920’s and 1930’s by a millionaire from Chicago as a winter home.
Except he accidentally built it on government land rather than the land he actually owned – big OOPSIE DAISY.
After the death of the owners, the National Park Service bought it, and today it’s open to the public and you can take a fun history tour with a guide who’s dressed up in clothing straight out of the 30’s. Most of the villa is still intact.
Note for 2023: Scotty’s Castle is closed through the end of 2023 due to a major flood, unfortunately. Opening date is still undetermined, check the park website to check the status for your trip.
Mesquite Flats Sand Dunes
Finish your day back near Stovepipe Wells at the Mesquite Flats Sand Dunes.
It’s an easy hike out to the dunes from the parking lot, but remember that you’ll be walking on sand, so it’s significantly harder than it looks.
You can sand board here, if you happen to have a board or a sled. Or just slide down on your butt, but be prepared to get sand everywhere.
This hike is 2.8 miles long if you go all the way out to the star dunes, which are, pardon the pun, the star of the show.
What to Do with 3 Days in Death Valley
First of all, two or three days is not nearly enough to see everything Death Valley has to offer.
It’s a massive park, and you’re going to have to pick and choose what you want to see with only a couple of days. This is particularly problematic because of the long drive to get there and back from anywhere in California.
With that said, here are some ways to spend the last of 3 days in Death Valley IF you have a 4WD vehicle.
Telescope Peak
Telescope Peak is the tallest mountain in the Panamint Range, which towers more than 10,000 feet above you when you’re in Badwater Basin. Getting to the summit involves a grueling 14 mile hike with 3,000 feet of elevation gain.
Which means you’re climbing 6,000 – 7,000 feet to reach the trailhead from the floor of Death Valley.
You’ll approach from the western side, which means you’ll head out past Stovepipe Wells. The last 1.5 miles of the road to reach the trailhead is rough, and the NPS does not recommend it for normal vehicles.
There is a campground at the trailhead, which would be a nice place to spend the night before your climb so that you can get an early start.
The trail starts by alternating between aggressive climbing and winding through meadows until you get to the switchbacks, which start at about 4 miles in. That’s where the climb starts to pick up again as you make your way to the summit, which sits at 11,000 feet above sea level.
Note that this hike is really only doable in the spring and summer, when the trail is no longer icy and the road is clear of snow. Because of the elevation, it’s much, much cooler than the rest of Death Valley, and the ice on the trail lingers well into the spring. Make sure to check conditions at the Visitor Center before you attempt this hike.
Darwin Falls
Wait, a waterfall in the desert? That can’t be right. Darwin Falls is an oasis in a landscape with very little water. It’s just west of Panamint Springs Resort, which makes this a great stop after Telescope Peak or on your way to or from Los Angeles.
The road to get to the trailhead is a little rough, so it’d be best to have a high-clearance car.
For what it’s worth, the official park map lists the road as “high-clearance recommended,” though we’ve read reviews that it’s doable with a normal car. Note that there are no restrooms at the trailhead.
The hike itself is moderate, gaining 450 feet in the mile it takes you to get to the waterfall (that’s a one-way distance, round trip this hike is right at two miles). It’s an unmarked trail, but the path will be fairly clear once you get there – tons of people do this hike.
There is no swimming in the pool – it’s a source of drinking water for the surrounding area.
Poke around Leadfield, an abandoned lead mining town along the road to the canyon, and Rhyolite, a ghost town just northeast of the eastern entrance, for some extra fun while you’re out there.
Titus Canyon
We were really bummed that we couldn’t do this drive, because it looks great! Titus Canyon is actually along the way up to the Ubehebe Crater, so you could add it as a stop on your way back from the Crater on day 2 if you have the time.
This drive is going to be similar to Twenty Mule Team Canyon, but significantly more rugged and scenic.
You can either start it from the western end, which is along that road up to the crater, or on the eastern end, which is along Hwy 374 outside the eastern edge of the park.
The canyon walls tower above you for the 27 mile drive, which is rougher on the eastern side of the canyon and can get a little bit sketchy when two cars end up trying to pass each other going opposite directions on the narrow, one way road.
What to Do With One Day in Death Valley National Park
Only have one day in Death Valley? Here’s how we would compress the 2 day itinerary above into a single, action-packed day.
This will work best if you have an overnight in the park, either to get an early start or to allow you to spend more time in the park around sunset and not have to worry about driving back to your accommodations.
Start your day with Dante’s View for the sweeping views over the valley below, which is where you’ll end the day (similar to the first day of the two day itinerary above).
Then, drive down to Zabriskie Point, stopping at Twenty Mule Team Canyon along the way to do the scenic drive.
Next, drive around to the Golden Canyon trailhead and do the hike up into Golden Canyon, looping around through Gower Gulch, which is going to be a moderate hike of about 4.2 miles.
Next, we’d recommend heading down to Badwater Basin and walking out onto the salt flats. If you’re not here during the winter, it’s going to be hot! On your way back towards the middle of the park, make stops at Devil’s Golf Course and Artist Drive.
By now, it should be time for a brief siesta, so head into the area around Furnace Creek and take a lunch and water break, either in the shaded parking spots at the Visitor Center, or at the restaurant at the Oasis at Death Valley.
For the afternoon, make the drive up to the Stovepipe Wells area and do the hike out to the Mesquite Sand Dunes. The light here is particularly spectacular around sunset, when the dunes light up with a golden orange color.
That’s an action packed day – if you want to cut some time, either because you want a more leisurely pace or because you have a long drive to Vegas at the tail end of the day, skip the Golden Canyon hike (or make it shorter by just doing a portion of the loop).
- 4 Days in San Francisco: A Local’s Guide
- Where to Stay in San Francisco
- How to Plan a Perfect San Francisco to Los Angeles Road Trip
- Plan an Incredible Seattle to San Francisco Road Trip
- The Best Day Trips from San Francisco
- 5 Days in Los Angeles, California
- Where to Stay in Los Angeles, California
- Gluten Free Los Angeles: The Best GF Eats in L.A.
- Gluten Free San Diego: Complete Travel Guide for Celiacs
- Where to Stay in San Diego, California
- A Perfect Northern California Road Trip
Hey Matt and Alysha
I hope you are doing great. What are your thoughts on visiting death valley in on Valentine’s weekend? I want to plan a trip for my wife that covers Las Vegas and Death Valley. We love national parks and haven’t been to a dessert such as death valley. Can you please give some tips? Thanks
Regards
Vikrant Kaushal
Hey there! February is a great time to go to Death Valley. It’s going to be cool enough to actually do things in the middle of the day, which was the problem we ran into in late March – it was blazing hot by 10am! All of our best tips and tricks are in this guide – let me know if you have any specific questions as you plan your trip and I’d be happy to answer them.