How to Plan an Incredible Pacific Northwest Road Trip
Evergreen trees as far as the eye can see, covered in a thick, green moss that makes you feel like you’re in an Elven Kingdom in the Lord of the Rings. Rocky coastlines interspersed with sandy beaches. Rugged alpine terrain and countless snowcapped peaks. Alpine lakes, subalpine meadows filled with wildflowers of all colors, and rushing rivers.
We’ve got it all here in the Pacific Northwest, and we’re here to share it with you.
We live in Portland, Oregon, a place that we have fallen in love with over the last decade or so, and we regularly venture north from our home base in Oregon to explore every corner of the Pacific Northwest.
Some of our favorite memories from the past few years (including when we spent the better part of a summer living in a van road tripping around Oregon and Washington) were made in the northwest corner of the US.
I (Matt) grew up in the Seattle area, and despite leaving the northwest for work for almost a decade, I always had my eye on a return to the area in the long term because there is so much to love in this corner of the country.
After a couple of years of uncertainty beginning a few years ago, we finally pulled the trigger on a long awaited move to Portland a few years ago now, and the more time we spend in the Pacific Northwest, the more we fall in love with everything it has to offer.
In this guide, we’re going to give you everything you need to know to plan an amazing trip, including the logistics you need to know – when to visit and our recommended route – along with a mini guide to each place on the itinerary.
That mini guide will have information like what to do and where to stay – all based on our own experiences exploring the Pacific Northwest – along with links to more in-depth content we’ve written on the destination.
Finally, at the end, we’ll give you some ideas on how to shorten or lengthen the itinerary to fit your particular trip (spoiler: there are too many great places in the Northwest to fit into one trip!).
Sound good to you? This guide is super detailed, full of our tips and favorite places based on our extensive experience exploring the upper left corner of the country, which means it’s LONG.
Disclaimer: Some of the links in this post, like hotel links, are affiliate links, meaning at no additional cost to you, we make a little bit of money if you click through and book. That being said, we would never recommend something to you that we don’t stand behind 100%.
How Many Days Do You Need?
The first thing you need to know about planning this road trip is the fact that you’re covering a huge swath of land in the Pacific Northwest that is absolutely packed with different landscapes.
Which is amazing, but it does mean that you’re inevitably going to be picking and choosing between places, and there will be things you’ll have to skip.
We’ve done a lot of thinking and tinkering with this itinerary (including a complete rewrite), and we think that you need a minimum of 14 days for the best version of this trip.
That’s how we’re organizing the main itinerary below, though we have ideas on what to do with more or less time in a separate section below that itinerary.
Two weeks gives you seven days in each state (enough time to see the main city, plus two other places in each), which is a nice balance and a good start for seeing the diverse natural beauty in the Pacific Northwest, including getting a taste of the high desert in Bend (which we love).
Are there other places to see? Absolutely. But we also know that you’re going to have a better experience if you opt to spend more time in fewer places to avoid spending your entire trip in the car.
With less than two weeks, we’d opt to start cutting places from the itinerary rather than spending fewer days in the same number of places, trying to cram it all in.
With anywhere between 10-14 days, we’d just focus on the I-5 corridor between Portland and Seattle, tackling Olympic and Rainier along with a day trip or two from Portland or Seattle.
This means missing out on Bend, but Bend adds a lot of driving that just isn’t feasible unless you skip one of the national parks to fit it in (which you could do, but it depends on what you’re into).
With less than 10 days, our strong recommendation would be to focus on one state or the other. There’s plenty to do and see in each state to fill 10 days, and you’ll likely run into the same problem (too many places, not enough time) even if you just limit yourself to Washington or Oregon.
What about Vancouver, B.C.? Yes, Vancouver (and British Columbia more broadly) is generally considered a part of the Pacific Northwest.
With two weeks we opted to focus on Washington and Oregon rather than spreading things out even more than they already are to try and fit Vancouver into a limited timeframe.
That being said, there are some cool stops heading north from Seattle to Vancouver, and we’d recommend adding it if you have three weeks.
More in the “with more time” section below the main itinerary.
Where to Start and End Your Road Trip
First, you should know that there are three main airports in the Pacific Northwest: Seattle-Tacoma International Airport (SEA), Portland International Airport (PDX), and Vancouver International Airport (YVR).
Since we’re focusing on Washington State and Oregon in this guide, it makes the most sense to fly into Seattle-Tacoma International Airport and out of Portland International Airport (PDX).
To make the most of your time, for this itinerary we suggest flying into one and flying out of the other so that you don’t have to waste time driving back to the airport you flew into.
We’ve chosen to have you fly into Seattle and out of Portland here, but you can easily flip it around and do it the other way if that happens to work better for you.
The other option, which makes sense if you’re including Bend on your trip, would be to fly into Seattle and out of Redmond Municipal Airport (RDM), which services the Bend area.
This is our preferred option because it saves you four or so hours of driving to get back to Portland to catch your flight home, and it makes the itinerary much smoother.
There are pros and cons to that approach – there will be fewer flight options, they will be more expensive, and they will likely have a connection (in either Portland or Seattle).
If you do choose to do that, you’d just move Portland up before Bend, which is totally doable. The latter half of the trip would go Rainier – Portland – Columbia River Gorge – Bend.
The Best Time to Do This Road Trip
We normally put this section down below the detailed itinerary, but we’ve had enough people ask us about the weather and conditions in the Pacific Northwest that we realized this needs to be up front.
The best time to do this road trip as written below is between July and October.
The reason is that the unique geography of the Pacific Northwest means that there is a very specific “best time” to do this road trip as written.
Because many of the places we’ve mentioned are in the Cascade Range – the mountains that form the spine of Washington and Oregon – some pieces of this itinerary are essentially inaccessible for large chunks of the year.
Between late October and June (though exact timing depends on the year), the following areas will be largely inaccessible: Mount Rainier National Park, Hurricane Ridge in Olympic National Park, and the Cascade Lakes Scenic Byway in Bend.
If you’re planning to visit outside of that timeframe, we have some good news. There are plenty of places worth visiting in the Pacific Northwest outside of the summer season.
You’ll still be able to use the itinerary below (plus the “more time” section below it) to put together a pretty incredible road trip, though you’ll have to skip some of the places in the mountains.
A Perfect Pacific Northwest Itinerary (for First Timers)
The main issue you’re working against when you’re planning your route is that the Seattle to Portland corridor – which is where the region’s two main airports are located – is a relatively small part of the broader two states we’re talking about.
That, combined with the fact that both states are bigger than you think, means that there are going to be some long drives in your future no matter which way you slice it.
For example, Portland to Crater Lake is somewhere around a five hour drive, depending on traffic and conditions (they are located on opposite ends of the state!).
Here is how we’d spend your time. There will be some long days of driving, but that’s going to be the reality if you want to make it to some of these places.
- Day 1: Seattle
- Day 2: Olympic National Park (Lake Crescent + Hurricane Ridge)
- Day 3: Olympic National Park (Northern Pacific Coast)
- Day 4: Olympic National Park (Pacific Coast + Hoh Rainforest)
- Day 5: Mount Rainier National Park (Paradise)
- Day 6: Mount Rainier National Park (Paradise)
- Day 7: Mount Rainier National Park (Sunrise)
- Day 8: The Columbia River Gorge + Hood River
- Day 9: The Columbia River Gorge + Hood River
- Day 10: Bend
- Day 11: Bend
- Day 12: Bend (Day Trip to Crater Lake)
- Day 13: Portland
- Day 14: Portland + Fly Home
Here’s what that meandering route looks like on a map so you can visualize what we’re talking about.
Of course, that’s just the base itinerary that we’d recommend.
The exact route you take is going to depend on your particular interests, what time of year you’re visiting, and more factors than we can possibly take into account here.
We have ideas for shorter and longer itineraries below the main itinerary if you have more or less time.
One note on the balance of cities vs. nature. We’ve intentionally slanted this itinerary towards nature because that’s what we think makes the Pacific Northwest special.
However, you could just as easily cut one or two nature destinations to give yourself extra time in Portland and Seattle, which are both well worth at least 2-3 days, given unlimited time. It depends on what you’re into!
Now that we’ve covered the important logistics, let’s get into the detailed itinerary!
We’ll do our best to give you all the information you need to plan YOUR trip to the Pacific Northwest, but if we miss something or you have more questions, leave us a comment below and we’ll do our best to either answer your question, or point you to someone who can.
Day 1: Seattle
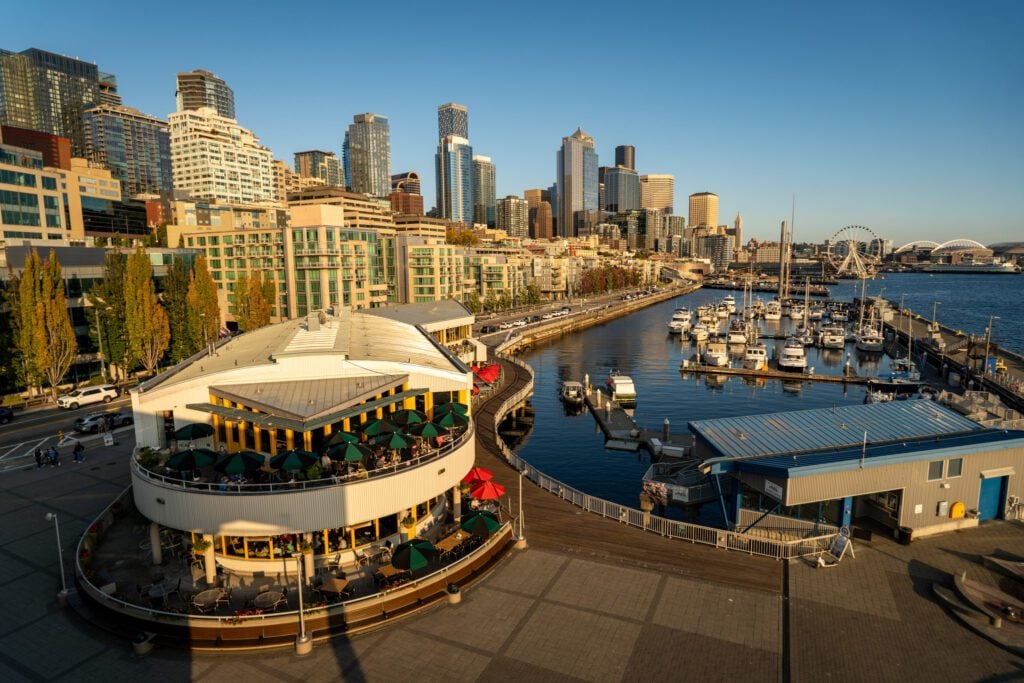
Any way you slice it, your trip is most likely going to start in Seattle, even if it’s just to snag your rental car and immediately head out to the wilderness.
Now, we recognize that you’re likely coming to the Pacific Northwest to experience its natural beauty. Which is why you’ll find that this itinerary is slanted heavily towards the outdoors.
However, allow us to make a suggestion for your trip.
We highly recommend bookending your trip with 1-2 days in Seattle and Portland – which are beautiful cities full of greenery, mountain views, and great food and drinks.
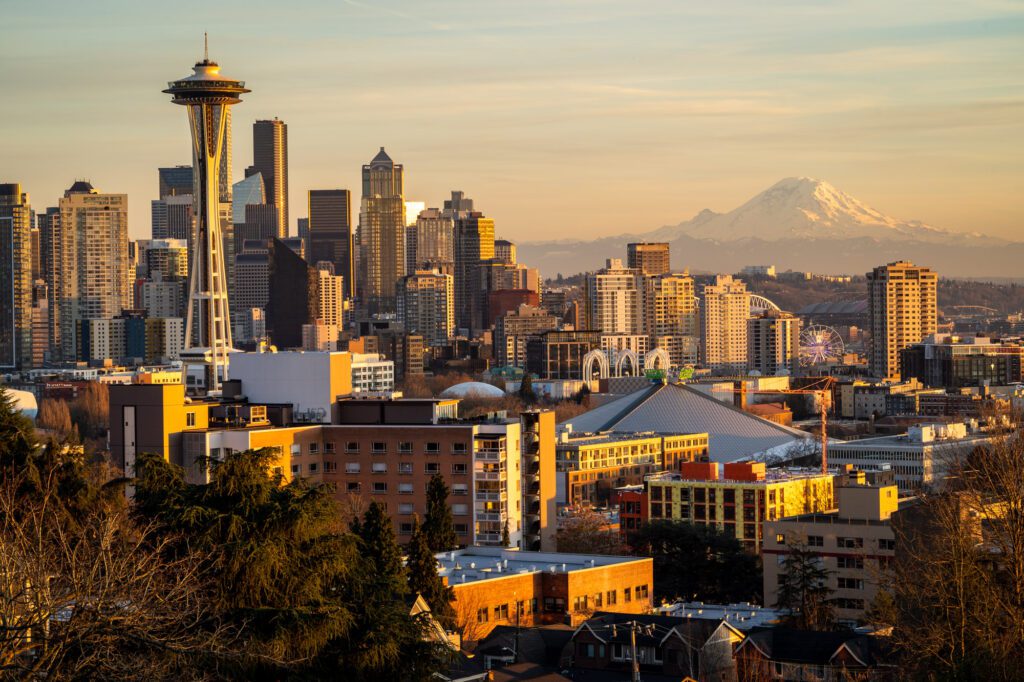
Seattle is set right on Elliott Bay, with views of the snow capped peak of Mount Rainier (which you’ll get to see up close later in the road trip!) from various vantage points.
I, Matt, grew up in the Seattle area, went to college in Seattle, and lived there for a few years before taking a brief detour to California with plans to return to the Pacific Northwest (which we made happen when we made Portland our adopted home city).
Despite ending up a few hours south, I still spend a fair amount of time in Seattle – my entire family lives there – and am consistently flabbergasted by how different the city looks today than, say, 20 years ago.
The development and amount of wealth that has flowed into Seattle with the rise of the tech industry is astounding, and the city is experiencing the associated growing pains (like traffic and a housing crisis).
I know I’m biased, but Seattle is a beautiful city with a diverse food scene and great cultural attractions that is well worth a couple of days of your limited time.
We have an entire guide dedicated to helping you make the most of one day in Seattle, which you should read for exactly how we spend a day in the city with first time visitors (along with our guide to the best things to do in Seattle, which has even more details).
What to Do in Seattle
With just a day, we’d recommend splitting it between the main attractions – Pike Place Market and Seattle Center – and exploring the neighborhoods outside of Seattle’s downtown core, like Capitol Hill.
Here are some of our favorite things to do in the city, in no particular order.
Experience Pike Place Market: There are certain tourist attractions around the world – like the Colosseum in Rome or the Louvre in Paris – that are very, very popular, and we’d say that it’s worth braving the crowds for the experience.
That’s how we feel about Pike Place Market.
Is it “touristy?” Certainly, yes. Is it a key element of any Seattle itinerary? Also yes. It’s worth coming relatively early to beat some of the crowds.
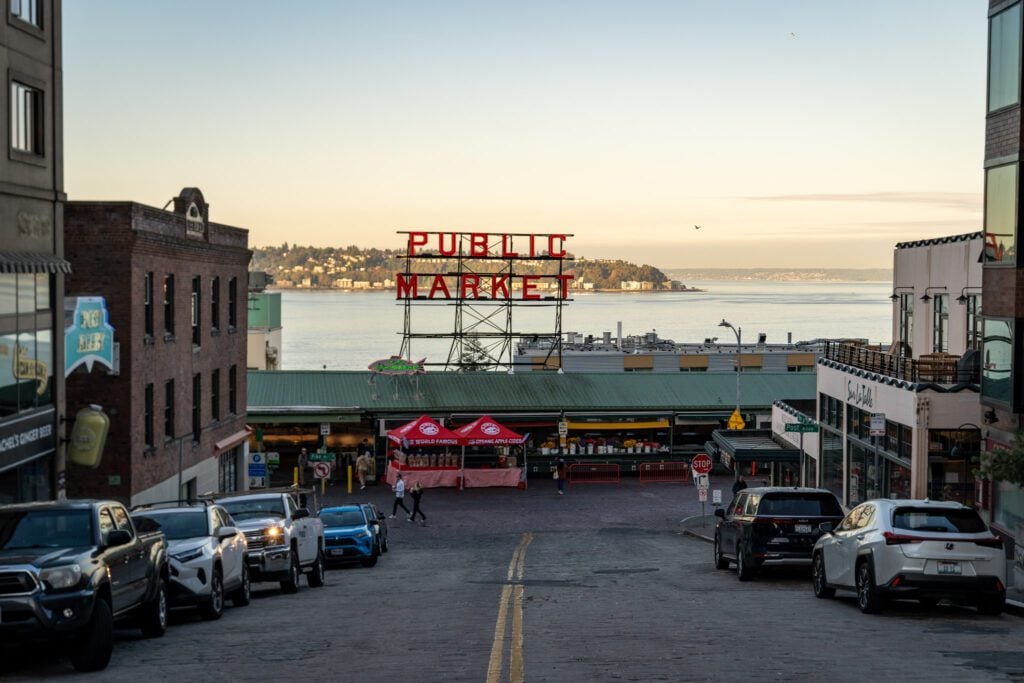
We’d skip the gum wall, which is downright disgusting if you really stop to think about it, and instead spend your time on the food and drink vendors in and around the market.
Walk through the market and check out the vendors selling everything from candied nuts to flowers, and of course, the flying salmon.
Stop by Rachel’s Ginger Beer, Beecher’s Cheese (their flagship cheese is one of my top three all time favorites), and Piroshky Piroshky while you’re there.
To go a level deeper, take this awesome guided tour of Pike Place with a Local Chef.
Seek out the Best View in Seattle: No, it’s not the Space Needle. In fact, we don’t think you should go to the top of the Space Needle.
It’s a nice view, sure, but it’s ridiculously expensive AND it’s missing the most distinctive element of the Seattle skyline…the Space Needle.
Instead, head just up the hill to Kerry Park, a free public park with a show stopping view of Seattle’s skyline, including the Space Needle, Mount Rainier, and Elliott Bay. You can find it here on Google Maps.
The Museum of Pop Culture: Formerly the Experience Music Project (EMP), this is where Matt had his senior prom wayyyyy back when.
It’s a cool space, and the focus is still mostly on Seattle’s influence in the global music scene with bands like Nirvana and Pearl Jam, along with some Jimi Hendrix thrown in.
There are also sections of the museum focused on other mediums, like movie production and sci-fi and fantasy.
It’s a little pricey, but it’s our favorite attraction at the Seattle Center.
Learn About Seattle’s History in a Unique Setting: A little quirky and offbeat, kind of like Seattle, the Beneath the Streets Tour is worth doing while you’re in Pioneer Square.
The tour guides are funny, and you get to learn about the history of Seattle from a slightly different perspective.
Wander Capitol Hill: Capitol Hill is the most convenient of Seattle’s cool neighborhoods, sitting just across the freeway from downtown Seattle.
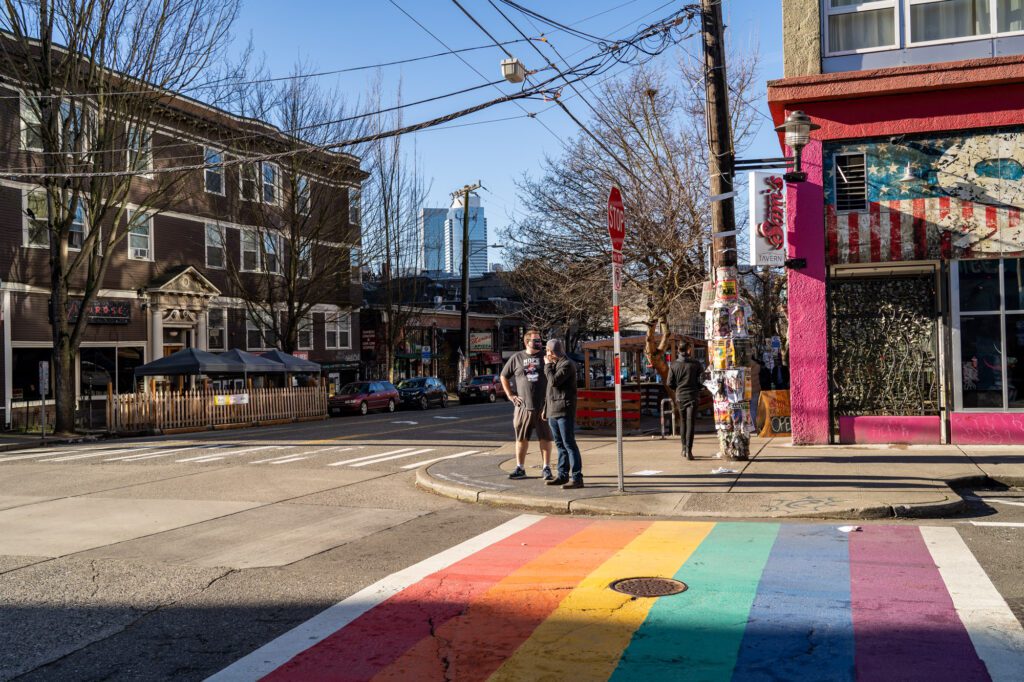
It’s packed full of interesting spots to stop in, whether you’re looking for vegan ice cream or a unique boutique selling who knows what.
Pound-for-pound, it’s probably the best place to eat and drink in the city.
Rather than give you all of the spots in this summary, we’d direct you to the Capitol Hill section of our 24 hour guide, which has our top spots for eating and drinking in Cap Hill.
Where to Stay in Seattle
Since you’re only in Seattle for a day on this trip, we’d strongly recommend a hotel in Seattle’s downtown core of Downtown Seattle, Belltown, or South Lake Union.
Keep in mind that if you’re renting a car, street parking is nonexistent, and you’ll need to either park at your hotel and pay a premium, park at a parking garage in downtown Seattle near your hotel (ask the hotel if they have any recommendations – do not leave ANYTHING in the vehicle), or wait to rent a car until you’re on your way to your next stop.
Given limited time, it probably makes the most sense to pony up for parking for a night to streamline things.
We have stayed at (and recommend) the CitizenM in South Lake Union.
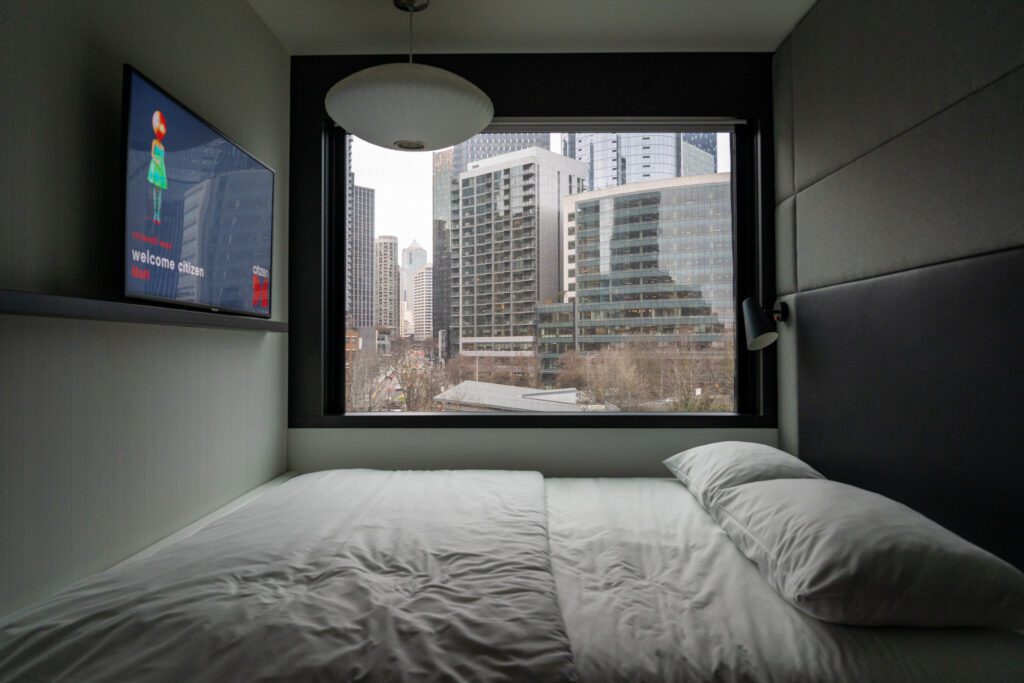
It’s within walking distance (~15 minutes to Pike Place Market or Seattle Center) to most of the sights you’re going to want to see, the rooms are modern and comfortable, and the staff are super friendly.
We’ve stayed in three different CitizenM hotels in the past couple of years, and love them.
Some other hotels we’d recommend are the Ace Hotel Seattle (the original Ace Hotel – we stayed there a few years back and it’s a great location near the waterfront), the State Hotel (a boutique hotel around the corner from Pike Place Market where I’ve stayed and it’s fantastic), and Hôtel Ändra (a Scandinavian-inspired boutique hotel in Belltown).
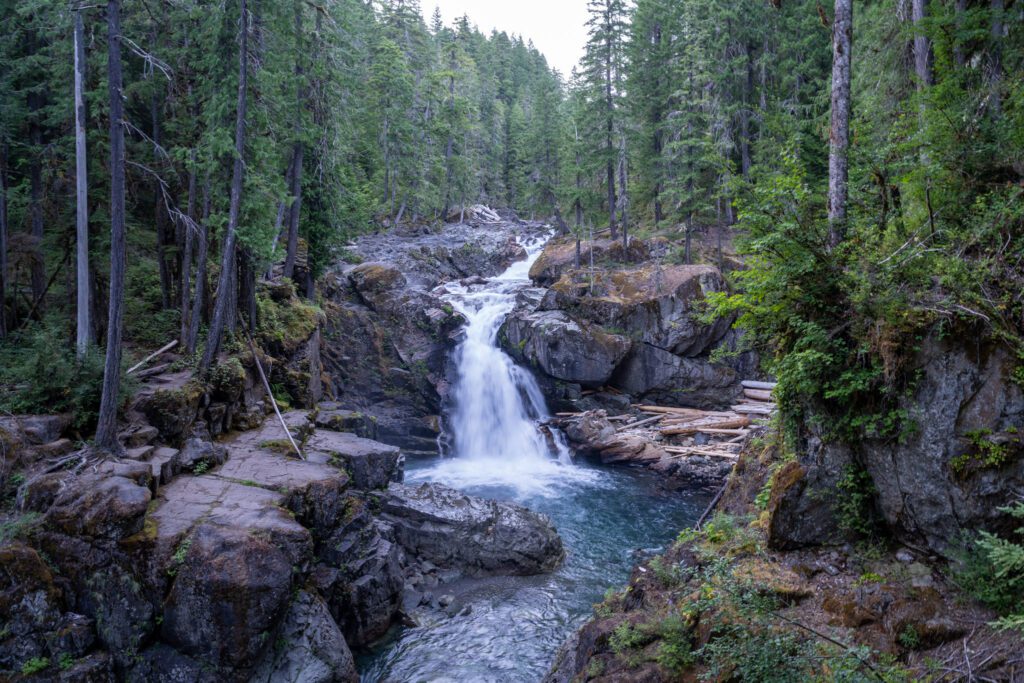
Days 2-4: Olympic National Park
Olympic National Park is directly west of Seattle at the northwest corner of the state, an easy journey from Seattle, and is one of the most unique national parks in the country.
A lot of our national parks are about seeing one type of landscape within the boundaries of the park.
For example, see Mount Rainier, Arches, or Crater Lake. They all essentially have one type of (extremely beautiful) landscape.
The thing that makes Olympic National Park special is that you get a bunch of different ecosystems within Olympic’s boundaries, including but not limited to Pacific beaches, alpine, and coastal temperate rainforest.
Before we can talk about specifics here, we need to take a second to talk about the park’s geography which has major implications for your trip.
The park is BIG, covering 1,400 square miles that are not necessarily connected to each other, which means being strategic is important to make sure your entire trip isn’t spent driving from one part of the park to the next.
To illustrate the point, it takes two and a half hours (one way) to drive between the two most popular parts of the park, the Hoh Rainforest and Hurricane Ridge.
In this case, we’d organize your trip to Olympic by working your way through the park in a “C” shape, starting in Port Angeles and ending in Kalaloch (or vice versa), which will save you several hours of driving and set you up for the next stop on your itinerary (Mount Rainier).
This has implications for where you stay, which we’ll cover below. We’ll also order the things to do below in the order you’ll encounter them if you take our advice.
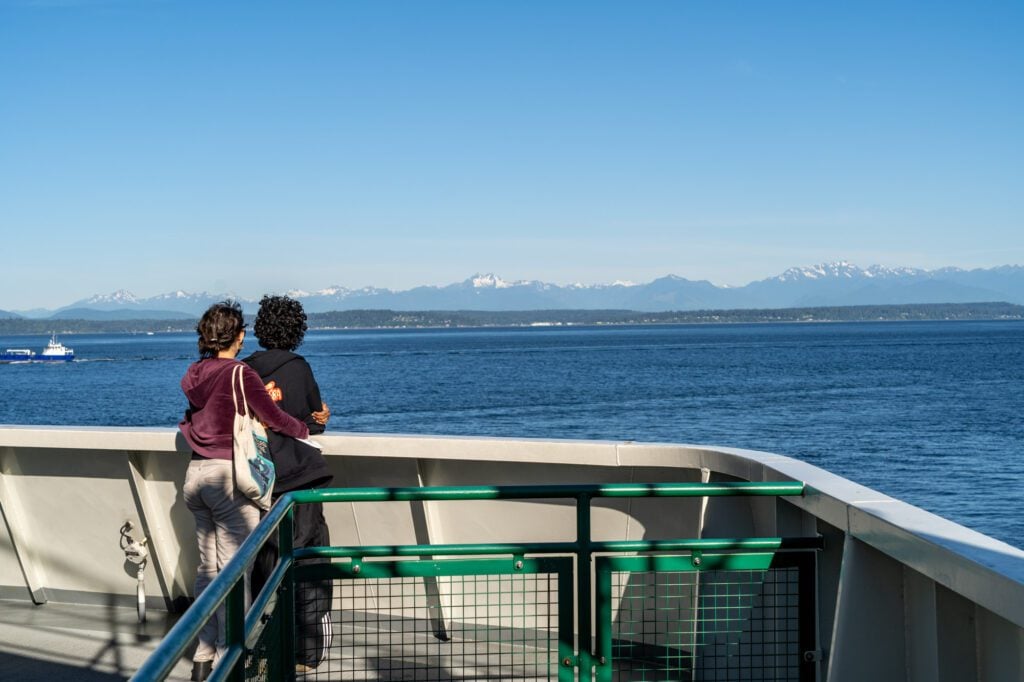
One note here: We’d strongly recommend you take the Bainbridge Island Ferry – which is a car ferry – across the Puget Sound from Seattle.
It’s faster than driving around, and more importantly, it’s 1,000 times more scenic (though it does cost more).
On a nice summer day, you can see Mount Rainier, Mount Baker, and the Olympic Range from the deck of the ferry.
Here’s a view from that ferry ride to convince you.
What to Do in Olympic National Park
Here are some of our favorite things to do in Olympic National Park.
We’ve ordered them in the order you’ll encounter them on your counter-clockwise loop around the tip of the Olympic Peninsula (from Port Angeles, to Forks, to Lake Quinault).
Hurricane Ridge: If you’re coming from Seattle as we’ve recommended, you’ll be coming through Port Angeles and your first stop is Hurricane Ridge, which is at the northeastern corner of the park.
To get up to the ridge – the highest point in the park that you can drive to – you’ll climb a steep, windy road (that closes in the winters for somewhat obvious reasons).
Once you’re there, hike Hurricane Hill for excellent sweeping views of Western Washington.
Then, drive out to Obstruction Point for more great views of the Olympic Range.
If you want a longer hike, the hike to Grand Lake leaves from the end of Obstruction Point Road.

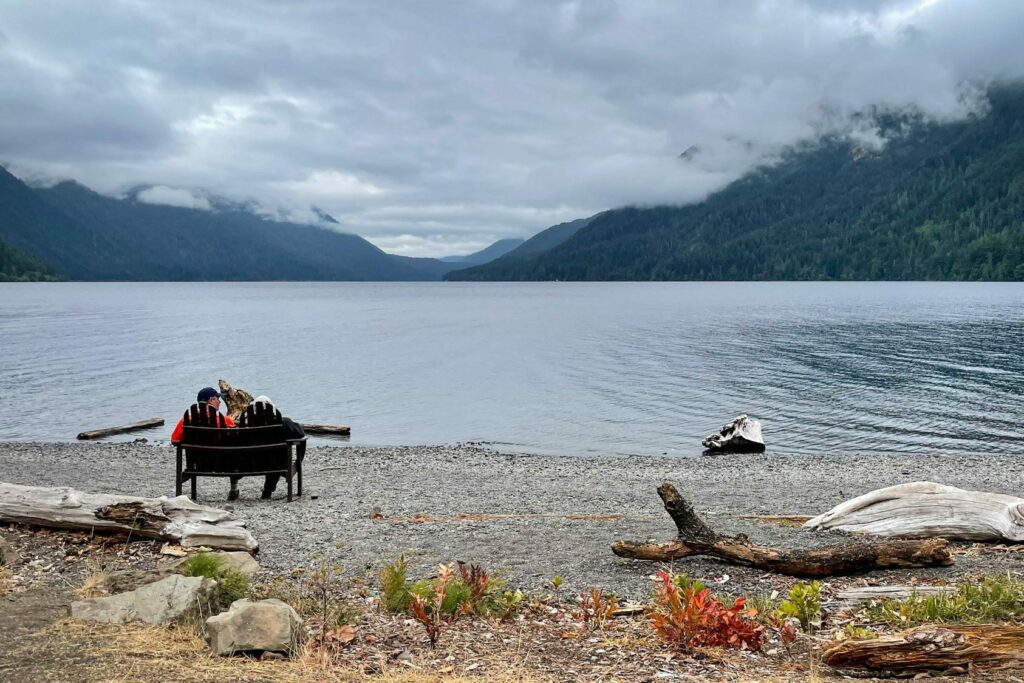
Lake Crescent: Lake Crescent is the second deepest lake in the state, and you’ll find it about 20 miles west of Port Angeles along Highway 101.
There are a couple of things to do and see here.
First is the Lake Crescent Lodge, which is a historic lodge right on the lake (as you might imagine) that would be a great place to grab a drink and a snack after a morning of exploring (bonus points if you sit in the Adirondack chairs on the lakeshore).
Second are the hikes to Marymere Falls (short and easy stroll through the forest to a waterfall) and Mount Storm King (tough hike straight up to a nice view over the lake).
Personally, we don’t really think the juice is worth the squeeze to get up to Mount Storm King, and we’d rather save the time and energy for a more rewarding hike elsewhere.
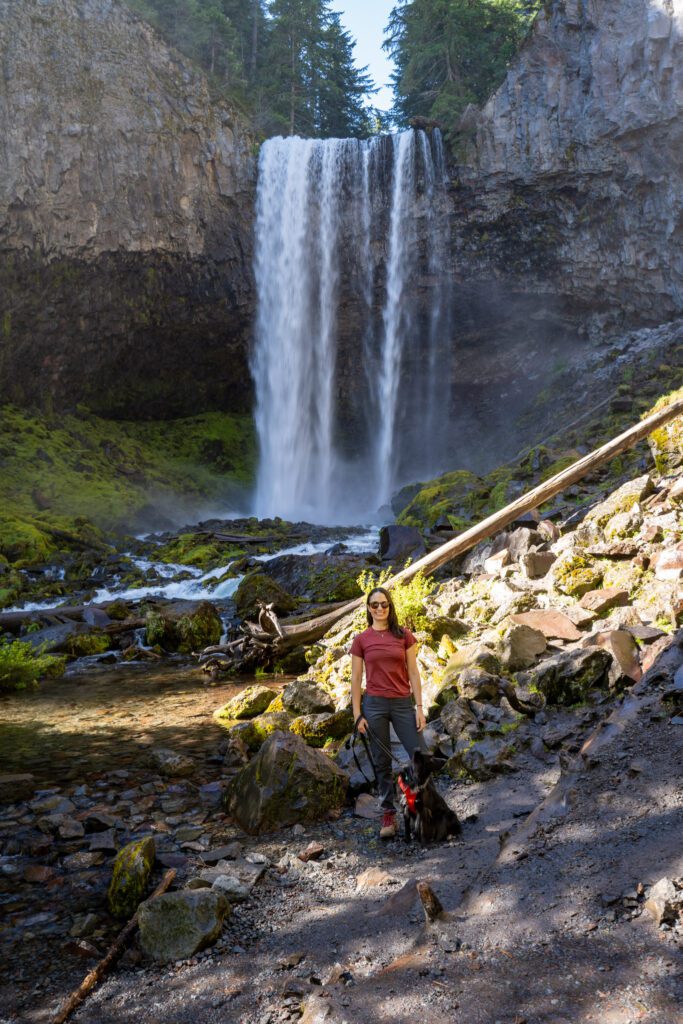
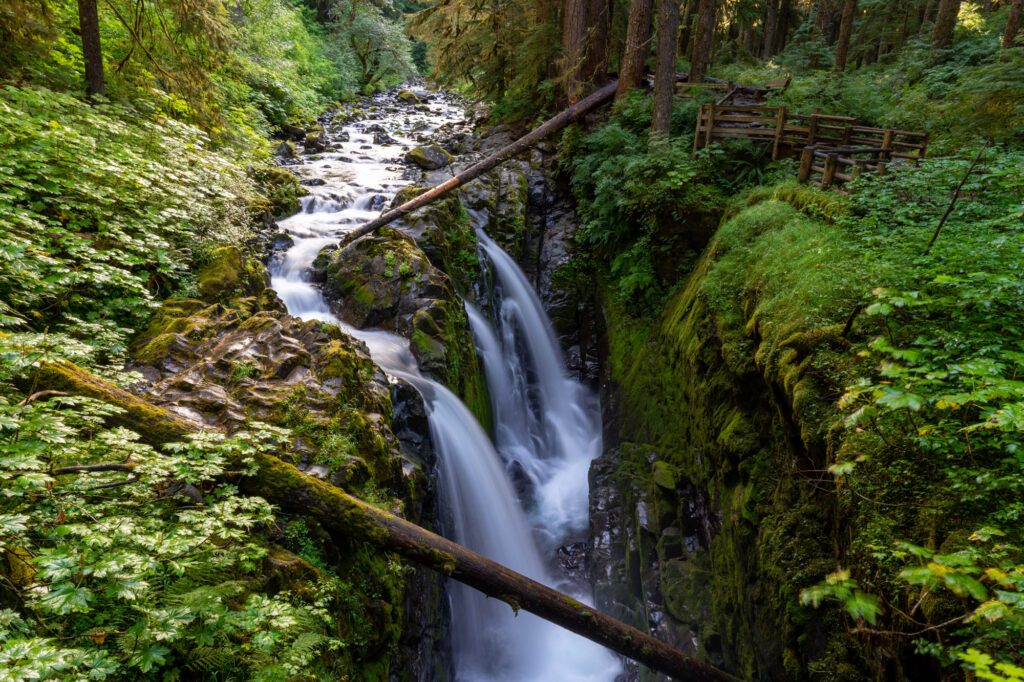
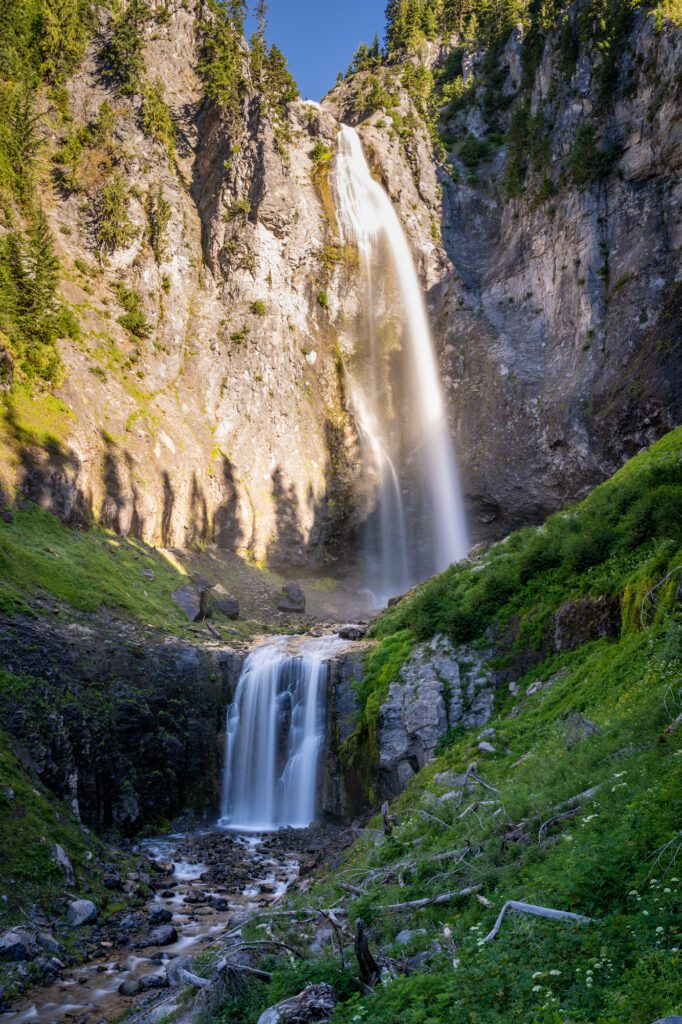
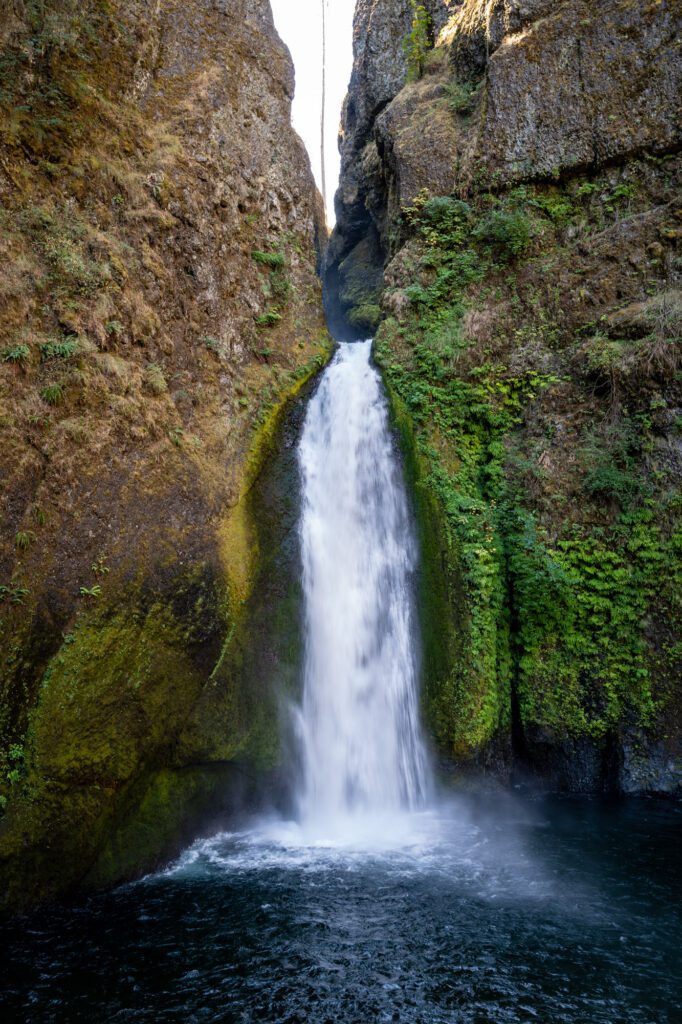
Sol Duc Falls: Our favorite waterfall in the park, this is a little bit of a detour from Lake Crescent.
We encountered it on our hike on the High Divide, a great backpacking trail that leaves from the same trailhead.
It’s a very short, mostly flat stroll through the woods to a wooden bridge over the falls.
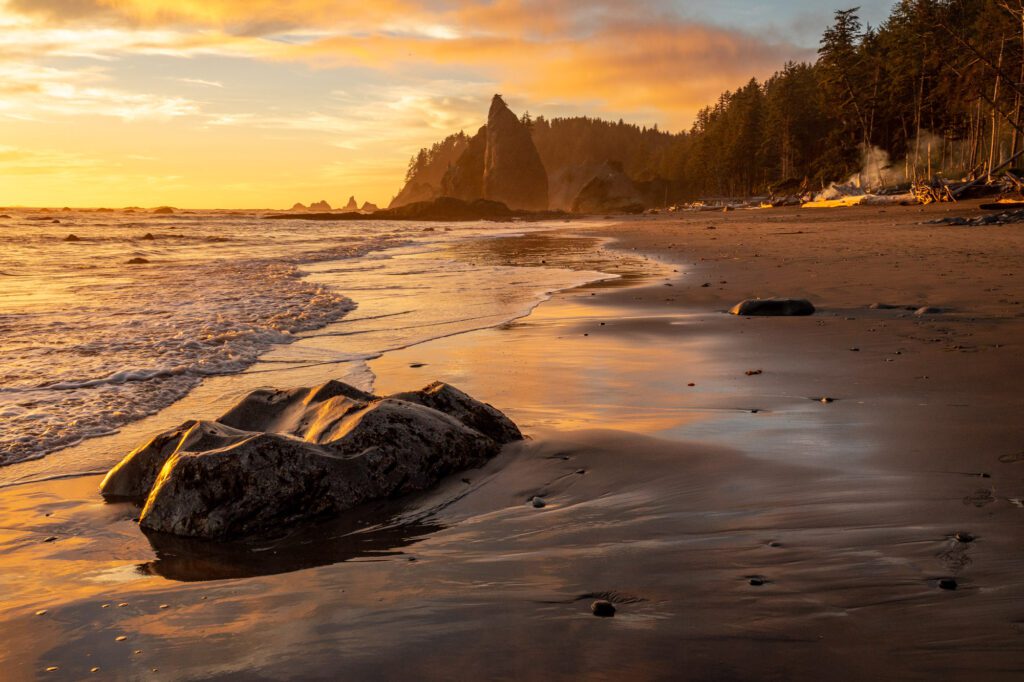
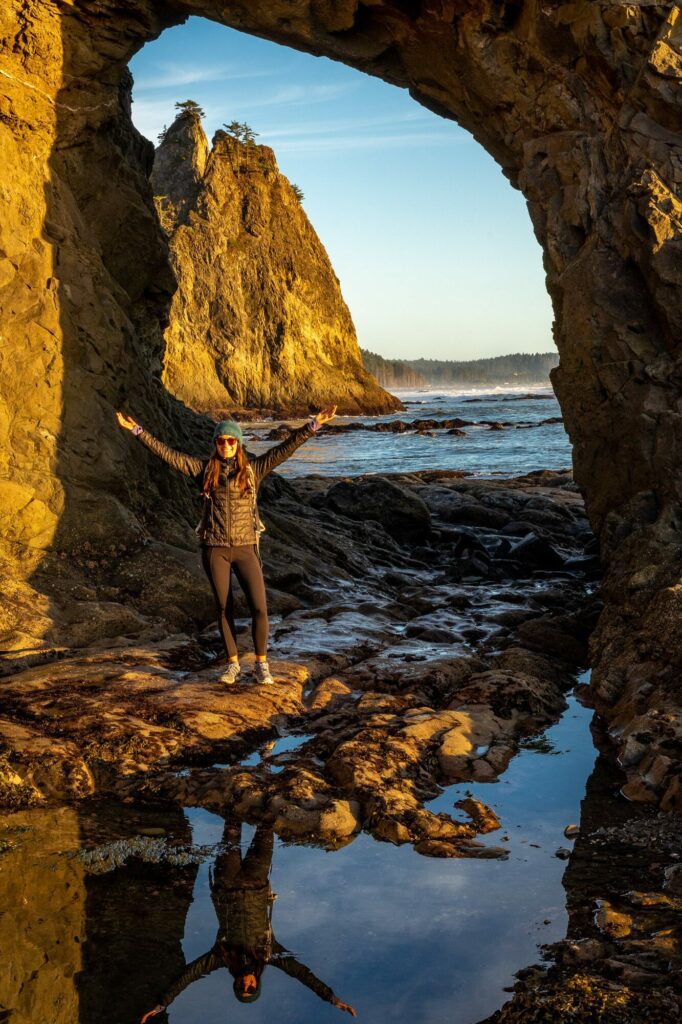
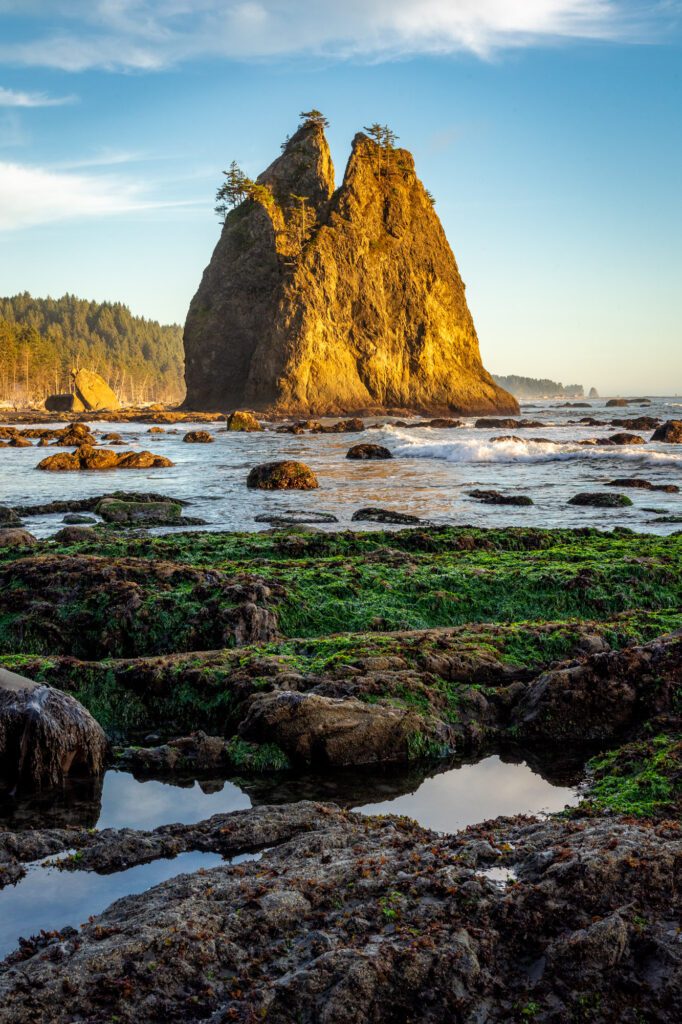
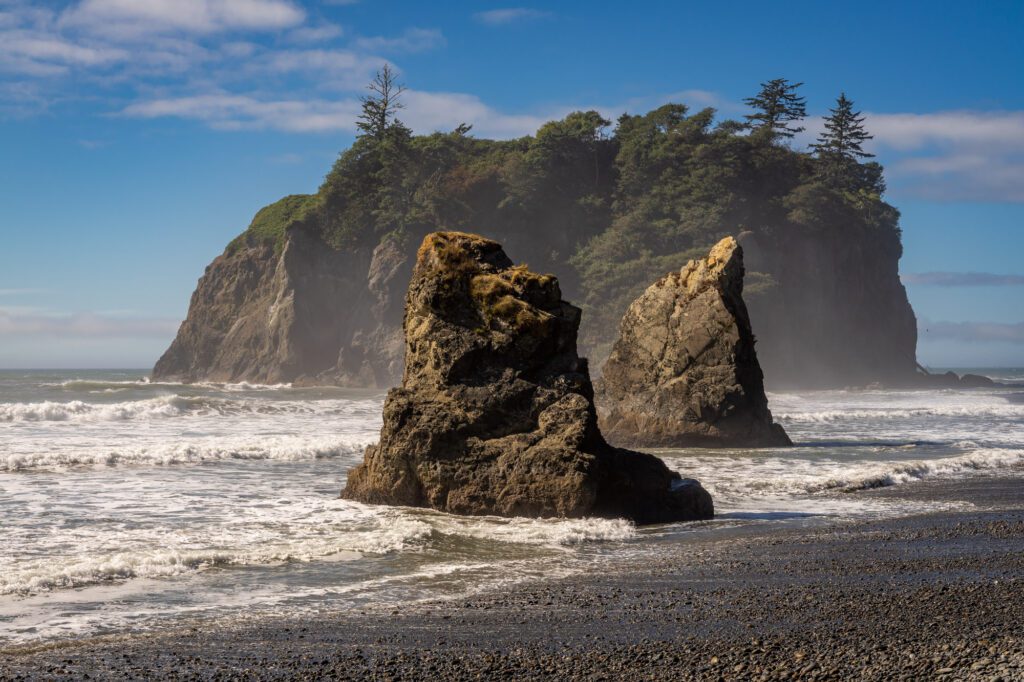
Rialto Beach and Hole-in-the-Wall: If you made us choose, this hike is in our top three when it comes to hikes in Olympic National Park.
It’s a flat stroll along the beach (hiking in the sand does suck, so be prepared for that) out past towering sea stacks, tidepools, and bald eagles sitting in the trees to a rock formation with a hole in it.
We got super lucky on our first ever trip with perfect weather at sunset, which is the best time to do this hike, but your experience may vary (we’ve since been here twice in the summer, and it has been gray and raining both times).
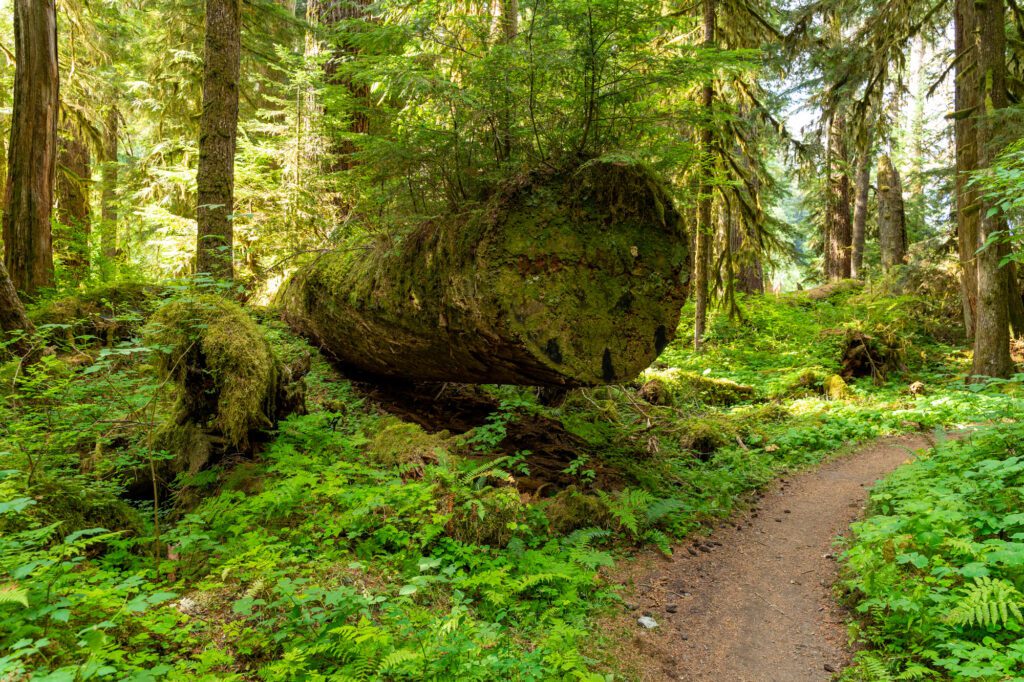
The Hoh Rainforest: The most famous of the coastal temperate rainforests in the Pacific Northwest, the Hoh Rainforest is lush, ferny, and mossy.
It’s also busy, so we’d recommend trying to structure your itinerary here to make sure you’re parked and on the trail by 9am at the latest to avoid the long lines that form at the entrance station.
Once you’re parked, do the short Hall of Mosses and Spruce Nature Trail, and if you’re up for a relatively easy walk, do the first portion of the Hoh River Trail, which sees a fraction of the people that those first few trails see and is a very pleasant walk.

Ruby Beach: Ruby Beach is one of our favorite beaches on this stretch of coast, and it’s a short walk away from the parking lot.
The location makes it a nice stop between the Hoh Rainforest and Kalaloch (which is the last beach in the park before you head to Rainier).
It’s everything you want in a coastal beach in Washington State – driftwood, sea stacks, and abundant bird life.
We have an entire 3 day Olympic National Park itinerary with far, far more detail on how to fit all of these things together, which you should go read for more information on planning this leg of your trip.
Where to Stay in Olympic National Park
As we teased above, the best approach to maximize your time in the park is to start in Port Angeles at the northeastern corner of the park and work your way counterclockwise around the Peninsula down to Kalaloch at the southwest corner of the park.
Because it can take several hours to drive between the park’s different regions, it makes sense to break up your trip and stay in different places to avoid having to do extra driving, which means you’ll spend less time in the car and more time exploring.
In this case, we’d spend your first night in Port Angeles, which is an excellent home base for exploring Hurricane Ridge and Lake Crescent in the northern end of the park.
Then we’d spend your second two nights near the town of Forks, which is the best home base for the beaches and rainforests along the Pacific Coast.
In Port Angeles, you have a choice to make.
If you want to be right in town with the amenities of a big city (like restaurants, grocery stores, and gas stations), look at the Olympic Lodge, which is clearly the best hotel in Port Angeles (we think).
For a more rustic experience, stay at one of the cabins between Port Angeles and Lake Crescent (we like this cozy studio for couples, or this house right on the edge of the park for bigger groups), or one of the houses on the shore of Lake Sutherland.
In Forks, you have a couple of options right in town (the best is the cabins at the Woodland Inns), along with some nice cabins along the road out to La Push, which will give you a more rustic experience.
For what it’s worth, we like this cozy tiny home with a hot tub for couples, and this beautiful craftsman in Forks for bigger groups.
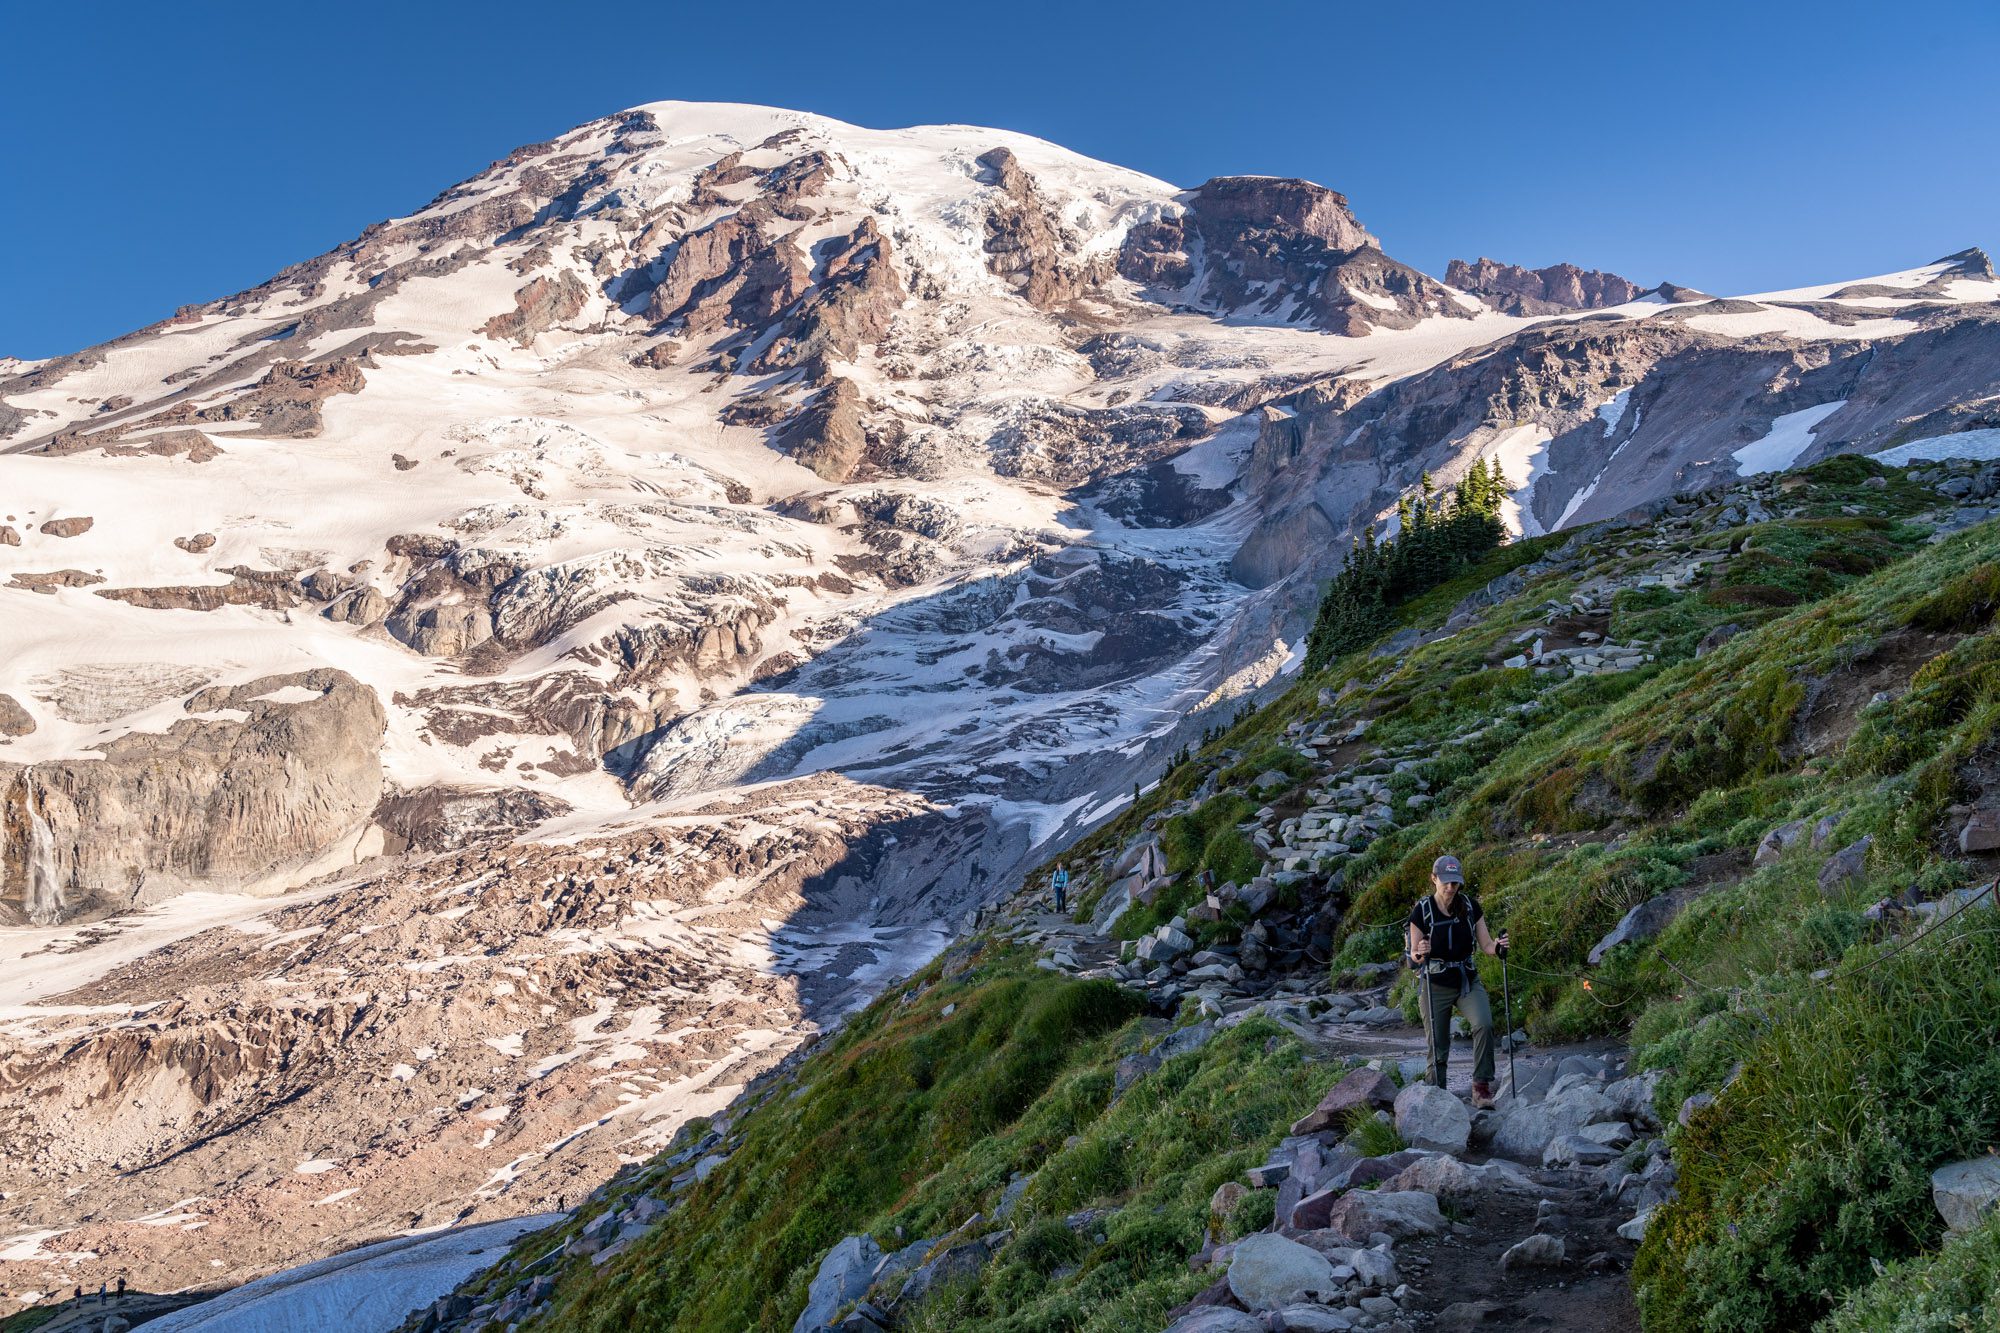
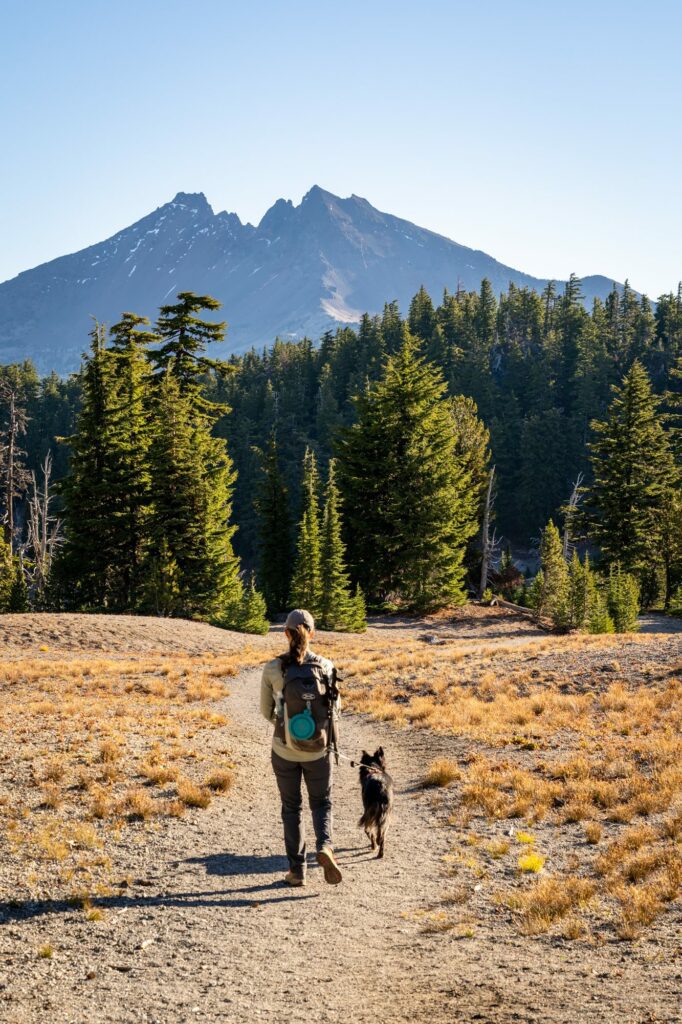
Days 5-7: Mount Rainier (Paradise + Sunrise)
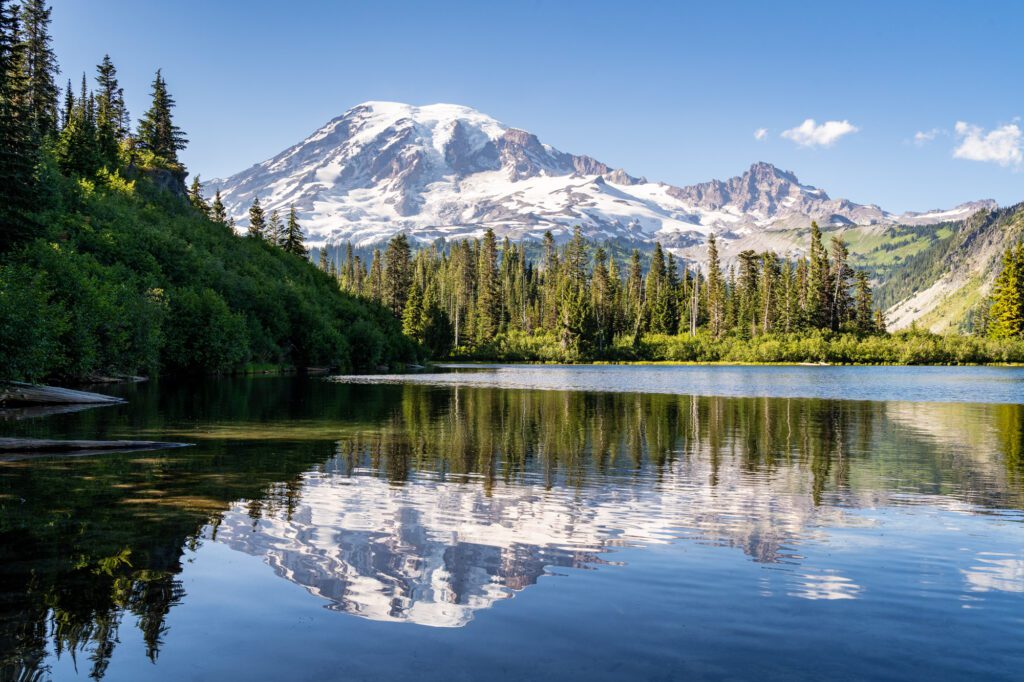
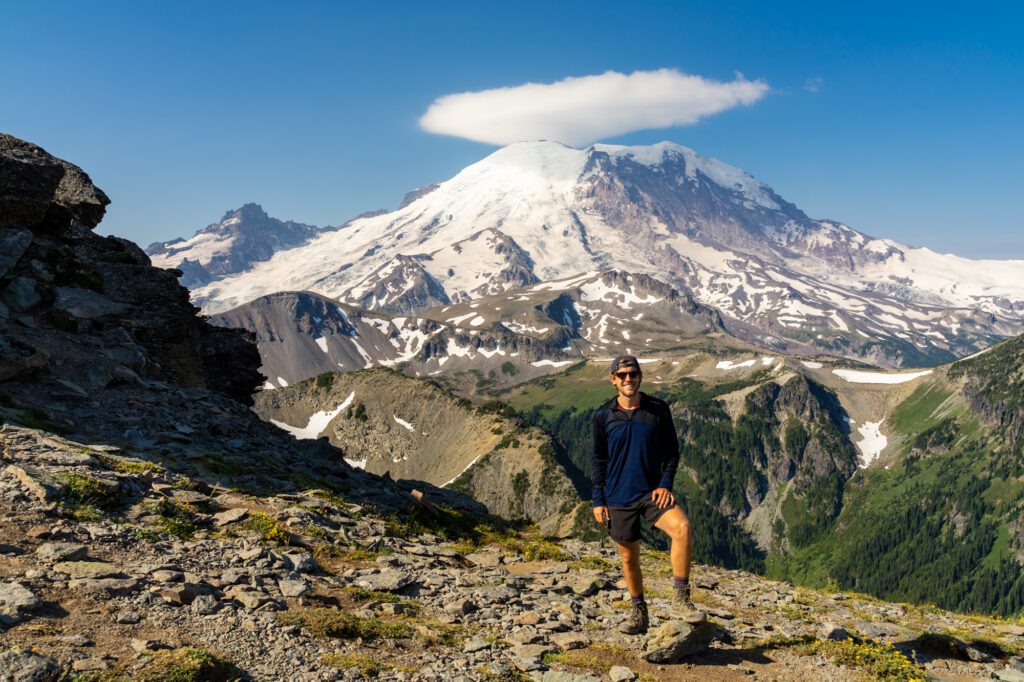
There is no better indicator for whether it’s a good day in the Pacific Northwest (really, the Seattle area) than whether or not “the mountain” is out. The mountain here is, of course, the towering snowy peak of Mount Rainier.
Rainier is as impressive as it gets when it comes to mountains on the west coast.
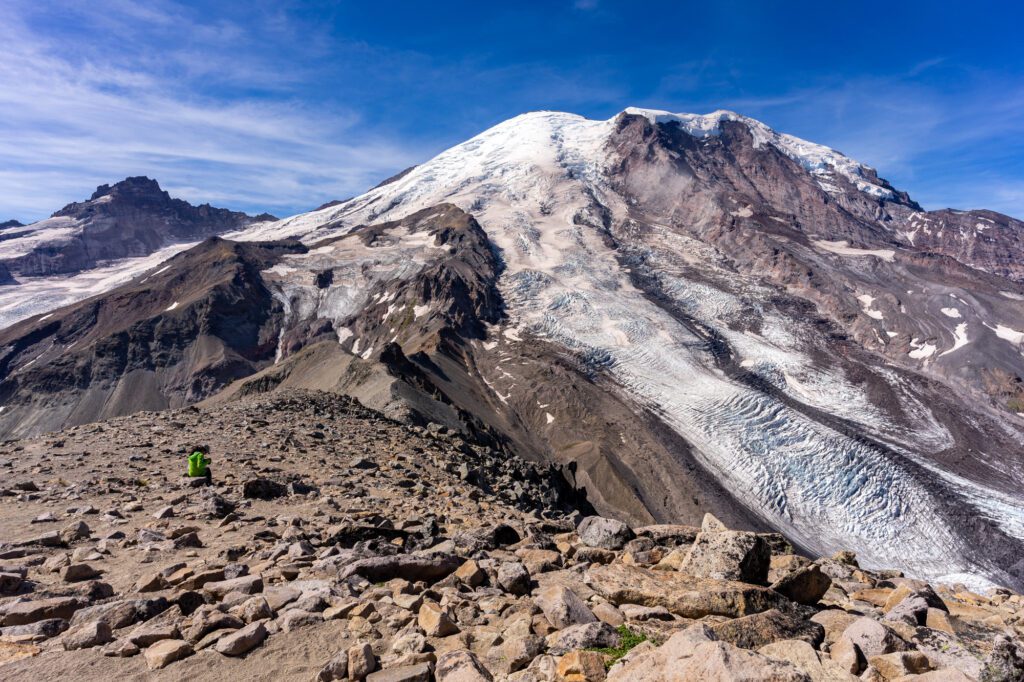
The reason it feels so massive is that not only is it the highest peak in the region at 14,410 feet, but it’s also surrounded by an area that is at sea level, so it really towers over the rest of the state.
Rainier’s geography is much less complicated than Olympic.
It’s worth noting that the two most popular slices of the park, Paradise (on the south side) with its wildflower-laden subalpine meadows and impressive waterfalls and Sunrise (on the east side) with its high alpine tundra, are not particularly close to each other because you have to drive all the way around the mountain to get between them (which takes around two hours on a busy summer day).
This has implications for how much time you spend here and where you stay, which we’ll cover in a section below.
With three days, you can comfortably see both Paradise and Sunrise (we’d do two days in Paradise, one day in Sunrise).
You might be saying “three days seems like a lot!” Allow us to explain why we think it’s worth spending that time here.
Now, in a previous version of the itinerary, we had just two days dedicated to Mount Rainier in order to fit in Mount Hood in Oregon, which is another place that we love.
With just two days, you’d be pressed for time if you wanted to see both Paradise and Sunrise, so we recommended just focusing on Paradise, the best slice of the park.
However, after some reflection and reworking, we realized that Mount Rainier is the best version of the subalpine meadows and towering snowy peak that you’ll find in the western United States, so in this latest version we opted to spend more time here so that you can see both.
What to Do in Mount Rainier National Park
As we mentioned already, during this latest rewrite, we decided to add a day at Mount Rainier in this itinerary because we think it really is worth seeing both Paradise and Sunrise, the two most popular sections of the park, and you need three days to do it.
Here are some of our favorite things to do in Mount Rainier National Park.
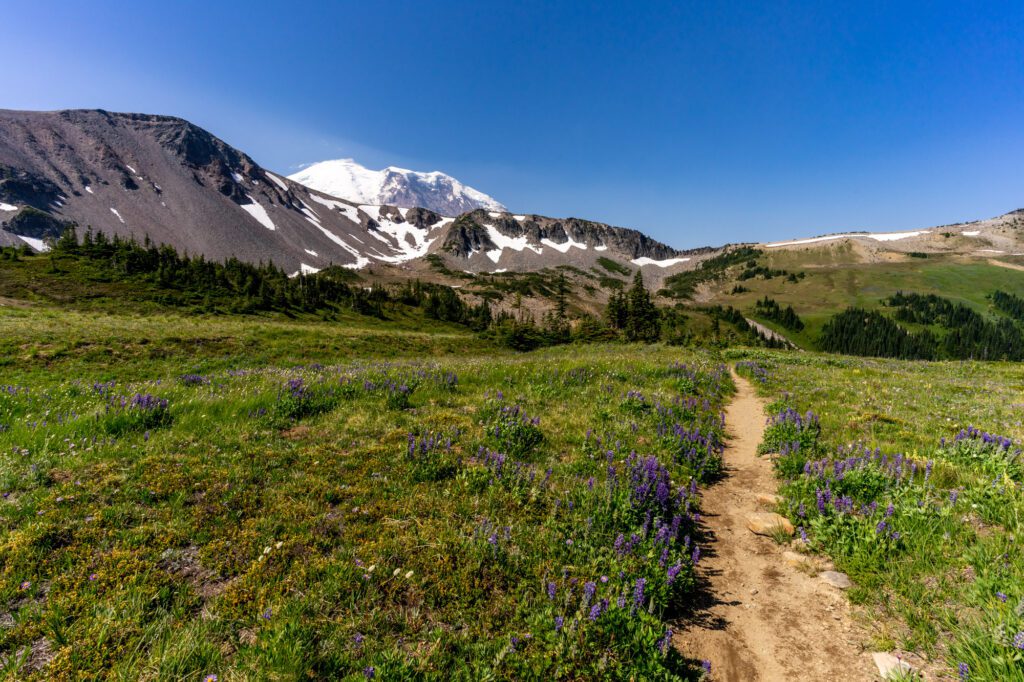
Hike the Skyline Trail: The Skyline Trail is one of the best hikes in Washington State.
From the lush subalpine wildflower meadows, to the rocky alpine terrain and up-close-and-personal view of Rainier’s face, to the sweeping views out over the Tatoosh Range and Mount Adams, it’s spectacular from start to finish.
And we didn’t even mention the marmots and mountain goats yet! It’s a difficult hike, and you need to be prepared for a fair amount of climbing and lots of sun exposure.
We have an entire guide dedicated to hiking the Skyline Trail – including logistics like which direction to hike and a complete trail guide – which you should read for more detail.

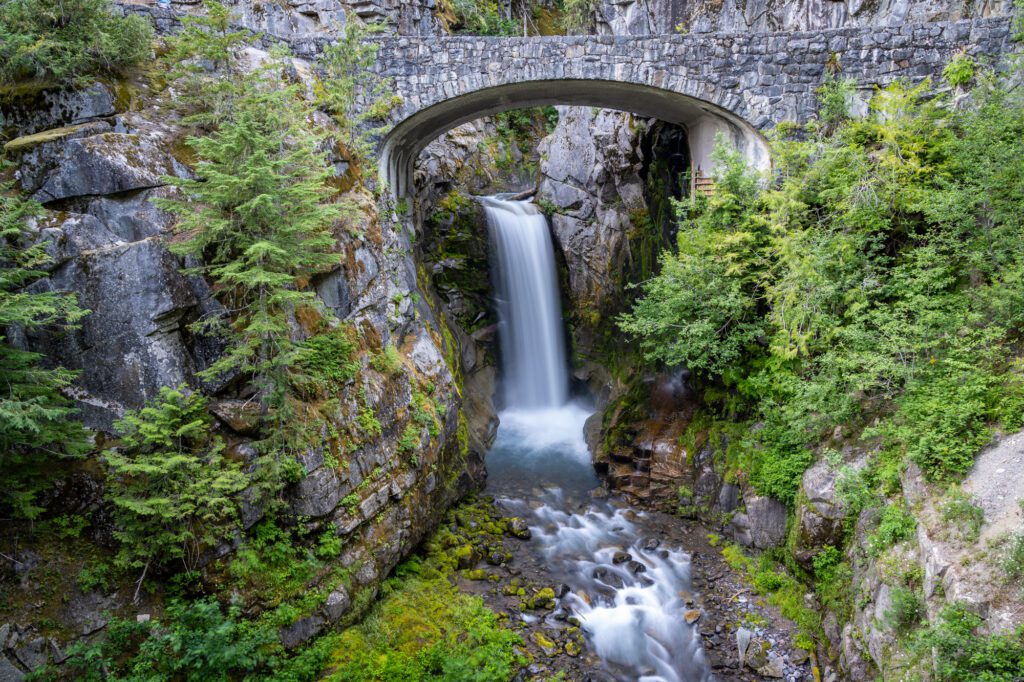
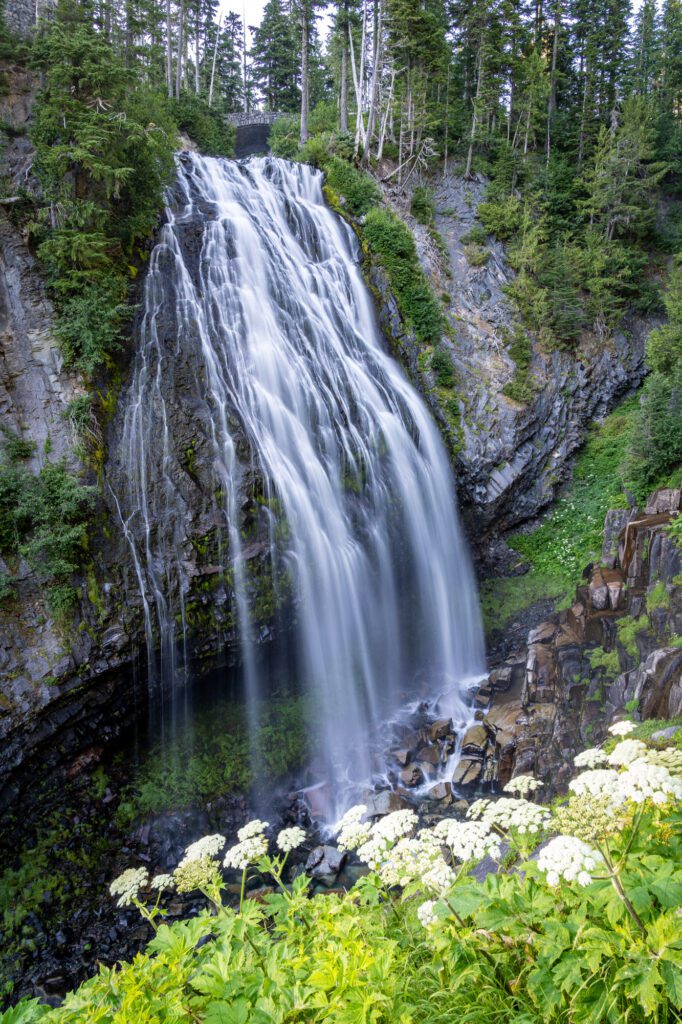
Go chasing waterfalls: One of our favorite parts about Paradise is the great waterfalls. There are four main falls, and one of them (Myrtle Falls) is on the Skyline Trail.
There are two that are accessible with a short walk from the parking lot – Christine Falls, framed by a picturesque stone bridge (here on Google Maps) – and Narada Falls (here on Google Maps), which are on the road up to Paradise.
The last is Comet Falls, which is the most impressive of the bunch and requires a moderate hike to reach (you can read about it in our Comet Falls trail guide).
Capture a perfect reflection at Reflection Lakes: Reflection Lakes is one of our favorite views in the park, especially at sunrise or sunset.
On a clear day, there’s a near-perfect reflection of Rainier’s glaciated peak in the water.
BEWARE: the bugs here in the summer are intense. Matt is a magnet for mosquitoes and flies, and he braved the swarms of them to get some photos at sunrise and sunset on our last few trips.
Tackle some other hikes near Paradise: While the Skyline Trail is our favorite of the bunch, there are several other hikes that are worth your time here.
The first we’d recommend is Bench and Snow Lakes, which we overlooked until our last foray into the park, and want to help you avoid making the same mistake.
It’s a great pair of lakes, and the hike in is tough enough to discourage most of the crowds, but easy enough for most people to make it out to both lakes.
Second is Comet Falls, which we already mentioned because we think it is the most impressive waterfall in the park.
Third is Pinnacle Peak, a tough climb up to a saddle with great views of Rainier.


Tackle one of the hikes at Sunrise: Sunrise is the highest point in the park that is accessible by car, and it’s home to several of our favorite hikes at Mount Rainier.
While our single favorite hike in the park is Skyline, we also think that the Sunrise Visitor Center and the area surrounding it has the best collection of hikes in the park.
They all follow the same picturesque path along Sourdough Ridge, inching closer to Rainier’s glaciated peak as you climb before diverging to completely different endpoints.
Whichever hike you end up choosing, we’d highly recommend making it a loop that comes out on the Sourdough Ridge Trail to Frozen Lake (which means you’re facing Mount Rainier) and then goes back past Shadow Lake on part of the Wonderland Trail (the 90+ mile backpacking trail that circumnavigates Mount Rainier).
From there, you cut over onto the Sunrise Rim Trail, which has great Rainier views and abundant wildflowers in the summer.
Burroughs Mountain (9 miles / 2,600 feet elevation gain): We’re big fans of this hike, especially if you go past the “official” end of the trail at the Second Burroughs and continue on to the Third Burroughs, where you’ll be about as close to the face of Mount Rainier as you can get without actually climbing it.
The downside? You have to descend down into the valley between the second and third burroughs in order to make the final ascent to the third, so it basically doubles the elevation gain.
We have an entire guide dedicated to hiking the Burroughs Mountain Trail for you to read for far, far more detail on that hike.
Mount Fremont Lookout: (5.5 miles / 1,200 feet elevation gain): Of the three hikes here, this is the most popular trail (mostly because it’s the most accessible in terms of difficulty).
We’re not exaggerating when we say that hundreds of hikers can be found at the fire lookout at the end of this trail on a nice Saturday evening in August, enjoying the orange glow that washes over the valley and Rainier’s peak as the sun sets to the west.
The hike climbs along a rocky, marmot-laden ridge on the way out to a historic fire lookout with sweeping views from Rainier, over the valley to the north, and beyond.
More trail information here.
Berkeley Park (7.5 miles / 1,600 feet elevation gain): We discovered this hike by talking to a ranger at Paradise, who we asked where to find wildflowers (it was the last few days of July).
They immediately said “Oh, Berkeley Park is the place to be right now.”
We had never heard of it, but we were heading towards Sunrise the next day, so we added it to the list.
It was a GREAT hike. The trail drops down from Frozen Lake into a lush valley with a brilliant display of wildflowers in just about every color imaginable.
There’s a babbling creek to keep you company as you hike, and numerous pull offs to sit and relax and take in the ambiance.
More trail information here.
Where to Stay at Mount Rainier
Because you’re heading south towards Portland from Rainier AND you’re going to be spending time in both Paradise and Sunrise, our strong recommendation is to find a place to stay near the town of Packwood on the southeast side of Rainier, which provides a nice home base for both areas of the park.
We have an entire guide that lays out our approach in much more detail – where to stay in Mount Rainier National Park – which you can read for plenty of other information and recommendations.
Here’s a quick summary.
If you were only doing Paradise OR Sunrise, it would make sense to find a place to stay that is a bit closer to the one you’re visiting.
However, it takes a LONG time to go from one area to the other, and in this case it makes more sense to pick a single home base for both, which is more convenient but will add a bit of driving.
That home base is the town of Packwood, which also happens to have the best amenities of the communities right on the border of the park (it has a gas station, small grocery store, brewery, and a coffee shop!).
Located just inside the park, Ohanapecosh Campground is both the biggest and nicest campground in the park (we think), and is an ideal location for exploring both Paradise and Sunrise.
You can also hike to Silver Falls right from the campground, which is cool.
Packwood is a nice little town with a couple of hotels – (the Packwood Lodge & Cabins is our pick.
There are also a bunch of great vacation rentals, from modern tiny homes for couples to big, luxurious cabins for larger groups.
If you’re camping, La Wis Wis Campground in Packwood – which has a swimming area within the campground – is a great option (we stayed there a couple years back).
It’s outside the park, so it’s marginally less competitive than Ohanapecosh in a similarly convenient location for accessing both Sunrise and Paradise.
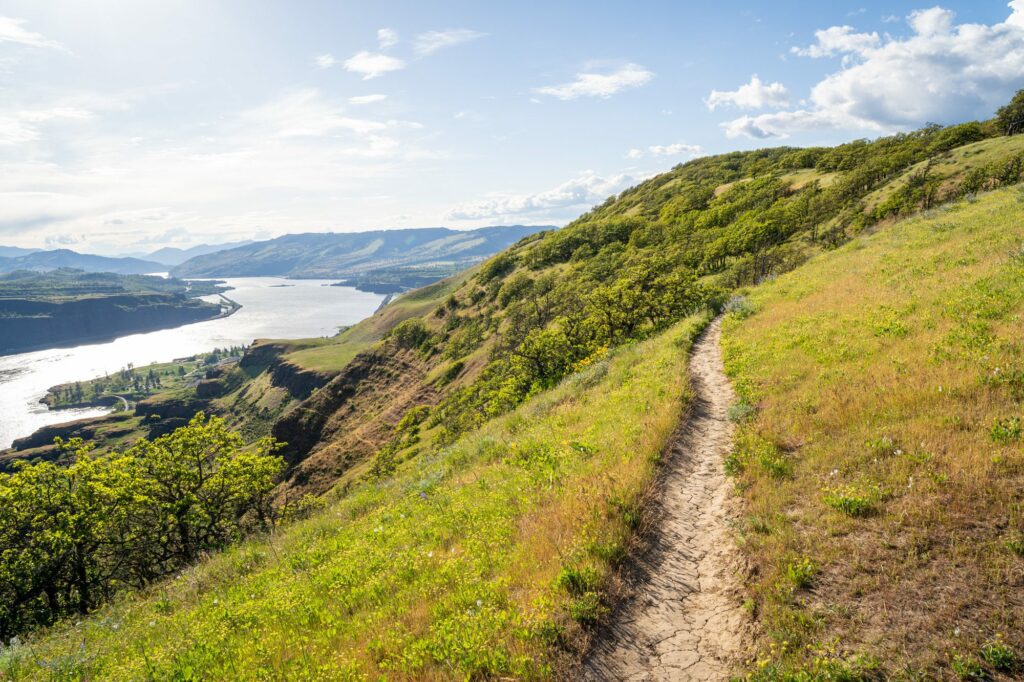
Days 8-9: Hood River + Columbia River Gorge
After Rainier, you’ll be making your way south and crossing the Oregon border – which is the Columbia River (the one that Lewis and Clark traveled up to “discover” Oregon) – bringing you right into our own backyard.
The Columbia River Gorge is nearly as impressive as the two national parks you’ve already seen, but in a different way.
Millions of years of water running down the Gorge, combined with ample volcanic activity, have formed this massive chasm that separates the two main states in the Pacific Northwest.
The Oregon side of the Columbia River Gorge, which is shaded by the walls of the Gorge, is lush, wet, green, and full of a stunning array of impressive waterfalls.
The Washington side of the Gorge, which gets more sun exposure with its south facing hillsides that makes it drier and a paradise for wildflower hunters in the spring, features some of the best views of the Gorge from various hikes along the river.
The town of Hood River sits at a unique point in the Gorge, and is a good home base for your explorations over the course of a couple of days.
We say it is unique because of its geography. Head in any direction and the geology and topography changes drastically.
East of Hood River deeper into the Gorge, you start to get into the High Desert. South of Hood River, you pass through the fertile Hood River Valley before climbing up into the Cascade Range. And west of Hood River is the lush Oregon side of the Gorge.
The Gorge and Hood River is our favorite day trip from Portland, and we take almost every visitor that comes to see us in Portland out to experience the natural beauty that exists roughly 30 minutes from our front door.
What to Do in the Columbia River Gorge & Hood River
Like we mentioned, we spend a lot of time exploring the Gorge and Hood River because they’re so accessible from our home in Portland.
Here are some of our favorite things to do.
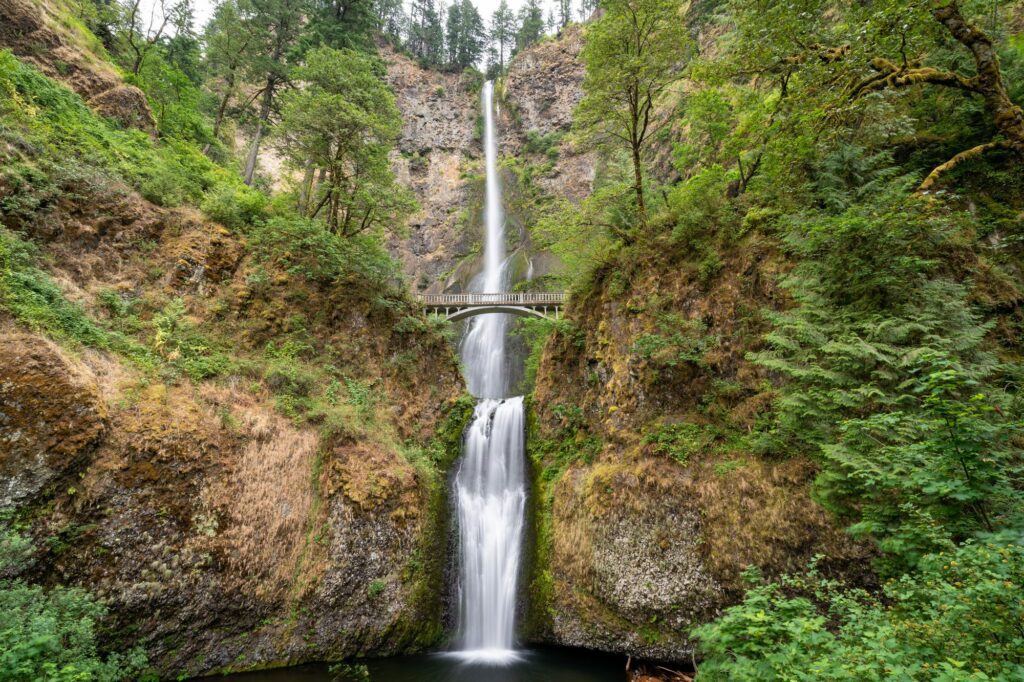
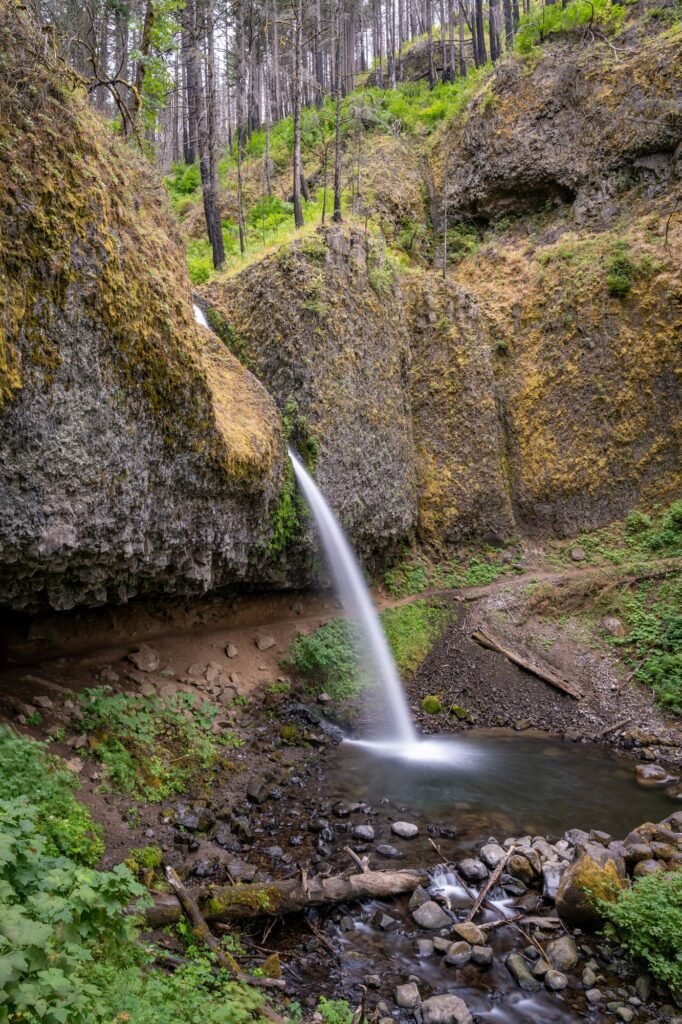
Waterfalls in the Gorge: The best concentration of waterfalls exists on the Oregon side of the Gorge.
Try to get to Multnomah Falls (here on Google Maps), which you’ve undoubtedly heard of and seen pictures of, early in the morning to beat the crowds and tour buses that make it a zoo starting at around 10am.
We really like Horsetail and Ponytail Falls (here on Google Maps) and the short hike to Wahclella Falls (here on Google Maps) which are a great bang-for-your-buck in terms of beauty to effort ratio.
The Best Views of the Gorge: For some of the best views of the Gorge, there are a couple of viewpoints on the Historic Columbia River Highway that are worth a stop – the Vista House (here on Google Maps) and the Women’s Forum Viewpoint (here on Google Maps).
In terms of hikes with a nice view, we love Angel’s Rest, which is a moderate climb to a rocky outcropping with great views up and down the Gorge.
There are also some great views from the Washington side from Beacon Rock, the Hamilton Mountain Trail, and the Dog Mountain Trail (this one is the most famous, but it is a DIFFICULT hike).
We also really like the Coyote Wall Trail, which is further out into the Gorge and gets far less traffic.

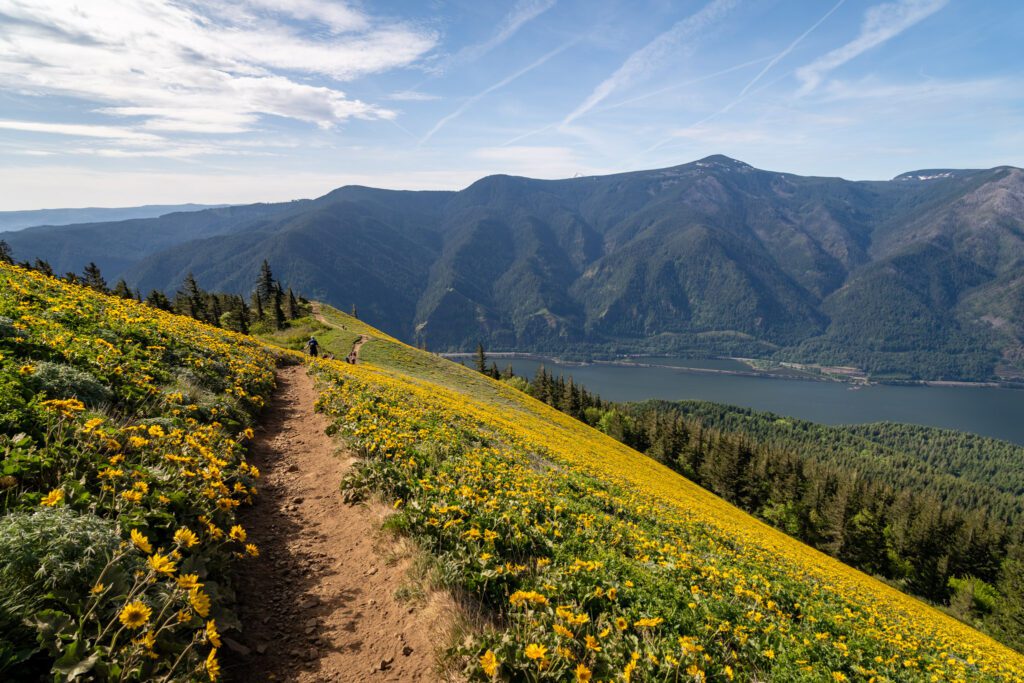
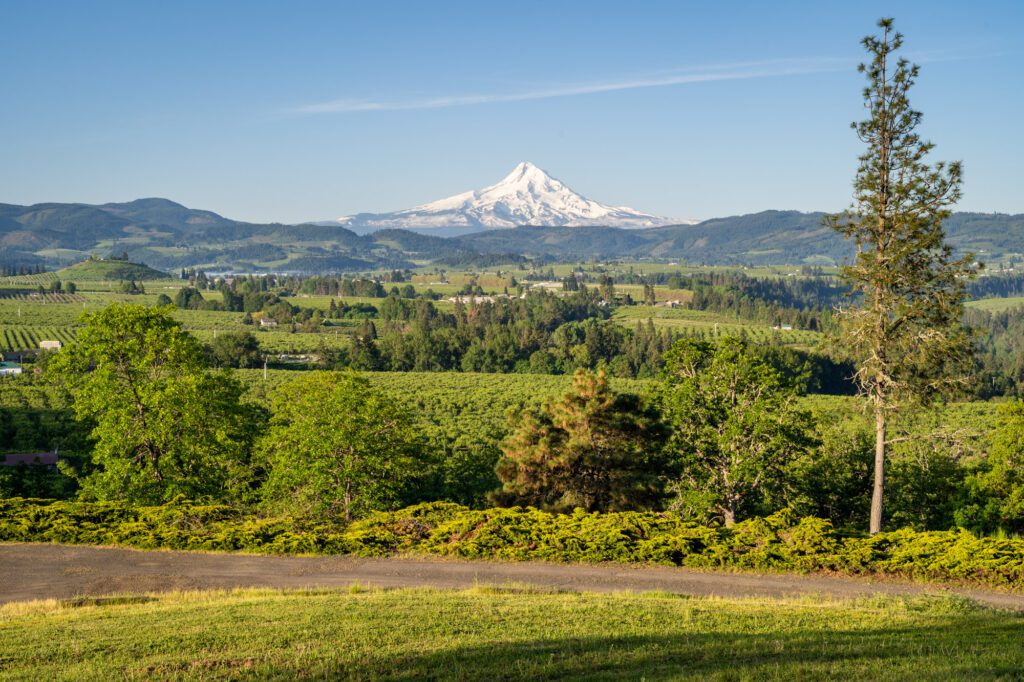
The Fruit Loop: The Hood River Fruit Loop refers to a particularly fertile section of the Hood River Valley that features fruit trees as far as the eye can see and excellent views of Mount Hood and Mount Adams, depending on which direction you’re looking.
We love stopping at the fruit stand at Draper Girls (they also do u-pick fruit in the summer) and the Gorge White House for a drink in a nice location.
For a great view of the valley and Mount Hood from above, head to Panorama Point (here on Google Maps).
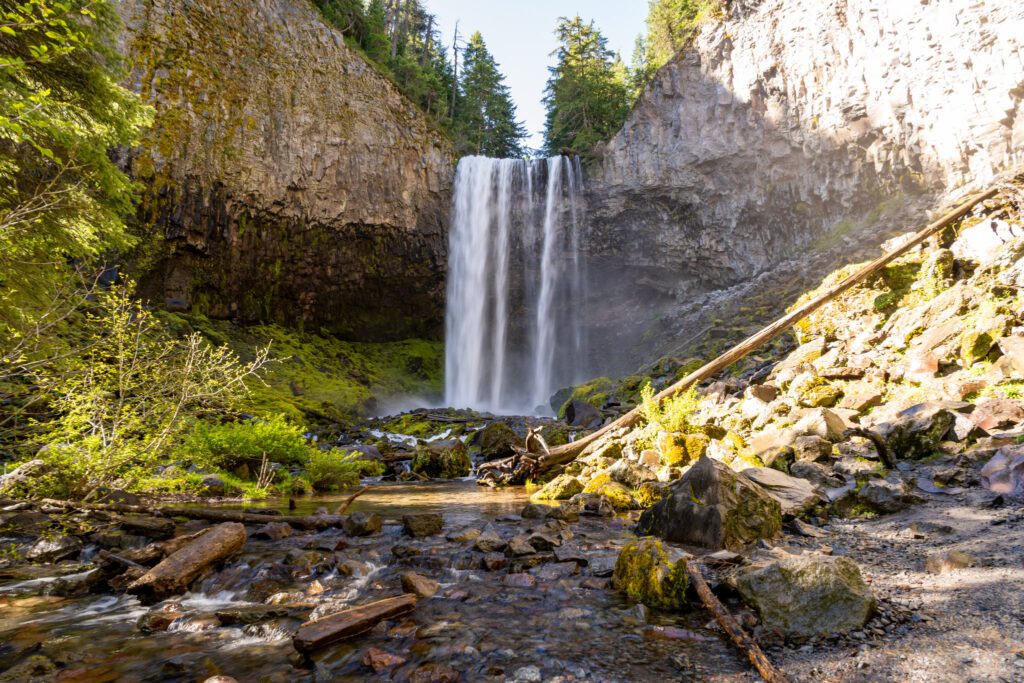
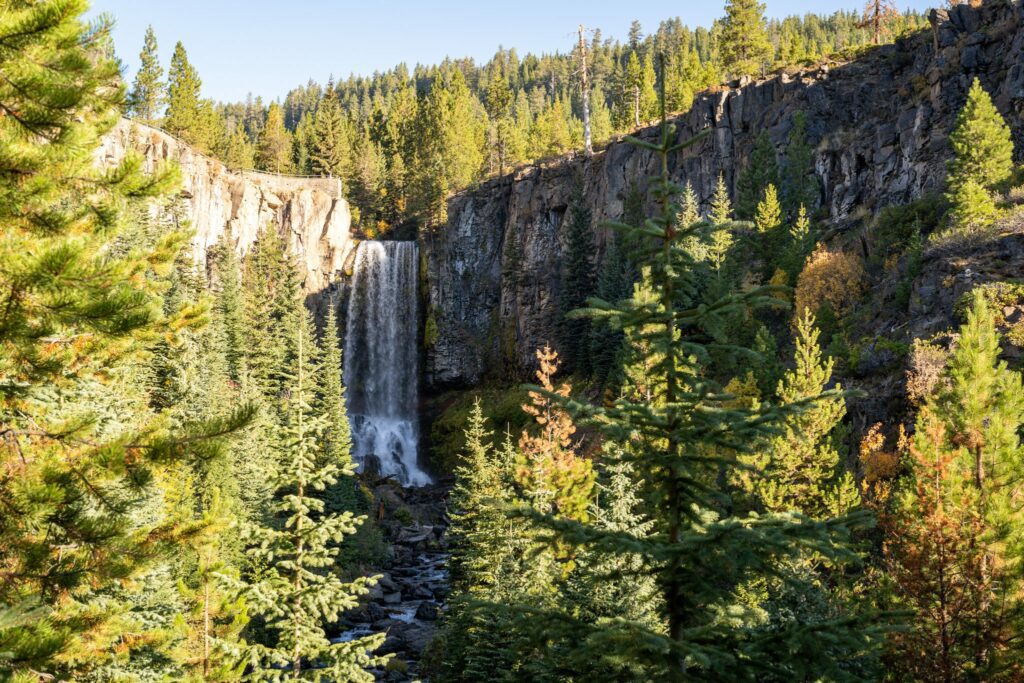
Tamanawas Falls: This is a beautiful hike, and is equally as impressive as some of the waterfalls in the Gorge for a very reasonable effort.
It’s about 30 minutes south of Hood River, and the trailhead is right off of Highway 35 on the way towards Mount Hood.
We have an entire guide dedicated to giving you all the information you need to hike the Tamanawas Falls trail, which you should read for far more information than we’ve fit into this summary.
Wine Tasting near Hood River: Hood River is a good place to go wine tasting because it’s more low key than the Willamette Valley – one of the premier wine regions on the west coast – but still has a baseline quality of wine.
We prefer the wineries on the Washington side of the Gorge, and Loop de Loop is our favorite of the bunch.
Other good ones that have been recommended to us by various locals are Savage Grace and AniChe (which are near Loop de Loop).
On the other side of the Gorge, it’s worth driving a bit further east to hit Annalemma Wines.
Where to Stay in the Columbia River Gorge
Generally speaking, you basically have two options here. Stay right in the town of Hood River (or close to it), or stay somewhere more secluded and private.
If you want to be walkable to town, we’d look at the Best Western right on the Marina, which has some rooms that have kitchens.
If you want something more secluded and private, we’d look across the river to the charming little town of White Salmon, which is where we like to stay when we head out to stay in the Gorge.
We have personally stayed at and loved the RubyJune Inn, which is a B&B in the truest sense (and the breakfast is fantastic, sourced from local bakeries). No kids, no pets allowed, and the owners are a wealth of knowledge about what to do, see, eat, and drink in the area (especially wine).
There are also a bunch of vacation rentals in White Salmon, like this light-filled guest suite that is walkable to town, or this secluded cabin that is further out in the woods.
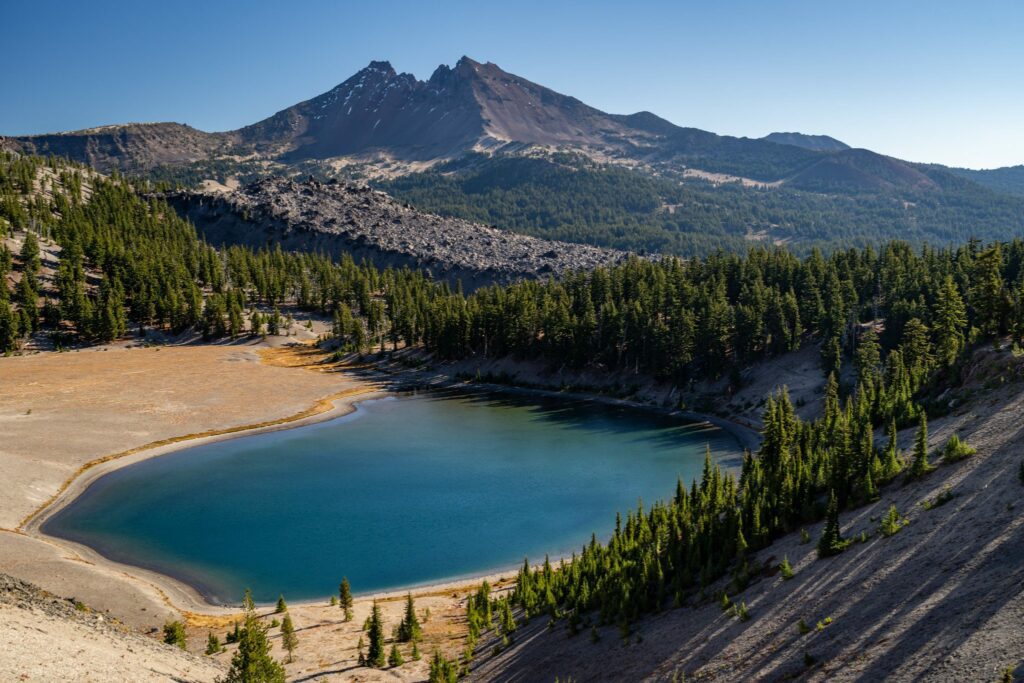
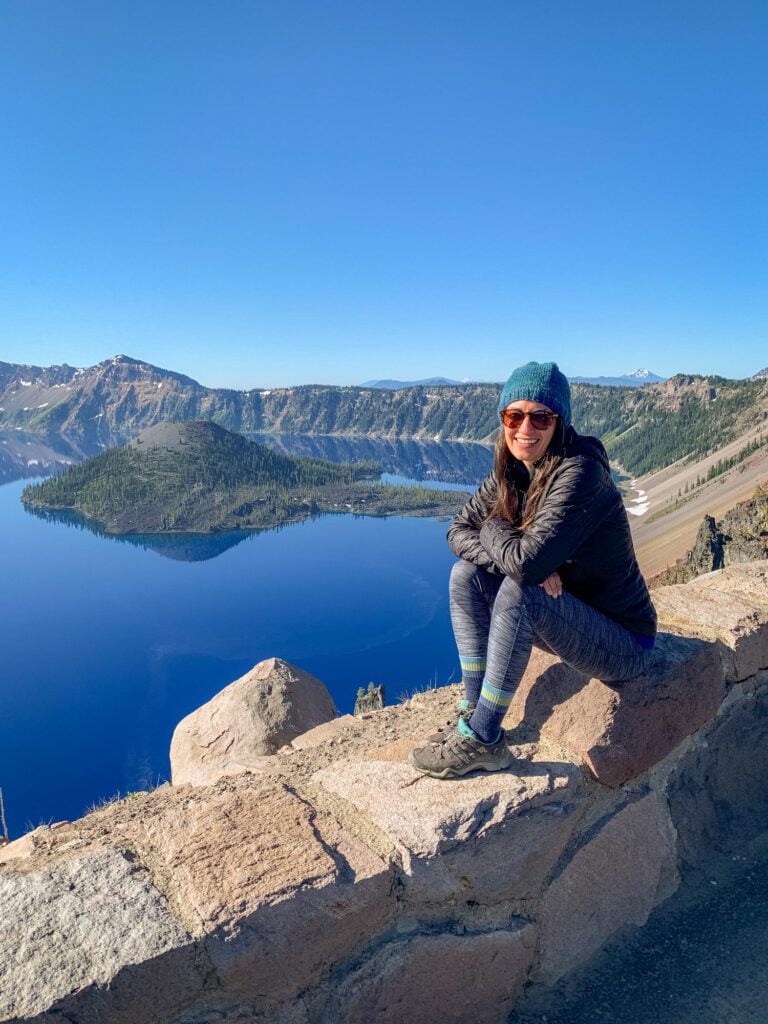
Days 10-12: Bend (& Day Trip to Crater Lake)
Bend, similar to Hood River, is in a unique geographical location. It sits at the transition point between the alpine and subalpine environment in the Cascades and the high desert that’s nestled in Central Oregon between the mountain ranges on either end of the state.
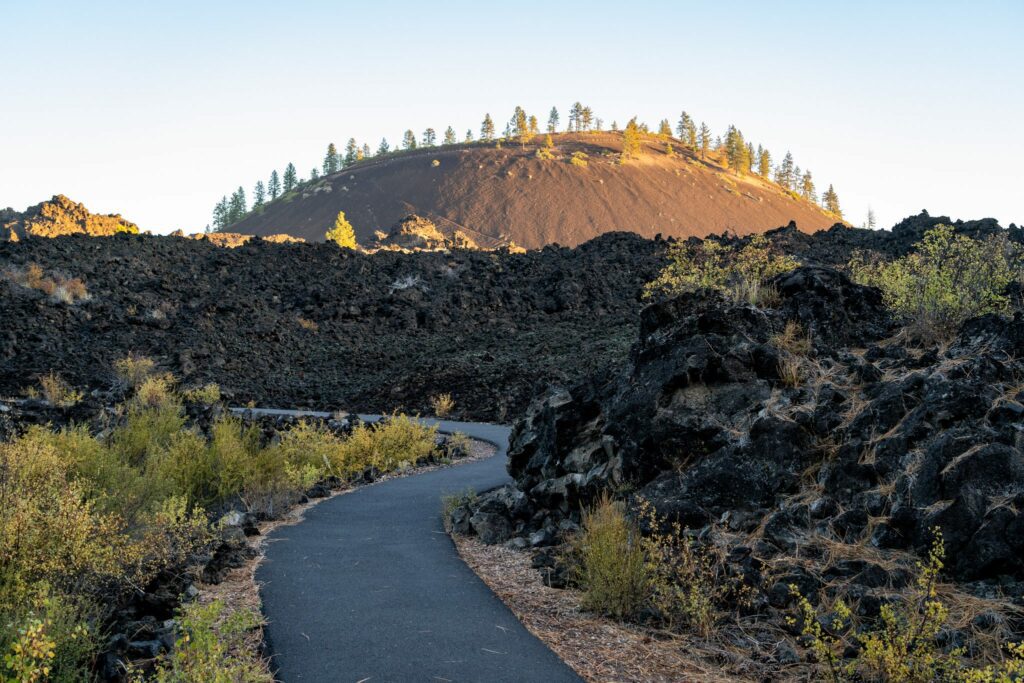
Plus, volcanoes! There’s lots of volcanic activity here that has shaped the landscape over hundreds of thousands of years.
That diversity has meant that Bend has become a little slice of paradise for adventure lovers over the past several years, and has gained nationwide notoriety with lots of media coverage recently.
Though it has always been on the map of most adventure-loving Pacific Northwest residents.
If we’re being honest, Bend requires a lot of driving to access (and even more driving if you head down to Crater Lake).
Ultimately, we think that detour is absolutely worth it, and you should definitely make an effort to include Bend as a part of your road trip. Both because of Bend itself, and because of the diversity of landscapes you’ll find just outside of Bend.
The other upside of Bend is that it makes a good home base for doing a day trip to Crater Lake National Park, which really is in an inconvenient location that is close to basically nothing.
We think a day is actually a good amount of time to spend at Crater Lake, and while getting there from anywhere is going to require a lot of driving, Bend is as good a home base as any to do it from.
We have it structured this way (rather than doing Portland then Bend) to end your trip in Portland, which has a much better selection of flights to get home (if you’re flying).
However, as we covered in the “where to fly in and out of” section, Bend does have an airport, and it will save you around four hours of driving to fly out of Bend (and rearrange this itinerary slightly). The downside is an additional connection for most places, and more expensive flights.
Anyway, we love Bend and we usually spend a full week there every year exploring, which has really opened our eyes to the diversity of things to do and see within about an hour of the city.
What to Do in Bend
Bend is a big city by Oregon standards – and growing fast – and there’s plenty to do to fill a full week (or a full month, or year, you get the idea).
With limited time in and around Bend, here is what we’d focus on.
For more, head over and read our in-depth guide to the best things to do in Bend, which has far more detail than we have here.
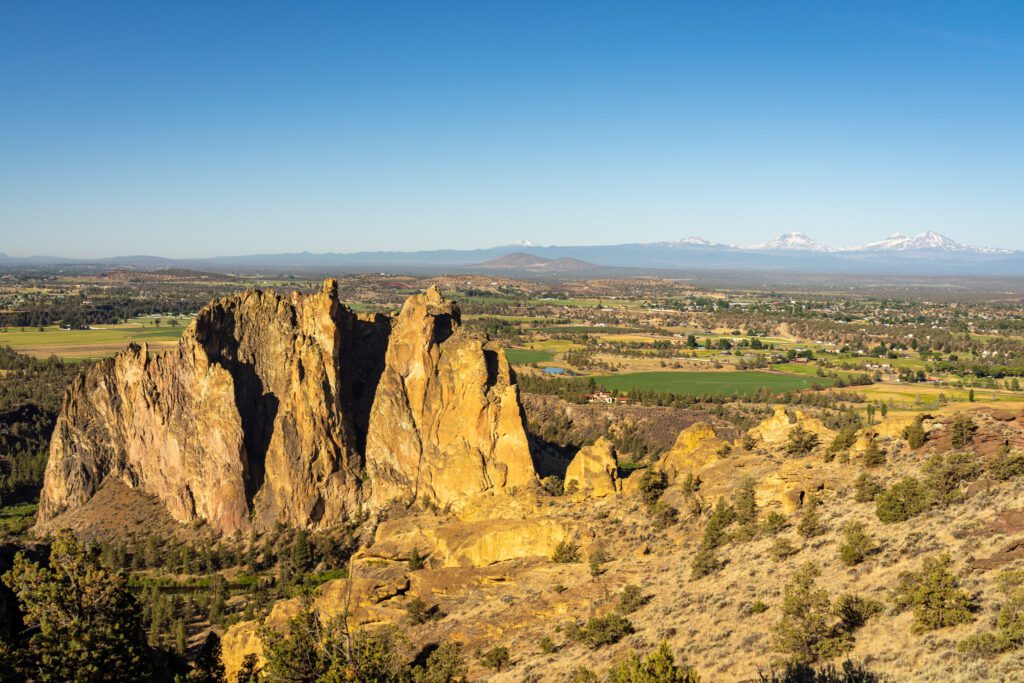
Smith Rock State Park: Smith Rock is one of the destinations that is most emblematic of the stark contrast between the wetter, greener part of the state that we live in (west of the Cascades) and the high desert on the east side of the mountains.
It looks like it belongs in Utah, not the lush Pacific Northwest! But the Pacific Northwest is more than evergreen forests.
The best trail in the park is the Misery Ridge Trail, which has two route options (after the brutal climb up to aptly-named Misery Ridge) – the shorter, flatter River Trail and the longer, more difficult Summit Trail.
It’s between Bend and Hood River/Portland, so you can stop on the way in or out of Bend (we’d try to go early, because it does get hot and there’s very little shade).
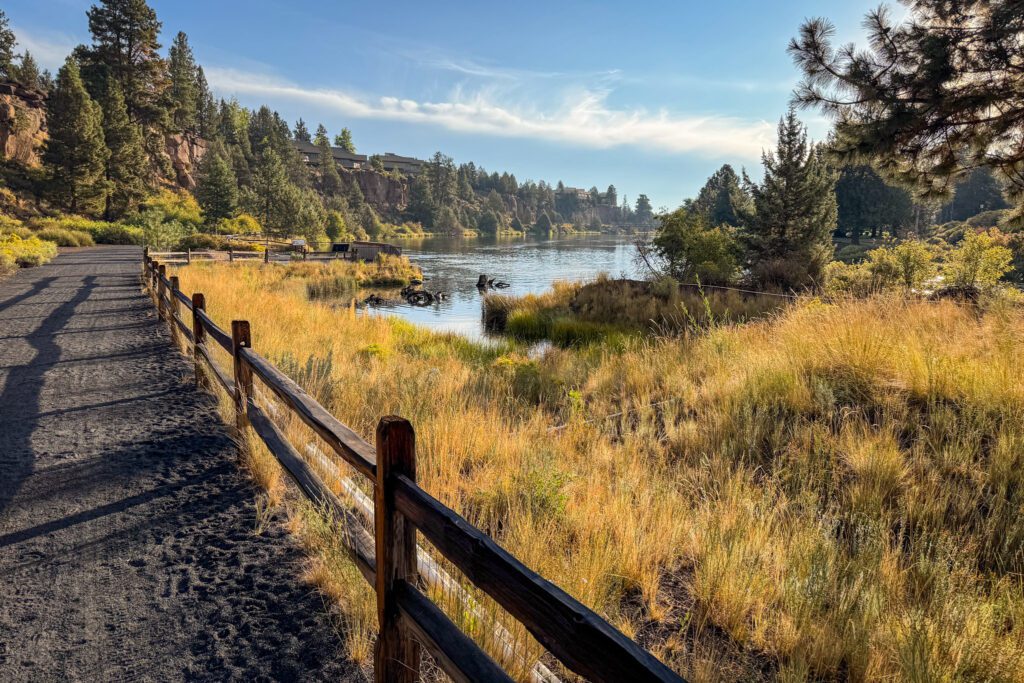
The Deschutes River: The Deschutes runs right through the center of town – and is one of the biggest reasons why Bend is located where it is.
Today, it isn’t really the lifeblood of the city, but it is full of recreation opportunities.
There’s a long trail that follows the path of the river south from Bend, and we love doing a short portion of it as part of any visit to Bend (here’s the rough route that we usually do when we’re in town).
The other thing you should try to do – as long as it’s summertime – is get out on the water!
You can float the river from Drake Park down to Riverbend Park. Rent a tube from Tumalo Creek and use the Ride the River service, which shuttles you to the entry and exit from the river.
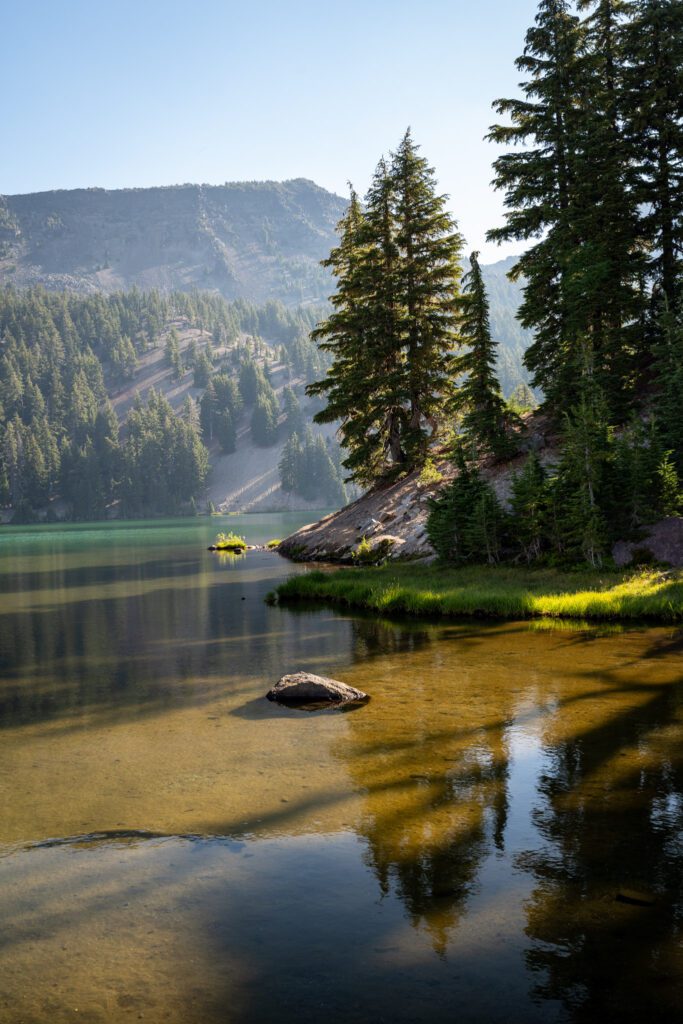
The Cascade Lakes Scenic Byway: This is one of our favorite places in the entire state. It’s a corridor that runs west out of Bend into the Cascades into a land of pine trees, gorgeous lakes, and great hikes.
Definitely stop by a couple of the lakes – Sparks Lake and Elk Lake are our favorites.
It’s well worth spending a day exploring this part of the state, and there are a nice range of hikes to choose from.
Here are three of our favorite Bend hikes that are along this stretch:
- Green Lakes (9.1 miles // 1,174 ft. elevation gain): A nice, relatively easy (but long) creekside stroll through the forest out to a series of lakes backed by the South Sister and Broken Top. Lovely hike – one of our favorite hikes in Oregon – and here’s our Green Lakes trail guide.
- Tumalo Mountain (4.1 miles // 1,423 ft. elevation gain): Short and sweet, this hike climbs straight up to the top of Tumalo Mountain where you’ll have sweeping views out over the valley and surrounding peaks. Particularly nice at sunrise or sunset!
- Moraine Lake (5.2 miles // 1,476 ft. elevation gain): This was an unexpected delight last fall! It starts with a climb through the forest, and a couple of miles in you burst forth from the forest out into a basin with great views of both the South Sister and Broken Top before you head down to the lake (which is tucked right at the base of the South Sister).
It’s worth noting that for the more popular hikes in the Bend area, you’ll need to reserve a Central Cascades Wilderness Permit, which they implemented a few years ago to control summer crowds on fragile trails. More information here.
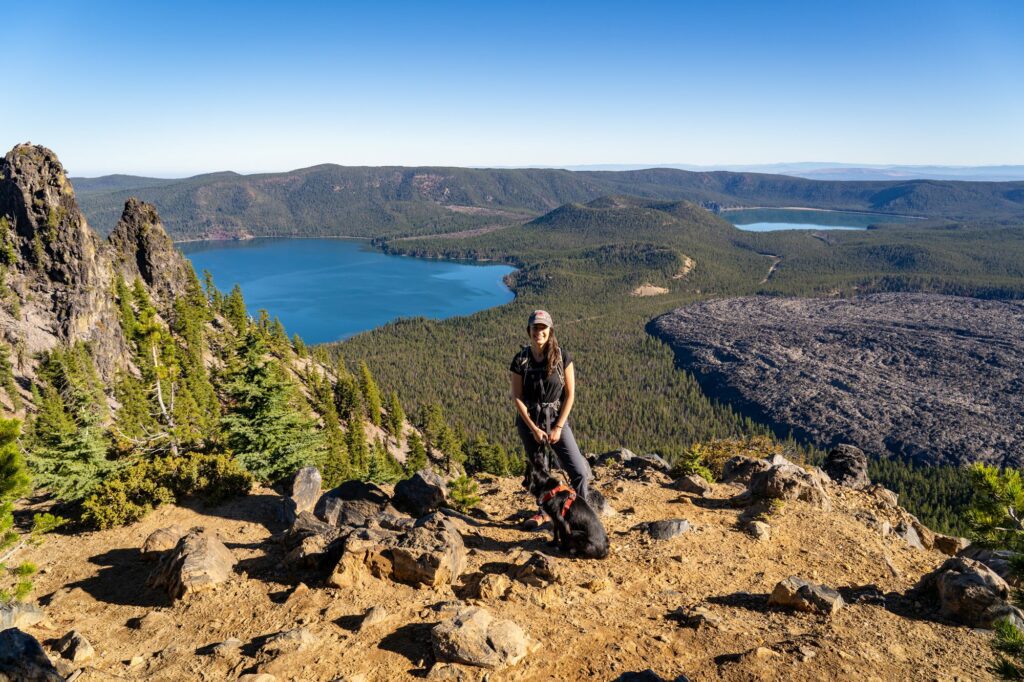
Newberry National Volcanic Monument: This is the volcano that shaped the high desert in Central Oregon, and it’s almost a mini-Crater Lake in terms of how it was formed and how it looks today.
There are two parts of the monument, and they’re about 30 minutes apart.
The first you’ll encounter heading south from Bend is the Lava Lands Visitor Center, which is where you’ll find the Trail of the Molten Land (walk through a lava field!) and Lava Butte.
Continue South to Paulina Lake and the Newberry Volcano, where you’ll find a large lake, the hike up to Paulina Peak (which features incredible views over the surrounding landscape, including the vast lava fields), and Paulina Falls.
Tumalo Falls: A nice waterfall just outside of town. There’s a longer hike that you can do that follows the creek, or you can drive right up to the lower viewpoint and follow the short trail up to the upper viewpoint (which would be our strong recommendation).
If you want to extend your hike, you can make it into a longer loop where you’ll be treated to a couple of other waterfalls along the hike, and it’s going to be a more interesting loop than the lower river walk.
More trail information here. Worth noting that dogs are not allowed on the upper trail sections.
Planning Your Day Trip to Crater Lake
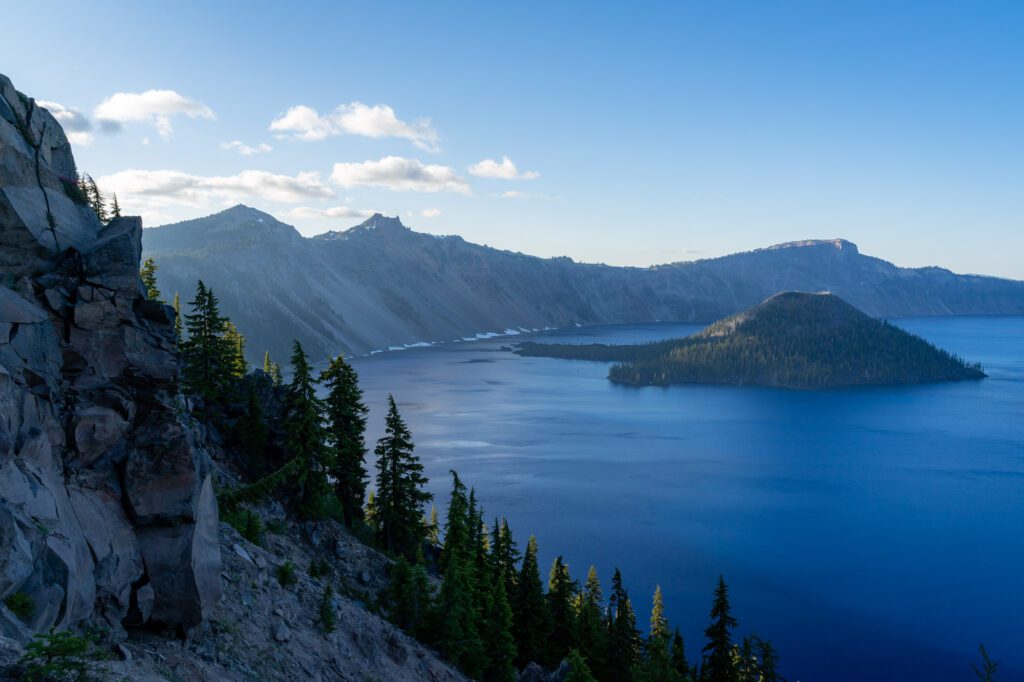
Full disclosure, we have somewhat mixed feelings on including Crater Lake National Park on this itinerary for a few reasons.
First, it’s pretty far out of the way, near Oregon’s southern border.
Second, it’s only really accessible for a small slice of the year (you can only circumnavigate the lake from roughly July to October).
Though, as we’ve noted above, that’s the best time to do this road trip anyway (and it’s the only time you can actually get to most places on this list).
However, if you’re already down in Central Oregon in the area around Bend, you’re within striking distance and you should do it as a side trip from Bend.
So if Crater Lake is on your bucket list, that’s probably as close as you’re going to be to Crater Lake without a dedicated trip to it and you might as well make the trip!
It takes roughly 90 minutes to go from Bend to the northern edge of Crater Lake, more if you have to drive around the lake and enter from the south (which is the case in the winter and spring – we’d probably skip Crater Lake during those timeframes).
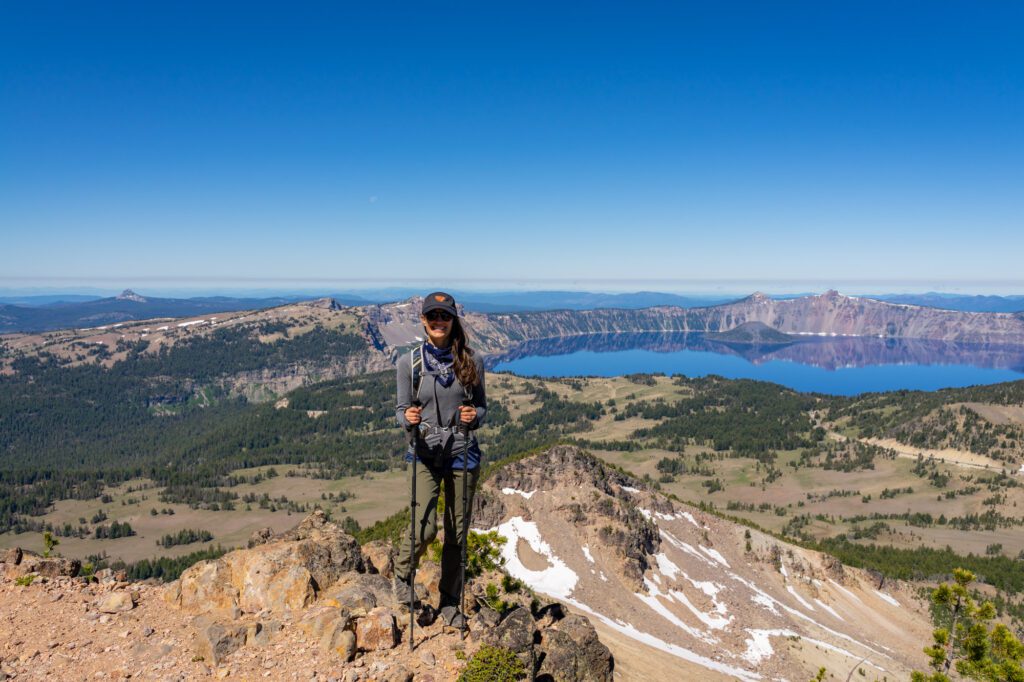
There are three things we think you should focus on with your time at Crater Lake.
- Drive the rim road all the way around the lake: This is the best way to see the lake from all angles, and it’ll take you a couple of hours, including stops at the various viewpoints along the way. Start at the Visitor Center on the southern rim, walk a portion of the Discovery Trail from there, and then hop in the car.
- Hike to the highest and lowest points in the park: Mount Scott is the highest point in the park, while Cleetwood Cove is the lowest point in the park, and is the only place where you can get down to the water level. We’d hike both!
- A sunset hike to Garfield Peak: Garfield Peak is right next to the Visitor Center, and makes an excellent place to watch the sunset because you’ll be looking north, where you’ll be able to see the setting sun to the west, and the soft golden light illuminating the eastern rim of the crater.
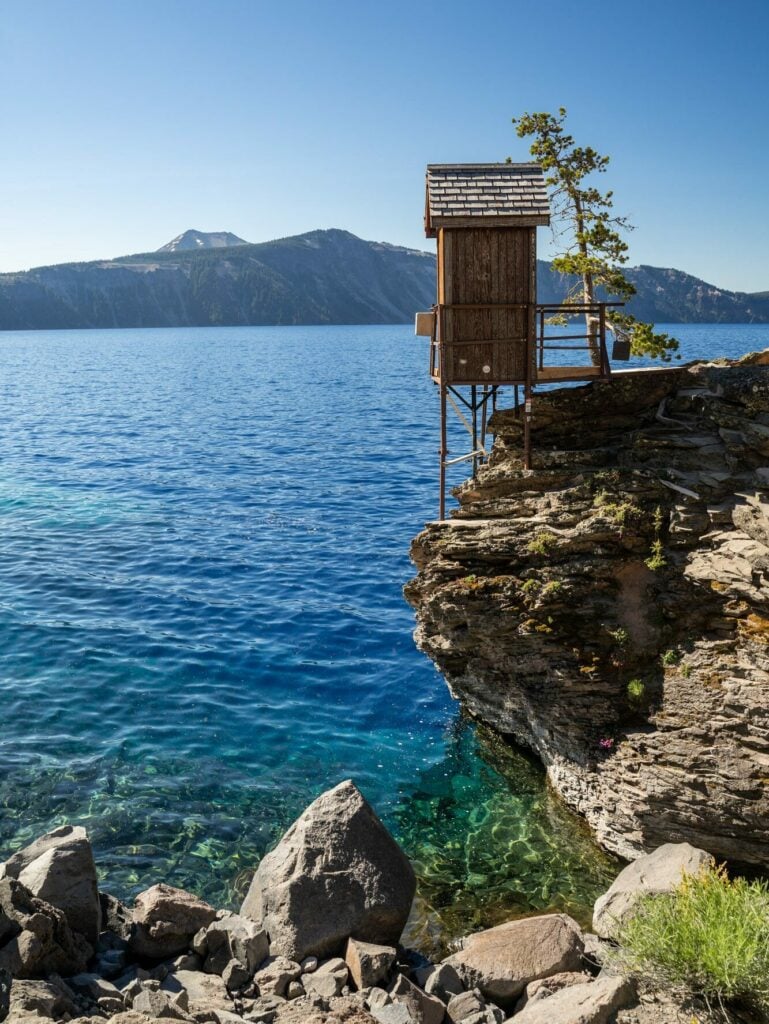
Here’s our guide to planning a Crater Lake National Park itinerary with far more details around those recommendations.
Where to Stay in Bend
With only a couple of days in town, you have two choices when it comes to where to stay. Stay right in town, or stay on the outskirts in a more quiet locale.
For the purposes of this trip, we’d recommend staying in town so you can be within walking distance (or a short drive) from the breweries and restaurants in Bend.
The Oxford Hotel is right in the heart of Downtown Bend, and is walkable to all of our favorite spots in that area.
We always like having a kitchen so we can cook for ourselves (Matt has Celiac Disease) and we’ve had our eyes on Wall Street Suites, which is about a block from the downtown area.
There are also tons of vacation rentals around Bend, and we personally love to stay at this cozy cottage within walking distance of the river and the Old Mill District (including Hayden Homes Amphitheater).
Days 13-14: Portland
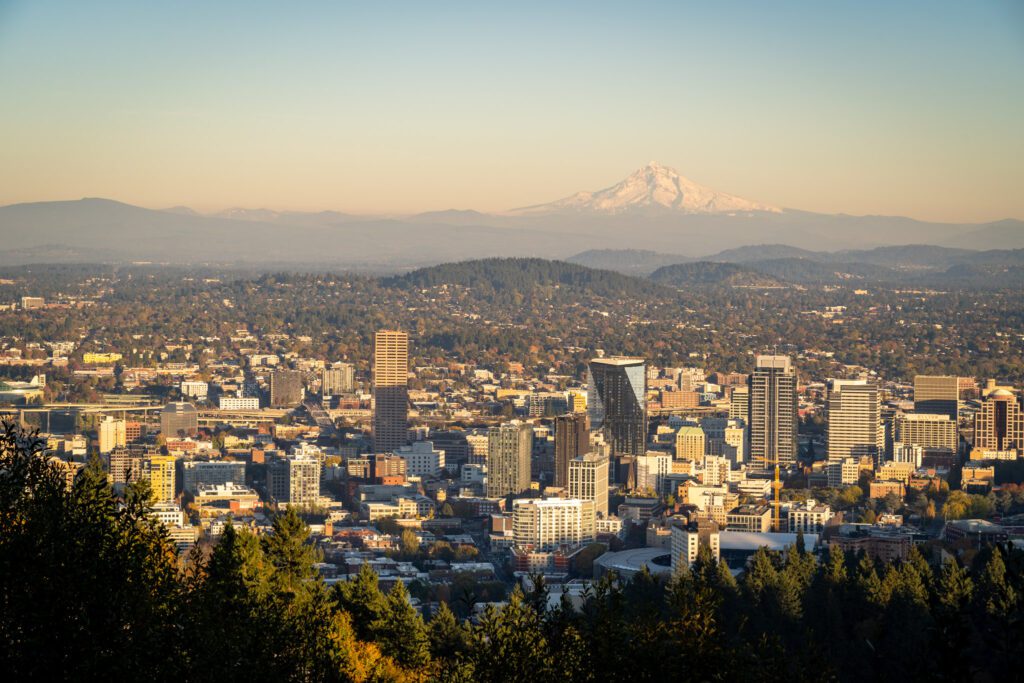
We live in Portland, and we think it’s a fitting end to your epic trip through the Pacific Northwest.
In some ways – mostly food and drinks – we’re saving the best for last here.
Portland also offers a nice contrast from Seattle. Portland is much more compact than Seattle, and feels a little bit more down-to-earth with the absence of the tech scene that Seattle has and all the money that brings.
A couple of days in Portland doesn’t really leave you with all that much time, but it’s enough to see some of the highlights (and start putting places on your list for a return trip).
Broadly speaking, we usually recommend spending a day exploring the downtown core (the west side of the Willamette River, which runs north/south through the middle of Portland), and a day east of the river exploring the neighborhoods on the eastside (where we live and think Portland is at its best).
What to Do in Portland
There are far too many things to list for Portland, so we’re going to go with our top recommendations here.
For more, you can read our guide to the best things to do in Portland, which has all of our recommendations in one place.
Powell’s City of Books: We bring every visitor to Powell’s, the largest independent bookstore in the world. Specifically, the multi-story downtown location. Matt is incapable of walking out of that store without at least 2-3 new books.
Hit the Markets! The PSU Farmers Market, which is year-round on Saturday mornings (8:30am – 2pm) down at Portland State University’s Campus, is a must-do.
It’s about a 10-15 minute walk from Downtown, and it’s the biggest farmers market I’ve ever been to.
The Portland Saturday Market, which focuses more on arts and crafts, is also worth a stop. Both ONLY happen on Saturdays, but are worth prioritizing if you happen to be here on a weekend.
The International Rose Test Garden: Portland is known as the City of Roses (which was essentially created as a marketing slogan for the city after the timber industry took a hit).
And this is the most convenient place to see them. 10,000 of them, in fact.
They bloom between June and October (ish), and we also come here often during that timeframe to see the roses of all shapes, colors, and sizes.
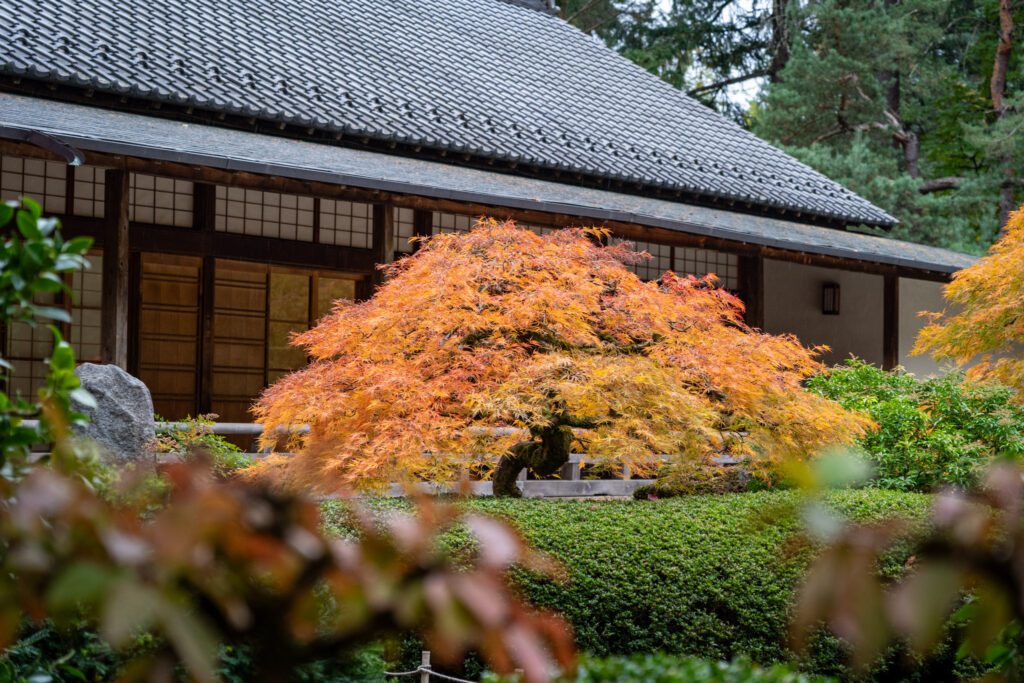
In the fall (call it late September through mid-October), it’s also worth going to the Portland Japanese Garden to see the brilliant fiery hues of orange and red with the Japanese Maples (it’s also just a lovely place to spend an hour – we’re members!).

Eat some Doughnuts (Donuts?): First thing’s first, somehow Portland became famous for its donuts, and the conversation around the “best donuts in Portland” is fairly contentious.
We think the best way to decide is to try them all – here are three spots that consistently rise to the top.
If you’re really into donuts, then you should probably hop on the Underground Donut Tour, which takes you to a bunch of the best stops for donuts in the city.
Here are three spots that give you a good breadth of the options in the city.
- Voodoo Doughnut is the Insta-famous spot and their location in Downtown Portland has a line around the corner most mornings. Come here for the novelty donuts, like donuts topped with Cap’n Crunch. However, the donuts certainly aren’t the best that Portland has to offer (though it’s a fun experience). We’d also recommend going to the location across the river (here on Google Maps) which is both less busy and a more pleasant location.
- Blue Star Donuts is the pick for the actual best donuts in Portland according to Alysha, her mom, my mom, my brothers, and my friends who came to my bachelor party – but they’re not cheap. They’re “artisanal” so you’ll need to budget $4-5 per donut. They have some fun flavors, like Blueberry Bourbon Basil and Mexican Hot Chocolate, so get a couple of different ones to try and split them with your group. “Get the apple fritter” says Alysha.
- Pip’s Original Doughnuts and Chai not only makes Alysha’s favorite chai in Portland, but also makes fried mini doughnuts that are fried fresh to order. They’re a little further out, but it’s worth the journey. Plan on waiting in line if you come on a weekend, but the warm mini doughnuts will make it all worth it in the end.


Note: These aren’t gluten free (NOT EVEN CLOSE), but if you are looking for some of the best gluten free donuts we’ve ever had, head to Petunia’s Pies and Pastries on the weekends – they’re 100% gluten free AND plant-based.
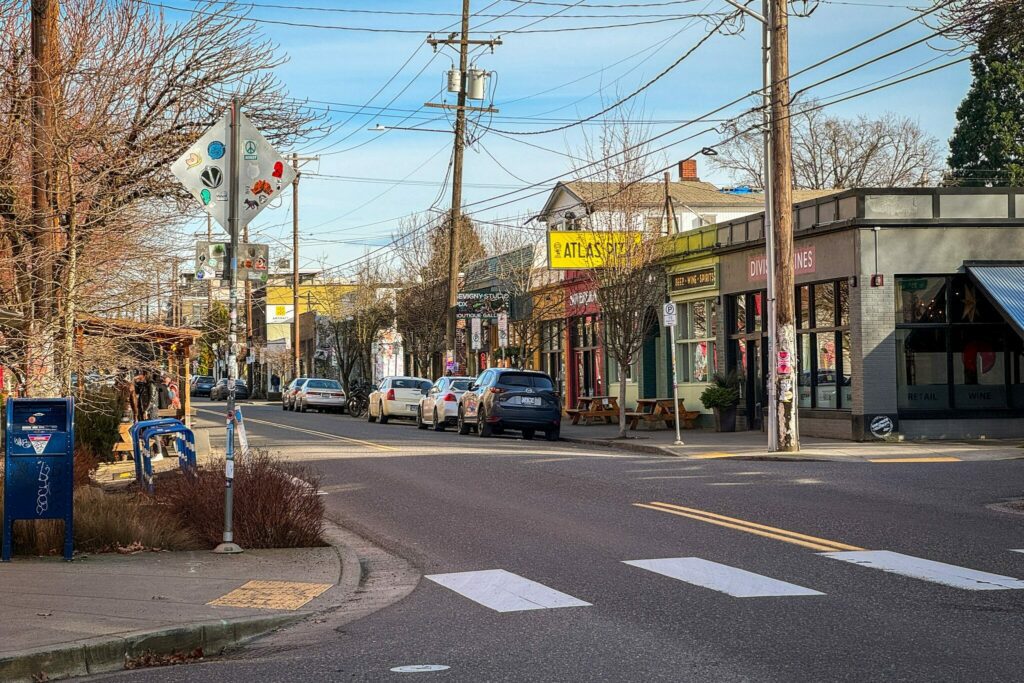
Explore the Eastside: East of the Willamette River, you’ll find a much more residential part of the city, which is where we think Portland really shines.
There are two broad areas we’d prioritize; Northeast Portland (Alberta and Mississippi, where we used to live) and Southeast Portland (Belmont, Hawthorne, and Division, where we currently live).
We’d highly recommend spending an afternoon and evening on Division Street, the best food and drink stretch in the entire city (we think, but we’re biased because we live here).
Rather than cover all of our favorite spots here, we’re going to refer you to the Southeast section of our 3 day Portland itinerary for what to do, see, eat, and drink on the Eastside (and for links to more detailed guides).
Where to Stay in Portland
We sound like a little bit of a broken record here, but there are two main approaches in Portland to choosing a place to stay.
You can opt to stay somewhere central, which means you’re in a denser, more walkable area, or you can stay in a quieter location on the east side of the river, which is a little further out but offers a bit more of a neighborhood-y experience.
If you want to stay as central as you can, stay either in Downtown Portland or the Northwest District, which are the urban heart of the city.
In Downtown Portland, shoot for somewhere in the southern end near the PSU Campus like the Heathman Hotel or the Paramount Hotel.
We also really like the Hyatt Centric as a slightly more affordable option, which is about as central as it gets.
In the Northwest District, there are only a few options, and the Inn at Northrup Station is the clear winner (we think) in terms of location and value.
For a more “neighborhood-y” experience in Portland, look across the river to Southeast Portland (which is where we happen to live now!).
We’ve stayed in multiple vacation rentals in Southeast that we’d recommend, like this unit above a garage in our current neighborhood and this modern guesthouse less than a block from Hawthorne Blvd.
As a reminder, make sure to choose a place where the owner lives onsite (rather than a corporate-owned unit with no real humans to help) for the best experience with vacation rentals.
For more information (and A LOT more detail), read our guide to the best places to stay in Portland.
What to Do with More Time
As we’ve alluded to numerous times, there are way, way too many amazing places to visit in the Northwest to jam into two weeks.
If you have more time (or different interests), here are the places we’d add time.
Add Seattle to Vancouver (+5-7 Days)
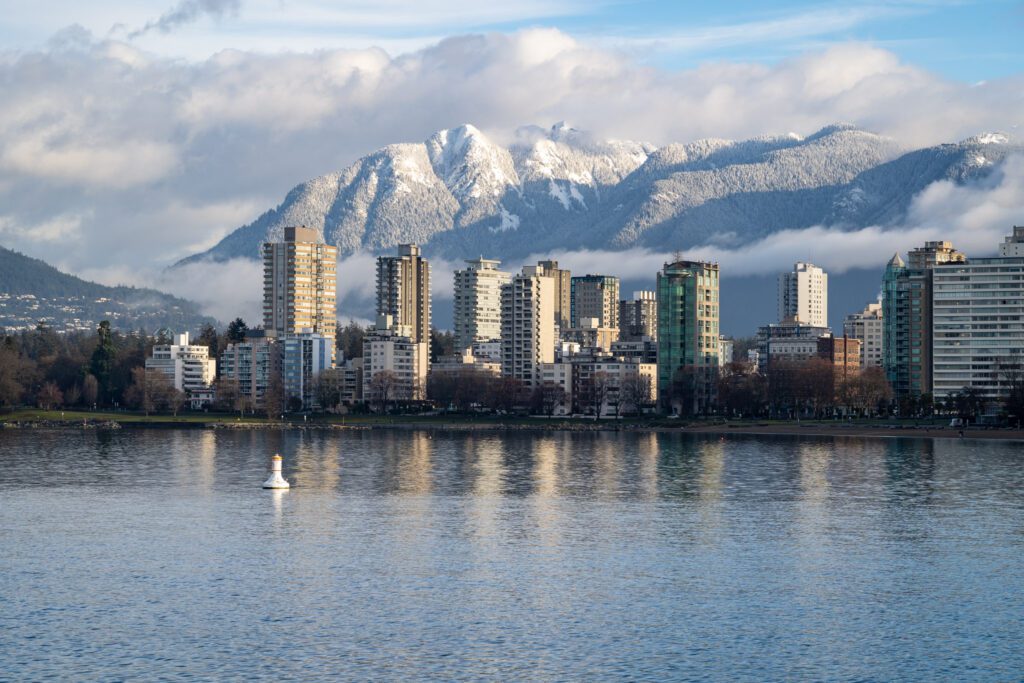
As we mentioned above, we do love the stretch between Seattle and Vancouver, but with limited time, we decided that you get a better taste of the diverse landscapes by heading south from Seattle rather than north.
Ultimately, we think the waterfalls of the Columbia River Gorge, the high desert in Bend, and the food and drink scene in Portland are a better use of your time than the trip up to Vancouver.
However, if you’re removing that time limitation and you find yourself with an extra week, you could make this a pretty excellent three week road trip that starts in Vancouver and ends in Portland (or vice versa) by adding this section on.
You have a few different route options, but if you’re here in the late summer and early fall, we really think a road trip that heads east to Leavenworth, a Bavarian-themed town in the eastern foothills of the Cascades, up through North Cascades National Park, and through Bellingham (a charming waterfront college town) is hard to beat.
Rather than cover all of the stops you could make here (this guide is already really long) we wrote an entirely separate guide to planning a Seattle to Vancouver road trip, which you should read to help plan this section.
The San Juan Islands (+2-5 Days)
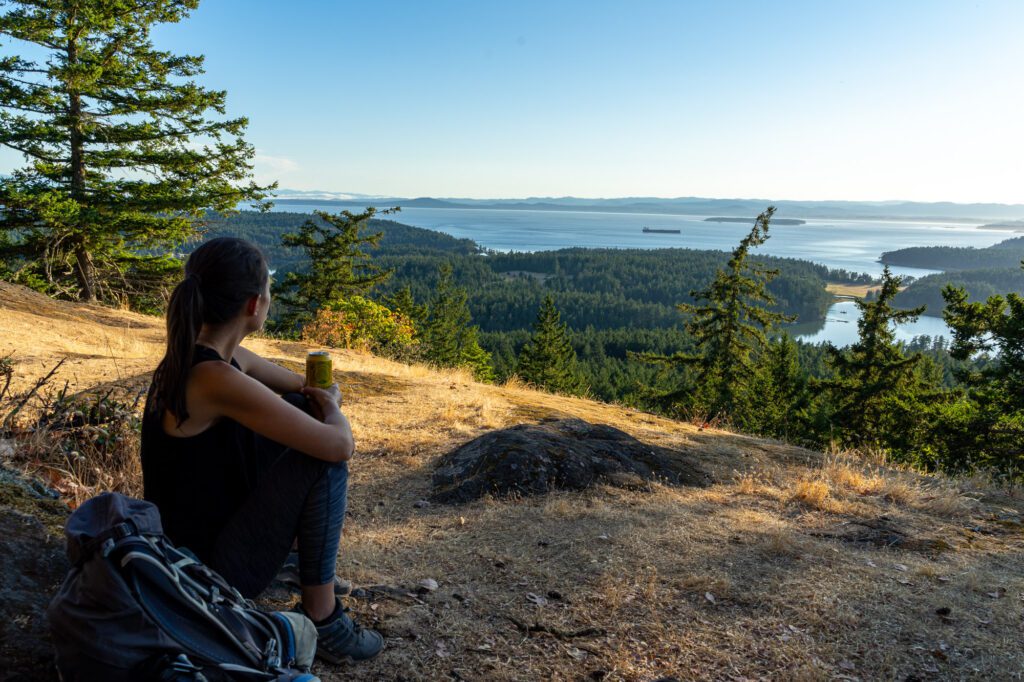
While, technically, this would fall under a road trip north from Seattle to Vancouver, we think the San Juan Islands would be worth a detour regardless of whether you go all the way up to Vancouver because it’s one of the most unique places on earth.
The San Juan Islands are a string of inhabited islands just off the coast of Washington that are only accessible by boat (they have car ferries that run between the islands), which is something you don’t see everyday.
Every summer growing up, Matt’s family would pack up the car and go camping out on San Juan Island (which, to be clear, is one island out of the many that make up the “San Juan Islands”).
The geography here is pretty unique, and there aren’t a whole lot of places that we can think of that are similar to these islands.
The weather is slightly cooler and sunnier thanks to the rain-shadow effect of the Olympics (which get ALL of the rain), and it’s a great time to get out on a kayak and explore the islands, which we were lucky to do a few summers ago.
Though, the waters are treacherous thanks to all the currents that meet here, and you’ll need to do a guided trip because it’s too dangerous for 99% of people to do solo.
Plus, the orca whales tend to pass by right off of the western coast of the islands in the summer!
For tourists, there are three main islands to consider; San Juan Island, Orcas Island, and Lopez Island, and which you choose depends on what you’re interested in.
San Juan Island is the most developed, with a cute downtown area, some nice short hikes, and one of the best places to view orca whales from the shore in the country at Lime Kiln Point State Park.
Here’s our guide to the best things to do on San Juan Island.
Orcas Island is a little more rugged, with better hiking and a similarly cute downtown area in Eastsound, the main town on the island.
Here’s our guide to the best things to do on Orcas Island.
Lopez Island is the smallest and quietest, and we spent a few nights on Lopez last summer and fell head-over-heels in love. It’s low key and charming (people literally wave to you as you drive by them…and everyone does it!).
Here’s our guide to the best things to do on Lopez Island.
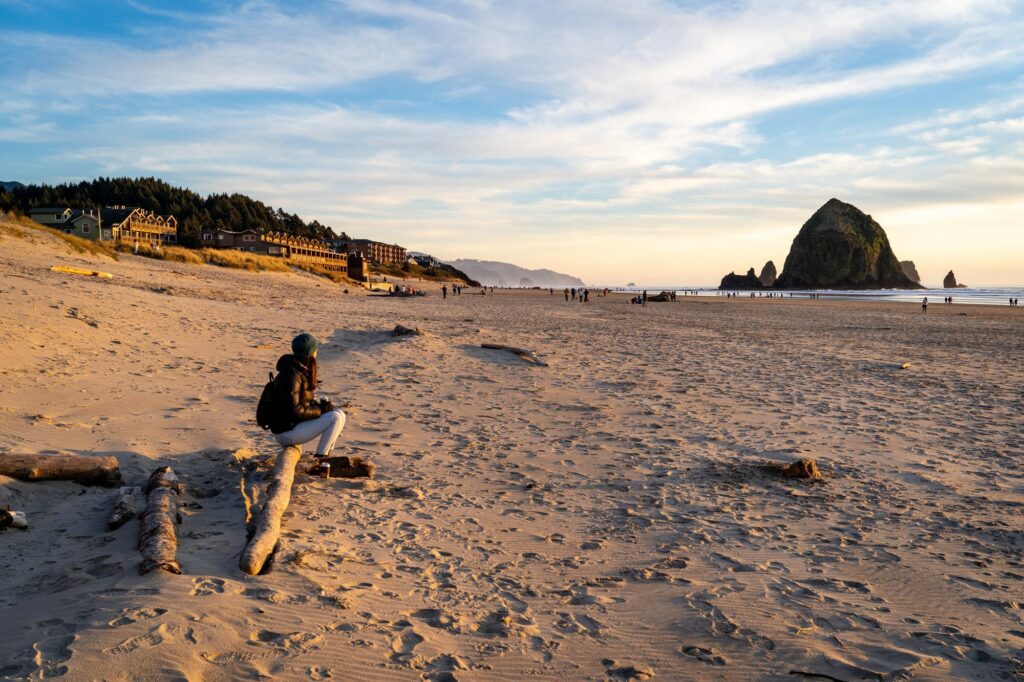
The Oregon Coast (+2-7 Days)
We love the Oregon Coast, and our first real foray into Oregon (before we moved here) was a three week road trip up and down the coast.
When we lived in our Honda Odyssey for a few years, we also found ourselves driving up and down the Oregon Coast fairly often to move between our families houses during the winters to avoid snow and ice in the mountain passes on I-5.
Since then, we’ve spent a lot more time on the coast, particularly the northern half (though we did just spend a few days at the southern end last fall), and we really think the Oregon Coast punches above its weight in natural beauty.
However, it didn’t make the cut in the main itinerary because the beaches of Olympic are equally beautiful, and we didn’t really have the time to add a detour south along the Oregon Coast without cutting time elsewhere.
If you find yourself with extra days and seeing the Pacific Ocean is a priority for you, hopping out to the coast from Portland is a relatively easy addition to your trip.
With limited time (2-3 days), you could focus on the northern coast between Astoria, near where Lewis & Clark ended their expedition and spent three miserable winter months getting rained on, and Cannon Beach.
With closer to a week, you can foray south down to Newport to experience a larger chunk of the coastal beauty that you’ll find in Oregon.
Here’s our guide to planning an Oregon Coast Road Trip, which will give you our perspective on what to see and where to spend your time up and down the coast.
More Time in Portland & Seattle (+1-2 Days Each)
We decided to make the natural beauty of the Pacific Northwest the hero of this itinerary, which means cutting both Seattle and Portland a day or two short of the number of days we’d really recommend (three for each is about right, we think).
If you have more time and you’re interested in exploring two of the best cities in the country, it’s worth adding some time and dedicating it to staying in the city (which, to be clear, is still beautiful).
What to Do with Less Time
With less than two weeks in the Pacific Northwest, you’re REALLY going to have to focus your time.
We’d immediately cut Bend because it adds 4-8 hours of driving (depending on whether or not you’re flying out of Bend).
We love Bend, but it’s definitely out of the way compared to other places on the itinerary.
As we mentioned above, with 10 days in the Pacific Northwest, we’d focus your time on the corridor between Seattle and Portland, which would include Olympic National Park and Mount Rainier National Park.
Depending on how much time you want to be spending in the cities themselves (we’d recommend at least one day in each, though two would be better), you could also fit in a day trip or two from Seattle or Portland.
Here’s what that might look like.
- Day 1: Arrive in Seattle
- Day 2: Seattle (Half Day Trip to Bainbridge Island)
- Day 3: Olympic National Park
- Day 4: Olympic National Park
- Day 5: Olympic National Park
- Day 6: Mount Rainier (Paradise)
- Day 7: Mount Rainier (Paradise)
- Day 8: Portland
- Day 9: Portland (Day Trip to Columbia River Gorge)
- Day 10: Portland + Fly Home
As we mentioned above, with anything less than 10 days, we’d opt to focus on one state or the other, otherwise you’re going to be spending a lot of time in the car trying to fit all of these places in.
Where are the restaurants listed that we’re supposed to eat at when we go visit these places? I mean this is a great itinerary for a non Celiac who can eat anywhere, But I would expect to have a list of restaurants to eat at at each stop which would be helpful for somebody who is gluten-free or celiac. I’m a bit disappointed… 🤷♀️🤦🏼♀️🤯 or am I missing something?
Hey Connie!
Unfortunately, the (sad) reality is that there just aren’t that many gluten free restaurants outside the main cities (Portland, Seattle, and Bend) on this itinerary with the notable exception of Nourish Sequim (which you should visit!). On road trips to places where there aren’t many options, we’re usually cooking for ourselves (either camping, or staying in a place with a kitchen) because there just aren’t that many gluten free options in more rural areas like Rainier, Olympic, or Mount Hood.
However, we do have guides to eating gluten free in Seattle and Portland, which you can read for some good gluten free options (along with options in cities nearby).
Hope that helps.
-Matt
What if I want to include the Oregon coast? How would you work that in and do you have recommendations for doing so?
Thank you!
Hey Melissa! You’d want to add it around Portland (which is probably an obvious thing to say). We have an entire guide to planning an Oregon Coast road trip, and we’d recommend doing the northern portion (Astoria to Newport) if you have anything less than 7 days. Hope that helps!