How to Plan an Amazing 3 Day Olympic National Park Itinerary
Olympic National Park is one of three incredible national parks in Washington State, and is by far the most diverse and interesting of the three. The park boasts rocky alpine zones, perpetually moist rainforests, rugged coastal beaches, and more.
There are only a few places in the world where you can spend the first half of your day in an alpine paradise, surrounded by rocky peaks and sweeping views, and end your day on a beach, with your feet in the Pacific Ocean.
Olympic National Park is one of them.
That biodiversity is what makes Olympic National Park special, and is why it deserves a visit, whether it’s as a weekend getaway from Seattle or as part of a broader Washington road trip.
Having grown up in the Seattle area, it might surprise you to learn that the first time I, Matt, visited Olympic National Park was in 2020, in my 30’s.
Olympic is a gigantic park – the 13th biggest national park in the US – that deserves multiple trips to truly take in all that it has to offer.
Because of its size, you’ll want to be strategic about how you organize your trip to avoid multiple 2+ hour drives to get between areas.
Which is exactly why we’ve written this guide – to help you plan an amazing trip.
We’ve been to the park multiple times for 5+ days each over the past several years, and we’re here to help you plan an amazing trip to the Olympic Peninsula.
In this guide, you’ll discover everything you need to know to plan the perfect Olympic National Park Itinerary – the best things to do, where to stay, how to organize your time – to help you plan an unforgettable adventure.
We’ve written this guide for 3 days, but we have plenty of suggestions on how to modify it if you have more or less time.
Planning a trip to Olympic National Park? Don’t miss our in-depth guide to the best things to do in Olympic National Park, the best hikes in Olympic National Park, and our guide to choosing where to stay in Olympic National Park.

Disclaimer: Some of the links in this post, like hotel links, are affiliate links, meaning at no additional cost to you, we make a little bit of money if you click through and book. That being said, we would never recommend something to you that we don’t stand behind 100%.
How Many Days Do You Need in Olympic National Park?
First of all, we want to stress that Olympic National Park is massive. For that reason, we’d recommend no less than two nights in the park.
3 days in the park is even better, because it will give you some time to explore the northwest corner of the park – namely Ozette Lake, Cape Flattery, and Shi-Shi Beach.
Here’s an idea of what you can cover in 2 or 3 days.
- With 2 Days: Spend one day on the Hurricane Ridge / Lake Crescent area, and one day on the Pacific Coast and the Hoh Rainforest.
- With 3 Days: Add the northwest corner of the park (Shi-Shi and Cape Flattery) in between the coast and Lake Crescent, and add more Pacific beaches to the itinerary.
Here are some other things to add, and approximately how much time to add.
- If you want to add on the Kalaloch beaches and Lake Quinault, add a half day. You can do this as your last day, and make this itinerary a loop by returning to the I-5 corridor along the southern border of the park through Aberdeen (where Nirvana is from!).
- If you want to camp overnight on the beach, add one extra day.
- If you want to do a longer, full day hike, add one half day for each one.
- If you want to do one of the many amazing overnight backpacking trips in the park, add 2-3 days.
The main guide below is written to help you explore the best of Olympic National Park in 3 days. Below the main itinerary, we have ideas on how to spend more and less time in the park.
Seasonal Closures: Depending on what time of the year it is that you’re going to visit this beautiful park, there may be some seasonal and temporary closures. You can check road closures and the status of different areas of the park here.
Can You Do a Day Trip to Olympic National Park from Seattle?
We don’t think a day trip makes sense here. Even if you JUST focus on Hurricane Ridge, the closest area to Seattle, it’s still a three hour drive AT A MINIMUM that includes a ferry crossing. That’s three hours, one way.
If you just do that, you’ll be missing out on the biological diversity that really makes the park a special place. If you want to get all the way out to the coast, it’s closer to four hours one way.
If you’re looking for a day trip, check out our guide to the best day trips from Seattle, which has a bunch of great options (including some good alternatives to Olympic National Park).
Do You Need a Car to Explore Olympic National Park?
You’ll need to make sure you have a car. If you’re coming from nearby – somewhere in Oregon or Washington – drive yourself. If not, rent a car when you arrive in Seattle.
There’s really no way to explore the Olympic Peninsula without one. We wouldn’t recommend options like the bus. The park is just too big, and there’s very little public transportation coverage out there.
If you’re coming from out of state, rent a car at SeaTac airport when you arrive.
Want to experience Olympic National Park in a campervan?
We own a campervan from Peace Vans in Seattle (their “modern” model, built on a Mercedes Metris) and highly recommend them.
The Metris is a smaller footprint than the big Sprinter and Dodge Ram Promaster, which is why we like it. There’s still plenty of space, and the pop-top makes it even more spacious.
You can rent a van from Peace Vans on Outdoorsy, which would be a great way to experience Olympic National Park (trust us, we’ve done it!).
They have an office in Seattle, and from there it’s an easy drive out to Olympic National Park (or you can hop on the Bainbridge Ferry).
Where to Stay in Olympic National Park
It bears repeating here: this park is massive. For example, it takes a full two hours to get from Port Angeles to the Hoh Rainforest.
Which means that using one home base to explore the whole park isn’t really all that practical, because it would require a couple of 2+ hour drives.
Usually, we’re 100% on board with picking one base and exploring from there, but doing that would add a ton of extra driving.
For that reason, we would highly recommend using multiple home bases for your itinerary.
With three full days in the park, we’d spend your first night near Port Angeles, which is the gateway to Hurricane Ridge, Lake Crescent, and the Sol Duc Valley, and your next two nights near Forks, where you’ll be closer to the Hoh Rainforest and Pacific Beaches.
Note: if you want to camp, make sure to read the section on camping below!
Here are some places to stay in each of those locations.
We have an entire guide on where to stay in Olympic National Park with more detail on this, if you’re interested in getting deeper on each area.
Staying Near Port Angeles
If you’re not camping, you have a couple of routes you could go here.
If you want to stay in Port Angeles itself, which is the biggest city near the park, and the town on the northeastern side with the most amenities (like grocery stores and gas station), stay at the Olympic Lodge. It’s clean, comfortable, and it’s the best hotel in town.
On our last trip, we camped in the back of the Emerald Valley Inn, a motel just outside of town, which was a lovely home base for exploring the eastern end of the park.
If you want a more rustic experience, stay in a vacation rental outside of town towards Lake Crescent. The best location would probably be a cabin around Lake Sutherland, which is conveniently located between Hurricane Ridge and Lake Crescent
Check out this one bedroom lakefront cabin, or this spacious three bedroom home).
In the area around Lake Sutherland, which puts you between Port Angeles and its amenities and Lake Crescent and the wilderness, there are also come good options. It’s hard to say no to this cozy cabin on the Strait of Juan de Fuca, or this beautiful custom studio.
Or, if you’re looking for a once-in-a-lifetime experience, stay at this incredible beachfront treehouse, which is on our bucket list!
Camping Options: If you’re camping, Heart O’ Hills Campground (first come, first served) is the best option, and Sol Duc Campground is the runner up (reserve in advance). We stayed at Sol Duc on our first trip to the park, and it was lovely.
Staying Near Forks
We have three solid options in and around Forks for you to choose from. Yes, that Forks. The one with the vampires.
If you want to stay in the town of Forks itself, stay at either the Forks Motel or the Pacific Inn Motel, which are literally across the street from each other in the middle of town.
If you’re looking for a more rustic experience outside of town, stay at either the Hoh Valley Cabins, which are gorgeous and are along the road that takes you out to the Hoh Rainforest, or the Misty Valley Inn, a cute B&B just north of Forks.
If you’re camping, stay at Mora Campground (reserve in advance), which might be the nicest national park campground we’ve ever stayed at. We’ve stayed twice! It’s five minutes from Rialto Beach.
Camping in Olympic National Park
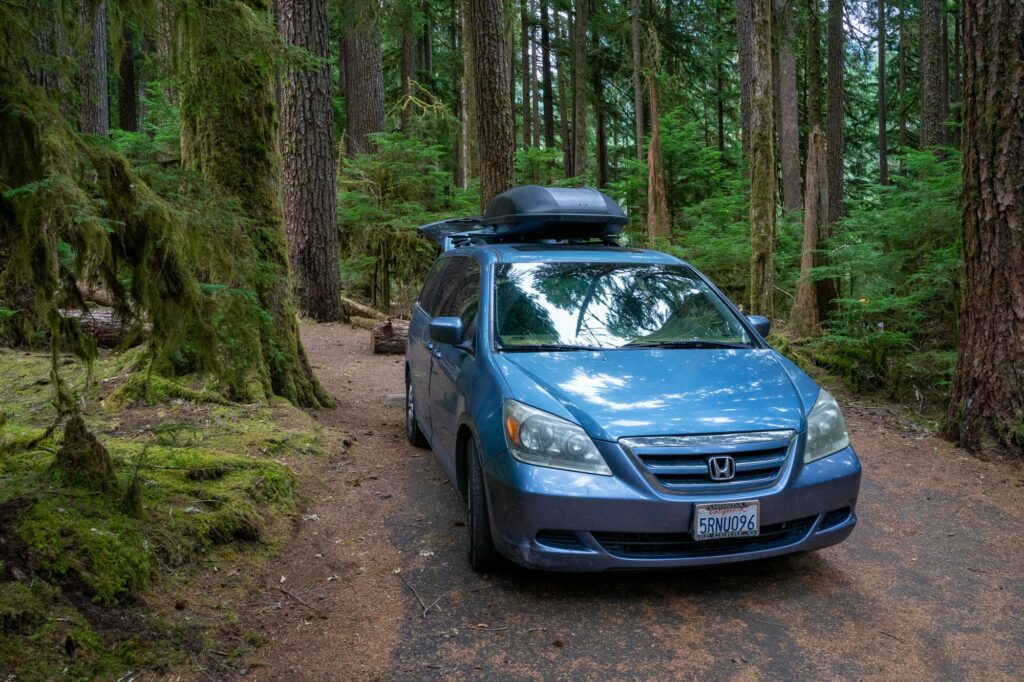
There are an abundance of campsites in the park. Only five require reservations ahead of time (Kalaloch, Fairholme, Sol Duc, Hoh Rainforest, and Mora), while the rest are first-come, first-served.
If you’re planning on visiting during the summer months, I highly recommend making reservations several months in advance for the campsites that require reservations.
They are usually booked months in advance, especially for summer weekends.
For campsites that are first-come, first-served (I’m going to start using FCFS as an acronym below), the earlier you get there, the wider selection of campsites you will have. If you show up at 4:00 pm on a Friday or Saturday in August, I wouldn’t expect to easily find a site.
The best campsite for the Hurricane Ridge area is Heart o’ Hills Campground (FCFS), though you could also camp at Fairholme Campground on Lake Crescent (reservations).
For the Hoh Rainforest and Pacific Beaches, we’ve camped at Mora and found it to be a great base for exploring the area (plus, the campground is really nice).
We’ve stayed there twice, and it’s the best campground location for exploring the entire stretch of Pacific coastline. Reserve as far in advance as you can.
If you want to be closer to the Hoh Rainforest, look at Hoh Campground. I don’t think it’s worth camping out there unless you’re planning on tackling a backpacking trip up the Hoh River.
Instead, I’d camp at Mora and make the hour-long journey to the rainforest as a morning trip on your way down the coast.
For Lake Quinault and the Quinault Rainforest, camp at either Falls Creek or Willaby Campground.
Both are technically outside the park in Olympic National Forest, and accept reservations in advance.
For more on camping in the park, including current campground status, head over to the NPS website.
A Perfect 3 Day Olympic National Park Itinerary
And now, with all the important logistics out of the way, onwards to the main event! We’re going to give you a detailed 3 day itinerary that you can essentially copy and paste to plan your own trip.
Please note that we’re assuming you have THREE FULL DAYS in the park. Which means you’re arriving the night before night 1, and leaving the morning after night 3.
If you have a little less time (e.g. you’re coming from Seattle on the first morning, or you need to head back to Seattle on the last evening), you’ll have to make some slight changes, but it’s totally doable.
If you only have one or two days in the park, we have suggestions on how to spend that amount of time below the main itinerary. Then, use the more detailed sections in the main itinerary to plan your trip!
Finally, if you have more time in the park, you’re in for a treat! We have suggestions on what to do with more time, including some longer hikes, multi-day backpacking trips, camping on the beach, and more.
Here’s a quick summary of the itinerary below:
- Day 1: Hurricane Ridge, Lake Crescent, and Sol Duc Falls
- Day 2: Shi-Shi Beach, Cape Flattery, and the La Push Beaches
- Day 3: The Hoh Rainforest and Our Favorite Beaches
Here’s a map of where your trip will take you!
Day 1: Hurricane Ridge and Lake Crescent
On your first day in the park, explore the northeastern corner, which is where you’ll find gems like Hurricane Ridge (the most accessible high-elevation area), Lake Crescent, and the Sol Duc Valley.
Hurricane Ridge

Start your day out nice and early with a drive up to Hurricane Ridge, which is the highest point in the park that is accessible by car.
We say early because this section of the park gets extremely busy, especially between 10:00 am and 5:00 pm.
You could be here waiting for 30-60 minutes for a parking spot if you get here during peak time on a summer weekend.
Even from the visitor center, the views are spectacular. But the main attraction here, at least to us, is the hiking.
Plan on arriving before 9:00 am, at the latest.
That way, you’ll have no trouble finding parking, and you’ll be able to do the hike up to Hurricane Hill with just a few people around. We arrived here at 7:00 am, and were the only people on the trail up to Hurricane Hill. It was magical.
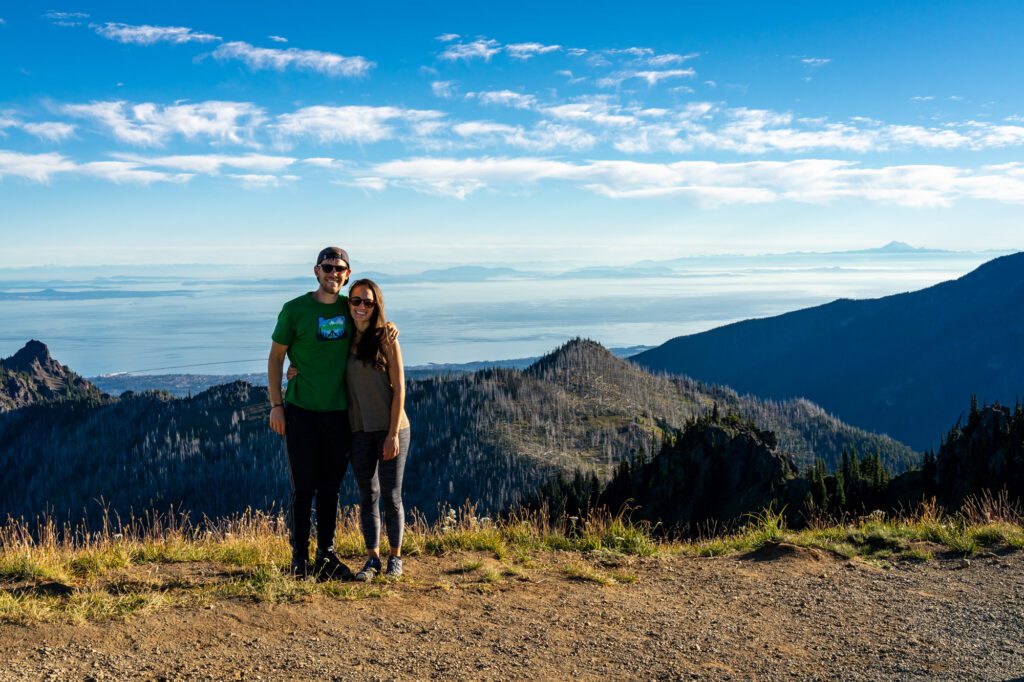
The must-do hike here is the short, paved climb up to Hurricane Hill.
From there, you’ll have incredible views of the Strait of Juan de Fuca and British Columbia to the north (you can see Vancouver’s skyline and the city of Victoria), Mount Baker to the east, and the Olympics to the south, with towering Mount Olympus.


If you’re also looking for a longer hike to do, here are two good options.
- Lake Angeles Trail: The hike to Lake Angeles takes you from just outside of Heart-o-Hills Campground up through the dense forest, and finally to a stunning alpine lake. It’s a tough hike, gaining almost 2,500 feet of elevation over 7.4 miles. You could also hike here from Hurricane Ridge, which is a much more scenic route where you hike along Klahanie Ridge with amazing views, but it’s a MUCH longer and harder hike (12+ miles, 4,500 feet of elevation).
- Klahhane Ridge: If the views I just mentioned sound like something you’re interested in, but you’re not up for the hike all the way to Lake Angeles, do the 5 mile hike along Klahhane Ridge instead. You’ll gain 1,700 feet along the way, mostly at the beginning in a series of switchbacks through the forest, but once you get up onto the ridge you’ll have sweeping views, including views of Mt. Angeles.
Marymere Falls
Your second stop of the day will be the parking lot at Lake Crescent, which is where you’ll park to access the next two stops on this list. This is also where you’ll find the historic Storm King Ranger Station.
The first of those two stops is the relatively short and easy hike to Marymere Falls.
It’s a nice stroll through the forest, which is ferny and wet, and leads you to a 90 foot waterfall with multiple viewpoints accessible by climbing relatively steep wooden stairs.
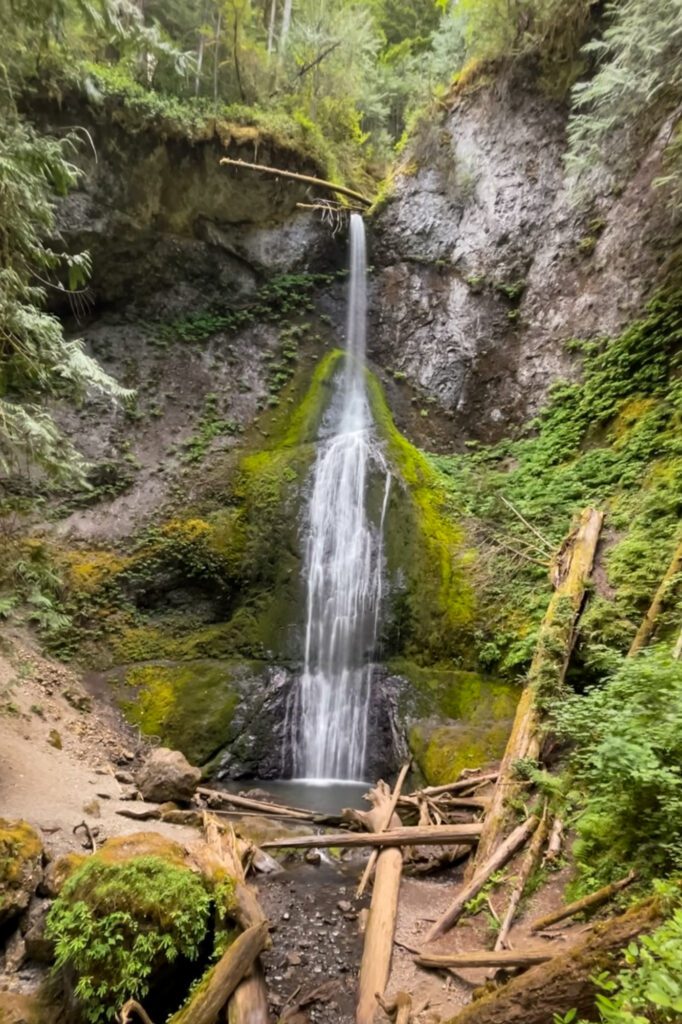
All-in, it’s a 1.8 mile hike round trip, with 500 feet of elevation gain. The end of the hike that takes you to the two viewpoints is the only piece of the hike that has any significant elevation changes.
Mount Storm King (OPTIONAL)
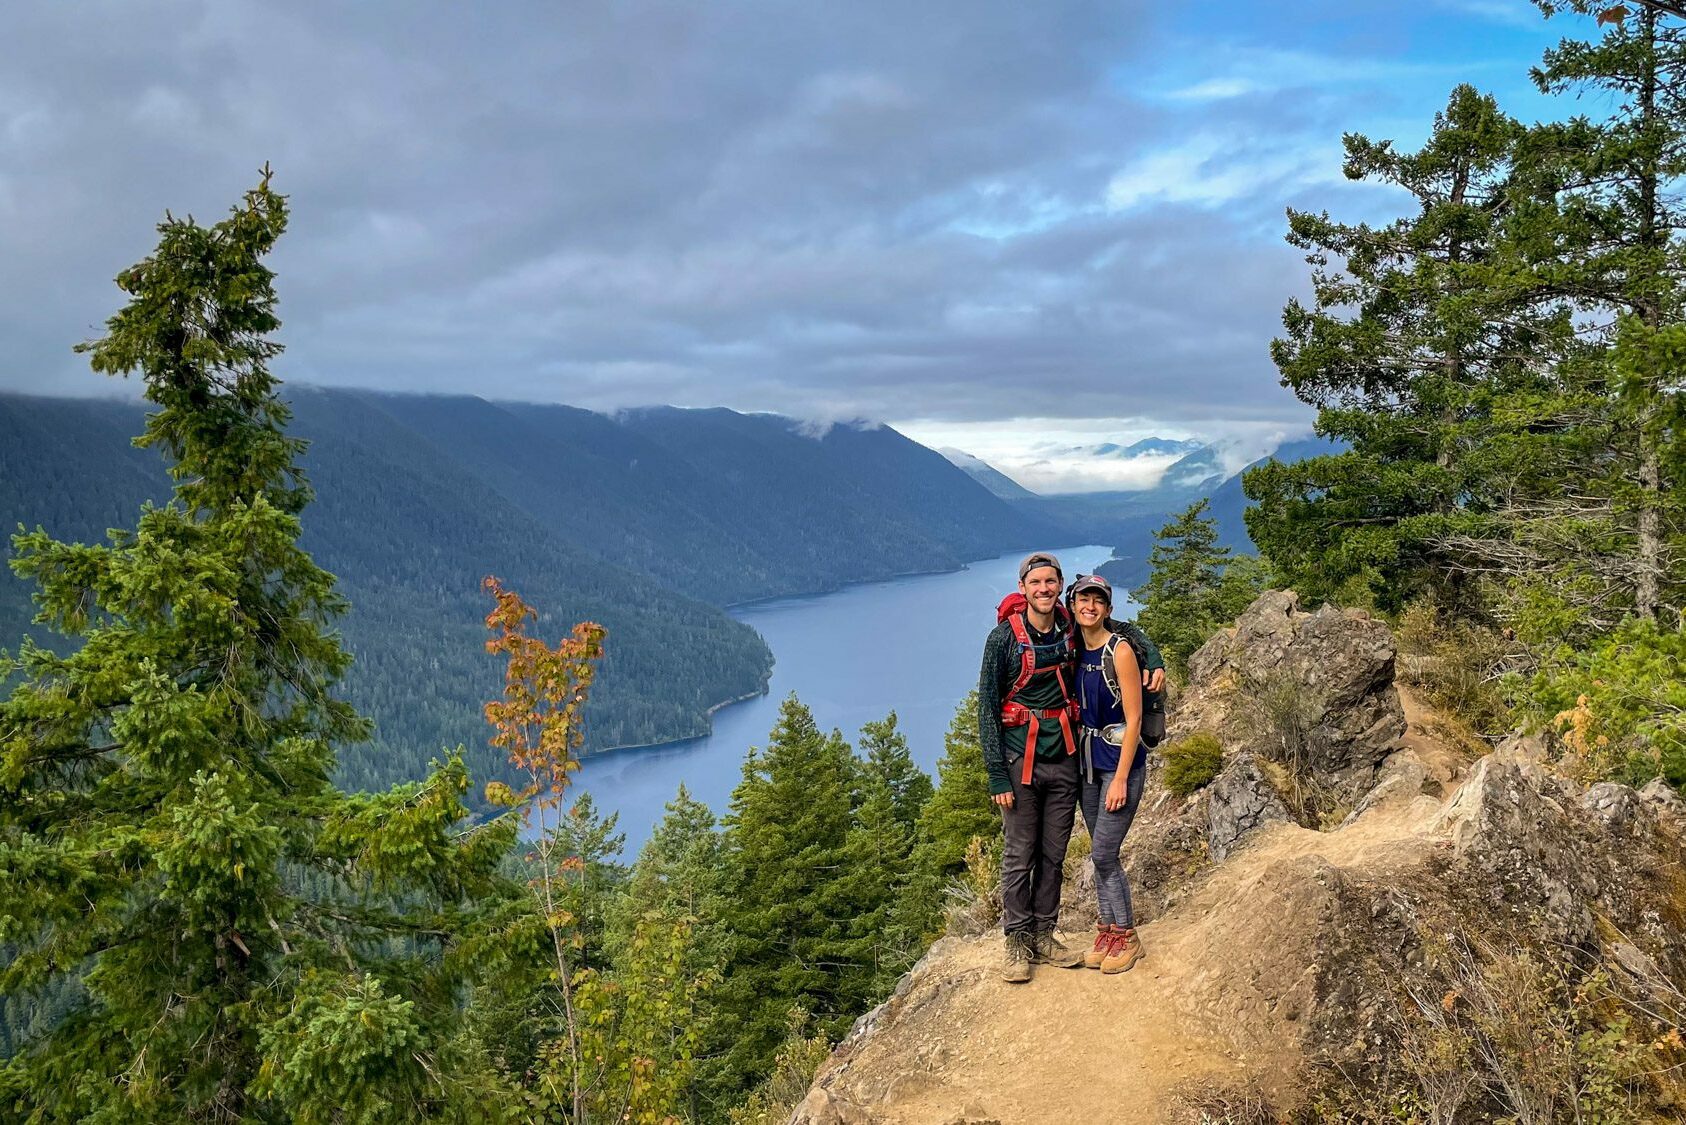
If you’re up for a longer, more difficult hike at sunset, the hike up to Mount Storm King is a good option.
We did it on our last trip out to the Olympic Peninsula, and it’s basically straight up and straight down. The reward is a nice view out over Lake Crescent from the rocky outcropping at the top.
To be honest, though, the hike itself really isn’t that cool. Or scenic. Or particularly fun.
The views at the top are nice, but the journey to get there is decidedly “meh.”
We discovered it because every PNW influencer has done an amazing photoshoot at the top, and the hike fell short of expectations if we’re being honest.
We’d opt for one of the two longer hikes near Hurricane Ridge before this one (and it’s not close).
It’s a relatively short and steep climb, and to get to the summit you’ll have to climb some cables and do some scrambling that might be a little much for people afraid of heights.
I suggest only doing this one if the weather is good because it can get pretty ugly up there when it’s not. This hike is 4 miles roundtrip with an elevation gain of 2,065 feet, and leaves from the same trailhead as Marymere Falls.
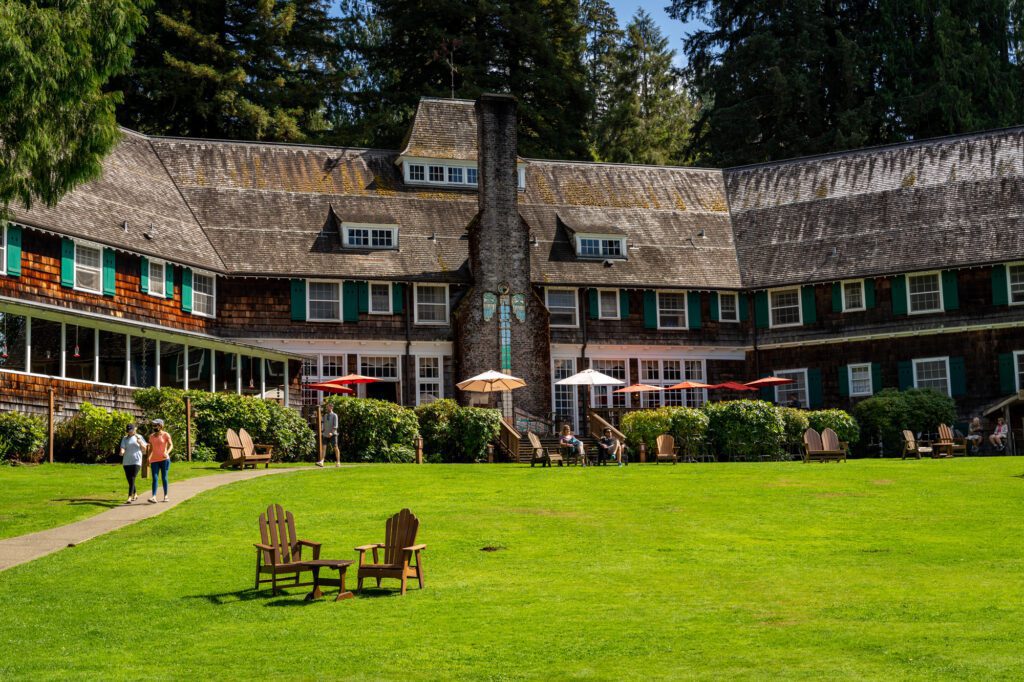
Lake Crescent Lodge

After your hike (or, hikes, depending on what you decided to do), head to the incredible Lake Crescent Lodge for an afternoon refreshment.
There’s a short hike through the woods from the parking lot where you parked, so you can walk and not have to deal with moving the car and finding a new parking spot.
The historic lodge was built way back in 1915, and is one of the oldest national park lodges in the country.
This is an excellent place to stay to explore the region, but it’s almost always fully booked (once you’re there, you’ll probably understand why).
At the Lake Crescent Lodge, which is predictably perched on the shores of Lake Crescent, you’ll find a bar and a restaurant, perfect for refueling after a busy morning.
You can take your drinks or food out to the patio, or find one of the adirondack chairs on the beach for the best views. Keep in mind that you’re going to pay a premium for the location here.

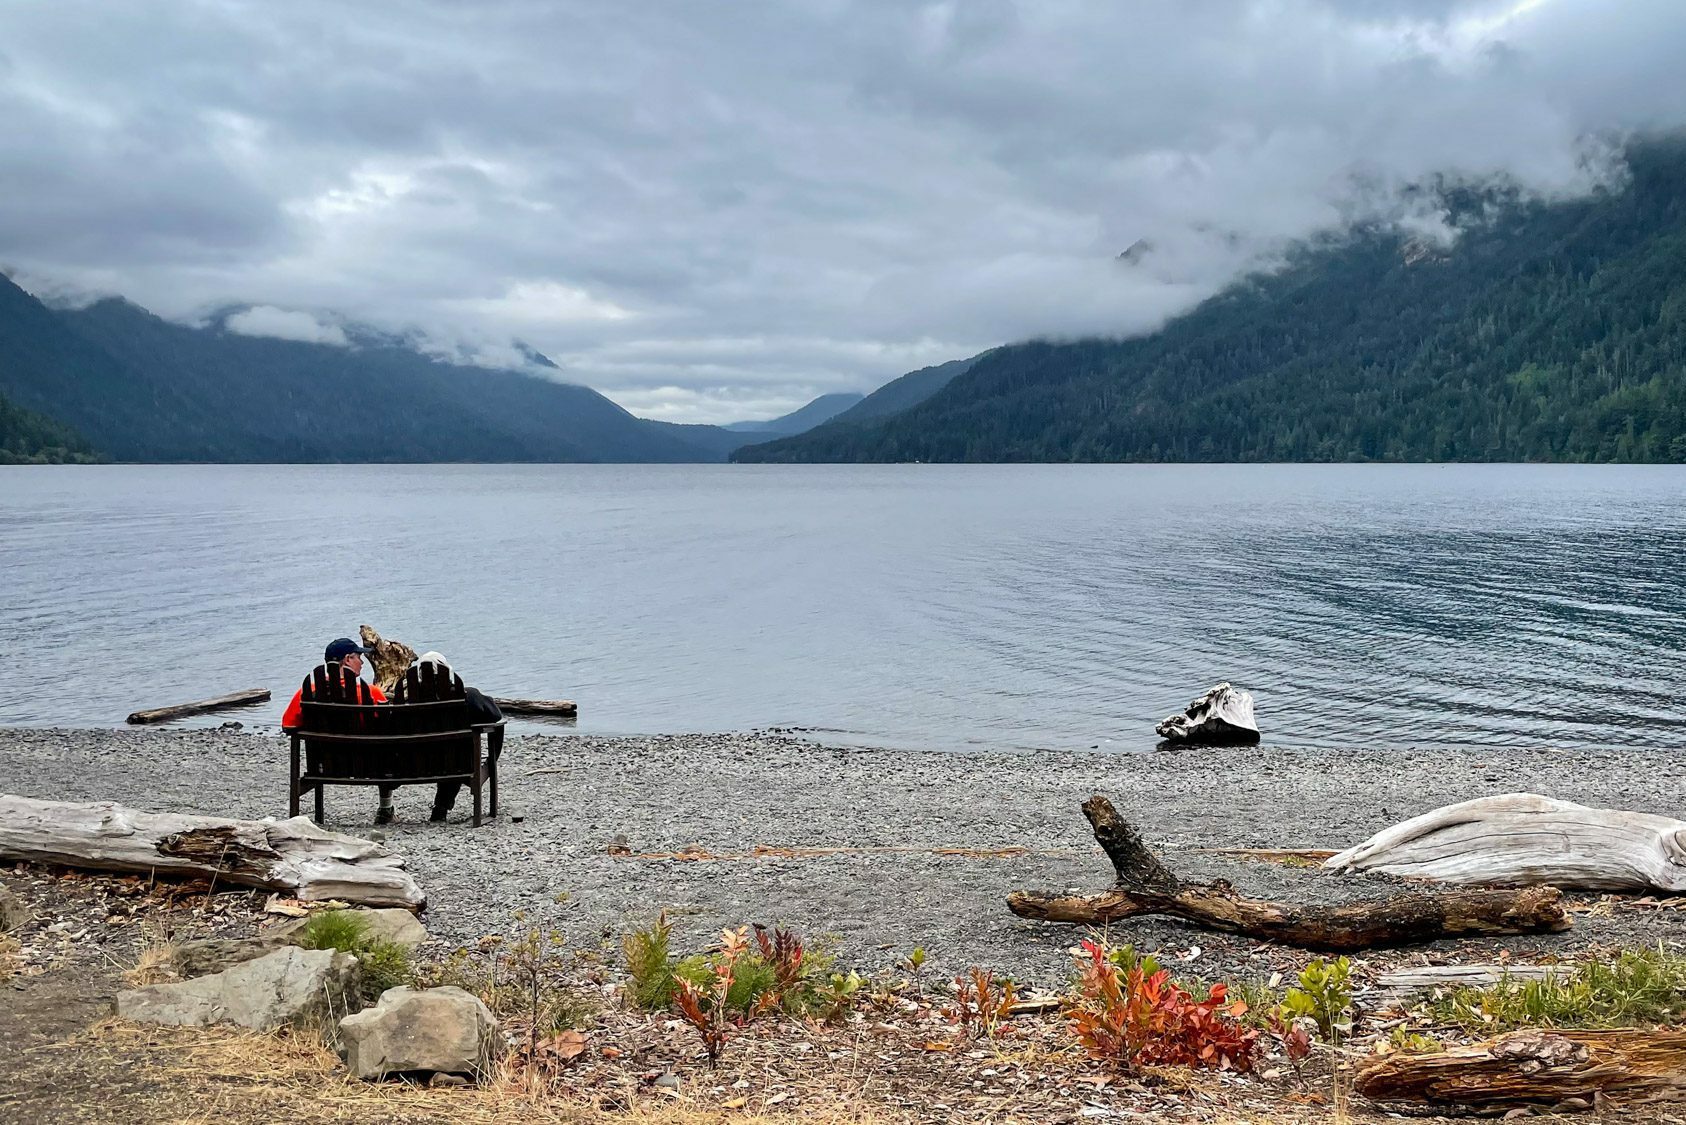
They also have boat, canoe, and paddleboard rentals, if you’re looking to get out on the water.
It’s worth lingering a bit and enjoying the lake – you’ve earned it after an action-packed morning and afternoon!
Sol Duc Falls

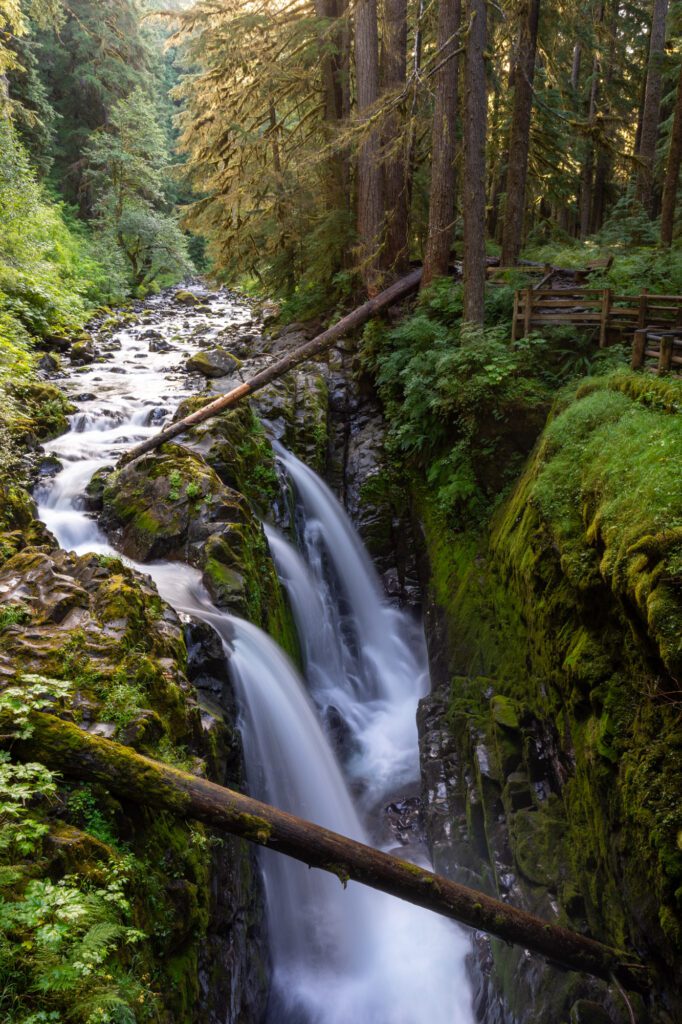
Sol Duc Falls is a gorgeous waterfall that we stopped by on our way up to backpack the High Divide Trail.
It’s a little bit of a detour, about a half hour up Sol Duc Road, but we think it’s worth it to see what might be the best waterfall in the park.
The hike through the forest will be 1.6 mi (2.6 km) and have an elevation gain of just 200 feet (61 m), so just about everyone can do it.
From the viewpoint on the wooden bridge, you get a nice view of the waterfall and the river flowing into it.
Day 2: Shi-Shi Beach and the La Push Beaches
For your second morning, head out to the northwest corner of Washington State, where you’ll find some of the least visited parts of the park. End your day with the drive into Forks, and some short beach hikes to the beaches near La Push.
The first part of your day today will be spent on the land of the Makah tribe – you can learn about the Makah here, and it’s worth taking some time to acknowledge that you are on their land while you’re enjoying this amazing part of the world.
On the way back to the rest of the park, it’s worth stopping in Neah Bay at the Makah Cultural and Research Center to check out the museum, where you can take some time to learn more about the history of the tribe and the history and tradition of the land you’re exploring.
Important note: You need a recreation permit from the Makah tribe to park at most of the attractions in the northwest corner of the state. You can get one at a bunch of different locations in the area, and it will cost you $20. It’s good for the calendar year. Display it on your dashboard while you’re in this area.
Cape Flattery
Start your day with the drive up to Cape Flattery, which is the northwestern corner of the continental, mainland United States (technically the San Juan Islands are further north).
There’s a 1.5 mile hike (roundtrip) out to a viewpoint, where you’ll have a nice view of the place where the Strait of Juan de Fuca meets the Pacific Ocean. There’s a lighthouse just offshore.
It’s an easy hike along a boardwalk for most of the way, and you’ll find yourself in a towering forest of sitka spruce trees, which is peak coastal Pacific Northwest for us.
Because it’s a short hike, it’s going to be a busy one. But not early in the morning! That’s why we have this first on the itinerary.
Shi-Shi Beach and the Point of Arches
The seemingly long hike out to Shi-Shi beach might scare you off, but you should know that it’s a relatively easy two mile walk out to the beach itself.
The longer part of the hike is the flat stroll along the beach out to the south end of the beach, which is where you’ll find Point of Arches.
Point of Arches is a collection of sea stacks – probably the best in the park – that take a little extra effort to get to, but are well worth the journey. It’s a full 8.5 miles (ish) to get out there. Make sure to bring plenty of water, snacks, and rain gear.
Point of Arches is best at low tide, when the tide pools are visible. Check tides here.
You can camp overnight on Shi-Shi beach, which is one of the coolest things to do in the park. You’ll need both a Makah permit and a park wilderness permit, along with a bear canister to store your food. More information here.
The La Push Beaches: First, Second, and Third Beaches
Give yourself the rest of the day to enjoy all of the beaches near La Push! These are going to be easy-going and mellow hikes. Actually, they’re more like strolls and long walks on the beach, which I have been known to love.
Before you Google it, yes, the names are actually First, Second, and Third Beach. Second is the best of the bunch, but they’re all worthwhile.
- First Beach: The small coastal village of La Push is your entryway to First Beach. Stroll along a mile-long sandy beach that has views onto sea stack islets and large waves. There is plenty of driftwood to look through and potentially find a souvenir.
- Second Beach: This beach is an unsung jewel of wild beaches. There’s two miles of a sprawling sandy beach here, as well as a lagoon, sea stack islets, tide pools, driftwood, and tons of sea life. There aren’t that many people here, which makes it a very peaceful place. It’s a short hike from the parking lot – nothing too crazy at all for families with kids.
- Third Beach: Third Beach is significantly less visited because of the 2.8 mile hike (round trip) that you’ll need to do to access the beach. The trail takes you through towering trees until it reaches a creek that flows into the Pacific Ocean. The sunsets at this, and the other beaches, are postcard-perfect!
Day 3: The Hoh Rainforest and Ruby + Rialto Beaches
Experiencing the rainforests and beaches on the west side of the park is the best thing to do in Olympic National Park, which means this third day is going to be a highlight of your trip.
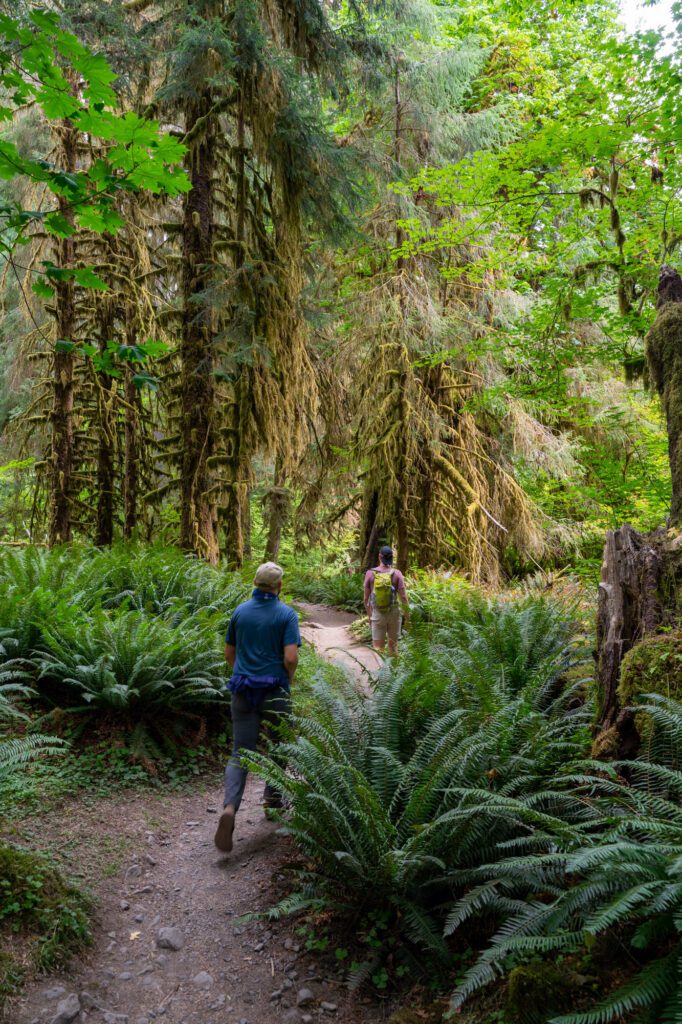
The vibrant collection of mosses covering ancient old-growth trees amid an enchanting backdrop of natural beauty is something that captivated us from the moment we first stepped foot in the rainforest.
Combined with the fact that, just an hour away, you’ll find towering sea stacks rising out of the ocean waves, this is the day that you’ll realize just how crazy the geography on the Olympic Peninsula is. It’s honestly a little unbelievable.
On your last day in the park, explore the Pacific Coast, doing the lush Hoh Rainforest first thing in the morning to beat the crowds (and have some semblance of solitude), and then do the top two beaches on the coast in the afternoon.
Make sure to pack a picnic lunch (or just some snacks) to enjoy on the beach!
The Hoh Rainforest
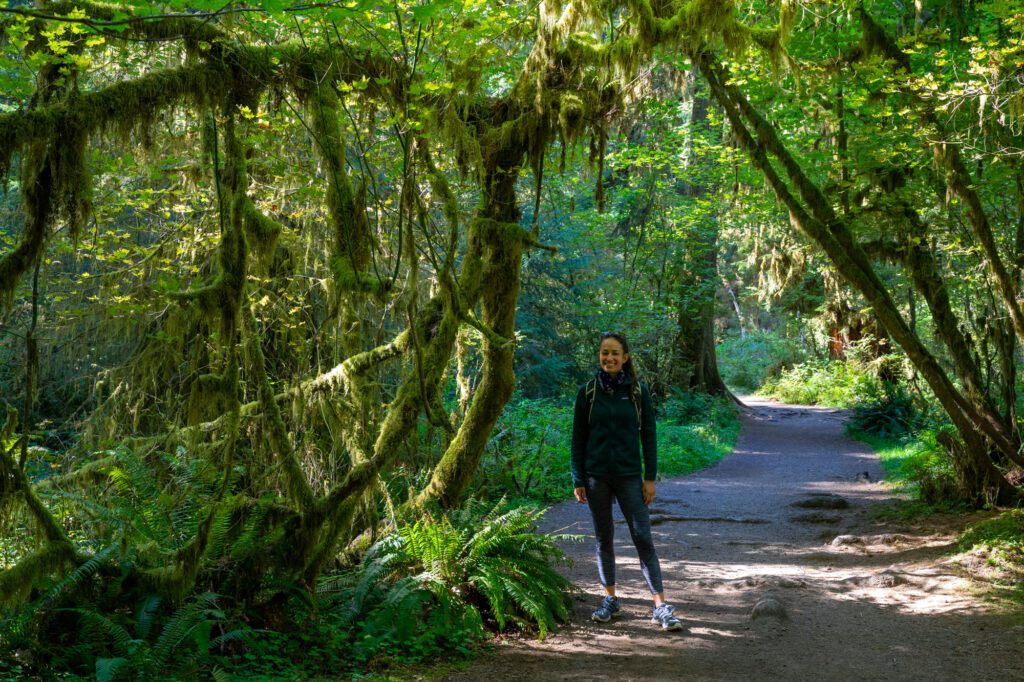
Head STRAIGHT to the magical Hoh Rainforest. I suggest you get there as early as humanly possible.
That way, you will get to experience the sublime ambiance of the rays of sunlight streaming in through the dense forest canopy. You may even get to spot some Roosevelt Elk!
The parking situation at the Hoh Rainforest is extremely limited, which means they’ve started limiting capacity at the entrance station during peak times with a one car in, one car out policy.
Between 10:00 am and 5:00 pm, there will be a line on a summer weekend. We know, because we accidentally got a late start last time and got caught in an hour wait to park.
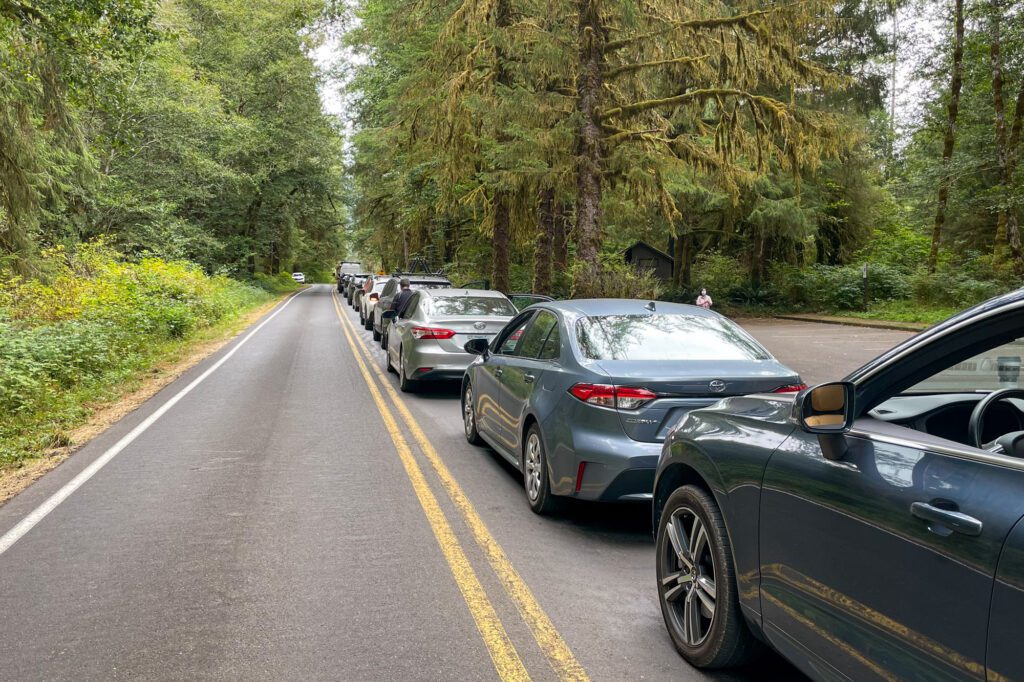
Do yourself a favor and get there by 9:00 am at the latest, both for the best experience in the rainforest, and so that you don’t have to wait for parking.
Did you know? Olympic National Park was put on the path to becoming a National Park in part to protect the calving grounds of these elk at the base of Mt. Olympus?
Teddy Roosevelt made it a National Monument in 1909, and it became a National Park in 1938 thanks to FDR.
Also, the early morning is the best time to visit because there won’t be that many people around, making it more of a solitary experience with the rainforest.
The ambiance is much more pleasant without hundreds of people talking and kids screaming. Believe us.
Once midday rolls around, there’s tons of people, given how accessible it is to explore. Keep that in mind, so you get to enjoy it to its fullest.
There are a couple of short hikes to do here, and a longer option that is customizable to what you’re up for.
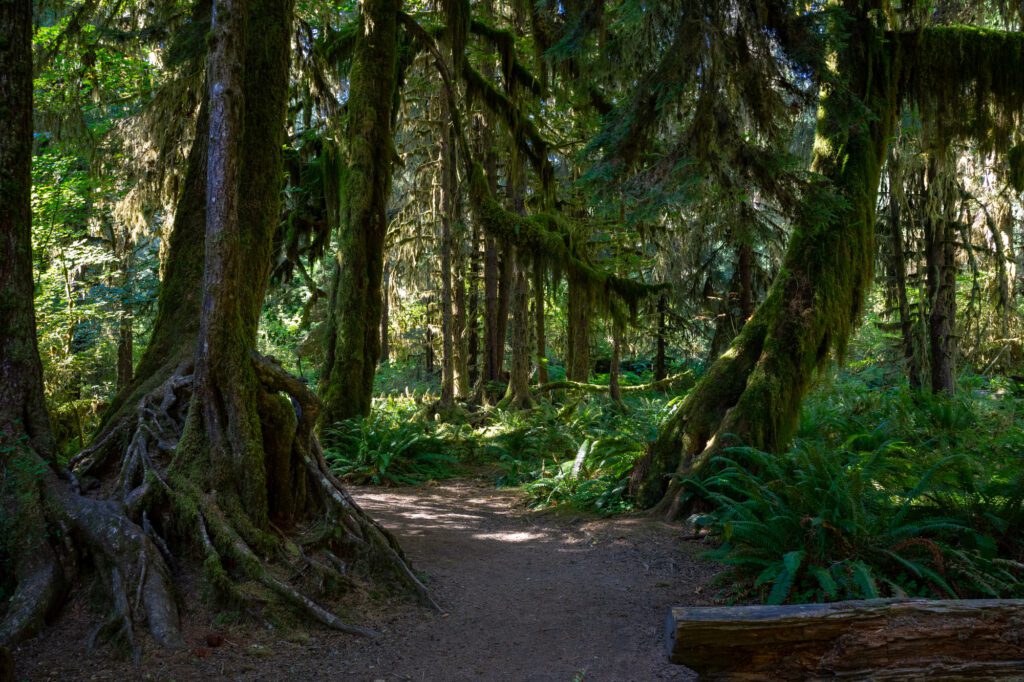
- Hall of Mosses: The Hall of Mosses is a short 0.8 mi (1.3 km) loop through lush rainforests where you will see moss-covered trees, banana slugs, elk, and more. There’s also plenty of signage with helpful information about everything you’ll be seeing.
- Spruce Nature Trail: The Spruce Nature Trail is a 1.2 mi (1.9 km) roundtrip stroll through the Hoh Rain Forest that takes you through ancient groves and relaxing areas of this exceptional rainforest.
- The Hoh River Trail: If these Hoh Rain Forest hikes are too short for your liking, you can also hike part of the Hoh River Trail. This is a 37-mile (59.5 km) backpacking trail that takes you all the way out to the base of Mount Olympus, so if you’re following this itinerary you’ll just want to hike a few miles along the river before heading back to make it to the beaches. We’ve done the hike out to Mineral Creek Falls, and it’s a lovely hike that’s basically flat the entire way.
Ruby Beach
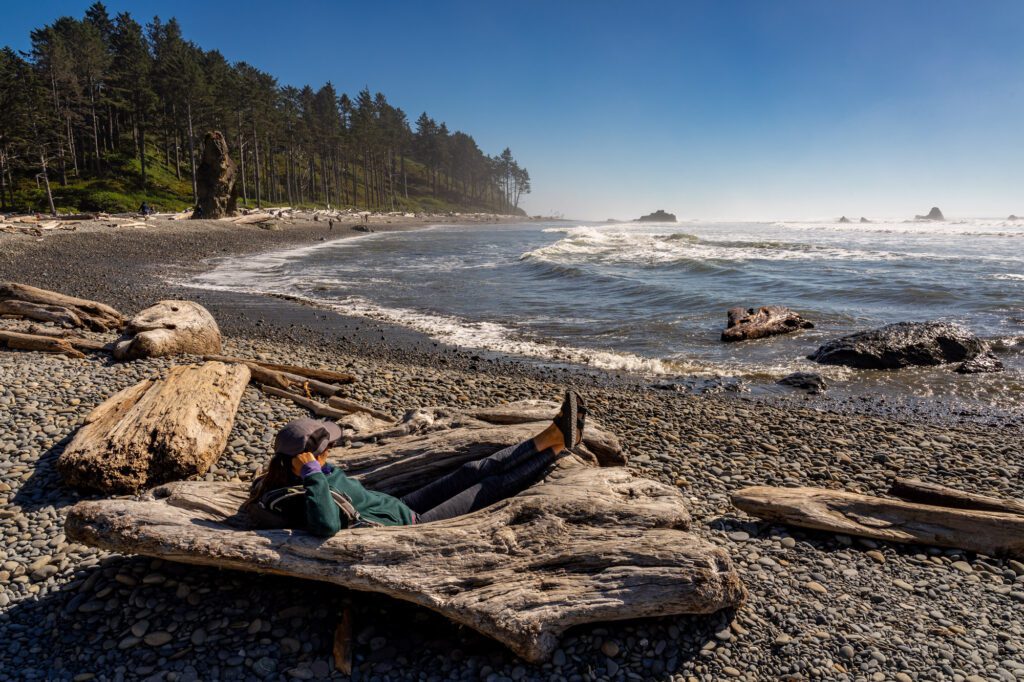
Ruby Beach is a little bit of a detour from the Hoh Rainforest, but we think it’s worth it. From the turnoff to the Hoh Rainforest, you’ll take a left and head south on 101 for 15 minutes to reach the parking lot.
Ruby Beach is probably our second favorite of the Pacific Coast beaches (after Rialto, which you’ll hit later in the evening). The driftwood on the beach and the sea stacks just off the coast are gorgeous, and impress us every time we’re here.
If you’re up for another beach walk, do at least a part of the 6 mile (9.7 km) round trip hike that looks out onto sea stacks and Abbey Island.
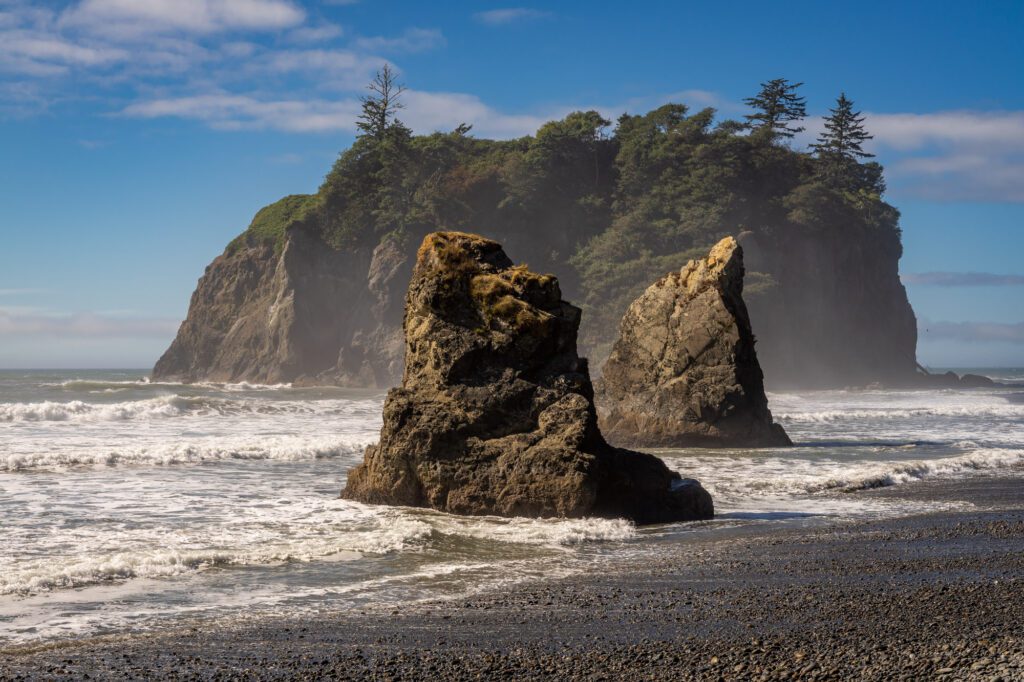
If you happen to be here at low tide, you may even see some starfish and other sea life while you’re at it.
Rialto Beach and Hole-in-the-Wall at Sunset
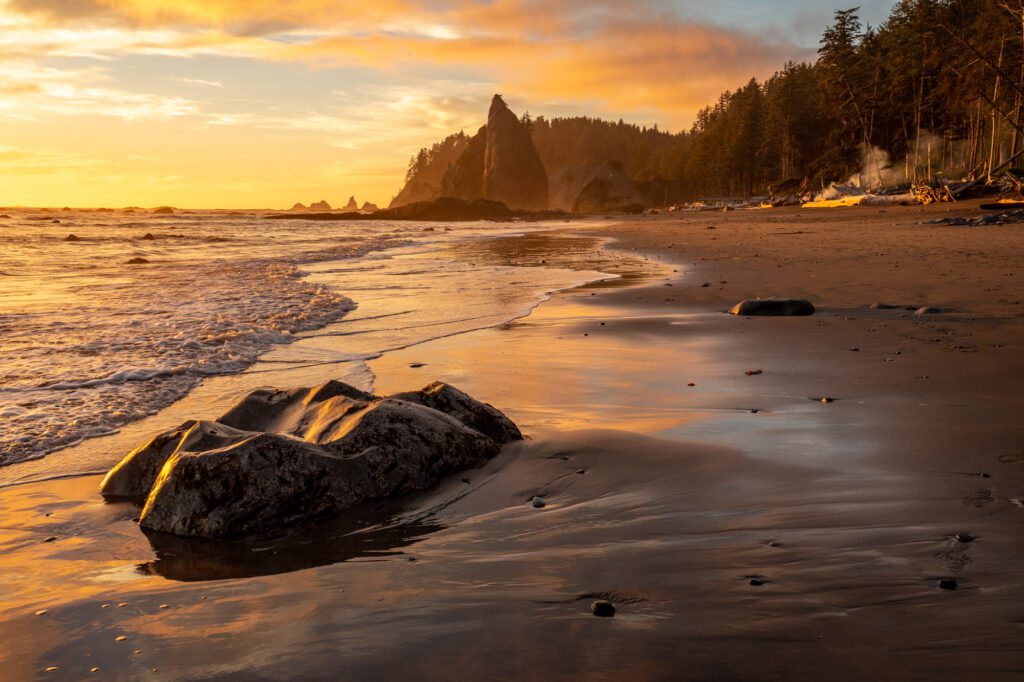
The evening is the perfect time to catch that glorious Pacific Ocean sunset that you have to see in person to truly believe.
The sunset at Rialto Beach is one of the top memories of our two year US road trip. The picturesque sea stacks emerging from the ocean add to the breathtaking backdrop of the daily sunset. Plus, we saw multiple bald eagles hanging out in the trees.
You should know going in that it’s coastal, so there’s a pretty high chance that you won’t be able to see a sunset at all because of the fog or clouds that enshroud this part of the world for most of the year.
However, if it’s a clear day, you’re in for a treat.
If you want to have the best chance of seeing a sunset here, you should come during the summer months. However, it will stay chilly year-round, so bring something warm to wear.
You definitely shouldn’t miss the stroll down Rialto Beach to an incredibly gorgeous spot called the Hole-in-the-Wall. Which is pretty much exactly what it sounds like, only prettier.
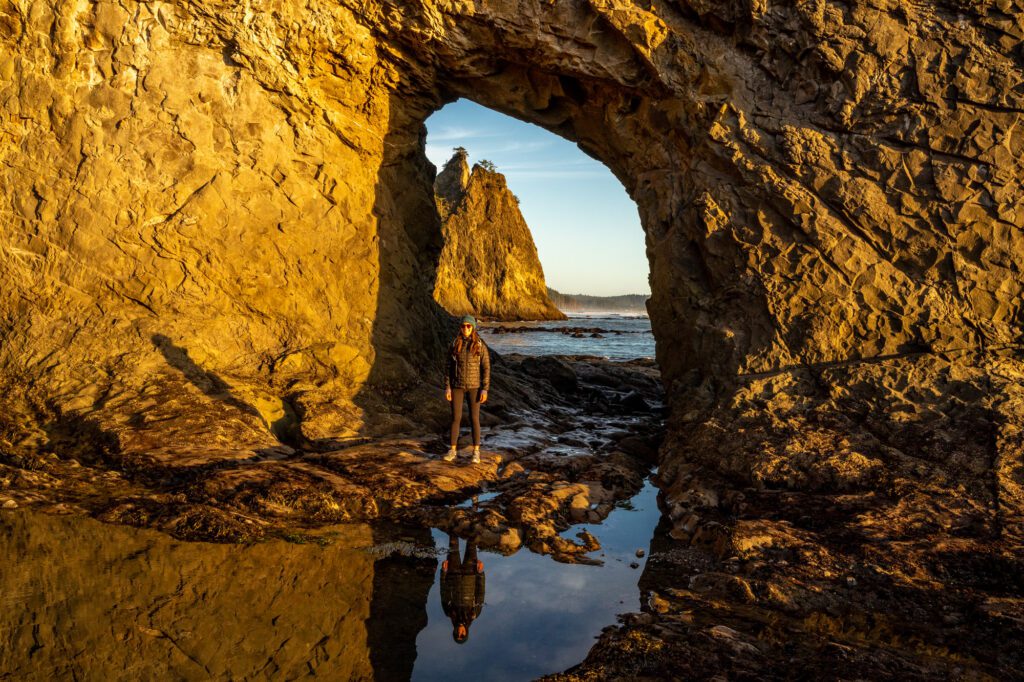
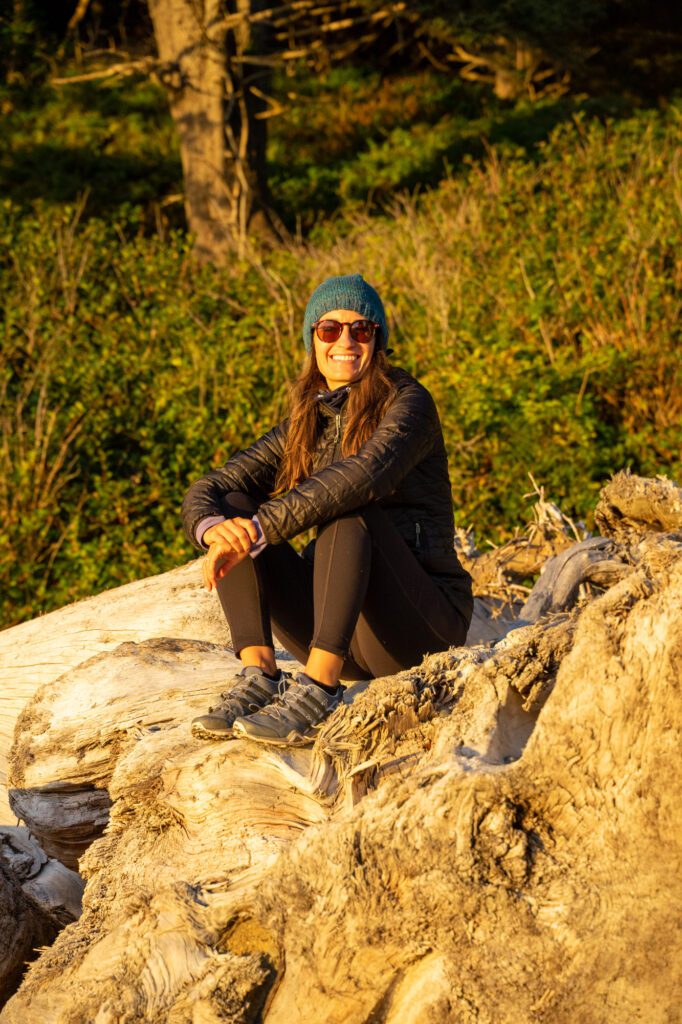
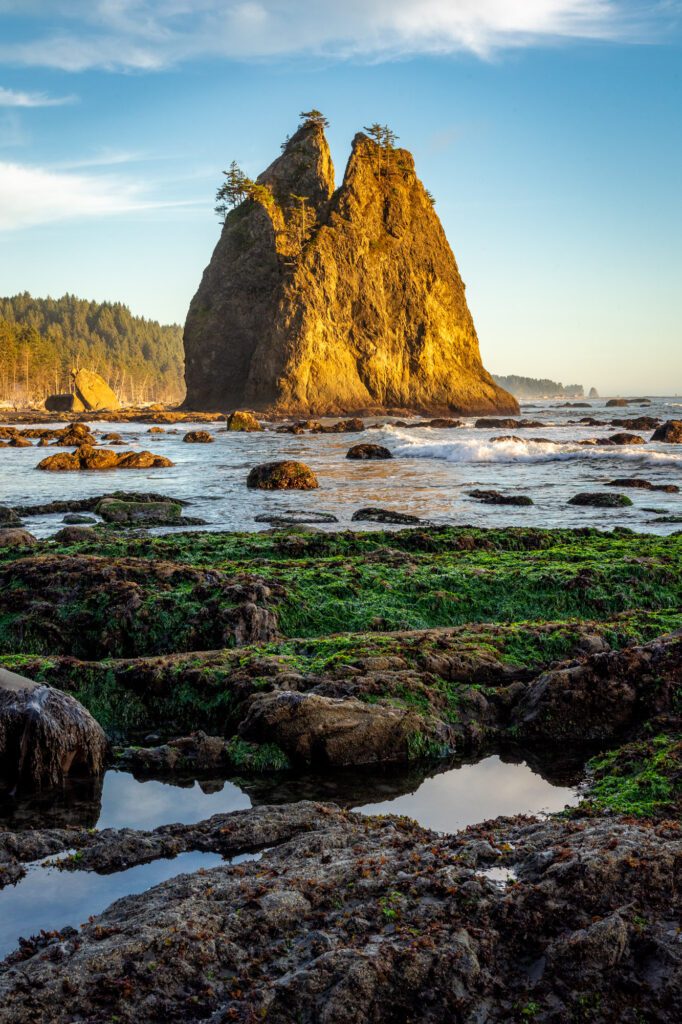
To get there, you’ll walk for about an hour down the beach, passing by a couple of incredible sea stacks that tower above you. Eventually, you’ll reach a point where a natural arch has formed in the wall thanks to countless years of erosion.
There are some pretty cool tidepools on either side of Hole in the wall to explore – remember not to touch or disturb the sea life!
Top Travel Tip: Make sure to check the tides – you need to do this walk at low tide, otherwise you’ll either not be able to get there, or you’ll get stuck out there and have to do some rock climbing to get back. We used this site to check tides.
What to Do with More Time in Olympic National Park
Here are some excellent additions to this itinerary if you’re lucky enough to have more than 3 days in Olympic National Park.
With a full extra day, you can easily add Lake Quinault and Kalaloch (it’s also possible to make this itinerary a big loop and do those two on the way home to Seattle / Portland, looping around the south end of the park to get back to I-5).
Lake Quinault & the Quinault Rainforest
On the southern Pacific Coast, you’ll find another lake and another fern-laden rainforest waiting for you.
Just like with the Hoh Rain Forest, the Quinault Rainforest gets packed. I’d actually recommend heading here later in the day when the crowds start to thin.
The Quinault Rainforest Nature Loop is a quick 0.5 mi (0.8 km) trail that takes you through an incredibly mossy forest with a dizzying array of fungi and animals.
Lake Quinault is a massive glacier-fed lake that is surrounded by mossy old-growth rainforest. It is around this lake that you will find some of the most massive Sitka Spruce trees in the entire world! It’s no wonder it’s called the Valley of the Giants.
There is a 31-mile (49.9 km) loop road that circles the entire lake that is a great place to do some wildlife spotting. Head out around sunset and you might see some elk, black-tail deer, cougars, bald eagles, bobcats, and black bears.
Kalaloch Beach
Just south of Ruby Beach is Kalaloch Lodge and the many sandy beaches surrounding it. There’s a nice campground here, and it’s also where you’ll find the Tree of Life, a tree whose roots have been exposed after years and years of erosion.
There are four wide beaches to explore here. You can find more information on the area here.
You can stay at the Kalaloch Lodge in one of their lodge rooms (hotel-style), or one of the oceanfront cabins.
For the price, the facilities are a little rundown (as they tend to be in national park lodges, which are almost always at full capacity), but the location and ambiance can’t be beat. Book well in advance – it’s completely full during the summer.
Like we mentioned, you can combine this area with Lake Quinault for a fourth day on this itinerary. Plus, if you do that, you can follow 101 south to loop back to Seattle or Portland.
Backpacking in Olympic National Park
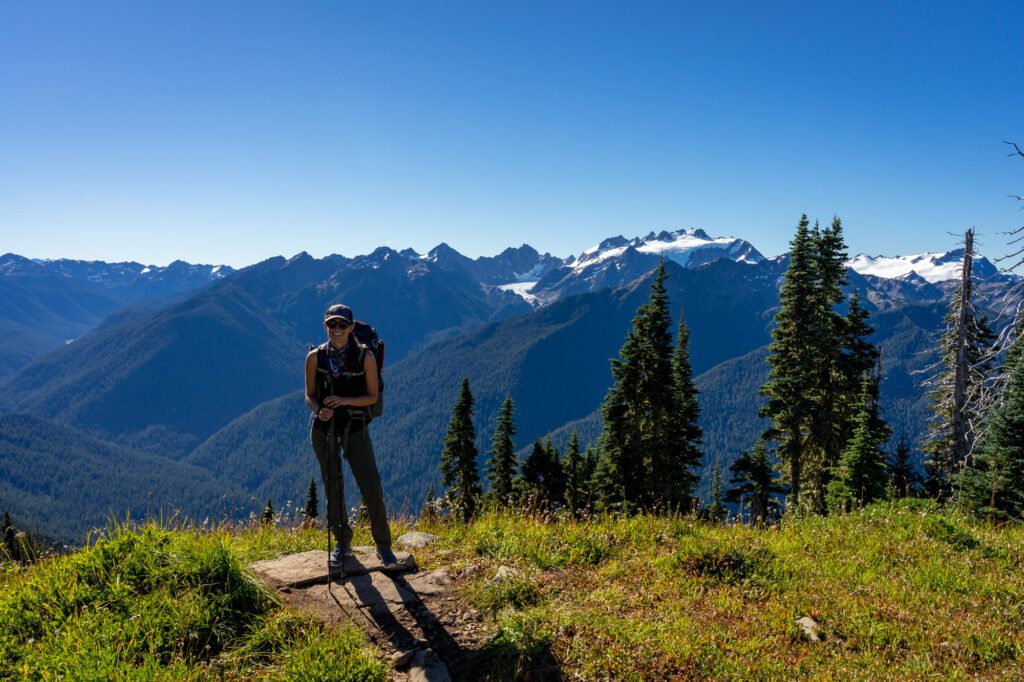
Over the past two summers, we’ve had the privilege of tackling two amazing backpacking trails in Olympic National Park, and loved them both.
Keep in mind that you’ll need a bear canister for any overnight camping – including on the beach – in Olympic National Park.
We have this one, and highly recommend it. Other friends have one of the clear, screw top ones, and prefer using ours.
If you’re planning to do any overnight backpacking, make sure to stop at the ranger station in Port Angeles to get your backcountry permits, bear canisters (for rent if you need them), and information about the park.
If you’re 16 years old or older, it will cost you $8 per night. Any overnight stay in the wilderness will carry this fee, so make sure you get your wilderness permit ahead of time. You can also print them at home ahead of time.
More information on backpacking in the park here.
The High Divide / Seven Lakes Basin
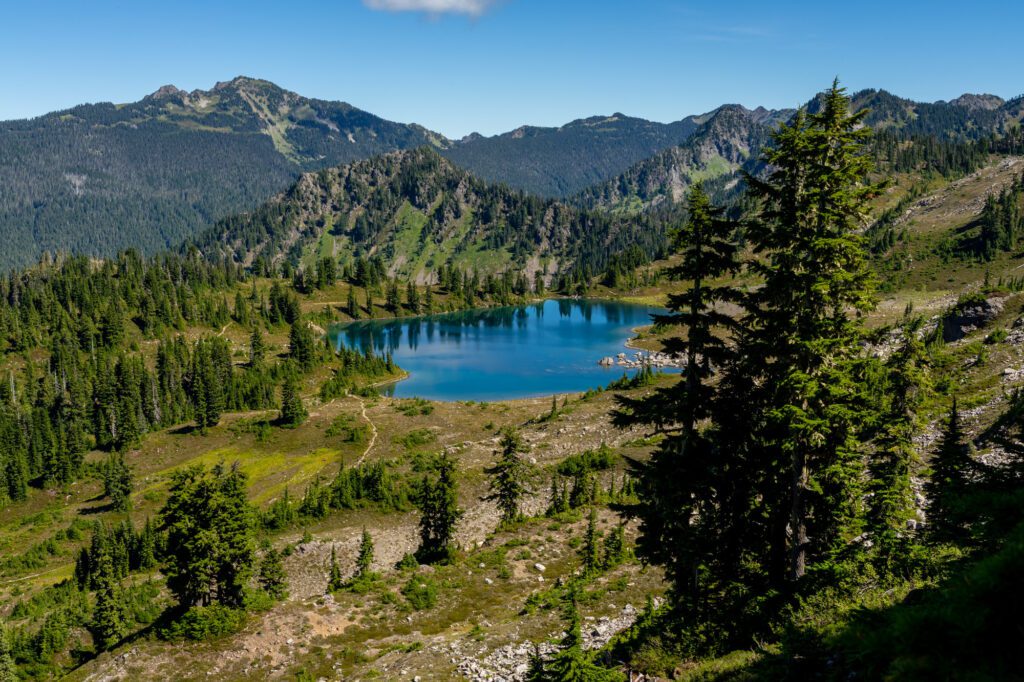
The first we did was the High Divide / Seven Lakes Basin, which is about as spectacular a backpacking trip as we’ve ever done.
You’ll start from the Sol Duc Falls parking lot, and make a big 19 mile loop that takes you up to the High Divide, a rocky ridge with spectacular views of the Olympics and the Seven Lakes Basin below.
Along the way, you’ll pass several spectacular alpine lakes, including our favorites Heart Lake and Lunch Lake.
You’ll need to snag permits as early as possible – they routinely sell out, especially in recent years. You can check availability on recreation.gov.
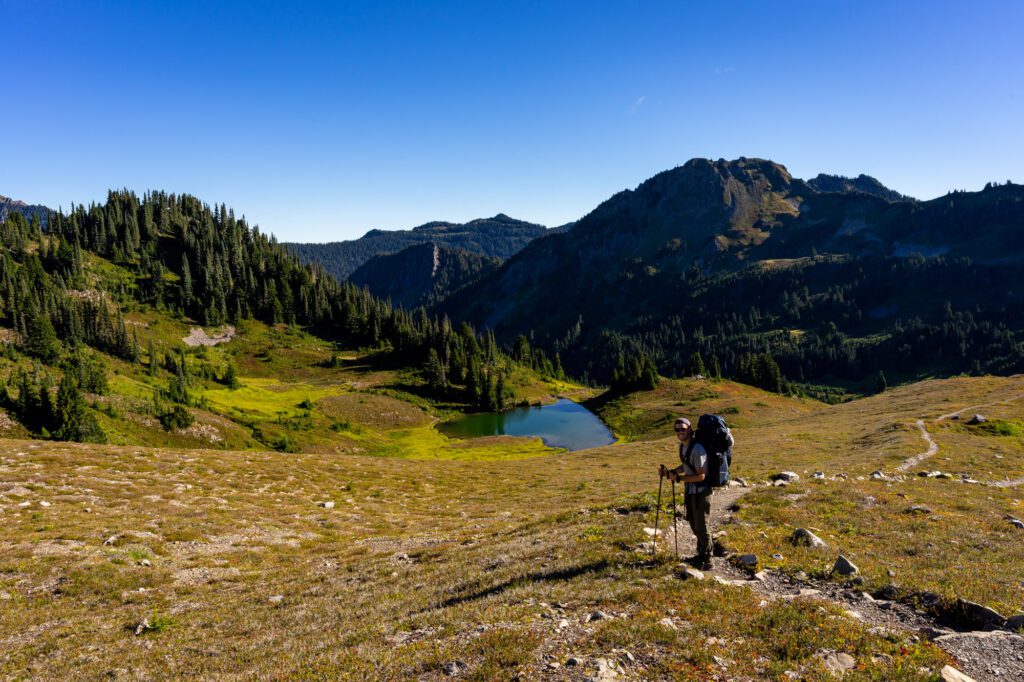
Do it in three days / two nights, spending one night up on the High Divide (at Lunch Lake!), and one night at Deer Lake or Sol Duc Park (depending on which direction you want to hike).
We liked doing it clockwise, which is a more gradual climb up and an easier climb down, but you could easily do it in the other direction.
The Enchanted Valley
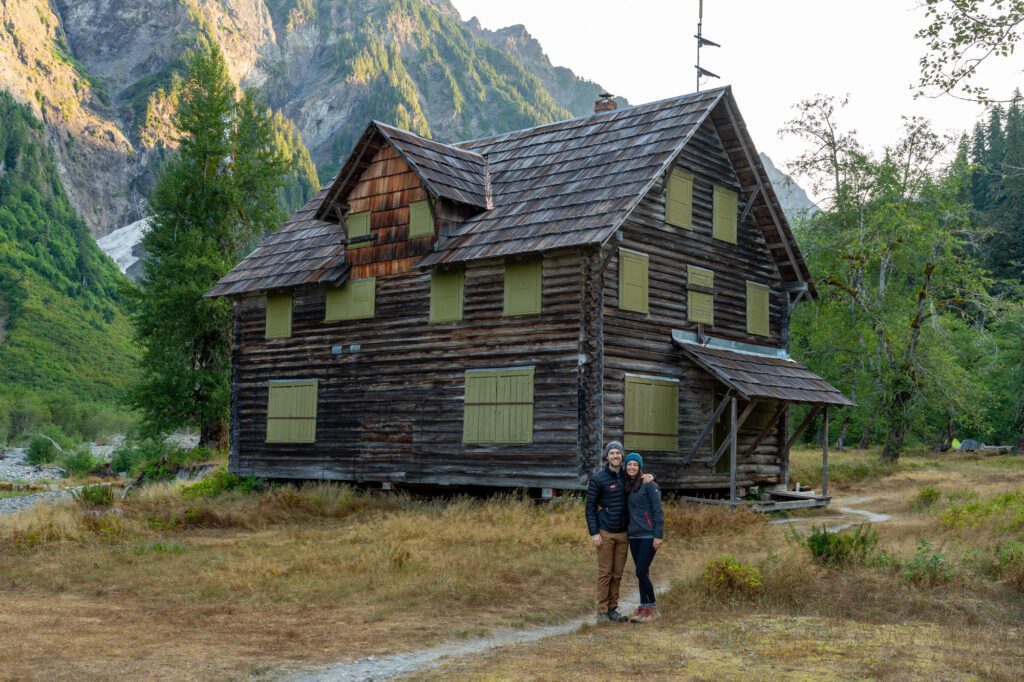
The second backpacking trip we did was the Enchanted Valley, which we tackled midweek a couple of summers ago.
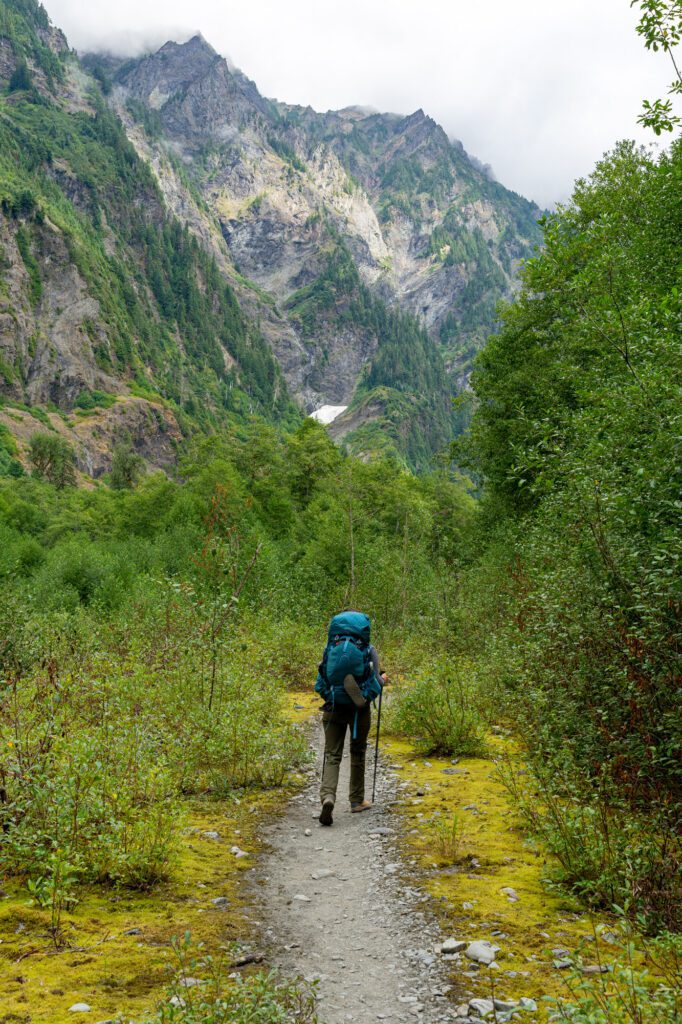
This one is less about the spectacular mountain views, and more about hiking into a beautiful, secluded valley only accessible to people willing to hike the 13 miles in.
We did three days / two nights here, but would recommend an extra night if you can swing it because hiking the entire 13 miles in one go was a little much. Better to spend a night on the trail there and back to break up the long days.

Definitely make sure to spend a night in the valley itself, which is where you’ll find the picturesque chalet that’s in all the pictures (it’s not actually being used at the moment).
We loved this hike, though the valley isn’t so secluded these days (there are routinely 100 people camping in the valley on summer weekends).
What to Do with Less Time in Olympic National Park
If you have one or two days in the park, you’ll need to be a little more strategic with your time. Here’s how we’d spend either one or two days in the park.
Olympic National Park in 2 Days
If you have two days in Olympic National Park, we’d devote one day to each area (the two areas being Hurricane Ridge/Lake Crescent and Pacific Beaches/Hoh Rainforest).
Spend your first morning at Lake Crescent, doing the hike to Marymere Falls and adding the climb up to Mount Storm King if you’re feeling adventurous before heading to the Lake Crescent Lodge afterwards.
Then, take a slight detour out to Sol Doc Falls, and head up to Hurricane Ridge for the afternoon and sunset. Hike Hurricane Hill around sunset for an unforgettable experience.
On your second day, head out towards Forks and make a beeline straight for the Hoh Rainforest. Try to arrive as early as you can to avoid the crowds and the lineup at the gate. Hike the Hall of Mosses and part of the Hoh River Trail to see the dense, wet rainforest in all its glory.
From there head down to Ruby Beach for a picnic lunch and to admire the sea stacks just offshore. End with a walk on Rialto Beach out to Hole in the Wall for an unforgettable sunset.
Olympic National Park in One Day
Like we mentioned above, Olympic National Park really isn’t a great day trip destination (if you’re looking for a day trip, make sure to read our guide to the best day trips from Seattle!).
However, if you have only one day and one night in the park, we’d focus on the northeastern corner around Hurricane Ridge, Lake Crescent, and the Sol Duc Valley. Which means you can follow day 1 of this itinerary as written!
Planning to visit Olympic National Park? We’ve got more detailed travel guides to help you explore Olympic National Park and make the most of your time in the northwest corner of Washington State.
- The Best Things to Do in Olympic National Park
- Where to Stay in Olympic National Park (For First Timers)
- The Best Hikes in Olympic National Park
- How to Get to Olympic National Park: Closest Airports + Ferries
- The Best Time to Visit Olympic National Park: All 4 Seasons (COMING SOON)

Thank you for writing this! Wife wanted to do a trip to Yellowstone last year but didn’t end up working out because of other plans. Now we’re planning one to Olympic National Park for early-mid June this year in a rental RV (I hope there are still enough campgrounds!) for 7 days. I am thinking that I will roughly follow the itinerary outlined in your blog here – just take it slower and spend roughly two days in each place. Please let me know if this sounds like a good idea.
Based on your recommendations and our interest, I will definitely want to go to Hoh Rainforest, Sol Duc Hot Springs, Hurricane Hill, Rialto Beach, Ruby Beach and Lake Quinault (hoping to catch some fish and do some boating/kayaking too). Wish us luck! Thanks again!
We recently returned from four days in the park that we visited in late September. We enjoyed the hiking despite being unable to get to hurricane ridge but I’d say the following:
1. Less ranger support than I’m used to. Many locations were unmanned so getting their perspective which I always liked was difficult.
2. Forks is really hit or miss for food or lodging and is expensive.
3. The Makah cultural center in Neah Bay was an unexpected treat. The staff and quality of the exhibits was well worth the hour diversion. The impact on the indigenous people who lived in the area before European settlement is something to understand.
4. We had Beach whiteout three of four days. The hikes were great but I’m told that it’s not uncommon to get a thick marine layer that can make seeing the coastline an iffy proposition.
This was so helpful! I appreciate your post so much! I felt overwhelmed when I begun planning this trip, but this laid it all out for me!
Thanks for the kind words! Glad you found it helpful – that’s what we’re trying to do.