8 Unbelievable Hikes in Rocky Mountain National Park
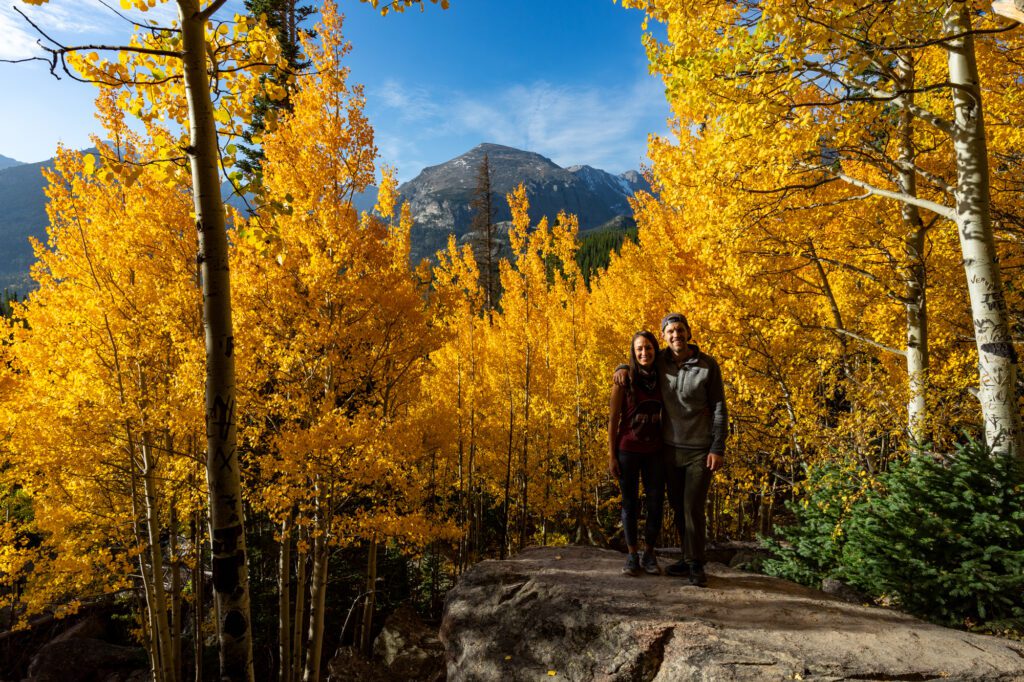
When we took off on our US road trip in the summer of 2020, we thought we would just be focused on an Oregon road trip, and some exploring in Washington State. Until we decided to head east around Labor Day and make a huge loop, starting with Yellowstone and Grand Teton before arriving in Colorado, where we spent a month exploring terrain that is VERY different from what we’re used to out on the West Coast.
This was our second foray into Rocky Mountain National Park, and we were lucky to spend five full nights exploring the park. We put together this guide to the best hikes in Rocky Mountain National Park after doing most of the hikes on the list, and falling in love with Colorado. We hope you’ll discover a new hike that you love to add to your Rocky Mountain National Park itinerary.
Our days looked something like this: sunrise, get up and go to a photo spot or on a wildlife drive, followed by a long hike, relax at camp in the afternoon, and then head out to see wildlife again in the evening, around dusk. Rinse and repeat for five days.
Disclaimer: Some of the links below are affiliate links, which means that if you click on one and purchase something, I make a small portion of the sale at no additional cost to you. It goes without saying that I would never recommend something I wouldn’t use or do myself.
The 8 Best Hikes in Rocky Mountain National Park
Here’s your guide to hiking in Rocky Mountain National Park, organized by trailhead.
If you only have time for one hike, I would recommend Sky Pond if you’re an avid hiker with some experience and fitness, and Dream Lake + Emerald Lake if you’re more of a beginner and looking for something a little easier (though equally spectacular, we think).
Hikes from the Glacier Gorge Trailhead
There are tons of hikes that leave from the Glacier Gorge trailhead, which is just before the end of Bear Lake Road. It’s a tiny parking lot, so you might need to catch the shuttle if you show up past 7am in the summer or early fall.
Note that all of these hikes can be done from the Bear Lake Trailhead, which has more parking. Just add an extra quarter mile or so to the distance.
Loch Lake
- Length: 5.5 miles
- Elevation Gain: 1,100 ft.
- Trail Type: Out-and-back
- Difficulty: Moderate
- Trailhead Location
This is a hike that we did on our first trip to Rocky Mountain National Park a few years ago, and we retraced our steps on our latest trip en route to Sky Pond (more on that in a second).
This hike climbs gradually through a forest of spruce trees to Alberta Falls, which is kind of hard to see from the trail – for a better view, climb the rocks straight ahead of you.
Continue climbing past the falls and you’ll start to notice two things. First, the number of people on the trail will be cut by 90%. Second, the forest will start to gradually change. You’ll find yourself traversing a few switchbacks before emerging onto the Loch.
The side of the lake that you’ll find yourself on is constantly windy, at least in my experience of being there twice at different times of year and day, so walk around to the other side of the lake and find a nice spot to eat a snack and take in the views before returning the way you came.
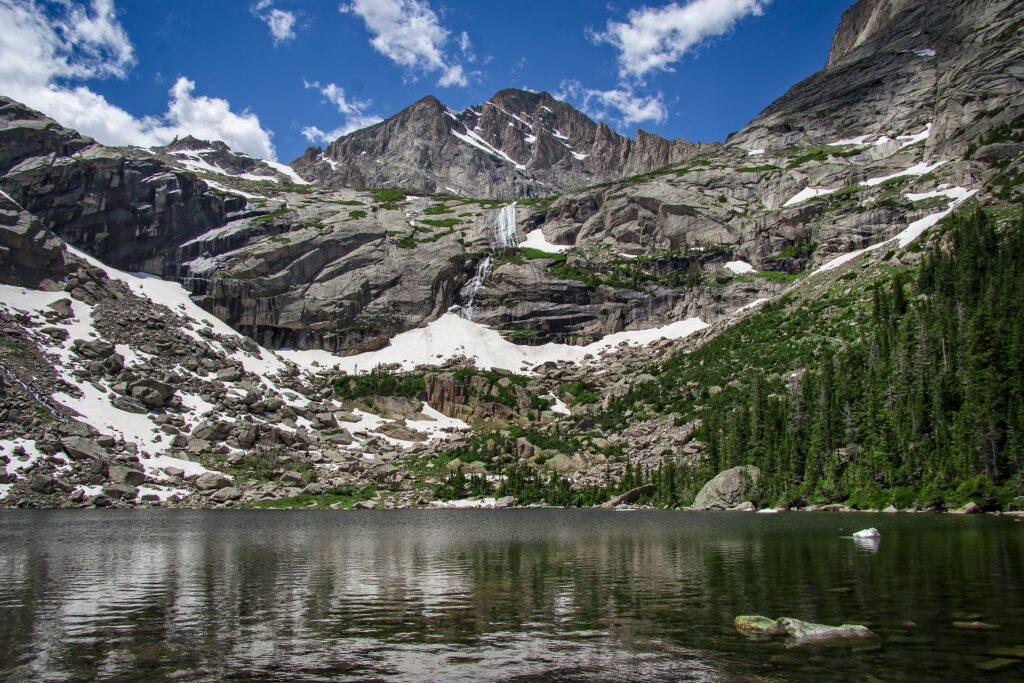
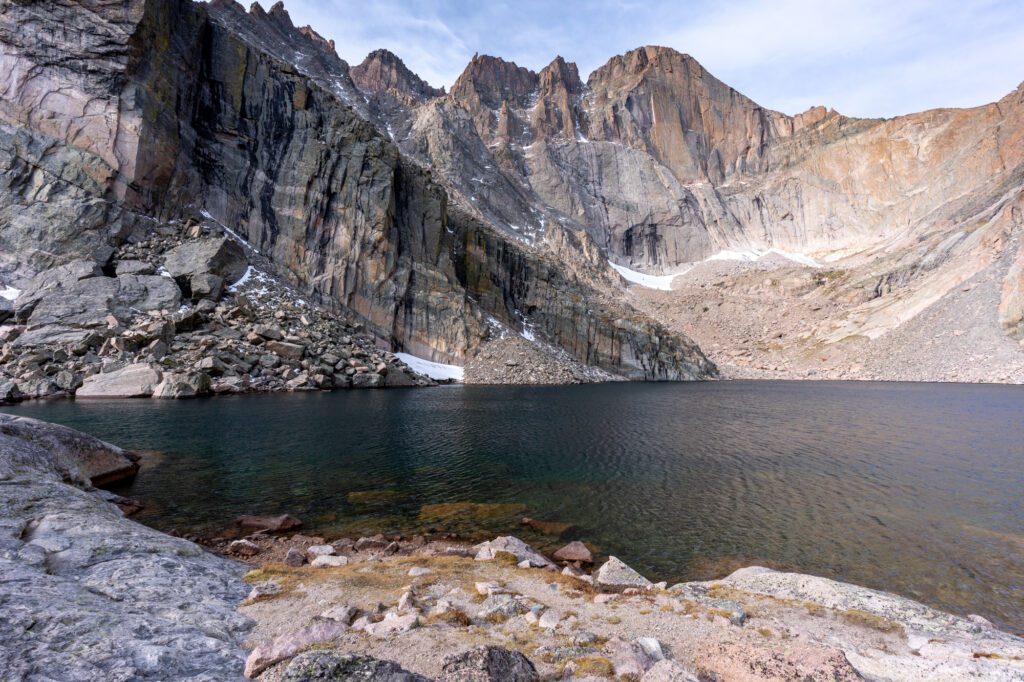
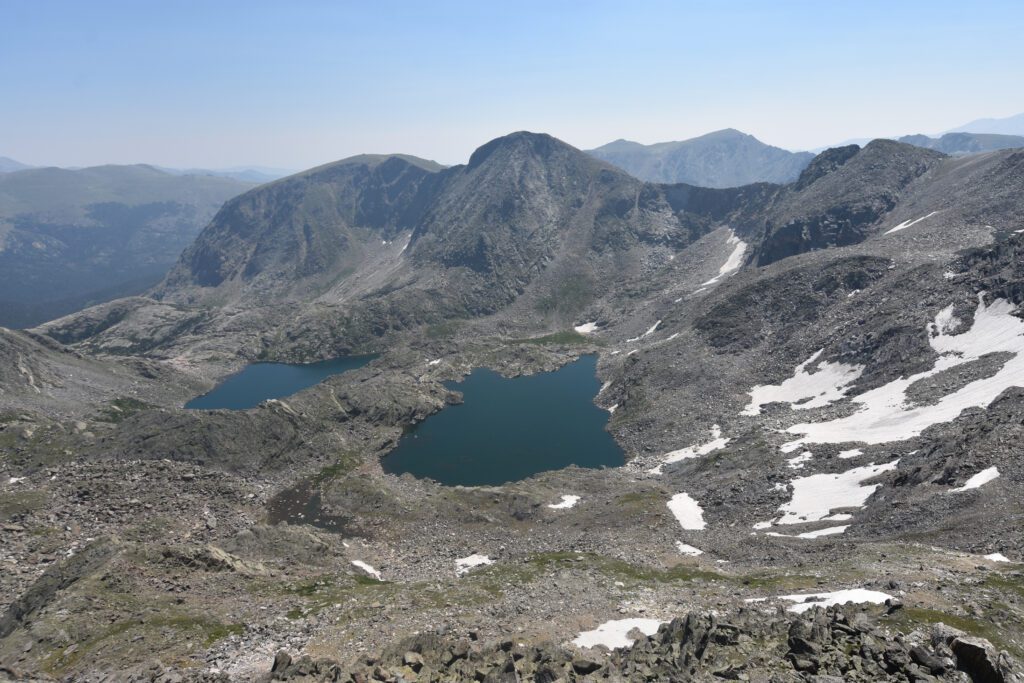
Sky Pond
- Length: 9.5 miles
- Elevation Gain: 1,800 ft.
- Trail Type: Out-and-back
- Difficulty: Hard
- Trailhead Location
The first part of this out and back hike (and the last part) is identical to the Loch Lake hike above. Instead of stopping at the lake, you’ll continue along the trail on the right side of the lake and climb first to Lake of Glass, then to Sky Pond.
Be warned – to get to either, you’ll need to make a steep climb up slippery rocks in the middle of a waterfall. If it’s cold enough to be icy, or it’s rained recently, I’d skip this hike and instead head to Black Lake.
That being said, I think it’s worth it. Take it slow, especially on the way down. You’ll get not one, but TWO gorgeous alpine lakes as your reward.
Sky Pond is a picturesque basin surrounded by all sorts of rocky peaks. For a spectacular view of the spires on the north side, head to the south side of the lake, which is left of where the trail spits you out. Once you’ve gotten your fill of the spectacular views and a snack or four, head back the way you came down the waterfall and around Loch Lake.
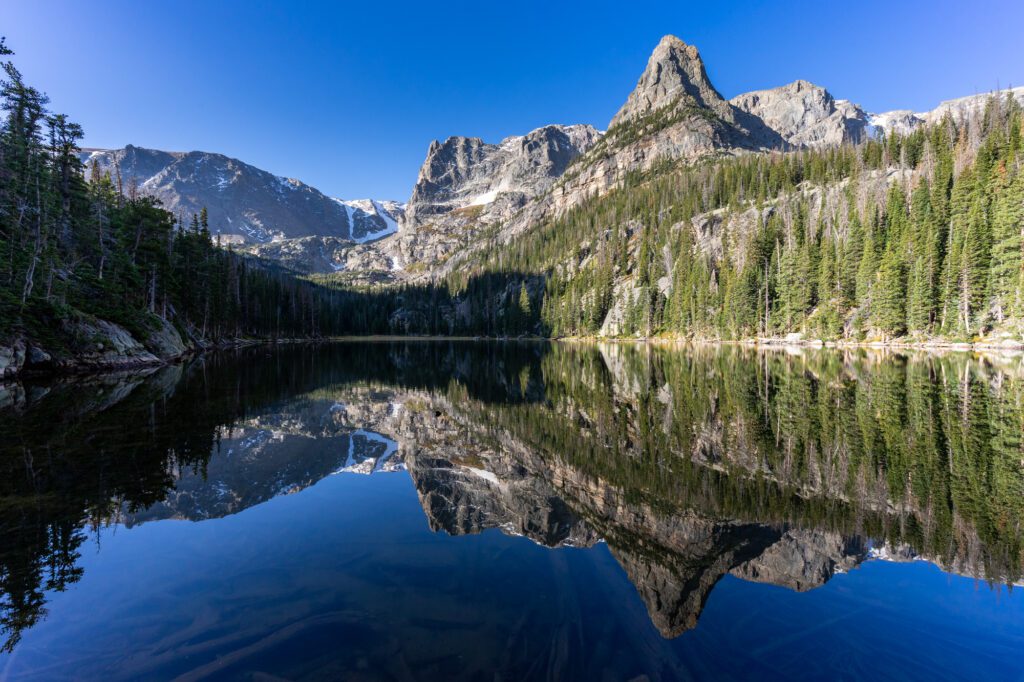
Black Lake
- Length: 10 miles
- Elevation Gain: 1,600 ft.
- Trail Type: Out-and-back
- Difficulty: Moderate
- Trailhead Location
We skipped this hike mostly because we’ve literally done the first half of the hike twice before. It follows the exact same trail as Loch Lake / Sky Pond, before cutting left just before the Loch.
You’ll pass two more lakes – Mills and Black Lake – the latter is 2.8 miles past the turnoff. Both lakes look gorgeous (particularly Black Lake). That being said, if you’re only doing one long hike from the Glacier Gorge trailhead, I’d do Sky Pond.
If the waterfall scramble on the way to Sky Pond scares you, this is a solid alternative.
Hikes From the Bear Lake Trailhead
I’m not going to count the short stroll along Bear Lake here, because it’s hardly a hike. It’s a beautiful lake, but the Bear Lake Trailhead is a gateway to so many other beautiful lakes.
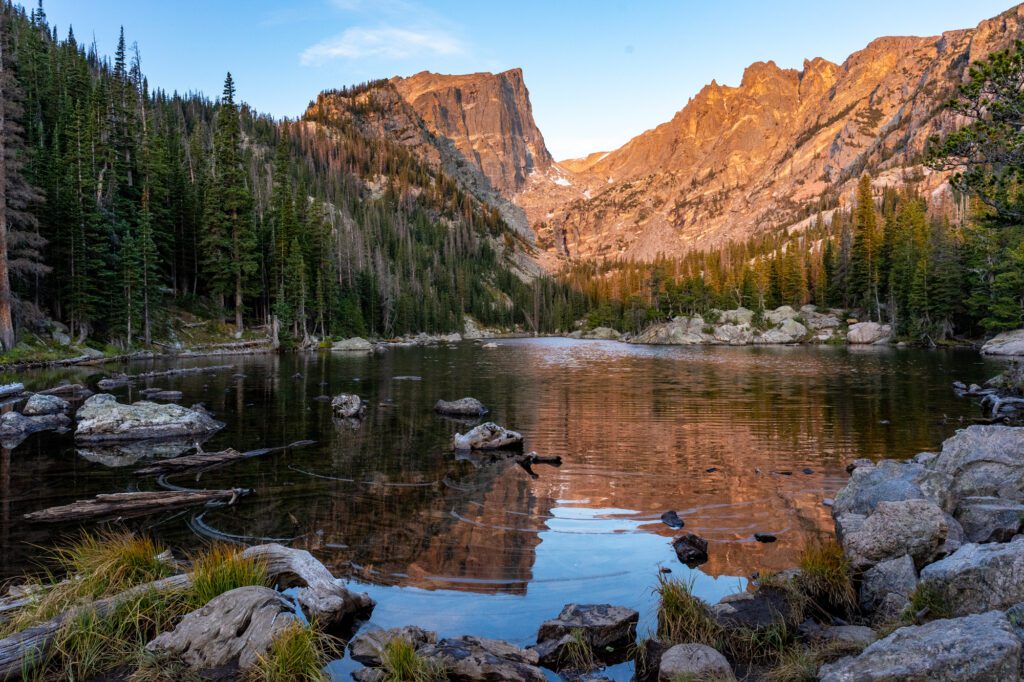
Dream Lake & Emerald Lake
- Length: 3.2 miles
- Elevation Gain: 700 ft.
- Trail Type: Out-and-back
- Difficulty: Easy / Moderate
- Trailhead Location
This is probably the best bang for your buck you’re going to get in Rocky Mountain National Park. It starts at the Bear Lake Trailhead and makes a short and steady climb, passing Nymph Lake first, which has some gorgeous Lily Pads on the surface, before arriving at the real destination: Dream Lake.
The trail up to Dream Lake is one of the most popular hiking trails in Rocky Mountain National Park, and for good reason. Photographers will love the crystal clear reflections you get at sunrise of the pink glow that lights up the peak on the far side of the lake. When we walked up just before sunrise, there were two distinct groups here. The professional photographers, who had their tripods out on and were hanging out on the left side of the trail across the little stream, and the Insta-photographers, who were taking all sorts of selfies right where the trail dumps you out onto the lake.
Take some photos – there’s a reason that the serious photographers are off to the left – and make your way along the right side of the lake to continue to your second stop on your tour-de-alpine-lakes – Emerald Lake.
In my opinion, Emerald Lake is far less photogenic than Dream Lake for the simple reason that it’s hard to get a good angle of it. Still, it’s definitely worth seeing, and when you’re done just follow the trail back the way you came back to the Bear Lake Trailhead.
You should do this hike as early as you can – sunrise would be ideal. For three reasons.
- You’ll be able to get parking, and there will be FAR less people on the trail.
- You might get to see some wildlife along the way – we saw two groups of elk on the way up and back.
- The sunrise light, which results in a pink glow on the peak across Dream Lake, is worth the price of admission. Which is an early wake up call.
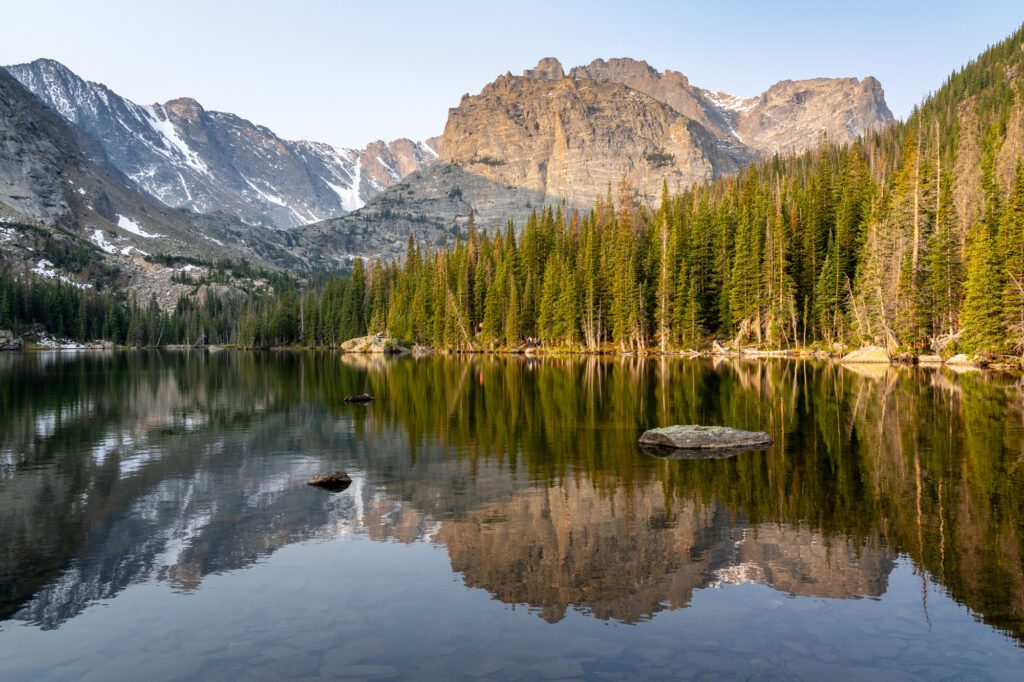
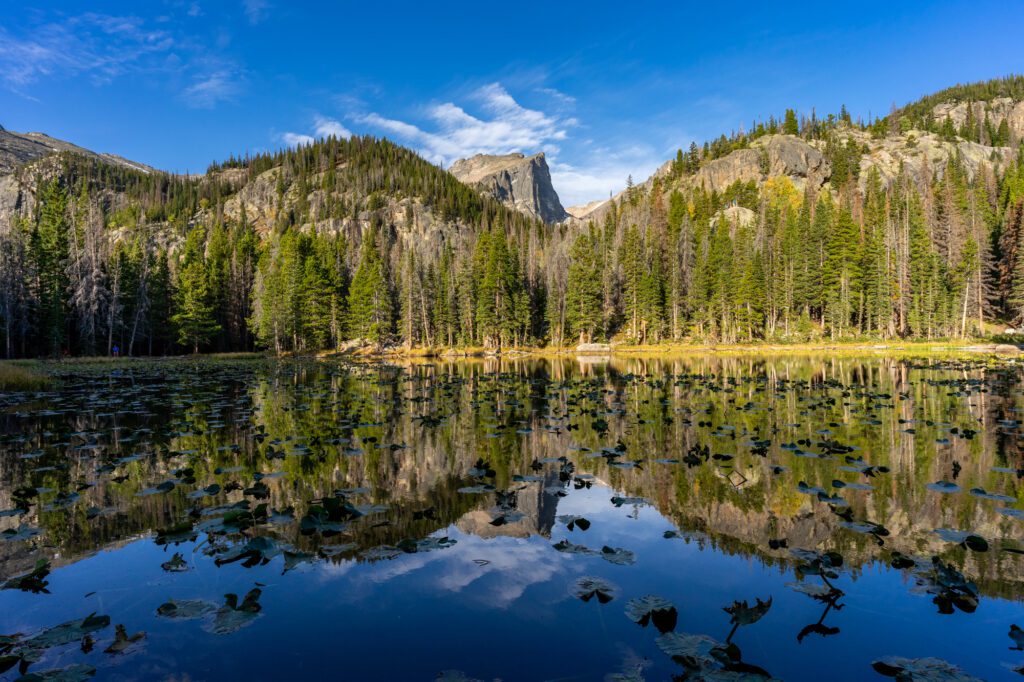
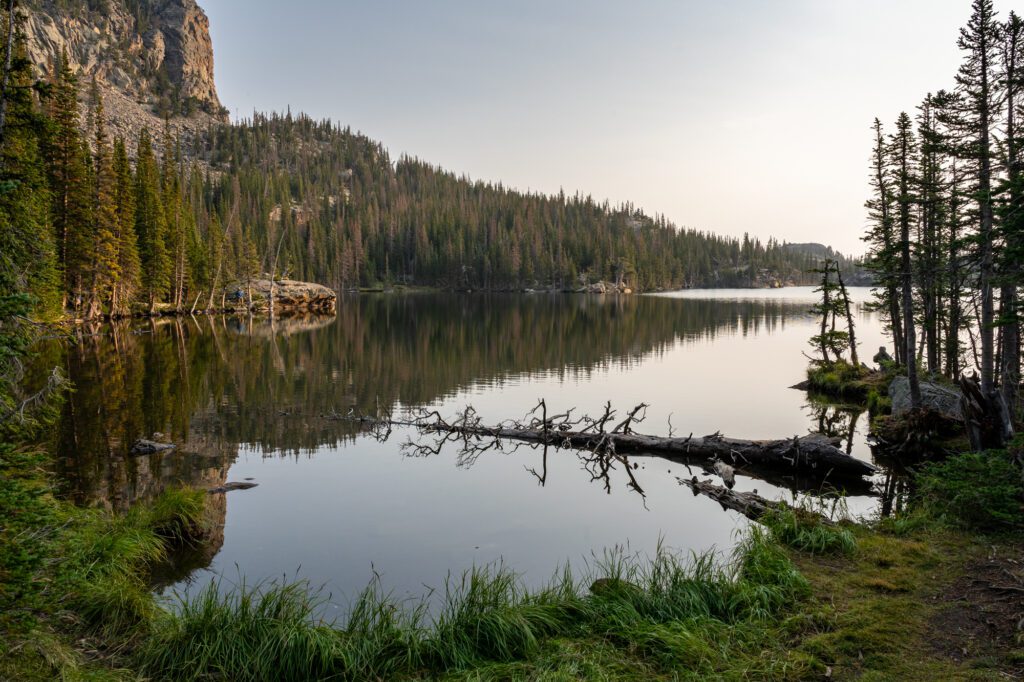
Bear Lake to Fern Lake via Lake Helene and Odessa Lake
- Length: 11 miles
- Elevation Gain: 2,000 ft.
- Trail Type: One way
- Difficulty: Hard
- Trailhead Location
While Fern Lake and Bear Lake are on either end of this one-way hiking trail, the real star of the show, in our opinion, is Odessa Lake. Although Lake Helene is a close second.
This hike is best done as a one way through-hike from the Bear Lake trailhead to the Fern Lake trailhead. Then, you’d hop on the shuttle at Fern Lake to the Bear Lake trailhead to pick up the car. Which is not what we did, and it was a mistake.
The reason? Along the way, you make a pretty steep and long descent that starts just after Lake Helene that takes you down to Odessa Lake, then further down to Fern Lake. If you plan on heading back to the Bear Lake Trailhead, it’s quite a climb.
It’s doable – in fact, it’s how we did it – but it’s not going to be super pleasant.
However you choose to do it, make sure you stop at both Lake Helene, a shallow alpine lake, and Odessa Lake, which is gorgeous, particularly early in the morning when it’s calm and you get a nice reflection of the mountains across the lake from you.
Hikes Along Highway 7 (East Side of Park)
These hikes are all accessed from Highway 7, south of Estes Park. While it might feel like you aren’t technically in the park here, you are. So you’ll still need proof of payment for a park pass even though you don’t pass by the toll booth.
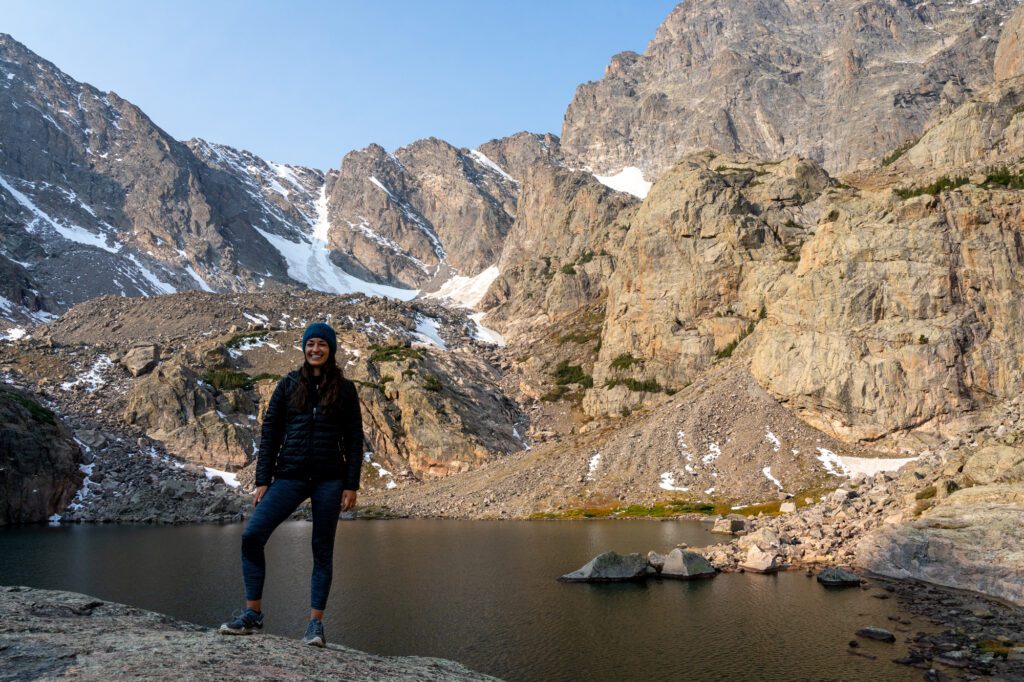
Chasm Lake
- Length: 9 miles
- Elevation Gain: 2,500 ft.
- Trail Type: Out-and-back
- Difficulty: Hard
- Trailhead Location
First of all, I was informed that it’s pronounced “Kh-asm.”
Second of all, this hike is not for the faint of heart.
You’ll spend most of the hike above 10,000 feet, ending at Chasm Lake which sits at 12,000 feet above sea level. We spent all summer routinely hiking eight to nine miles that climb 3,000 feet, and the elevation still got to us on this one and slowed our pace significantly. Make sure you have plenty of water, snacks, and sun protection, and plan on it taking 33% longer than you think it will. That being said, it’s an incredible hike. But I wouldn’t make it your first stroll in the park.
Now, onto the hike itself.
You begin climbing immediately, and it’s basically a steady climb all the way through. You’ll start on switchbacks up into the forest for several miles before emerging onto the alpine tundra, which is a landscape I haven’t really experienced before. For just over a mile, you’ll slowly wind through the barren landscape with a few patches of trees and plenty of rocks, with Longs Peak jutting up in front of you. Eventually, you’ll arrive at the junction with the Longs Peak Trail, where you’ll find a backcountry toilet if you need it (quite the view!).
Then you’ll descend into the valley past a lake on your left (nope, that’s not Chasm Lake, but it’s beautiful!).
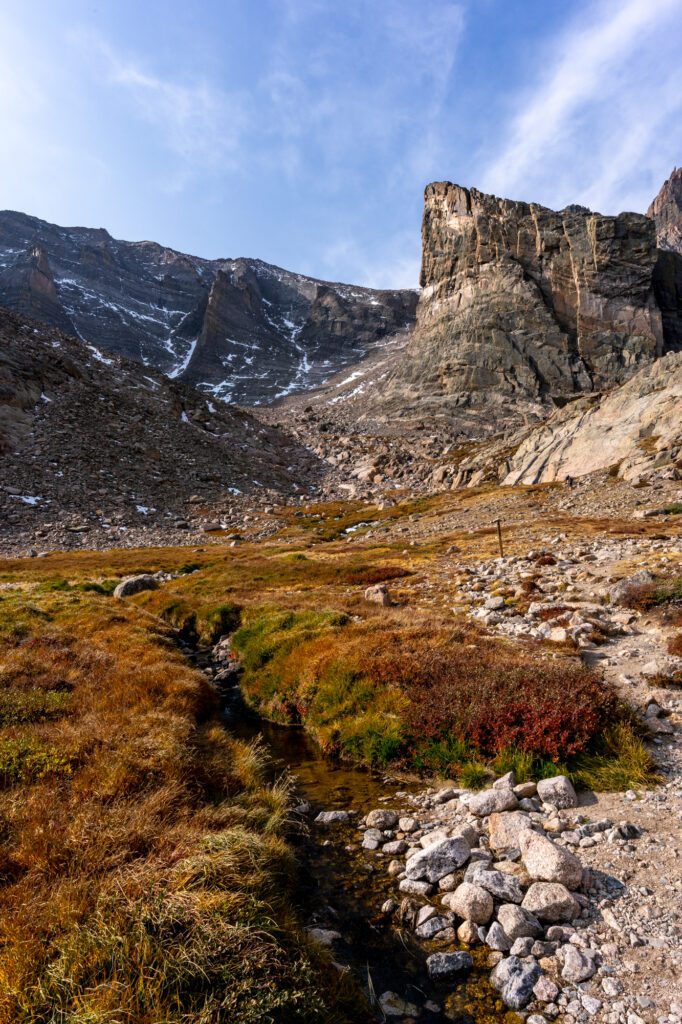
Then, embark on the final climb to the lake, which is really more of a scramble. We found different ways to go on the way up and down, so find a path that feels good for you. You’ll emerge into a basin with Chasm Lake at the base of Longs Peak, which is another 2,000 feet above the lake. It’s a spectacular example of an alpine lake in the Rocky Mountains.
Hikes on the West Side of the Park
These are two hikes on the west side of Rocky Mountain National Park that are worth a stop if you’re driving through the park.
Green Mountain Trail to Big Meadow
- Length: 3.6 miles
- Elevation Gain: 600 ft.
- Trail Type: Loop
- Difficulty: Moderate
- Trailhead Location
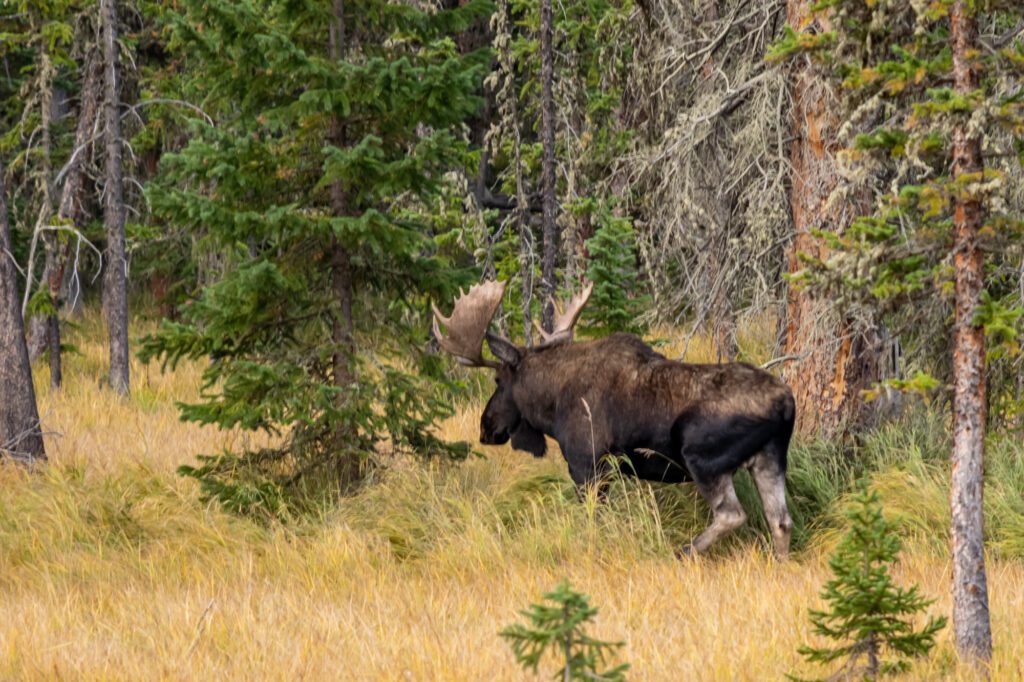
If you’re looking for a nice family-friendly stroll through the forest with a solid chance to see wildlife like elk and moose, this is it.
We saw three moose, two deer, and a coyote.
The hike climbs gently through the forest past a couple of open meadows on your right – take a look to see if you can spot animals, we saw a family of three moose at the second meadow.
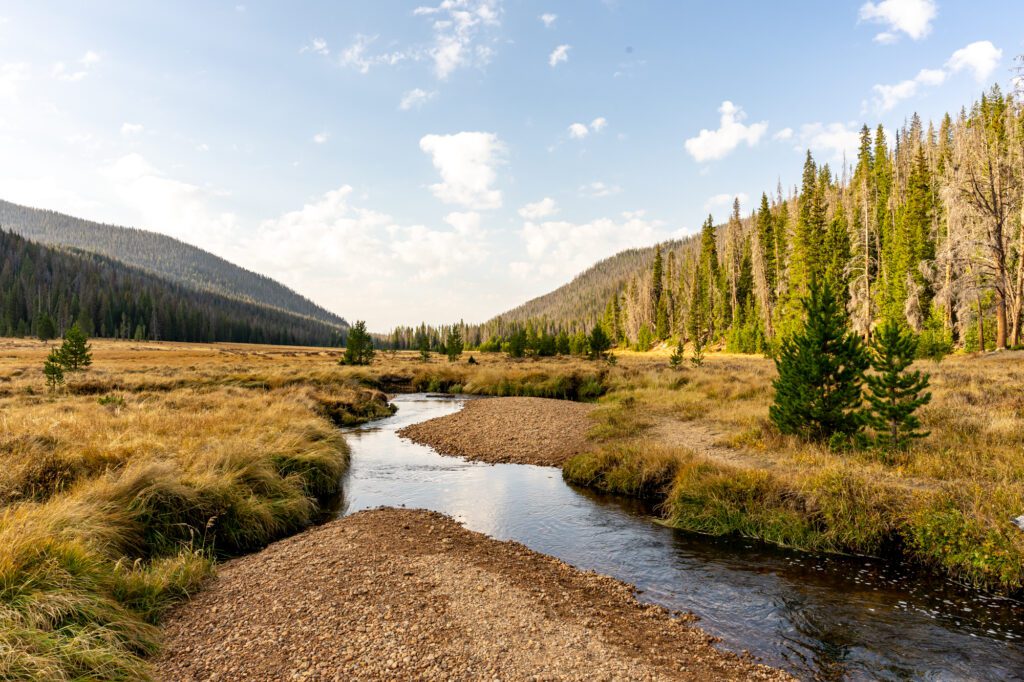
Eventually, it flattens out and opens up into Big Meadow, which is exactly what it sounds like. From there, you can continue along the west side of the meadow north or south. We wandered a bit in both directions, and liked the southern route better because of the creek that you cross.
It’s 4 miles out and back to the meadow, plus a half mile or so of wandering along the perimeter of the meadow.
Mount Ida
- Length: 9.5 miles
- Elevation Gain: 2,400 ft.
- Trail Type: Out-and-back
- Difficulty: Moderate
- Trailhead Location
Unfortunately, we’re going to have to come back for this hike, because we ran out of time on our last trip, opting for Chasm Lake instead.
This hike leaves from the south shore of Poudre Lake along Highway 34 just after you descend down into the valley on the west side of the park. That means you will only be able to access this trail from the more popular east side of the park during the late spring and summer. You could do it by entering from Grand Lake, but expect snow between November and May.
This hike STARTS at 10,500 feet above sea level, so while the mileage might seem not that bad, the elevation is almost certainly going to make it feel ten times harder. You’ll finish at a hair under 13,000 feet, which is very, very high. Make sure you are acclimated to the elevation – do not do this hike on your first day if you’re coming from somewhere around sea level.
The plus side of hiking at that elevation is that you’ll be above the treeline for most of the hike with spectacular views of the surrounding mountain peaks, and the valley below. As you climb, you’ll notice the terrain changing to a more rocky alpine tundra, which is a key feature of the Rocky Mountains.
Since you’ll be above the treeline, if you do this hike in the summer, make sure you’re done by noon to avoid lightning storms that happen pretty much every day in the peak summer months.
Tips for Visiting Rocky Mountain National Park
Entry Fees – it’s going to cost you at least $20 to get into the park for a day, and $30 for entry that is good for 7 days (note: in 2020, 7 day passes were unavailable, and the cost of a single day entry was $25. TBD whether that continues into 2021). If you’re planning on visiting multiple National Parks in the next 12 months, you’ll want an America the Beautiful Pass, which costs $80 and pays off with 3 visits to National Parks, National Forests, or National Recreation Areas. Get it here.
The altitude is no joke – you’ll be at 8,000 feet in most parts of the park, which means if you do a long hike you’ll get up above 10,000 feet. We came from Yellowstone and Grand Teton, where we were at around 7,000 feet, and the altitude hit us like a ton of bricks on the first day. Make sure to take it easy on your first day (maybe don’t do Longs Peak on your first day at elevation) and stay hydrated.
The sun is also no joke – for some reason, it feels like the sun is stronger in the mountains. Maybe that extra few thousand feet closer to the sun really does make a difference? Always bring sun protection like sunscreen (We love Sun Bum!) and a sun hat.
Parking can be a nightmare – in mid-September, the parking lots at Glacier Gorge was full by just after 6am, and the Bear Lake parking lot was full by 7am. We think the reason is there are at least 4-5 highly trafficked hiking trails that leave from each of those trailheads. Luckily, there’s a handy park and ride with tons of parking and a shuttle system that will whisk you away to the trailheads along Bear Lake Road. There’s even a hiker shuttle that will bring you in from the Estes Park Visitor Center so you don’t even have to worry about parking in the park at all.
East versus West Side of the Park – the eastern half of the park is connected to the less-visited west side by Alpine Ridge Road, which closes for the winter. It’s worth a drive on any Rocky Mountain National Park itinerary, because it takes you up above the treeline into the alpine tundra with fantastic views of the surrounding Rocky Mountains. The west side can be accessed by that drive, or via Grand Lake. It’s worth a visit – do the Green Mountain Trail to Big Meadow for some good chances to see wildlife, including moose.
What to Pack for a Day Hike in Rocky Mountain National Park
At a high level, I’d say there are three things that you should aim to pack for your trip to the Rocky Mountains.
- First is plenty of water. As a general rule, carry half a liter of water for every hour you’ll be hiking at the very least. We each have two of these Platypus water bottles that are seriously the perfect water bottle for hiking. Once you’re done with the water, just fold it or roll it and stuff it inside your backpack. They weigh almost nothing too! Don’t get the one with the clip. As great as it sounds, we’ve found through trial and error that those are much more likely to leak. I returned two in a row because within two or three hiking trips they had exploded all over my backpack.
- Second would be sturdy hiking footwear, preferably waterproof. You’ll be climbing and descending a lot (it’s the Rocky Mountains, after all!) and walking on uneven ground. Even bouldering and route-finding, depending on which hikes you choose. If it’s not your first rodeo, you probably already have solid hiking footwear. If it’s not, I’d recommend either the budget-friendly and super stylish Columbia Newton Ridge (a great first hiking boot), or the Brooks Cascadia (basically a sturdier version of a running shoe). If you can, go for the waterproof version.
- Last would be layer, but most importantly a waterproof rain jacket.
- You’ll also want a sturdy hiking backpack with waist straps if you’re planning on doing some of the longer hikes below – I love this Deuter pack, Alysha loves her Osprey Tempest 20.
Check out our guide to what to pack for a day hike for more things to being along on your adventure in Rocky Mountain National Park.
When to Visit Rocky Mountain National Park
Peak season for exploring the park is summer – mid-June to Labor Day. In the summer, you’ll find relatively warm temperatures in the 70’s and 80’s during the day, with cooler nights that come with the elevation (~8,000 ft above sea level). However, you’ll also find daily thunderstorms above the treeline, which means you should plan on starting hikes early and being off the trail by noon. Or at the very least, on the way down. Or at the very least, on the way down. That being said, you’re in the mountains. Weather can be unpredictable, as the snow storm in September showed us in 2020.
Shoulder seasons, mid-May to June and Labor Day to the first week of October, are a great time to be inside the park. Weather will be more variable, but there will be a whole lot less people.
We have been to Rocky Mountain National Park twice now, spending about a week total inside the park exploring the best hikes and wildlife spots, and neither has been “peak season.” However, both May, when the days are a little cooler but everything is GREEN, and September, when temperatures are still warm and snow is mostly gone from all trails, were very pleasant times to be in the park.
Plus, the elk rut is in September, and we spent multiple evenings at Moraine Park watching hundreds of elk mill about with the males bugling their little hearts out competing for the attention of the females. And by “little,” I mean “that animal is enormous and could kill me in about three seconds flat.”
How to Get to Rocky Mountain National Park
If you’re coming from out of state and planning on flying, the easiest way to get to Rocky Mountain National Park is to fly into Denver International Airport, rent a car, and drive.
From Denver, it’s just over an hour and a half (68 miles) to the Beaver Meadows Visitor Center, which is the most visited portion of the park. The shortest route is to get yourself to Highway 36 and follow it north through Boulder and Estes Park.
From Boulder, it’s going to be just over an hour (40 miles) to the Beaver Meadows Visitor Center near Estes Park. You’ll basically follow Highway 36 all the way there.
This route along Highway 36 can get packed on summer weekends, so check Google Maps before you leave to prepare for a longer journey if there’s traffic.
That’s all we’ve got! Hopefully you have a good sense for the best hikes in Rocky Mountain National Park, along with some of the logistics that you’re going to need to know to actually get onto the trails in the park.
If you liked this guide, don’t miss our Rocky Mountain National Park itinerary to help you plan out your time.
We’ve also got hiking guides and National Park travel guides to some of our favorite adventures around the world. Here are some of our favorites.
The Best Hikes in Olympic National Park
How to Plan a Perfect Olympic National Park Itinerary
An Incredible Utah National Parks Road Trip
A 4 Day Yellowstone National Park Itinerary for First Timers
I’ve been lucky enough to do all of these hikes and if you’re in the Glacier Gorge area I’d choose Black lake over Sky Pond. That side of the park can get very crowded but the two times I’ve been to Black Lake it was much more private. The mountains surrounding Sky Pond are unreal. Both of amazing hikes but Black Lake is absolutely my favorite in Rocky Mountain.
Good to know! We’re headed back to Colorado this year and Black Lake is on our agenda if we make it to RMNP. Thanks for sharing your perspective – we appreciate it!