How to Plan a 2 Day North Cascades National Park Itinerary
While we love our adopted home state of Oregon and places like Mount Rainier and Olympic National Park, if you ask us to name our favorite hiking destination in the Pacific Northwest (the west coast?), both of our minds go straight to North Cascades National Park (and the Mount Baker Wilderness, too).
Why do we love the North Cascades so much? Two main reasons.
First, we’re mountain people through-and-through (versus beach people).
We’re all about the high elevation hikes, verdant wildflower meadows, and shimmering alpine lakes (though preferably we get to them early in the morning before they’re shimmering with the intense sun).
And the North Cascades are basically paradise if you’re into those things.
Second, there are far, far fewer people visiting the North Cascades because they are WAY harder to get to than, say, Mount Rainier.
That’s not to say you’re going to find perfect solitude, but it is true that you won’t need to make reservations for entry permits or fight 100 people to the death for the last parking spot.
Long story short, we love the North Cascades, and think it’s a great option for a quick mountain getaway.
In this guide, we’re going to go through all the information we think you need to plan an incredible 2 day North Cascades National Park itinerary, with ideas on what to do with more time at the end of the guide.
In this guide, here’s what we’re going to cover:
- A few important logistics to keep in mind as you’re planning, like the different passes you might need and seasonal considerations to know before you go
- Our favorite things to do in North Cascades National Park and how to put it all together to form an itinerary to make the most of your time
- Ideas on what to do with more or less time in the North Cascades
Throughout the guide, we’ll share our favorite hikes, viewpoints, waterfalls, and more based on our trips to help you plan your North Cascades adventure.
Sound good to you? Let’s get into it.
Disclaimer: Some of the links in this post, like hotel links, are affiliate links, meaning at no additional cost to you, we make a little bit of money if you click through and book. That being said, we would never recommend something to you that we don’t stand behind 100%.
A Quick North Cascades Geography Overview
Before we get into this guide, we think it’s important to talk about the park’s geography.
While the area on the northern side of Mount Baker (along Highway 542 just south of the Canadian border) is TECHNICALLY the North Cascades, it is NOT part of North Cascades National Park.
I’ve seen some guides mentioning hikes and viewpoints along that stretch as part of the park, and it’s worth noting that it’s a full three hour drive to get from the visitor center in Newhalem out to the trailheads for those hikes.
For what it’s worth, we really love that part of Washington, but it definitely doesn’t make sense to include any of those trails here.
For the purposes of this guide, we are talking about things that are along the Highway 20 corridor, which is the North Cascades Highway and goes all the way from I-5 over Washington Pass (and the Cascades) into eastern Washington.
Here’s a map of the park so you can see what we mean (Highway 20 is the red line).

Every single hike, viewpoint, and point of interest that we mention in this guide is off of that thoroughfare (some are further west than the map shows), though it is worth noting that some trailheads require driving along potholed forest roads that can add a significant amount of drive time.
The other geography note that we want to add is that most of our favorite hikes in the park, like Maple Pass and Blue Lake, are on the eastern side of the park near Washington Pass (the high point of the road).
The implication here is mostly around where you choose to stay.
There really aren’t very many places to stay near the park, ESPECIALLY on the western side of the park and ESPECIALLY if you’re not up for camping.
If you’re camping, you want to either camp at Colonial Creek (the best campground inside the park), which is 35 minutes from the Maple Pass Trailhead, or outside the park at one of the Forest Service campgrounds on the eastern side of Washington Pass.
Lone Fir Campground and Klipchuck Campground are both good options, and they’re 20-25 minutes from those trailheads.
Plus, they’re FAR less competitive than the campgrounds inside the park, though they’re first-come, first-served, so they are harder to plan for if you’re coming from out of the area.
If it were us, we’d actually choose to stay outside the park on the eastern edge for the improved access to those trailheads.
Which we do every fall when we come to this part of the world when it’s too cold to camp comfortably.
If you’re not up for camping, staying outside the eastern boundary of the park is BY FAR the best option in terms of both quantity and quality of places to stay.
The charming town of Winthrop in the eastern foothills of the Cascades has the best combination of places to stay, amenities, and proximity to the park.
More on this in the “where to stay” section below, but we want to hammer this point home early and often, because it’s counterintuitive.
How Much Time Do You Need?
North Cascades National Park – at least the main chunk of it that lines Highway 20 – is not a big park.
It’s downright small in comparison to Mount Rainier and Olympic, the other two national parks in Washington State.
The biggest challenge you’re going to run into with the North Cascades – aside from the maddeningly short season (we’ll get to that) – is going to be the fact that it’s not super accessible from any of Washington’s main cities, including Seattle.
From Seattle, it’s somewhere between a two and a two and a half hour drive on a good day (assuming you’re not hitting traffic, which is a bold assumption given Seattle’s traffic).
So, while we think you could see a good chunk of the park with one day – the highlights, at least – we wouldn’t recommend it.
Given the time investment it takes to get to the park, it probably makes sense to spend two full days (and ideally two full nights) in the park at a minimum.
Which means it’s a perfect candidate for a mountain-filled weekend getaway from Seattle (or a stop on a broader Washington road trip).
That will give you plenty of time to see the main viewpoints, get a couple of hikes in (including a longer hike like Maple Pass, if you’re up for it), and do it at a relatively leisurely pace.
We’ve written this itinerary for two days, with ideas for how to extend your trip in a section below the main itinerary.
We would NOT recommend North Cascades National Park as a day trip, if you can avoid it.
Where to Stay near the Park
This is the big question you’ll need to answer because it’s a little complicated. Here’s why.
North Cascades National Park straddles Highway 20, which cuts through the Cascades from rainy western Washington into drier eastern Washington.
That highway is closed for roughly six months of the year (usually November through May – check the status here).
The most convenient place to stay if you’re coming from the western part of the state (the Seattle area) would be on the western side of the park, near Marblemount or Rockport.
The only issue is that there are basically zero places to stay, and staying any further west means you’re well over an hour from the main trailheads in the park (which are concentrated around Washington Pass, the high point in the road, for the most part).
Which leads us to our recommendation here. The way we see it, you essentially only have two options here.
The first, and the best, is to camp inside the park.
This is what we usually do, and we have found that Colonial Creek Campground is the best option inside the park in terms of location and amenities.
Newhalem Campground is at the western edge of the park, next to the visitor center, and the sites are packed in tight and it’s a good distance from Washington Pass and many of our favorite hikes.
However, we also recognize that not everyone is up for camping, especially if you’re coming from out of the area.
Plus, if you’re planning a trip during the fall (larch season!), you’ll find that those two campgrounds close about a month before the larches really start to pop, which leaves you with even fewer options.
If you’re not camping inside the park, our recommendation is to stay on the eastern side of the park around Winthrop.
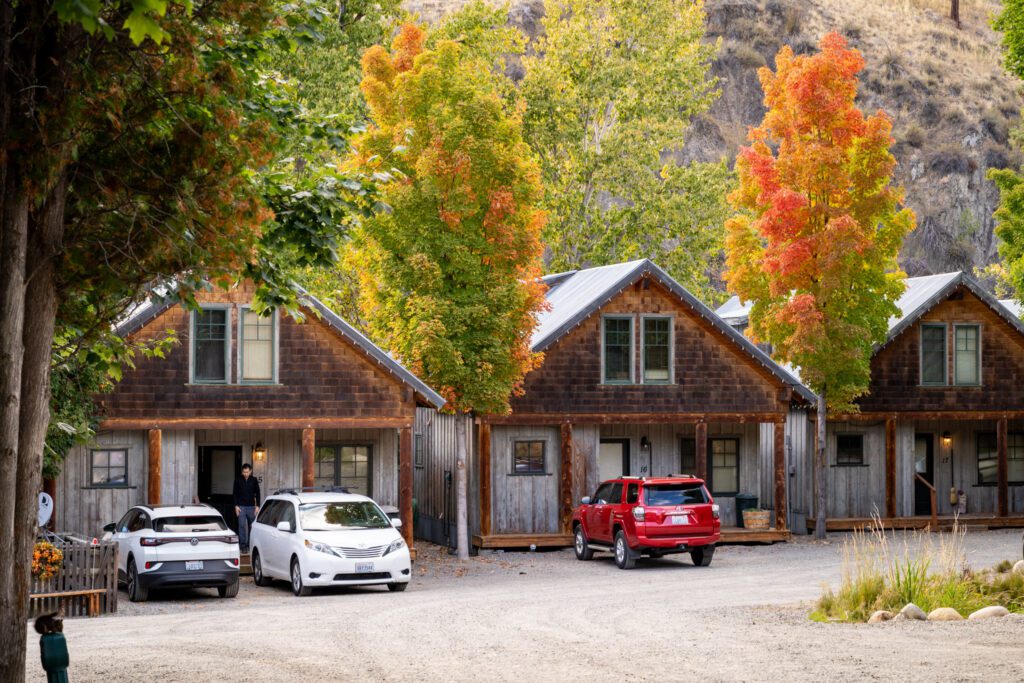
We stayed in Winthrop on our latest visit (a fall visit to see some fall color, though Matt sprained his ankle a week before the trip leaving him unable to hike).
We stayed at the River’s Edge Resort, which has quiet cabins on the river a quick walk from the main stretch in Winthrop, and we’d recommend it.
It’s also worth noting that there are several Forest Service campgrounds – namely Lone Fir Campground and Klipchuck Campground – just outside the eastern end of the park.
Both are first-come, first-served, though, which makes planning a little tough. They’re also open through late October (unlike the campgrounds inside the park), but it will be COLD.
The Best Time to Visit North Cascades National Park
Our two favorite hiking destinations in Washington State – Mount Baker Highway and North Cascades National Park – are also the two places with the shortest hiking seasons in the state.
If you’re visiting North Cascades National Park and you want to hike, the best time to visit is mid-July through mid-September. This is when the trails are (largely) snow-free, the roads are open, and the campgrounds are open.
Years ago, we made the mistake of showing up in late June expecting to hit the trail, and found out that we were several weeks early.
We learned that lesson so that you don’t have to!
July and August are the two months where you’re going to get the warmest weather and the highest chance of blue skies.
However, it’s also (predictably) the busiest time to be in the park, and trailheads will fill up by 8am on weekend mornings in the summer (sometimes even earlier based on Alysha’s recent experience).
September can also be nice – you mostly get the summer weather with a little more unpredictability sprinkled in – but it’s worth keeping in mind that the campgrounds inside the park close sometime in the middle of the month, which makes visiting a little bit harder.
October is another peak season for the park for exactly one reason: the famous golden larches that light up the high elevation terrain for a few short weeks.
However, it’s worth noting that this time of year comes with significant tradeoffs.
It will be cold (it was 38 degrees F and snowing when we were at Washington Pass on this latest trip).
It will be unpredictable in terms of weather (you’re far more likely to see rain and clouds).
The campgrounds are closed.
And the larches are hard to time right.
As that fall color starts to fade, usually by the third week of October, the weather transitions to winter, when it’s cold, rainy, and sometimes even snowy.
Then the road closes, and we’re back to waiting for next year’s summer season all over again
A Perfect 2 Day North Cascades National Park Itinerary
Now that we’ve got all those logistics covered, on to the best part – the actual itinerary!
We’ve outlined a two day itinerary for you below, with options to turn it into a one day version or a slightly longer version below the main itinerary.
Day 1: A Scenic Drive and Afternoon Hike
On your first day, get an overview of the park by driving from one end of it to the other along Highway 20 (also known as the North Cascades Scenic Highway, which lives up to its name).
Then, tackle a relatively easy afternoon hike to get your first taste of the North Cascades.
A Scenic Drive on Highway 20
Assuming you’re coming from Western Washington (the Seattle area), this drive will take you from the western boundary of the park (where you should stop at the Visitor Center for information on trail and road closures) all the way to the highest point of the road before it descends into eastern Washington.
This is one of the more scenic drives in Washington, and there are plenty of places to get out, stretch your legs, and hike a little bit along the way.
The scenic portion of the drive starts at the North Cascades Visitor Center in Marblemount (here on Google Maps) and ends at the Washington Pass Overlook (here on Google Maps).
Here are the stops we think you should make along the way (we have you skipping a few hikes, which we’ll come back to later in the itinerary).
Trail of the Cedars: Your first opportunity to stretch your legs, this is a very short stroll through a forest with good interpretive signage that serves as a nice introduction to the flora and fauna in the Cascades. Plus, a fun suspension bridge!
Park in the town of Newhalem, and you can do the next stop without moving your car. More trail information here.
Ladder Creek Falls: A nice waterfall at the end of a short hike that crosses the Skagit River, passes the Gorge Powerhouse, and arrives at a waterfall after just a quarter of a mile or so. More trail information here.
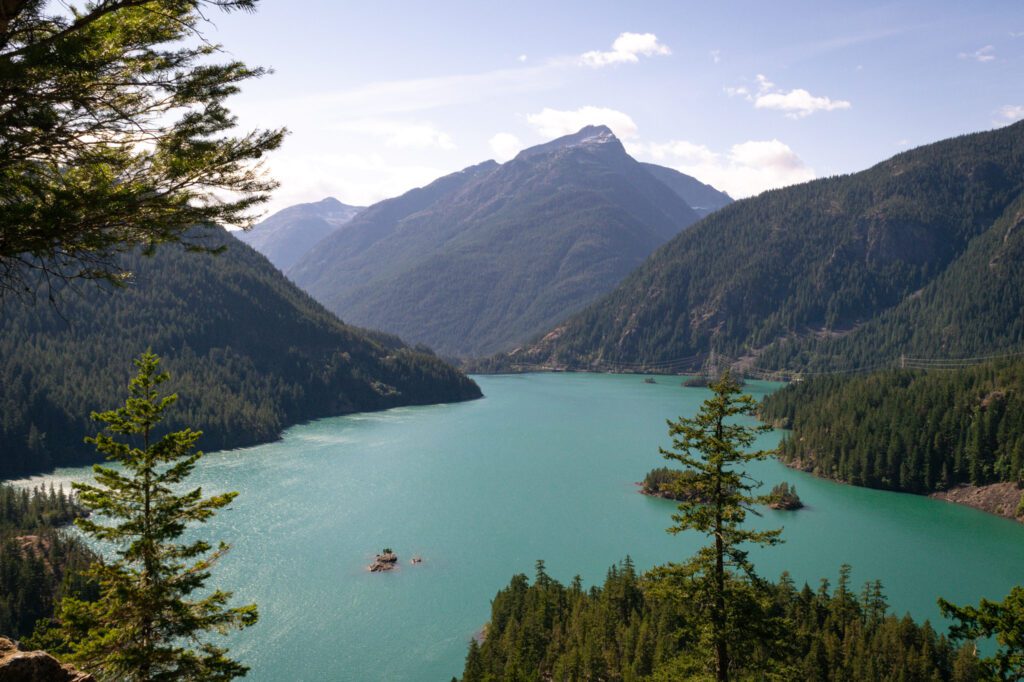
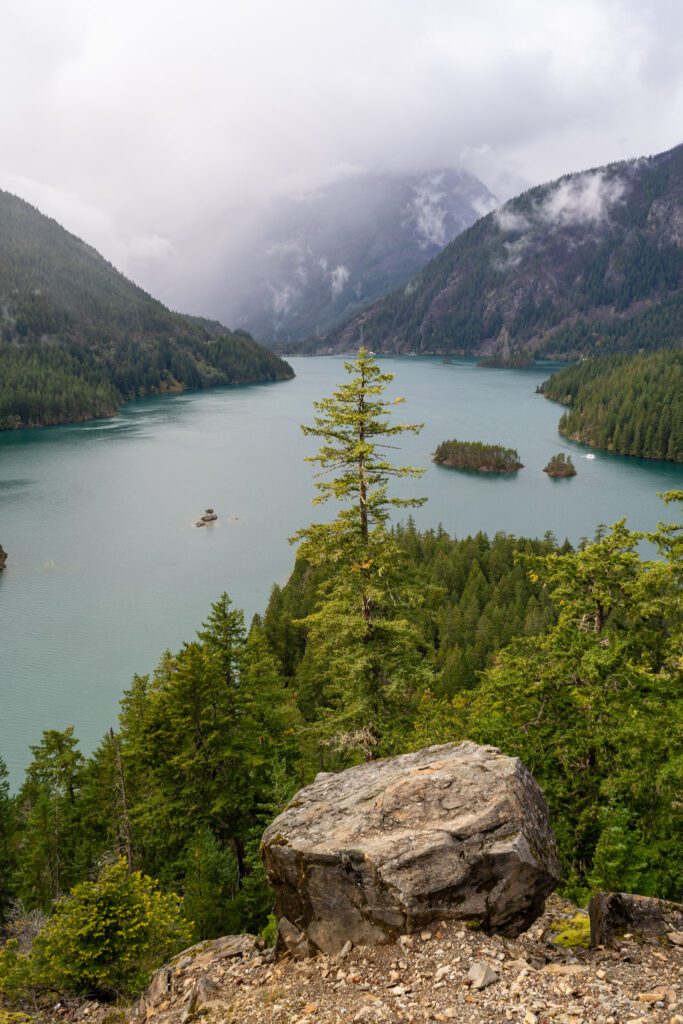
Diablo Lake Overlook: About 20 minutes (12 miles) east, you’ll run into Diablo Lake.
First, you’ll drive over a bridge, which doesn’t really give you an accurate picture of the natural beauty that’s in store for you when you drive up the hill immediately after the bridge and pull into the overlook on the left.
Here, you’re treated to a spectacular view of Diablo Lake’s turquoise water, backed by the rocky peaks of the Cascades.
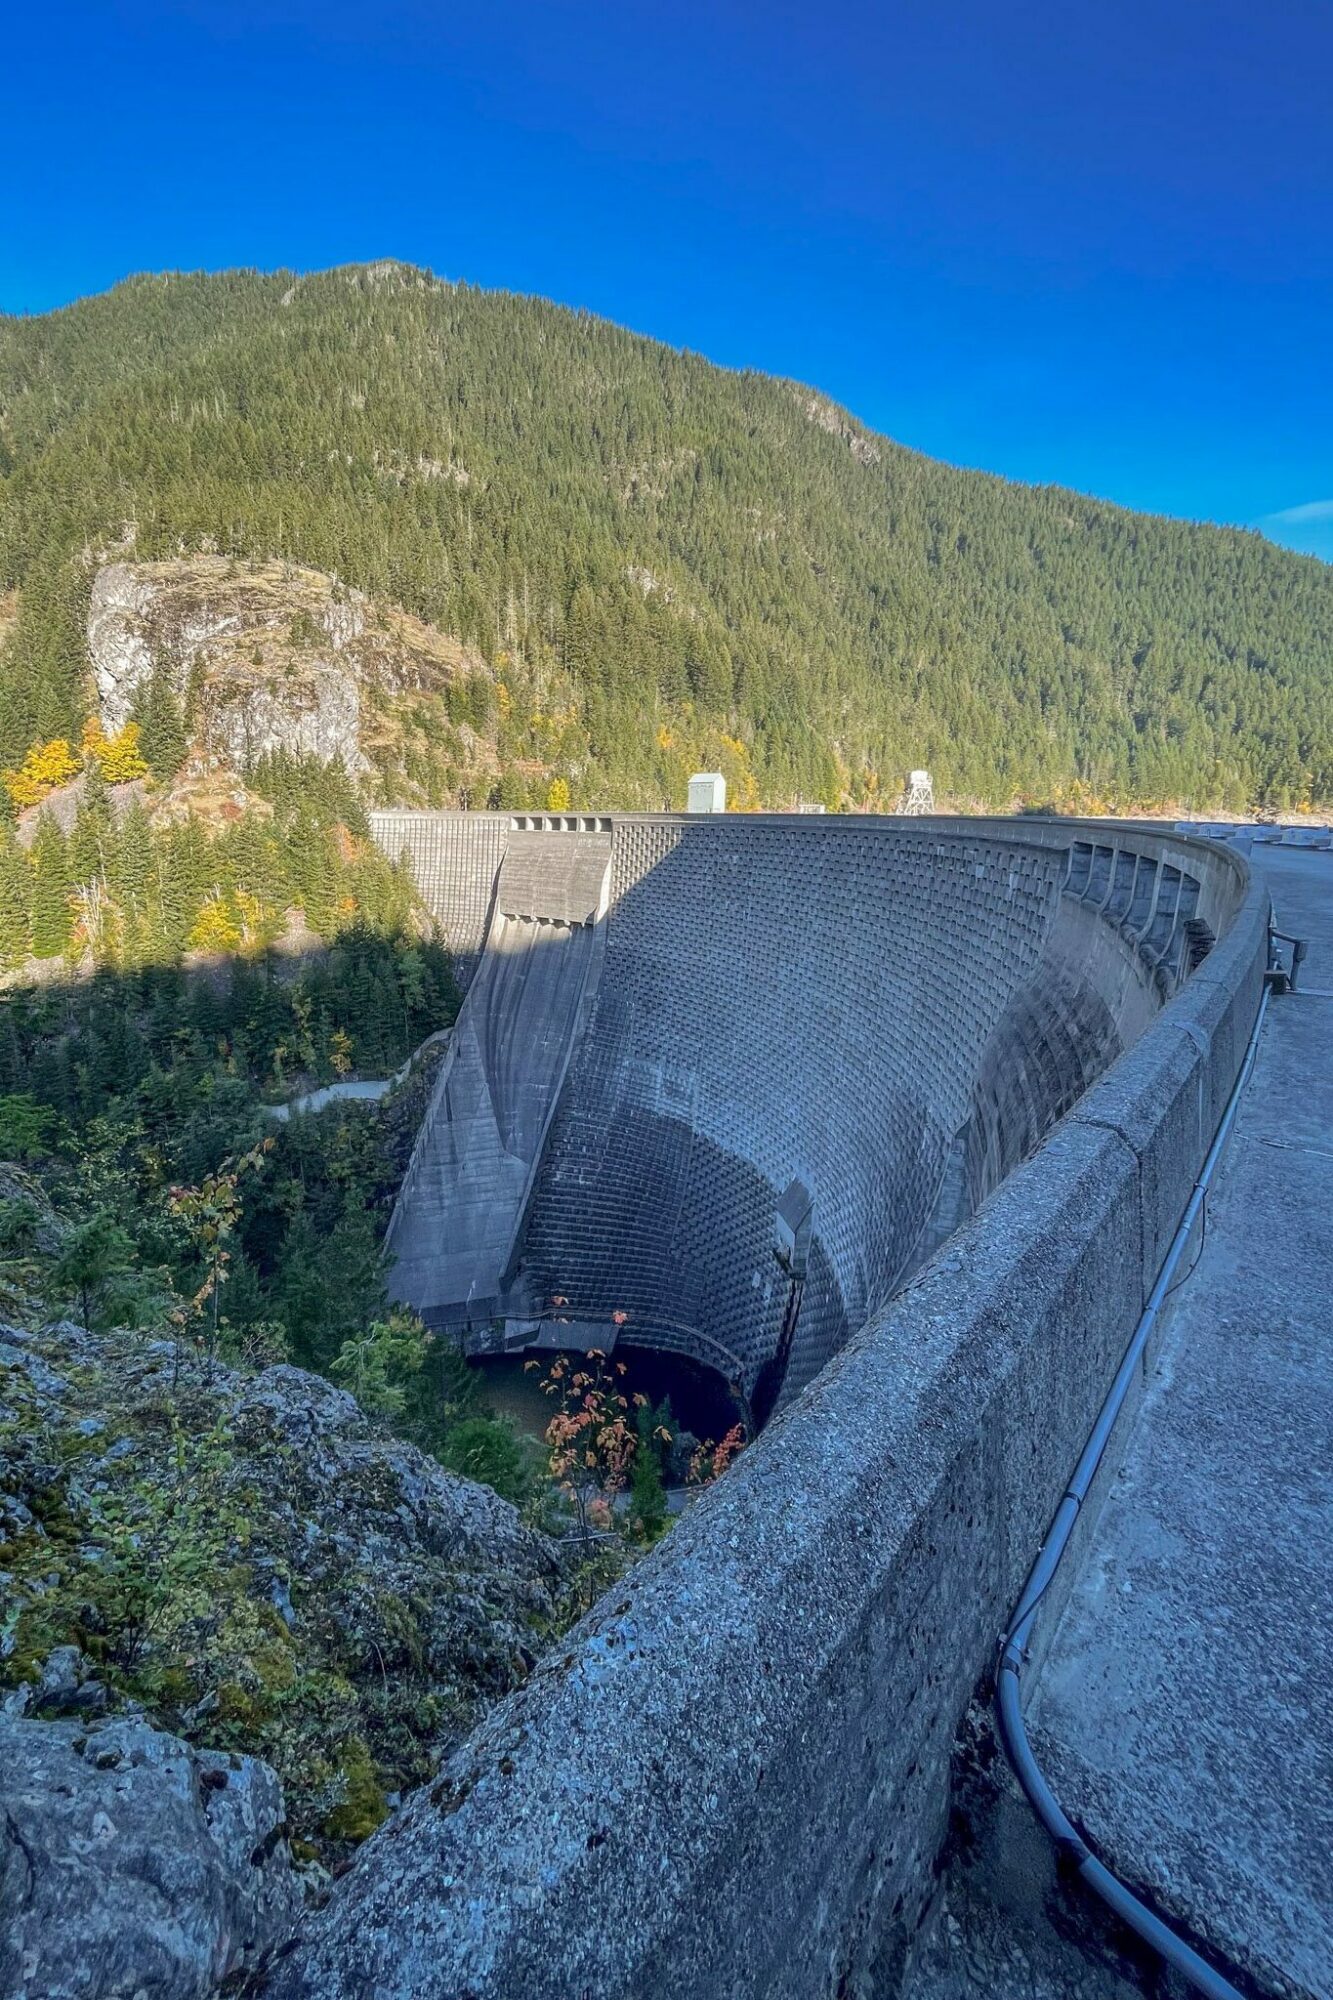
The Ross Dam Trail: Ross Lake, along with Diablo Lake, is the other huge lake in the park.
There’s a cool resort in the middle of the lake – the Ross Lake Resort – that you can stay at overnight. It’s only accessible by water taxi.
There’s also a short hiking trail that takes you down closer to the water and allows access to walking across Ross Dam, which is worth doing.
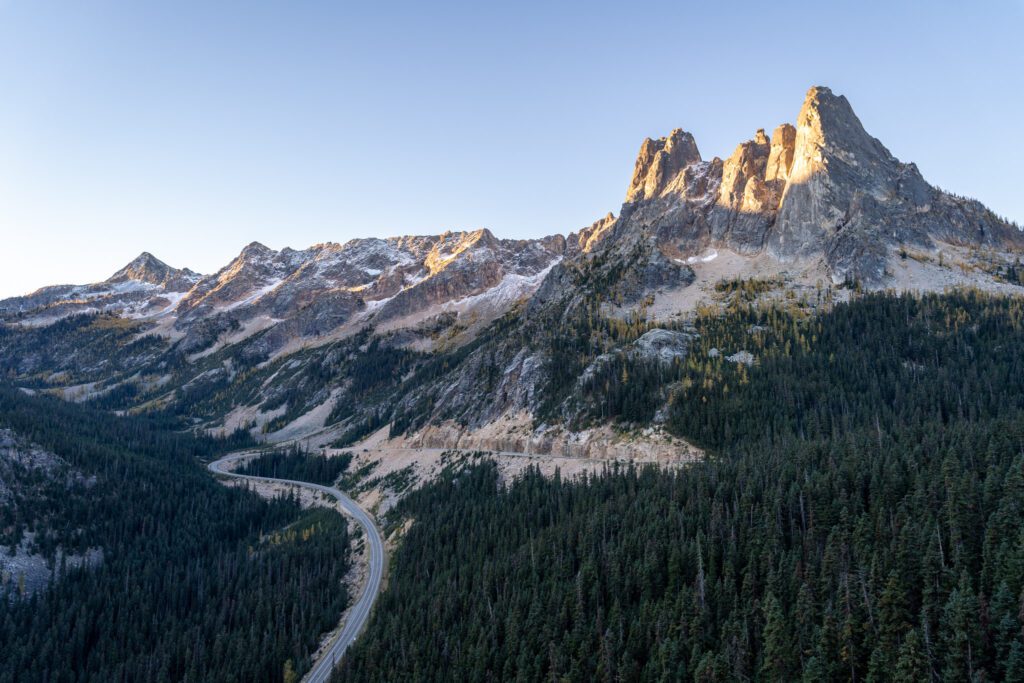
Washington Pass Overlook: Your final stop marks the top of the pass, and the border between the mild, temperate climate of western Washington and the harsher, drier climate in eastern Washington.
It’s about 35 minutes from Ross Dam to the top of the pass, and it’s a windy, scenic drive.
Head out on the short little loop trail, which takes you out to the best view from the road in the park (we think).
An Afternoon Hike: Choose Your Own Adventure
After your scenic drive and picnic lunch, hop out of the car and tackle a relatively easy hike for your first taste of what really makes the North Cascades special.
We have two hike options for you that are both within 5-10 minutes of Washington Pass.
One is VERY popular, and the other is much less trafficked (and Alysha would say even more spectacular after she did both of them on our latest trip).
Option 1: The Blue Lake Trail
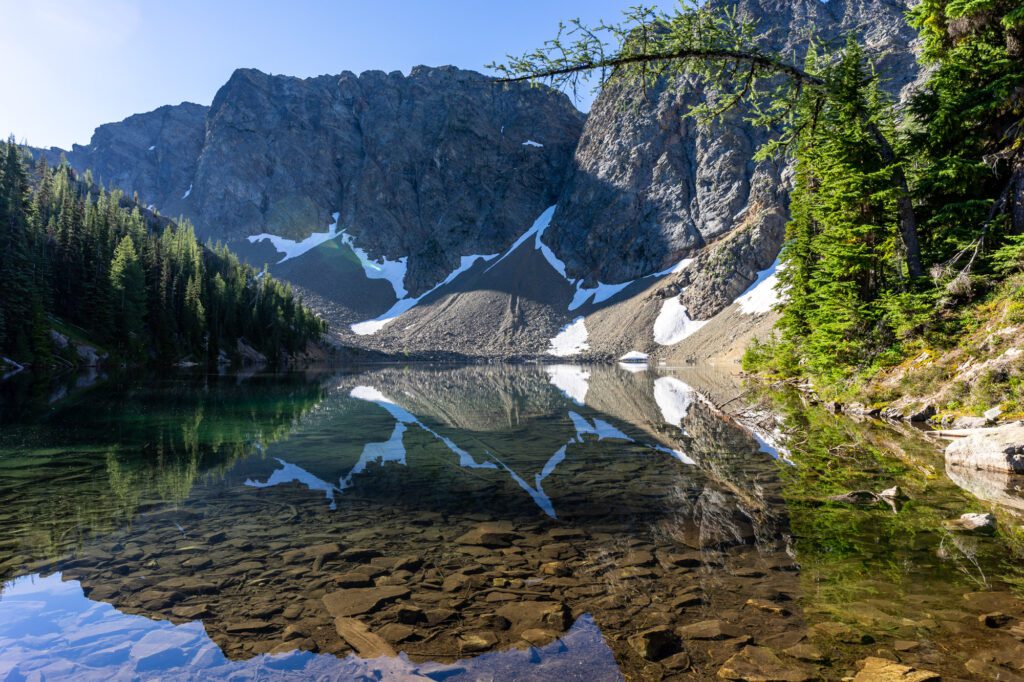
This is the hike that is EXTREMELY popular, and for good reason. The lake at the end, which sits at the base of a towering rock wall and shimmers with a blue-green glow when the sun hits it, is beautiful.
The best part is the accessibility. This is a relatively easy hike, and the reward-to-effort ratio is nearly unmatched in the entire state.
It’s a steady, forested (which means not as much sun exposure) climb up to the lake, and we’ve seen plenty of kids on the trail (remember to pull over to let faster hikers pass!).
It’s a hike that is on nearly everyone’s “best hikes” list (including ours, to be fair, which you can read here), and the result is a very crowded experience from the parking lot to the lake.
First of all, the parking lot is tiny, and you’ll need to be here around 8am at the latest (in the summer) to get a spot.
Otherwise, you’re parking along the road (which is what Alysha had to do despite arriving only slightly after 8am).
Second of all, do not expect any solitude when you hit the trail. It’s popular (for good reason, we’d argue), and is one of the most heavily trafficked trails in the park.
Not interested in sharing the trail with your hiking companions and hundreds of your new closest friends? We have an alternative for you!
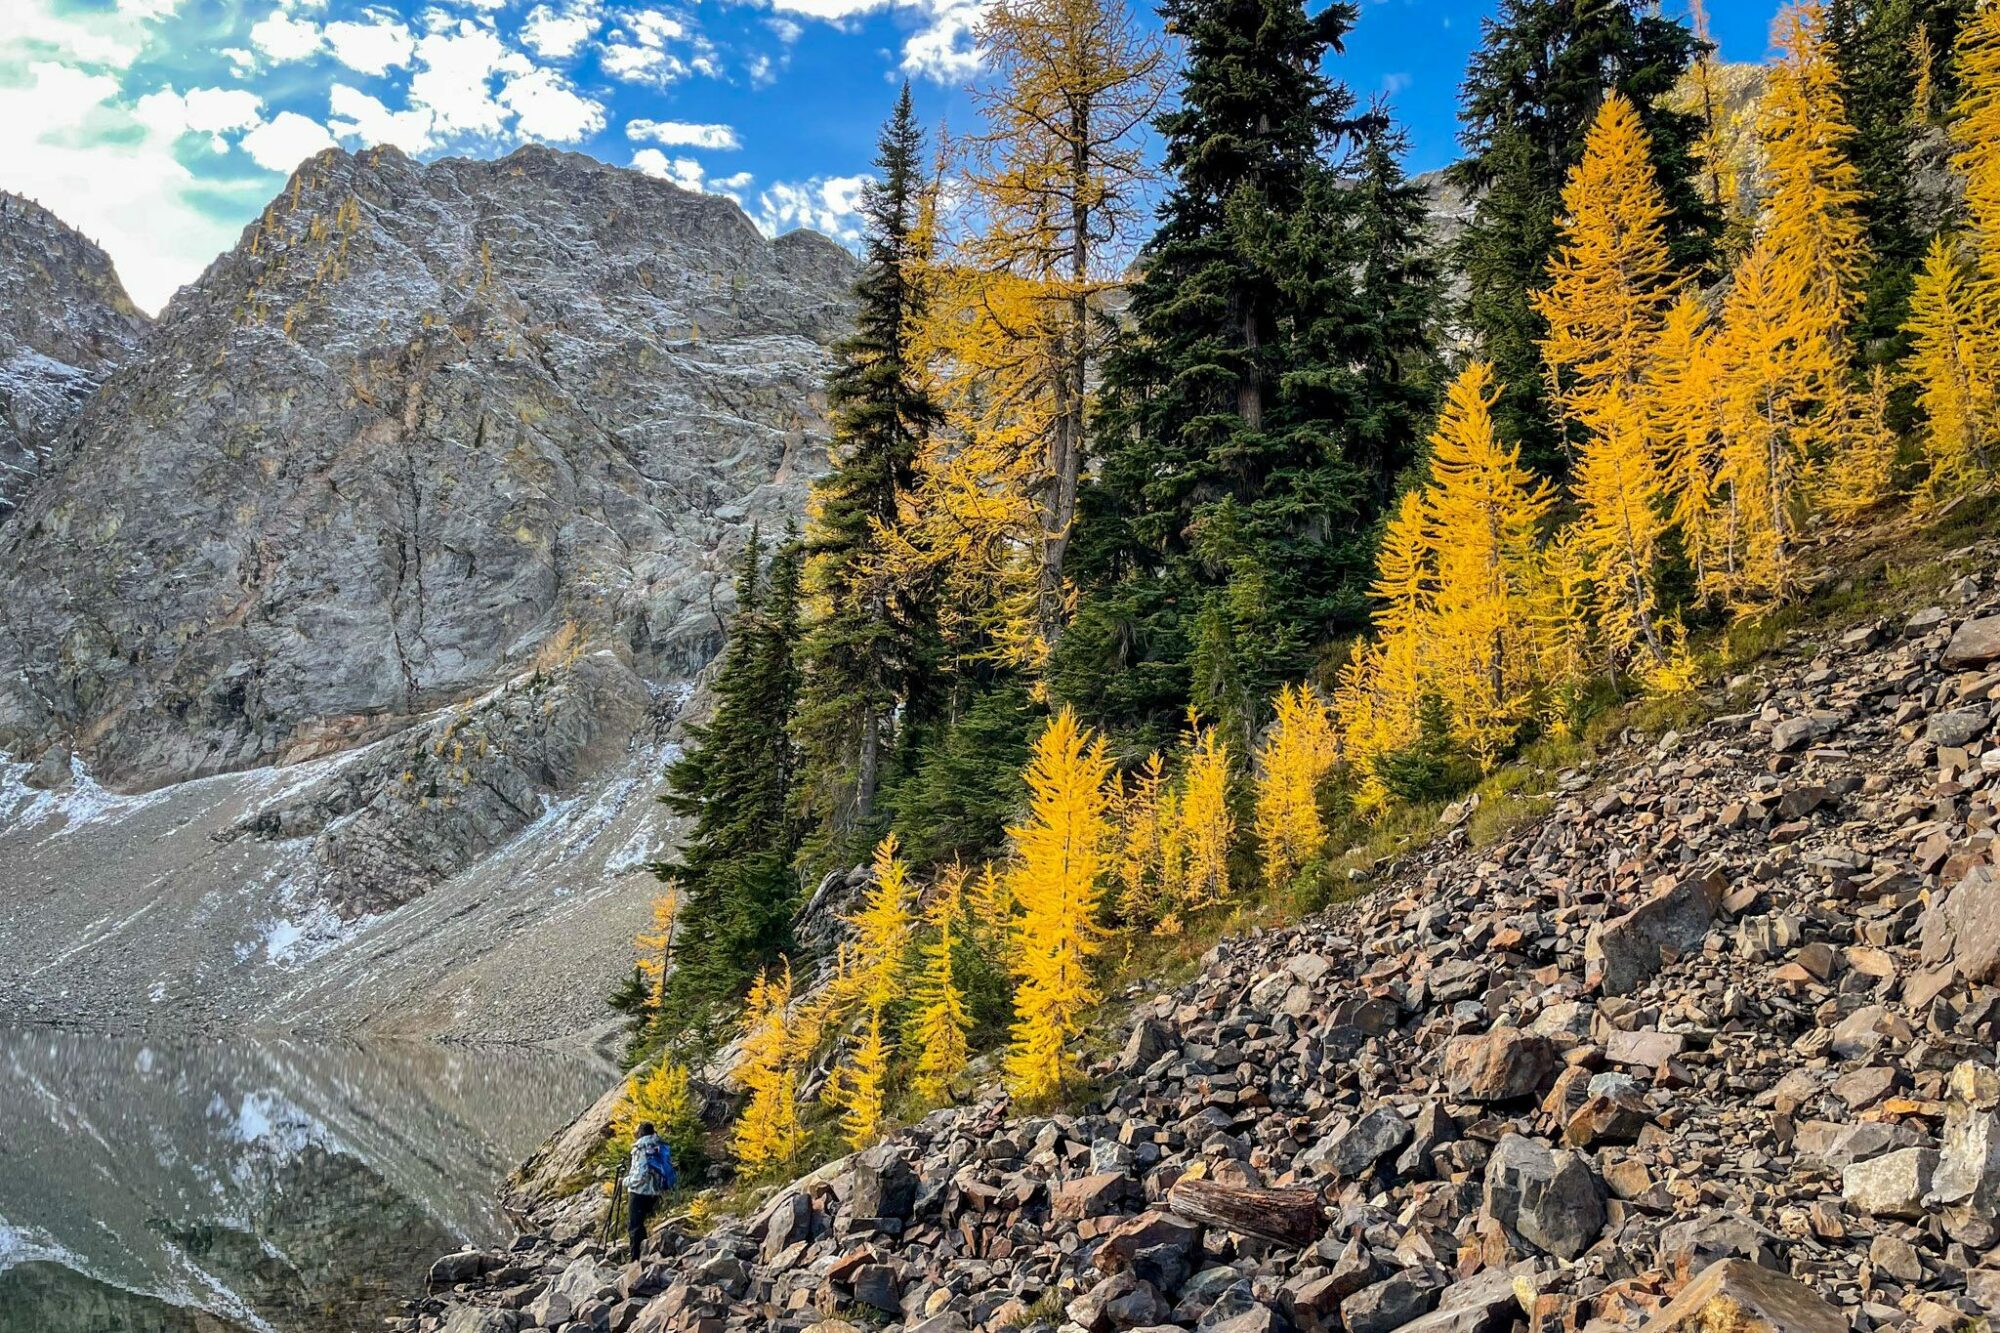
Option 2: The Cutthroat Lake Trail
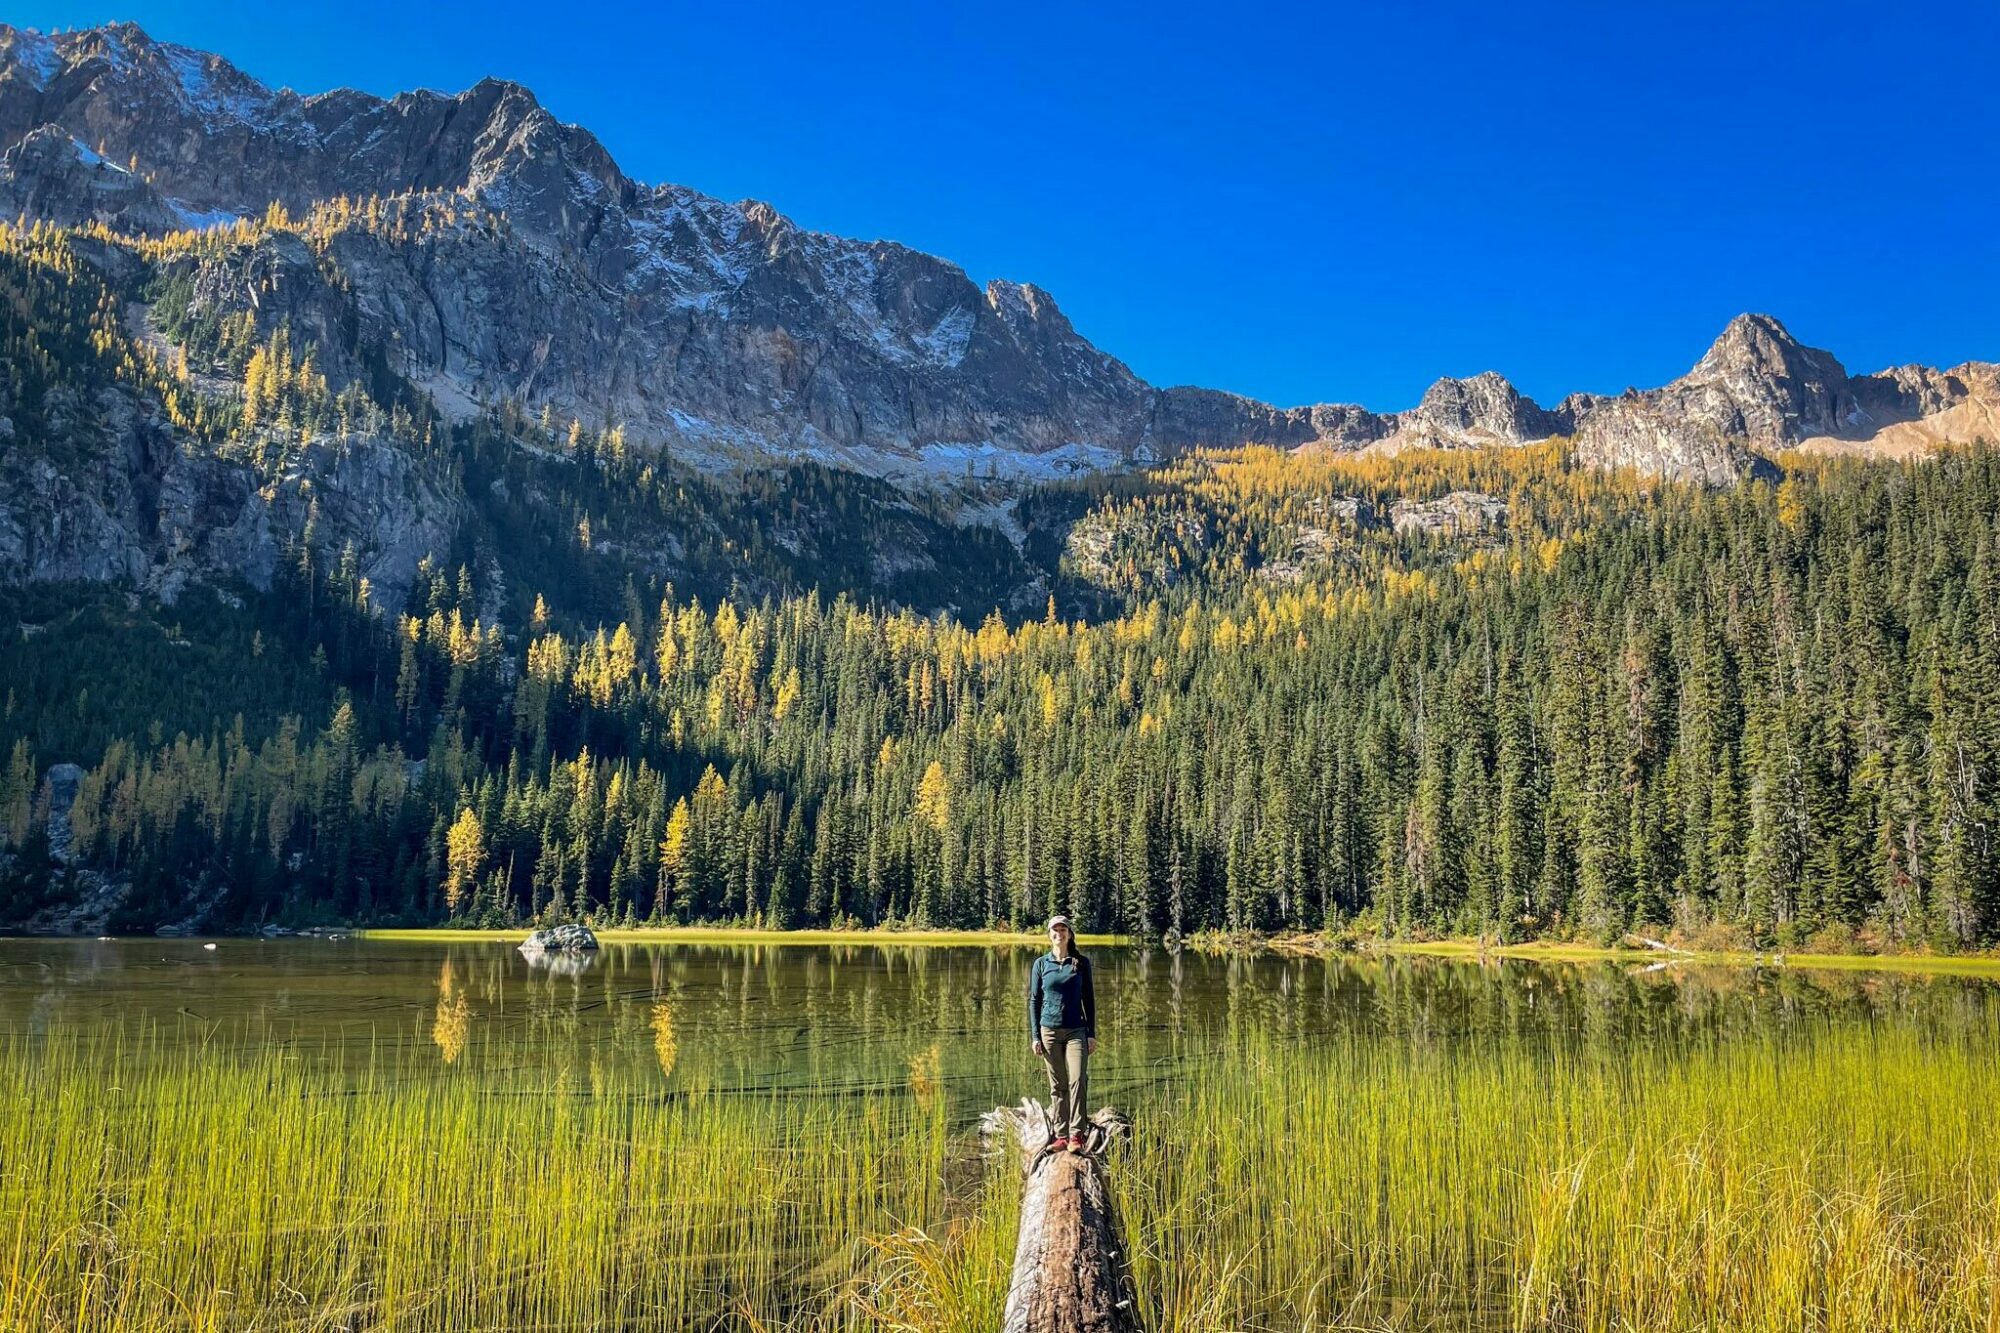
This is a hike that surprised us in terms of the payoff and relatively low traffic on the trail.
The Cutthroat Pass Trail – which is the hike we actually wanted to do on this latest trip but skipped because Matt had an ankle injury and was in a boot – runs from the same area as the Heather-Maple Pass Trail (don’t worry, we’ll get there!), following the PCT up to Cutthroat Pass before branching off to the east and heading down to a trailhead on the other side of Washington Pass.
The eastern portion of this trail, which runs from the Cutthroat Trailhead (here on Google Maps) out to Cutthroat Lake and back, is actually a better bang-for-your-buck than the Blue Lake Trail.
Especially when you consider the level of traffic on the trail.
The reason is simple. The payoff is similar – both lakes are gorgeous – but the journey to get there is part of the beauty for the hike to Cutthroat Lake.
You’re hiking through a valley with rocky peaks (and golden larches in the fall!) rather than through the forest with limited views (which is what you’re doing on the way to Blue Lake).
If you’re looking for a similar payoff and similar effort with a fraction of the crowds, we can’t recommend this hike highly enough (and if you want a slightly harder hike, you can do the hike following the PCT to Cutthroat Pass, which we were very excited about before Matt hurt himself).
Day 2: A Morning Hike and The Eastern Foothills
On your second day, tackle a longer hike before strolling out to Rainy Lake and driving east over Washington Pass, dropping into the eastern foothills of the Cascades to explore Winthrop for the afternoon and evening.
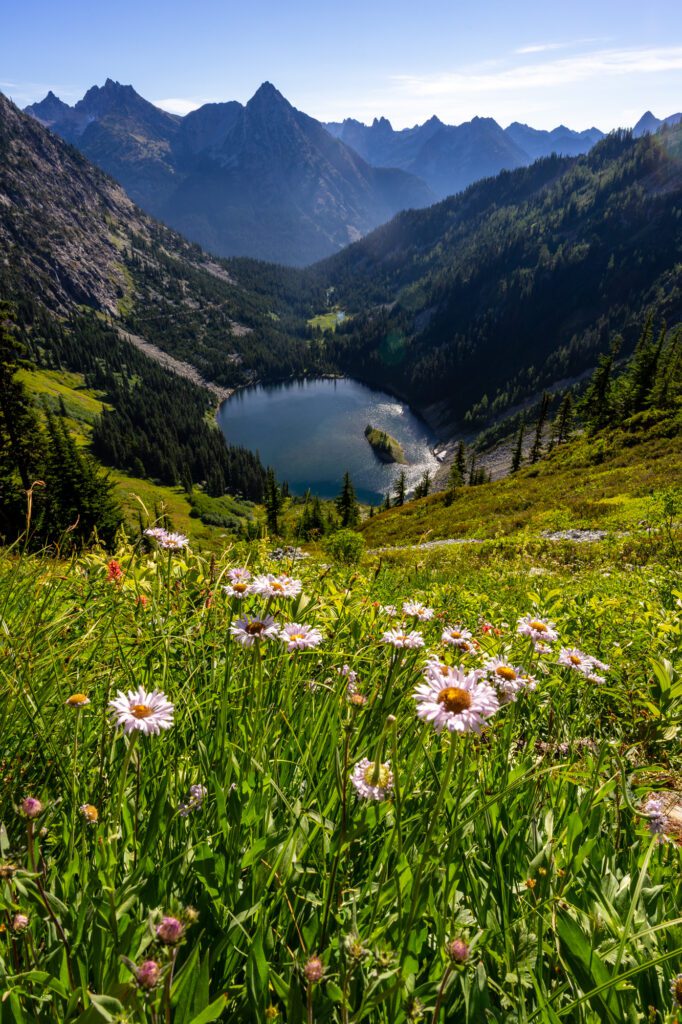
Hike the Heather-Maple Pass Loop (Our Favorite)
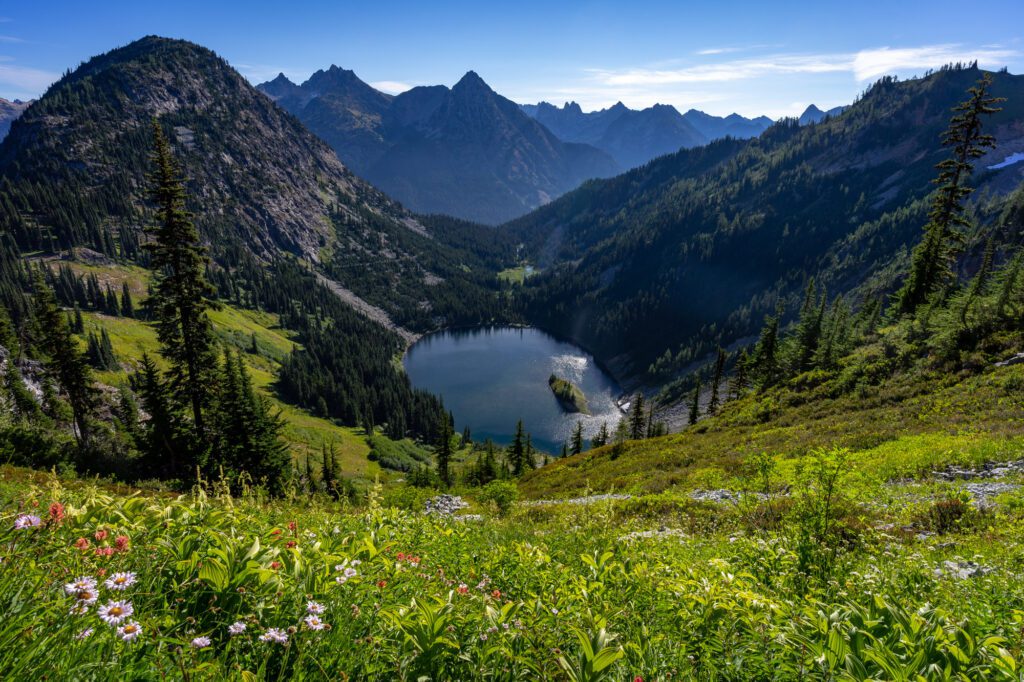
This is at the top of the list of the best bang-for-your-buck hikes in the Pacific Northwest.
It has it all – a nice alpine lake, a climb to the top of a mountain pass for a good workout, and stunning views almost the entire way through the hike.
There’s a reason we have it in our top three hikes in Washington State.
The downside is that the secret is certainly out, and this is also one of the most popular hikes in the state from about mid-July through mid-October (when it’s golden larch season).
The parking lot will be full if you show up after about 8am (sometimes earlier on the weekends), and it will be a busy trail.
The trailhead is along Highway 20, about five miles west of Washington Pass (here on Google Maps).
The parking lot is relatively large, but it will be full by about 8:00 am on summer and fall weekends, when hikers from all over the state flock here for the wildflowers or the fall color, depending on the time of year.
We’d hike counter clockwise, which has you doing a more gradual ascent, with the steepest part of the trail done on the descent from the pass.
However, if you have bad knees, we might recommend going clockwise so that you’re going up the steep part, because it is brutal on the downhill, even for us.
If you choose to go the same direction we did, you’ll start with a series of switchbacks, climbing away from the parking lot.
It’s a gradual climb to the top of the pass, and you’ll gain about 2,000 feet of elevation in 3.5 miles – just over 500 feet per mile. Not too hard, but plenty of climbing to get a good workout in.
There’s a detour you can take to the shore of Lake Ann, the aforementioned alpine lake, that you should definitely take.
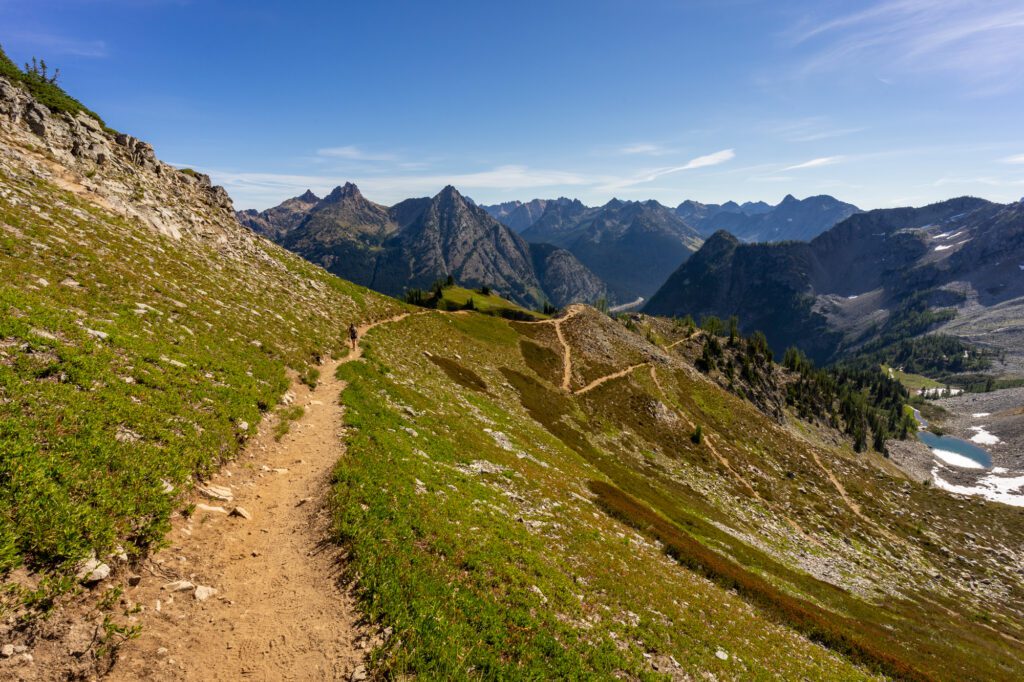
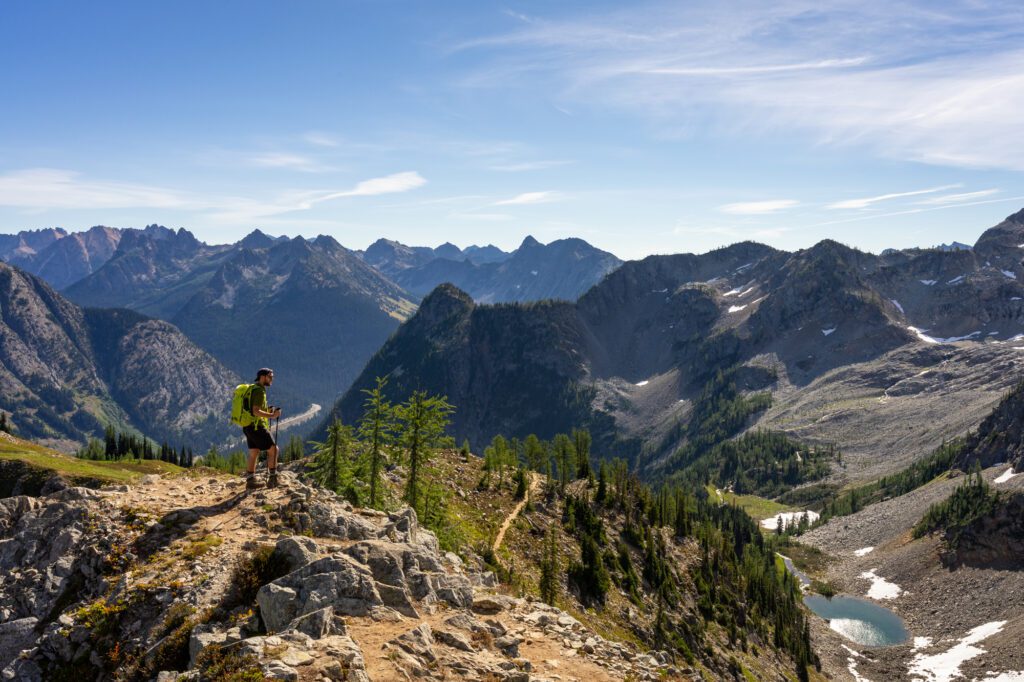
When you reach the pass, you’ll have panoramic views over Lake Ann and the surrounding rocky peaks of the North Cascades.
The views to the east are particularly impressive from the summit, with the trail winding its way through the landscape, with the Cascade Range in the distance.
The trail is still covered in snow into July most years, so take that into account as you’re planning your trip.
For more information, we have an entire guide dedicated to hiking the Heather-Maple Pass Loop with more information like how to get to the trailhead, what to expect, and a mini trail report.
Looking for a slightly easier hike to start your day?
Our recommendation would be to do either the hike you didn’t do on afternoon 1 (Blue Lake or Cutthroat Lake) or the hike out to Thunder Knob, which is a relatively easy one that leaves from a trailhead across from Colonial Creek Campground right on the shore of Diablo Lake.
If you’re looking for a less-trafficked hike with a similar payoff, look at the Cutthroat Pass Trail via the PCT that we mentioned above.
A Stroll Out to Rainy Lake
Rainy Lake is a paved, accessible trail that takes you out to yet another beautiful lake.
It’s a nice add-on to the Heather-Maple Pass Loop because the trail (if you do it in the direction we recommend) pops out part of the way out to the lake.
If you haven’t already devoured your picnic lunch at the top of the pass, mosey on over to Rainy Lake and have it on the shore of the lake.
The trail from the Rainy Pass Trailhead (which is the same trailhead as the one you use for the Heather-Maple Pass hike) is flat, paved, and two miles long (roundtrip).
This works best if you choose Maple Pass as your morning hike, mostly because of the aforementioned parking disaster, which can lead to cars parked on the side of the highway for a half mile on either side of the trailhead. Parking might be an issue if you decide on a different hike.
Exploring Winthrop
For the afternoon and evening, we’d highly recommend a drive down into the eastern foothills of the Cascades towards the three towns of Mazama, Winthrop, and Twisp.
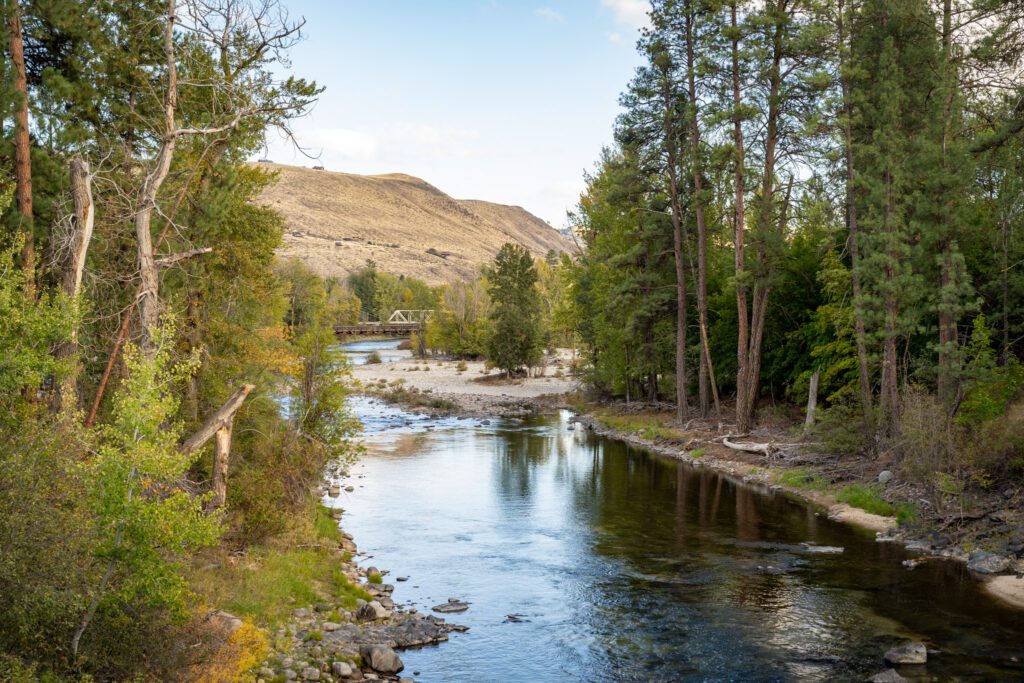
From the top of Washington Pass down into Winthrop, it will take you about 30 minutes, give or take, and you’ll drop down into a beautiful valley, following the Methow River (which the valley is named after) as it snakes its way through a very different landscape than you’ll find on the other side of the park.
When people think of Washington, they think of the evergreen trees and rain that are major features of the western third (ish) of the state, but as you cross the Cascades, the weather changes fairly abruptly and it gets a lot more arid.
You get a whole different set of landscapes, flora, and fauna (this is also true in Oregon), which we always find fascinating.
Along the way, you’ll pass open pastures (with plenty of horses) backed by the rolling hills of the Cascade foothills.
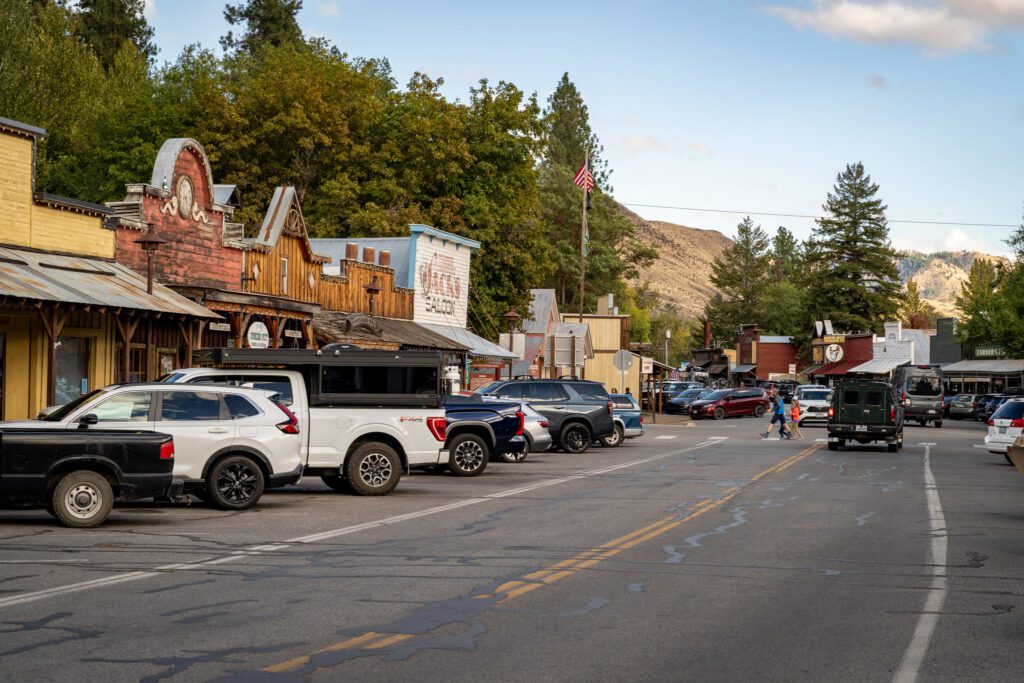
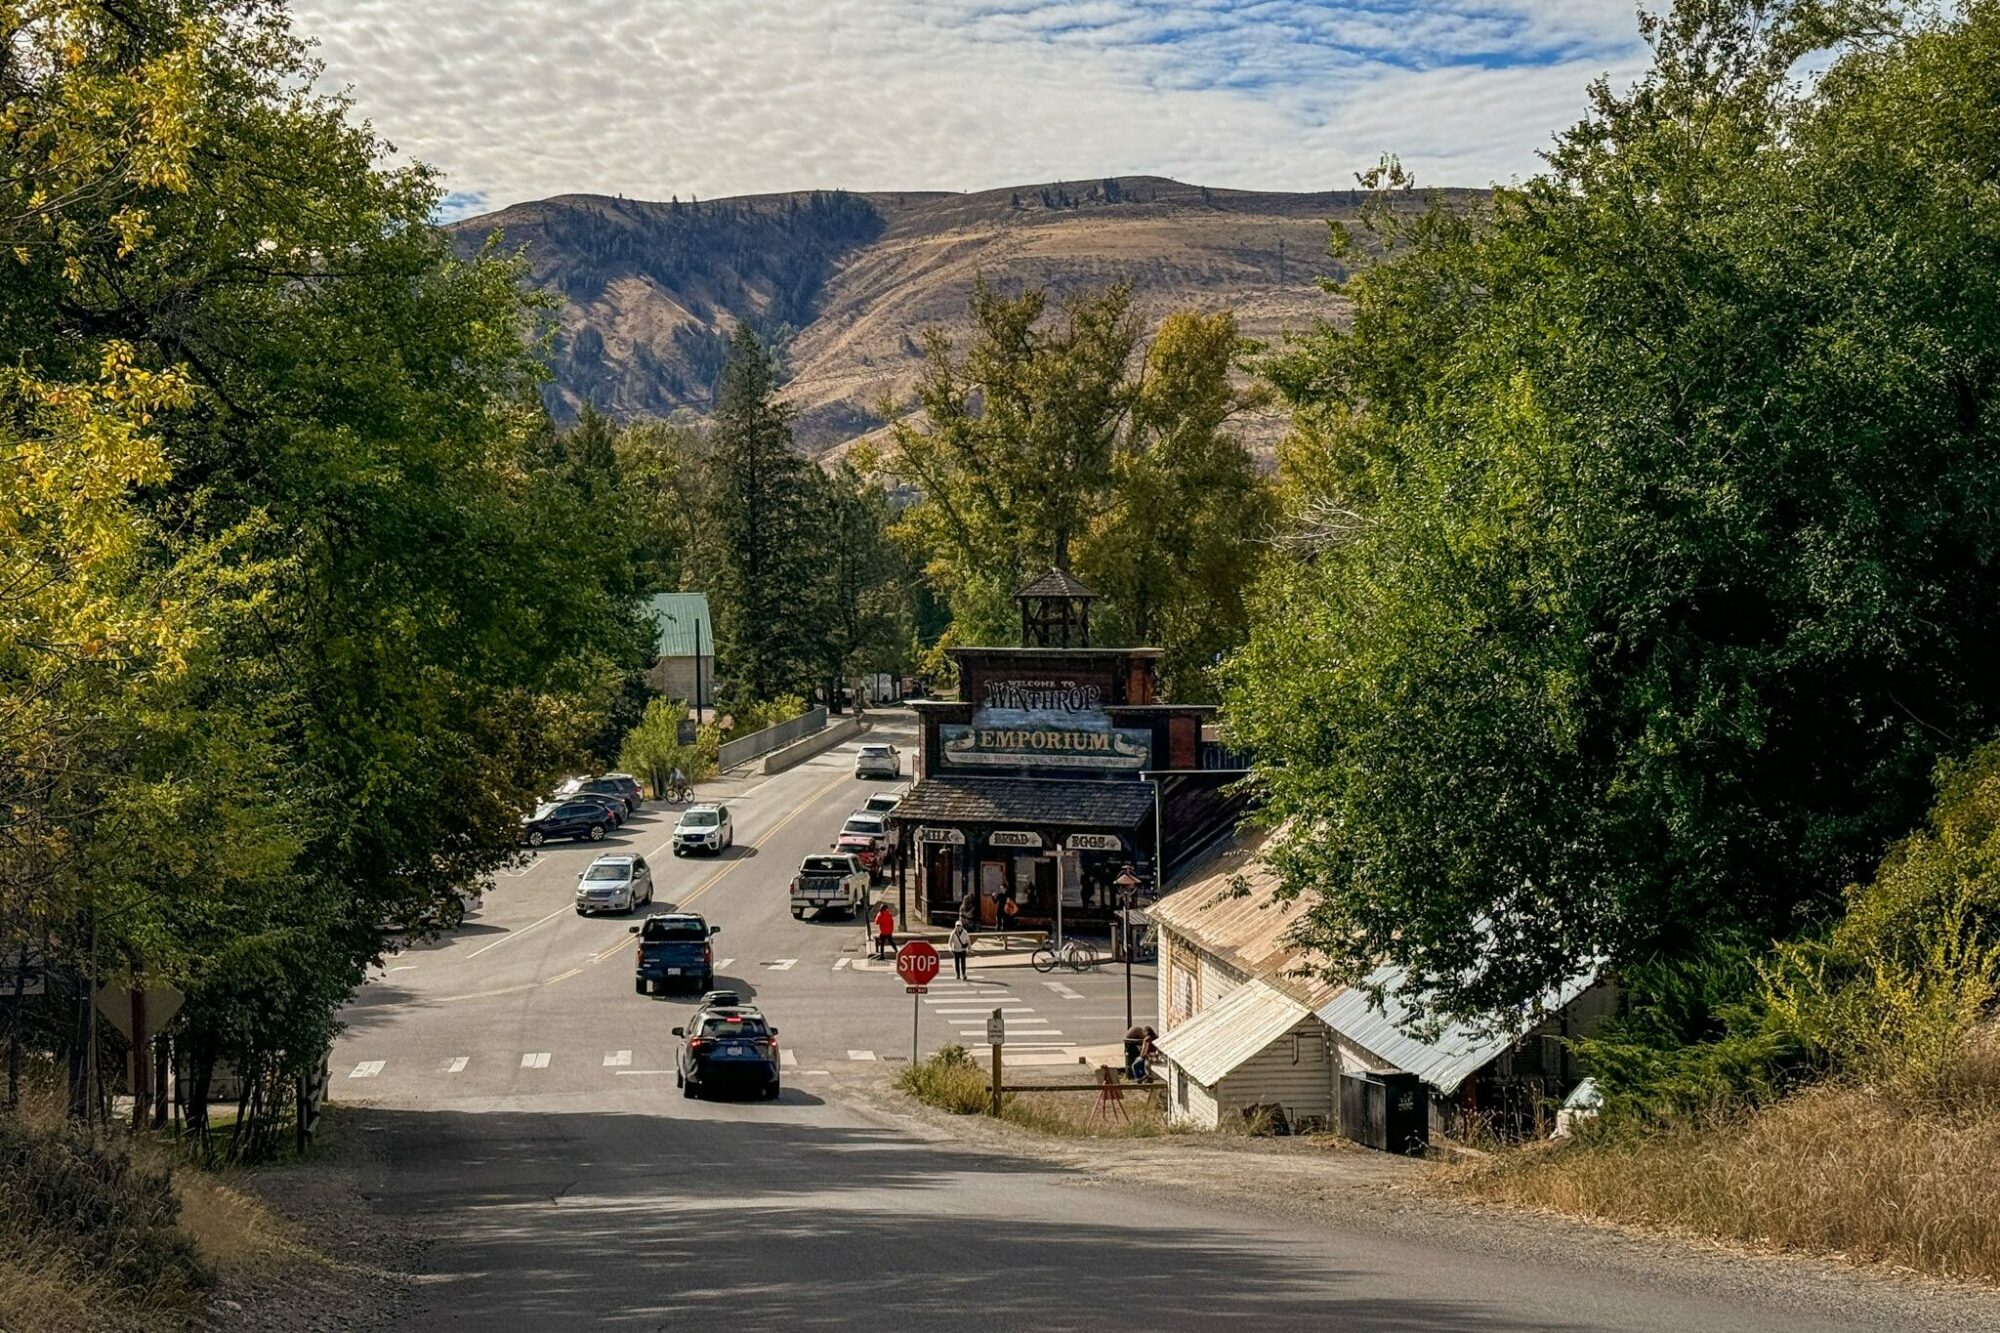
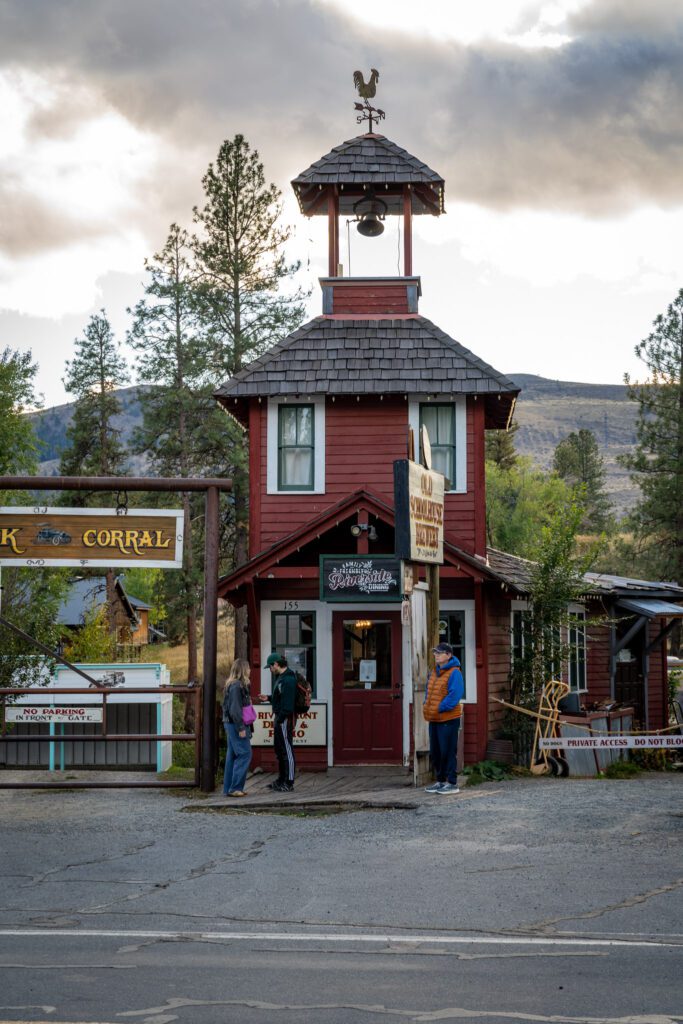
It’s all very old west feeling, which is accentuated when you arrive in Winthrop, a former mining town that has been reconstructed to look and feel like it did a hundred years ago during its heyday.
Even if you’re not staying here like we recommended (we did on our last trip, when Matt was in a boot, and spent a fair bit of time exploring this part of the world), we think it’s worth a stop.
The town of Winthrop is where you probably will focus your time since it’s the closest to the park (aside from Mazama, which isn’t much of a town).
Twisp is a much bigger town with more to eat and drink, but it’s a solid 15 minutes further away from the park.
If you head out there, Blue Star Coffee is the coffee roaster of choice for this part of the world, and there are some highly rated places to eat on Glover St. North (Cinnamon Twisp for baked goods, 1908 BBQ for … barbecue).
The Saturday Farmers Market is also worth a stop when it’s going (spring to late fall).
Here are some things to do, see, eat, and drink in Winthrop. The town is basically two consecutive blocks that are lined with shops, bars, and restaurants, all decked out in a western theme.
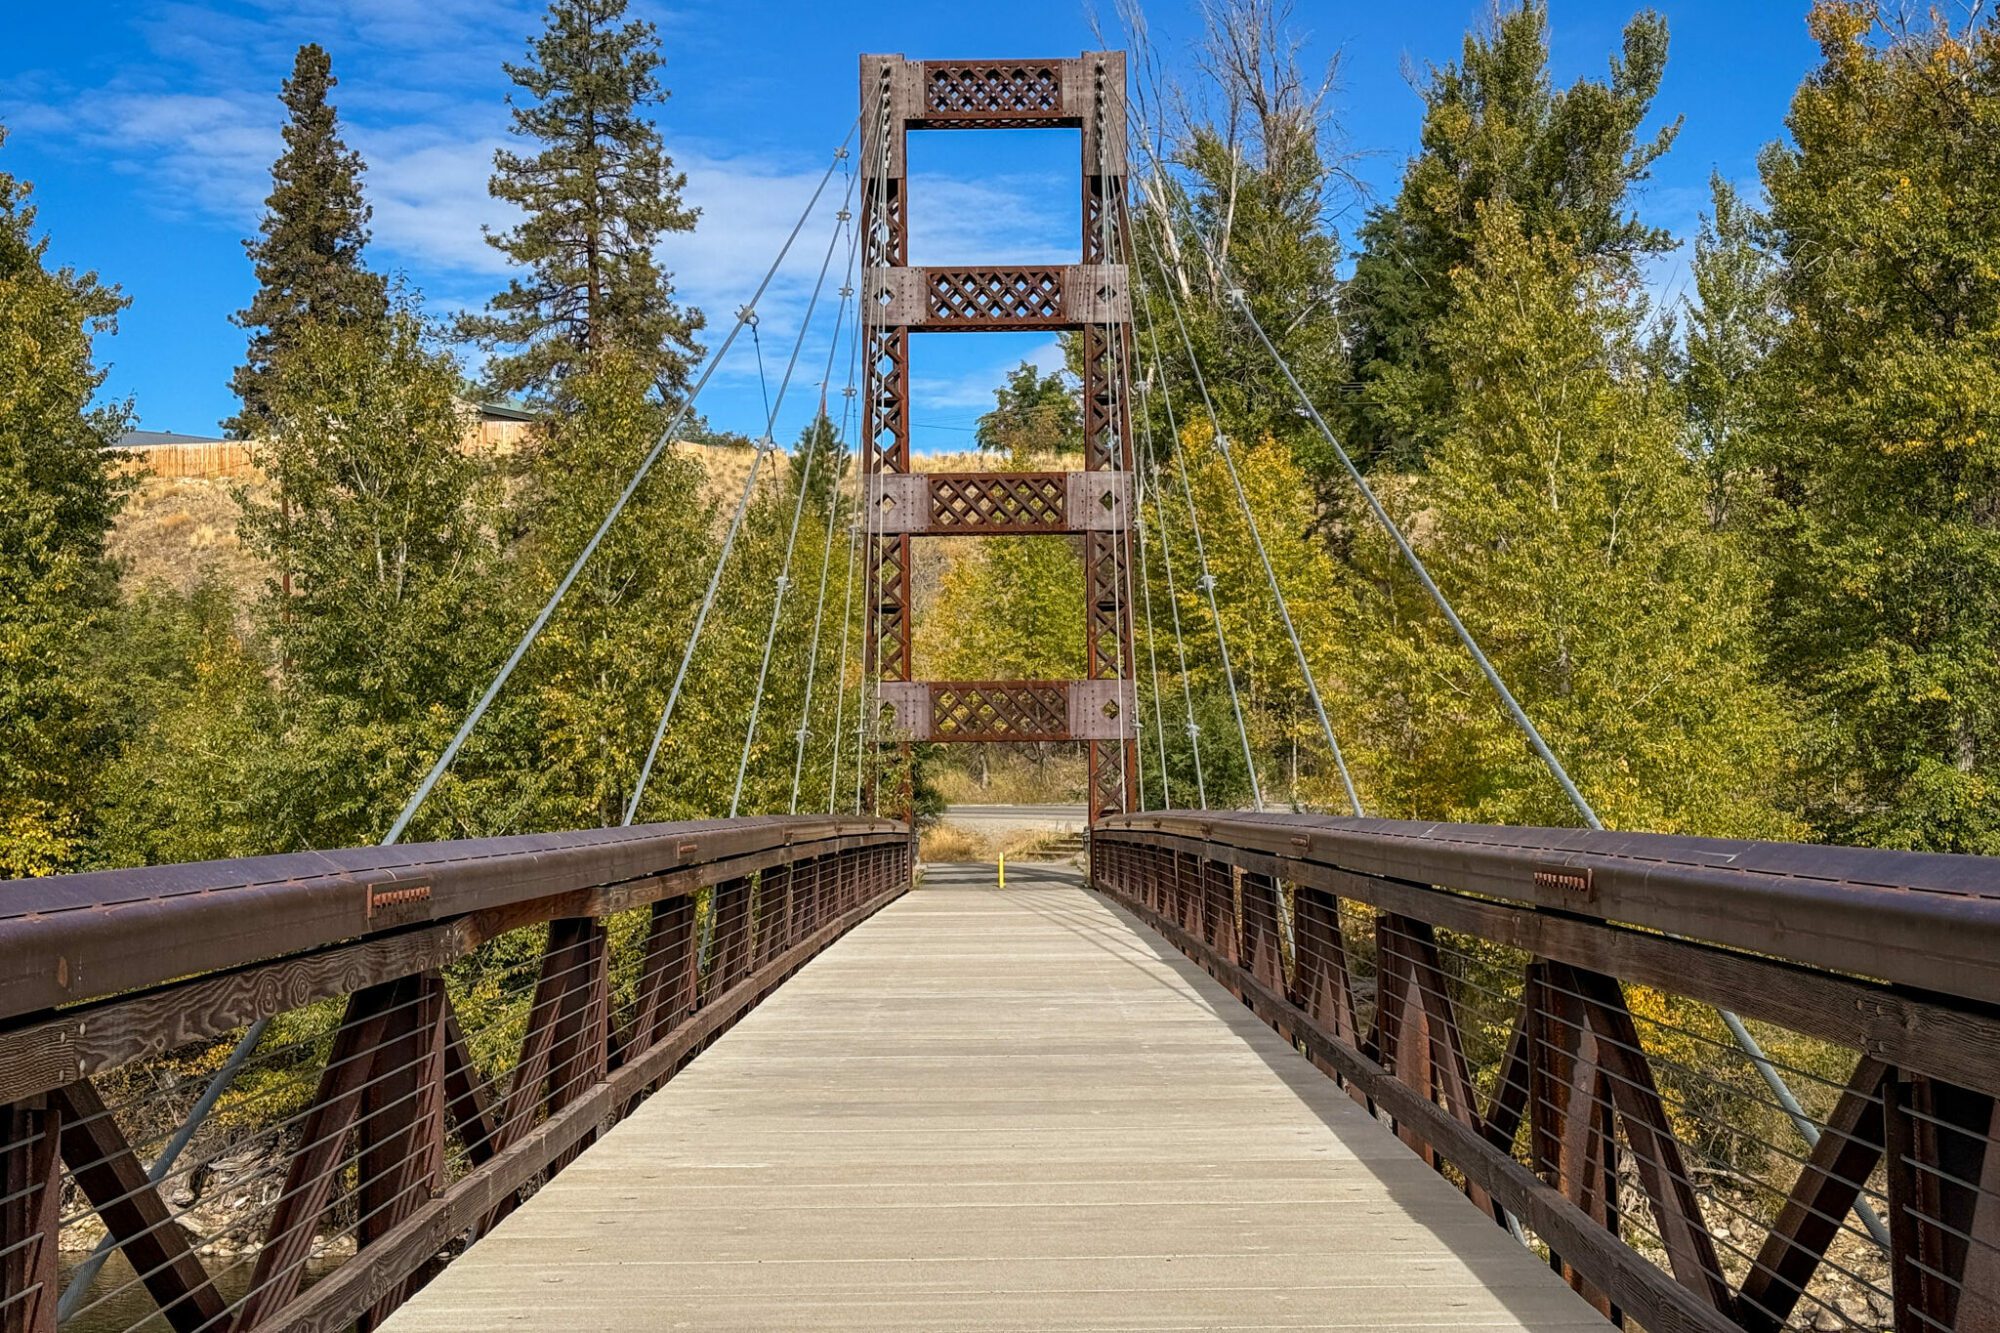
The Pedestrian Bridge: Winthrop sits at the confluence of two rivers, where the smaller Chewuch River flows into the Methow River, which continues south.
There is a pedestrian bridge on the south side of town (here on Google Maps) that provides a nice view up and down the river.
The Shafer Historical Museum: This small museum sits up the hill from the main stretch, and is well worth a half hour or so of your time.
It covers Winthrop’s history, including the settling of the land and the peak of its powers when it was a mining destination (they have a bunch of old mining equipment on display).
There are some cool historical artifacts, including photos, maps, and diary entries, that paint a vivid picture of Winthrop’s rise in the 19th Century.
The Restaurants: If you’re looking for a place to eat, there are a few places to choose from along the main drag in Winthrop.
For more progressive food, you’ve got Meza and Jupiter.
For more traditional pub fare, you’ve got Old Schoolhouse Brewery (a local brewery) and Three Fingered Jack’s Saloon (the oldest legal saloon in Washington State, according to them).
Other notable spots are Rocking Horse Bakery (for baked goods and coffee in the morning) and Sheri’s Sweet Shop (for all sorts of sweets).

What to Do with Less Time in the Park (One Day Itinerary)
If you have just one day to spend in the North Cascades, here’s how we’d organize your visit to maximize your time.
The first thing you’re going to want to do is tackle whatever hike you’re up for, because these trailheads do get busy. Get as early a start as you can.
As we mentioned above, our recommendations are Maple Pass (our favorite of the many great hikes in the park), Blue Lake, and Cutthroat Lake/Pass.
Lucky for you, all three are located on the eastern end of the park, which sets you up for how we’d spend the afternoon.
After a morning hike, spend the afternoon driving the entirety of the North Cascades Scenic Highway between Washington Pass and Newhalem, stopping at all of the stops we listed in the main itinerary above.
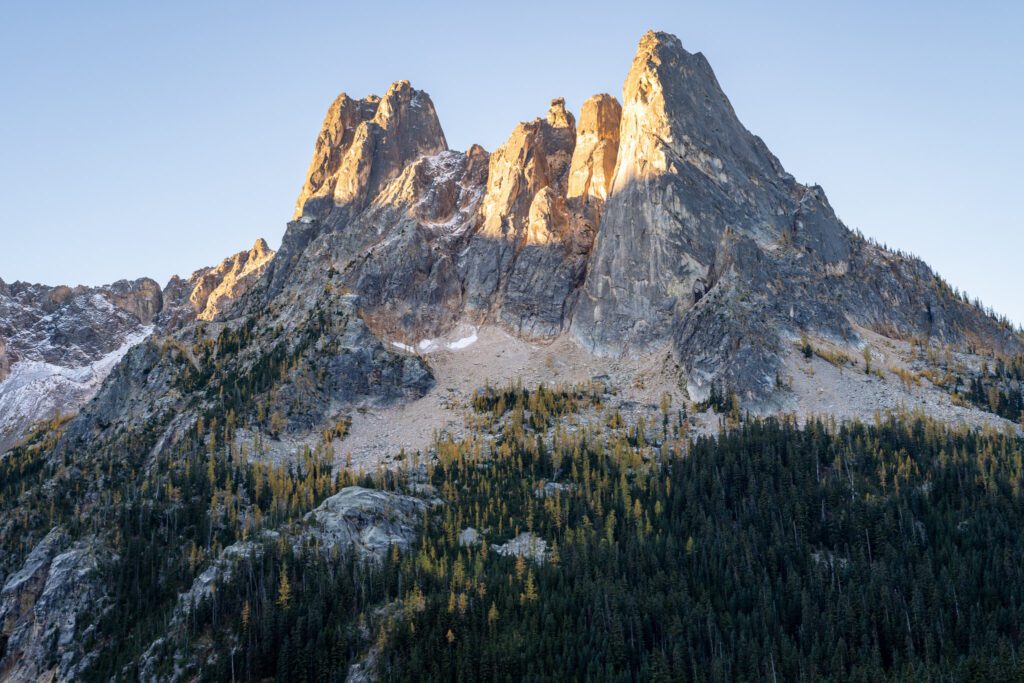
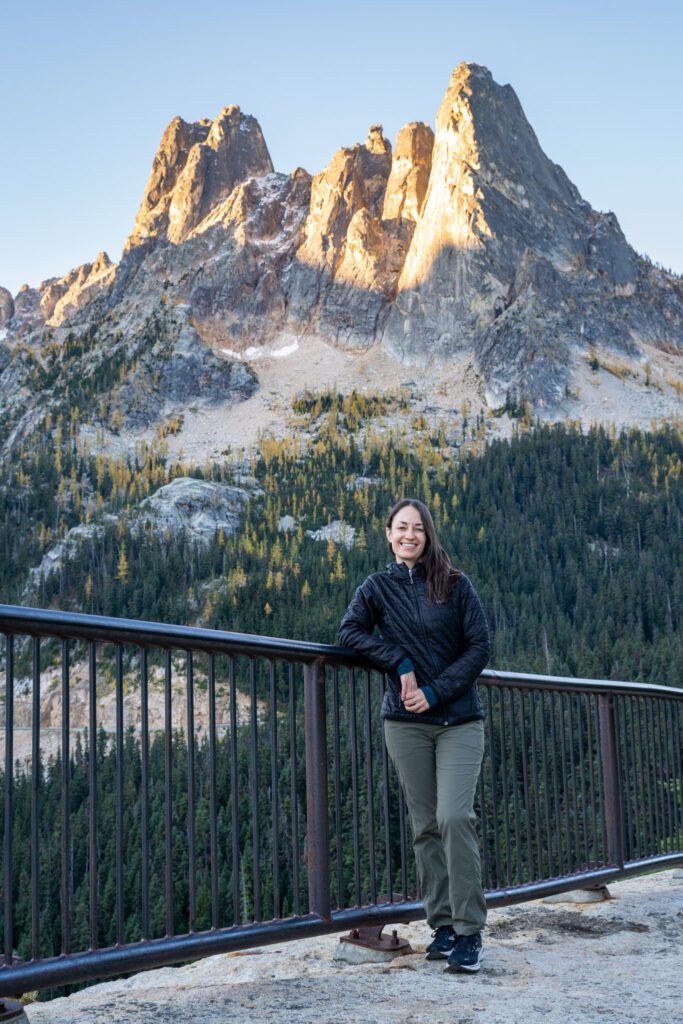
If you’re feeling extra ambitious, you can head to the Washington Pass Overlook first thing in the morning for incredible light on the Liberty Bell and surrounding rocky peaks, which is a few minutes away from the trailheads for all three of those hikes.
That’s what we did on our latest trip, and it certainly did not disappoint.
Finish with sunset (or just a late afternoon stop) at the Diablo Lake Overlook, which is one of the best views in the park accessible from the road, and is one of the iconic photos of Washington State.
What to Add with More Time in the North Cascades
Here are some things to add if you happen to have more time in the park.
Get Out on the Water at Ross Lake Resort (+½ Day)
Take a water taxi out to the resort, which will cost you $3. Rent a boat (canoes are $65 for the day, kayaks are slightly more expensive) and spend the day exploring out on the water of Ross Lake.
You could also stay the night at the resort, which has cabins and bunkhouses (make sure to reserve in advance!) that can only be accessed by boat in the summer and early fall.
There are basically no services out there, so you’ll need to bring all your own food (most of the cabins have some sort of kitchen amenities).
Tackle More Hikes! (+1 Day for Each)
There are basically an endless number of hikes to do in and around North Cascades National Park. Here are a few more, in addition to the few that are included in the itinerary above.
Cascade Pass / Sahale Arm (12 miles out and back, 4,000 feet of elevation gain): We STILL haven’t done this hike, even though it’s supposed to be one of the most spectacular hikes in the state, because of the road getting there.
It’s passable with normal vehicles, but the road is long. We figured out that it would take at least an hour each way, and decided to spend our time elsewhere.
If you have a high-clearance vehicle, you’ll be fine, and it’s totally doable with a normal passenger vehicle. This is also a great overnight hike.
Park Butte (7.5 miles out and back, 2,200 feet of elevation gain): This is actually more in the Mt. Baker region, not the North Cascades, but it’s a short drive off of Highway 20 near Baker Lake between Sedro-Woolley and Marblemount.
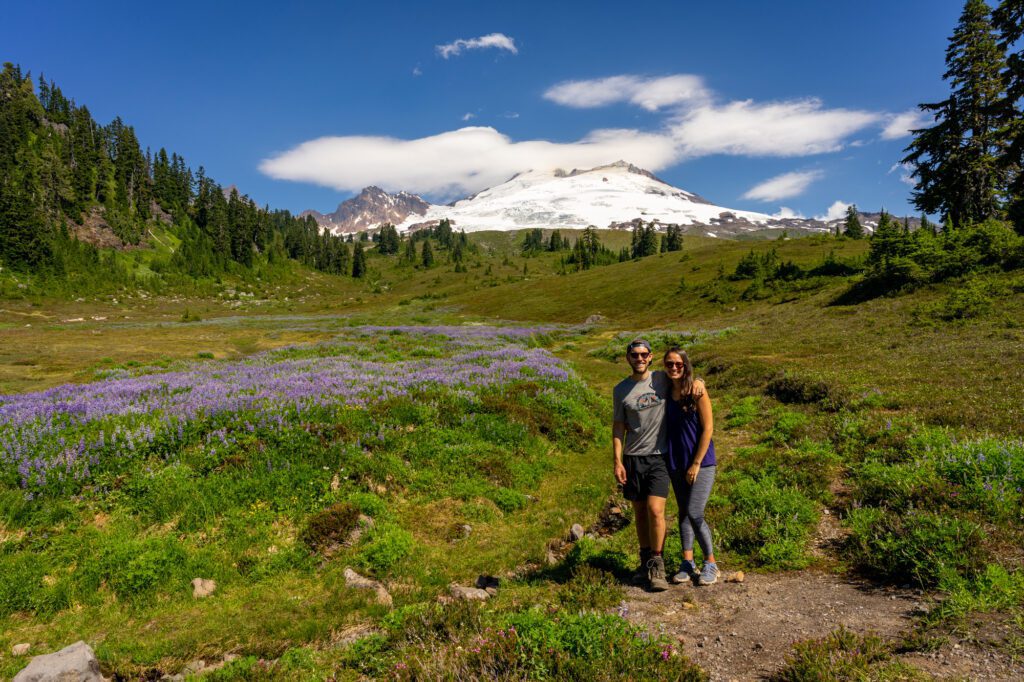
The hike is moderate and you’ll have views of Mt. Baker the whole way through the second half of the hike.
Thunder Knob (3.6 miles out and back, 635 feet of elevation gain): One of the easier hikes in the park, this one is 3.6 miles and leaves from the trailhead across Hwy 20 from Colonial Creek Campground.
We did it as an early morning hike, and you get some nice views from the opposite side of Diablo Lake from the usual viewpoint. Good hike for families staying at Colonial Creek.
Hidden Lake Lookout (8 miles, 3,300 feet of elevation gain): This was the first hike we ever tackled in the North Cascades, and it kind of set a crazy high bar for the rest of the hikes that followed.
This hike is spectacular, and is worth every hard-fought foot of elevation gain to get there.
Let’s start with the payoff. At the end of this hike, there’s a perched lake waiting for you. You’ll have the lake in the foreground, and the snowy peaks of the Cascades in the background, making for one of the most incredible views in the entire state.
The trail takes you through three different landscapes as you make the climb to the lake.
You’ll start in the forest for about a mile, then you’ll emerge into a meadow full of wildflowers, at least in the early summer (July), where you’ll climb a long series of switchbacks up the face of the mountain before the trail starts to turn rocky and you arrive in the alpine piece.
Great hike, but the road to the trailhead is gnarly.
Things to Know Before You Visit
Here are a few things we think you should know before your trip.
Are Dogs Allowed? It’s Complicated. Dogs are allowed on some trails – provided they’re on a leash – especially in the eastern end of the park.
While the trails inside the national park – like Thunder Knob, Cascade Pass, and Ladder Creek Falls – do not allow dogs, a bunch of the trails on the eastern end of the park are actually on National Forest land, which means dogs are allowed.
No dogs on the Heather-Maple Pass Trail (it passes into the park at the far end of the loop, which basically makes it a no-go for pups), but Blue Lake, Cutthroat Lake (and Pass), and Rainy Lake are all dog-friendly (keep the pups on a leash!).
The Best Time to Visit is Late Summer and Early Fall. The hiking season is tragically short. We touched on this above, but it bears repeating.
Don’t make the same mistake we did and show up in early July thinking all of the high elevation trails in the park will be snow-free and ready to tackle without winter hiking equipment.
The best time to hit the trail with little fear of snow and ice is late July through the end of September.
Stop at the Visitor Center in Newhalem. It’s worth stopping at the Visitor Center to check on trail conditions and closures.
The visitor center is located off of Highway 20, near the town of Newhalem and Newhalem Creek Campground as you’re entering the park from the west (the direction of Seattle).
Stop by the center between 9am and 5pm between May 18th-September 30th, where you’ll find maps of the park and surrounding area, multimedia exhibits on the natural and cultural history of North Cascades National Park, and short, interpretive trails.
Given the fact that this area is known for both fires and mudslides, it’s worth stopping in to check what the status of various parts of the park are when you’re there.
Note that you can’t pick up backcountry permits here, that is done at the separate Wilderness Information Center which is in Marblemount (here on Google Maps).
The Parking Pass Situation is Also Complicated. This national park does NOT require a pass to enter, but you might need a parking permit at certain trailheads.
The good news is that there aren’t any national park fees for North Cascades National Park!
However, you will need a Northwest Forest Pass to park at many of the trailheads outside the eastern boundary of the park, which are on National Forest land (an America the Beautiful Pass also works).
There is No Cell Service in the Park. Once you enter the park, right around Newhalem, you’re going to lose cell service.
On the other end of the park, you get cell service back just before you get to Winthrop.
So through the vast majority of the park, you’re not going to have any service.
We’d strongly recommend that you download an offline map of the park before you go so that you can still navigate without service (here’s how to do it).
There is Nowhere to Eat Inside the Park. Aside from the convenience-ish store in Newhalem, there is nowhere to eat inside the park.
The closest amenities are going to be in Marblemount and Rockport (though Concrete is the first real town) on the west side, and Mazama on the east side (the Mazama Store is a classic stop for bagels, sandwiches, and coffee – it’s here on Google Maps).
You’re probably going to need to pack a lunch and some snacks and bring it with you.
More to Explore in Washington State
Heading to the great state of Washington? Here are some other posts you might like.
- The Best Things to Do in Seattle: A Complete Guide for First Timers
- Where to Stay in Seattle: 5 Amazing Areas to Stay
- How to Plan an Amazing Weekend in Seattle (3 Day Itinerary)
- Two Days in Seattle: The Best of Seattle in 48 Hours
- One Day in Seattle: How to See The Best of Seattle in a Day
- The 8 Best Day Trips from Seattle: A Complete Guide
- 10 Amazing Weekend Getaways from Seattle: A Complete Planning Guide
- Where to Find the Best Coffee in Seattle: 15+ Amazing Seattle Coffee Shops
- Gluten Free Seattle: A Complete Travel Guide for Celiacs
- How to Plan an Amazing Washington State Road Trip
- The 19 Best Airbnbs in Washington State
- 33 Incredible Cabins in Washington State
- 12 Amazing Easy Hikes in Washington State for Beginners
- How to Plan an Amazing Olympic National Park Itinerary
- What to Do in Leavenworth, Washington: A Complete Guide
- What to Do on San Juan Island: A Complete Visitors Guide
- The Best Things to Do on Orcas Island: Complete Planning Guide
- The Best Things to Do on Vashon Island: A Complete Day Trip Guide