How to Plan an Amazing 2 Day Zion National Park Itinerary
Zion National Park is full of amazing landscapes, from towering canyon walls featuring a blend of red rocks and white stone to the blue-green hues of the Virgin River, and is one of our favorite National Parks in the United States.
If you’re an avid hiker like us, Zion is basically paradise.
Several of the best day hikes in the United States are in Zion – namely Angels Landing and the Virgin Narrows – and there are a handful of other hikes that are somewhat hidden gems, though it’s hard to call anything in Zion “hidden” considering it’s one of the most popular parks in the country.
We spent four days in Zion National Park on our latest trip (Matt has been multiple times before), and we wrote this complete Zion National Park itinerary to help you plan the perfect trip to Zion.
Along the way, you’ll tackle one of the big hikes in the park, explore the Zion Canyon, and do a couple of gorgeous scenic drives. Plus, if you’re lucky enough to have more time, we have some suggestions on how to spend it.
Ready to plan an amazing trip to Zion National Park? Off we go!
2024 Update: If you want to hike the Angels Landing trail in 2024, you will need to secure a permit beforehand. After hiking it in 2021, we were hoping this might happen because there were SO MANY people on the narrow, exposed trail that it felt somewhat dangerous. More information on how to secure permits can be found here (and in a dedicated section below).
Disclaimer: Some of the links in this post, like hotel links, are affiliate links, meaning at no additional cost to you, we make a little bit of money if you click through and book. That being said, we would never recommend something to you that we don’t stand behind 100%.
How Many Days in Zion National Park?
I’m sitting here at our campsite in Zion writing this, and Alysha and I just talked about how long we would recommend spending in Zion.
We think 2 days in Zion National Park is a perfect baseline.
With 2 days, you’ll be able to plan an itinerary that fits in one of the longer hikes in Zion (like Angels Landing), the scenic drive between the East Entrance and Zion – Mt. Carmel tunnel, and some of the shorter hikes in the canyon.
However, there’s plenty to do and see in the area to fill 3 days in Zion National Park. Here are some ideas, and how much time you should add if you want to add them to your itinerary.
- Another Long Hike (+1 day): Want to do another long hike, like the famous Narrows or Observation Point (which puts you above Angels Landing)? Add another day – both of those hikes will take you the majority of a day to complete.
- Kolob Canyons (+1 day): Did you know there’s a whole other equally beautiful part of the park that a tiny fraction of visitors to Zion experience? It’s called Kolob Canyons, and it’s roughly 45 minutes northwest of the canyon. There’s a five mile scenic drive, a couple of good hiking trails (we wanted to do the Taylor Creek trail, but it was snowing when we were up there so we passed), and plenty of spectacular views to go around.
Below the detailed itinerary we’ve written, you’ll find some suggestions for what to add with an extra day, and what to do with just one day in Zion.
Getting Around Zion National Park
Getting around Zion is a little more complicated than other national parks because access to Zion Canyon Scenic Drive is restricted from spring all the way through fall, which means you can only get into the upper canyon by using the Zion Canyon Shuttle.
There is a separate shuttle line that connects the town of Springdale to the visitor center, which connects with the aforementioned Zion Canyon Shuttle.
Below, we’ll cover both shuttle routes.
The Zion Canyon Shuttle
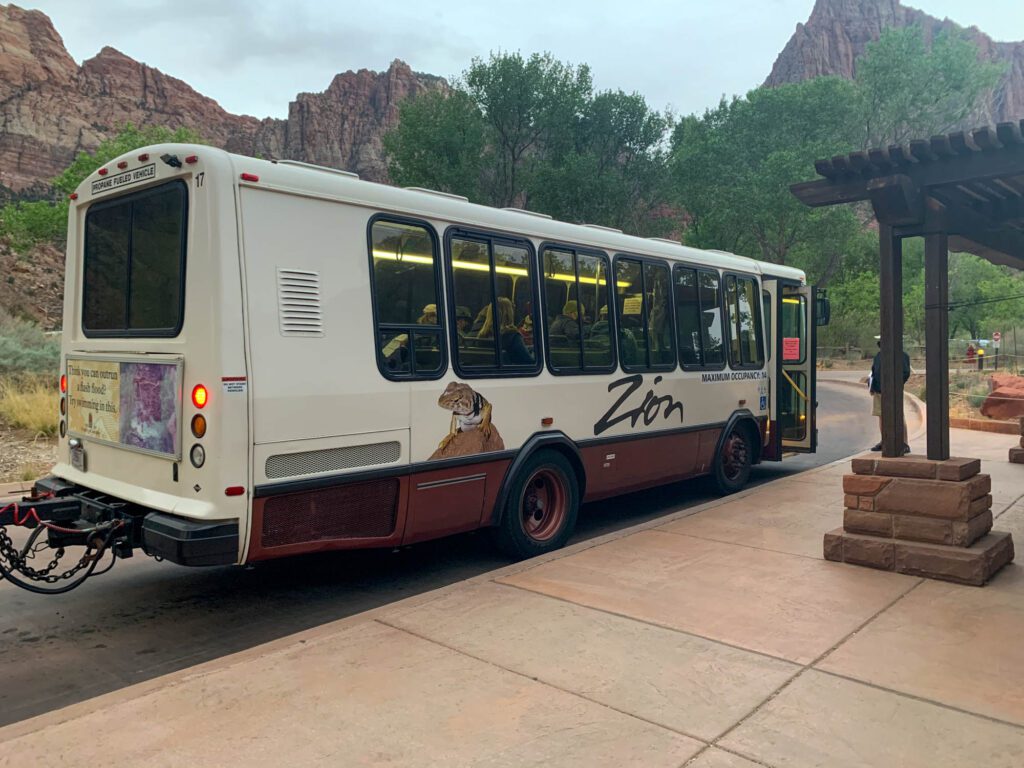
The Zion Canyon Shuttle is actually super efficient in terms of getting people from the visitor center at the South Entrance to the canyon itself.
Between March and November (and for the holiday season near the end of December), private vehicles are prohibited from driving along Zion Canyon Scenic Drive to prevent congestion, which means the shuttle is required if you want to enter the most interesting part of the park.
The shuttle picks up from the visitor center, which has a lot of parking but gets full early in the day, even in spring (so get an early start). There are nine shuttle stops through the canyon, and taking it to the end of the line takes about 15 minutes, give or take a couple of minutes.
It’s a relatively seamless experience, especially if you’re staying inside the park, but expect long lines in the summer. We recommend getting as early a start as possible for that reason – peak time for the shuttle is around 9-10am.
In the summer, the first shuttle of the day is at 6am. The rest of the year, it’s at 7am.
The Springdale Shuttle
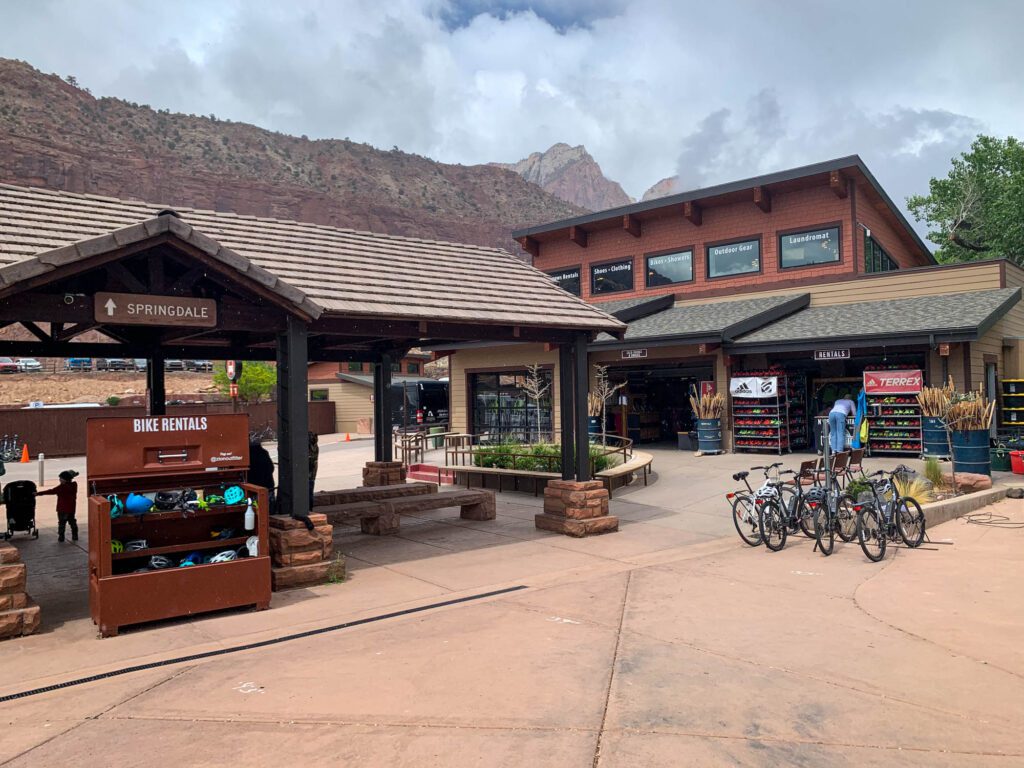
There’s another shuttle loop that connects the town of Springdale to the visitor center. It stops outside many of the hotels mentioned above, which makes it pretty easy to get from Springdale into the park.
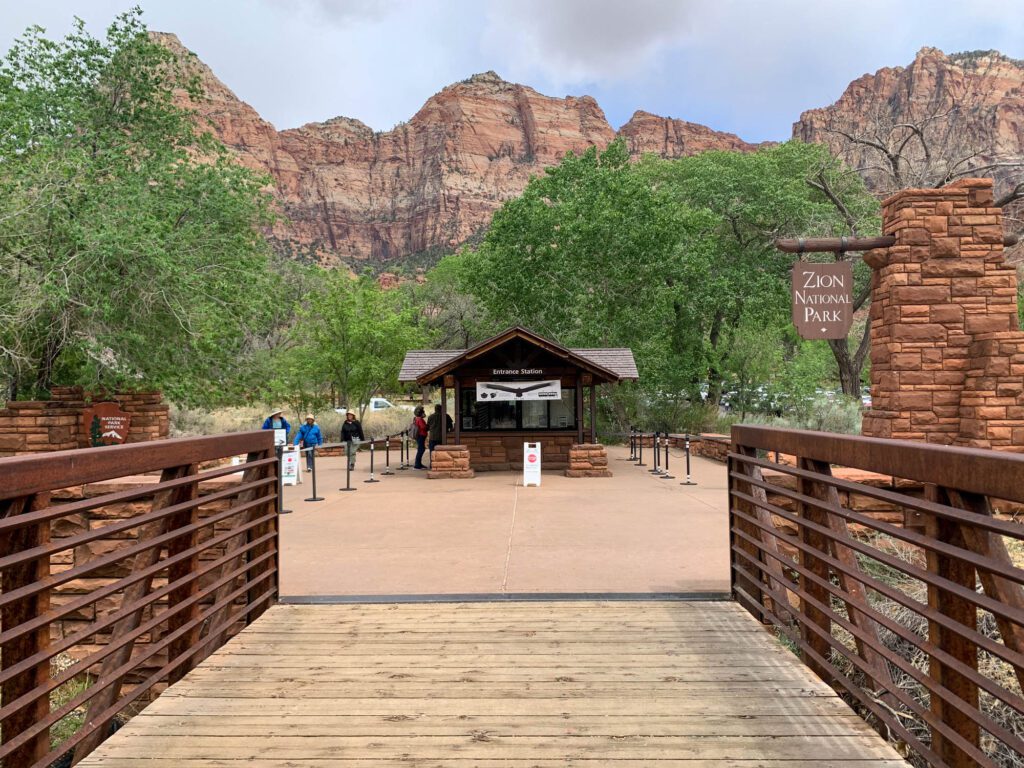
Keep in mind, the shuttle actually drops you outside the park entrance, so you’ll need to bring your National Park Pass with you (or pay the $35 entrance fee) to enter the park across the pedestrian bridge. There can be a bit of a line here, so again, GET AN EARLY START.
Where to Stay at Zion National Park
The two best places to stay to visit Zion National Park are going to be inside the park, either at the historic Zion Lodge or in one of the two campgrounds, or in the town of Springdale, which is literally right outside the south entrance to the park.
Psst! Trying to decide on a place to stay in Zion? We have a whole guide dedicated to finding the perfect place to stay in Zion – you should definitely read that if you’re looking for a deeper dive into places to stay.
Staying Inside the Park
We usually recommend staying inside national parks if you can – usually camping – to avoid the sometimes long lines to enter the park in the morning.
Zion is no exception, and it’s especially convenient because you are required to take the shuttle to access the canyon much of the year, and the places to stay inside the park mean you’ll be able to walk to the shuttle.
There is one lodge inside the park and two campgrounds.
Zion Lodge
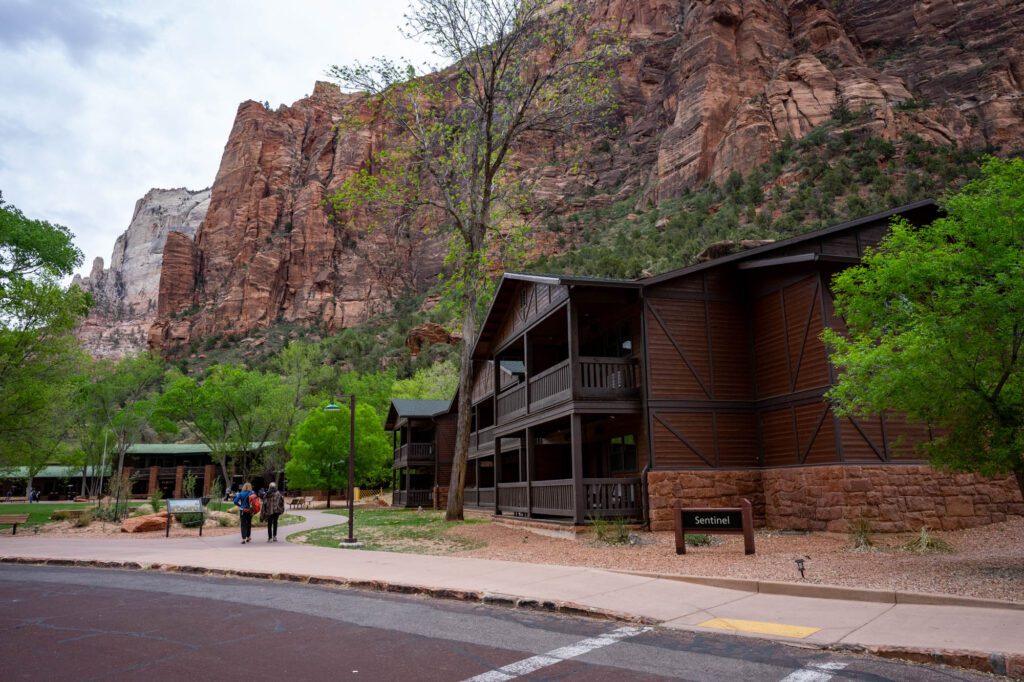
The Zion Lodge is the only place to stay inside that park that is not camping. It’s inside the canyon with its own shuttle stop, which means you won’t have to deal with the parking and shuttle situation at the main visitor center.
They have a range of room options, from spacious lodge rooms to private cabins. It’s a nice place, with plenty of amenities onsite like a cafe, restaurant, and gift shop.
Usually, in places like Olympic National Park and Bryce Canyon for example, the lodges inside National Parks are… strictly okay. The location is usually good, but they’re pretty run down due to constantly being at capacity. And the price is generally high – you’re paying for the convenience of being inside the park.
The Zion Lodge is a bit of an exception to that rule. It’s relatively nice, though it is still going to be expensive.
It might be worth it given the location inside the canyon – you’ll be within walking distance of multiple trailheads (including the trailhead for Angels Landing and Emerald Pools), and a short shuttle ride away from the rest of the park.
Camping Options
There are two campgrounds inside the park, both right at the visitor center near the South Entrance.
We stayed at Watchman Campground, which is a nice campground at the foot of the Watchman that takes reservations up to 6 months in advance.
The location is unbeatable – you can easily walk to the shuttle, and the facilities are relatively updated – flush toilets and dishwashing sinks (no showers, though).
It’s a competitive campground that books up months and months in advance for peak season (May – September), so make your reservations in advance.
If you aren’t able to get reservations, check back often as cancellations do happen (that’s how we got a site – Alysha hit refresh several times a day on the park website).
South Campground is the other option, and it’s right along the main park road not nearly as nice as Watchman. It’s first-come-first-served (though it is currently closed for renovations with no timeline for opening).
The nicest sites are the eight walk-in sites along the river – you park across the trail from the site, so it’s not like you’ll be lugging your gear very far.
Outside the Park
The best place to stay outside the park is going to be the town of Springdale, which begins just outside the south entrance of Zion.
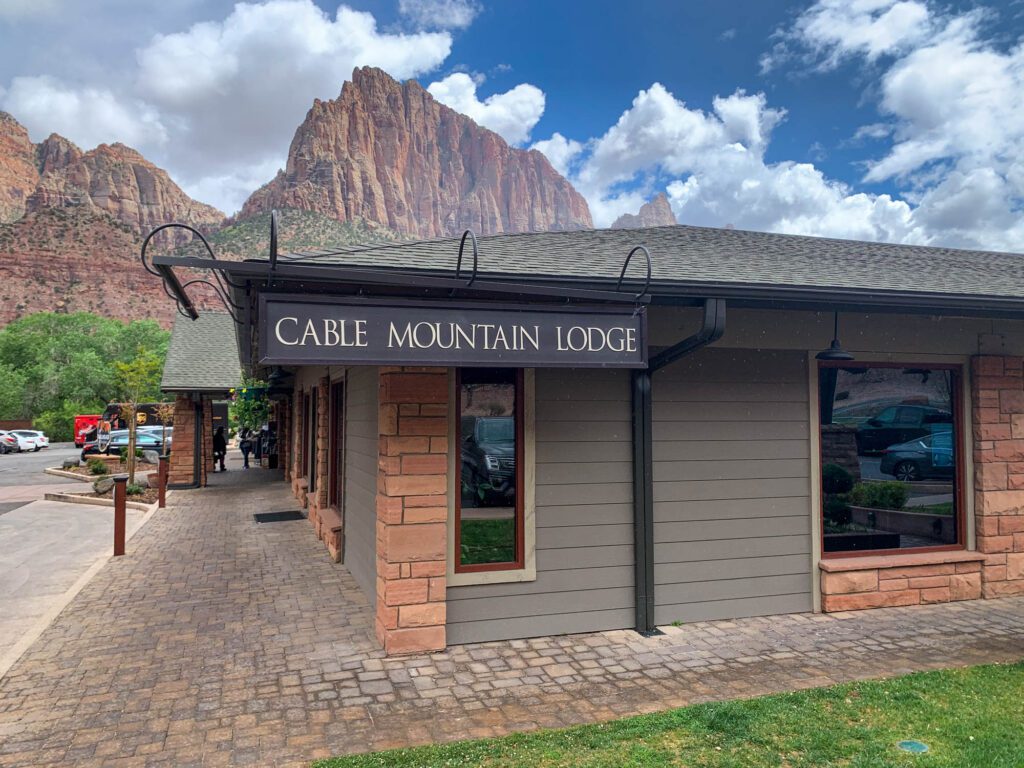
The Cable Mountain Lodge, which is literally right outside the entrance to the park – you can walk into the park and avoid parking and shuttling into the park altogether! – is both the nicest hotel in terms of style and amenities, and also the best location.
It is a little pricier than other options below, so if you’re on a budget it’s probably not for you.
The other two hotels that are within walking distance to the park entrance (~0.5 miles away) are Flanigan‘s Resort and Spa and the Cliffrose Hotel.
- Flanigan’s Resort and Spa is a great option, with nice facilities and an onsite restaurant (the Spotted Dog) that consistently gets phenomenal reviews.
- The Cliffrose is very, very nice, and is about the same level as the Cable Mountain Lodge. It’s slightly less convenient, but is still a good option if you want to be within walking distance of the shuttle into the canyon.
If you’re looking for the best value in Zion, you’re going to have to look a bit further out. The Best Western PLUS and Holiday Inn Express (I stayed here with my family years ago on a summer road trip) are great options with nice enough rooms at a reasonable price.
Plus, the Springdale Shuttle stops just outside both of them, making it easy to get into the park.
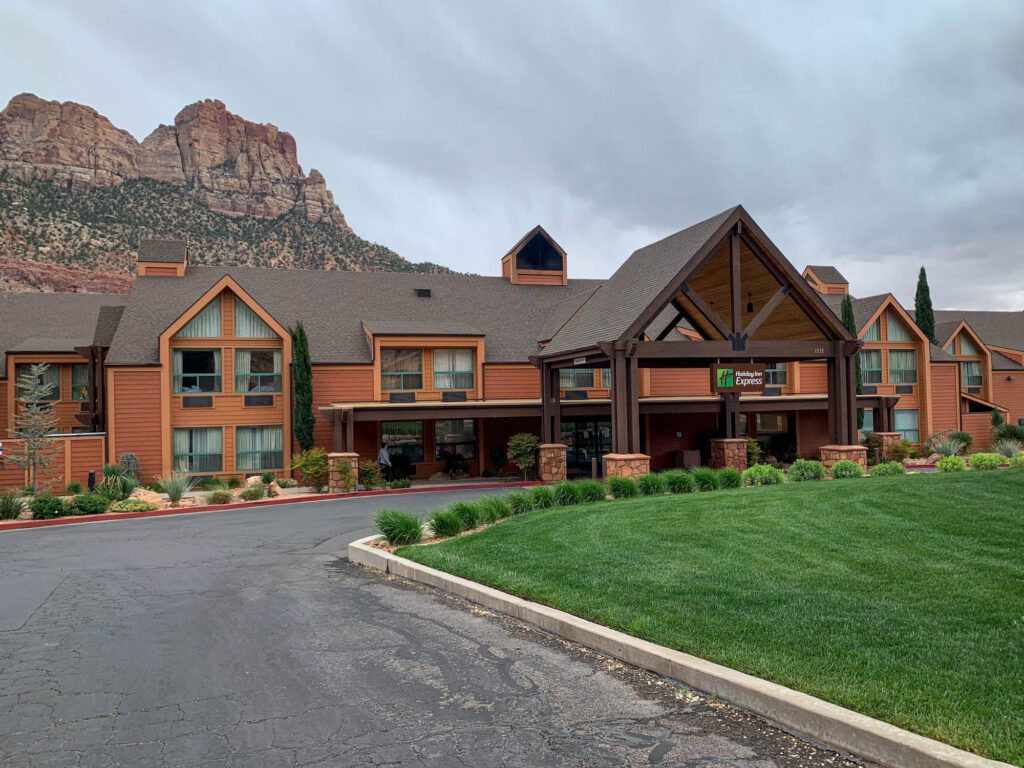
There are some cool and unique places to stay in Springdale and just outside of town that are worth mentioning if you want a truly unforgettable stay near Zion.
- The Red Rock Inn: Great location in Springdale, walking distance to the best grocery store in town (Sol Marketplace), the best coffee in town (Deep Creek Coffee Company), AND one of the best restaurants (Oscar’s). They have standalone cottages, with breakfast delivered straight to your door.
- Wildflower: We drove by this spot as we were heading up Kolob Terrace Road, and I was intrigued. They’re about 15 minutes outside of Springdale, and you’ll have a choice between a stylish bungalow, a safari-style glamping tent, or a unique covered wagon. It’s a cool place to stay, and while it’s not right in town, it’s only about 15 minutes away from the park entrance.
- Under Canvas Zion: We first came across Under Canvas in Moab, when we said “whoa, THAT looks cool” as we drove by. It’s a little further out – about 30 minutes from the park entrance up Kolob Terrace Road – but it’s a cool spot with outstanding views of the surrounding landscape and stylish safari-style glamping tents. It’s pricey, but it’s one of the most unique ways to experience Zion, which is why it’s on this list.
Tips for Planning Your Trip to Zion National Park
Here are a few tips that we learned on our trips to Zion that may be helpful as you’re planning your visit.
- The Two Parts of the Park: There are two parts of Zion National Park – Zion Canyon, which is the more popular portion of the park and where most of the infrastructure is located, and Kolob Canyons, which is about 30 miles northwest of the canyon, and is far, far less visited (though well worth the detour!). Zion Canyon is where you’ll find most of the iconic sights in Zion – Angels Landing, Observation Point, and the Narrows. Kolob Canyons is home to a great five mile scenic drive, the Taylor Creek trail, the Timber Creek Overlook, and some great backpacking trails.
- Park Fees: The cost to enter Zion National Park is $35 (unless you’re on a motorcycle or bike which costs a bit less), which gives you entry for seven consecutive days. Or, if you’re doing a broader Utah road trip and are planning on visiting more than three National Parks in the next 12 months, an America the Beautiful Pass will be worth the money (it costs $80, so it starts saving you money after three parks…we’ve visited 14 in the past 12 months).
- Park Entrances: There are three entrances to Zion National Park. The most popular and crowded is the south entrance, which you’ll enter from the town of Springdale. There are multiple lanes, so the backup isn’t usually too bad. If you’re coming from the west – like from Vegas – this is the entrance you’ll probably use. There’s also an entrance at the east end of the park along Highway 9. From here, you’ll drive down a VERY scenic stretch of road until you reach the Zion – Mt. Carmel Tunnel, which is an architectural marvel in its own right. You’ll use this entrance if you’re coming from the east – like from Bryce Canyon or the Grand Canyon. The other entrance, which is just for people wanting to visit the Kolob Canyons area, is at the Kolob Canyons Visitor Center. There’s no booth along the road here, you’ll need to stop at the Visitor Center to either show or buy your pass.
- Check the Park Website for Latest Conditions: Before you leave (or on the way), check the park website for the latest conditions in the park. For example, the Weeping Rock trailhead was closed due to a major rockfall (as was the Taylor Creek trail a few days before we arrived), which meant that Hidden Canyon and Observation Point were inaccessible while we were there. Check current conditions here before you leave.
- Services in Springdale: Springdale is the closest town to the park… and it’s literally right outside the south entrance to the park. The area known as “Zion Village,” which is where the Springdale Shuttle drops you off, has a variety of services for visitors – there’s a brewpub, a coffee shop, a grocery store, an outfitter that can rent bikes and equipment for hiking the Narrows, and more. Deeper into Springdale, you’ll find numerous restaurants and cafes. We loved Deep Creek Coffee and Sol Foods Marketplace, though be prepared to pay a little extra at the latter – it’s not cheap, but has a great selection, including plenty of gluten free groceries.
A Complete 2 Day Zion National Park Itinerary for First Timers
For the purposes of this itinerary, we’re going to assume you have arrived in Zion the night before, have two full days to explore the park, and are up for getting an early start.
Have more than two days in Zion? Below, we’ve got suggestions for what to do with more time to help you plan your 3 day Zion itinerary.
Day 1: Angels Landing & The East Side of the Park
On your first day in Zion, you’ll tackle one of the best day hikes in the United States, then head out to Kolob Canyons, the less-visited part of the park, to take in the landscapes along the scenic drive.
End your day by hiking the Watchman Trail just before sunset with a beer in your daypack to cheers to an amazing trip to Zion as the sun goes down.
Hiking Angels Landing
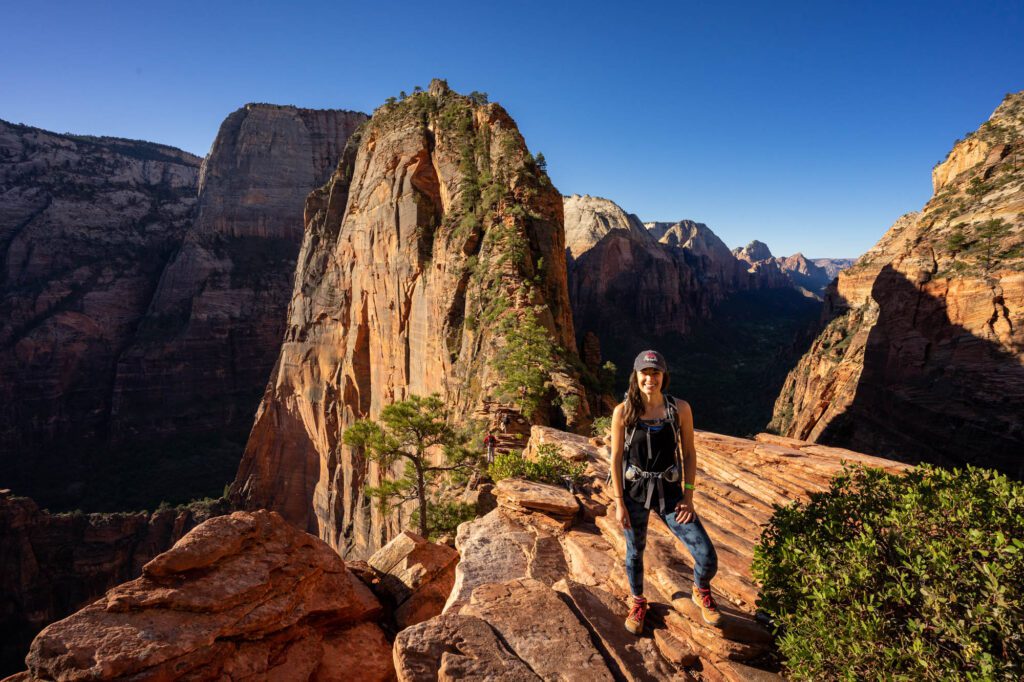
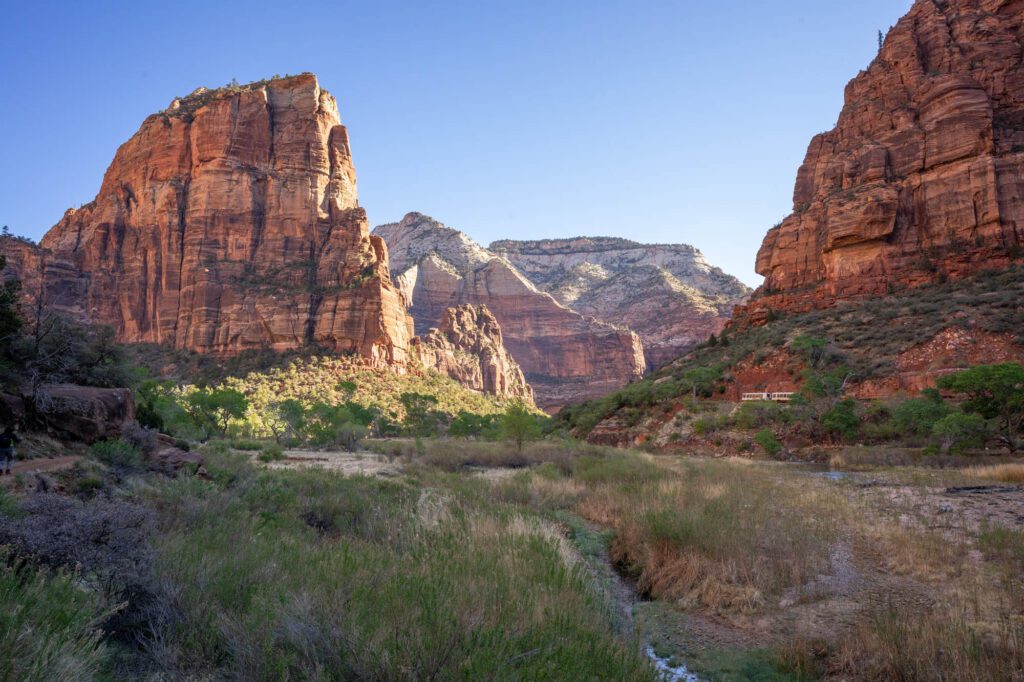
Angels Landing is a great hike. It’s also not an easy hike, so absolutely do not underestimate it – pack plenty of water, sunscreen, a sun hat, and snacks. It’s around 5 miles roundtrip, with nearly 1,500 feet of elevation gain. And it’s basically straight up the whole way.
There are three other things to note about this hike.
First, it’s insanely crowded. Think hundreds of people trying to navigate the chained sections of the hike all at the same time.
It’s not particularly fun, so we’d recommend as early a start as you can get. If you get on the first shuttle, at least you won’t have to deal with too many people coming down as you’re trying to go up the last section of chains.
Second, conditions are variable, and they matter. We were there the day after it rained and the entire section with the chains was covered in a fine sand thanks to the recent rain, which was very slippery.
We wouldn’t recommend doing this hike if it is actively raining, and if it rained the previous day, be very careful (especially on the last section). It will likely be windy at the top, which isn’t a huge deal.
Last, if you’re at all queasy about heights (guilty as charged, your honor), you’re not going to like the end of this hike.
Specifically, the last third of a mile, where you’re climbing a very exposed narrow ridge with chains while other people try to descend the same narrow path.
We stopped at Scout Lookout because we didn’t feel comfortable with the conditions and number of people. And we regret nothing.
Getting a Permit for the Angels Landing Trail (Updated for 2024)
As a result of the congestion on the trail, in 2024, you will need a permit to hike the Angels Landing Trail.
There are two ways to get a permit.
First is the seasonal lottery. This is the best way to secure your permits in advance.
You’ll hop on Recreation.gov (here is the January lottery) and apply for a permit, selecting seven potential days and times (times are really just three possible blocks – before 9am, 9am-12pm, after 12pm).
Note that there is a $6 non-refundable application fee, which covers the application for up to six hikers.
Here are the relevant lottery dates that you’ll need to know.
- To hike between March 1 – May 31, 2024: Lottery opens January 1, lottery closes January 20, permits issued January 25. Here is the link to the application.
- To hike between June 1 – August 31, 2024: Lottery opens April 1, lottery closes April 20, permits issued April 25. Here is the link to the application.
- To hike between September 1 – November 30, 2024: Lottery opens July 1, lottery closes July 20, permits issued July 25. Here is the link to the application.
- To hike between December 1, 2023 – February 28, 2024: Lottery opens October 1, lottery closes October 20, permits issued October 25. Here is the link to the application.
On the day that permits are released, you’ll get an email saying either that you got permits and have been charged $3 per permit, or that you didn’t get permits.
The second way to get a ticket is the day before lottery. For this lottery, you apply between 12:01 am MST and 3pm MST the day BEFORE you want to hike.
Then, at 4pm MST, the emails go out to those people who got permits. Note that in the day before lottery, all fees are non-refundable.
Note that there is also a $6 non-refundable application fee for this lottery, which covers the application for up to six hikers.
More information on the Angels Landing lottery – including a helpful explainer video – here.
Hiking the Angels Landing Trail: What to Expect
The hike leaves from the Grotto shuttle stop, where you’ll cross a footbridge over the Virgin River and head right. The trail meanders a bit, with a few gradual ascents before you arrive at the foot of your first round of switchbacks.
These climb QUICK. Don’t be afraid to take a break and look behind you at the views out towards the canyon, which get better as you climb higher.
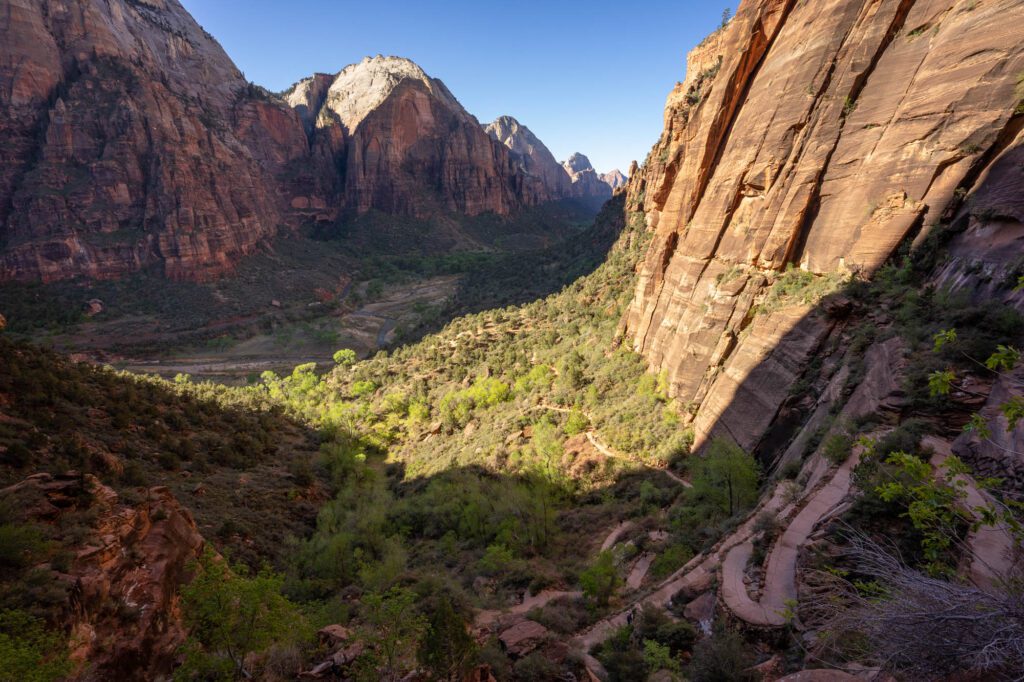
The trail levels out for about a quarter mile before it becomes switchbacks again, and you arrive at Walter’s Wiggles.
This part of the hike had my jaw on the floor at the architectural achievement. They are steep switchbacks carved straight into the mountain. At the top, the chained section begins.
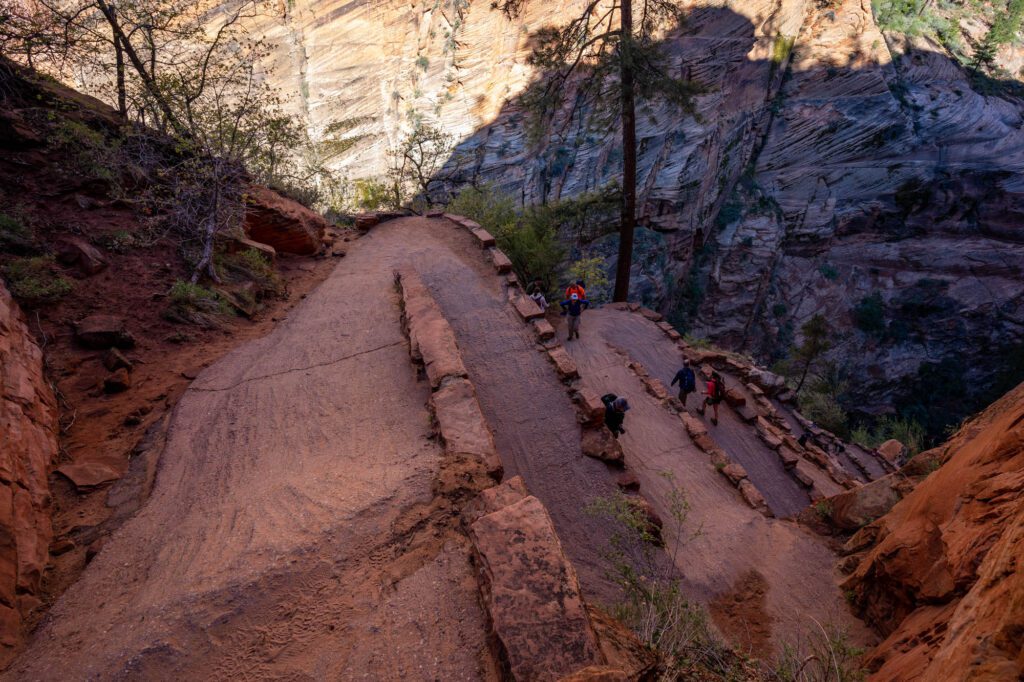
First, you’ll traverse a shorter section that involves a couple of slightly sketchy climbs with limited handholds, and a chained section where you’ll need to hold onto the chain and use it to pull yourself across a slick rock face.
There, you’ll be treated to Scout’s View, a spectacular viewpoint where you can see to the top of Angels Landing, and both directions down the canyon.
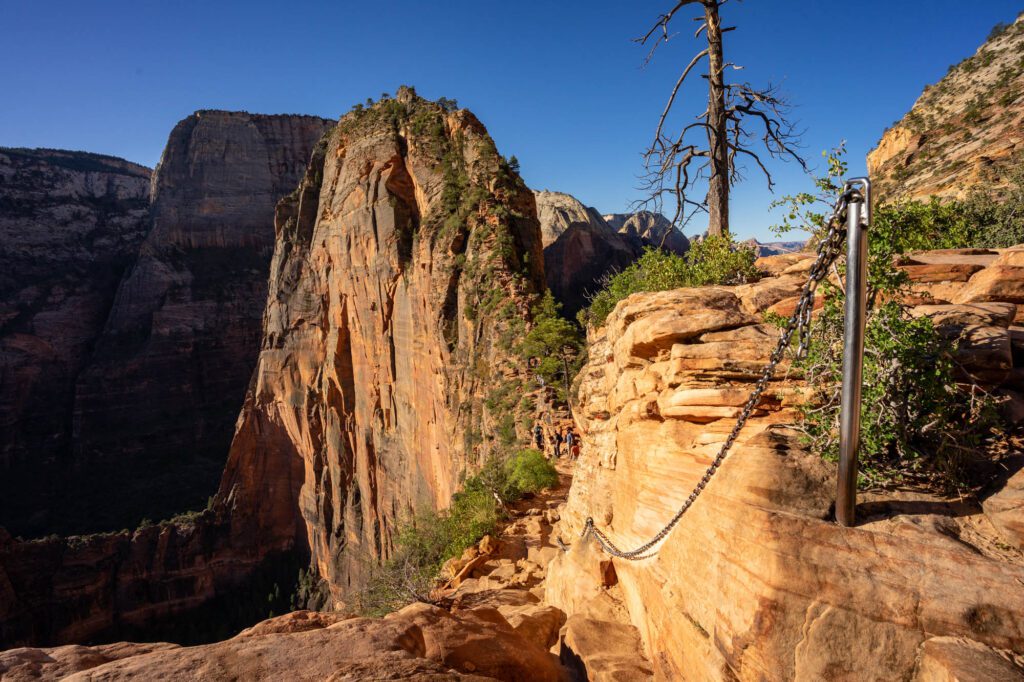
We stopped here and had no regrets about doing the hike to this point. If you want to continue to the top, follow the chain (and the hordes of people) as they climb to the viewpoint at the top, then return the way you came.
If that sounds like too much for you or you didn’t manage to get a permit, there are two other great hikes to consider doing here: Observation Point (which honestly has better views anyway) and the equally-famous Narrows of the Virgin River.
Kolob Canyons Scenic Drive
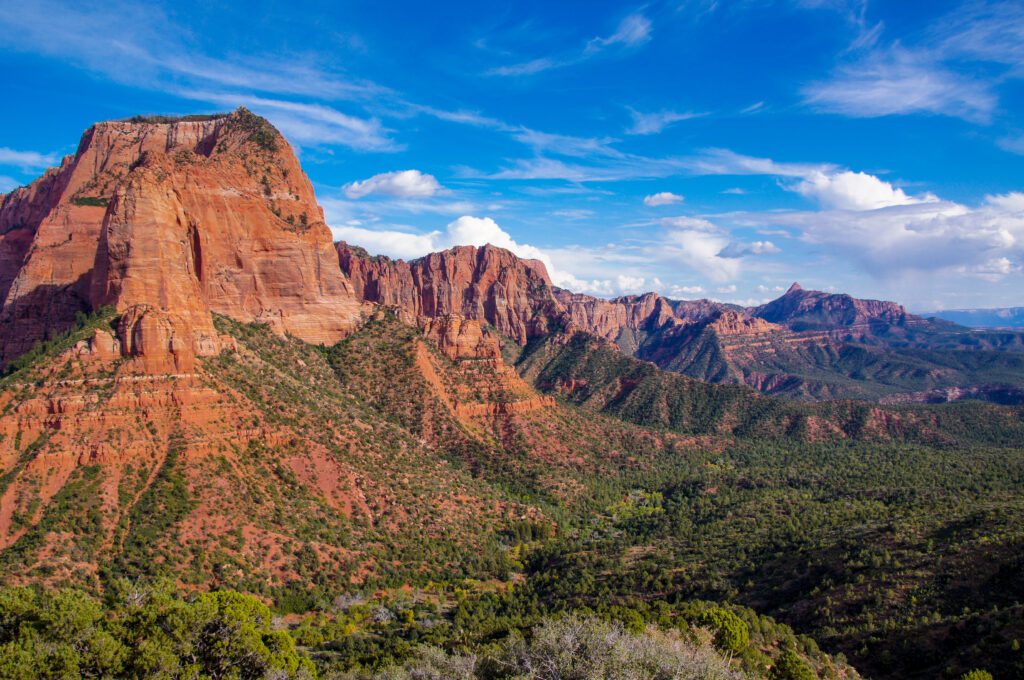
After your eventful morning, head out to the less-visited section of the park to the northwest – Kolob Canyons. It’ll take about 45 minutes each way, and is well worth the journey.
There are some great hikes here – namely the middle fork of Taylor Creek – which you may or may not be up for after Angels Landing in the morning.
Plus, you’ve got another hike for sunset tonight, so we’d recommend saving Taylor Creek for next time (or adding it if you find yourself with more time).
Drive the entirety of the five mile scenic road, and make sure to stop at basically all of the pullouts to marvel at the red rock formations.
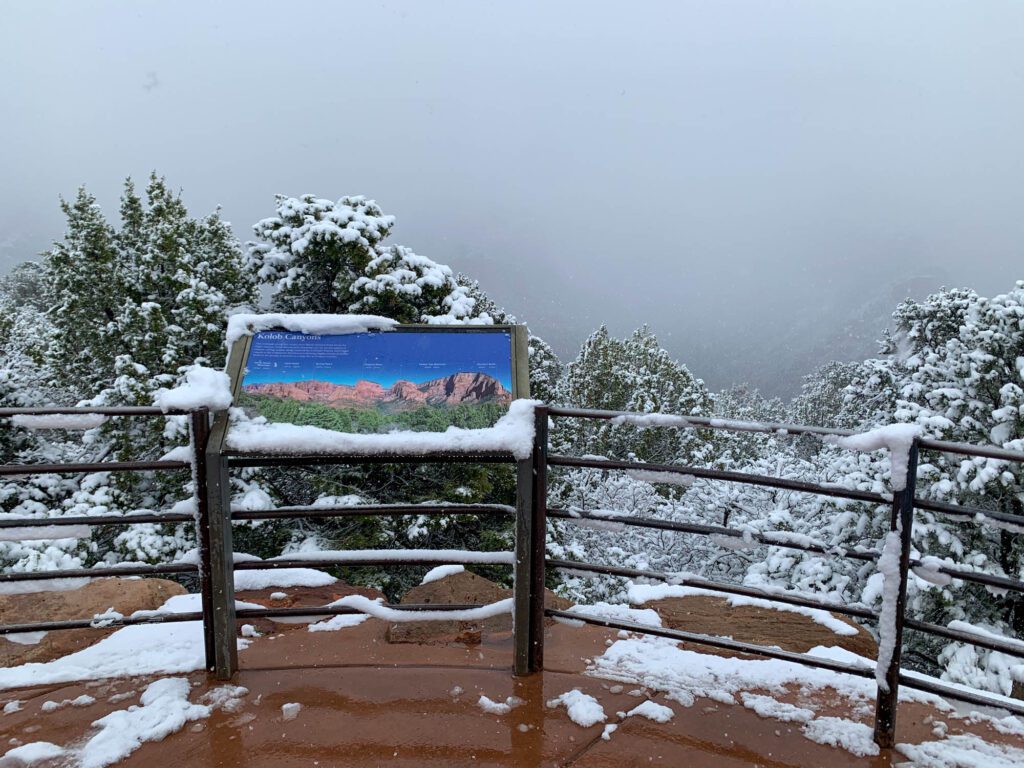
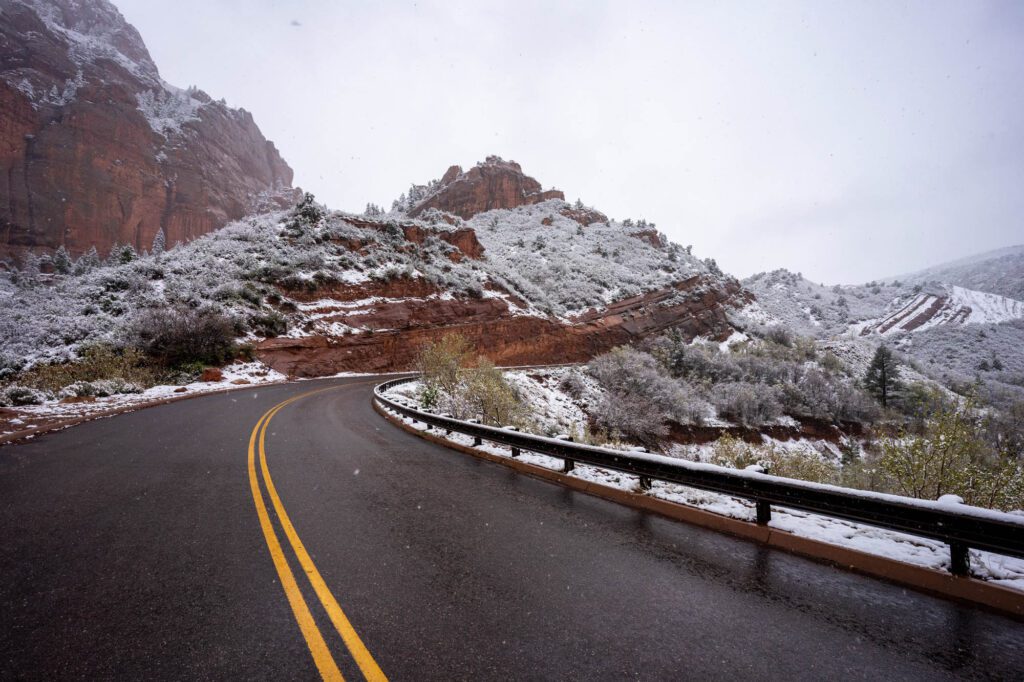
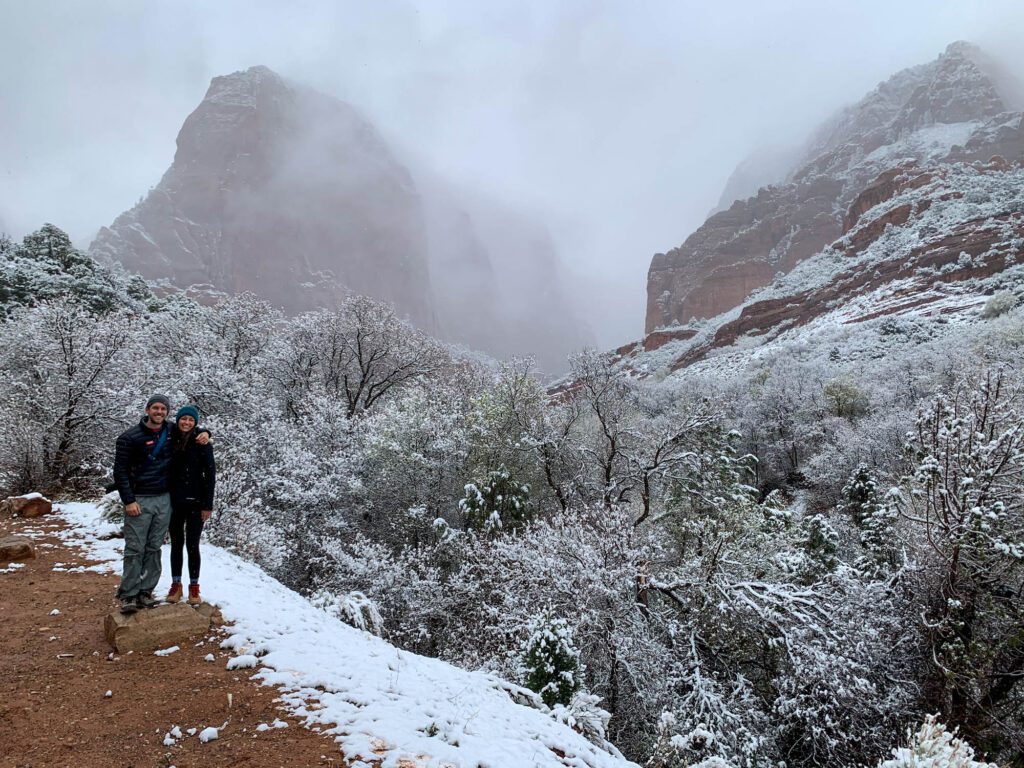
Unfortunately (or fortunately, depending on how you look at it), we were there on a random day of snow and fog, so while we missed most of the scenic views because they were shrouded in fog, we did get to see some of the red rock formations with a dusting of snow, which was a treat.
At the end of the road, do the quick walk up to Timber Creek viewpoint.
The Watchman at Sunset
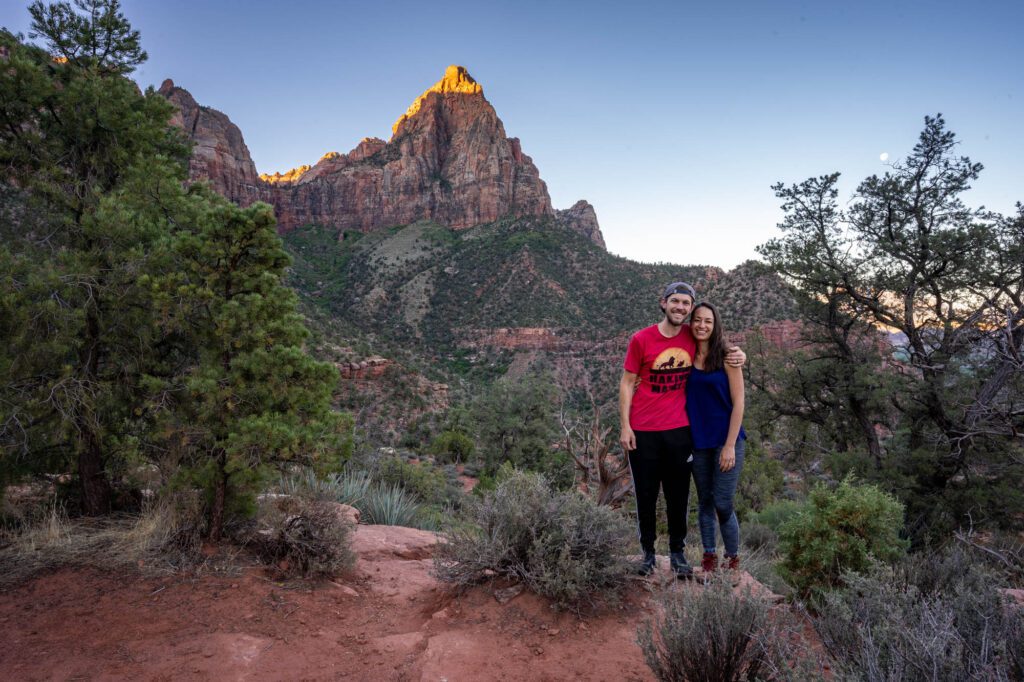
For sunset, head up to the Watchman, a short 3 mile hike that leaves from the main visitor center just inside the south entrance of the park.
It’s a relatively easy hike, with a gradual ascent and a couple of switchbacks along the way. It takes you up to a mesa with a fantastic view of the towering rock formation known as the Watchman.
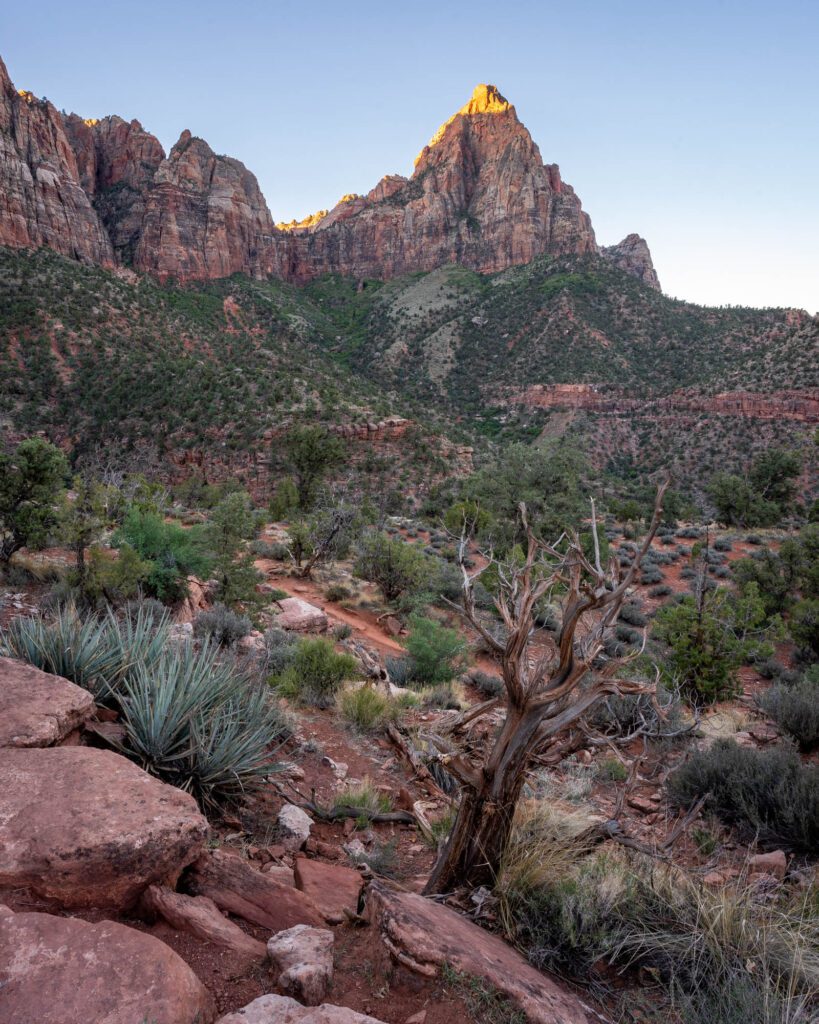
There’s a loop around the top of the mesa where you can get a bunch of different views of the tower and the surrounding landscape, and we think it’s best enjoyed with a nice cold beer and some well-earned snacks.
Wait until the golden light of the setting sun brings out the red hues for the best light and photos. It’ll happen about 15 minutes before sunset on most clear nights.
We actually did this same hike at sunrise, and it was equally gorgeous. Though the mountains at your back kind of prevent the light from drenching the Watchman until well after sunrise, which is why we’re putting it at sunset here.
Day 2: Shorter Hikes in the Canyon + Canyon Overlook at Sunset
On your second day in Zion, do some of the shorter hikes along Zion Canyon Scenic Drive in the morning, then hop in the car and take a scenic drive through the eastern end of the park and round the day out with another sunset hike.
You’ll be in the canyon for most of the day, which means you’ll need to have lunch.
Either pack a picnic lunch (we usually opt for a sandwich and some salty snacks like plantain chips or salt & vinegar chips) or plan on grabbing lunch at the Zion Lodge – they have a full-service restaurant and café.
The Emerald Pools
Start your day with an early shuttle out to the Grotto Shuttle Stop (Stop 6).
From there, cross the road to the opposite side from where you were dropped off, cross a footbridge, and head up the Kayenta Trail, a one mile mostly flat trail that connects you to the upper, middle, and lower Emerald Pools.
We think this is one of the most unique spots in Zion, and is well worth a stop on any Zion itinerary. It’s also relatively easy to get to.
Most people that get off at this stop will be heading up to Angels Landing, which you did yesterday, so you’ll likely have most of the Kayenta Trail to yourself after the other hikers continue up to the start of that trail.
Make sure to look back behind you every so often for great views of the Great White Throne across the canyon.
Eventually, you’ll see signs directing you to the Emerald Pools. Start by heading up to the Upper Emerald Pool to get the climbing out of the way (it’s a short climb).
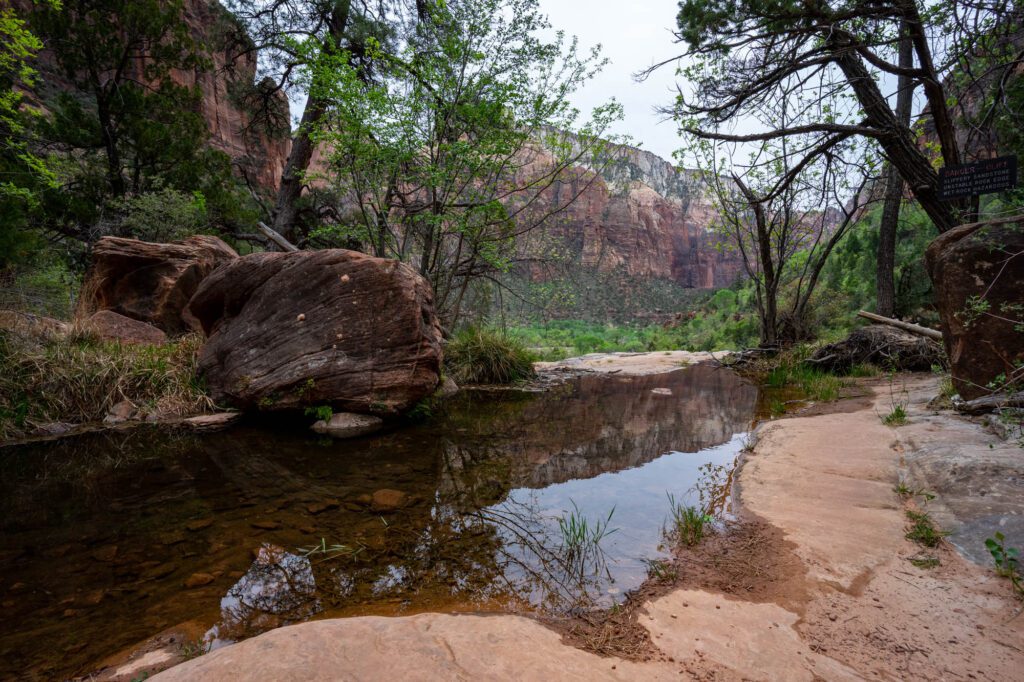
Along the way, you’ll pass the Middle Emerald Pool, which has a nice view across the canyon. In the early morning, the reflection in the calm water of the pool is worth stopping for.
Upper Emerald Pool is at the end of a sandy, rocky climb, and is surrounded by sheer rock cliffs that seem to be impossibly angled so that they jut out over you.
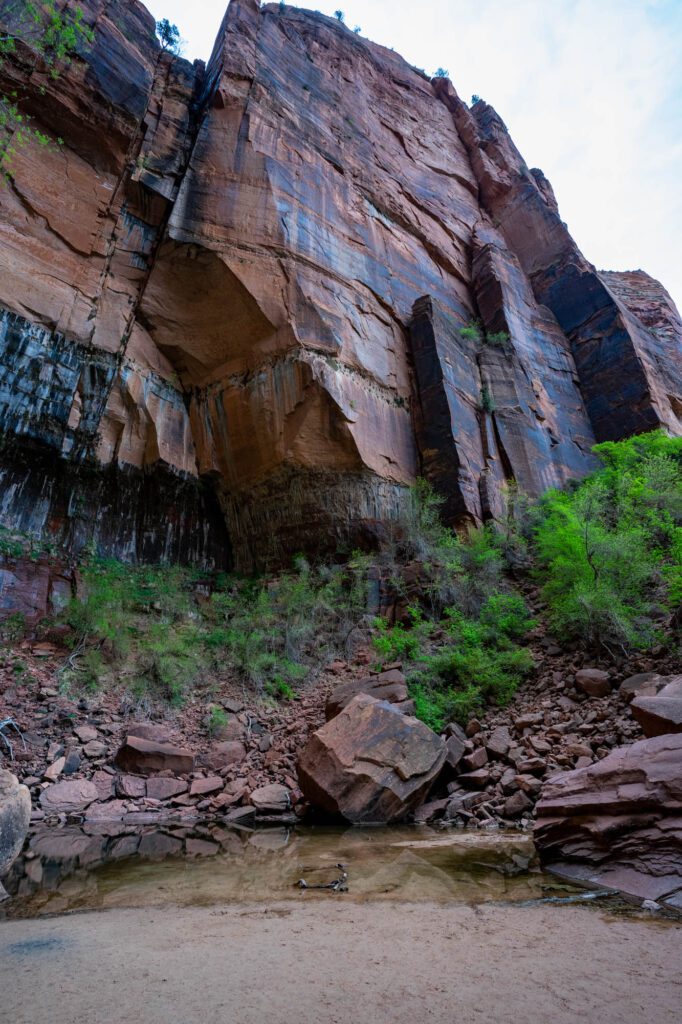
Lower Emerald Pool is back down the way you came – you cut through a narrow passageway between two vertical rocks. Here, you’ll pass under a rocky overhang as waterfalls tumble over the side. You may get wet here, but not TOO wet. If you’re concerned about a little mist, put on a rain jacket before you walk around the lower pool.
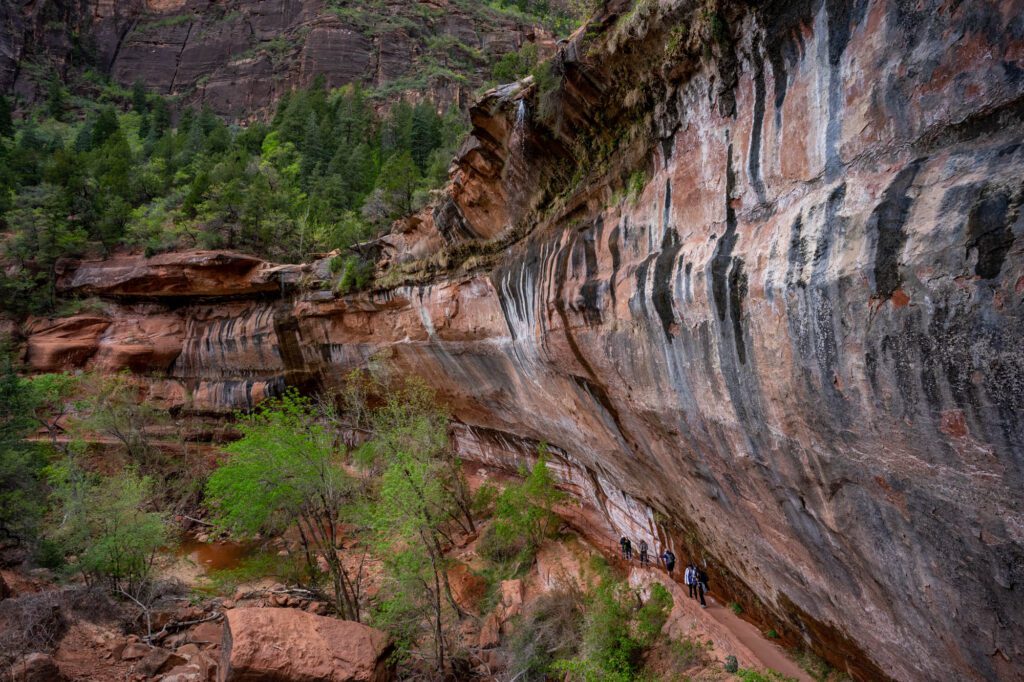
From there, continue along the paved path, which takes you to Zion Lodge (stop 5).
All-in, that hike is going to be about 2.5 miles, with 500 feet of elevation gain. If that sounds like too much for you, you can do just the lower pool starting and ending at Zion Lodge, which is a flat, paved 1.2 mile trail.
Hidden Canyon
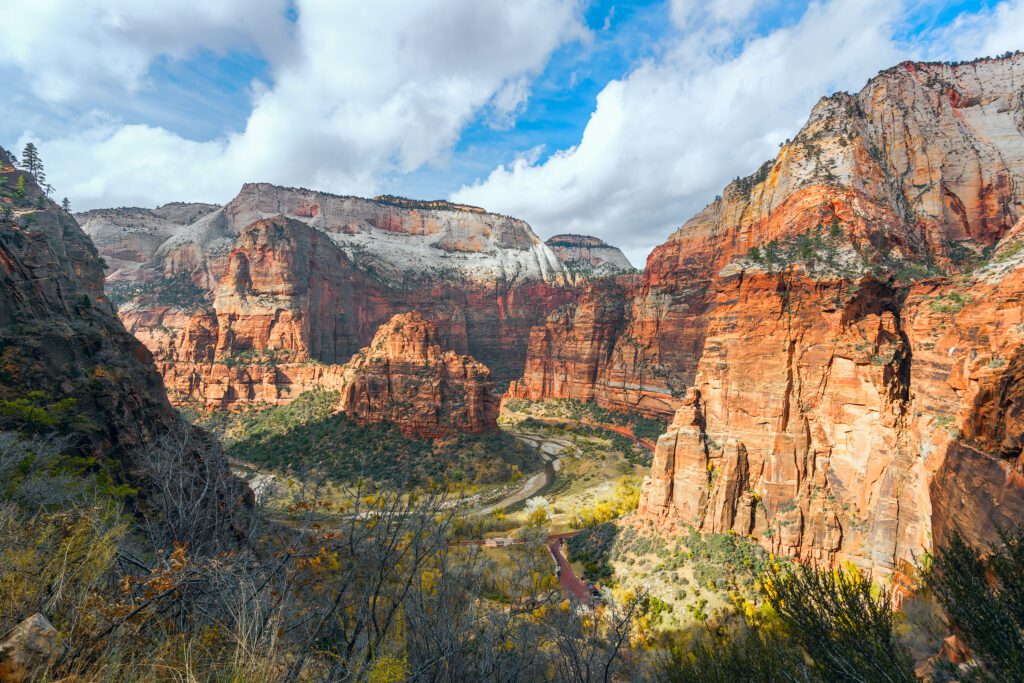
For another unique hike, hop on the shuttle and head to the Weeping Rock shuttle stop (stop 7).
This hike takes you up into a slot canyon between Cable Mountain and the Great White Throne. It’s a 3 mile hike with just under 1,000 feet of elevation gain, so it’s not the easiest hike out there.
Similar to Angels Landing, there are narrow, exposed sections and chain-assisted climbs, so it’s probably not the best hike for small children.
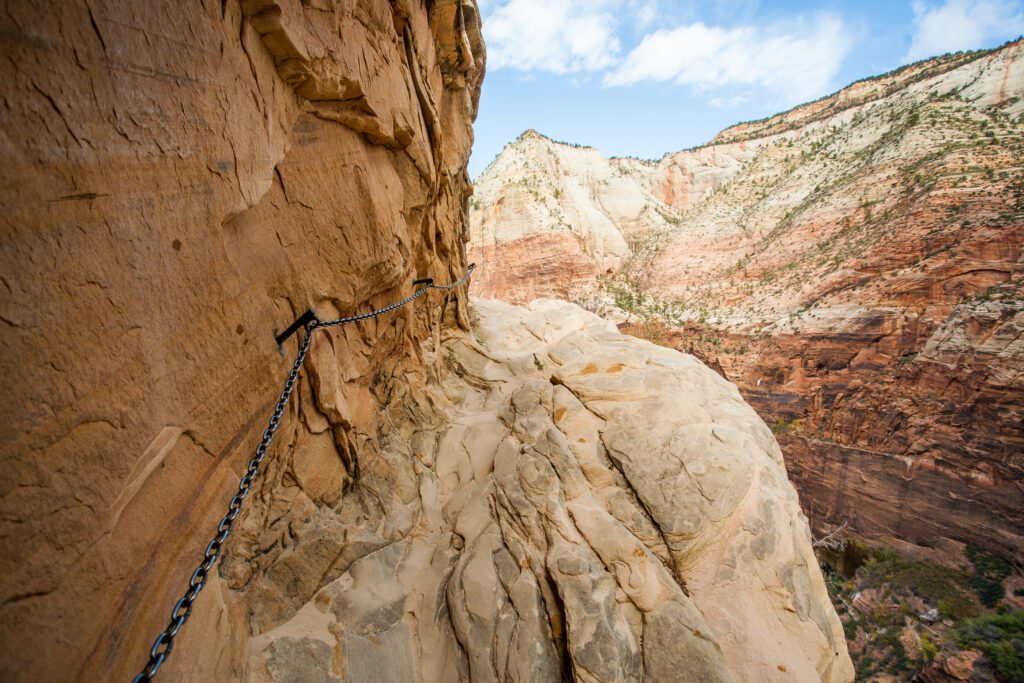
Along the way, you’ll get nice views of the canyon and pass under a freestanding arch, which is kind of cool.
It’s a fun hike with some unique sections of climbing using chains, which is a different experience than most hikes you’ll do in Zion and beyond.
Picnic Lunch & Riverside Walk
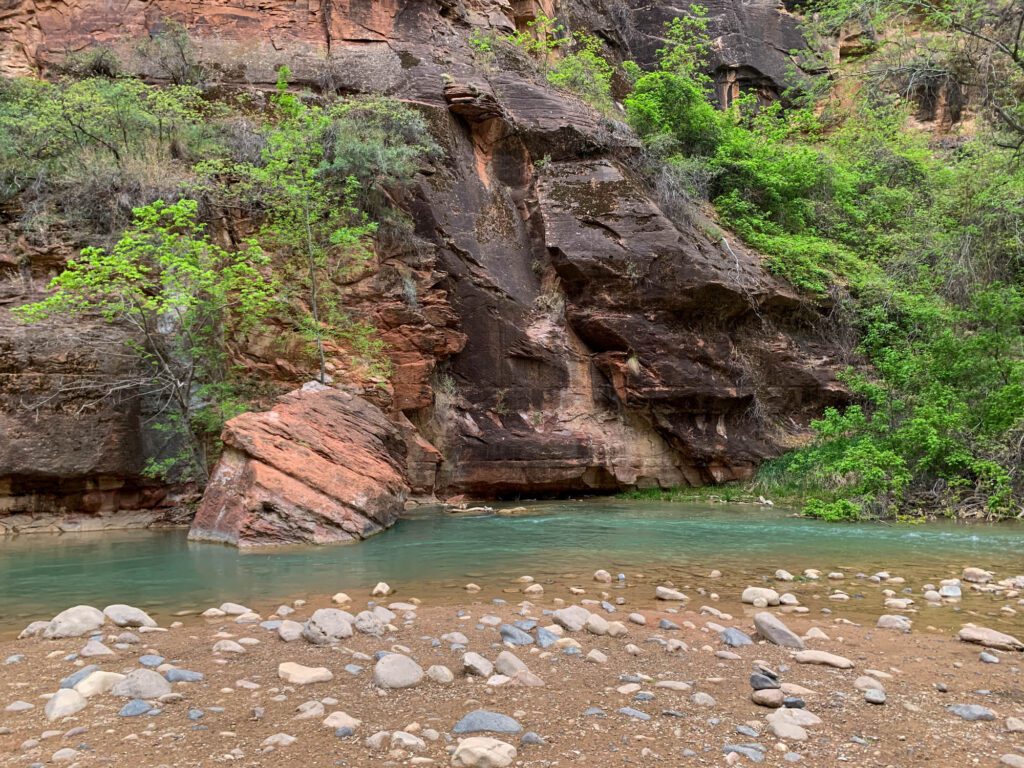
Take the shuttle out to the last stop on the line – Temple of Sinawava (stop 9).
There’s some nice picnic areas nearby that would make a great spot for lunch (you could also head to Zion Lodge, where you can either get lunch at their cafe, or make some space on the lawn or at the picnic tables to eat your pre-packed lunch).
After lunch, do a nice and easy stroll along the Virgin River known as the Riverside Walk.
It’s a mostly flat trail that meanders along the river, and you’ll be able to admire the blue-green hue of the water as you make your way to the end of the trail, which is the beginning of the world-famous Narrows hike.
There are some gorgeous sections of trail where you’ll have the river in the foreground, with the towering red walls of the canyon in the background.
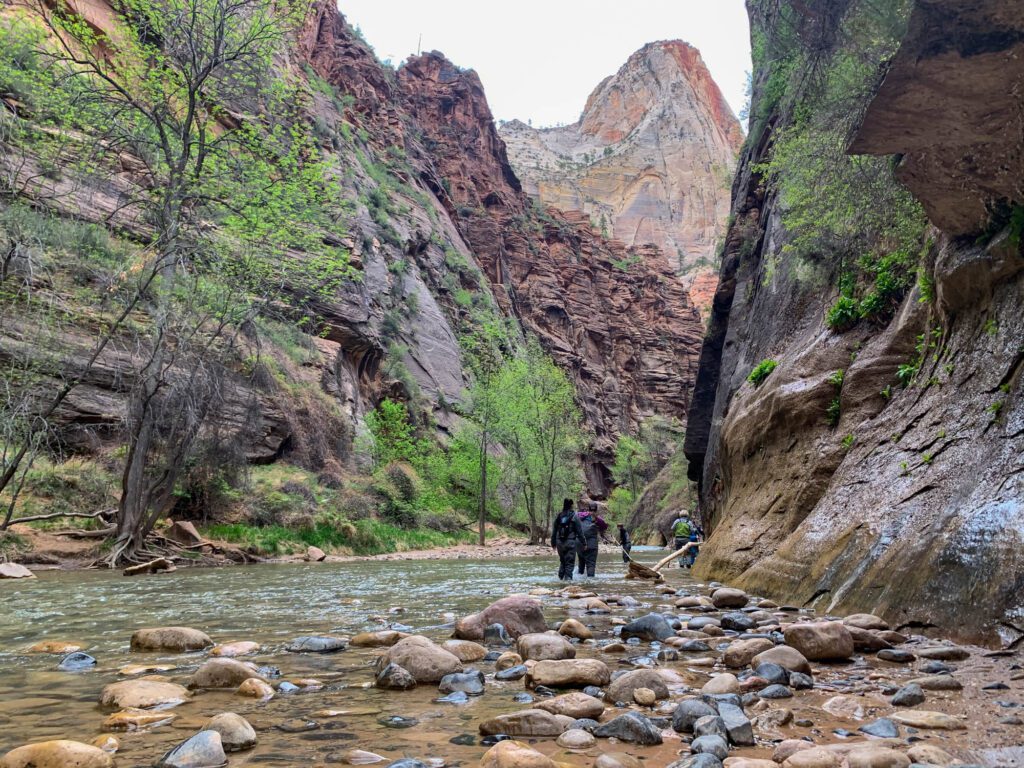
It’s two miles roundtrip and is mostly flat all the way through, which makes it a perfect post-lunch hike. It’s family-friendly too.
Scenic Drive Through the East End of the Park
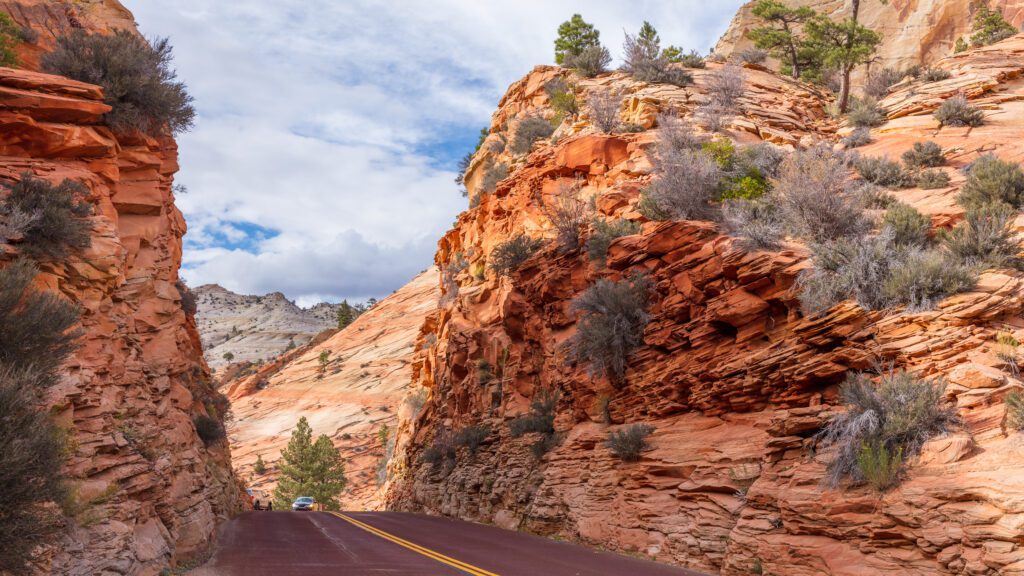
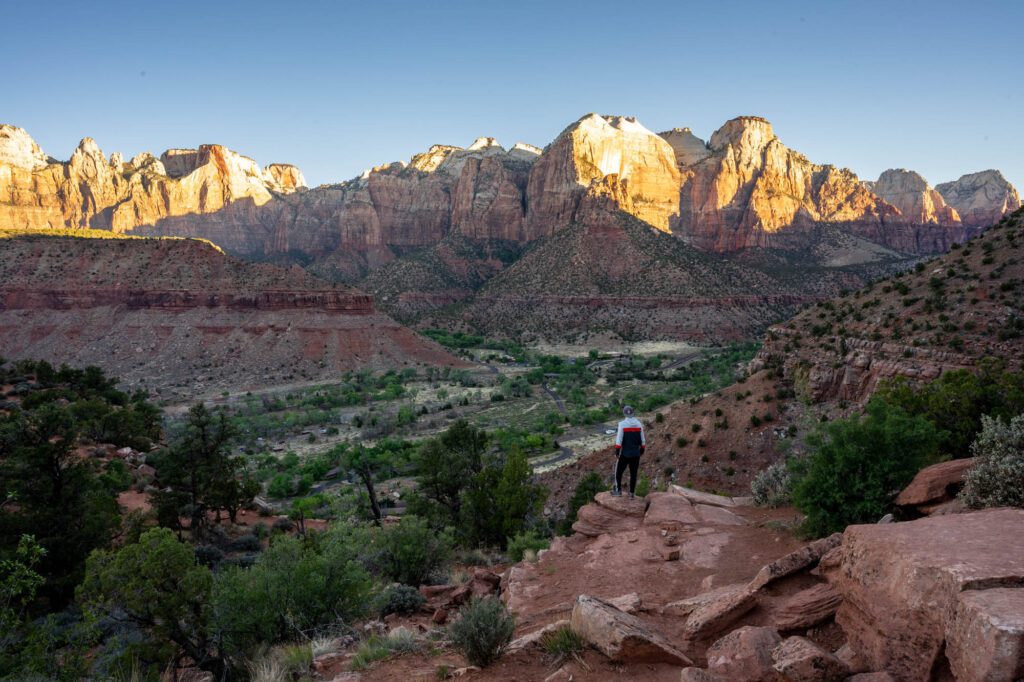
After your eventful morning, take a scenic drive through the eastern end of the park. From the visitor center, you’ll start by ascending a series of switchbacks (in your car, don’t worry) to reach the mouth of the Zion – Mt. Carmel Tunnel.
Pass through the tunnel, which was built way back in the 1930’s, and continue all the way to the east entrance of the park, where you’ll find Checkerboard Mesa. The textures of the rock here, and really throughout this whole section of the park, are something else.
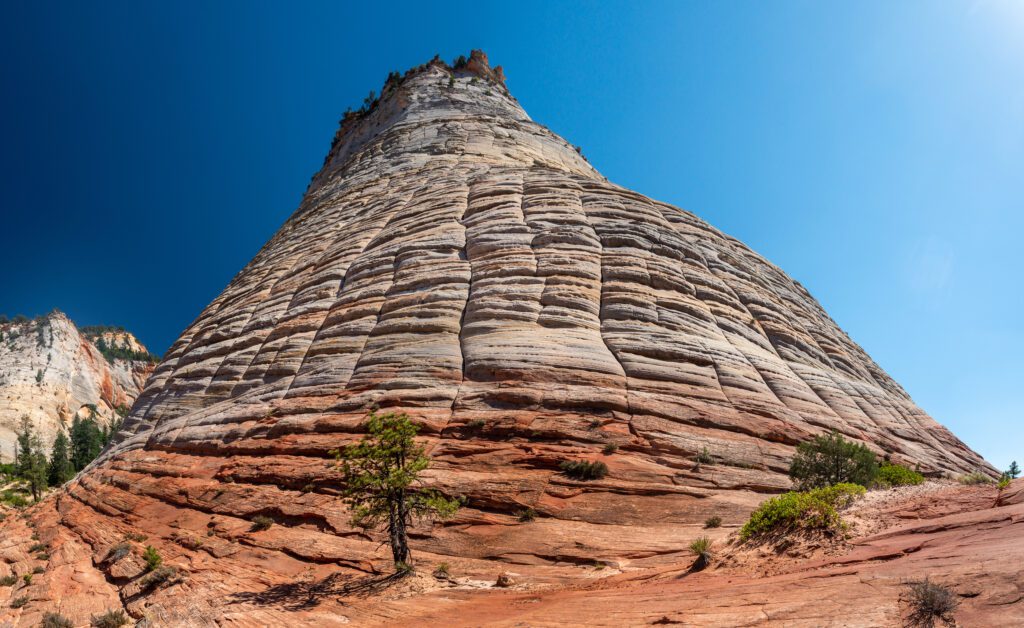
Keep an eye out for the resident bighorn sheep, who tend to hang out on the slick rocky slopes of the mountains around the road.
Canyon Overlook for Sunset
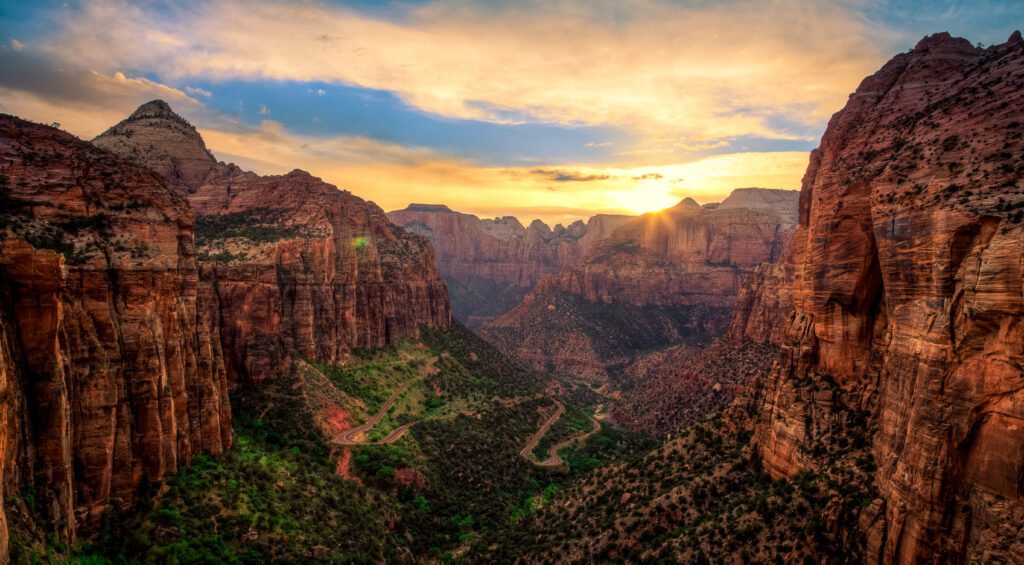
Continue back down towards the tunnel and park somewhere near the Canyon Overlook trailhead.
You likely won’t find parking at the trailhead itself – it’s a small lot for a very popular trail – so if you see a parking spot along the road that is legal, take it and walk along the road to the trailhead.
It’s a quick and relatively painless hike to a viewpoint that captures the canyon and the switchbacks of the road below, which is a great end for your time in Zion.
Stay for sunset, or at least for the last light in the canyon (which is about an hour or two before sunset).
What to Do with More Than 2 Days in Zion National Park
If you have an extra day, we’d add another one of the best hikes in Zion – either the Narrows or Observation Point.
It depends on what you’re looking for, really.
Hike the Famous Narrows
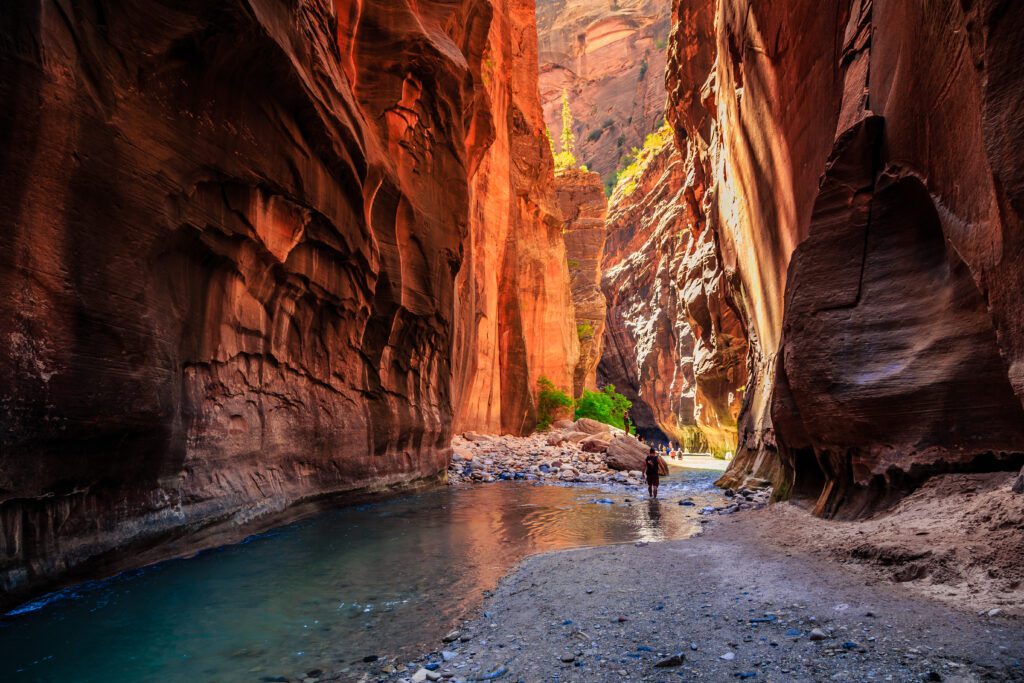
The Narrows is one of the most unique hikes you’ll ever find. You’ll start from where the Riverside Walk ends and head up the Virgin River, following the canyon as it oscillates between narrow and wide and changes shape and color at every turn.
Keep in mind that in the spring, you need special equipment because the water levels will be high, which you can rent from Zion Outfitters just outside the south entrance.
Hike to Observation Point for the Best View in Zion (We Think)
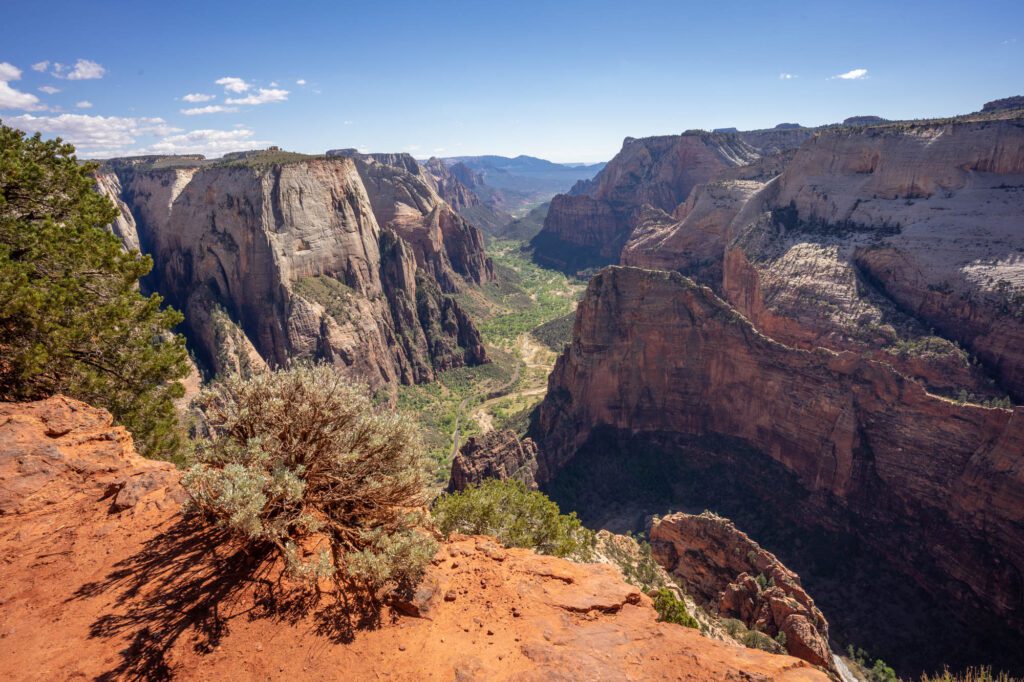
Observation Point is the best view in the park, in our opinion, and is a great alternative to Angels Landing.
It’s a longer and harder hike at 8 miles and 2,600 feet of elevation gain if you do it from the canyon floor.
However, there’s an easier way to do it that involves more driving – head out to the East Mesa Trailhead (the last 0.5 miles is rough and rutted – we recommend parking and walking the last bit, particularly after rain) and hike the 6.5 miles roundtrip, which only gains about 600 feet of elevation.
Here’s the view you get at the end.
You could also spend more time in Kolob Canyons and hike the Taylor Creek Middle Fork.
What to Do with One Day in Zion National Park?
If you only have one day in Zion, we’d recommend getting an early start to your morning.
Plan on doing a big hike – either Angels Landing, the Narrows, or Observation Point – first thing.
Break for lunch at the Zion Lodge (or the picnic tables nearby if you packed a lunch) and then head up to the Upper and Lower Emerald Pools from there.
After that, if you didn’t do the Narrows as your hike, head out to the Sinawava Temple shuttle stop and do the short and sweet Riverside Walk to get familiar with the Virgin River and its subtle blue-green hue, which contrasts nicely with the red rocks of the canyon.
In the afternoon, head out to the east end of the park, checking out Checkerboard Mesa, looking out for bighorn sheep, and doing the Canyon Overlook trail before calling it a day.
The Best Time to Visit Zion National Park
We think the shoulder seasons – spring and fall – are the best times to visit Zion National Park. Both will give you relatively nice weather without the blazing hot temperatures that descend on the park during the summer, and fewer crowds than over the summer.
However, weather can be more unpredictable. We were there in late April, and experienced both sunny and mid-70’s and snow from one day to the next.
Spring brings higher water levels, which makes hiking the Narrows a bit trickier – you’ll need to visit one of the outfitters in Springdale to get waders and special boots since the water can get up to your waist (or higher).
Fall is similar to spring in terms of temperature and crowds, but you likely won’t have to worry too much about high water after a long, dry summer. Plus, the fall color in Zion can be pretty spectacular, with yellow trees creating a picturesque contrast with the red rocks of the canyon walls.
In the summer, the park is BLAZING hot. It’s not like Bryce Canyon, which is about 3,000 feet higher in elevation and stays relatively cool during the summer.
We’re talking 100+ degrees on a regular basis.
You’ll want to stay hydrated, wear sun protection like sunscreen and a sun hat, and plan on being out and about primarily in the early morning and late afternoon, when it’s slightly cooler.
Heat exhaustion is a real thing – don’t underestimate the heat.
Summer is also the most popular time to visit, which means you’ll need to book things well in advance if you’re planning on joining the hordes of tourists descending on the canyon.
You’ll have longer waits for the shuttle, and longer lines to enter the park.
Winter is the low season, and it’s going to be cold. You’ll find snow at higher elevations, which makes hiking a little trickier.
However, the canyon is downright gorgeous with a light dusting of snow (which we got to experience…in April) and the crowds are thin, so it’s not a terrible time to visit.
Plus, you can actually drive into the upper canyon in the winter months! We’d probably choose winter over the summer, if we’re being honest.
Zion National Park is a treat – we think you’re going to love it. There’s such a diversity of landscapes, a ton of great hikes, and it’s the gateway to some of our other favorite spots in Utah and Arizona.
If you’re heading to the Southwest, don’t miss our other detailed travel guides to help you plan an unforgettable trip.
- The Best Hikes in Bryce Canyon National Park
- How to Spend One Day in Bryce Canyon (Complete Itinerary)
- The Best Hikes in Arches National Park
- 4 Days in Moab: The Best of Arches, Canyonlands, and More
- Where to Stay in Moab, Utah
- 12 Amazing Things to Do in Moab, Utah
- A Complete Utah National Parks Road Trip Itinerary (10 Days)
